Connect with us

Electric Bike

How Long Would It Take With Electric Bike Rentals On Martha’s Vineyard Ma

Published

on

An image showcasing the picturesque landscape of Martha's Vineyard, with a winding bike path leading through lush greenery

I’ve always been curious about how long it would take to explore Martha’s Vineyard with electric bike rentals. Did you know that Martha’s Vineyard has over 44 miles of bike paths? That’s a lot to cover!

In this article, I’ll dive into the geography of the island, the condition of the bike paths, the types of electric bikes available for rental, and factors that may affect travel time.

Whether you’re a fitness enthusiast or just looking for a fun way to get around, this information will help you plan your perfect Martha’s Vineyard adventure.

Key Takeaways

  • Electric bike rentals provide an enjoyable way to explore Martha’s Vineyard, with stops at picturesque locations like Menemsha Beach and Aquinnah Cliffs.
  • Weather conditions can impact the riding experience, requiring caution and preparation, but with the right gear and adjustments to riding style, riders can confidently ride in any condition.
  • Safety is of utmost importance for electric bike riders, and it is essential to wear a helmet, check the bike’s condition, and obey traffic laws.
  • Local resources and support, such as rental shops with a wide selection of electric bikes and knowledgeable staff, make it easy to plan an unforgettable adventure on Martha’s Vineyard.

Geography of Martha’s Vineyard

Martha’s Vineyard is an island off the coast of Massachusetts that you’ll love exploring with electric bike rentals. With its diverse geographic features, from pristine beaches to rolling hills and picturesque towns, Martha’s Vineyard offers the perfect backdrop for a scenic bike ride.

Advertisement

As you pedal along, you’ll discover the island’s unique charm and beauty. The island is relatively small, making it easy to navigate with various local transportation options. Electric bike rentals provide a convenient and eco-friendly way to explore the island at your own pace.

Whether you choose to ride along the coastline, explore the quaint towns, or venture into the lush forests, Martha’s Vineyard offers a multitude of breathtaking vistas and hidden gems waiting to be discovered.

Now, let’s delve into the condition of the bike paths that await you on this enchanting island.

Condition of Bike Paths

You can easily navigate the bike paths on Martha’s Vineyard MA with electric bike rentals. The geography impact of this beautiful island can be seen in the diverse terrain, from rolling hills to sandy beaches. The bike path conditions are generally well-maintained, making it a smooth and enjoyable ride. To give you an idea of the different bike paths available, here is a table showcasing some popular routes:

Path Name Length (miles) Difficulty
State Beach 5 Easy
Edgartown Loop 8 Moderate
Aquinnah Cliffs 15 Challenging

Whether you’re a beginner or an experienced cyclist, there’s a path for everyone. Now that you know about the conditions of the bike paths, let’s explore the types of electric bikes available for rental.

Advertisement

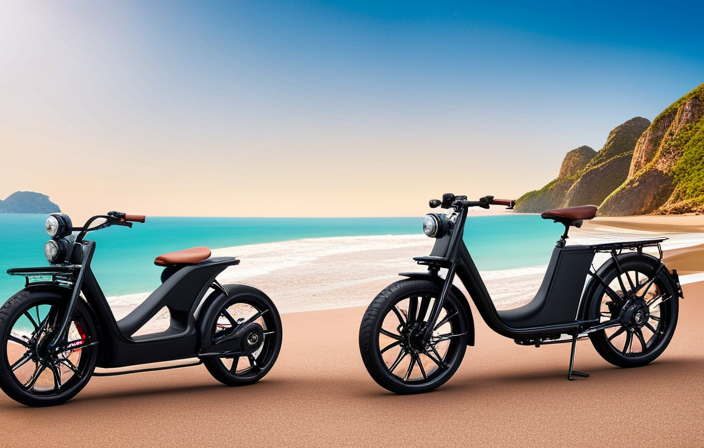
Types of Electric Bikes Available for Rental

When planning your bike adventure on the island, consider the various types of electric bikes available for rental. Martha’s Vineyard has a diverse landscape, with rolling hills, scenic coastal roads, and charming towns to explore. The geographical considerations of the island make electric bikes a great option for those looking to cover more ground with ease.

There are different types of rentals available, including traditional electric bikes, electric mountain bikes, and electric fat-tire bikes. Traditional electric bikes are perfect for cruising along the paved bike paths and exploring the towns. If you’re feeling more adventurous, the electric mountain bikes are designed for off-road trails and rugged terrains. And for those looking for a bit of fun, the electric fat-tire bikes are perfect for riding on the sandy beaches.

Now that you know the types of electric bikes available, let’s talk about how your fitness level impacts travel time.

Advertisement

Fitness Level and Its Impact on Travel Time

Consider how your fitness level affects the amount of time it takes to travel.

Your fitness level plays a significant role in determining how quickly you can get from one place to another. As we age, our physical capabilities may decline, leading to a slower pace and longer travel times. However, regular exercise can help offset these effects and improve our overall fitness.

By engaging in activities like biking, walking, or jogging, we can increase our stamina, strength, and endurance, allowing us to travel more efficiently. The benefits of regular exercise extend beyond just travel time, as it also improves cardiovascular health, reduces the risk of chronic diseases, and enhances mental well-being.

Now, let’s delve into the average speed and range of electric bikes.

Average Speed and Range of Electric Bikes

Advertisement

Get ready to explore the average speed and range of electric bikes, which can greatly enhance your travel experience. When it comes to electric bikes, there are a few key factors to consider that can impact your journey. Here are some important things to know:

  • Average Speed Impact: Electric bikes have an average speed of around 20 mph, allowing you to zip through the beautiful landscapes of Martha’s Vineyard with ease. This increased speed can significantly reduce travel time and make your exploration more efficient.

  • Range Limitations: Electric bikes have a range of approximately 30-60 miles, depending on the terrain and riding conditions. It’s important to plan your route accordingly and be mindful of the distance you can cover before needing to recharge.

  • Battery Life: The battery life of electric bikes can vary, but on average, you can expect a battery to last around 3-4 hours of continuous riding. It’s always a good idea to carry a charger or extra battery if you plan on going on longer rides.

With these average speeds and range limitations in mind, you can now plan your journey, taking into account any stops and attractions along the way.

Stops and Attractions Along the Way

As you explore Martha’s Vineyard on an electric bike, there are plenty of popular attractions and points of interest to highlight along the way.

From the iconic lighthouses and picturesque beaches to the charming towns and historic sites, there’s something for everyone to enjoy.

Advertisement

Planning your itinerary to include these enjoyable stops not only adds excitement to your ride, but also allows you to fully immerse yourself in the beauty and culture of this stunning island.

Highlighting popular attractions and points of interest

You’ll love exploring popular attractions and points of interest on Martha’s Vineyard with electric bike rentals! This picturesque island off the coast of Massachusetts is known for its stunning geographical features, including beautiful beaches, rolling hills, and charming coastal towns. As you pedal along on your electric bike, you’ll have the opportunity to take in the breathtaking views and immerse yourself in the island’s unique atmosphere. And while you’re exploring, be sure to indulge in the local cuisine, which features fresh seafood, farm-to-table ingredients, and delicious homemade treats. From the iconic lighthouses to the quaint shops and galleries, there’s something for everyone to enjoy on Martha’s Vineyard. So hop on your electric bike and start your adventure today!

Attractions Points of Interest
Aquinnah Cliffs Edgartown Harbor
Oak Bluffs Menemsha Beach
Martha’s Vineyard Museum Chappaquiddick Island

As you explore these popular attractions and points of interest, don’t forget to plan your itinerary to include enjoyable stops during your ride.

Planning your itinerary to include enjoyable stops during your ride

Don’t forget to include some enjoyable stops in your itinerary as you plan your ride. Exploring Martha’s Vineyard on an electric bike rental is not just about getting from point A to point B—it’s about immersing yourself in the beauty of the island and making lasting memories.

Here are three must-visit spots along the way:

Advertisement
  1. Menemsha Beach: Take a break from your ride and soak up the sun at this picturesque beach. With its tranquil waters and breathtaking sunsets, it’s the perfect spot to relax and recharge.

  2. Aquinnah Cliffs: Prepare to be awe-struck by the stunning views from the top of these colorful clay cliffs. The vibrant hues and sweeping vistas make for a truly memorable stop.

  3. Edgartown Lighthouse: Pedal your way to this iconic landmark and snap a photo with the charming lighthouse as your backdrop. The surrounding area is filled with quaint shops and restaurants, adding to the overall charm.

By incorporating these enjoyable stops into your itinerary, you’ll not only have a chance to rest and take in the scenic views but also create unforgettable experiences.

Now, let’s dive into the next section about weather conditions and their impact on travel time.

Weather Conditions and Their Impact on Travel Time

When it comes to biking, weather conditions can play a significant role in both your speed and overall comfort.

Whether it’s a scorching hot day or a rainy afternoon, the elements can impact your riding experience.

In this discussion, I will explore how weather conditions can affect your speed and comfort, and provide some useful tips for riding in different weather conditions to ensure an enjoyable and safe journey.

Advertisement

How weather conditions can affect your speed and comfort

If it’s raining, you might find that your speed and comfort on the electric bike rentals are affected. Riding in wet weather requires a bit more caution and preparation. Here are some tips for staying dry and maintaining traction:

  • Wear appropriate rain gear, such as a waterproof jacket and pants.
  • Use fenders on your bike to prevent water from splashing onto you.
  • Opt for wider tires with deeper treads to improve grip on wet surfaces.

Riding in the rain can be challenging, but with the right gear and precautions, you can still enjoy your electric bike rental experience.

Now, let’s explore some tips for riding in different weather conditions, so you can be prepared for any scenario.

Tips for riding in different weather conditions

Be prepared for various weather conditions by wearing appropriate gear and making sure your bike is equipped with the necessary features.

When it comes to riding in the rain, waterproof clothing and fenders can be your best friends. A waterproof jacket and pants will keep you dry, and fenders will prevent water from splashing up onto you and your bike. Additionally, using rain covers for your bike’s seat and handlebars can provide extra protection.

When riding in the snow, it’s important to have tires with good traction. Consider using studded tires or snow chains to ensure a safe and stable ride. It’s also crucial to adjust your riding style and take extra caution, as snow can make the road slippery.

Advertisement

With these tips in mind, you can confidently ride in any weather condition.

Now, let’s move on to some safety tips for electric bike riders.

Safety Tips for Electric Bike Riders

To ensure your safety while riding an electric bike on Martha’s Vineyard, remember to always wear a helmet and follow the local traffic laws. Electric bikes can be a fun and convenient way to explore the island, but it’s important to prioritize safety.

Here are some tips to keep in mind:

  • Check the condition of your bike before each ride, ensuring that the geared brakes are working properly.
  • Pay attention to road visibility, especially during low light conditions. Consider wearing reflective clothing or adding lights to your bike.
  • Stay alert and be aware of your surroundings. Keep an eye out for other vehicles, pedestrians, and potential hazards on the road.
  • Remember to signal your turns and obey all traffic signs and signals.

By following these safety tips, you can enjoy your electric bike ride on Martha’s Vineyard with peace of mind.

Now, let’s explore the local resources and support available for electric bike rentals on the island.

Advertisement

Local Resources and Support for Electric Bike Rentals

You should check out the local shops and businesses that offer support and resources for renting electric bikes on the island. Martha’s Vineyard has a great selection of local rental options that cater to all types of riders. From sleek city bikes to rugged mountain bikes, you can find the perfect electric bike to explore the island’s beautiful landscapes.

Not only do these local businesses provide top-notch rentals, but they also offer community support. The staff are knowledgeable and friendly, always ready to answer any questions or offer recommendations on the best routes to take. With their help, you can plan an unforgettable adventure on two wheels.

Now, let’s dive into the personal experiences and recommendations from electric bike riders who have explored Martha’s Vineyard.

Personal Experiences and Recommendations from Electric Bike Riders

Exploring Martha’s Vineyard on an electric bike was an incredible experience. I had the opportunity to connect with fellow riders who shared their personal stories and equipment recommendations. Here are some highlights from their experiences:

  • Breathtaking Scenery: From the rolling hills to the stunning beaches, every corner of Martha’s Vineyard offers picturesque views that are even more enjoyable on an electric bike.

  • Ease of Navigation: Navigating the island’s charming towns and hidden gems was a breeze with the help of an electric bike. I was able to effortlessly explore the island at my own pace.

  • Fun and Eco-Friendly: Riding an electric bike not only provided a fun and exhilarating way to see the island, but it also allowed me to do my part in reducing my carbon footprint.

When it comes to equipment recommendations, riders emphasized the importance of comfortable seats, reliable batteries, and sturdy tires. Investing in high-quality gear ensures a smooth and enjoyable ride throughout your Martha’s Vineyard adventure.

Advertisement

Frequently Asked Questions

Are there any restrictions or age limits for renting electric bikes on Martha’s Vineyard?

There are no age restrictions for renting electric bikes on Martha’s Vineyard. Rental requirements typically include a valid ID, credit card, and signed waiver. Enjoy exploring the island’s scenic beauty at your own pace!

How do I make a reservation for an electric bike rental on Martha’s Vineyard?

To make a reservation for an electric bike rental on Martha’s Vineyard, simply contact the rental company. They offer various pricing options to suit your needs. Reserve your bike today for an unforgettable adventure!

Are there any additional costs or fees associated with renting an electric bike on Martha’s Vineyard?

There are no additional fees or hidden costs when renting an electric bike on Martha’s Vineyard. The rental costs are straightforward and include everything you need for a fun and convenient biking experience.

Can I bring my own helmet or do I need to rent one with the electric bike?

Sure, you can bring your own helmet for the electric bike! Safety is vital, and bringing your own equipment ensures a comfortable fit. Enjoy the ride and take necessary safety precautions.

Are there any specific rules or regulations that electric bike riders need to follow on Martha’s Vineyard?

There are specific rules and regulations for electric bike riders on Martha’s Vineyard. Riders must adhere to age limits, make reservations for renting electric bikes, pay additional costs and fees, and can choose to bring their own helmet or rent one.

Advertisement

Conclusion

In conclusion, I can confidently say that electric bike rentals on Martha’s Vineyard are a fantastic way to explore the island. The beautiful geography, well-maintained bike paths, and variety of electric bikes available for rental make it easy to enjoy your time exploring the island’s attractions. Your fitness level and the weather conditions may impact your travel time, but with proper safety tips and the support of local resources, you can have an enjoyable and memorable experience. So, hop on an electric bike and embark on an adventure you won’t forget!

Ralf is a devoted husband and father who loves spending time with his family. He enjoys riding his bicycle as much as possible, and takes every opportunity he can to get out on the open road. Ralf is a kind and gentle person who wants only the best for those around him.

Continue Reading
Advertisement

Electric Bike

How To Turn Your Bike Electric

Published

on

By

An image showcasing the step-by-step transformation of a traditional pedal-powered bike into an electric one

Are you prepared to upgrade your bike with more power? Converting your ordinary bike into an electric one is simpler than you may believe. With the appropriate conversion kit and a few easy steps, you’ll be enjoying rides on an electric bike in no time.

In this article, we’ll guide you through the process, from assessing your bike’s compatibility to installing the electric components.

So, strap on your helmet and get ready to pedal into the future with your very own electric bike.

Key Takeaways

  • Choose a motor and battery based on power output, size, weight, and compatibility with the bike.
  • Consider the range, charging time, and capacity of different battery options for desired distance requirements.
  • Select a motor type for optimal efficiency and battery range, such as lithium-ion batteries with high energy density and long lifespan.
  • Ensure proper wiring installation and controller compatibility for safe and efficient conversion.

Assess Your Bike’s Compatibility

You’ll need to assess if your bike is compatible for an electric conversion. Start by choosing the right motor for your bike. Consider factors such as the power output, size, and weight of the motor.

Advertisement

Evaluate battery options based on their capacity, voltage, and weight. Determine if your bike has enough space to accommodate the battery and if it can handle the added weight. Additionally, consider the range and charging time of different battery options.

Once you have assessed your bike’s compatibility and chosen the right motor and battery, you can move on to the next section about choosing the right conversion kit. This will ensure that you have all the necessary components to successfully convert your bike to electric.

Choose the Right Conversion Kit

When choosing the right conversion kit for your electric bike, there are three key points to consider.

First, you need to consider the motor type that’s compatible with your bike and your specific needs.

Second, evaluate the different battery options available. Take into account factors such as capacity, weight, and range.

Advertisement

Lastly, determine the controller requirements for your conversion kit. Ensure that it’s compatible with your bike’s existing components and provides the necessary functionality.

Consider Motor Type

To make your bike electric, you can choose from different motor types. When considering motor type, it is important to think about motor efficiency and battery range.

The motor efficiency refers to how effectively the motor converts electrical energy into mechanical energy. A higher motor efficiency means that your bike will be able to go further on a single charge.

The battery range, on the other hand, refers to how far your bike can travel on a full battery. This is influenced by both the motor efficiency and the capacity of the battery.

By selecting the right motor type, you can ensure that your bike will have optimal motor efficiency and battery range.

Advertisement

Now, let’s move on to evaluating battery options for your electric bike.

Evaluate Battery Options

Now, let’s take a look at the different battery options available for your e-bike. When converting your bike to electric, the battery is a crucial component to consider. Here are some battery options you can evaluate:

  • Lithium-ion batteries: These are the most common and widely used batteries for e-bikes due to their high energy density and long lifespan.

  • Lead-acid batteries: Although they are cheaper, lead-acid batteries are heavier and have a lower energy density than lithium-ion batteries.

  • Nickel-metal hydride (NiMH) batteries: These batteries are less common nowadays due to their lower energy density and shorter lifespan compared to lithium-ion batteries.

  • Lithium polymer (LiPo) batteries: These batteries have a higher energy density than lithium-ion batteries, but they are more expensive and require special care during charging.

When choosing a battery for your e-bike, consider the battery capacity, as it determines the range you can achieve. Also, evaluate the charging options available for the battery you choose. They can vary from plug-in charging to removable batteries with external chargers.

With the battery options covered, let’s now transition into determining the controller requirements for your electric bike conversion.

Determine Controller Requirements

Next, let’s explore the necessary controller requirements for your e-bike conversion.

Advertisement

Controller selection is a critical aspect of turning your bike electric. It serves as the brain of your electric system, controlling the power output to the motor and managing the flow of electricity from the battery.

When choosing a controller, consider factors such as voltage compatibility, current rating, and motor compatibility.

Wiring installation is another crucial step in the process. Ensure that you have the appropriate connectors, wires, and tools to connect the controller to the battery and motor. Proper wiring is essential for a safe and efficient electric bike conversion.

Once you have determined the controller requirements, you can move on to the next step of gathering the necessary tools for the installation process.

Gather the Necessary Tools

First, gather all the necessary tools for the job. Here are three essential items you’ll need to get started:

Advertisement
  • A conversion kit: Choose the right conversion kit that suits your bike’s specifications and provides the power and speed you desire.

  • Compatible batteries: Find lithium-ion batteries specifically designed for electric bike conversions. Ensure the battery has enough capacity to meet your distance requirements.

  • Basic tools: Have a set of wrenches, screwdrivers, and pliers to remove and install components during the conversion process.

Once you have gathered all the necessary tools, you can move on to the next step, which is removing non-essential components from your bike.

Remove Non-Essential Components

To begin the conversion process, start by removing any non-essential components from your bicycle. This step is crucial in making room for the electric components that you will be installing later on. Take off accessories such as fenders, racks, and bells that are not necessary for the functioning of the electric bike.

By doing this, you can reuse these components on another bicycle or sell them to recover some of the costs associated with the conversion. If you don’t plan on reusing these components, there are cost-effective alternatives available in the market. For example, instead of using a traditional rear rack, you can opt for a seat post rack that doesn’t require any additional mounting points.

Once you have removed these non-essential components, you can move on to the next step of installing the electric components, which will give your bike the power it needs.

Install Electric Components

To install electric components on your bike, you’ll need to follow a few key steps.

Advertisement

First, attach the motor to the bike frame securely using the provided brackets and screws.

Next, mount the battery and controller in a convenient and balanced location. Make sure they are easily accessible but won’t interfere with your riding.

Finally, connect the wiring and cables, making sure to follow the provided instructions to ensure proper functioning of the electric system.

Attach Motor to Bike Frame

After attaching the motor to the bike frame, you can move on to the next step in the bike motor installation process.

To ensure a secure attachment, begin by aligning the motor with the frame and making sure it is centered.

Advertisement

Use the appropriate mounting brackets and hardware to secure the motor in place.

Tighten all bolts and screws to ensure a stable connection.

It is important to double-check the alignment and tightness of the motor to prevent any issues during operation.

Once the motor is securely attached, you can now proceed to the next section about mounting the battery and controller.

This step is crucial in completing the electric bike conversion process and will provide power to the motor for a smooth and efficient ride.

Advertisement

Mount Battery and Controller

Once the motor is securely attached, you can now move on to mounting the battery and controller. Battery installation is a crucial step in converting your bike into an electric one. The battery provides the necessary power to run the motor and ensures a smooth ride. To mount the battery, follow these steps:

  1. Choose a suitable location on the bike frame, ensuring it is secure and easily accessible.
  2. Use straps or brackets to attach the battery securely to the frame, minimizing any movement or vibration during rides.
  3. Connect the battery to the controller using the provided wiring harness and connectors.
  4. Mount the controller near the battery, ensuring it is protected from any external elements.
  5. Use zip ties or clamps to secure the controller to the bike frame, keeping it stable and preventing damage.

Once the battery and controller are securely mounted, you can now proceed to connect the wiring and cables. This ensures proper communication and power flow between the motor, battery, and controller, allowing for a seamless electric biking experience.

Connect Wiring and Cables

First, connect the wiring and cables to ensure proper communication and power flow between the motor, battery, and controller. This step is crucial for the functioning of your electric bike. Here are some wire connection techniques and cable routing tips to help you with this process:

  1. Use proper wire connectors such as butt connectors or soldering for secure connections.
  2. Organize and route the cables in a way that avoids interference with other bike components.
  3. Secure the cables using zip ties or cable clamps to prevent them from getting caught in moving parts.
  4. Test the connections by gently tugging on the wires to ensure they are properly secured.

Once you have completed the wiring and cable connections, you can move on to the next step of reassembling and adjusting the components of your electric bike.

Reassemble and Adjust

To reassemble and adjust your bike, you’ll wanna start by attaching the electric motor to the frame. Ensure that it is securely fastened using the appropriate bolts and brackets.

Next, reconnect the wiring and cables, making sure to follow the correct color-coded scheme. Double-check that all connections are tight and free from any damage.

Once the motor is in place, adjust the tension of the drive belt or chain to ensure smooth operation. Use adjustment techniques such as loosening or tightening the tensioner bolts as needed.

Advertisement

If you encounter any issues during this process, troubleshoot by checking the wiring connections and making sure all components are properly aligned.

Finally, ensure safety measures are in place by testing the brakes and adjusting them if necessary. This will guarantee a safe and reliable electric bike experience.

Ensure Safety Measures

Now that you have reassembled and adjusted your electric bike, it’s time to focus on ensuring safety measures.

Safety precautions are of utmost importance when it comes to riding an electric bike. Before you hit the road, make sure to have the right protective gear. A helmet is essential to protect your head from potential injuries. Elbow and knee pads can protect your joints in case of a fall. Don’t forget to wear gloves to enhance your grip and protect your hands.

Additionally, reflective clothing or accessories can increase your visibility, especially when riding at night. Following these safety measures will greatly reduce the risk of accidents and injuries.

Advertisement

With your safety gear in place, you are ready to learn to ride electric and experience the thrill of your newly transformed bike.

Learn to Ride Electric

Once you feel comfortable with the safety gear, it’s time to start experiencing the thrill of riding an electric bike.

Riding an electric bike offers numerous benefits that make it a popular choice among cycling enthusiasts. First and foremost, electric bikes provide assistance in pedaling, allowing you to cover longer distances with less effort. They also offer various levels of assistance, so you can choose the level that suits your fitness level and desired intensity of workout.

However, it’s important to take certain safety precautions when riding an electric bike. Always wear a helmet and other protective gear, obey traffic laws, and be mindful of your surroundings. Additionally, make sure to familiarize yourself with the controls and features of your electric bike before taking it for a spin.

Now, let’s move on to the next section and learn how to maintain your electric bike properly.

Advertisement

Maintain Your Electric Bike

Make sure you regularly check and maintain the various components of your e-bike to ensure its optimal performance. Electric bike maintenance is crucial to keep your bike running smoothly and avoid any unexpected issues. Here are some key tasks you should perform:

  • Check the tire pressure regularly to ensure proper traction and efficiency.
  • Clean and lubricate the chain to prevent excessive wear and ensure smooth operation.
  • Inspect the brakes for any signs of wear or misalignment and adjust them if necessary.

Troubleshooting common issues is also an important part of maintaining your electric bike:

  • If your battery doesn’t hold a charge, try resetting it or consider replacing it.
  • If your motor is not functioning properly, check the connections and consult the user manual for troubleshooting steps.

By following these maintenance tips and promptly addressing any issues, you can enjoy your electric bike to the fullest without any interruptions.

Enjoy Your Electric Bike

Get ready to have a blast riding your e-bike and experience the thrill of effortless speed and freedom.

Electric bikes offer a range of benefits that enhance your riding experience. Firstly, they provide assistance with pedaling, making it easier to tackle hills and long distances. This means you can ride for longer periods without getting tired.

Additionally, electric bikes allow you to travel at higher speeds, reaching up to 20 mph, while still maintaining control and safety.

To make the most out of your electric bike, consider investing in some accessories. A helmet is essential for safety, while a bike lock ensures your e-bike stays secure. Other popular accessories include lights for visibility, fenders to protect against splashes, and a pannier or basket for carrying your belongings.

Advertisement

With these accessories, you can fully enjoy the convenience and pleasure of riding your electric bike.

Frequently Asked Questions

Can any type of bike be converted into an electric bike?

Yes, any type of bike can be converted into an electric bike. Converting a mountain bike has pros such as enhanced performance, but cons like increased weight. To choose the right battery, consider factors like capacity, voltage, and compatibility with your bike’s motor.

What factors should be considered when choosing a conversion kit?

Consider the electric bike conversion cost and opt for the best electric bike conversion kits. Keep in mind factors like motor power, battery capacity, ease of installation, and compatibility with your bike model. Remember, "You get what you pay for."

Are there any specific tools required for the conversion process?

To convert your bike into an electric one, you will need specific tools such as wrenches, pliers, wire cutters, and a soldering iron. The step-by-step conversion process involves removing the bike’s pedals, attaching the motor, and connecting the battery and controller.

Can the non-essential components be reinstalled after converting the bike?

Sure, you can reinstall non-essential components after converting your bike, but be cautious of compatibility issues. Ensure the components are compatible with the electric conversion and won’t interfere with the new system’s performance.

Advertisement

How long does it typically take to complete the conversion process?

The time it takes to complete the conversion process depends on various factors, such as your familiarity with bike mechanics, availability of tools, and the complexity of the conversion kit. Common challenges include wiring issues and compatibility problems with existing bike components.

Conclusion

In conclusion, by following these steps, you can successfully turn your bike into an electric one.

While some may argue that the process is complicated and time-consuming, it is worth the effort for the benefits it brings.

Not only will you be able to enjoy a faster and smoother ride, but you will also contribute to a greener environment.

Don’t let the initial challenges discourage you; with the right tools and instructions, you can easily transform your regular bike into an electric one and experience the joy of riding in a whole new way.

Advertisement

Continue Reading

Electric Bike

How To Turn On Nakto Electric Bike

Published

on

By

An image showcasing a close-up of a hand firmly gripping the Nakto Electric Bike's handlebar, while the other hand reaches down to press the power button located on the battery pack

So you just got your hands on a new Nakto electric bike, and you’re ready to start riding.

But wait! Before you can embark on your thrilling adventure, you need to know how to turn on this sleek and powerful machine.

In this article, I will guide you through the step-by-step process of familiarizing yourself with the controls, checking the battery level, and activating the power button.

Get ready to unleash the full potential of your Nakto electric bike and experience the exhilaration of effortless riding.

Key Takeaways

  • Locate the power button on the display panel
  • Ensure the battery is fully charged before turning on the bike
  • Familiarize yourself with icons and symbols on the display panel
  • Press the power button to turn on the bike

Familiarizing Yourself with the Controls

Advertisement

To turn on the Nakto electric bike, familiarize yourself with the controls. Understanding the gear system is crucial for a smooth and efficient ride. The Nakto electric bike typically comes with a gear selector located on the handlebars.

By shifting gears, you can adjust the bike’s resistance and speed. Lower gears are ideal for climbing uphill or starting from a stop, while higher gears are suitable for cruising at faster speeds. Take some time to practice shifting gears before hitting the road to ensure a comfortable ride.

Additionally, it is essential to know how to use the brakes effectively. The Nakto electric bike usually has both front and rear brakes that can be engaged by squeezing the brake levers. Practice applying the brakes gradually and evenly to ensure a safe and controlled stop.

Familiarizing yourself with the gear system and mastering the art of using the brakes effectively will enhance your overall riding experience on the Nakto electric bike.

Checking the Battery Level

First, you’ll want to check the level of your battery. This is an important step in battery maintenance to ensure that you have enough power for your ride.

Advertisement

Here are some charging tips to help you keep your Nakto electric bike battery in good condition:

  1. Locate the battery indicator on your bike’s control panel. It is usually a series of bars or a digital display.

  2. Turn on the bike by pressing the power button.

  3. Look at the battery indicator to see the current level. If it is low, you’ll need to charge the battery before riding.

  4. To charge the battery, plug the charger into a power outlet and connect it to the battery port on your bike. Make sure the charger is securely plugged in.

Remember to follow the manufacturer’s instructions for charging and maintaining your battery. Regularly checking the battery level will help ensure a smooth and enjoyable ride.

Adjusting the Seat and Handlebars

Adjusting the seat and handlebars is an essential step in customizing your riding experience. It ensures that you are comfortable and in control while riding your Nakto electric bike. When adjusting the seat, make sure it is set at a height that allows your feet to touch the ground when seated and provides a slight bend in your knee when pedaling. The handlebars should be adjusted to a position that allows you to maintain a relaxed and upright posture.

Advertisement

In order to adjust the brakes, locate the brake levers on the handlebars. Squeeze the levers to test the brakes and make sure they engage properly. If they feel too loose or too tight, adjust the tension using the barrel adjuster located near the brake levers.

Finding the right gear is crucial for a smooth and efficient ride. Use the gears to match your pedaling speed with the terrain you are riding on. Shift to a lower gear when climbing hills or starting from a stop, and shift to a higher gear when riding on flat or downhill surfaces. Experiment with different gears to find the one that feels most comfortable and efficient for you.

Adjusting the seat, handlebars, brakes, and finding the right gear will greatly enhance your riding experience on your Nakto electric bike. Take the time to make these adjustments and enjoy a comfortable and safe ride.

Seat Adjustment Handlebar Adjustment Brake Adjustment Gear Selection
Adjust height for feet to touch ground Adjust for relaxed and upright posture Test and adjust tension Match pedaling speed to terrain
Slight bend in knee when pedaling Comfortable grip and reach Proper engagement Lower gear for climbing, higher gear for flat or downhill surfaces
Personalize for optimal comfort Enhance control and maneuverability Ensure responsiveness Experiment for best performance

Turning on the Display Panel

Make sure you know how to power on the display panel. It is an essential step in getting your Nakto electric bike up and running.

Once you have adjusted the seat and handlebars to your liking, it’s time to dive into the display panel. This is where you can adjust the gears and understand the display settings.

Advertisement

Here are a couple of tips to help you navigate the display panel like a pro:

  • Adjusting the gears:

  • Use the up and down arrows to shift between gears.

  • Experiment with different gear settings to find the one that suits your riding style and terrain.

  • Understanding the display settings:

  • Familiarize yourself with the different icons and symbols on the display panel.

  • Pay attention to important information like battery level, speed, and distance traveled.

By mastering these aspects of the display panel, you will have complete control over your Nakto electric bike.

Activating the Power Button

To activate the power button, simply press the button located on the display panel. This button is usually marked with a power symbol or labeled ‘on/off.’

Advertisement

If you are experiencing any power issues with your Nakto electric bike, troubleshooting the power system can help identify and resolve the problem. Start by checking the battery level and ensuring it is fully charged. If the battery is low, connect the charger and wait for it to reach a sufficient charge before attempting to turn on the bike.

Additionally, familiarize yourself with the different power modes available on your electric bike. Understanding these modes can help you optimize the bike’s performance and battery life. It’s important to note that different Nakto models may have varying power modes and features, so refer to the user manual for specific instructions.

Engaging the Pedal Assist Mode

Engaging the pedal assist mode is a simple way to enhance your riding experience. It allows you to effortlessly glide through various terrains while enjoying the benefits of electric assistance.

To activate the pedal assist mode on your Nakto electric bike, follow these steps:

  • Press the power button to turn on the bike.
  • Once the bike is powered on, locate the pedal assist button on the handlebar.
  • Press the pedal assist button to cycle through the different pedal assist settings.

The pedal assist mode offers several benefits. It provides an extra boost of power when you pedal, making uphill climbs and long rides more manageable. The different pedal assist settings allow you to customize the level of assistance according to your preference and riding conditions.

Whether you want a gentle assist or a more powerful boost, the pedal assist mode on your Nakto electric bike can be adjusted to suit your needs.

Advertisement

Testing the Throttle

Once you’ve activated the pedal assist mode, you can test the throttle by gently twisting it to experience the instant acceleration and control it provides.

The throttle on the Nakto electric bike is designed to give you a seamless riding experience. When you twist the throttle, the bike responds immediately, providing you with a burst of power that propels you forward.

It’s important to test the throttle in a safe and controlled environment, ensuring that you have enough space to maneuver and adjust to the acceleration.

Additionally, while testing the throttle, it’s a good idea to also test the brakes to ensure they are responsive and functioning properly. This will give you confidence in your ability to control the bike’s speed and come to a stop when necessary.

Lastly, don’t forget to adjust the gear shift to find the most comfortable and efficient setting for your riding style.

Advertisement

Ensuring Proper Safety Measures

Make sure you follow all safety precautions to ensure a safe riding experience. One of the most important safety measures to take when riding a Nakto electric bike is wearing a helmet. Wearing a helmet can significantly reduce the risk of head injuries in case of an accident. It is important to choose a helmet that fits properly and meets safety standards. Additionally, it is recommended to wear other protective gear such as knee and elbow pads, especially for beginners or when riding on uneven terrains.

To emphasize the importance of safety, here is a table highlighting some key safety precautions to follow when riding a Nakto electric bike:

Safety Precautions
Wear a helmet
Use proper hand signals
Follow traffic rules
Check brakes and tires regularly
Be aware of surroundings

Remember, taking these safety precautions can greatly reduce the risk of accidents and injuries while enjoying your Nakto electric bike. Stay safe and happy riding!

Troubleshooting Common Issues

Troubleshooting common issues with your Nakto e-bike can help resolve any problems you may encounter while riding. Here are four common problems and their solutions:

  1. Troubleshooting motor issues: If your Nakto electric bike’s motor is not working, first check the battery to ensure it is properly charged. Then, inspect the motor connections to make sure they are secure. If these steps don’t solve the issue, it might be a faulty motor that needs professional repair or replacement.

  2. Troubleshooting display panel errors: If you encounter errors on the display panel, start by checking the connections between the display and the controller. Ensure they are tightly connected. If the problem persists, try resetting the display panel by turning off the e-bike and turning it back on. If none of these steps work, contact Nakto customer support for further assistance.

Remember, troubleshooting is an essential skill to maintain your Nakto e-bike’s performance and ensure a smooth riding experience.

Advertisement

Enjoying Your Nakto Electric Bike Ride

Having fun on your Nakto e-bike ride is all about embracing the exhilarating experience of electric biking. To fully enjoy your ride, it is important to choose the right riding gear and maintain your electric bike properly. The right riding gear will ensure your safety and comfort throughout your journey. It is recommended to wear a helmet, gloves, and appropriate clothing that allows freedom of movement. Additionally, maintaining your Nakto electric bike is crucial for a smooth and enjoyable ride. Regularly check the tire pressure, brakes, and battery level before each ride. Clean the bike regularly and lubricate the chain to prevent rust and ensure smooth pedaling. By following these tips, you can maximize your enjoyment and make every Nakto e-bike ride a memorable experience.

Riding Gear Maintenance
Helmet Check tire pressure
Gloves Inspect brakes
Appropriate clothing Battery level
Clean and lubricate bike

Frequently Asked Questions

How do I charge the battery of my Nakto electric bike?

To charge the battery of my Nakto electric bike, I simply connect the charger to the bike’s charging port. I ensure the charger is properly plugged in and wait for the battery to fully charge. If I encounter any issues, I troubleshoot common battery problems.

Can I adjust the speed settings on my Nakto electric bike?

Yes, you can adjust the speed settings on your Nakto electric bike. To do this, you will need to navigate the troubleshooting display panel and make the necessary adjustments according to the bike’s user manual.

What do I do if the display panel on my Nakto electric bike is not turning on?

If the display panel on your Nakto electric bike is not turning on, there may be some common display panel issues. Troubleshooting the display panel involves checking the battery connection, ensuring the display is properly installed, and contacting customer support if needed.

How long does it take for the battery of my Nakto electric bike to fully charge?

The battery of my Nakto electric bike takes approximately 4-6 hours to fully charge, depending on the model. This ensures a longer battery life and allows me to enjoy extended rides without worrying about running out of power.

Advertisement

Is there a specific maintenance routine I need to follow for my Nakto electric bike?

To properly maintain my Nakto electric bike, I should follow a specific maintenance routine. This includes regular cleaning, checking tire pressure, lubricating the chain, and inspecting the brakes. Additionally, troubleshooting the display panel is important for identifying any potential issues.

Conclusion

After following these steps, you’re now ready to enjoy your ride on the Nakto electric bike.

First, familiarize yourself with the controls. Make sure you know how to operate the throttle, brakes, and any other features specific to your model.

Next, check the battery level. It’s important to know how much charge you have left before setting off on your ride. This will help you plan your route accordingly.

Then, adjust the seat and handlebars to ensure a comfortable riding position. This will help prevent any discomfort or strain during your ride.

Advertisement

Now, you’ve ensured a comfortable and safe ride. Some may argue that electric bikes are not as powerful as traditional bikes, but imagine the thrill of effortlessly gliding down the road. Feel the wind in your hair and the freedom of the open road.

So, hop on your Nakto electric bike and experience the joy of an eco-friendly and convenient mode of transportation.

Continue Reading

Electric Bike

How To Turn The Light On My Electric Bike

Published

on

By

An image capturing a close-up of a hand firmly grasping the bike's handlebar, fingers positioned on the power button, with the other hand reaching towards the front light switch, ready to toggle it on, showcasing the step-by-step process of turning on the electric bike's light

Are you tired of riding in the dark on your electric bike? Are you wondering how to light up your path and stay safe? Look no further!

In this comprehensive guide, we’ll walk you through the step-by-step process of turning on the light on your electric bike. From familiarizing yourself with the bike’s controls to troubleshooting common light issues, we’ve got you covered.

So, grab your bike and let’s shed some light on the road ahead!

Key Takeaways

  • Locate the light switch on the handlebar or control panel
  • Check the battery level regularly and keep it between 20% and 80%
  • Press the power button to turn on the bike’s power
  • Activate the display panel to adjust light settings and personalize preferences

Familiarizing Yourself with the Bike’s Controls

You’ll need to familiarize yourself with the bike’s controls before you can turn the light on. Understanding the bike controls is crucial for a seamless riding experience.

Advertisement

Start by locating the handlebar, where you’ll find various features and buttons. Look for the control panel, which is usually positioned near the center of the handlebar. This panel allows you to access different functions, including the light switch.

Take a moment to study the layout and labels on the control panel. Each bike may have different symbols or icons, so it’s essential to understand what each one represents.

Once you’ve grasped the basic functions, locate the light switch. It is commonly marked with a light bulb symbol. By pressing or flipping this switch, you can easily turn the light on and illuminate your path.

Locating the Light Switch

To find the switch, look for a small button or lever near the handlebars. The light switch location on electric bikes can vary depending on the model, but it is typically located within easy reach of the rider’s thumb or fingers. Some bikes have a dedicated switch for the lights, while others may have a multifunctional button that controls various features, including the lights. Make sure to familiarize yourself with your specific bike’s controls to locate the light switch easily.

Using bike lights at night is crucial for your safety and visibility. It not only helps you see the road ahead but also makes you more visible to other road users. Once you have found the light switch, you can turn on the lights and ride confidently in low-light conditions.

Advertisement

Now, let’s move on to checking the battery level.

Checking the Battery Level

When checking the battery level, it’s important to know how much power is left in order to plan your ride accordingly. To check the battery level on your electric bike, locate the battery indicator on the display panel. This indicator will show you the current charge level of your battery.

It’s recommended to regularly check the battery level to ensure you have enough power for your desired distance. Proper battery maintenance is crucial for prolonging battery life. To maximize the lifespan of your battery, avoid completely draining it and try to keep it between 20% and 80% charged. This will help prevent excessive wear and tear on the battery cells.

Advertisement

Now that you know how to check the battery level, let’s move on to turning on the bike’s power and getting ready for your ride.

Turning on the Bike’s Power

To start your ride, simply press the power button on the control panel. This button is usually located near the handlebars, within easy reach. Once you press the power button, the bike’s power system will activate, and you’ll be ready to go.

Here are four key things to keep in mind when turning on your electric bike:

  1. Check the battery level: Before starting your ride, it’s important to ensure that the battery has enough charge. You can do this by glancing at the battery indicator on the control panel.

  2. Safety precautions: Always make sure that you are in a safe and stable position before turning on the bike’s power. This will help you maintain balance and prevent any accidents.

  3. Listen for the startup sound: When you press the power button, listen for a startup sound or a beep. This indicates that the bike’s power system has successfully turned on.

  4. Confirm the bike’s readiness: Take a quick look at the control panel to ensure that all the necessary indicators, such as speed, assist level, and battery level, are active and functioning properly.

Once you have turned on the bike’s power, you can proceed to activate the display panel, which will provide you with additional information about your ride.

Activating the Display Panel

Advertisement

To activate the display panel, simply press the corresponding button on the control panel.

The display panel is an essential part of your electric bike as it provides important information about your ride and allows you to access various settings.

Once activated, you will be able to see your speed, battery level, and distance traveled.

Additionally, the display panel also allows you to activate the headlight on your electric bike. This is crucial for ensuring visibility and safety, especially when riding in low light conditions or at night.

Advertisement

To activate the headlight, navigate to the display panel settings and select the option to turn on the headlight. By doing so, you can have a clear view of the road ahead.

Next, we will delve into accessing the settings menu, where you can personalize your bike’s features and preferences.

Accessing the Settings Menu

Accessing the settings menu allows you to customize the features and preferences of your bike.

To access the settings menu, locate the display panel on your electric bike. This panel is usually located on the handlebars or near the center of the bike. Once you have located the display panel, press the power button to turn it on.

Use the buttons on the display panel to navigate through the menu options until you find the settings menu.

Advertisement

Once you have accessed the settings menu, look for the option to customize light settings. This option will allow you to adjust the brightness, mode, and other settings related to the lights on your electric bike.

By customizing the light settings, you can ensure optimal visibility and safety while riding.

To navigate to the lights option, simply scroll through the settings menu until you find the appropriate category.

Navigating to the Lights Option

Once you have located the display panel, simply scroll through the settings menu until you find the category for adjusting the lights on your e-bike.

To navigate to the lights option, follow these steps:

Advertisement
  1. Press the power button on the display panel to turn on the e-bike.
  2. Use the arrow buttons to scroll through the menu options until you see the settings icon.
  3. Press the settings icon to enter the settings menu.
  4. Within the settings menu, continue scrolling until you find the lights option.

Once you have successfully navigated to the lights option, you can proceed to adjust the light settings according to your preference.

This will allow you to select the light mode that best suits your needs.

Selecting the Light Mode

When you have reached the lights option, you can easily choose the light mode that suits your preferences. Ensure proper light alignment by adjusting the light intensity using the controls provided. Here is a table to help you understand the different light modes available:

Light Mode Description
Low Provides a dim light for conserving battery
Medium Offers a moderate amount of brightness for regular use
High Gives a bright light for enhanced visibility

By selecting the appropriate light mode, you can ensure that you have the desired level of brightness while riding your electric bike. Once you have adjusted the light intensity, you can proceed to the next step of adjusting the brightness level.

Adjusting the Brightness Level

To adjust the brightness level, simply use the provided controls to increase or decrease the intensity of the light. On most electric bikes, you can find these controls near the handlebars or on the display panel. By adjusting the brightness level, you can customize the lighting to suit your preference and riding conditions.

If you’re riding in a well-lit area, you may want to lower the brightness level to conserve battery power. On the other hand, if you’re riding in low light conditions or at night, increasing the brightness level will enhance visibility and safety.

Advertisement

Additionally, some electric bikes allow you to adjust the angle of the light, allowing you to direct the beam where you need it most.

Once you have adjusted the brightness level and angle, you can move on to choosing between steady or flashing light modes, which we will cover next.

Choosing Between Steady or Flashing Light

Now that you have adjusted the brightness level of your electric bike’s light, it’s time to choose between a steady light or a blinking light.

The steady light emits a continuous beam of light, providing a consistent source of illumination. This is particularly helpful when riding in low-light conditions or on dark roads, as it allows other road users to easily see you. The steady light also helps improve visibility and reduces the risk of accidents.

On the other hand, the blinking light flashes intermittently, which can attract attention and make you more noticeable to others on the road. However, it may not provide as much visibility as the steady light.

Advertisement

Now that you understand the benefits of using a steady light, let’s move on to testing the functionality of the light.

Testing the Light Functionality

Before proceeding, it’s important to ensure that the light on your electric bike is functioning properly. To test the light functionality, follow these steps:

  1. Turn on the bike’s power and locate the light switch or button.
  2. Press or toggle the switch to activate the light.
  3. Check if the light turns on and stays steady or flashes, depending on your preference.
  4. If the light doesn’t turn on, check the battery connection and make sure it’s securely attached.
  5. Ensure that the light bulb is not burnt out by visually inspecting it or replacing it with a new one.
  6. If the light still doesn’t work, consider upgrading your bike’s lighting system to a more reliable and brighter option.

Troubleshooting common light issues will be discussed in the next section, where we will address potential problems and provide solutions.

Troubleshooting Common Light Issues

If your bike’s light is not functioning properly, troubleshooting common light issues can help you identify and solve the problem. Here are some steps to troubleshoot the connections and replace light bulbs:

  • First, check the connections between the light and the battery or power source. Ensure that all the cables are securely connected and free from any damage or corrosion.

  • If the connections are fine, then the issue might be with the light bulb itself. To replace the light bulb, refer to the manufacturer’s instructions or user manual. Usually, you would need to remove the casing or cover of the light and carefully unscrew the old bulb. Replace it with a new bulb of the same type and wattage.

  • After replacing the light bulb, test the functionality by turning on the light. If it still doesn’t work, consider seeking professional help or contacting the manufacturer for further assistance.

To ensure the longevity and proper functioning of the light, it is crucial to maintain and clean it regularly.

Maintaining and Cleaning the Light

To keep your bike light in optimal condition, make sure to regularly clean and maintain it. Cleaning techniques for your electric bike light will depend on the specific model, but most can be wiped clean with a soft cloth and mild soap and water. Avoid using harsh chemicals or abrasive materials that could damage the light. Additionally, check the light for any loose or damaged parts and tighten or replace them as needed. It’s important to keep the light free from dirt, dust, and moisture to ensure it functions properly. Regularly inspect the wiring and connections to make sure they are secure and undamaged. By following these maintenance tips, you can ensure your bike light stays in top shape for years to come. Now, let’s move on to using additional light accessories to enhance your biking experience.

Advertisement

Using Additional Light Accessories

Using extra light accessories can enhance your biking experience by increasing visibility and safety. When it comes to bike light installation, choosing the right light accessories is crucial. Here are three essential accessories to consider:

  1. Headlights: Invest in a powerful headlight that emits a bright beam to illuminate the path ahead. Look for headlights with multiple brightness settings and a long battery life.

  2. Taillights: A taillight is essential for visibility from behind. Opt for a taillight with a flashing mode to grab the attention of drivers and ensure they can see you, especially in low-light conditions.

  3. Reflective gear: In addition to lights, wearing reflective gear such as vests, arm bands, and ankle straps can greatly increase your visibility. These accessories reflect light from car headlights, making you more noticeable on the road.

By incorporating these additional light accessories into your biking routine, you can stay safe and visible on the road, ensuring a worry-free ride.

Staying Safe and Visible on the Road

Make sure you wear bright and reflective clothing to stay safe and visible on the road.

Nighttime visibility is crucial when riding your electric bike, as it can be difficult for drivers to see you in the dark. Reflective clothing helps to increase your visibility by reflecting light from car headlights, making you more noticeable.

It is important to choose clothing that has reflective strips or patches on the front, back, and sides. This will ensure that you are visible from all angles. Additionally, consider wearing a reflective vest or jacket for added visibility.

Advertisement

Remember, the more visible you are, the safer you will be on the road. So, make it a priority to wear bright and reflective clothing every time you ride your electric bike at night.

Frequently Asked Questions

How do I change the light bulb on my electric bike?

To change the light bulb on your electric bike, start by locating the light assembly. Depending on the model, you may need to remove a cover or unscrew the assembly.

Once exposed, carefully remove the old bulb and replace it with a new one of the same type and wattage.

If you’re still experiencing light issues after changing the bulb, consider troubleshooting the wiring connections or checking the battery power.

Can I use a different type of light on my electric bike?

Switching up the light on your electric bike? No worries, there are a plethora of alternative light options available in the market.

Advertisement

To make the best choice, consider reputable brands known for their stellar performance, like [insert best light brands here]. These brands offer a range of lights designed specifically for electric bikes, ensuring optimal brightness, energy efficiency, and durability.

So go ahead, illuminate your ride with a new light that suits your style and needs!

How often should I clean and maintain the light on my electric bike?

To clean and maintain the light on your electric bike, start by disconnecting the light from the power source.

Use a soft cloth or sponge to gently wipe away any dirt or debris on the surface of the light.

For stubborn stains, you can use a mild soap and water solution.

Advertisement

After cleaning, make sure the light is completely dry before reconnecting it to the power source.

Regularly check for any loose connections or damage to ensure proper functioning.

Are there any regulations or laws regarding the use of lights on electric bikes?

To ensure your safety and comply with regulations, it’s crucial to understand the rules regarding lights on electric bikes.

The brightness of the light must meet specific regulations, typically ranging from 300 to 1000 lumens.

Additionally, the required light colors vary depending on your location. For example, in some areas, a white light is required at the front, and a red light at the rear.

Advertisement

Familiarize yourself with the regulations in your region to ensure your electric bike’s lights meet the necessary requirements.

Can I adjust the angle or direction of the light on my electric bike?

To adjust the angle or direction of the light on your electric bike, look for a small screw or lever near the light housing. Loosen the screw or move the lever to change the position of the light.

Adjusting the light angle has several benefits, including increased visibility and improved safety during nighttime rides. A brighter light can help you see the road ahead more clearly, making your rides safer and more enjoyable.

Conclusion

As you embark on your electric bike journey, remember that the light represents more than just illumination. It symbolizes safety, visibility, and a connection to the world around you.

By understanding the bike’s controls, locating the light switch, and ensuring the battery is charged, you can activate this powerful symbol.

Advertisement

Maintain and clean the light, and consider using additional accessories to enhance your visibility.

As you ride, let the light guide you, and may it serve as a beacon of safety on your path.

Continue Reading
Advertisement

Affiliate disclaimer

As an affiliate, we may earn a commission from qualifying purchases. We get commissions for purchases made through links on this website from Amazon and other third parties.

About us

We are a passionate team driven by the belief that cycling is a fantastic and accessible way to stay active while enjoying the beauty of the outdoors. Our mission is to share our love for cycling with as many people as possible. We provide a welcoming environment for individuals of all ages, abilities, and backgrounds to come together and ride bikes. With Ralf’s visionary leadership, Zane’s expertise in cycling adventures, and Olivia’s dedication to community building, we strive to create a vibrant space where everyone can experience the joy of cycling. Through group rides, workshops, and inclusive events, we inspire and empower individuals to embrace an active lifestyle. Join us in our quest to pedal together, embrace the joy of cycling, and foster connections that last a lifetime.

Advertisement

Trending