
Juxtaposing precision and technicality, this article delves into the intricacies of wiring a generic 36v 700w electric bike controller.
With a first-person perspective, I will guide you step-by-step through the process of gathering the necessary tools, disconnecting the battery, and connecting the wires according to the wiring diagram.
By securing the connections and fine-tuning the controller settings, you can enhance the performance of your electric bike.
So, let’s get started on this electrifying journey!
Key Takeaways
- Make incremental changes when addressing motor problems
- Ensure proper insulation and cable management
- Use heat shrink tubing to cover exposed wire connections
- Properly connect the controller to the battery, motor, and throttle
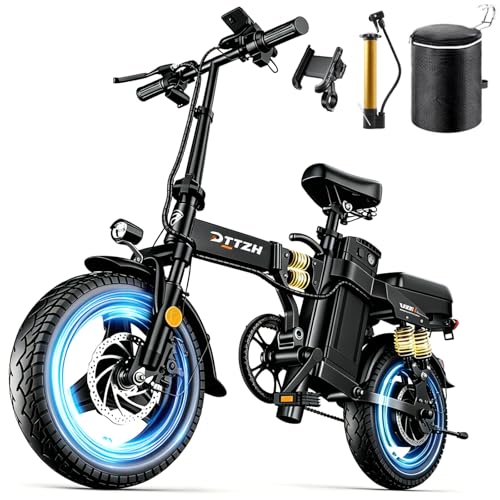
DTTZH A12 1000W Folding Ebikes for Adults, Electric Bike Foldable, 14" Commuter Foldable Ebike, 750W Motor Folding Electric Bicycle, 48V 15Ah Battery UL 2849 Certified, 60 Miles Range (Black)
[Peak 1000W Motor & 48V 15Ah Battery] - The A12 foldable ebike zips through city traffic effortlessly with...
As an affiliate, we earn on qualifying purchases.
Gather the Necessary Tools and Materials
To wire a generic 36v 700w electric bike controller, you’ll need to gather the necessary tools and materials.
Start by choosing the right controller for your bike, ensuring it is compatible with your bike’s voltage and power requirements.
Next, gather the tools required for wiring, such as wire cutters, strippers, and crimping tools. Additionally, you’ll need a soldering iron, heat shrink tubing, and electrical tape for secure connections.
It is important to have a multimeter handy for troubleshooting purposes. When troubleshooting the wiring, always double-check the connections for any loose or improperly connected wires. Test the voltage and continuity using the multimeter to ensure everything is working correctly.
Familiarize yourself with the controller’s wiring diagram, which will guide you through the entire wiring process, including the connection points for the battery, motor, throttle, and brakes. This will help you understand the wiring sequence and proceed with confidence.

TS TST GRP LLC Electric Bike for Adults, Peak 1500W Motor Retro Ebike, Range 65Miles, 48V 15Ah Removable Battery, 20"x4" Fat Tires, Full Suspension, Off-Road E Bike for City Commuting
【Conquer Any Terrain: Powerful 1500W Motor】Experience unstoppable performance with our 1500W peak motor, delivering 90N.m of torque to...
As an affiliate, we earn on qualifying purchases.
Familiarize Yourself with the Controller’s Wiring Diagram
First, take a look at the wiring diagram of the 36v 700w controller. Understanding the different components of the controller is crucial for successfully wiring it. The diagram will illustrate the various connections and terminals, such as the battery input, motor output, throttle input, brake input, and display connections. Each component has a designated wire color and label, ensuring proper installation.
Troubleshooting common wiring issues with electric bike controllers can be easier with a thorough understanding of the diagram. By referring to it, you can identify potential problems, such as loose connections, incorrect wiring, or faulty components. This knowledge will save time and effort in the long run.
Now, let’s move on to the next section where we will disconnect the battery and remove the old controller.

RPINT Electric Mountain Bike for Adults, 20 Inch Fat Tire Dirt E Bike with 1500W Peak Motor, 48V 15Ah Removable Battery, 60 Miles PAS Range, All Terrains Electric Bicycles for Off Road and Commuting
【Safety Certification】Our product complies with UL 2271 (Standard for Lithium Batteries) and UL 2849 (Standard for Electric Bicycles),...
As an affiliate, we earn on qualifying purchases.
Disconnect the Battery and Remove the Old Controller
Begin by disconnecting the battery and removing the old controller. Ensure that the power switch on the old controller is in the off position.
Next, locate the battery connection wires and carefully disconnect them from the old controller. Take note of the wire colors and their corresponding positions for easy reference later.
Now, using a screwdriver, remove any screws or bolts that are securing the old controller to the bike frame. Once the old controller is free, gently lift it out of its housing and set it aside.
Now, it’s time to install the new controller. Connect the wires from the battery to the corresponding terminals on the new controller, following the wiring diagram.
Transitioning into the next section, we will now connect the wires according to the wiring diagram for proper functionality.

Orbit Velo - Advanced Bike Tracker with Apple Find My, Global GPS Location on iPhone, iPad, Mac & Apple Watch, Waterproof with 3 Year Battery Life, Secure Mount for Bottle Holder
✔ [Apple Find My Integration]: Seamlessly connect to Apple’s Find My network to locate your bicycle anytime, anywhere....
As an affiliate, we earn on qualifying purchases.
Connect the Wires According to the Wiring Diagram
Now, you’ll need to follow the wiring diagram to connect the wires correctly.
Before proceeding, it’s important to take precautions when handling electric bike controllers. Make sure the battery is disconnected and the old controller is removed.
Take note of the specific colors and labels on the wires as indicated in the diagram.
Start by connecting the battery wires to the corresponding terminals on the new controller.
Then, connect the power wires from the motor to the appropriate terminals on the controller.
Next, connect the throttle and brake wires to their designated terminals.
Finally, connect any additional wires such as the display or lights according to the diagram.
Troubleshooting common issues with electric bike controllers may involve checking for loose connections, ensuring proper voltage supply, and inspecting for any damaged wires.
Once the connections are made, we can move on to securing them with wire connectors or soldering.
Secure the Connections with Wire Connectors or Soldering
To ensure a reliable and secure connection, you can use wire connectors or soldering to fasten the wires together. Here are some discussion ideas regarding the benefits of using wire connectors over soldering and common mistakes to avoid when securing connections with wire connectors or soldering:
Benefits of using wire connectors over soldering in securing connections:
- Easy to install and remove without damaging the wires.
- Provides a more flexible and adjustable connection.
- Allows for easier troubleshooting and maintenance.
Common mistakes to avoid when securing connections with wire connectors or soldering:
- Using connectors that are not suitable for the wire gauge or type.
- Over-tightening or under-tightening the connectors, leading to loose connections.
- Failing to properly insulate the connectors, risking short circuits.
To ensure a successful connection, it’s important to secure the connections with either wire connectors or soldering.
Once the connections are secured, we can proceed to the next step of mounting the new controller in a suitable location.
Mount the New Controller in a Suitable Location
Find a suitable location to mount your new controller securely. When deciding where to mount the controller, there are several factors to consider. First, ensure that the location is easily accessible for maintenance and troubleshooting purposes. Additionally, consider the controller placement considerations such as protection from water and dust, as well as heat dissipation. To help you visualize the placement options, refer to the table below:
| Placement Options | Pros | Cons |
|---|---|---|
| Under the Seat | Easy access | Limited space |
| Handlebar | Convenient control access | May interfere with steering |
| Rear Rack | Ample space | Increased weight distribution |
Keep these considerations in mind to avoid common controller mounting issues. Once the controller is securely mounted, we can move on to the next step of reconnecting the battery and testing the controller.
Reconnect the Battery and Test the Controller
Make sure you reconnect the battery and test the controller to ensure everything is working properly.
To begin the testing procedure, first, double-check that all the connections are secure and properly attached. Once confirmed, turn on the power switch and listen for any unusual noises or vibrations coming from the controller.
Next, check if the throttle is responsive by gradually increasing the speed. If the bike doesn’t respond or behaves erratically, there might be an issue with the wiring or settings. In such cases, refer to the troubleshooting tips in the controller’s manual.
If everything seems to be functioning correctly, take the bike for a short test ride to confirm its performance.
Once the test is complete, you can proceed to fine-tune the controller settings, if necessary, to optimize your electric bike’s performance.
Fine-tune the Controller Settings, if necessary
If adjustments are required, you can fine-tune the settings of the controller to optimize performance. Start by accessing the controller’s programming interface, typically done through a display panel or smartphone app.
Once inside, you can adjust various settings such as speed limits, acceleration rates, and pedal assist levels. It is crucial to consult the controller’s user manual for specific instructions on adjusting these settings, as they can vary depending on the brand and model.
When troubleshooting issues, you may need to adjust parameters such as current limits or throttle response to address any problems with motor functionality or responsiveness. Remember to make incremental changes and test the bike after each adjustment to ensure the desired outcome.
Next, we will discuss how to ensure proper insulation and cable management when wiring the controller.
Ensure Proper Insulation and Cable Management
To ensure your insulation and cable management is done properly, make sure to secure all wires and protect them from potential damage. Here are some cable routing techniques and proper grounding techniques to consider:
- Use zip ties or cable clamps to secure the wires along the frame of the bike, keeping them away from moving parts and sharp edges.
- Bundle the wires together with cable ties to keep them organized and prevent tangling.
- Use wire loom or spiral wrap to provide additional protection and insulation for the wires.
Ensure that all exposed metal parts of the controller are properly grounded to prevent electrical shocks. Use heat shrink tubing to cover any exposed wire connections and protect them from moisture and corrosion.
By following these techniques, you can prevent any potential damage to your electric bike’s wiring system and enjoy the enhanced performance of your electric bike.
Enjoy the Enhanced Performance of Your Electric Bike
Experience the improved performance of your e-bike and embrace the thrill of effortless riding. With a generic 36V 700W electric bike controller, you can unlock the full potential of your electric bike.
To improve electric bike performance, ensure that the controller is properly connected to the battery, motor, and throttle. Check for any loose connections or damaged wires that may affect performance. Troubleshoot common controller issues such as overheating, erratic speed control, or sudden loss of power.
Inspect the controller for any visible signs of damage or corrosion. If necessary, consult the controller’s manual or contact the manufacturer for troubleshooting tips. By addressing these issues, you can enhance the overall performance and reliability of your electric bike, providing you with a smooth and enjoyable riding experience.
Frequently Asked Questions
What are the necessary tools and materials required to wire a generic 36v 700w electric bike controller?
The necessary tools for wiring a generic 36v 700w electric bike controller include wire strippers, crimping tool, soldering iron, heat shrink tubing, electrical tape, and a multimeter. Required materials include appropriate gauge wires, connectors, and a controller mounting bracket.
How can I familiarize myself with the controller’s wiring diagram?
To understand the wiring diagram of the controller, I carefully study the symbols and their meanings. By grasping the connections between wires, I can accurately identify the correct wire connections.
What steps should I follow to disconnect the battery and remove the old controller?
To disconnect the battery and remove the old controller, first, turn off the power switch and unplug any connectors. Then, carefully disconnect the battery wires, ensuring no contact between the positive and negative terminals. Finally, remove any screws securing the old controller and gently detach it from the bike.
How do I connect the wires according to the wiring diagram?
To interpret a wiring diagram and successfully connect the wires, it is important to understand the symbols and labels used. Troubleshooting common wiring issues can be done by checking for loose connections or damaged wires.
What are some tips for ensuring proper insulation and cable management during the wiring process?
Proper insulation techniques include using heat shrink tubing, electrical tape, and cable ties to protect exposed wires and prevent short circuits. Cable management tips involve organizing and securing cables neatly to avoid tangles and ensure efficient airflow within the system.
Conclusion
Well, congratulations! You’ve meticulously followed the steps to wire your generic 36v 700w electric bike controller. Now, you can bask in the glory of your enhanced two-wheeled wonder.
Your dedication to gathering the necessary tools, deciphering the wiring diagram, and connecting the wires with precision has paid off. Now, your electric bike will surely boast peak performance, leaving all other cyclists in the dust.
So, enjoy the thrill of your newfound speed and power. And remember, with great wiring comes great responsibility! Keep on riding, my electrifying friend.