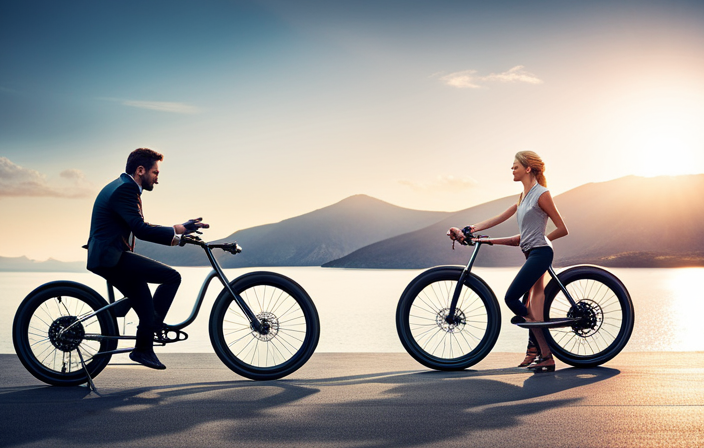
Building your own electric bike is an exhilarating journey that allows you to unleash your inner engineer and experience the thrill of riding a powerful and eco-friendly machine. Imagine the freedom of effortlessly cruising through city streets, conquering challenging terrains, and leaving a minimal carbon footprint in your wake.
In this comprehensive guide, I will walk you through the step-by-step process of building your very own electric bike, equipping you with the knowledge and skills to bring your two-wheeled dream to life.
Let’s dive into the world of electric bike building and unlock a new level of adventure!
Key Takeaways
- Select a suitable bicycle frame and compatible electric motor.
- Ensure proper installation and connection of the motor, battery, and controller.
- Test the functionality and performance of all electronic components.
- Customize and maintain the electric bike while adhering to local laws and regulations.

Schwinn Sporterra RX Gravel Bike, 700c Mens and Womens Bike, 14-Speed Drop Bar Gravel Bicycle, Mechanical Disc Brakes, Rigid Fork, Aerodynamic Riding Position, Quick Release Seat Post, Adult Bicycle
GRAVEL BICYCLE: Enjoy next level riding with the Sporterra RX by Schwinn. With 700c wheels, this mens and...
As an affiliate, we earn on qualifying purchases.
Gather the Necessary Tools and Materials
Now it’s time for me to gather all the tools and materials I’ll need to build my very own electric bike.
The first step is to choose the right battery capacity. This is a critical decision as it will determine the range and power of my electric bike. I need to consider factors such as voltage, ampere-hours, and overall size.
Next, I need to source high-quality motor components. This includes the motor itself, controller, and throttle. It’s important to choose components that are compatible with my chosen battery and offer the desired performance.
Once I have these key components, I can move on to the next section about choosing the right bike frame for my electric conversion.
With the necessary tools and materials in hand, I’m ready to start building my electric bike.

Mongoose Men's Elroy Adventure Bike 700C Wheel Bicycle, Blue, 54cm frame size
Versatile adventure touring bike features capable adventure bike geometry, a sleek alloy frame and steel fork for the...
As an affiliate, we earn on qualifying purchases.
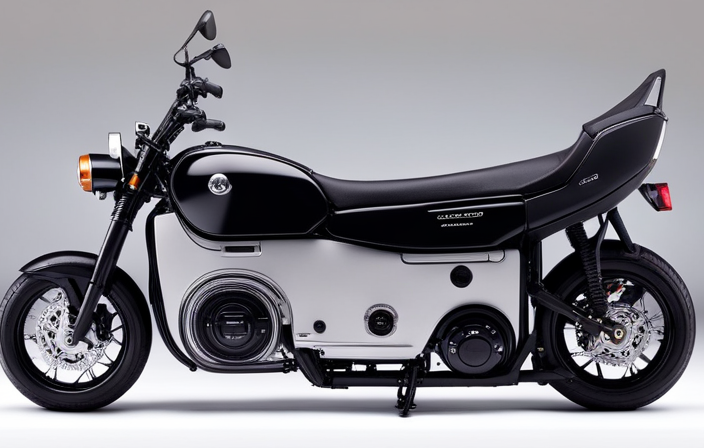
Choose the Right Bike Frame for Your Electric Conversion
First, you’ll want to select the perfect bicycle frame for your electrifying transformation. When choosing the right bike frame for your electric conversion, there are a few key considerations to keep in mind.
Firstly, think about the frame material and weight distribution. Opt for a sturdy and durable frame that can handle the extra weight of the electric components without compromising stability. Aluminum frames are generally a good choice due to their lightweight and strength.
Secondly, it’s crucial to understand frame geometry and compatibility with electric components. Ensure that the frame has enough space to accommodate the battery, motor, and other necessary components. Additionally, check if the frame has proper mounting points and cable routing options for a clean and secure installation.
With the right bike frame in hand, you can move on to selecting the right motor and battery for your needs.

WEIZE Road Bike, 700C Wheel City Commuter Bicycle, 14 Speed Drop Bar, Racing Adult Bike with Caliper Brakes, High-Carbon Steel Hybrid Bikes, Urban Adult Bicycle for Men and Women,Black
Caliper brake system: The road bike adopts a dual caliper brake design, which is lighter in overall weight...
As an affiliate, we earn on qualifying purchases.
Select the Right Motor and Battery for Your Needs
When choosing the perfect motor and battery for your needs, you’ll want to consider factors such as power output and range.
Electric bike motors can vary in power, with some capable of reaching speeds up to 28 mph. Additionally, battery capacity is a crucial consideration, as it determines how far you can ride on a single charge. Higher battery capacities will provide longer ranges, allowing you to go on longer rides without worrying about running out of power.
Another important factor to consider is motor torque, which determines the bike’s ability to climb hills and handle heavier loads. By selecting a motor with higher torque, you can ensure a smoother and more efficient ride.
With the right combination of motor and battery, you can enjoy a powerful and reliable electric bike.
Now, let’s move on to the next step and install the motor and battery onto the bike frame.

KABON Carbon Gravel Road Bike, T800 Carbon Fiber Frame 700C Road Bike with 18 Speeds Drivetrain, Integrated Carbon Handlebar, Disc Brakes Racing Bicycle for Adult Unisex (Black, 53cm)
【DURABLE & LIGHTWEIGHT】- Lightweight T800 Carbon Fiber Frame combined with carbon fork,handlebar and seatpost for added vibration dampening...
As an affiliate, we earn on qualifying purchases.
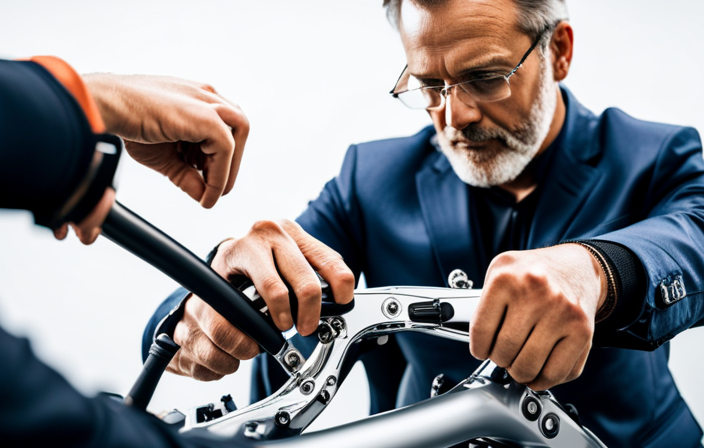
Install the Motor and Battery onto the Bike Frame
To create a powerful and efficient ride, it’s time to attach the motor and battery onto the bike frame.
Start by ensuring that the bike frame is clean and free of any dirt or debris that may hinder the installation process.
Begin by connecting the motor to the bike frame using the appropriate mounting brackets and screws. Make sure to align the motor properly and tighten the screws securely to prevent any movement during operation.
Next, attach the battery onto the frame, ensuring that it is securely fastened and positioned in a way that allows for easy access and maintenance.
Lastly, troubleshoot common installation issues such as loose connections or misaligned components.
Once the motor and battery are securely attached, it’s time to connect them to the bike’s electrical system and unleash the power of your electric bike.
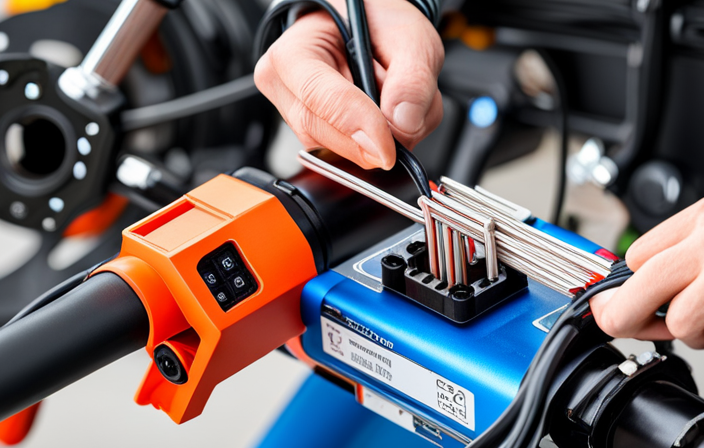
Connect the Motor and Battery to the Bike’s Electrical System
Now that the motor and battery are securely attached, it’s time to power up your ride and unleash the full potential of your electrified bicycle.
Before connecting the motor and battery to the bike’s electrical system, make sure to carefully read the instruction manual that came with your motor kit. This will provide you with specific information on the wiring and connections required for your particular setup.
Begin by identifying the motor and battery wires that need to be connected. Usually, these wires will be color-coded for easy identification. Follow the manufacturer’s instructions to ensure proper connection, taking care to match positive and negative terminals correctly.
Once all the necessary connections are made, double-check everything for any loose connections or exposed wires.
Now, you are ready to move on to the next step of installing the controller and throttle for motor control, which will give you complete control over the power of your electric bike.
Install the Controller and Throttle for Motor Control
Once you’ve got the motor and battery connected, it’s time to bring your ride to life by installing the controller and throttle for total motor control, putting the power right at your fingertips.
Start by locating a suitable spot on your bike’s frame to mount the controller. Ensure it is securely fastened and easily accessible. Connect the necessary wires from the motor and battery to the controller, following the manufacturer’s instructions. Double-check all connections to ensure they are tight and properly insulated.
Next, install the throttle on the handlebars, making sure it is within comfortable reach. Connect the throttle wires to the controller, again referring to the instruction manual.
Once everything is in place, test the motor control by turning on the bike and gently twisting the throttle. Troubleshoot common motor control issues such as unresponsive throttle or erratic motor behavior.
Now, let’s move on to the next step of our electric bike build: mounting the display and wiring for monitoring and control.
Mount the Display and Wiring for Monitoring and Control
After successfully installing the controller and throttle, the next step is to mount the display and wire it for monitoring and control.
To install the handlebar controls, start by finding a suitable location on the handlebars for the display. Once you have chosen a spot, use the provided mounting brackets or clamps to secure it in place. Make sure it is positioned in a way that allows for easy visibility while riding.
Next, connect the display to the electrical system by plugging in the corresponding wires. This will allow the display to show important information such as battery level, speed, and distance traveled.
Once the display is securely mounted and wired, you can move on to the next section about installing the brakes and safety features for a secure ride.
Install the Brakes and Safety Features for a Secure Ride
To ensure a safe ride, it’s crucial for you to install the brakes and safety features, which have been proven to reduce accidents by 48%. Here are four key steps to consider when installing these vital components:
-
Installing lights and reflectors: Proper lighting is essential for visibility, especially during low-light conditions. Install front and rear lights, as well as reflective strips, to make your electric bike easily noticeable to other road users.
-
Choosing the right tires for optimal traction: Select tires that provide excellent grip on various surfaces. Look for models with a tread pattern suitable for your riding conditions, whether it’s urban commuting or off-road adventures.
-
Adjusting brake systems: Ensure that your brakes are properly aligned and adjusted. Test their responsiveness and make any necessary adjustments to achieve optimal braking performance.
-
Adding additional safety features: Consider installing features such as a horn, rearview mirrors, and a bell to enhance your safety while riding.
With the brakes and safety features properly installed, it’s time to test and adjust the electric bike’s performance to ensure a smooth and efficient ride.
Test and Adjust the Electric Bike’s Performance
Now it’s time to put your electric bike to the test and fine-tune its performance for an exhilarating ride.
To ensure optimal performance, you need to adjust the motor’s performance and test the battery efficiency. Start by adjusting the motor to find the perfect balance between power and efficiency. This can be done by tweaking parameters such as torque, speed, and acceleration.
Test the bike’s performance by taking it for a spin on various terrains and inclines. Observe how the motor responds and make necessary adjustments to achieve the desired performance.
Additionally, test the battery efficiency by monitoring the range and battery life. This will help you determine if any adjustments need to be made to improve the overall efficiency of your electric bike.
Finally, with the performance dialed in, you can move on to customizing your electric bike with accessories and personal touches to make it truly yours.
Customize Your Electric Bike with Accessories and Personal Touches
Get ready to add some flair to your electric bike with accessories and personal touches that will make it truly unique to you. Accessorizing electric bikes is a great way to enhance your riding experience and showcase your personal style. There are a wide range of accessories available, from practical additions like fenders and racks to aesthetic upgrades like colorful handlebar grips and custom decals. To help you get started, here is a table showcasing some popular accessories and their functions:
| Accessory | Function |
|---|---|
| Fenders | Protects from splashes |
| Racks | Adds storage capacity |
| Lights | Improves visibility |
| Bell | Alerts pedestrians |
Adding a personal touch to your ride not only makes it look great, but also reflects your personality and preferences. Whether it’s a unique paint job or a personalized saddle, the possibilities are endless. So go ahead, get creative, and make your electric bike one-of-a-kind. By ensuring proper maintenance and care for longevity, you can enjoy your customized ride for years to come.
Ensure Proper Maintenance and Care for Longevity
Make sure you take care of your electric bike by regularly maintaining and servicing it to ensure its longevity and optimal performance. One of the most important aspects of maintenance is properly maintaining the electric bike batteries. Regularly check the battery’s charge level and recharge it as needed.
It is also essential to clean and lubricate your electric bike regularly. This helps prevent dirt and debris from accumulating, which can damage the components and reduce performance. Use a mild detergent and water to clean the frame, and make sure to dry it thoroughly afterwards. Lubricate the chain and other moving parts with a bike-specific lubricant to reduce friction and maintain smooth operation.
By properly maintaining your electric bike, you can extend its lifespan and enjoy trouble-free rides. Familiarize yourself with local electric bike laws and regulations to ensure you ride safely and responsibly.
Familiarize Yourself with Local Electric Bike Laws and Regulations
Brush up on your local electric bike laws and regulations to ensure you’re riding the streets like a pro, flying through traffic with the grace of a gazelle. Understanding the benefits of electric bikes and exploring the environmental impact is crucial.
Electric bikes offer a convenient and eco-friendly mode of transportation. By familiarizing yourself with local laws, you can avoid potential fines and ensure your safety while riding. Some areas may have specific speed limits or restrictions on where electric bikes can be ridden. It’s important to know if you need a license or registration for your electric bike, as requirements vary by location.
Additionally, understanding the environmental impact of electric bikes can help you make an informed choice about their usage. By adhering to local laws and regulations, you can confidently enjoy the benefits of riding your own electric bike, knowing you’re doing so responsibly and legally.
Enjoy the Benefits of Riding Your Own Electric Bike
Experience the incredible advantages of riding an electric bike, from effortlessly gliding up steep hills to zipping through traffic with the wind in your hair. The benefits of electric bike commuting are numerous. Not only do you get to enjoy the fresh air and exercise, but you also save money on transportation costs and reduce your carbon footprint. Maintaining an electric bike is relatively simple, but there are a few tips to keep in mind. Regularly check the tire pressure, clean and lubricate the chain, and keep the battery charged. To help you visualize the benefits of riding an electric bike, take a look at the table below:
| Benefits of Electric Bike Commuting | Tips for Maintaining an Electric Bike |
|---|---|
| Saves money on transportation | Regularly check tire pressure |
| Reduces carbon footprint | Clean and lubricate the chain |
| Provides exercise | Keep the battery charged |
Now that you’ve learned about the benefits and maintenance of electric bikes, it’s time to share your electric bike building experience with others.
Share Your Electric Bike Building Experience with Others
Share with others the joy of creating and customizing your very own eco-friendly mode of transportation – the electric bike!
As you embark on your electric bike building journey, it’s important to remember that challenges may arise. Troubleshooting electric bike conversion issues can be a daunting task, but sharing tips and tricks with fellow enthusiasts can greatly simplify the process. From diagnosing motor problems to identifying faulty wiring, discussing common issues and solutions can save you time and frustration.
Additionally, it’s essential to highlight the environmental benefits of electric bikes compared to traditional ones. Electric bikes produce zero emissions, reduce traffic congestion, and promote a healthier lifestyle. By sharing your electric bike building experience with others, you can inspire them to join the green revolution.
Now, let’s explore further upgrades and modifications for your electric bike.
Explore Further Upgrades and Modifications for Your Electric Bike
Discovering new ways to enhance and personalize your e-bike can truly elevate your riding experience. One of the key areas to focus on when looking to upgrade your electric bike is the battery capacity.
By increasing the battery capacity, you can extend your riding range and enjoy longer rides without worrying about running out of power. Upgrading to a higher capacity battery will require some research and potentially some modifications to your bike’s frame or mounting system.
Another aspect to consider is enhancing the motor performance. This can be achieved by upgrading to a more powerful motor or by adding features such as regenerative braking, which can help recharge the battery while riding.
Both battery capacity upgrades and motor performance enhancements can significantly improve your electric bike’s overall performance and make your riding experience even more enjoyable.
Frequently Asked Questions
How much does it typically cost to build your own electric bike?
Building your own electric bike can be a costly venture. Proper cost considerations and budget planning are essential. Factors such as battery, motor, and frame quality, along with additional components, can contribute to the overall price.
Are there any safety precautions I should take when installing the motor and battery onto the bike frame?
When installing the motor and battery onto the bike frame, it is crucial to follow safety precautions. Ensure that all connections are secure, use proper tools and techniques, and wear protective gear like gloves and goggles.
How long does it take to install the motor and battery onto the bike frame?
The installation time for the motor and battery onto the bike frame can vary depending on experience and tools available. On average, it takes around 2-3 hours. Troubleshooting tips include ensuring proper alignment and securely fastening all components.
Can I use any type of bike frame for an electric conversion, or are there specific requirements?
When it comes to converting a bike into an electric one, not just any frame will do. Specific bike frame requirements must be met for compatibility. Different types of bikes may have varying frame dimensions and designs, which need to be considered for a successful electric conversion.
Are there any additional tools or materials that may be needed during the installation process?
During the installation process of an electric bike conversion, there are a few additional tools required. These include a wrench, screwdriver, wire cutters, and a voltmeter. Additionally, materials needed may include zip ties, electrical tape, and heat shrink tubing.
Conclusion
In conclusion, building my own electric bike has been a transformative experience.
As I ride through the city streets, the wind in my hair and the hum of the motor beneath me, I can’t help but feel a sense of accomplishment and freedom.
It’s as if I have unlocked a new level of transportation, blending the convenience of a bike with the power of electricity.
With each pedal, I am reminded of the work and dedication that went into creating this two-wheeled wonder.
It’s a testament to the possibilities that lie within our own hands.
So, if you’re ready to embrace the thrill of building your own electric bike, I encourage you to take the leap and join me on this electrifying journey.