Connect with us

Electric Bike

How To Choose The Right Electric Scooter Or Electric Bike In 3 Easy Steps

Published

on

An image showcasing three distinct steps: 1) A person comparing different electric scooters and bikes, 2) Evaluating features like battery life, speed, and weight, 3) A person confidently riding their chosen electric vehicle

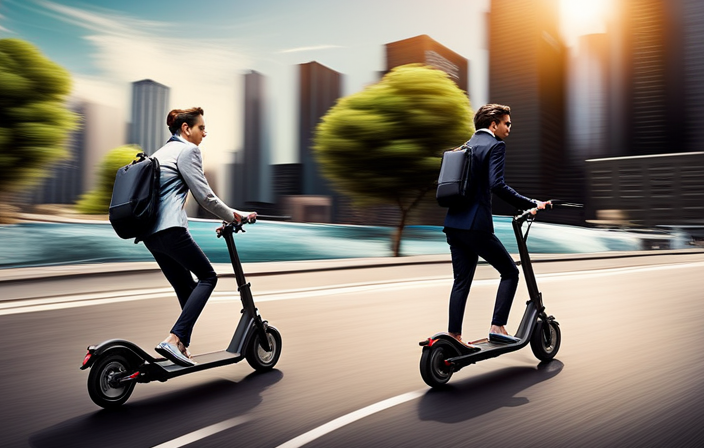
Are you tired of sitting in traffic or waiting for public transportation? Well, fear not! I have discovered a solution that will revolutionize your daily commute and give you a newfound sense of freedom and convenience.

In this article, I will guide you through the process of choosing the perfect electric scooter or electric bike in just three easy steps.

So, get ready to embark on a journey of electric mobility and discover the joy of zipping through the streets with ease.

Contents

Key Takeaways

  • Consider daily commute distance, terrain, and desired speed
  • Read reviews and ratings from other users, compare features and specifications, and look for trusted and reliable brands with a good reputation
  • Evaluate factors like speed, range, and battery life, choose the right size for comfort and maneuverability, and consider weight, dimensions, and adjustable features
  • Check for LED lights and reflectors for enhanced visibility, consider disc brakes or anti-lock braking systems for better control, and look for additional safety features like horn and turn signals.

Determine Your Needs and Preferences

You’ll need to determine your needs and preferences before choosing the right electric scooter or electric bike. Factors to consider include your daily commute distance, terrain, and desired speed.

Advertisement

If you plan to use it for short trips around the neighborhood, a scooter with a lower top speed may suffice. On the other hand, if you have a longer commute or need to tackle hilly terrain, an electric bike with a higher top speed and better suspension might be more suitable.

Additionally, personal preferences such as design, color, and comfort should also be taken into account. Once you have a clear understanding of what you need and what you like, you can transition to the next step of researching different brands and models to find the perfect electric scooter or electric bike for you.

Research Different Brands and Models

When researching different brands and models of electric scooters or electric bikes, it’s important to read reviews and ratings from other users. This will give you valuable insights into the performance and reliability of the product.

Additionally, comparing features and specifications will help you determine which model best suits your needs and preferences.

Lastly, it’s advisable to look for trusted and reliable brands that have a good reputation in the market. This ensures a higher level of quality and customer satisfaction.

Advertisement

Read Reviews and Ratings

To find the right electric scooter or electric bike for you, start by checking out reviews and ratings. This step is crucial in making an informed decision about your purchase. Reviews and ratings provide valuable insights from other customers who have already experienced the product.

Here are some reasons why reviews and ratings are important:

  • They offer unbiased opinions about the pros and cons of different brands and models.
  • They help you understand the performance, durability, and reliability of the electric scooter or electric bike.
  • They give you an idea of any potential issues or drawbacks to consider before making your purchase.
  • They can help you spot fake reviews and ratings, ensuring that you are getting genuine and trustworthy information.

By reading reviews and ratings, you can gather valuable knowledge and make an educated decision. Once you have done this, the next step is to compare features and specifications to further narrow down your options.

Compare Features and Specifications

Comparing features and specifications allows me to make a more informed decision about the electric scooter or electric bike that best suits my needs. By conducting a performance comparison, I can evaluate factors such as speed, range, and battery life to determine which model will provide the optimal riding experience.

Additionally, choosing the right size is crucial for comfort and maneuverability. Considering factors like weight, dimensions, and adjustable features can help me find the perfect fit.

By comparing these features and specifications, I can narrow down my options and select a model that meets my requirements. Once I have gathered this information, I am ready to move on to the next step and look for trusted and reliable brands that offer the electric scooter or electric bike I desire.

Advertisement

Look for Trusted and Reliable Brands

After comparing features and specifications, it’s important to consider trusted and reliable brands. When choosing an electric scooter or electric bike, opting for a reputable brand can make a significant difference in terms of quality and performance. Trusted brands often have a track record of delivering innovative and reliable products. One way to compare features between trusted brands is to create a table that showcases the key specifications, such as motor power, battery range, and maximum speed. Additionally, it’s crucial to take into account customer reviews during brand selection. Reading about other customers’ experiences can provide valuable insights into the overall satisfaction and reliability of a particular brand. By considering trusted brands and customer reviews, you can make a more informed decision when selecting your electric scooter or electric bike. This will ensure that you are investing in a reliable and high-quality product that meets your needs. In the next section, we will discuss how to test ride and evaluate different models.

Test Ride and Evaluate

When you’re ready to make a decision, take the electric scooter or electric bike for a test ride and evaluate its performance.

Testing a potential purchase is essential to ensure it meets your requirements and expectations. By taking it for a spin, you can experience firsthand the benefits of a test ride.

Not only can you assess its speed, acceleration, and maneuverability, but you can also get a feel for the overall comfort and stability of the ride. Pay attention to how the scooter or bike handles different terrains and turns. Evaluate its braking system and responsiveness. Additionally, take note of any noise or vibrations that may indicate potential issues.

Once you’ve thoroughly tested and evaluated the performance, it’s time to consider battery life and range for your desired mode of transportation.

Advertisement

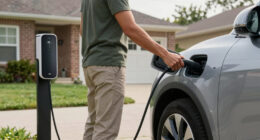
Consider Battery Life and Range

Battery life and range are important factors to consider when deciding on an electric scooter or electric bike. The battery capacity determines how long you can ride before needing to recharge, while the range indicates the maximum distance you can travel on a single charge.

When considering battery life and range, you should take into account your daily commuting needs. If you have a short commute, a scooter or bike with a smaller battery capacity may suffice. However, if you have a longer commute or plan on using your electric vehicle for longer trips, it’s recommended to opt for a higher battery capacity and a longer range.

Additionally, consider the charging time of the battery. Some models may take longer to charge fully, while others have quick charging capabilities. This can be crucial if you need to recharge your electric vehicle during the day or if you have limited time to wait for it to charge.

Considering battery life, range, and charging time will ensure that you choose an electric scooter or electric bike that meets your specific needs and provides a convenient and enjoyable riding experience.

Now, let’s delve into the next section and explore the safety features to look for.

Advertisement

Look for Safety Features

When considering safety features for an electric scooter or electric bike, it’s important to check for LED lights and reflectors. These can greatly enhance visibility, especially during night rides or in low light conditions.

Additionally, looking for disc brakes or anti-lock braking systems can provide better control and stopping power, ensuring a safer ride.

Finally, it’s worth considering additional safety features such as a horn or turn signals, which can further enhance communication and alert others of your presence on the road.

Check for LED Lights and Reflectors

LED lights and reflectors are important features to consider when choosing the right electric scooter or electric bike. Comparing safety features is crucial in ensuring a secure ride.

LED lights provide enhanced visibility, allowing you to be seen by other road users during low light conditions. They also illuminate the path ahead, ensuring a clear view of any obstacles.

Advertisement

Reflectors further enhance your safety by reflecting light from other sources, making you more visible from various angles.

Evaluating durability and build quality is equally important. Look for high-quality LED lights and reflectors that are resistant to water and shock, ensuring they can withstand different weather conditions and vibrations.

These features not only enhance your safety but also contribute to the overall longevity of the scooter or bike.

Now, let’s move on to the next section and explore the importance of disc brakes or anti-lock braking systems.

Look for Disc Brakes or Anti-lock Braking Systems

One important feature to consider is whether the scooter or bike is equipped with disc brakes or an anti-lock braking system. These braking systems provide numerous benefits and are essential for ensuring your safety while riding. Here are some reasons why you should prioritize them:

Advertisement
  • Enhanced stopping power: Disc brakes and anti-lock braking systems offer superior stopping power compared to traditional brake systems, allowing you to come to a halt quickly and safely.

  • Improved control: These braking systems provide better control over your scooter or bike, especially in emergency situations, preventing skidding or loss of control.

  • Benefits of regenerative braking: Some electric scooters and bikes have regenerative braking, which helps recharge the battery while you brake, increasing your overall range.

  • Importance of brake maintenance: Disc brakes and anti-lock braking systems require regular maintenance to ensure optimal performance and safety.

Considering these factors, it’s crucial to select a scooter or bike with reliable braking systems.

Now, let’s explore additional safety features like horns and turn signals that you should also consider.

Consider Additional Safety Features (Horn, Turn Signals, etc.)

To ensure your safety while riding, it’s important to consider additional safety features such as a horn and turn signals. These features provide several advantages that can greatly enhance your riding experience.

Having a horn allows you to alert pedestrians and other vehicles of your presence, helping to prevent accidents. Turn signals are essential for indicating your intentions to other motorists, ensuring a smooth flow of traffic and reducing the risk of collisions.

These safety features are especially important in electric scooters or bikes, as they are often quieter and less noticeable on the road. By incorporating a horn and turn signals, you can significantly increase your visibility and overall safety.

Advertisement

Now, let’s move on to evaluating the maintenance and warranty of your prospective electric scooter or bike.

Evaluate Maintenance and Warranty

When evaluating maintenance and warranty for electric scooters or electric bikes, it is important to research the maintenance needs and costs associated with the specific model you are considering. This will help you understand if there are any ongoing expenses or specialized services required.

Additionally, checking for warranty coverage and support is crucial to ensure that you are protected in case of any defects or issues with your purchase.

Lastly, reading customer experiences and feedback can provide valuable insights into the overall reliability and durability of the product, giving you a better understanding of what to expect in terms of maintenance and warranty.

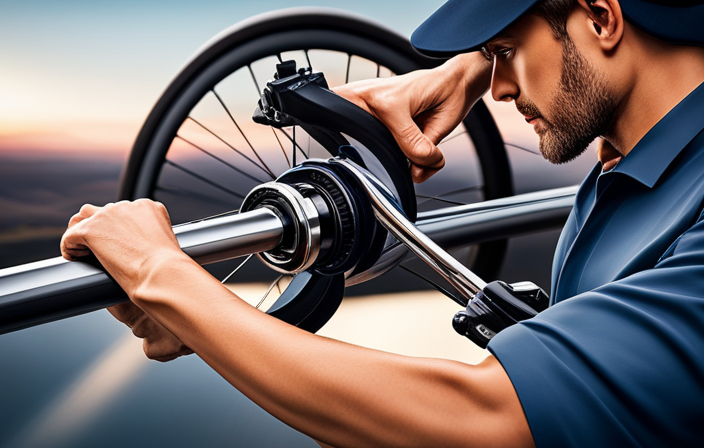
Research Maintenance Needs and Costs

Make sure you research the maintenance needs and costs of electric scooters or electric bikes. It’s important to understand what kind of maintenance these vehicles require and how much it will cost you in the long run.

Advertisement

Electric scooters and bikes have different maintenance needs compared to traditional gasoline-powered vehicles. For example, you may need to regularly check and replace the battery, tires, and brake pads. Additionally, you should consider the costs of routine maintenance such as oil changes, tune-ups, and repairs.

By understanding the maintenance needs and costs, you can make an informed decision about which electric scooter or bike is right for you.

Once you have evaluated the maintenance needs and costs, it’s important to also check for warranty coverage and support, which will be discussed in the next section.

Check for Warranty Coverage and Support

After researching the maintenance needs and costs of electric scooters and electric bikes, it’s vital to consider warranty coverage and support. This step is crucial in ensuring that you are protected in case of any unforeseen issues or defects with your new electric ride.

When checking for warranty coverage, it’s important to understand the specific terms and conditions, such as the duration and what it covers. Additionally, assessing the customer service quality is equally important. A helpful and responsive customer service team can make all the difference when it comes to resolving any warranty claims or addressing any concerns you may have.

Advertisement

Now, let’s move on to the next step and read customer experiences and feedback to make an informed decision about the right electric scooter or electric bike for you.

Read Customer Experiences and Feedback

Reading customer experiences and feedback can provide valuable insights into the performance and reliability of different electric scooters and bikes. It is important to take the time to research and read reviews from other customers before making a decision.

Customer reviews can help you understand the pros and cons of a particular model, as well as any common issues or concerns. By reading about other people’s experiences, you can get a better idea of how the scooter or bike performs in real-life situations. This information is especially helpful when it comes to determining the durability and longevity of the product.

Taking into account customer feedback can help you make an informed decision and avoid potential disappointments.

Now, let’s consider the next factor to consider: portability and storage.

Advertisement

Consider Portability and Storage

When considering portability and storage, it’s important to think about the size and weight of the electric scooter or electric bike. Portability is crucial because you may need to carry or transport your scooter or bike in various situations, such as when using public transportation or storing it in a small apartment. Look for models that are lightweight and compact, making them easier to handle and store.

Additionally, consider the storage and space requirements of the scooter or bike. Some models may fold or have detachable parts, allowing you to save space when not in use.

Now that you have thought about portability and storage, it’s time to check local regulations and laws to ensure you can ride your electric scooter or bike legally and safely.

Check Local Regulations and Laws

When choosing an electric scooter or electric bike, it’s crucial to check the local regulations and laws in your area. Researching the electric ride laws will help you understand the specific rules and restrictions you need to follow.

Additionally, you must determine if a license or registration is required for your chosen vehicle and ensure compliance with speed and safety regulations. By doing so, you can confidently enjoy your electric ride while staying within the legal boundaries of your community.

Advertisement

Research Electric Ride Laws in Your Area

To choose the right electric scooter or electric bike for you, make sure you research the electric ride laws in your area. It is essential to understand the regulations surrounding electric ride sharing and how they may impact your choice.

Different cities and states have different rules and restrictions, so taking the time to familiarize yourself with local laws is crucial. Some areas may have specific requirements for speed limits, designated bike lanes, or helmet usage. Additionally, there may be restrictions on where and how you can park or ride your electric scooter or bike.

By researching these regulations, you can ensure that you choose a vehicle that aligns with your local laws and avoids any potential legal issues. Understanding the electric ride laws in your area will help you make an informed decision when selecting the right electric scooter or electric bike for your needs.

Moving on to the next step, it is also important to determine if a license or registration is required.

Determine if a License or Registration is Required

First, find out if you need a license or registration for your electric ride. License requirements for electric scooters and electric bikes vary depending on where you live. Some states or cities may require a valid driver’s license or a special license specifically for electric rides. It’s important to research and understand the specific regulations in your area to avoid any legal issues.

Advertisement

Additionally, certain areas may also require you to register your electric ride. This process usually involves filling out some paperwork and paying a fee. By familiarizing yourself with the license requirements and registration process, you can ensure that you are in compliance with the law.

Now, let’s move on to the next step, which is to ensure compliance with speed and safety regulations.

Ensure Compliance with Speed and Safety Regulations

Make sure you are aware of and follow the speed and safety regulations to stay in compliance with the law. Understanding local laws and regulations is crucial when it comes to electric scooters and electric bikes.

Speed and safety regulations are put in place for the safety of riders and pedestrians alike. They ensure that everyone can enjoy the benefits of these vehicles without compromising their well-being. By adhering to these regulations, you not only avoid legal consequences but also contribute to a safer environment for everyone.

It is important to note that speed limits can vary depending on the area, so familiarize yourself with the specific regulations in your locality. By doing so, you can confidently enjoy the convenience and freedom that electric scooters and electric bikes provide.

Advertisement

Seeking recommendations and advice from experienced riders can further enhance your understanding of these regulations and assist you in making an informed decision.

Seek Recommendations and Advice

Once you’ve gathered recommendations and advice, it’s easier to choose the right electric scooter or electric bike. Seeking recommendations and advice from trusted sources is crucial when making a decision between an electric scooter and an electric bike. Here are some pros and cons to consider:

  • Electric Scooter:

  • Pros: Compact and portable, suitable for short commutes, easy to maneuver in traffic.

  • Cons: Limited range and speed, may not be suitable for longer distances or rough terrains.

  • Electric Bike:

  • Pros: Longer range and higher speed options, suitable for various terrains, provides exercise.

  • Cons: Heavier and bulkier than electric scooters, limited portability.

By seeking recommendations and advice, you can gather valuable insights from experienced riders and experts. This will enable you to make an informed decision when choosing between an electric scooter and an electric bike, ensuring that you select the option that best suits your needs and preferences.

Transitioning into the next section, let’s explore how to make an informed decision when purchasing your electric vehicle.

Make an Informed Decision

When making an informed decision about choosing the right electric scooter or electric bike, it is essential to consider all factors and prioritize your needs.

Advertisement

Think about your daily commute distance, terrain, and desired speed, as well as any additional features or accessories that may be important to you.

Additionally, compare prices and financing options to ensure you are getting the best deal and can afford the purchase.

Lastly, it is crucial to purchase from a reputable retailer or authorized dealer to guarantee the quality, warranty, and after-sales support of your chosen electric scooter or electric bike.

Consider all Factors and Prioritize Your Needs

First, think about all the factors and prioritize your needs when choosing the right electric scooter or electric bike. It’s important to consider various aspects such as range, speed, weight capacity, and terrain compatibility. To help you make an informed decision, I have created a table that compares three key factors: range, speed, and weight capacity.

Factors Electric Scooter Electric Bike
Range 15-25 miles 20-40 miles
Speed 15-20 mph 20-28 mph
Weight Capacity 220-250 lbs 250-350 lbs

By prioritizing your needs and comparing these options, you can determine which electric scooter or electric bike suits you best. Once you have considered all the factors, it’s time to move on to the next step: comparing prices and financing options.

Advertisement

Compare Prices and Financing Options

To compare prices and financing options, you can start by researching different retailers and checking if they offer any financing plans. Comparison shopping is essential to ensure you are getting the best deal on your electric scooter or electric bike. Look for retailers that offer competitive prices and promotions. Take note of any additional costs, such as shipping or assembly fees, as these can affect the overall price.

Additionally, consider the financing options available. Some retailers may offer zero-interest financing or flexible payment plans, making it easier to afford your desired electric vehicle. Once you have compared prices and financing options, you can confidently move on to the next step of purchasing from a reputable retailer or authorized dealer, ensuring a smooth and reliable transaction.

Purchase from a Reputable Retailer or Authorized Dealer

It’s important to purchase your electric scooter or electric bike from a reputable retailer or authorized dealer to ensure a reliable and trustworthy transaction. Here are three reasons why:

  1. Genuine Products: Authorized retailers have direct access to the manufacturer’s inventory, ensuring that you receive a genuine product with all the necessary warranties and guarantees. This eliminates the risk of purchasing counterfeit electric scooters or bikes that may not meet safety standards or perform as expected.

  2. Expert Advice: Authorized dealers have in-depth knowledge about the products they sell. They can provide expert advice on choosing the right electric scooter or bike based on your specific needs and preferences. They can also guide you through the features, specifications, and maintenance requirements, helping you make an informed decision.

  3. After-Sales Support: Purchasing from a reputable retailer or authorized dealer ensures that you have access to reliable after-sales support. They can assist with any warranty claims, repairs, or maintenance needs that may arise. This level of support is vital in ensuring that your electric scooter or bike remains in optimal condition for years to come.

To avoid counterfeit products, always verify the retailer’s authorization status and look out for any red flags such as unusually low prices or suspicious packaging. It’s better to invest in a genuine product from a reputable source for your safety and peace of mind.

Frequently Asked Questions

Are electric scooters or electric bikes more suitable for urban commuting?

For urban commuting, electric scooters are more cost-effective than electric bikes. They have lower upfront costs, require less maintenance, and are cheaper to charge. Safety-wise, electric bikes offer better stability and control, making them a safer option.

Advertisement

How long does it typically take to fully charge the battery of an electric scooter or electric bike?

The charging time of an electric scooter or electric bike depends on the battery capacity. Generally, it takes about 4-8 hours to fully charge the battery. Higher battery capacity may require longer charging time.

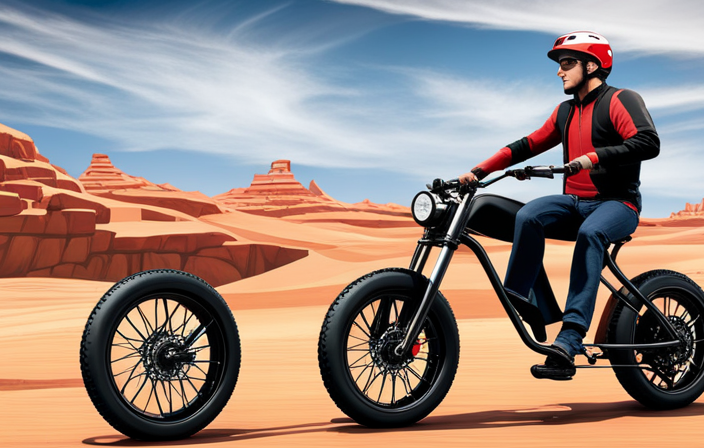
Can electric scooters or electric bikes be used in hilly areas or off-road terrains?

Yes, electric scooters and electric bikes can be used in hilly areas, but electric scooters are more suitable due to their power and torque. Additionally, electric scooters have advantages in off-road terrains with their sturdy construction and shock absorption capabilities.

What should be considered when choosing the appropriate size or frame of an electric scooter or electric bike?

When choosing the size or frame of an electric scooter or electric bike, several considerations should be taken into account. These include comfort, maneuverability, and the benefits of a larger frame for stability and carrying capacity.

Are there any specific maintenance requirements for electric scooters or electric bikes that differ from traditional bicycles or scooters?

Maintenance tips for electric scooters and electric bikes differ from traditional bikes. Regularly check the battery, motor, and wiring connections. Clean the scooter or bike regularly and avoid riding in extreme weather conditions to prolong the lifespan of the electric components.

Conclusion

In conclusion, when it comes to choosing the perfect electric scooter or electric bike, it’s crucial to consider your own needs and preferences. Researching different brands and models will help you make an informed decision.

Advertisement

Don’t forget to test ride and evaluate the options to ensure a smooth and enjoyable ride. Battery life and range, as well as safety features, should also be taken into account.

Lastly, check local regulations and seek recommendations to ensure a hassle-free and legal experience. Remember, a well-chosen electric ride will revolutionize your commute with ease and efficiency.

Ralf is a devoted husband and father who loves spending time with his family. He enjoys riding his bicycle as much as possible, and takes every opportunity he can to get out on the open road. Ralf is a kind and gentle person who wants only the best for those around him.

Continue Reading
Advertisement

Electric Bike

How To Turn On Nakto Electric Bike

Published

on

By

An image showcasing a close-up of a hand firmly gripping the Nakto Electric Bike's handlebar, while the other hand reaches down to press the power button located on the battery pack

So you just got your hands on a new Nakto electric bike, and you’re ready to start riding.

But wait! Before you can embark on your thrilling adventure, you need to know how to turn on this sleek and powerful machine.

In this article, I will guide you through the step-by-step process of familiarizing yourself with the controls, checking the battery level, and activating the power button.

Get ready to unleash the full potential of your Nakto electric bike and experience the exhilaration of effortless riding.

Key Takeaways

  • Locate the power button on the display panel
  • Ensure the battery is fully charged before turning on the bike
  • Familiarize yourself with icons and symbols on the display panel
  • Press the power button to turn on the bike

Familiarizing Yourself with the Controls

Advertisement

To turn on the Nakto electric bike, familiarize yourself with the controls. Understanding the gear system is crucial for a smooth and efficient ride. The Nakto electric bike typically comes with a gear selector located on the handlebars.

By shifting gears, you can adjust the bike’s resistance and speed. Lower gears are ideal for climbing uphill or starting from a stop, while higher gears are suitable for cruising at faster speeds. Take some time to practice shifting gears before hitting the road to ensure a comfortable ride.

Additionally, it is essential to know how to use the brakes effectively. The Nakto electric bike usually has both front and rear brakes that can be engaged by squeezing the brake levers. Practice applying the brakes gradually and evenly to ensure a safe and controlled stop.

Familiarizing yourself with the gear system and mastering the art of using the brakes effectively will enhance your overall riding experience on the Nakto electric bike.

Checking the Battery Level

First, you’ll want to check the level of your battery. This is an important step in battery maintenance to ensure that you have enough power for your ride.

Advertisement

Here are some charging tips to help you keep your Nakto electric bike battery in good condition:

  1. Locate the battery indicator on your bike’s control panel. It is usually a series of bars or a digital display.

  2. Turn on the bike by pressing the power button.

  3. Look at the battery indicator to see the current level. If it is low, you’ll need to charge the battery before riding.

  4. To charge the battery, plug the charger into a power outlet and connect it to the battery port on your bike. Make sure the charger is securely plugged in.

Remember to follow the manufacturer’s instructions for charging and maintaining your battery. Regularly checking the battery level will help ensure a smooth and enjoyable ride.

Adjusting the Seat and Handlebars

Adjusting the seat and handlebars is an essential step in customizing your riding experience. It ensures that you are comfortable and in control while riding your Nakto electric bike. When adjusting the seat, make sure it is set at a height that allows your feet to touch the ground when seated and provides a slight bend in your knee when pedaling. The handlebars should be adjusted to a position that allows you to maintain a relaxed and upright posture.

Advertisement

In order to adjust the brakes, locate the brake levers on the handlebars. Squeeze the levers to test the brakes and make sure they engage properly. If they feel too loose or too tight, adjust the tension using the barrel adjuster located near the brake levers.

Finding the right gear is crucial for a smooth and efficient ride. Use the gears to match your pedaling speed with the terrain you are riding on. Shift to a lower gear when climbing hills or starting from a stop, and shift to a higher gear when riding on flat or downhill surfaces. Experiment with different gears to find the one that feels most comfortable and efficient for you.

Adjusting the seat, handlebars, brakes, and finding the right gear will greatly enhance your riding experience on your Nakto electric bike. Take the time to make these adjustments and enjoy a comfortable and safe ride.

Seat Adjustment Handlebar Adjustment Brake Adjustment Gear Selection
Adjust height for feet to touch ground Adjust for relaxed and upright posture Test and adjust tension Match pedaling speed to terrain
Slight bend in knee when pedaling Comfortable grip and reach Proper engagement Lower gear for climbing, higher gear for flat or downhill surfaces
Personalize for optimal comfort Enhance control and maneuverability Ensure responsiveness Experiment for best performance

Turning on the Display Panel

Make sure you know how to power on the display panel. It is an essential step in getting your Nakto electric bike up and running.

Once you have adjusted the seat and handlebars to your liking, it’s time to dive into the display panel. This is where you can adjust the gears and understand the display settings.

Advertisement

Here are a couple of tips to help you navigate the display panel like a pro:

  • Adjusting the gears:

  • Use the up and down arrows to shift between gears.

  • Experiment with different gear settings to find the one that suits your riding style and terrain.

  • Understanding the display settings:

  • Familiarize yourself with the different icons and symbols on the display panel.

  • Pay attention to important information like battery level, speed, and distance traveled.

By mastering these aspects of the display panel, you will have complete control over your Nakto electric bike.

Activating the Power Button

To activate the power button, simply press the button located on the display panel. This button is usually marked with a power symbol or labeled ‘on/off.’

Advertisement

If you are experiencing any power issues with your Nakto electric bike, troubleshooting the power system can help identify and resolve the problem. Start by checking the battery level and ensuring it is fully charged. If the battery is low, connect the charger and wait for it to reach a sufficient charge before attempting to turn on the bike.

Additionally, familiarize yourself with the different power modes available on your electric bike. Understanding these modes can help you optimize the bike’s performance and battery life. It’s important to note that different Nakto models may have varying power modes and features, so refer to the user manual for specific instructions.

Engaging the Pedal Assist Mode

Engaging the pedal assist mode is a simple way to enhance your riding experience. It allows you to effortlessly glide through various terrains while enjoying the benefits of electric assistance.

To activate the pedal assist mode on your Nakto electric bike, follow these steps:

  • Press the power button to turn on the bike.
  • Once the bike is powered on, locate the pedal assist button on the handlebar.
  • Press the pedal assist button to cycle through the different pedal assist settings.

The pedal assist mode offers several benefits. It provides an extra boost of power when you pedal, making uphill climbs and long rides more manageable. The different pedal assist settings allow you to customize the level of assistance according to your preference and riding conditions.

Whether you want a gentle assist or a more powerful boost, the pedal assist mode on your Nakto electric bike can be adjusted to suit your needs.

Advertisement

Testing the Throttle

Once you’ve activated the pedal assist mode, you can test the throttle by gently twisting it to experience the instant acceleration and control it provides.

The throttle on the Nakto electric bike is designed to give you a seamless riding experience. When you twist the throttle, the bike responds immediately, providing you with a burst of power that propels you forward.

It’s important to test the throttle in a safe and controlled environment, ensuring that you have enough space to maneuver and adjust to the acceleration.

Additionally, while testing the throttle, it’s a good idea to also test the brakes to ensure they are responsive and functioning properly. This will give you confidence in your ability to control the bike’s speed and come to a stop when necessary.

Lastly, don’t forget to adjust the gear shift to find the most comfortable and efficient setting for your riding style.

Advertisement

Ensuring Proper Safety Measures

Make sure you follow all safety precautions to ensure a safe riding experience. One of the most important safety measures to take when riding a Nakto electric bike is wearing a helmet. Wearing a helmet can significantly reduce the risk of head injuries in case of an accident. It is important to choose a helmet that fits properly and meets safety standards. Additionally, it is recommended to wear other protective gear such as knee and elbow pads, especially for beginners or when riding on uneven terrains.

To emphasize the importance of safety, here is a table highlighting some key safety precautions to follow when riding a Nakto electric bike:

Safety Precautions
Wear a helmet
Use proper hand signals
Follow traffic rules
Check brakes and tires regularly
Be aware of surroundings

Remember, taking these safety precautions can greatly reduce the risk of accidents and injuries while enjoying your Nakto electric bike. Stay safe and happy riding!

Troubleshooting Common Issues

Troubleshooting common issues with your Nakto e-bike can help resolve any problems you may encounter while riding. Here are four common problems and their solutions:

  1. Troubleshooting motor issues: If your Nakto electric bike’s motor is not working, first check the battery to ensure it is properly charged. Then, inspect the motor connections to make sure they are secure. If these steps don’t solve the issue, it might be a faulty motor that needs professional repair or replacement.

  2. Troubleshooting display panel errors: If you encounter errors on the display panel, start by checking the connections between the display and the controller. Ensure they are tightly connected. If the problem persists, try resetting the display panel by turning off the e-bike and turning it back on. If none of these steps work, contact Nakto customer support for further assistance.

Remember, troubleshooting is an essential skill to maintain your Nakto e-bike’s performance and ensure a smooth riding experience.

Advertisement

Enjoying Your Nakto Electric Bike Ride

Having fun on your Nakto e-bike ride is all about embracing the exhilarating experience of electric biking. To fully enjoy your ride, it is important to choose the right riding gear and maintain your electric bike properly. The right riding gear will ensure your safety and comfort throughout your journey. It is recommended to wear a helmet, gloves, and appropriate clothing that allows freedom of movement. Additionally, maintaining your Nakto electric bike is crucial for a smooth and enjoyable ride. Regularly check the tire pressure, brakes, and battery level before each ride. Clean the bike regularly and lubricate the chain to prevent rust and ensure smooth pedaling. By following these tips, you can maximize your enjoyment and make every Nakto e-bike ride a memorable experience.

Riding Gear Maintenance
Helmet Check tire pressure
Gloves Inspect brakes
Appropriate clothing Battery level
Clean and lubricate bike

Frequently Asked Questions

How do I charge the battery of my Nakto electric bike?

To charge the battery of my Nakto electric bike, I simply connect the charger to the bike’s charging port. I ensure the charger is properly plugged in and wait for the battery to fully charge. If I encounter any issues, I troubleshoot common battery problems.

Can I adjust the speed settings on my Nakto electric bike?

Yes, you can adjust the speed settings on your Nakto electric bike. To do this, you will need to navigate the troubleshooting display panel and make the necessary adjustments according to the bike’s user manual.

What do I do if the display panel on my Nakto electric bike is not turning on?

If the display panel on your Nakto electric bike is not turning on, there may be some common display panel issues. Troubleshooting the display panel involves checking the battery connection, ensuring the display is properly installed, and contacting customer support if needed.

How long does it take for the battery of my Nakto electric bike to fully charge?

The battery of my Nakto electric bike takes approximately 4-6 hours to fully charge, depending on the model. This ensures a longer battery life and allows me to enjoy extended rides without worrying about running out of power.

Advertisement

Is there a specific maintenance routine I need to follow for my Nakto electric bike?

To properly maintain my Nakto electric bike, I should follow a specific maintenance routine. This includes regular cleaning, checking tire pressure, lubricating the chain, and inspecting the brakes. Additionally, troubleshooting the display panel is important for identifying any potential issues.

Conclusion

After following these steps, you’re now ready to enjoy your ride on the Nakto electric bike.

First, familiarize yourself with the controls. Make sure you know how to operate the throttle, brakes, and any other features specific to your model.

Next, check the battery level. It’s important to know how much charge you have left before setting off on your ride. This will help you plan your route accordingly.

Then, adjust the seat and handlebars to ensure a comfortable riding position. This will help prevent any discomfort or strain during your ride.

Advertisement

Now, you’ve ensured a comfortable and safe ride. Some may argue that electric bikes are not as powerful as traditional bikes, but imagine the thrill of effortlessly gliding down the road. Feel the wind in your hair and the freedom of the open road.

So, hop on your Nakto electric bike and experience the joy of an eco-friendly and convenient mode of transportation.

Continue Reading

Electric Bike

How To Turn The Light On My Electric Bike

Published

on

By

An image capturing a close-up of a hand firmly grasping the bike's handlebar, fingers positioned on the power button, with the other hand reaching towards the front light switch, ready to toggle it on, showcasing the step-by-step process of turning on the electric bike's light

Are you tired of riding in the dark on your electric bike? Are you wondering how to light up your path and stay safe? Look no further!

In this comprehensive guide, we’ll walk you through the step-by-step process of turning on the light on your electric bike. From familiarizing yourself with the bike’s controls to troubleshooting common light issues, we’ve got you covered.

So, grab your bike and let’s shed some light on the road ahead!

Key Takeaways

  • Locate the light switch on the handlebar or control panel
  • Check the battery level regularly and keep it between 20% and 80%
  • Press the power button to turn on the bike’s power
  • Activate the display panel to adjust light settings and personalize preferences

Familiarizing Yourself with the Bike’s Controls

You’ll need to familiarize yourself with the bike’s controls before you can turn the light on. Understanding the bike controls is crucial for a seamless riding experience.

Advertisement

Start by locating the handlebar, where you’ll find various features and buttons. Look for the control panel, which is usually positioned near the center of the handlebar. This panel allows you to access different functions, including the light switch.

Take a moment to study the layout and labels on the control panel. Each bike may have different symbols or icons, so it’s essential to understand what each one represents.

Once you’ve grasped the basic functions, locate the light switch. It is commonly marked with a light bulb symbol. By pressing or flipping this switch, you can easily turn the light on and illuminate your path.

Locating the Light Switch

To find the switch, look for a small button or lever near the handlebars. The light switch location on electric bikes can vary depending on the model, but it is typically located within easy reach of the rider’s thumb or fingers. Some bikes have a dedicated switch for the lights, while others may have a multifunctional button that controls various features, including the lights. Make sure to familiarize yourself with your specific bike’s controls to locate the light switch easily.

Using bike lights at night is crucial for your safety and visibility. It not only helps you see the road ahead but also makes you more visible to other road users. Once you have found the light switch, you can turn on the lights and ride confidently in low-light conditions.

Advertisement

Now, let’s move on to checking the battery level.

Checking the Battery Level

When checking the battery level, it’s important to know how much power is left in order to plan your ride accordingly. To check the battery level on your electric bike, locate the battery indicator on the display panel. This indicator will show you the current charge level of your battery.

It’s recommended to regularly check the battery level to ensure you have enough power for your desired distance. Proper battery maintenance is crucial for prolonging battery life. To maximize the lifespan of your battery, avoid completely draining it and try to keep it between 20% and 80% charged. This will help prevent excessive wear and tear on the battery cells.

Advertisement

Now that you know how to check the battery level, let’s move on to turning on the bike’s power and getting ready for your ride.

Turning on the Bike’s Power

To start your ride, simply press the power button on the control panel. This button is usually located near the handlebars, within easy reach. Once you press the power button, the bike’s power system will activate, and you’ll be ready to go.

Here are four key things to keep in mind when turning on your electric bike:

  1. Check the battery level: Before starting your ride, it’s important to ensure that the battery has enough charge. You can do this by glancing at the battery indicator on the control panel.

  2. Safety precautions: Always make sure that you are in a safe and stable position before turning on the bike’s power. This will help you maintain balance and prevent any accidents.

  3. Listen for the startup sound: When you press the power button, listen for a startup sound or a beep. This indicates that the bike’s power system has successfully turned on.

  4. Confirm the bike’s readiness: Take a quick look at the control panel to ensure that all the necessary indicators, such as speed, assist level, and battery level, are active and functioning properly.

Once you have turned on the bike’s power, you can proceed to activate the display panel, which will provide you with additional information about your ride.

Activating the Display Panel

Advertisement

To activate the display panel, simply press the corresponding button on the control panel.

The display panel is an essential part of your electric bike as it provides important information about your ride and allows you to access various settings.

Once activated, you will be able to see your speed, battery level, and distance traveled.

Additionally, the display panel also allows you to activate the headlight on your electric bike. This is crucial for ensuring visibility and safety, especially when riding in low light conditions or at night.

Advertisement

To activate the headlight, navigate to the display panel settings and select the option to turn on the headlight. By doing so, you can have a clear view of the road ahead.

Next, we will delve into accessing the settings menu, where you can personalize your bike’s features and preferences.

Accessing the Settings Menu

Accessing the settings menu allows you to customize the features and preferences of your bike.

To access the settings menu, locate the display panel on your electric bike. This panel is usually located on the handlebars or near the center of the bike. Once you have located the display panel, press the power button to turn it on.

Use the buttons on the display panel to navigate through the menu options until you find the settings menu.

Advertisement

Once you have accessed the settings menu, look for the option to customize light settings. This option will allow you to adjust the brightness, mode, and other settings related to the lights on your electric bike.

By customizing the light settings, you can ensure optimal visibility and safety while riding.

To navigate to the lights option, simply scroll through the settings menu until you find the appropriate category.

Navigating to the Lights Option

Once you have located the display panel, simply scroll through the settings menu until you find the category for adjusting the lights on your e-bike.

To navigate to the lights option, follow these steps:

Advertisement
  1. Press the power button on the display panel to turn on the e-bike.
  2. Use the arrow buttons to scroll through the menu options until you see the settings icon.
  3. Press the settings icon to enter the settings menu.
  4. Within the settings menu, continue scrolling until you find the lights option.

Once you have successfully navigated to the lights option, you can proceed to adjust the light settings according to your preference.

This will allow you to select the light mode that best suits your needs.

Selecting the Light Mode

When you have reached the lights option, you can easily choose the light mode that suits your preferences. Ensure proper light alignment by adjusting the light intensity using the controls provided. Here is a table to help you understand the different light modes available:

Light Mode Description
Low Provides a dim light for conserving battery
Medium Offers a moderate amount of brightness for regular use
High Gives a bright light for enhanced visibility

By selecting the appropriate light mode, you can ensure that you have the desired level of brightness while riding your electric bike. Once you have adjusted the light intensity, you can proceed to the next step of adjusting the brightness level.

Adjusting the Brightness Level

To adjust the brightness level, simply use the provided controls to increase or decrease the intensity of the light. On most electric bikes, you can find these controls near the handlebars or on the display panel. By adjusting the brightness level, you can customize the lighting to suit your preference and riding conditions.

If you’re riding in a well-lit area, you may want to lower the brightness level to conserve battery power. On the other hand, if you’re riding in low light conditions or at night, increasing the brightness level will enhance visibility and safety.

Advertisement

Additionally, some electric bikes allow you to adjust the angle of the light, allowing you to direct the beam where you need it most.

Once you have adjusted the brightness level and angle, you can move on to choosing between steady or flashing light modes, which we will cover next.

Choosing Between Steady or Flashing Light

Now that you have adjusted the brightness level of your electric bike’s light, it’s time to choose between a steady light or a blinking light.

The steady light emits a continuous beam of light, providing a consistent source of illumination. This is particularly helpful when riding in low-light conditions or on dark roads, as it allows other road users to easily see you. The steady light also helps improve visibility and reduces the risk of accidents.

On the other hand, the blinking light flashes intermittently, which can attract attention and make you more noticeable to others on the road. However, it may not provide as much visibility as the steady light.

Advertisement

Now that you understand the benefits of using a steady light, let’s move on to testing the functionality of the light.

Testing the Light Functionality

Before proceeding, it’s important to ensure that the light on your electric bike is functioning properly. To test the light functionality, follow these steps:

  1. Turn on the bike’s power and locate the light switch or button.
  2. Press or toggle the switch to activate the light.
  3. Check if the light turns on and stays steady or flashes, depending on your preference.
  4. If the light doesn’t turn on, check the battery connection and make sure it’s securely attached.
  5. Ensure that the light bulb is not burnt out by visually inspecting it or replacing it with a new one.
  6. If the light still doesn’t work, consider upgrading your bike’s lighting system to a more reliable and brighter option.

Troubleshooting common light issues will be discussed in the next section, where we will address potential problems and provide solutions.

Troubleshooting Common Light Issues

If your bike’s light is not functioning properly, troubleshooting common light issues can help you identify and solve the problem. Here are some steps to troubleshoot the connections and replace light bulbs:

  • First, check the connections between the light and the battery or power source. Ensure that all the cables are securely connected and free from any damage or corrosion.

  • If the connections are fine, then the issue might be with the light bulb itself. To replace the light bulb, refer to the manufacturer’s instructions or user manual. Usually, you would need to remove the casing or cover of the light and carefully unscrew the old bulb. Replace it with a new bulb of the same type and wattage.

  • After replacing the light bulb, test the functionality by turning on the light. If it still doesn’t work, consider seeking professional help or contacting the manufacturer for further assistance.

To ensure the longevity and proper functioning of the light, it is crucial to maintain and clean it regularly.

Maintaining and Cleaning the Light

To keep your bike light in optimal condition, make sure to regularly clean and maintain it. Cleaning techniques for your electric bike light will depend on the specific model, but most can be wiped clean with a soft cloth and mild soap and water. Avoid using harsh chemicals or abrasive materials that could damage the light. Additionally, check the light for any loose or damaged parts and tighten or replace them as needed. It’s important to keep the light free from dirt, dust, and moisture to ensure it functions properly. Regularly inspect the wiring and connections to make sure they are secure and undamaged. By following these maintenance tips, you can ensure your bike light stays in top shape for years to come. Now, let’s move on to using additional light accessories to enhance your biking experience.

Advertisement

Using Additional Light Accessories

Using extra light accessories can enhance your biking experience by increasing visibility and safety. When it comes to bike light installation, choosing the right light accessories is crucial. Here are three essential accessories to consider:

  1. Headlights: Invest in a powerful headlight that emits a bright beam to illuminate the path ahead. Look for headlights with multiple brightness settings and a long battery life.

  2. Taillights: A taillight is essential for visibility from behind. Opt for a taillight with a flashing mode to grab the attention of drivers and ensure they can see you, especially in low-light conditions.

  3. Reflective gear: In addition to lights, wearing reflective gear such as vests, arm bands, and ankle straps can greatly increase your visibility. These accessories reflect light from car headlights, making you more noticeable on the road.

By incorporating these additional light accessories into your biking routine, you can stay safe and visible on the road, ensuring a worry-free ride.

Staying Safe and Visible on the Road

Make sure you wear bright and reflective clothing to stay safe and visible on the road.

Nighttime visibility is crucial when riding your electric bike, as it can be difficult for drivers to see you in the dark. Reflective clothing helps to increase your visibility by reflecting light from car headlights, making you more noticeable.

It is important to choose clothing that has reflective strips or patches on the front, back, and sides. This will ensure that you are visible from all angles. Additionally, consider wearing a reflective vest or jacket for added visibility.

Advertisement

Remember, the more visible you are, the safer you will be on the road. So, make it a priority to wear bright and reflective clothing every time you ride your electric bike at night.

Frequently Asked Questions

How do I change the light bulb on my electric bike?

To change the light bulb on your electric bike, start by locating the light assembly. Depending on the model, you may need to remove a cover or unscrew the assembly.

Once exposed, carefully remove the old bulb and replace it with a new one of the same type and wattage.

If you’re still experiencing light issues after changing the bulb, consider troubleshooting the wiring connections or checking the battery power.

Can I use a different type of light on my electric bike?

Switching up the light on your electric bike? No worries, there are a plethora of alternative light options available in the market.

Advertisement

To make the best choice, consider reputable brands known for their stellar performance, like [insert best light brands here]. These brands offer a range of lights designed specifically for electric bikes, ensuring optimal brightness, energy efficiency, and durability.

So go ahead, illuminate your ride with a new light that suits your style and needs!

How often should I clean and maintain the light on my electric bike?

To clean and maintain the light on your electric bike, start by disconnecting the light from the power source.

Use a soft cloth or sponge to gently wipe away any dirt or debris on the surface of the light.

For stubborn stains, you can use a mild soap and water solution.

Advertisement

After cleaning, make sure the light is completely dry before reconnecting it to the power source.

Regularly check for any loose connections or damage to ensure proper functioning.

Are there any regulations or laws regarding the use of lights on electric bikes?

To ensure your safety and comply with regulations, it’s crucial to understand the rules regarding lights on electric bikes.

The brightness of the light must meet specific regulations, typically ranging from 300 to 1000 lumens.

Additionally, the required light colors vary depending on your location. For example, in some areas, a white light is required at the front, and a red light at the rear.

Advertisement

Familiarize yourself with the regulations in your region to ensure your electric bike’s lights meet the necessary requirements.

Can I adjust the angle or direction of the light on my electric bike?

To adjust the angle or direction of the light on your electric bike, look for a small screw or lever near the light housing. Loosen the screw or move the lever to change the position of the light.

Adjusting the light angle has several benefits, including increased visibility and improved safety during nighttime rides. A brighter light can help you see the road ahead more clearly, making your rides safer and more enjoyable.

Conclusion

As you embark on your electric bike journey, remember that the light represents more than just illumination. It symbolizes safety, visibility, and a connection to the world around you.

By understanding the bike’s controls, locating the light switch, and ensuring the battery is charged, you can activate this powerful symbol.

Advertisement

Maintain and clean the light, and consider using additional accessories to enhance your visibility.

As you ride, let the light guide you, and may it serve as a beacon of safety on your path.

Continue Reading

Electric Bike

How To Turn Your Bike Into An Electric One.

Published

on

By

An image showcasing a bicycle with a sleek, low-profile electric motor attached to the rear wheel

Are you prepared to upgrade your regular bike into an electrifying adventure? Prepare to enjoy the excitement of easy pedaling and increased range with an electric bike conversion.

In this comprehensive guide, I’ll walk you through the step-by-step process of turning your regular bicycle into a powerful, eco-friendly electric bike.

From choosing the right bike for conversion to installing the electric conversion kit and adding extra features, you’ll have all the information you need to embark on this exciting transformation.

Get ready to revolutionize your cycling experience.

Key Takeaways

  • Lithium-ion batteries are commonly used for their high energy density and long lifespan in electric bike conversion kits.
  • Hub motors provide direct power to the wheels and are simpler to install, while mid-drive motors offer better balance and performance by driving the crankshaft.
  • When choosing a bike for conversion, consider factors such as frame size, weight capacity, and the bike’s weight and balance for a smooth and safe riding experience.
  • Necessary tools and materials for the conversion include a motor kit, battery pack, and miscellaneous tools like wrenches and screwdrivers. Prioritize safety by ensuring components meet safety standards and sourcing them from reputable suppliers.

Understanding Electric Bike Conversion Kits

Advertisement

Understanding electric bike conversion kits can be a game-changer for transforming your regular bike into an electric one.

When it comes to understanding battery technology, it’s crucial to know that lithium-ion batteries are the most common choice due to their high energy density and long lifespan. They provide efficient power delivery while being lightweight and easy to recharge.

Comparing different motor options is equally important. There are two main types: hub motors and mid-drive motors. Hub motors are simpler to install and provide direct power to the wheels, while mid-drive motors offer better balance and performance by driving the crankshaft.

Ultimately, the choice between the two depends on your specific needs and preferences.

By understanding battery technology and comparing motor options, you can make an informed decision when converting your bike into an electric one.

Advertisement

Choosing the Right Bike for Conversion

When choosing the right bike for conversion, it’s important to consider factors like frame size and weight capacity. Choosing the right frame for your conversion is crucial in ensuring a successful electric bike transformation.

The frame should be sturdy enough to support the added weight of the electric components without compromising its integrity. Additionally, considering the weight and balance of the bike is essential for a smooth and safe riding experience.

A heavier bike may require more powerful motor and battery to maintain balance and provide adequate propulsion. On the other hand, a lighter bike may be more agile but may not have enough stability for the added weight.

Carefully evaluating the frame’s weight capacity and balance will help you select the right bike for your electric conversion project.

Gathering the Necessary Tools and Materials

Advertisement

To gather the necessary tools and materials, you’ll need to make a list of items required for the conversion process. Here are the essential components you’ll need:

  1. Motor kit: This includes a motor, controller, and wiring harness. Make sure to choose a motor that is compatible with your bike’s frame and wheel size.

  2. Battery pack: Select a lithium-ion battery with a suitable voltage and capacity for your desired range. Consider factors like weight and mounting options.

  3. Miscellaneous tools: You will need a set of wrenches, screwdrivers, wire cutters, and crimping tools to install the components properly.

When sourcing components, it’s crucial to prioritize safety considerations. Ensure that the motor and battery meet safety standards and have built-in protection features. Additionally, choose a reputable supplier to guarantee the quality of the components.

Remember to wear protective gear when working with electrical components and follow all safety guidelines provided by the manufacturer.

Removing the Bicycle’s Existing Components

Start by removing the existing components of your bicycle. This is a crucial step in the process of turning your bike into an electric one. The first component to remove is the chain, which can be done by using a chain tool to break the chain and remove it from the bike. Next, remove the pedals by using a pedal wrench to unscrew them from the crank arms. Then, remove the front and rear derailleurs by loosening the bolts that hold them in place and sliding them off the bike. Finally, remove the brake calipers by loosening the bolts that attach them to the frame.

Advertisement

Removing these components allows for a clean slate to work with when installing the electric components. It is important to note that there are alternative methods of converting a bike into an electric one, such as using a conversion kit that can be attached to the existing components. However, removing the existing components provides a more seamless integration of the electric components and ensures optimal performance.

The following table showcases the components that need to be removed and the tools required for each:

Component Removal Method Required Tool
Chain Use chain tool Chain tool
Pedals Unscrew from crank arms Pedal wrench
Front Derailleur Loosen bolts and slide off Allen wrench
Rear Derailleur Loosen bolts and slide off Allen wrench
Brake Calipers Loosen bolts and remove Allen wrench

Removing the existing bike components may seem daunting, but with the right tools and a bit of patience, it can be accomplished smoothly. Once these components are removed, you will be ready to move on to the next step of the conversion process.

Installing the Electric Conversion Kit

Advertisement

First, you’ll need to install the electric conversion kit onto your bicycle. This kit includes a motor, battery, controller, and wiring. Here’s a step-by-step guide on how to install it:

  1. Start by removing the bottom bracket of your bike using a wrench. This is where the motor will be installed.

  2. Attach the motor onto the bottom bracket using the provided brackets and screws. Make sure it’s securely fastened.

  3. Connect the motor to the controller using the wiring harness. Follow the color-coding instructions for proper connection.

  4. Mount the battery onto the frame of your bike using the included battery mount. Ensure it’s in a secure and stable position.

  5. Connect the battery to the controller using the wiring harness. Double-check the connections to avoid any issues.

  6. Finally, test the electric conversion kit by turning on the battery and controller. Troubleshoot common issues like faulty wiring or loose connections if necessary.

By following these steps, you can successfully install the electric conversion kit onto your bike and enjoy the benefits of an electric bicycle.

Connecting the Motor and Battery

Once you have securely attached the motor onto the bottom bracket, the next step is to connect it to the battery. Motor and battery compatibility is crucial to ensure optimal performance and safety. Before making any connections, it is essential to check the specifications provided by the manufacturer for both the motor and battery. This will ensure that they are compatible in terms of voltage, current, and power output.

To make the necessary connections, refer to the wiring diagram provided with the electric conversion kit. This diagram will guide you on how to connect the motor and battery correctly. It is important to follow the instructions carefully to avoid any damage or malfunction.

In order to keep the audience engaged, let’s take a look at a table that summarizes the wiring connections for a typical electric bike conversion:

Advertisement
Motor Connections Battery Connections
Motor "+" wire Battery "+" wire
Motor "-" wire Battery "-" wire
Motor control wire Battery control wire

By following this table and the provided wiring diagram, you can ensure a successful connection between the motor and battery, allowing your bike to run smoothly as an electric one.

Testing and Adjusting the Electric System

To test and adjust the electric system, I should begin by ensuring that all the connections between the motor and battery are secure and correctly wired according to the provided diagram. This step is crucial to ensure the proper functioning of the electric bike.

Once the connections are checked, I can move on to testing the system. One important testing technique is to use a multimeter to measure the voltage and current at different points in the system. This will help me identify any potential issues or weak spots.

Additionally, I can test the performance of the electric system by taking the bike for a ride and observing its speed, acceleration, and overall power. Based on the test results, I can make adjustments to optimize the performance of the electric system, such as adjusting the voltage or current levels.

By thoroughly testing and adjusting the electric system, I can ensure that my bike operates smoothly and efficiently.

Advertisement

Adding Additional Features and Accessories

Adding extra features and accessories can enhance the functionality and style of your electric bike.

When it comes to upgrading brakes, you have several options. One option is to replace the stock brake pads with high-performance ones that offer better stopping power and durability. Another option is to upgrade to hydraulic disc brakes, which provide even more stopping power and better modulation.

Upgrading the suspension is another way to improve the overall performance of your electric bike. Consider replacing the stock suspension fork with a high-quality one that offers better damping and adjustability. This will provide a smoother and more controlled ride, especially when tackling rough terrains.

Additionally, you can add accessories like a rack and panniers for increased carrying capacity, or a comfortable saddle for long rides. These upgrades will not only improve the functionality of your electric bike but also elevate its style and make it a more enjoyable ride.

Maintaining and Troubleshooting Your Electric Bike

Make sure you regularly check the battery level and keep it properly charged to maintain the optimal performance of your electric bike. Troubleshooting battery issues is crucial for ensuring a smooth ride.

Advertisement

If you notice a sudden decrease in battery life, first check for any loose connections or damaged wiring. Clean the battery terminals regularly to prevent corrosion, as this can affect the battery’s performance.

In case of battery failure, it’s important to replace it with a compatible and high-quality battery.

Maintaining the motor is equally important. Regularly inspect the motor for any signs of wear or damage. Keep it clean and lubricated to reduce friction and extend its lifespan.

If you encounter any issues with the motor, consult the manufacturer or a professional electric bike technician for assistance.

Enjoying the Benefits of Your Electric Bike

Get ready to experience the many benefits of riding an electric bike. With an electric bike, you can enjoy the convenience of commuting without the hassle of traffic or the struggle of pedaling up hills.

Advertisement

Here are some reasons why electric bike commuting is beneficial:

  • Increased Efficiency:

  • Electric bikes provide a boost of power when needed, allowing you to cover more distance with less effort.

  • The pedal-assist feature helps you maintain a consistent speed, reducing fatigue during long rides.

  • Health Benefits:

  • Electric biking still requires pedaling, which provides a good cardiovascular workout and helps improve endurance.

  • Regular electric bike commuting can contribute to weight loss and muscle toning.

By incorporating an electric bike into your daily routine, you can enjoy the convenience of commuting while reaping the health benefits of regular exercise.

So, get ready to pedal your way to a healthier and more efficient lifestyle.

Frequently Asked Questions

How much does it cost to convert a regular bike into an electric one?

Converting a regular bike into an electric one can cost anywhere from $500 to $2000, depending on the quality of components and battery. However, the benefits of electric bikes, such as increased speed and reduced effort, outweigh the cost comparison.

Can I convert any type of bike into an electric bike?

Yes, any type of bike can be converted into an electric bike. Electric bike advantages include faster speeds, longer distances, and easier uphill climbs. There are different types of electric bike motors, such as hub motors and mid-drive motors.

Advertisement

How long does it take to install an electric conversion kit?

The installation time for an electric conversion kit can vary depending on your experience and the complexity of the kit. On average, it takes about 2-4 hours. Common issues may include compatibility problems and troubleshooting electrical connections.

Is it possible to switch back to a regular bike after converting it into an electric one?

Yes, it is possible to switch back to a regular bike after converting it into an electric one. However, there are pros and cons to consider. Converting offers convenience and speed, but it may reduce the bike’s range and require additional maintenance.

Are there any legal restrictions or requirements for riding an electric bike?

There are legal restrictions and requirements for riding an electric bike. It is important to follow electric bike regulations and be aware of safety concerns, such as wearing a helmet and obeying traffic laws.

Conclusion

After going through the process of converting my bike into an electric one, I can confidently say that the theory of turning a regular bike into an electric one is indeed true.

By following the steps outlined in this article, I was able to successfully transform my bike and enjoy the benefits of an electric ride.

Advertisement

It was a technical and detailed process that required the right tools and materials, but the end result was well worth the effort.

So, if you’re considering converting your bike, don’t hesitate to give it a try – you won’t be disappointed.

Continue Reading
Advertisement

Affiliate disclaimer

As an affiliate, we may earn a commission from qualifying purchases. We get commissions for purchases made through links on this website from Amazon and other third parties.

About us

We are a passionate team driven by the belief that cycling is a fantastic and accessible way to stay active while enjoying the beauty of the outdoors. Our mission is to share our love for cycling with as many people as possible. We provide a welcoming environment for individuals of all ages, abilities, and backgrounds to come together and ride bikes. With Ralf’s visionary leadership, Zane’s expertise in cycling adventures, and Olivia’s dedication to community building, we strive to create a vibrant space where everyone can experience the joy of cycling. Through group rides, workshops, and inclusive events, we inspire and empower individuals to embrace an active lifestyle. Join us in our quest to pedal together, embrace the joy of cycling, and foster connections that last a lifetime.

Advertisement

Trending