Imagine the thrill of effortlessly cruising down the road on your very own electric bike, leaving traditional pedal power in the dust. Converting your bike into an electric one may seem like a daunting task, but fear not! With the right tools, components, and a step-by-step approach, you can transform your beloved two-wheeler into a powerful and eco-friendly machine.
This article will guide you through the process, ensuring that you have all the knowledge and expertise needed to successfully make your bike electric.
Key Takeaways
- Assess the compatibility of the bike frame with the electric bike conversion, including battery compatibility and weight distribution.
- Gather the necessary components and tools for the conversion, including the electric motor, battery, conversion kit, and maintenance equipment.
- Install the electric motor securely, aligning it with the chain and ensuring it matches the bike’s specifications.
- Properly maintain the battery, choosing a lithium-ion battery with sufficient capacity, securely mounting it on the frame, and regularly checking and charging it to prolong its lifespan.
Assess Your Bike’s Compatibility for Conversion
You’ll need to assess if your bike is compatible for conversion into an electric bike. Start by assessing battery compatibility. Check the size and dimensions of your bike’s frame to ensure it can accommodate the battery pack. Consider the weight of the battery and how it may affect the balance and handling of the bike.
Evaluate motor power by examining the power output and torque of the motor. Determine if the motor can provide enough power to meet your desired speed and distance requirements. Additionally, consider the type of motor, such as hub motors or mid-drive motors, and how they may fit with your bike’s frame and drivetrain.
Once you’ve assessed your bike’s compatibility, you can move on to gathering the necessary components and tools for the conversion process.
Gather the Necessary Components and Tools
To convert your bike into an electric one, you’ll need to gather a few key components and tools.
First, you’ll need an electric motor and battery to provide the power.
A conversion kit, which includes all the necessary wiring and connectors, will also be essential.
Finally, you’ll need basic tools such as wrenches, screwdrivers, and pliers to assist you during the installation process.
Electric Motor and Battery
First, you’ll need an electric motor and a battery to convert your bike into an electric bike. Here’s how to get started:
-
Electric Motor Installation:
Begin by selecting an electric motor that matches your bike’s specifications. Ensure it has enough power to propel your bike efficiently. Remove the existing pedals, crankset, and bottom bracket using the appropriate tools. Install the motor in their place, making sure it is securely attached and aligned with the chain. -
Battery Maintenance:
Choose a lithium-ion battery with sufficient capacity to meet your desired range. Mount the battery securely on the frame, ensuring it is well-balanced to maintain stability while riding. Connect the battery to the motor using the provided wiring harness, following the manufacturer’s instructions. Regularly check the battery’s charge level and keep it properly charged to prolong its lifespan.
Now that you have the electric motor and battery installed, it’s time to move on to the next step – the conversion kit – which will further enhance your bike’s electrification.
Conversion Kit
Once you have the electric motor and battery installed, it’s time to move on to enhancing your bike’s electrification with a conversion kit.
Before diving into the installation process, it’s crucial to assess the compatibility of the conversion kit with your bike. Check if the kit is compatible with your bike’s frame size, wheel size, and brake system.
Next, estimate the battery range you desire for your electric bike. This will help determine the capacity of the battery you need to choose.
Once you have assessed compatibility and battery range estimation, you can proceed with the installation process. In the subsequent section about basic tools for installation, you will discover the essential equipment needed to successfully complete the conversion.
Basic Tools for Installation
Before you start installing the conversion kit, it’s important to gather the basic tools needed for the process. To ensure a smooth installation, you will need a set of wrenches, screwdrivers, pliers, and Allen keys. These tools will allow you to disassemble and reassemble various components of your bike.
Additionally, you will require tools for charging such as a multimeter and a battery charger. These tools will help you measure the voltage and charge the electric components of your bike.
Furthermore, having maintenance equipment like a tire pump, tire levers, and a chain tool is essential for keeping your bike in top condition.
Once you have gathered these tools, you can proceed to the next step of removing the non-essential components for the conversion process.
Remove the Non-Essential Components
To remove the non-essential components from your bike and transform it into an electric bike, start by removing the pedals and crankset.
Use a pedal wrench to loosen the pedals and then unscrew them completely.
Next, take off the front derailleur and chainrings by loosening the bolts that hold them in place.
Finally, remove the rear derailleur and cassette by using a chain whip to hold the cassette in place while you loosen the lockring with a cassette lockring tool.
Remove the Pedals and Crankset
Start by removing the pedals and crankset. This step is crucial in converting your bike into an electric one. Here are some important points to keep in mind:
-
Assessing compatibility: Before you begin, make sure that the electric conversion kit you have chosen is compatible with your bike’s crankset and pedal system. Check the specifications provided by the manufacturer to ensure a proper fit.
-
Choosing location: Decide on the location where you want to install the electric motor. Typically, it is recommended to place it in the center of the bike to maintain balance and stability.
-
Use a pedal wrench: To remove the pedals, use a pedal wrench to loosen the bolts. Remember that the left pedal has reverse threading, so turn it clockwise to loosen it.
-
Remove the crankset: Once the pedals are off, use a crank puller tool to remove the crankset. Insert the tool into the crank arm and tighten it until the crankset loosens. Then, carefully slide it off the bottom bracket spindle.
Now that you have successfully removed the pedals and crankset, it is time to move on to the next step of taking off the front derailleur and chainrings.
Take off the Front Derailleur and Chainrings
Now that you’ve successfully removed the pedals and crankset, it’s time to move on to the next step in transforming your bike into an electric one.
The current subtopic requires you to take off the front derailleur and chainrings. Before doing so, it’s essential to assess the compatibility of your bike’s components with the electric conversion kit you’ll be installing. Ensure that the front derailleur and chainrings are compatible with the new motor and battery system.
Once you’ve confirmed compatibility, you can proceed to remove these non-essential components. Start by loosening the bolts that secure the front derailleur to the frame, carefully sliding it off the chainstay.
Next, use a chainring removal tool to unscrew the chainrings from the crankset.
With these components removed, you are now ready to move on to the subsequent section about removing the rear derailleur and cassette, which will further streamline your bike for the electric conversion.
Remove the Rear Derailleur and Casette
After successfully removing the front derailleur and chainrings, you can now proceed to remove the rear derailleur and cassette. This step is crucial in the process of converting your bike into an electric bike. Before starting, it’s important to assess the compatibility of your bike’s rear derailleur and cassette with the electric motor you plan to install. Check if they have the necessary components, such as a derailleur hanger and a cassette hub, that are compatible with the electric motor system.
To remove the rear derailleur, begin by shifting the chain to the smallest cog on the cassette. Then, use a 5mm Allen wrench to remove the bolt that attaches the derailleur to the derailleur hanger. Gently slide the derailleur off the hanger and set it aside.
Next, to remove the cassette, you’ll need a cassette lockring tool and a chain whip. Insert the lockring tool into the cassette lockring and attach the chain whip to the cassette. Hold the chain whip securely and turn the lockring counterclockwise to loosen it. Once loose, unscrew the lockring by hand and carefully slide off the cassette from the freehub body.
Now that the rear derailleur and cassette are removed, you can move on to the next step of installing the electric motor system.
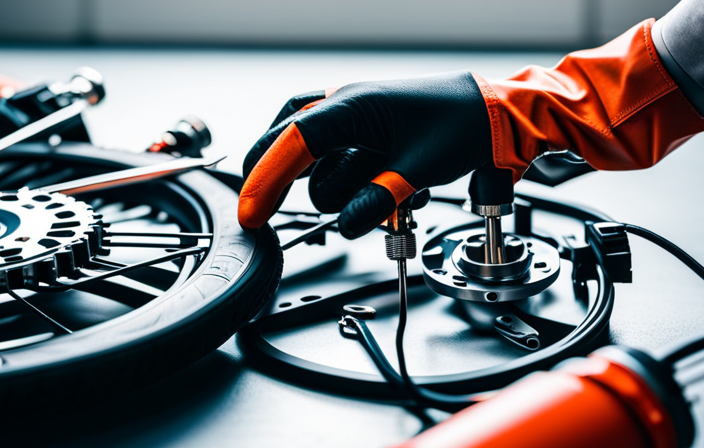
Install the Electric Motor
To install the electric motor, you’ll need to first remove the existing pedals and crankset. This will provide you with the necessary space and access to attach the motor properly. Once you have cleared the area, it’s crucial to choose the right electric motor for your bike. Consider factors such as power output, weight, and compatibility with your bike’s frame. After selecting the motor, refer to its installation manual for specific instructions. Ensure that all the necessary components, such as brackets and mounting screws, are included and properly aligned. Troubleshooting common installation issues, such as motor misalignment or improper wiring, can save you a lot of time and frustration. Once the electric motor is securely in place, you can move on to the next step of attaching the battery and controller, which will provide power to your new electric bike.
Attach the Battery and Controller
To begin the process of attaching the battery and controller to your electric bike, you need to choose a suitable location for the battery. Look for a spot on the bike frame that is secure and easily accessible.
Once you have found the perfect spot, connect the battery and controller to the motor. Follow the manufacturer’s instructions for the correct wiring connections.
Finally, secure the battery and controller to the bike frame using zip ties or other suitable fasteners. Make sure they are tightly secured to prevent any movement or potential damage while riding.
Choose a Suitable Location for the Battery
When choosing a suitable location for the battery, it’s important to consider factors such as weight distribution and accessibility.
Choosing the right battery location for your electric bike is crucial to ensure optimal performance and safety. Factors to consider when selecting a battery placement for your e bike include the overall weight balance of the bike, as placing the battery in the wrong spot can affect stability and maneuverability.
Additionally, accessibility is key for ease of maintenance and charging. Ideally, the battery should be mounted low and centrally on the bike frame to maintain a low center of gravity and evenly distribute the weight. This will enhance the bike’s handling and stability while riding.
With the battery properly placed, you can now move on to the next step of connecting the battery and controller to the motor.
Connect the Battery and Controller to the Motor
Once you have selected a suitable location for the battery, it’s time to connect it and the controller to the motor.
Start by gathering the necessary materials: connecting wires, wire cutters, and electrical tape.
Begin by identifying the motor wires and the corresponding wires on the controller. Connect the wires using the appropriate connectors or by soldering them together.
Make sure to secure the connections tightly and cover them with electrical tape to prevent any potential short circuits.
Once the connections are made, it’s important to test the motor to ensure it is functioning properly. Troubleshoot common issues such as loose connections or incorrect wiring.
Once the motor is working correctly, you can move on to the next step of securing the battery and controller to the bike frame.
Secure the Battery and Controller to the Bike Frame
Now, it’s time to securely attach the battery and controller to the frame of the bike. This step is crucial for the proper functioning and safety of your electric bike. Follow these steps to ensure a secure and reliable attachment:
-
Choosing the right battery location: Consider the weight distribution of the bike and aim for a balanced position. Avoid placing the battery in an area that might interfere with your pedaling or handling. Look for a spot that provides protection from elements like water and dirt.
-
Ensuring proper wiring connections: Connect the battery and controller using the provided wiring harness. Double-check the connections to ensure they are tight and secure. Use zip ties or Velcro straps to neatly secure the wires to the bike frame, preventing them from dangling or getting caught.
By securely attaching the battery and controller, you will have a solid foundation for the next step: installing the throttle or pedal assist system.
Install the Throttle or Pedal Assist System
To install the throttle or pedal assist system, you’ll need to follow these steps.
First, decide whether you want a throttle or pedal assist for your electric bike. Throttles provide easy control by simply twisting or pushing a lever, while pedal assist systems use sensors to determine how much assistance you need based on your pedaling.
Throttles offer instant power and are great for quick bursts of speed, but they can drain the battery faster. Pedal assist systems are more efficient and provide a more natural riding experience, but they require more effort from the rider.
Once you’ve made your choice, select the appropriate throttle or pedal assist system for your bike and install it according to the manufacturer’s instructions.
With the throttle or pedal assist system installed, you can now move on to adjusting and fine-tuning your electric bike to ensure optimal performance.
Adjust and Fine-Tune the Electric Bike
To optimize performance, the electric bike can be adjusted and fine-tuned. Here are some fine-tuning techniques and troubleshooting tips to help you get the most out of your electric bike:
- Check the tire pressure: Proper tire pressure ensures optimal traction and efficiency.
- Adjust the brakes: Ensure that the brake pads are aligned correctly and make necessary adjustments for responsive braking.
- Fine-tune the gears: Adjust the derailleur to ensure smooth shifting and minimize chain noise.
- Calibrate the motor: Follow the manufacturer’s instructions to calibrate the motor for better power delivery and efficiency.
- Test the battery: Check the battery charge level regularly and replace if necessary.
By fine-tuning your electric bike, you can enjoy a smoother and more efficient ride.
Now, let’s move on to the next section, where we will discuss how to ensure safety and compliance with electric bike regulations.
Ensure Safety and Compliance
Ensure your safety and comply with regulations by following these guidelines.
Ensuring legal requirements is crucial when converting your bike into an electric bike. Before hitting the road, make sure to check the laws and regulations in your area regarding electric bikes. Some places may require registration, insurance, or a specific type of electric bike.
Additionally, ensure that your electric bike meets safety standards. Install proper lighting, reflectors, and a horn or bell. It’s also essential to wear a helmet and other protective gear while riding. Safety precautions should not be overlooked.
Regularly inspect your electric bike for any loose connections, worn-out components, or damaged wires. Keep your electric bike well-maintained and clean to ensure optimal performance.
Transitioning into the subsequent section about maintaining and caring for your electric bike, it’s important to be proactive in keeping your bike in top condition.
Maintain and Care for Your Electric Bike
To maintain and care for your electric bike, you should regularly charge the battery. This ensures that your bike is always ready for use and helps extend the lifespan of the battery.
Additionally, it is important to keep the electric components clean and dry. Use a damp cloth to wipe down the components and avoid using excessive water or cleaning products.
Lastly, check and replace worn-out parts as needed. Inspect the tires, brakes, and other moving parts for any signs of wear and tear, and replace them to ensure optimal performance and safety.
Regularly Charge the Battery
Charging the battery regularly is essential for maintaining an electric bike. To maximize battery life, follow these tips:
-
Choose the right charger: Ensure compatibility between the charger and your bike’s battery voltage and capacity. Using an incorrect charger can damage the battery or reduce its lifespan.
-
Charge at the right time: Avoid fully discharging the battery before recharging. Instead, recharge when the battery level drops to around 20-30%. This helps prevent deep discharges that can harm the battery.
-
Avoid overcharging: Once the battery is fully charged, unplug it from the charger. Overcharging can lead to overheating and reduce the battery’s overall life.
To keep the electric components clean and dry, follow proper maintenance techniques.
Keep the Electric Components Clean and Dry
Keep your electric components clean and dry to ensure their optimal performance and longevity. Cleaning and maintenance tips are essential for preventing water damage and maintaining the functionality of your electric bike.
Firstly, use a dry cloth to wipe down the electric components regularly, removing any dirt or debris. Avoid using water or any liquid cleaners, as this can cause damage to the electrical connections.
Additionally, inspect the components for any signs of moisture or water accumulation, and if necessary, use a hairdryer on a low setting to dry them thoroughly.
It is also important to store your electric bike in a dry and sheltered area to prevent exposure to rain or excessive moisture.
By following these cleaning and maintenance practices, you can ensure that your electric components remain in good condition.
In the subsequent section, we will discuss how to check and replace worn-out parts as needed.
Check and Replace Worn-Out Parts as Needed
Now that you’ve ensured the electric components of your bike are clean and dry, it’s time to move on to the next step in transforming your bike into an electric one.
This step involves checking and replacing any worn-out parts as needed. Begin by assessing compatibility between the existing bike parts and the electric conversion kit you’ve chosen. Make sure the kit is compatible with the frame, fork, and other essential components.
Next, carefully inspect all parts of the bike for signs of wear and tear. Common areas to check include the chain, gears, brakes, and tires. Replace any worn-out parts to ensure optimal performance and safety.
Troubleshoot common issues such as loose connections or faulty wiring during the process.
Once you’ve completed this step, you’re one step closer to enjoying your electric bike!
Enjoy Your Electric Bike!
Hop on your electric bike and experience the thrill of a whole new way to ride!
Now that you have successfully converted your regular bike into an electric bike and checked and replaced any worn-out parts, it’s time to enjoy your creation. Electric bikes offer numerous benefits, including easier uphill climbs, faster speeds, and reduced physical exertion.
To fully enjoy your electric bike, follow these steps.
First, make sure the battery is fully charged before each ride.
Next, familiarize yourself with the different power modes and adjust them according to your needs and terrain.
Remember to follow all traffic laws and wear appropriate safety gear.
Finally, take the time to explore new routes and enjoy the freedom and convenience that your electric bike provides.
Happy riding!
Frequently Asked Questions
How long does it typically take to convert a bike into an electric bike?
Typically, it takes around 4-8 hours to convert a bike into an electric bike. To choose the right electric motor, consider factors like power output and compatibility with your bike. To extend battery life, maintain proper tire pressure and avoid excessive acceleration and braking.
Can any type of bike be converted into an electric bike?
Yes, any type of bike can be converted into an electric bike. You can choose from various types of batteries such as lithium-ion or lead-acid. Converting a bike into an electric bike offers benefits like increased speed, extended range, and reduced effort while cycling.
Are there any specific tools or skills required for the conversion process?
To convert a bike into an electric bike, you will need specific tools such as a motor kit, battery, controller, and wiring. Additionally, skills in bike mechanics, electrical wiring, and basic knowledge of electric systems are necessary for a successful conversion process.
What is the average cost of converting a bike into an electric bike?
The average cost of converting a bike into an electric bike varies depending on factors such as the quality of components and the level of customization. The conversion process can take a few hours to a few days, and common challenges include battery placement and wiring.
Are there any legal requirements or restrictions for riding an electric bike on public roads?
To ride an electric bike on public roads, you must adhere to electric bike regulations and safety precautions. Regulations may include age restrictions, speed limits, helmet requirements, and the need for lights and reflectors. Always follow these guidelines to ensure a safe and legal ride.
Conclusion
In conclusion, you’ve successfully transformed your regular bike into an electric bike. By assessing compatibility, gathering components, and removing non-essential parts, you’ve taken the necessary steps.
Installing the electric motor, attaching the battery and controller, and adjusting the bike ensure a smooth conversion. Remember to prioritize safety and compliance throughout the process.
Maintaining and caring for your electric bike will ensure its longevity. Now, you can enjoy the exhilarating experience of riding your very own electric bike.