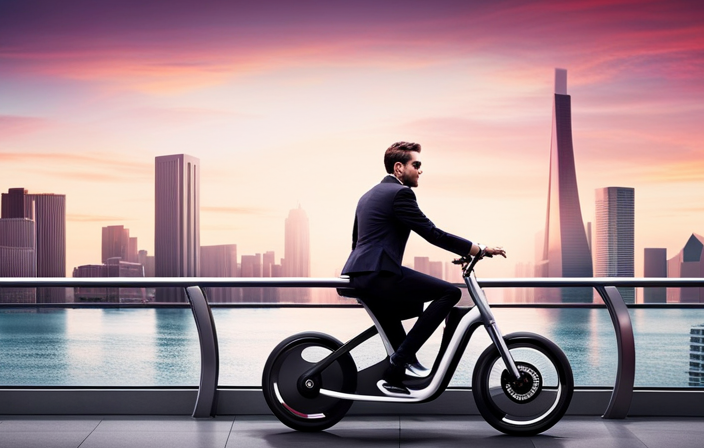
I’ve always loved the feeling of freedom that comes with riding a bike. But recently, I’ve been craving something more. Something that combines the simplicity of a bicycle with the power of electricity.
That’s why I decided to embark on a journey to make my own electric bike. In this article, I’ll guide you through the steps, from gathering the necessary tools and materials to customizing your creation.
So, let’s dive in and electrify our rides together!
Key Takeaways
- Choose a sturdy bicycle frame and consider the size and type of bicycle for conversion.
- Select an appropriate motor and battery, ensuring the battery capacity meets distance requirements.
- Take safety precautions and refer to the bike’s manual or online resources when removing existing components.
- Properly position and secure the motor and battery, ensuring all connections are tight and following manufacturer’s instructions.
Gather the Necessary Tools and Materials
First, gather all the tools and materials you’ll need to make your own electric bike.
Choosing the right bicycle is crucial for a successful conversion. Look for a sturdy frame that can handle the extra weight of the motor and battery. Consider the size and type of bicycle that suits your needs, whether it’s a mountain bike for off-road adventures or a sleek road bike for commuting.
Next, select the appropriate motor and battery. Determine the power and torque you desire, keeping in mind the terrain you’ll be riding on. Consider the battery capacity and range to ensure it meets your distance requirements.
Transitioning into the next section, it’s important to choose the right bicycle for conversion as it sets the foundation for your electric bike.
Choose the Right Bicycle for Conversion
To choose the right bicycle for conversion, you’ll need to consider factors such as size, frame material, and weight capacity. Here are four important things to keep in mind when selecting a bike for electric conversion:
-
Size: Ensure that the bike is the right size for your body. A bike that is too small or too large can affect your comfort and control while riding.
-
Frame Material: Look for a bike with a sturdy frame material, such as steel or aluminum. This will provide the necessary strength and durability to support the added weight of the electric components.
-
Weight Capacity: Check the bike’s weight capacity to ensure it can handle the additional weight of the electric conversion kit and the rider.
-
Avoid Common Mistakes: Don’t choose a bike with a suspension system as it can complicate the installation process. Additionally, avoid bikes with rear suspension as it can interfere with the battery placement.
Remove the Existing Components
Once you’ve selected the right bicycle for conversion, it’s time to remove the existing components. Before starting, it’s important to take safety precautions to protect yourself and the bike. First, gather the necessary tools such as wrenches and screwdrivers. Next, refer to the bike’s manual or online resources to understand the specific instructions for your bike model. Remember to wear protective gear like gloves and safety glasses. Now, let’s take a look at the table below to see the components you need to remove:
| Component | Tools Needed | Safety Precautions |
|---|---|---|
| Pedals | Wrench | Avoid injury to feet |
| Chain | Chain tool | Protect hands |
| Derailleur | Allen wrench | Mind sharp edges |
| Brakes | Allen wrench | Prevent sudden release |
Install the Electric Motor and Battery
Now that you’ve removed the existing components, you can proceed to installing the electric motor and battery.
Let’s start with the electric motor installation. Begin by positioning the motor in the designated area, ensuring it aligns properly with the rear wheel. Use the appropriate mounting brackets and bolts to securely attach the motor to the frame.
Once the motor is securely in place, it’s time to install the battery. Locate a suitable spot on the frame, preferably near the motor, and mount the battery securely using the provided brackets. Ensure all connections are tight and secure to prevent any potential issues during operation.
Now that the electric motor and battery are successfully installed, we can move on to connecting the wiring and components, allowing for a fully functional electric bike.
Connect the Wiring and Components
Start by ensuring that all the wiring connections and components are properly aligned and securely attached for a fully functional electric bike. Proper wiring is crucial for the optimal performance of the bike.
Begin by inspecting each wire connection, making sure they are tight and free from any loose ends or frayed wires. Check for any damaged components and replace them if necessary.
To troubleshoot any wiring issues, use a multimeter to test the continuity and voltage of each connection. This will help identify any faulty wires or connections that need to be repaired or replaced.
Additionally, make sure to follow the manufacturer’s instructions for wiring the components together.
Once all the wiring is properly connected and secured, you can move on to the next step of testing and adjusting the electric bike for optimal performance.
Test and Adjust the Electric Bike
To ensure optimal performance, it’s important to test and adjust the electric bike after connecting the wiring and components. Here are the key steps to follow:
-
Adjusting brakes: Begin by checking the brake cables and ensuring they are properly connected. Test the brakes by applying pressure and observing the response. Make any necessary adjustments to ensure they engage and release smoothly.
-
Testing battery life: Connect the fully charged battery to the bike and turn it on. Monitor the battery life by observing the voltage levels displayed on the control panel. Take the bike for a test ride to gauge the battery’s performance and range. Make note of any issues or inconsistencies.
-
Fine-tuning: Pay attention to the bike’s overall performance, including acceleration, top speed, and handling. Adjust the throttle and pedal assist settings as needed to achieve the desired level of assistance. Ensure that all components are securely fastened and functioning properly.
By thoroughly testing and adjusting your electric bike, you can ensure that it operates at its best.
Once you have completed this step, you can move on to adding additional features and accessories to enhance your riding experience.
Add Additional Features and Accessories
Once you’ve adjusted and tested your electric bike, it’s time to add any extra features or accessories to enhance your riding experience. Upgrading options and safety accessories can make your electric bike more efficient, comfortable, and secure. To help you choose the right additions, here is a table showcasing some popular options:
| Upgrading Options | Safety Accessories |
|---|---|
| Suspension fork | Helmet |
| Rear rack | Reflective vest |
| LED lights | Mirrors |
| Pannier bags | Bell |
By installing a suspension fork, you can improve the bike’s handling and absorb shocks better. A rear rack allows you to carry your belongings conveniently, while LED lights ensure visibility during night rides. Pannier bags offer additional storage space for long trips. Safety accessories like a helmet, reflective vest, mirrors, and a bell are essential for your protection and alerting others on the road.
To ensure proper maintenance and safety, it is vital to regularly check and maintain your electric bike.
Ensure Proper Maintenance and Safety
Regularly checking and maintaining your e-bike is vital to ensure its proper maintenance and safety. By following some simple maintenance techniques and safety precautions, you can keep your electric bike in optimal condition and enjoy a safe riding experience.
Firstly, inspect the tires regularly for any signs of wear or damage, and ensure they are properly inflated. Keep the chain clean and lubricated to prevent rust and enhance performance. Check the brakes regularly and adjust them if necessary, ensuring they are working effectively.
Additionally, inspect the battery and electrical components for any signs of damage or malfunction. It is also important to wear appropriate safety gear, such as a helmet and reflective clothing, and follow traffic rules when riding your e-bike. By maintaining your e-bike and taking necessary safety precautions, you can ensure a smooth and enjoyable ride.
Now, let’s move on to learning how to ride and handle an electric bike, to further enhance your e-bike experience.
Learn How to Ride and Handle an Electric Bike
When riding an e-bike, it’s important to get comfortable with the hand controls and how they operate. Learning how to properly handle an electric bike is crucial for a safe and enjoyable riding experience.
As a rider, I need to familiarize myself with the different hand controls, such as the throttle, brakes, and gear shifters. By understanding how these controls work, I can effectively maneuver the bike and adjust my speed accordingly.
Additionally, I should explore the various riding modes available on my e-bike. These modes, such as pedal-assist and full-electric, offer different levels of assistance and power. By experimenting with these modes, I can find the one that suits my riding style and needs.
Now, let’s delve into the next section and understand the laws and regulations for electric bikes.
Understand the Laws and Regulations for Electric Bikes
It’s important to familiarize yourself with the laws and regulations surrounding electric bikes to ensure that you ride safely and legally. Electric bikes are becoming increasingly popular, and understanding the rules can help you avoid fines and potential accidents.
Here are some key points to consider:
-
Check local laws: Laws regarding electric bikes can vary from one jurisdiction to another. Make sure you are aware of the specific regulations in your area.
-
Age restrictions: Some regions have age restrictions for riding electric bikes. Ensure you meet the minimum age requirement before hitting the road.
-
Speed limits: Electric bikes often have speed limits that you need to adhere to. Familiarize yourself with the maximum speed allowed in your area.
-
Equipment requirements: In many places, electric bikes are required to have certain equipment, such as lights and reflectors. Ensure your bike meets these requirements.
-
Maintenance: Regular maintenance is crucial for the safety and longevity of your electric bike. Follow manufacturer guidelines for upkeep and inspect your bike regularly.
Understanding and following these laws and regulations will help ensure your safety and the safety of others.
Now, let’s explore different riding modes and speed options.
Explore Different Riding Modes and Speed Options
Exploring different riding modes and speed options can enhance your electric biking experience. When it comes to electric bikes, it’s important to consider the different motor options available.
There are various types of motors, such as hub motors and mid-drive motors, each with its own advantages and disadvantages. Hub motors provide a simpler design and are less expensive, but they can add weight to the bike. On the other hand, mid-drive motors offer better weight distribution and allow for more efficient use of the bike’s gears.
Additionally, comparing speed controllers is crucial. Different speed controllers have varying features, such as throttle control or pedal assist modes. These options allow you to customize your riding experience based on your preferences and the terrain you’ll be riding on.
Consider Upgrading and Customizing Your Electric Bike
Consider upgrading and customizing your electric bike to optimize its performance and tailor it to your specific needs and preferences.
Upgrading your electric bike can bring numerous benefits, such as increased speed, longer range, and improved overall performance.
One option is to upgrade the motor, which can provide more power and torque, allowing you to tackle steep hills and rough terrains with ease.
Another customization option is to upgrade the battery, which can extend your bike’s range and reduce the need for frequent charging.
Additionally, you can customize your electric bike by adding accessories like lights, fenders, and racks, making it more versatile and practical for your daily commute or recreational rides.
By upgrading and customizing your electric bike, you can enhance your riding experience and make it truly your own.
To further enhance your electric bike journey, it’s beneficial to join online communities and forums for support and advice from fellow electric bike enthusiasts.
Join Online Communities and Forums for Support and Advice
Joining online communities and forums can provide you with valuable support and advice for optimizing the performance and customization of your electric bike. These communities are filled with like-minded individuals who share a passion for electric bikes and are willing to help troubleshoot any issues you may encounter.
By participating in these online communities, you can learn about the latest trends, techniques, and troubleshooting techniques for electric bikes. Whether you’re facing a technical issue with your battery, motor, or controller, or simply looking for suggestions on how to improve the performance of your electric bike, these online communities can offer valuable insights and solutions.
Share Your Experience and Inspire Others
By sharing my experiences and inspiring others, I can help create a supportive and enthusiastic community of electric bike enthusiasts.
When I first started building my own electric bike, I was filled with excitement and curiosity. I documented my progress, from choosing the right components to troubleshooting any issues that arose.
I shared my journey on online forums and social media platforms, where I received valuable feedback and encouragement from fellow electric bike enthusiasts.
Through my personal experiences, I hope to inspire others to embark on their own DIY electric bike projects. By sharing our knowledge and passion, we can inspire each other to push the boundaries of what is possible with electric bikes.
Enjoy the Benefits of Your DIY Electric Bike
After sharing my experience and inspiring others to embark on their own electric bike conversion journey, it’s time to delve into the benefits of enjoying my DIY electric bike. Not only does it provide a fun and eco-friendly mode of transportation, but it also offers numerous advantages over traditional bicycles. The table below highlights some key benefits of electric bike conversion:
| Benefits of Electric Bike Conversion | Description |
|---|---|
| Increased Speed | The electric motor provides assistance, allowing for faster speeds and effortless travel. |
| Extended Range | With the added power of the electric motor, you can cover longer distances without getting tired. |
| Hill Climbing Ability | Electric bikes excel at tackling steep inclines, making them ideal for hilly terrains. |
| Reduced Physical Effort | The electric motor takes the strain off your muscles, making cycling less strenuous. |
| Low Maintenance | Electric bikes require minimal maintenance compared to traditional bicycles. Regular check-ups and battery care are the main tasks. |
Frequently Asked Questions
How much does it cost to convert a regular bicycle into an electric bike?
Converting a regular bicycle into an electric bike can cost between $500 to $2000, depending on the quality of components and desired features. Despite the initial investment, the long-term benefits of electric bikes include increased speed, reduced effort, and a greener commute.
Can I convert any type of bicycle into an electric bike?
Yes, any type of bicycle can be converted into an electric bike. The cost of electric bike conversion varies depending on the components used. Converting a regular bicycle offers benefits like increased speed, range, and ease of riding uphill.
Are there any specific safety precautions I should take when installing the electric motor and battery?
When installing an electric motor and battery for an electric bike, it is crucial to prioritize safety. Wearing protective gear is necessary to prevent injuries. Always follow manufacturer’s instructions and take precautions to avoid electrical and mechanical hazards.
What are the legal requirements for riding an electric bike?
Riding an electric bike comes with legal requirements. Electric bike regulations vary by country, so it’s crucial to research local laws. In some places, electric bike licensing might be necessary, ensuring safety and compliance with traffic rules.
Are there any limitations or restrictions on upgrading and customizing an electric bike?
There are limitations on customizing an electric bike, as certain modifications may void the warranty or violate safety regulations. Additionally, there may be restrictions on upgrading certain components, such as the motor or battery, due to compatibility issues or legal requirements.
Conclusion
In conclusion, creating my own electric bike has been a rewarding and fulfilling experience. By following the steps outlined in this article, I was able to convert a regular bicycle into a powerful and efficient electric vehicle.
One interesting statistic to note is that according to a recent study, the number of electric bike users has increased by 38% in the past year alone. This shows the growing popularity and demand for eco-friendly transportation solutions.
With my DIY electric bike, I am not only enjoying the benefits of a greener mode of transportation, but also inspiring others to do the same.