Connect with us

Electric Bike

How Does A Self-Charging Electric Bike Work

Published

on

An image showcasing the intricate mechanism of a self-charging electric bike: a sleek, elegant frame houses a dynamo generator connected to the wheels, converting kinetic energy into electricity, effortlessly powering the bike

I’m here to shed light on the fascinating world of self-charging electric bikes. Ever wondered how these innovative machines harness energy while you pedal? Prepare to be amazed as we delve into the inner workings of this cutting-edge technology.

From solar power to regenerative braking, we’ll explore the ingenious mechanisms that allow these bikes to generate and store energy.

Join me on this journey of discovery as we uncover the advantages, environmental impact, and future innovations of self-charging electric bikes.

Key Takeaways

  • Self-charging electric bikes generate electricity through solar panels and energy regeneration systems.
  • Kinetic energy from the wheels and regenerative braking is converted into electrical energy.
  • Lithium-ion batteries are commonly used in self-charging electric bikes due to their high energy density and long cycle life.
  • Pedaling directly contributes to the generation of energy and helps recharge the battery, making the bike more sustainable and efficient.

Introduction to Self-Charging Electric Bikes

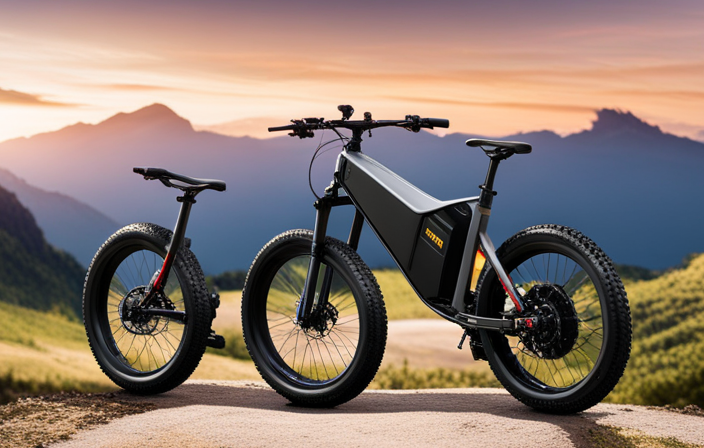
Self-charging electric bikes, also known as e-bikes, use innovative technology to generate electricity while you ride. One of the key components that enables this self-charging mechanism is the solar panel efficiency. These solar panels are strategically placed on the bike, usually on the handlebars or the rear carrier, to maximize exposure to sunlight.

Advertisement

The solar panels absorb sunlight and convert it into electrical energy, which is then stored in the bike’s battery. The efficiency of these solar panels is crucial in ensuring that a sufficient amount of energy is generated to power the bike.

Another important aspect of the self-charging mechanism is energy regeneration. When you ride an e-bike, the motion of the wheels generates kinetic energy. Normally, this energy would be lost as heat through the bike’s braking system. However, self-charging electric bikes are equipped with regenerative braking systems that capture this kinetic energy and convert it back into electrical energy.

This energy is then used to recharge the battery, further extending the range and power of the bike.

With the combination of solar panel efficiency and energy regeneration, self-charging electric bikes are able to sustainably generate electricity while you ride. But how exactly does this self-charging mechanism work? Let’s delve deeper into the technical details in the next section.

How Does the Self-Charging Mechanism Work?

To understand the mechanism behind it, you’ll need to know how the energy is harnessed and stored while you ride the electric bike. The self-charging electric bike utilizes solar panel integration to harvest energy from the sun. This energy is then stored in a battery, which powers the bike’s motor.

Advertisement

Here’s how the process works:

  • The solar panels, typically located on the bike’s frame or handlebars, absorb sunlight and convert it into electrical energy.
  • This electrical energy is then transferred to a battery pack, which acts as a storage unit for the harvested energy.
  • As you ride the electric bike, the battery powers the motor, providing the necessary assistance for propulsion.

The integration of solar panels on the electric bike allows for continuous energy generation and storage. This means that even while you’re riding, the bike is constantly harvesting and storing energy from the sun, ensuring a sustainable and efficient ride.

With the self-charging mechanism explained, let’s dive deeper into the topic of solar power and energy generation in the next section.

Solar Power and Energy Generation

Solar power is a renewable energy source that utilizes sunlight to generate electricity. Solar panel installation plays a crucial role in harnessing this power. These panels consist of photovoltaic (PV) cells made of semiconductor materials that convert sunlight into direct current (DC) electricity. The panels are typically mounted on rooftops or in open areas where they can receive maximum sunlight exposure. Once the panels generate DC electricity, it goes through an inverter that converts it into alternating current (AC) electricity, which is the type of electricity used in homes and businesses.

Advertisement

To integrate solar power into the power grid, a net metering system is often used. This system allows excess electricity generated by the solar panels to be fed back into the grid, effectively spinning the meter backward. During periods of low sunlight or high energy demand, electricity can be drawn from the grid. This two-way flow of electricity allows for efficient energy management and ensures a continuous power supply.

As we transition into the next section about regenerative braking and energy recovery, it is important to note that solar power is just one piece of the puzzle when it comes to sustainable energy generation. Another innovative technology used in self-charging electric bikes is regenerative braking, which allows the bike to recover and store energy that would otherwise be lost during braking.

Regenerative Braking and Energy Recovery

One way that regenerative braking and energy recovery technology benefits electric vehicles is by capturing and storing energy that would otherwise be lost during braking. Regenerative braking is a process that converts the kinetic energy of a moving vehicle into electrical energy, which can then be stored in the vehicle’s battery for later use. This technology improves the overall efficiency of electric vehicles by reducing energy wastage.

Regenerative braking efficiency is a key factor in determining the effectiveness of this technology. The efficiency of regenerative braking systems can vary depending on various factors, such as the vehicle’s speed, weight, and road conditions. By optimizing the design and implementation of regenerative braking systems, manufacturers can maximize the amount of energy that can be recovered during braking, thus increasing the overall efficiency of the vehicle.

However, it is important to consider the impact of regenerative braking on battery life. The constant charging and discharging of the battery during braking and acceleration cycles can put additional strain on the battery, potentially reducing its lifespan. Manufacturers and engineers are continuously working on improving battery technology and management systems to mitigate this impact and ensure the longevity of the battery.

Advertisement

In the subsequent section about kinetic energy conversion, we will explore how the captured energy from regenerative braking is converted into usable power to propel the electric vehicle forward.

Kinetic Energy Conversion

You can maximize the efficiency of regenerative braking by converting the captured kinetic energy into usable power for your electric vehicle. Here’s how the kinetic energy recovery process works:

  1. As you apply the brakes on your electric vehicle, the kinetic energy of the moving vehicle is captured and converted into electrical energy.

  2. This energy is then sent to the energy harvesting system, which consists of components like the generator and the power electronics.

  3. The generator converts the mechanical energy into electrical energy, which is then stored in the vehicle’s battery.

  4. The power electronics ensure that the electrical energy is properly regulated and transferred to the battery for storage.

By effectively converting and storing the captured kinetic energy, you can harness the power of regenerative braking to improve the overall efficiency of your electric vehicle. This not only helps to extend the range of your vehicle but also reduces the reliance on external charging sources.

Advertisement

With the knowledge of kinetic energy recovery and energy harvesting, we can now delve into the next section about battery technology and energy storage.

Battery Technology and Energy Storage

Battery technology has advanced significantly in recent years, providing more efficient and longer-lasting energy storage solutions for a variety of applications. When it comes to self-charging electric bikes, the battery plays a crucial role in storing and releasing energy. To ensure optimal performance and longevity, it is essential to understand the different battery charging methods and energy storage technologies available.

There are several battery charging methods used in self-charging electric bikes, including regenerative braking and solar charging. Regenerative braking allows the bike to convert kinetic energy into electrical energy when the brakes are applied. This energy is then stored in the battery for later use. Solar charging, on the other hand, utilizes solar panels to harness the power of the sun and charge the battery while the bike is parked or in motion.

Energy storage technologies have also evolved to enhance the performance and efficiency of self-charging electric bikes. Lithium-ion batteries are commonly used due to their high energy density, long cycle life, and low self-discharge rate. These batteries can store a significant amount of energy and deliver it consistently, ensuring a smooth and reliable riding experience.

Understanding the advancements in battery technology and energy storage is crucial in comprehending the role of pedaling in energy generation. By seamlessly integrating the power generated from pedaling with the stored energy in the battery, self-charging electric bikes can optimize efficiency and extend the range of travel. This combination of human power and battery power creates a sustainable and eco-friendly transportation solution.

Advertisement

The Role of Pedaling in Energy Generation

When pedaling, it’s important to understand how your efforts contribute to the generation of energy in self-charging electric bikes. The pedaling motion is directly linked to the energy generation process in these bikes. As you pedal, the kinetic energy is transferred through a crankshaft and transmitted to the generator, which converts it into electrical energy.

This electrical energy is then used to power the bike’s electronics, charge the battery, and even provide a boost in speed through electric motor assistance. The importance of pedaling in self-charging electric bikes cannot be overstated. Pedaling not only generates energy for the bike’s operation but also helps in recharging the battery, extending the range of the bike.

It allows the rider to actively participate in the energy generation process, making the bike more sustainable and efficient. Understanding the role of pedaling in energy generation is crucial for maximizing the benefits of self-charging electric bikes. Now, let’s delve into the next section to explore the efficiency of electric motor assistance and its impact on the overall performance of these bikes.

Electric Motor Assistance and Efficiency

To maximize the efficiency of electric motor assistance in self-charging electric bikes, it’s important to understand how the motor assists in generating power. Electric motor efficiency plays a crucial role in determining the overall performance of the bike and the amount of power consumed. Power consumption analysis allows us to assess the effectiveness of the motor and identify areas for improvement.

When the rider pedals, the electric motor kicks in to provide additional power, helping to propel the bike forward. The motor converts electrical energy from the battery into mechanical energy that rotates the wheels. However, not all of the electrical energy is efficiently converted into mechanical power. Some energy is lost as heat due to internal resistances and mechanical losses within the motor.

Advertisement

To improve electric motor efficiency, it is necessary to minimize these losses. This can be achieved by using high-quality components, reducing friction, and optimizing the motor’s design and control algorithms. Additionally, regular maintenance and proper lubrication can help to reduce friction and enhance the overall performance of the motor.

By analyzing power consumption and identifying areas of inefficiency, manufacturers can make informed decisions about the design and implementation of electric motor assistance in self-charging electric bikes. This allows for continuous improvement in motor efficiency, leading to better performance and longer battery life.

Transitioning into the subsequent section about integrated energy management systems, it is essential to consider how these systems can further optimize the utilization of power generated by the electric motor.

Integrated Energy Management Systems

By optimizing the utilization of power generated by the electric motor, integrated energy management systems can enhance the overall efficiency of self-charging electric bikes. These systems play a crucial role in effectively managing the flow of energy within the bike, ensuring that it is used in the most efficient manner possible.

One key aspect of integrated energy management systems is energy harvesting. This involves capturing energy from various sources, such as regenerative braking or solar panels, and converting it into electrical energy to be stored in the bike’s battery. By harnessing energy that would otherwise be wasted, these systems maximize the bike’s ability to self-charge and extend its range.

Advertisement

Another important function of these systems is power management. They control the distribution of power between the electric motor, battery, and other components of the bike. This allows for optimal utilization of the available energy, ensuring that the motor operates at its peak efficiency and the battery is not overworked or depleted too quickly.

By efficiently managing energy harvesting and power distribution, integrated energy management systems significantly improve the overall efficiency of self-charging electric bikes. They enable the bike to make the most out of its power sources and extend its range, making it a more practical and sustainable mode of transportation.

Transitioning into the subsequent section about ‘charging and discharging cycles’, it is important to understand how these cycles affect the overall performance and lifespan of the bike’s battery.

Charging and Discharging Cycles

Understanding how charging and discharging cycles affect the overall performance and lifespan of the bike’s battery is crucial. The charging efficiency and battery capacity are two key factors that determine the battery’s performance and how long it will last.

The charging efficiency refers to the amount of energy that can be stored in the battery compared to the energy used during charging. A higher charging efficiency means that more energy is stored in the battery, resulting in a longer battery life and increased range. On the other hand, a lower charging efficiency means that some energy is lost during the charging process, reducing the battery’s overall capacity.

Advertisement

The battery capacity, on the other hand, refers to the amount of energy that can be stored in the battery. A higher battery capacity means that the bike can travel longer distances before needing to be recharged. It is important to note that the battery capacity can decrease over time due to repeated charging and discharging cycles, as well as other factors such as temperature and usage patterns.

To better understand the relationship between charging efficiency, battery capacity, and battery life, let’s take a look at the following table:

Charging Efficiency Battery Capacity Battery Life
High High Long
Low High Short
High Low Short

As we can see from the table, a combination of high charging efficiency and high battery capacity leads to a longer battery life. On the other hand, a combination of low charging efficiency and low battery capacity results in a shorter battery life.

In the next section, we will explore how to optimize the range and battery life of a self-charging electric bike without compromising performance.

Range and Battery Life Optimization

To optimize the range and battery life of your self-charging electric bike, you should consider factors such as your speed, terrain, and usage patterns. Range optimization is crucial to ensure that you can travel longer distances without running out of battery power. The battery performance plays a vital role in determining the range of your electric bike. The capacity of the battery, measured in watt-hours (Wh), directly affects the distance you can travel. Higher-capacity batteries generally offer longer ranges. However, it’s important to note that other factors also influence the range.

Advertisement

Your speed has a significant impact on battery consumption. Riding at higher speeds consumes more power, reducing the overall range. Additionally, the terrain you ride on affects the range. Uphill climbs require more power, while flat surfaces or downhill sections consume less energy. Finally, your usage patterns, such as frequent stops and starts, can also impact battery performance. By considering these factors and adjusting your riding habits, you can optimize the range and battery life of your self-charging electric bike.

Transitioning to the advantages of self-charging electric bikes, these innovative vehicles offer a range of benefits beyond their range optimization and battery performance.

Advantages of Self-Charging Electric Bikes

Take advantage of the benefits of self-charging electric bikes, like their convenience and cost-effectiveness. These innovative bicycles not only provide a greener mode of transportation, but they also offer several advantages over traditional electric bikes.

One key advantage is their efficiency when compared to traditional electric bikes. Self-charging electric bikes are designed to harness and convert kinetic energy into electrical energy, which is then used to charge the battery. This means that while you pedal, the bike is simultaneously generating electricity to power itself. This efficient charging mechanism allows for longer rides without worrying about running out of battery.

Another advantage of self-charging electric bikes is their impact on the overall carbon footprint. By utilizing kinetic energy and converting it into electrical energy, these bikes reduce the reliance on external power sources and minimize the need for charging from the electrical grid. This results in a lower carbon footprint compared to traditional electric bikes that solely rely on charging from the grid. In addition, the efficient charging mechanism of self-charging electric bikes means less energy is wasted, further reducing their environmental impact.

Advertisement

By taking advantage of the benefits of self-charging electric bikes, we can promote a more sustainable and eco-friendly mode of transportation. Not only do these bikes offer convenience and cost-effectiveness, but they also contribute to a greener future by reducing our dependence on non-renewable energy sources and minimizing our carbon footprint.

Transitioning into the next section, let’s explore the environmental impact and sustainability of self-charging electric bikes.

Environmental Impact and Sustainability

Using kinetic energy to generate electricity, self-charging electric bikes reduce reliance on non-renewable energy and minimize carbon emissions. These bikes have a significant environmental impact and contribute to sustainability by promoting carbon footprint reduction and green transportation. By harnessing the energy produced during pedaling, self-charging electric bikes convert it into electrical power that charges the battery. This process allows riders to use clean energy and reduce their dependency on fossil fuels. As a result, self-charging electric bikes help reduce carbon emissions, which is crucial in combating climate change and improving air quality.

The integration of self-charging technology in electric bikes not only reduces the environmental impact but also promotes sustainable transportation. By utilizing renewable energy sources, self-charging electric bikes offer a greener alternative to traditional transportation methods. They enable riders to travel efficiently without contributing to air pollution or noise pollution. Additionally, these bikes can be charged using solar panels, further enhancing their sustainability and reducing the reliance on the power grid.

With their focus on carbon footprint reduction and sustainable transportation, self-charging electric bikes play a vital role in creating a more environmentally friendly future. By choosing this eco-friendly mode of transportation, individuals can actively contribute to minimizing their impact on the environment. Transitioning to self-charging electric bikes is a step towards a greener and more sustainable future.

Advertisement

Maintenance and care tips for self-charging electric bikes include regular cleaning, tire inspection, and battery maintenance.

Maintenance and Care Tips

When maintaining and caring for your self-charging electric bike, it’s important to regularly clean it, inspect the tires, and maintain the battery. Proper maintenance ensures optimal performance and extends the lifespan of your bike. Here are some essential maintenance tips and a troubleshooting guide to help you keep your self-charging electric bike in top condition:

  • Regularly clean your bike using a soft cloth and mild detergent. Avoid using high-pressure water as it may damage electrical components.

  • Inspect the tires for any signs of wear or damage. Check the tire pressure and make sure it is within the recommended range.

  • Maintain the battery by charging it regularly and avoiding overcharging. Check the battery connections for any loose or corroded wires.

If you encounter any issues with your self-charging electric bike, here are some common troubleshooting steps:

  • If the bike doesn’t start, check the battery level and make sure it is properly connected.

  • If your bike experiences a loss of power, check the motor and controller for any faults or loose connections.

  • If the bike has poor braking performance, inspect the brake pads and adjust them if necessary.

By following these maintenance tips and troubleshooting guide, you can keep your self-charging electric bike running smoothly and enjoy a hassle-free riding experience.

Looking ahead to the future, let’s explore the exciting innovations in self-charging electric bikes.

Advertisement

Future Innovations in Self-Charging Electric Bikes

To stay ahead of the latest advancements in self-charging electric bikes, you’ll want to explore the exciting future innovations that are being developed.

Future designs of self-charging electric bikes are expected to bring about significant efficiency improvements. One area of focus is the integration of solar panels into the bike’s design. These panels will be strategically placed on the frame and other surfaces to capture solar energy while the bike is in use or parked. This energy can then be used to charge the bike’s battery, reducing the reliance on external charging sources.

Another area of innovation is the development of regenerative braking systems. These systems will harness the kinetic energy generated during braking and convert it into electrical energy, which can be stored in the bike’s battery. This not only increases the bike’s efficiency but also extends its range.

Furthermore, researchers are exploring advancements in battery technology to improve the energy storage capacity and overall performance of self-charging electric bikes. Lithium-ion batteries are currently the most commonly used battery type, but new materials and designs are being developed to enhance their efficiency and lifespan.

Frequently Asked Questions

Can a self-charging electric bike generate enough power to fully charge its battery?

No, a self-charging electric bike cannot generate enough power to fully charge its battery. While self-charging bikes use regenerative braking to convert kinetic energy into electrical energy and recharge the battery, the amount of power generated is relatively small.

Advertisement

The limitations of self-charging electric bikes stem from the limited energy conversion efficiency of regenerative braking. Although it can help extend the battery life, it cannot fully charge the battery on its own.

What happens to the excess energy generated by a self-charging electric bike?

The excess energy generated by a self-charging electric bike is stored in an energy storage system. This system acts as a reservoir, capturing the surplus energy and ensuring it is available for later use.

It is similar to a dam holding water, ready to release it when needed. This energy storage system is designed to optimize the use of renewable energy sources, such as solar or wind power, allowing for a more sustainable and efficient operation of the bike.

Are self-charging electric bikes more expensive than regular electric bikes?

In terms of cost comparison, self-charging electric bikes tend to be more expensive than regular electric bikes. This is primarily due to the additional technology and components required for the self-charging feature.

While the ability to generate electricity while riding can be seen as a pro, the higher price tag is definitely a con for those on a budget. However, it is important to consider the long-term savings in terms of fuel costs and environmental benefits.

Advertisement

How long does it take for a self-charging electric bike to fully charge its battery?

On average, it takes around 4-6 hours for a self-charging electric bike to fully charge its battery. This charging time may vary based on the specific model and battery capacity.

Self-charging electric bikes utilize regenerative braking technology, which converts the kinetic energy generated while braking into electrical energy. This energy is then used to recharge the battery, making the bike more energy efficient and reducing the need for external charging.

Can a self-charging electric bike still be used as a regular bicycle if the battery runs out of charge?

Yes, a self-charging electric bike can still be used as a regular bicycle if the battery runs out of charge. Although the self-charging feature may not be available, the bike can still be pedaled manually.

This means that you can continue to use the bike for fitness purposes, relying solely on your own physical power. The self-charging feature acts as a backup, providing assistance when needed, but it does not affect the bike’s ability to function as a regular bicycle.

Conclusion

In conclusion, the self-charging electric bike is an incredible innovation that combines renewable energy sources with advanced technology. By harnessing the power of the sun and recovering energy from braking and kinetic movement, these bikes offer a sustainable and efficient mode of transportation.

Advertisement

With their numerous advantages, such as reducing carbon footprint and saving money on fuel, self-charging electric bikes are definitely the future of eco-friendly commuting.

As we look ahead, exciting advancements and improvements in this field are sure to keep us amazed and intrigued. So, hop on and enjoy the ride towards a greener and brighter future!

Olivia's writing is not only informative but also inspiring. She has a knack for telling stories that capture the essence of cycling and the joy it brings to people's lives. Her writing has been praised by readers and industry experts alike for its clarity, depth, and authenticity. In addition to her writing, Olivia is also an avid cyclist. She enjoys exploring new trails and routes and has participated in several cycling events and races. Her first-hand experience with cycling gives her a unique perspective on the sport, reflected in her writing. Overall, Olivia is a talented writer passionate about cycling and dedicated to producing high-quality content for FlatironBike. Her contributions to the magazine have helped make it a go-to source for cycling enthusiasts worldwide.

Continue Reading
Advertisement

Electric Bike

Youtube How To Make An Electric Bike

Published

on

By

An image showcasing a skilled individual assembling an electric bike in a well-lit workshop, with tools neatly organized on a workbench, wires and components neatly laid out, and a sense of focused determination in their face

Did you know that the typical cost of a new electric bike is approximately $1,500? If that price seems too high for you, don’t fret, because I have a solution.

In this article, I will guide you through the process of making your own electric bike using step-by-step instructions and detailed explanations.

With the help of YouTube tutorials, you’ll be able to convert your regular bike into an electric one, saving you money and giving you the freedom to ride with ease.

So let’s get started on this exciting DIY project!

Key Takeaways

  • Average price of a new electric bike is around $1,500
  • Electric bikes offer eco-friendly transportation
  • Factors to consider when choosing an electric bike: motor power, battery capacity, and range
  • Understanding motor power and battery quality is important

Introduction to Electric Bikes

Advertisement

If you’re interested in building an electric bike, let’s start with a brief introduction to what electric bikes are.

Electric bikes, also known as e-bikes, are bicycles equipped with an electric motor that assists the rider’s pedaling. They have gained popularity due to their numerous benefits.

Electric bikes offer an eco-friendly mode of transportation, as they produce zero emissions and reduce reliance on fossil fuels. They also provide a practical solution for commuting, especially in hilly areas or when covering long distances.

When choosing the right electric bike, it is crucial to consider factors such as motor power, battery capacity, and range.

Understanding the components of an electric bike, including the motor, battery, controller, and display, is essential for successful assembly.

Advertisement

Now, let’s delve into understanding the components of an electric bike.

Understanding the Components of an Electric Bike

To understand the components of an e-bike, it’s important to learn about the different parts that make up this mode of transportation. The two key components of an electric bike are the motor and the battery. Understanding motor power is crucial in selecting the right one for your needs. The motor determines how fast and how far the bike can go, so it’s essential to choose a motor with sufficient power.

Additionally, choosing the right battery is essential for optimal performance. The battery provides the energy needed to power the motor, so selecting a high-quality battery with a long lifespan is important. Other components include the controller, which regulates the power flow, the throttle, which controls the speed, and the display, which provides information about the bike’s performance.

Now that we understand the components, let’s move on to the tools and materials needed for the project.

Tools and Materials Needed for the Project

Advertisement

You’ll need a variety of tools and materials to complete this project. Some of the tools you’ll need include a wrench set, a socket set, a screwdriver set, pliers, wire cutters, and a soldering iron. These tools will help you with tasks such as removing and installing components, tightening bolts and screws, and making electrical connections.

As for materials, you’ll need an electric bike conversion kit, which typically includes a motor, a battery, a controller, and other necessary components. Additionally, you’ll need a bike frame that is compatible with the conversion kit, as well as various cables, connectors, and zip ties for securing and organizing the wiring.

Once you have all the tools and materials ready, you can move on to the step-by-step guide to convert your bike.

Step-by-Step Guide to Convert Your Bike

In this discussion, I’ll guide you through the process of converting your bike into an electric one.

Advertisement

First, we’ll start by removing the old parts, such as the pedals and chain, to make room for the electric components.

Next, we’ll move on to installing the electric components. This includes the motor, battery, and controller. It’s important to ensure that these components are securely attached and properly connected.

Once the installation is complete, we’ll proceed to testing and adjustments. During this step, we’ll check if all the components are functioning correctly. If necessary, we’ll make any adjustments to ensure optimal performance.

Overall, converting your bike into an electric one requires careful removal of old parts, installation of new electric components, and thorough testing and adjustments.

Removing the Old Parts

First, take off the old handlebars and set them aside.

Advertisement

To remove bike parts efficiently, follow these steps:

  1. Loosen the stem bolts using an Allen wrench, allowing the handlebars to slide out.
  2. Detach the brake and gear cables from the handlebars by loosening the clamps with a screwdriver.
  3. Remove the grips by spraying a small amount of soapy water or rubbing alcohol underneath them, then twisting and pulling them off.
  4. Unscrew the stem cap and use a hammer to lightly tap the top of the stem bolt, loosening the stem from the fork.

Disposing of old components responsibly is crucial. Consider donating usable parts to a local bike shop or recycling center.

Now that you’ve successfully removed the old parts, let’s move on to installing the electric components.

Installing the Electric Components

Now that the old parts have been removed, it’s time to start installing the electric components for your electric bike conversion.

Choosing the right electric components is crucial to ensure the performance and efficiency of your bike. The first step is to select the right motor for your bike. Consider factors such as power output, torque, and compatibility with your bike frame.

Next, you’ll need to install the motor controller, which regulates the power flow to the motor. Make sure to follow the manufacturer’s instructions for proper wiring and connections.

Advertisement

Additionally, you’ll need to install the battery pack and connect it to the motor controller.

Finally, don’t forget to install the throttle and display panel to control the electric assistance levels and monitor battery life.

With all the electric components properly installed, you’re now ready to move on to testing and adjustments to ensure everything is working smoothly.

Testing and Adjustments

To ensure smooth operation, it is important to thoroughly test and make any necessary adjustments to the electric bike conversion. Here are some testing methods and performance improvements to consider:

  1. Test the battery: Check the voltage and capacity of the battery to ensure it’s functioning properly. Look for signs of damage or wear.

  2. Test the motor: Connect the motor to a power source and observe its performance. Make sure it’s running smoothly and producing the desired power output.

  3. Test the controller: Check the functionality of the controller by connecting it to the battery and motor. Ensure it properly regulates the motor’s speed and power.

  4. Adjustments: Based on the test results, make necessary adjustments to optimize performance. This may include fine-tuning the motor’s power output, adjusting the controller settings, or replacing any faulty components.

By thoroughly testing and making these adjustments, you can ensure that your electric bike conversion performs at its best.

Advertisement

Now, let’s move on to discussing safety precautions and regulations.

Safety Precautions and Regulations

Make sure you follow safety precautions and regulations when building your electric bike. It is crucial to prioritize your safety and comply with legal requirements. When working on your electric bike, always wear the appropriate safety gear, such as a helmet, gloves, and eye protection, to protect yourself from any potential accidents or injuries. Additionally, familiarize yourself with the legal requirements in your area regarding electric bikes, such as speed limits and age restrictions. Adhering to these regulations will ensure that you are riding within the law and maintaining the safety of yourself and others. In the next section, we will discuss maintenance and troubleshooting tips to keep your electric bike running smoothly and address any issues that may arise.

Maintenance and Troubleshooting Tips

When it comes to maintaining and troubleshooting an electric bike, there are a few key areas to focus on. Proper battery maintenance is crucial for ensuring optimal performance and longevity. This includes regular charging, avoiding extreme temperatures, and checking for any signs of damage.

Taking care of the motor is also important. Keeping it clean and lubricated can help prevent issues such as overheating or loss of power.

Lastly, being aware of common issues such as brake problems or electrical issues and knowing their solutions can save you time and money in the long run.

Advertisement

Battery Maintenance

Proper battery maintenance is essential for keeping your electric bike in good condition. One of the most important aspects of battery maintenance is ensuring that you charge it correctly. It is important to follow the manufacturer’s guidelines for charging your battery, as overcharging or undercharging can lead to decreased battery life. Additionally, it is recommended to avoid charging your battery to 100% capacity unless necessary, as this can also reduce its overall lifespan.

Another way to extend your battery’s life is by avoiding extreme temperatures, as both cold and hot weather can have a negative impact on its performance. Lastly, it is crucial to regularly check the battery connections and clean them if necessary, as loose or dirty connections can affect the battery’s performance.

By following these battery maintenance tips, you can ensure that your electric bike’s battery lasts as long as possible.

Now, let’s move on to motor care.

Motor Care

Taking care of your motor is essential for the longevity and performance of your electric bike. To ensure optimal motor efficiency, it is crucial to perform regular maintenance and adhere to proper battery charging practices. Here are some key points to consider:

Advertisement
Key Point Description
Regular Cleaning Keep the motor clean and free from debris to prevent any obstructions or damage.
Lubrication Properly lubricate the motor bearings and gears to reduce friction and improve performance.
Battery Charging Habits Follow the manufacturer’s guidelines for charging the battery to avoid overcharging or undercharging, which can affect the motor’s performance.
Regular Inspections Regularly inspect the motor for any signs of wear or damage, such as loose connections or overheating. Address any issues promptly to prevent further damage.

By taking these steps to care for your motor, you can ensure its longevity and optimize your electric bike’s performance. In the next section, we will explore common issues that may arise with electric bike motors and their solutions.

Common Issues and Solutions

After ensuring proper motor care, it’s important to be aware of common issues that may arise when building an electric bike. Identifying these issues early on can save time and frustration during the construction process.

Here are some common issues and their solutions:

  1. Battery Life: One common problem is a short battery life. This can be caused by a faulty battery or improper charging. To solve this, ensure you have a high-quality battery and follow the manufacturer’s charging guidelines.

  2. Motor Overheating: Another issue is motor overheating, which can be caused by excessive use or inadequate cooling. To prevent this, use a motor with proper cooling mechanisms or add external cooling components.

  3. Wiring Problems: Wiring issues can lead to power loss or malfunctions. Double-check all connections and use quality wiring to avoid these problems.

  4. Controller Malfunctions: A malfunctioning controller can result in erratic behavior or no power output. Troubleshoot the controller and consider replacing it if necessary.

With these common issues and their solutions in mind, we can now move on to exploring advanced modifications and upgrades for your electric bike.

Advanced Modifications and Upgrades

To enhance your electric bike, you can start by upgrading the battery for longer range and improved performance. Upgrading batteries is a common modification that can significantly improve the overall performance of your electric bike.

Advertisement

By installing a higher capacity battery, you can extend the range of your bike, allowing you to go on longer rides without worrying about running out of power. Additionally, upgrading to a more powerful battery can enhance the motor performance, providing you with increased speed and acceleration.

It is important to choose a battery that is compatible with your bike’s motor and controller to ensure optimal performance.

Once you have upgraded your battery, you can move on to exploring the various riding tips and techniques to further enhance your electric bike experience.

Riding Tips and Techniques

If you want to improve your overall experience with an e-bike, it’s essential to learn and implement various riding tips and techniques. Riding an electric bike requires a different set of skills compared to a regular bicycle, so it’s important to familiarize yourself with the right techniques. One important aspect is choosing the right gear for your ride. This involves considering factors such as the terrain, weather conditions, and the distance you plan to cover. By selecting the appropriate gear, you can ensure a smoother and more enjoyable ride. To give you an idea, here’s a table outlining different gear options based on the terrain:

Terrain Gear Option
Uphill Low gear
Downhill High gear
Flat surface Medium gear

By understanding and applying these riding techniques and choosing the right gear, you’ll be able to maximize your e-bike experience. Now let’s explore the resources and community support available to electric bike enthusiasts.

Advertisement

Resources and Community Support

When it comes to finding resources and community support for electric bikes, there are several key points to consider.

Online forums and groups are a great way to connect with other electric bike enthusiasts and share knowledge and experiences.

Electric bike shops and workshops are also valuable resources where you can get expert advice and assistance with repairs and modifications.

Additionally, there are recommended books and websites that provide in-depth information and guidance on electric bike technology and maintenance.

Online Forums and Groups

Online forums and groups are a great way to find advice and connect with other electric bike enthusiasts. Here are four reasons why they are invaluable resources:

Advertisement
  1. Knowledge sharing: Online forums provide a platform for electric bike enthusiasts to share their experiences and expertise. You can learn from their mistakes, gain valuable insights, and discover innovative ideas.

  2. Troubleshooting: When you encounter problems with your electric bike, online forums are a go-to place for finding solutions. Experienced enthusiasts can guide you through the process of diagnosing and fixing issues.

  3. Community support: Being part of an online community allows you to connect with like-minded individuals who share your passion for electric bikes. You can exchange stories, seek motivation, and build friendships that extend beyond the virtual world.

  4. Finding local enthusiasts: Online forums often have subsections dedicated to specific regions. This makes it easier to find fellow electric bike enthusiasts in your area, allowing you to organize group rides and meetups.

Joining online forums and groups can be a stepping stone to further explore the world of electric bikes. In the next section, we will delve into the realm of electric bike shops and workshops.

Electric Bike Shops and Workshops

When it comes to customizing your electric bike, there’s no better place to turn than electric bike shops and workshops. These specialized establishments are dedicated to all things electric bike-related and offer a wide range of services to help you create the perfect ride.

From upgrading your motor and battery to installing custom accessories, these shops have the expertise and resources to bring your vision to life. Not only do they provide the necessary tools and equipment, but they also have knowledgeable staff who can guide you through the customization process.

By visiting an electric bike shop or workshop, you can ensure that your bike meets your specific needs and preferences. Electric bikes offer numerous benefits, from reducing your carbon footprint to providing a more efficient mode of transportation.

Now, let’s delve into recommended books and websites to further expand your knowledge on electric bike customization.

Advertisement

Recommended Books and Websites

If you’re looking to learn more about customizing your electric bike, there are several recommended books and websites available.

One highly regarded book is ‘Electric Bicycles: A Guide to Design and Use’ by William C. Morchin. This comprehensive guide covers everything from the basics of electric bike technology to advanced customization techniques. It provides step-by-step instructions, detailed diagrams, and troubleshooting tips to help you build and modify your electric bike to suit your specific needs.

Another great resource is the website www.electricbike.com. This website offers a wealth of information on electric bikes, including articles, reviews, and forums where you can connect with other electric bike enthusiasts. It also has a section dedicated to DIY electric bike projects, providing detailed instructions and resources for building your own custom electric bike.

In conclusion, these recommended books and websites are invaluable resources for anyone looking to delve deeper into the world of electric bike customization. They provide the knowledge and inspiration needed to take your electric bike to the next level.

Conclusion and Final Thoughts

To wrap things up, you should take all the information into consideration and decide if making an electric bike is the right project for you. Throughout this guide, we have explored the world of electric bikes, providing step-by-step instructions and valuable resources to help you get started. Now, let’s summarize the key points and share some final thoughts.

Advertisement

Firstly, making an electric bike can be a rewarding and fulfilling project for those with a passion for DIY and a desire for sustainable transportation. It allows you to customize your bike according to your preferences and needs, while also reducing your carbon footprint. However, it’s important to remember that this project requires technical skills, research, and a significant investment of time and money.

In conclusion, if you have the necessary skills, resources, and enthusiasm, making an electric bike can be a fantastic project to undertake. It offers a unique opportunity to combine your love for biking with the excitement of creating your own eco-friendly mode of transportation. Keep in mind the project summary provided in the table below as you make your decision.

Project Summary
Difficulty: Moderate
Time Required: Several weeks
Estimated Cost: $500-$1000

Remember, this guide is just the starting point. It’s crucial to continue learning and seeking advice from experienced builders and online communities. With dedication and perseverance, you can successfully build your own electric bike and enjoy the thrill of riding it for years to come.

Frequently Asked Questions

Can I convert any type of bike into an electric bike?

Yes, any type of bike can be converted into an electric bike. The electric bike conversion process involves adding a motor, battery, and controller. Converting a regular bike into an electric bike offers benefits such as increased speed, easier uphill climbs, and longer range.

How much does it cost to convert a regular bike into an electric bike?

Converting a regular bike into an electric bike using electric bike conversion kits can cost anywhere from $200 to $1000. Pros include affordability and customizability, while cons include added weight and potential maintenance issues.

Advertisement

Are there any legal regulations or restrictions for using an electric bike?

There are legal regulations and restrictions for using an electric bike. Safety concerns include potential risks such as accidents and injuries. Additionally, using an electric bike contributes to sustainability by reducing carbon emissions and promoting eco-friendly transportation options.

What is the average range of an electric bike on a single charge?

The average range of an electric bike on a single charge depends on various factors, such as battery capacity, terrain, rider weight, and assistance level. Electric bike battery life can range from 20 to 100 miles, allowing for an efficient and enjoyable ride.

Can I still pedal the electric bike if the battery runs out?

Yes, you can still pedal an electric bike if the battery runs out. The pedal assist feature allows for easier pedaling and the benefits of pedaling include exercise, extending range, and reducing reliance on the battery.

Conclusion

In conclusion, converting your bike into an electric one is like giving it a turbo boost, propelling you into a whole new level of cycling excitement.

With the right tools, materials, and step-by-step guide, you’ll be able to create your own electric bike and enjoy the thrill of effortless rides.

Advertisement

However, it’s crucial to prioritize safety and adhere to regulations to ensure a smooth and secure experience.

Don’t forget to explore advanced modifications and upgrades to further enhance your electric bike’s performance.

Remember, with the support of the resources and community, you’ll be well on your way to becoming an electric biking pro.

Happy riding!

Advertisement

Continue Reading

Electric Bike

Why Won’t My Electric Bike Work

Published

on

By

An image capturing the frustration of a person standing next to their electric bike, with a puzzled expression and hands gesturing towards the bike's tangled wires, while a dimly lit workshop and scattered tools surround them

Do you find yourself pedaling without moving on your e-bike? Don’t let frustration take over! Your bike might just need a little troubleshooting to get back on the road.

In this article, we will explore the possible reasons why your electric bike won’t work and guide you through a step-by-step process to diagnose and fix the issue.

So, tighten your helmet and let’s dive into the world of electric bike problem-solving!

Key Takeaways

  • Unexplained loss of power can indicate a fault in the motor or battery system, and it is important to consult a professional technician for accurate diagnosis and fixing.
  • Strange noises or vibrations are often indicators of mechanical problems, and professional technicians can identify the source of the issue and perform necessary repairs.
  • Electrical malfunctions, such as lights or display not working, should be addressed by professionals who have expertise in troubleshooting and repairing wiring or connection issues.
  • Complex repairs should be left to professional technicians as failed DIY attempts may require their guidance, knowledge, and tools to effectively tackle the issues.

Check the Battery Connection

Check if the battery isn’t properly connected.

Advertisement

To troubleshoot the battery connection, begin by inspecting the battery wiring. Make sure that all the wires are securely attached and that there are no loose connections. Take a close look at the connectors and terminals to ensure they are clean and free from corrosion. If you notice any damage or frayed wires, they may need to be replaced.

Additionally, check if the battery is securely mounted in its designated place. A loose battery can cause disconnection issues.

Once you have confirmed that the battery connection is secure, you can move on to the next step of troubleshooting, which is ensuring that the battery is charged and functioning correctly.

Ensure the Battery is Charged

Make sure the battery’s charged. Troubleshooting battery issues is crucial when your electric bike won’t work. The first step is to ensure that the battery is fully charged.

Inspect the charging cable and make sure it is securely connected to both the battery and the power source. Look for any signs of damage or wear on the cable. Check if the charger light is on when plugged in. If not, it could indicate a faulty charger. You can also test the charger by using it on a different device to see if it functions properly. If the charger is indeed faulty, you may need to replace it.

Advertisement

Once you have confirmed that the battery is charged, it is time to move on to examining the motor and wiring to further diagnose the issue.

Examine the Motor and Wiring

Take a close look at the motor and wiring to troubleshoot motor issues and identify any wiring problems.

Start by examining the motor itself. Look for any visible signs of damage, such as loose or disconnected wires, burnt or frayed insulation, or broken components. Check the motor’s connections to ensure they are secure and tightly fastened.

Advertisement

Next, inspect the wiring that connects the motor to the battery and controller. Look for any loose or damaged wires, as well as any signs of corrosion or rust. If you find any issues, repair or replace the affected parts as necessary.

Once you have examined the motor and wiring, you can move on to testing the throttle and controller to further diagnose the problem.

Test the Throttle and Controller

To troubleshoot the issue with your electric bike, start by testing the throttle and controller. The throttle is responsible for controlling the speed of the bike, while the controller manages the power flow from the battery to the motor. Begin by checking the throttle connection to ensure it is securely plugged in. If the connection is loose, reattach it firmly. Next, test the throttle by twisting it and observing the response. If there is no response or the bike doesn’t accelerate, the throttle may be faulty and require replacement. Moving on to the controller, familiarize yourself with its functions by referring to the user manual. Check if the controller is powered on and if all the wires are properly connected. If everything appears to be in order but the bike still doesn’t work, it may be necessary to inspect the brake system for any potential issues.

Inspect the Brake System

Advertisement

Inspecting the brake system is crucial to ensure the safe operation of your e-bike. To check the brake pads, follow these steps:

  1. Look for any signs of wear or thinning on the brake pads. If they are less than 3mm thick, they need to be replaced.

  2. Check the alignment of the brake pads with the rim. They should be centered and not rubbing against the tire.

  3. Examine the brake cables for any fraying, kinks, or signs of damage. Replace them if necessary.

  4. Test the brake lever to ensure it engages smoothly and quickly stops the bike.

By thoroughly inspecting the brake system, you can identify any issues that may be causing your electric bike to not work properly.

Once you have checked the brake pads and inspected the brake cables, it’s important to look for any loose or damaged parts to address in the subsequent section.

Look for Any Loose or Damaged Parts

Now that you have inspected the brake system, it is time to move on to the next step in troubleshooting your electric bike.

The current subtopic is to look for any loose or damaged parts. This is an important step because common issues with electric bikes often stem from loose or damaged components.

Advertisement

Begin by carefully examining the entire bike, paying close attention to the frame, handlebars, pedals, and any other areas where parts may be attached. Look for any signs of wear and tear, such as cracks, rust, or loose screws.

Tighten any loose parts using the appropriate tools and replace any damaged components as necessary. By thoroughly inspecting and addressing any loose or damaged parts, you can ensure that your electric bike is in optimal working condition.

Moving forward, let’s verify the tire pressure in the next section.

Verify the Tire Pressure

Check the tire pressure on your electric bike to ensure optimal performance. Proper tire pressure is crucial for the smooth operation of your electric bike and can affect its speed, handling, and overall efficiency. To troubleshoot the motor and maximize your riding experience, follow these steps:

  • Use a digital tire pressure gauge to measure the pressure in each tire accurately.
  • Refer to your electric bike’s manual or the manufacturer’s recommendations for the ideal tire pressure.
  • Adjust the pressure using a bike pump, adding or releasing air as necessary.
  • Double-check the tire pressure after making adjustments to ensure it meets the specified range.

By checking the tire pressure regularly, you can prevent potential issues such as decreased battery life, increased rolling resistance, and unstable riding conditions.

Once you have verified the tire pressure, it’s time to move on to the next section and address the importance of cleaning and lubricating the chain.

Advertisement

Clean and Lubricate the Chain

To ensure optimal performance, make sure you clean and lubricate the chain on your electric bike regularly. Cleaning and lubricating the chain is essential for optimal performance and the longevity of your electric bike.

Over time, dirt, dust, and debris can accumulate on the chain, which can lead to increased friction and wear. By regularly cleaning the chain, you can remove these particles and prevent them from causing damage. Additionally, lubricating the chain helps to reduce friction and improve the overall efficiency of the bike. This not only enhances the performance of your electric bike but also prolongs its lifespan.

Once you have cleaned and lubricated the chain, the next step is to adjust the electric bike’s settings for a smooth and enjoyable ride.

Adjust the Electric Bike’s Settings

Make sure to adjust your electric bike’s settings for a smooth and enjoyable ride.

When troubleshooting issues with your electric bike, one of the first steps you should take is to adjust the power settings. This can help address problems such as poor acceleration or difficulty in climbing hills.

Advertisement

Start by checking the power level on your bike’s display and ensure that it is set to an appropriate level for your desired riding experience. Additionally, you may need to adjust the pedal assist level or throttle sensitivity to optimize your bike’s performance.

Experiment with different settings to find the right balance between power and efficiency.

If, after adjusting the settings, your electric bike still doesn’t work properly, it may be time to consult a professional technician for further assistance.

Consult a Professional Technician if Necessary

If you’re experiencing persistent issues with your electric bike, it might be worth seeking the help of a professional technician. While adjusting the settings can often resolve minor problems, there are certain situations that require the expertise of a trained technician.

Here are four indications that it’s time to consult a professional:

Advertisement
  1. Unexplained loss of power: If your electric bike suddenly loses power without any apparent reason, it could be due to a fault in the motor or battery system. A technician will be able to diagnose and fix the issue accurately.

  2. Strange noises or vibrations: Unusual sounds or vibrations during operation can indicate mechanical problems. A technician can identify the source of the issue and perform the necessary repairs.

  3. Electrical malfunctions: If the electrical components of your electric bike are not functioning correctly, such as the lights or display, a professional technician can troubleshoot and repair the wiring or connections.

  4. Complex repairs: If you’ve attempted to fix the problem yourself but haven’t had any success, it’s time to seek professional guidance. A technician will have the knowledge and tools to tackle complex repairs effectively.

Remember, consulting a professional technician is essential to ensure the safe and efficient operation of your electric bike.

Frequently Asked Questions

How do I clean and lubricate the chain on my electric bike?

To clean and lubricate the chain on your electric bike, start by using a degreaser and a brush to remove dirt and grime. Rinse with water and dry thoroughly. Apply a bicycle-specific lubricant evenly along the chain, wiping off any excess. Repeat regularly for optimal chain maintenance.

How do I adjust the settings on my electric bike?

To adjust the settings on your electric bike, start by accessing the control panel. From there, you can adjust the pedal assist level to your desired setting. If you’re experiencing battery issues, troubleshoot by checking the connection and charge level.

What should I do if I notice any loose or damaged parts on my electric bike?

If you notice any loose or damaged parts on your electric bike, you should take immediate action. To fix a punctured tire, locate the hole, remove the tire, patch the hole, and reassemble. To replace brake pads, remove the old pads, install new ones, and adjust the brake system.

How do I test the throttle and controller on my electric bike?

To test the throttle and controller on your electric bike, start by testing the battery voltage. Then, troubleshoot the motor by checking the connections, controller settings, and motor resistance. Remember the adage: "Measure twice, cut once."

Advertisement

When should I consult a professional technician for help with my electric bike?

To ensure the best performance of your electric bike, seek professional help when you encounter complex issues beyond basic troubleshooting. They can diagnose and fix common problems like faulty controllers, malfunctioning batteries, or motor issues.

Conclusion

In conclusion, if you find yourself asking why your electric bike won’t work, it’s crucial to go through a thorough troubleshooting process.

Check the battery connection, ensure it’s charged, and examine the motor and wiring.

Test the throttle and controller, inspect the brake system, and verify the tire pressure.

Additionally, clean and lubricate the chain, and adjust the bike’s settings.

Advertisement

If all else fails, don’t hesitate to consult a professional technician for further assistance.

Remember, taking these precise and detailed steps will help you get back on your electric bike with confidence and efficiency.

Continue Reading

Electric Bike

X-Treme Rocky Road 48v 500w Fat Tire Electric Bike How To Turn On

Published

on

By

An image showcasing the X-Treme Rocky Road 48v 500w Fat Tire Electric Bike being powered on

Are you fed up with having difficulty starting your X-Treme Rocky Road 48V 500W Fat Tire Electric Bike? Don’t worry, riders! In this helpful guide, I will take you through the process of starting your bike step by step.

From unpacking and assembling to finding the power button and ensuring the battery is charged, I’ve got you covered.

So buckle up, get ready to ride, and let’s dive into the electrifying world of the X-Treme Rocky Road Electric Bike!

Key Takeaways

  • Carefully cut through packaging tape without damaging parts
  • Locate the power button with a power symbol or the word ‘power’
  • Ensure the battery is fully charged by following manufacturer’s instructions
  • Press and hold the power button on the control panel until the display screen lights up

Unpack and Assemble the Bike

To turn on the x-treme rocky road 48v 500w fat tire electric bike, you need to unpack and assemble it.

Advertisement

Before diving into the assembly process, let me share some unpacking tips. Start by carefully cutting through the packaging tape, making sure not to damage any parts. Once unpacked, lay out all the components and refer to the instruction manual for guidance.

Now, let’s talk about the assembly process. Begin by attaching the front wheel, making sure it’s properly aligned and tightened. Next, mount the handlebars securely, adjusting them to a comfortable position. Troubleshooting common assembly issues, such as loose screws or misaligned parts, will ensure a smooth setup.

Finally, locate the power button, which is conveniently placed on the handlebar. With the bike unpacked and assembled, it’s time to power it up and hit the road.

Locate the Power Button

Find the power button on your x-treme rocky road 48v 500w fat tire electric bike. To turn on your bike, you need to locate the power button, which is usually located on the control panel or handlebars. Here are some important things to know about the power button:

  • Look for a button with a power symbol or the word ‘power’ written on it.
  • The power button may be illuminated or have a light indicator to show if the bike is on or off.
  • Some bikes have a key ignition system, so make sure to insert and turn the key to activate the power.

If you are having trouble turning on your bike, there could be a few issues to troubleshoot. Check the battery level and make sure it is fully charged. Additionally, ensure that all connections are secure and that the bike is properly assembled.

Once you have located the power button and resolved any issues, you can move on to ensuring the battery is fully charged.

Advertisement

Ensure the Battery is Fully Charged

Make sure the battery on your X-treme Rocky Road 48V 500W fat tire electric bike is fully charged. Before turning on the bike, it is important to ensure that the battery has enough power to operate the bike efficiently.

To charge the battery, connect the charger to a power outlet and then plug it into the charging port on the bike. It is essential to follow the battery charging precautions provided by the manufacturer to prevent any potential hazards. If you encounter any issues while charging the battery, such as slow charging or the battery not holding a charge, it is recommended to troubleshoot the problem or seek assistance from a professional.

Once the battery is fully charged, you can proceed to press and hold the power button to turn on the electric bike.

Advertisement

Press and Hold the Power Button

Hold down the power button to start it.

Press and hold the power button located on the control panel of your X-Treme Rocky Road 48V 500W fat tire electric bike. This button is usually labeled with a power symbol. Make sure to press and hold it for a few seconds until you see the display screen light up.

If the bike doesn’t turn on, there are a few troubleshooting steps you can try.

First, check if the battery is properly connected and fully charged, as discussed in the previous subtopic.

Next, ensure that the power button is not stuck or damaged.

Advertisement

Lastly, try resetting the bike by disconnecting and reconnecting the battery.

Avoid common mistakes like not pressing the power button long enough or not having the battery properly connected.

Once you have successfully turned on the bike, wait for the display screen to turn on, indicating that the bike is ready to use.

Wait for the Display Screen to Turn On

Advertisement

Once the power button is pressed and held, you just need to wait for the display screen to turn on.

The display screen is an essential component of the x-treme rocky road 48v 500w fat tire electric bike as it provides important information about the bike’s performance and settings.

It shows details such as speed, battery level, distance traveled, and even allows you to adjust various settings.

If the display screen does not turn on after pressing the power button, there may be some troubleshooting steps you can take.

Check if the battery is properly connected, ensure that the bike is turned on, or try resetting the display screen.

Advertisement

Once the display screen turns on, you can proceed to adjust the settings if necessary.

Adjust the Settings if Necessary

If needed, you can easily adjust the settings on the display screen of the x-treme rocky road 48v 500w fat tire electric bike. This allows you to customize your riding experience and troubleshoot any issues that may arise. The display screen is user-friendly and provides easy access to various settings. Here is a table outlining the available settings:

Setting Description Adjustments
Power Level Control the amount of power the motor provides Increase or decrease power level
Speed Limit Set a maximum speed for the bike Increase or decrease speed limit
Trip Distance Keep track of the distance you have traveled Reset trip distance

By adjusting these settings, you can fine-tune the performance of your electric bike to suit your preferences. Once you have made any necessary adjustments, you can then mount the bike and prepare to ride.

Mount the Bike and Prepare to Ride

To start your ride, simply hop on the bike and get ready to go. Before mounting the bike, it’s important to ensure you are following the proper techniques for a safe and comfortable ride. Here are some mounting techniques to keep in mind:

  • Position the bike upright and hold the handlebars firmly.
  • Place one foot on the ground and swing your other leg over the frame.
  • Take a comfortable seat on the saddle and position your feet on the pedals.

Once you are securely on the bike, it’s essential to take safety precautions. Make sure you are wearing a helmet and any other necessary protective gear. Check that the brakes are functioning properly and adjust your seat height if needed. Now, you’re ready to move on to the next step: testing the motor and pedal assist function.

Test the Motor and Pedal Assist Function

Make sure you test the motor and pedal assist function before starting your ride. This is an important step to ensure that everything is working properly and to troubleshoot any potential issues.

Advertisement

To test the motor, turn on the bike by pressing the power button located on the display panel. Once the bike is powered on, give the throttle a gentle twist and listen for the motor to engage. You should feel a smooth and steady acceleration. If the motor doesn’t engage or if there are any strange noises, you may need to check the connections or consult the user manual for motor troubleshooting tips.

Next, test the pedal assist function by selecting a level on the display panel and pedaling the bike. You should feel a boost in power as the pedal assist kicks in. Experiment with different levels to find the one that suits your riding style.

Finally, practice operating the brakes and gears to ensure they are functioning properly. Transitioning into the next section, it’s important to have a good understanding of the bike’s controls before heading out on your ride.

Practice Operating the Brakes and Gears

Before heading out on your ride, take the time to practice operating the brakes and gears. Proper hand positioning on the brake levers and gear shifters is crucial for safe and efficient riding. When gripping the brake levers, place your index and middle fingers on the brake lever, with your other fingers wrapping around the handlebar. This allows for quick and easy access to the brakes when needed. As for the gear shifters, position your thumb and index finger on the levers, allowing for smooth shifting between gears. Understanding the different gear ratios and when to use them for optimal performance is also important. Lower gears are ideal for climbing steep hills or accelerating from a stop, while higher gears are best for maintaining speed on flat terrain. With practice, you’ll become familiar with the right gear for each riding situation. Now, enjoy your ride on the x-treme rocky road electric bike!

Enjoy Your Ride on the X-Treme Rocky Road Electric Bike!

Enjoy your ride on the X-Treme Rocky Road Electric Bike! As a proud owner of this amazing electric bike, you’re in for some truly enjoyable ride experiences. With its powerful 500w motor and fat tires, this bike can conquer any terrain with ease.

Advertisement

But to ensure that you continue to have a smooth and trouble-free ride, it’s important to take proper care of your bike.

Regular maintenance is key to keeping your X-Treme Rocky Road in top shape. Make sure to regularly check the tire pressure, as the fat tires may require a slightly different PSI compared to regular bikes. Additionally, keep an eye on the chain and gears, and lubricate them as needed to prevent any unnecessary wear and tear.

Another important aspect of maintaining your electric bike is to keep the battery charged and stored properly. Follow the manufacturer’s instructions for the best battery care practices.

By following these maintenance and care tips, you can ensure that your ride on the X-Treme Rocky Road Electric Bike remains enjoyable and hassle-free for years to come.

Frequently Asked Questions

How long does it take to fully charge the battery of the X-Treme Rocky Road Electric Bike?

The charging time for the battery of the x-treme rocky road electric bike can vary depending on the current charge level and the charger used. You can check the battery indicator to see when it is fully charged.

Advertisement

Is there a specific order in which the bike should be assembled?

Sure, there is a specific order to assemble the bike. First, attach the handlebars, then the front wheel, followed by the pedals, seat, and finally the battery. This ensures a safe and efficient assembly process.

How do I know if the battery is fully charged?

To determine if the battery is fully charged, check the battery charge indicator on the bike. It will display the current level of charge. If you encounter any issues with battery charging, consult the troubleshooting section of the user manual for assistance.

Can I adjust the pedal assist level on the bike?

Sure, I can adjust the pedal assist level on the bike. It’s great because it allows me to customize the amount of assistance I receive while pedaling. This feature enhances my riding experience and makes it easier to conquer hills or ride longer distances.

Are there any safety precautions I should be aware of before riding the X-Treme Rocky Road Electric Bike?

Before riding the electric bike, it’s important to follow safety precautions. Use proper riding techniques, such as maintaining balance and using hand signals. Regular maintenance is also crucial, including checking tire pressure, brakes, and keeping the bike clean.

Conclusion

After following the simple steps to turn on the X-Treme Rocky Road electric bike, I was ready to hit the road in no time.

Advertisement

The unpacking and assembly process was a breeze, and locating the power button was a piece of cake.

Once I ensured the battery was fully charged, I pressed and held the power button, anxiously waiting for the display screen to turn on.

As I mounted the bike and tested the motor and pedal assist function, I couldn’t help but feel a rush of excitement.

Operating the brakes and gears was a smooth experience, and before I knew it, I was off on an exhilarating ride.

The X-Treme Rocky Road electric bike truly delivers an unmatched experience, combining power, comfort, and style.

Advertisement

Continue Reading
Advertisement

Affiliate disclaimer

As an affiliate, we may earn a commission from qualifying purchases. We get commissions for purchases made through links on this website from Amazon and other third parties.

About us

We are a passionate team driven by the belief that cycling is a fantastic and accessible way to stay active while enjoying the beauty of the outdoors. Our mission is to share our love for cycling with as many people as possible. We provide a welcoming environment for individuals of all ages, abilities, and backgrounds to come together and ride bikes. With Ralf’s visionary leadership, Zane’s expertise in cycling adventures, and Olivia’s dedication to community building, we strive to create a vibrant space where everyone can experience the joy of cycling. Through group rides, workshops, and inclusive events, we inspire and empower individuals to embrace an active lifestyle. Join us in our quest to pedal together, embrace the joy of cycling, and foster connections that last a lifetime.

Advertisement

Trending