
So you think you have what it takes to build your own electric bike motor, huh? Well, buckle up and get ready to embark on a thrilling journey of engineering and craftsmanship.
In this article, I’ll guide you through the process of understanding the basics, selecting the right components, gathering the necessary tools, preparing the bike frame, installing the motor, and even maintaining and troubleshooting your creation.
By the end, you’ll be cruising the streets on your very own DIY electric bike motor. Let’s get started.
Key Takeaways
- Electric bike motors consist of components such as the motor, controller, battery, and sensors.
- When selecting components, consider options such as motor type (hub, mid-drive, etc.), battery capacity and charging options, and controller durability and programmable features.
- The installation process involves preparing the bike frame, properly attaching and aligning the motor, battery, and controller, and making secure wiring connections.
- Regular maintenance and troubleshooting are essential for ensuring the optimal performance of the electric bike motor, including inspection, cleanliness, lubrication, and checking battery connection, charge level, and faulty components.

Young Electric E-Bike Rack with Ramp, Hitch 2 Bike Rack, 200 lbs Capacity Electric Bike Carrier, Foldable Platform Mount for Cars, Trucks, SUVs, Minivans, Up to 5-Inch Fat Tire for 2'' Receiver
200LBS CAPACITY & V-GROOVE RAMP: The electric bike rack weighing 66 pounds is built with durable steel and...
As an affiliate, we earn on qualifying purchases.
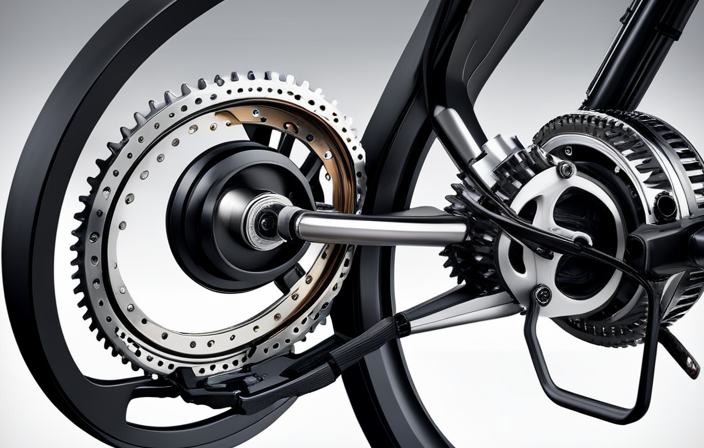
Understand the Basics of Electric Bike Motors
To understand the basics of electric bike motors, it’s important to familiarize yourself with their components and how they work. The motor is the heart of the electric bike, responsible for providing power and propulsion. It consists of several key components, including the motor itself, the controller, the battery, and the sensors.
The motor maintenance is crucial to ensure the longevity and optimal performance of your electric bike. Regularly inspect the motor for any signs of wear or damage. Keep it clean and free from debris, as this can affect its efficiency. Lubricate the moving parts as recommended by the manufacturer to prevent friction and prolong its lifespan.
When it comes to troubleshooting, there are a few common issues you may encounter with electric bike motors. If the motor fails to start, check the battery connection and ensure it is fully charged. If the motor is running but lacks power, it could be due to a faulty controller or a worn-out battery. In such cases, it is recommended to consult a professional for further diagnosis and repair.
By understanding the components and maintenance of electric bike motors, you can troubleshoot and address any issues that may arise.
Now that we have covered the basics of electric bike motors, let’s move on to the next section, where we will discuss how to select the right components for your electric bike build.

WEIZE 700C Hybrid Bike for Adults, 14 Speed Road Bike, City Commuter Bicycle with Caliper Brakes, High-Carbon Steel Racing Adult Bike, Urban Adult Bicycle for Men and Women, White
Caliper brake system: The hybrid bike adopts a dual caliper brake design, making daily maintenance more convenient and...
As an affiliate, we earn on qualifying purchases.
Select the Right Components
When it comes to selecting the right components for an electric bike, there are three key points to consider: motor options, battery options, and controller options.
Motor options refer to the different types and sizes of motors available, each with their own power output and performance characteristics.
Battery options involve choosing the right type and capacity of battery to provide the desired range and power for the electric bike.
Lastly, controller options pertain to the electronic device that regulates the power flow between the battery and motor, allowing for precise control and customization of the electric bike’s performance.
Motor Options
You can choose from a variety of motor options for your electric bike. When selecting a motor, it’s important to consider factors such as motor efficiency and motor torque to ensure optimal performance.
Here are some key options to consider:
-
Hub Motors: These motors are located in the wheel hub and provide a smooth and quiet ride. They are easy to install and maintain.
-
Mid-Drive Motors: These motors are mounted near the bike’s crankshaft, providing better weight distribution and improved handling. They offer high torque for tackling steep hills.
-
Geared Motors: These motors have a gearbox that enhances torque output and efficiency. They are compact and lightweight.
-
Direct Drive Motors: These motors offer high efficiency and require less maintenance. They provide a natural riding experience with minimal resistance.
-
Brushless Motors: These motors use magnets instead of brushes, resulting in less friction and higher efficiency.
Now that we have explored the motor options, let’s move on to discussing the different battery options for your electric bike.
Battery Options
Consider the various battery options available for your e-bike to ensure optimal performance and range. When choosing a battery, it’s important to consider its capacity and charging options.
Battery capacity refers to the amount of energy it can store, which directly affects the range of your e-bike. Higher capacity batteries will allow you to go further without needing to recharge.
Additionally, it’s crucial to consider the charging options available for your battery. Some batteries can be charged using a standard electrical outlet, while others may require a specialized charging station. Understanding your charging options will help you plan your rides and ensure that your battery is always ready to go.
Now let’s move on to discussing the next component of your e-bike: the controller options.
Controller Options
To optimize your e-bike’s performance, it’s essential to explore the available controller options. The controller is a vital component that regulates the power flow from the battery to the motor.
When choosing a controller, it’s important to consider its durability and programmable features. Durable controllers are designed to withstand the rigors of daily use and offer long-lasting performance. Programmable controllers, on the other hand, allow you to customize the settings to match your riding preferences. With a programmable controller, you can adjust parameters such as acceleration, top speed, and throttle response to suit your needs. These features provide a more personalized riding experience.
Now that you understand the importance of selecting the right controller, let’s move on to gathering the necessary tools for the next step.

AVASTA 700C Road Adult Step-Over Hybrid Bike Bicycle for Men Woman Male Female,Lightweight Aluminum Alloy Frame with 21-Speed Gearing for City Commuting,Dual Disc Brakes,19 inch Frame,Chameleon Grey
🚴♂️【Durable Aluminum Alloy Frame】This lightweight yet strong frame is built to last, offering a perfect balance of durability...
As an affiliate, we earn on qualifying purchases.
Gather the Necessary Tools
First, make sure you’ve got all the necessary tools for building your electric bike motor. Here are three essential tools you’ll need:
-
Allen wrench set: This set includes different sizes of Allen wrenches that are required for assembling the motor components. It is important to have a set with a variety of sizes to ensure a proper fit and secure connection.
-
Screwdriver set: A set of screwdrivers with different types and sizes is essential for removing and tightening screws during the motor installation process. Make sure to have both flathead and Phillips screwdrivers to accommodate different screw types.
-
Multimeter: Understanding motor specifications is crucial for troubleshooting common motor issues. A multimeter is a versatile tool that allows you to measure voltage, current, and resistance. It can help you diagnose problems such as faulty connections or motor malfunctions.
With these tools in hand, you’ll be well-equipped to tackle the construction of your electric bike motor.
Now, let’s transition into the next section where we will discuss how to prepare the bike frame for the motor installation.

Schwinn Wayfarer Hybrid Bike, 700c Mens and Womens Bike, 7-Speed Hybrid Bicycle, Retro Steel Frame, Front and Rear Linear Pull Brakes, Fenders, Cargo Space, Adult Bicycle
HYBRID BICYCLE: Ride in comfort and vintage style with the Wayfarer by Schwinn. With 700c wheels, this mens...
As an affiliate, we earn on qualifying purchases.
Prepare the Bike Frame
Make sure you have a sturdy and stable bike frame that can support the weight and movement of the motor. Before installing the motor, it is essential to prepare the bike frame to ensure optimal performance and safety. This involves conducting a thorough inspection of the frame and making any necessary modifications.
One important aspect of bike frame preparation is ensuring that the frame is free from any damage or structural weaknesses. Check for any cracks, dents, or signs of wear and tear that could compromise the integrity of the frame. If any issues are detected, it is crucial to address them before proceeding with the motor installation.
In addition to inspecting the frame, certain modifications may need to be made to accommodate the motor. This could include adding mounting brackets or reinforcements to ensure a secure attachment. It is important to follow the manufacturer’s guidelines and specifications when making these modifications to ensure compatibility and safety.
To provide a clear overview, here is a table summarizing the steps for bike frame preparation:
| Steps | Description |
|---|---|
| Frame inspection | Thoroughly inspect the bike frame for any damage or weaknesses. |
| Address any issues | Repair or replace any damaged components to ensure frame integrity. |
| Modify the frame | Make any necessary modifications to accommodate the motor. |
| Follow manufacturer’s guidelines | Adhere to the specifications provided by the motor manufacturer. |
| Ensure compatibility | Confirm that the modifications are compatible with the motor. |
Install the Motor
Once you have completed the necessary preparations, it’s time to attach the motor to your bike frame. Before doing so, you need to determine the ideal placement for the motor. This will depend on factors such as the type of bike you have and the desired balance and weight distribution. Generally, the motor is mounted near the bottom bracket or the rear wheel hub.
To secure the motor in place, start by removing the bottom bracket of your bike frame. This will provide a space for the motor to fit snugly. Next, attach the motor to the frame using the mounting brackets provided with the kit. Make sure to align the motor properly with the bike’s chain and gears for optimal performance. Use a torque wrench to tighten the bolts securely, ensuring that the motor is firmly in place.
With the motor securely attached to the bike frame, you can now move on to the next step, which is to install the battery. This will provide the power needed to run the motor and propel your electric bike forward.
Install the Battery
Now that the motor is securely attached to the bike frame, you can proceed to install the battery. The battery is a crucial component of the electric bike, as it provides the power needed to operate the motor. Proper placement and connection of the battery are essential for optimal performance.
To install the battery, follow these steps:
| Step | Instructions |
|---|---|
| 1 | Locate the battery mount on the bike frame. This is usually located towards the rear of the bike, near the seat tube. |
| 2 | Attach the battery mount securely to the bike frame using the provided screws or straps. Make sure it is tightly fastened to prevent any movement during rides. |
| 3 | Carefully place the battery onto the mount, ensuring that it is aligned properly. The battery should fit snugly into the mount without any loose parts. |
| 4 | Connect the battery cables to the corresponding connectors on the motor. This is usually a simple plug-and-play process, with connectors that are designed to fit together easily. |
| 5 | Double-check all connections to ensure they are secure and tight. Test the battery by turning on the bike’s power switch and verifying that the motor is receiving power. |
With the battery securely installed, you are now ready to move on to the next step: installing the controller. This component is responsible for regulating the power flow from the battery to the motor, ensuring smooth and efficient operation.
Install the Controller
When installing the controller for my electric bike motor, there are three key points to consider.
Firstly, I need to carefully determine the ideal location for the controller. This involves considering factors such as accessibility and protection from the elements.
Once the placement is decided, I will secure the controller firmly using suitable mounting brackets or straps. This ensures that the controller stays in place and doesn’t move during operation.
Determine Controller Placement
You’ll want to consider the best placement for the controller when building an electric bike motor. The controller mounting is a crucial step in ensuring the smooth functioning of your electric bike.
The ideal location for the controller is near the bike’s battery, as this allows for shorter wiring connections. It is essential to secure the controller in a position that is protected from water, dust, and other potential hazards. Additionally, ensure that the controller is easily accessible for maintenance purposes.
When it comes to controller wiring, it is crucial to follow the manufacturer’s instructions carefully. Make sure to use appropriate gauge wires and connectors to ensure proper electrical connections.
Once the controller placement and wiring are complete, you can move on to securing the controller in place, ensuring its stability during the operation of your electric bike motor.
Secure Controller in Place
To ensure stability during operation, it is important to secure the controller in a position that is protected from potential hazards. The controller, being a crucial component of the electric bike motor system, needs to be positioned properly for optimal performance and safety. Factors such as accessibility for maintenance and protection from water, dust, and extreme temperatures should be considered when determining the controller position. Once the ideal location is identified, sturdy mounting brackets or straps should be used to secure the controller in place. It is advisable to avoid placing the controller near moving parts or areas prone to vibrations. Additionally, it is essential to ensure that the controller wiring is properly secured to prevent any loose connections or potential damage. By taking these precautions, the longevity and reliability of the electric bike motor system can be guaranteed.
Now that the controller is securely in place, it’s time to connect it to the motor and battery.
Connect Controller to Motor and Battery
Now that the controller is securely in place, it’s time for me to connect it to the motor and battery. Here are the steps to follow:
-
Check the compatibility: Ensure that the controller is compatible with the motor and battery. Refer to the manufacturer’s specifications to avoid any issues later on.
-
Controller troubleshooting tips: Before connecting, it’s wise to familiarize yourself with common troubleshooting tips. This will help you identify and resolve any potential issues that may arise during the connection process.
-
Battery charging techniques: Make sure the battery is fully charged before connecting it to the controller. Follow the recommended charging techniques provided by the battery manufacturer to maximize its lifespan and performance.
-
Proper wiring connection: Connect the controller to the motor and battery following the wiring diagram provided by the manufacturer. Double-check the connections to ensure they are secure and correctly aligned.
By following these steps, you can successfully connect the controller to the motor and battery.
Now, let’s move on to the next section and explore how to connect the wiring without any complications.
Connect the Wiring
First, make sure all the necessary wires are securely connected to the electric bike motor. Proper wiring is crucial for the functioning of the motor and to avoid potential problems. Let’s discuss some troubleshooting tips and common wiring mistakes to help you avoid any issues.
| Common Wiring Mistakes | Troubleshooting Tips |
|---|---|
| Loose connections | Check all wire connections and ensure they are tight. |
| Incorrect wire gauge | Use the appropriate wire gauge for your motor’s power requirements. |
| Reverse polarity | Double-check the polarity of the wires and make sure they are connected correctly. |
| Damaged wires | Inspect the wires for any signs of damage, such as cuts or fraying. Replace any faulty wires. |
| Poor insulation | Ensure that all wires are properly insulated and protected from potential damage. |
By being aware of these common wiring mistakes and following the troubleshooting tips, you can ensure a smooth and efficient connection for your electric bike motor.
Now that we have the wiring securely connected, it’s time to test the electric bike motor and make sure everything is working as it should.
Test the Electric Bike Motor
Make sure you give the throttle a gentle twist to test the functionality of the motor. This step is crucial in ensuring that your electric bike motor is working properly.
Here are some important points to consider when testing your motor:
-
Check for any abnormal sounds or vibrations coming from the motor. This could indicate a problem that needs to be addressed.
-
Monitor the motor’s performance, such as how quickly it accelerates and reaches top speed. Any inconsistencies in speed or power delivery may require further investigation.
-
Pay attention to the responsiveness of the motor to throttle inputs. It should smoothly and promptly respond to changes in throttle position.
-
Test the motor under various load conditions, such as going uphill or carrying heavy loads. This will help you assess its overall performance and determine if any adjustments are needed.
-
Keep an eye on the motor’s temperature. If it becomes excessively hot during the test, it could be a sign of a malfunction or inadequate cooling.
By thoroughly testing your electric bike motor, you can identify and address any issues before they become major problems. This will help ensure the longevity and reliability of your motor.
Once you have completed the testing phase, you can move on to fine-tuning the system to optimize its performance.
Fine-Tune the System
When it comes to fine-tuning the electric bike system, there are a few key points to consider.
First, adjusting the power and speed settings is crucial to ensure optimal performance. By finding the right balance, you can maximize efficiency and control.
Once the settings are adjusted, it’s important to take the bike for a test ride and make any necessary adjustments based on your riding experience. This hands-on approach will allow you to fine-tune the system to your specific needs and preferences.
Adjust Power and Speed Settings
To adjust the power and speed settings, you’ll need to access the control panel on the electric bike motor. This control panel allows you to customize the power output and speed of your electric bike, giving you full control over your riding experience. Here is a table that explains the different power and speed settings available:
| Power Setting | Speed Setting |
|---|---|
| Low | Slow |
| Medium | Moderate |
| High | Fast |
Test Ride and Make Adjustments
After adjusting the power and speed settings, take the electric bike for a test ride to ensure the adjustments are satisfactory. During the test ride, pay close attention to the performance and responsiveness of the bike.
Start by riding on flat terrain, gradually increasing the speed to test the acceleration. Observe if the modifications have optimized the performance, allowing for a smoother and more efficient ride. If necessary, make further adjustments to the power and speed settings to achieve the desired outcome.
Additionally, evaluate the bike’s handling and stability when turning and braking. Take note of any issues or areas that require improvement. This test ride will provide valuable feedback and help fine-tune the electric bike’s performance.
Now, let’s move on to ensuring safety measures are in place to protect both the rider and the bike.
Ensure Safety Measures
When building an electric bike motor, it’s crucial to prioritize safety. To ensure a safe riding experience, it’s important to install safety features such as a reliable braking system and proper lighting.
Additionally, checking for proper wiring insulation and wearing protective gear such as a helmet and gloves can greatly reduce the risk of accidents and injuries.
Install Safety Features
Make sure you’ve installed the necessary safety features before proceeding with the electric bike motor build. Safety features for electric bike motors are of utmost importance to ensure the rider’s well-being. The implementation of these features is essential to prevent accidents and maintain a safe riding experience.
Here are some key safety features to consider:
-
Brake sensors: These sensors detect when the rider applies the brakes, sending a signal to the motor to cut off power, ensuring a quick and smooth stop.
-
Throttle control: A throttle control allows the rider to adjust the speed of the electric bike motor, ensuring better control and preventing sudden acceleration.
-
Battery management system: This system monitors the battery’s voltage and temperature, preventing overcharging or overheating, which can lead to safety hazards.
When installing these safety features, it is crucial to adhere to safety certifications and standards for electric bike motors.
Now, let’s move on to checking for proper wiring insulation to ensure a secure and reliable electric bike motor build.
Check for Proper Wiring Insulation
To ensure a safe and reliable ride, check if your wiring insulation is properly secured. Faulty connections and improper grounding can lead to electrical malfunctions and potential accidents. Here is a visual representation of the key points to consider:
| Wiring Insulation |
|---|
| Check for cracks or breaks in the insulation |
| Ensure all wires are properly connected and insulated |
| Use electrical tape or heat shrink tubing to secure any exposed wires |
By examining your wiring insulation, you can identify any areas that may require attention. Look for cracks or breaks in the insulation, as these can leave wires exposed and vulnerable to damage. Additionally, make sure all connections are secure and insulated to prevent any loose or exposed wires. If you notice any issues, use electrical tape or heat shrink tubing to reinforce and protect the wiring.
Ensuring proper wiring insulation is just one step towards building an electric bike motor. Another important aspect is to wear protective gear, which will be discussed in the next section.
Wear Protective Gear
After ensuring that the wiring insulation of the electric bike motor is intact and secure, it is crucial to shift our focus towards another vital aspect of building an electric bike motor: wearing protective gear. This step cannot be overlooked, as safety should always be our top priority.
When working with electrical components and potentially hazardous tools, protective gear becomes indispensable. The importance of safety cannot be stressed enough, as it minimizes the risk of accidents and injuries. To ensure maximum protection, there are various options for protective gear available in the market, including helmets, safety glasses, gloves, and sturdy footwear. These items provide essential safeguards against potential hazards such as electrical shocks, flying debris, and impact-related injuries.
Now that we have discussed the importance of safety and protective gear options, let’s move on to the next section, where we will explore how to maintain and troubleshoot the electric bike motor without compromising safety.
Maintain and Troubleshoot
If you’re experiencing issues with your electric bike motor, it’s important to identify and troubleshoot the problem. There are several troubleshooting techniques and maintenance tips that can help you keep your electric bike motor running smoothly.
One common issue with electric bike motors is a sudden loss of power. This could be caused by a variety of factors, such as a loose connection or a worn-out battery. To troubleshoot this problem, you can start by checking all the connections and ensuring they are secure. If the connections are fine, you may need to replace the battery.
Another issue you might encounter is a noisy motor. This could be due to a loose or misaligned chain, or a problem with the gears. To fix this, you can tighten the chain and adjust the gears as needed. It’s also important to regularly clean and lubricate the motor to prevent any buildup of dirt or debris.
Here are some maintenance tips to keep your electric bike motor in top shape:
| Maintenance Tips |
|---|
| Regularly clean and lubricate the motor |
| Check and tighten all connections |
| Replace worn-out parts as needed |
| Keep the battery charged and in good condition |
| Consult the manufacturer’s manual for specific maintenance instructions |
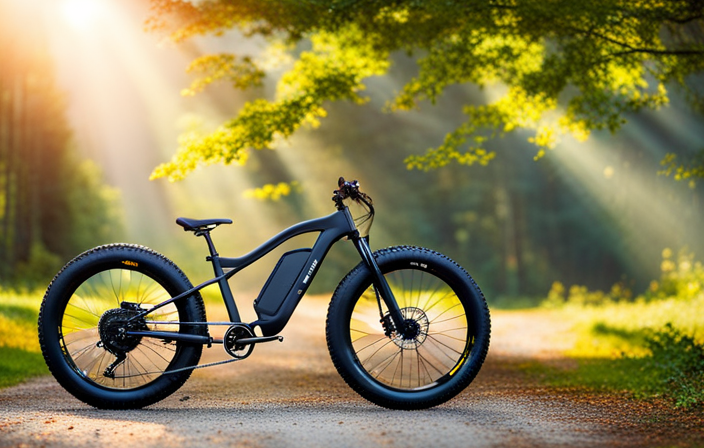
Enjoy Your DIY Electric Bike Motor
To fully enjoy your DIY electric bike, make sure you take the time to explore different routes and terrains. Here are three reasons why you should do so:
-
Enhanced Power and Speed: With a DIY electric bike motor, you can experience a significant boost in power and speed compared to a traditional bike. Electric bike motors, especially those from DIY electric bike kits, offer various power levels and assist modes, allowing you to effortlessly conquer hills and cover longer distances in less time.
-
Extended Range: Electric bike motors provide an extra source of power, allowing you to ride for longer distances without getting fatigued. By exploring different routes and terrains, you can test the limits of your DIY electric bike’s range and discover how far it can take you. This opens up new possibilities for adventure and exploration.
-
Enjoyable Riding Experience: Riding a DIY electric bike is a unique and enjoyable experience. The smooth and silent operation of electric bike motors adds to the overall pleasure of riding. Exploring different routes and terrains allows you to fully appreciate the benefits of electric bike motors, such as effortless pedaling and a reduced impact on your joints.
Share Your Experience
Don’t forget to share your experience of exploring different routes and terrains on your DIY electric bike with the rest of the community. Building my own electric bike motor has been an exciting journey, but it hasn’t been without its challenges.
From sourcing the right components to assembling them correctly, there were definitely some building challenges along the way. However, the satisfaction of seeing my creation come to life and the freedom it has given me on the road makes it all worth it.
One of the most rewarding aspects of building my own electric bike motor was finding cost-effective solutions. By researching and comparing prices, I was able to source affordable components without compromising on quality. I discovered alternative suppliers and even repurposed some old parts, saving me money in the process. This allowed me to invest in other essential components, such as a high-capacity battery or a more powerful motor, enhancing the performance of my electric bike.
Sharing my experience with the community is important because it allows others to learn from my triumphs and challenges. By discussing the building process, the difficulties faced, and the cost-effective solutions found, we can inspire and support each other in our DIY electric bike motor projects. It’s through these shared experiences that we can continue to improve and innovate in this exciting field.
Considering legal and regulatory requirements is the next crucial step in the journey of building your own electric bike motor. It’s important to familiarize yourself with local laws and regulations regarding electric bikes.
Consider Legal and Regulatory Requirements
Considering legal and regulatory requirements, it’s crucial to familiarize yourself with the local laws and regulations surrounding DIY electric bike motors. When building your own electric bike motor, it is important to ensure legal compliance and adhere to safety regulations.
First and foremost, it is essential to check the legal requirements in your area for operating electric bikes. Some jurisdictions may require registration and licensing for electric bikes, while others may have specific regulations regarding speed limits or age restrictions. Familiarize yourself with these laws to avoid any legal complications.
In addition to legal compliance, safety regulations should be a top priority. When building an electric bike motor, it is crucial to use high-quality components that meet safety standards. This includes choosing a reliable motor, battery, and controller that have been tested and certified for safety. It is also important to properly install and secure these components to ensure they function correctly and safely.
Furthermore, it is recommended to wear appropriate safety gear while operating an electric bike, such as a helmet and protective clothing. Following traffic laws and practicing safe riding habits, such as signaling turns and obeying speed limits, is also crucial for the safety of yourself and others.
Frequently Asked Questions
What are the legal and regulatory requirements for building and using an electric bike motor?
To legally build and use an electric bike motor, you must comply with certain legal and regulatory requirements. These include meeting specific power limits, having a valid license or registration, and adhering to safety standards and traffic laws.
How can I ensure the safety of myself and others while using an electric bike motor?
To ensure safety while using an electric bike motor, it is crucial to follow safety precautions and wear proper gear. This includes wearing a helmet, using reflective clothing, and familiarizing oneself with the motor’s controls and limitations.
What are some common troubleshooting issues that may arise when building and using an electric bike motor?
Some common motor issues that may arise when using an electric bike motor include overheating, loss of power, and noise. Troubleshooting solutions for these issues involve checking the wiring, inspecting the battery, and adjusting the motor settings.
Can you provide tips and recommendations for maintaining an electric bike motor?
To keep your electric bike motor running smoothly, regular maintenance is essential. Here are some maintenance tips: lubricate the chain regularly, check tire pressure, clean the motor with a soft cloth, and use recommended tools like a torque wrench for proper adjustments.
Are there any specific recommendations or guidelines for sharing my experience in building and using an electric bike motor?
When sharing experiences in building and using an electric bike motor, it is important to provide detailed information about the techniques used. This helps others understand the process and replicate the results successfully.
Conclusion
Well, congratulations on successfully building your own electric bike motor! I hope you enjoyed the process as much as I did writing this informative guide.
Now that you have your DIY masterpiece, it’s time to hit the road and experience the joy of riding with an electric boost. Just remember to double-check all the legal and regulatory requirements before you embark on your adventures.
Happy riding, and remember to always wear a helmet!