As an avid electric bike enthusiast, I understand the frustration of dealing with faulty connectors on the battery. But fear not, because I have the perfect solution for you.
In this article, I will guide you through the step-by-step process of fixing the connectors on your electric bike battery. By following these instructions, you’ll be able to enjoy a fully functional electric bike once again, without any hiccups along the way.
So, let’s dive in and get those connectors back in top shape!
Key Takeaways
- Regularly check and maintain the electrical system of your electric bike to prevent further damage and ensure its proper functioning.
- Upgrade connectors for enhanced durability, improved performance, and reduced maintenance time.
- Conduct visual inspections, clean connectors, and ensure proper alignment and secure fastening for effective maintenance and inspection of connectors.
- Seek professional help for accurate diagnosis of complex issues and to ensure safety and longevity of the electric bike battery.

Under Armour Squeeze Water Bottles, 32 oz Water Bottles, Sideline Sports Water Bottle with Quick-Shot Lid, Quick & Easy Hydration, Gym Water Bottles, Squeeze Bottle, 1 32oz Bottle
- Easy Hydration: Quick-shot lid and one-way valve
- On-the-Go Use: One-hand operation for active hydration
- Measurement Markings: Ounces and milliliters for tracking
As an affiliate, we earn on qualifying purchases.
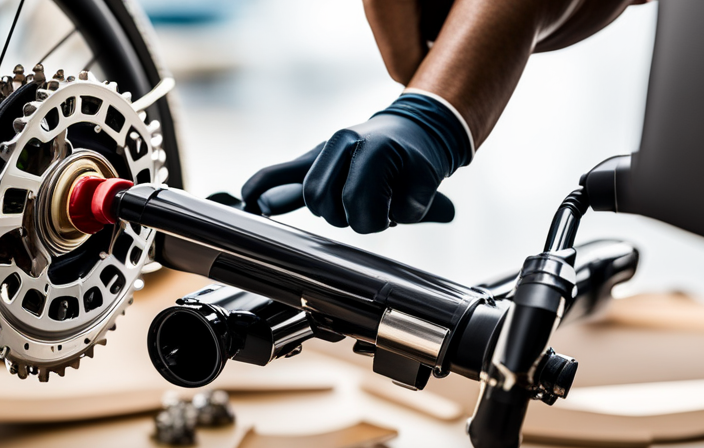
Identify the Issue with the Connectors
First, check if the connectors aren’t properly plugged in. This is a common issue that can cause a malfunction in an electric bike battery.
To troubleshoot the problem, start by visually inspecting the connectors. Look for any loose or disconnected wires. Ensure that the connectors are securely plugged into their respective ports.
If everything appears to be in order, use a multimeter to test the voltage across the connectors. A reading of zero volts indicates a complete lack of connection. In this case, the cause of the issue is likely a faulty connector or a broken wire.
To gather the necessary tools and materials for the next step, such as a multimeter and replacement connectors, you will need to visit a local hardware store or order them online.
Gather the Necessary Tools and Materials
Next, gather all the tools and materials you’ll need for the task.
To repair the connectors on your electric bike battery, you will require a few specific tools and battery materials.
First, make sure you have a set of wire strippers and crimping pliers. These will be essential for removing the old connectors and installing new ones.
Additionally, you’ll need a soldering iron and solder to ensure a secure connection.
Don’t forget to have heat shrink tubing and a heat gun on hand to provide insulation and protect the repaired connectors from moisture and other elements.
Lastly, be sure to have replacement connectors or terminal ends ready for installation.
Now that we have all the necessary tools and materials, it’s time to disconnect the battery from the electric bike.
Disconnect the Battery from the Electric Bike
To safely proceed with the disconnection process, you should begin by turning off the power switch on your electric bike. This step is crucial to avoid any accidental electric shocks or short circuits.
Once the power is off, locate the battery compartment and carefully remove the battery. It’s important to handle the battery with caution, as it may be heavy and sensitive. Disconnect the connectors by gently pulling them apart, ensuring not to damage any wires or connectors in the process.
After the battery is disconnected, you can proceed to recharge it using a compatible charger. Recharging the battery regularly and properly can help extend its overall lifespan and maximize its performance.
Now, let’s move on to the next step and inspect the connectors for any damage or loose connections.
Inspect the Connectors for Damage or Loose Connections
Now, take a close look at the connectors to see if there’s any damage or if any of them are loose. This step is crucial for ensuring the proper functioning of your electric bike battery.
Here are the key things to look for:
-
Check for physical damage: Inspect the connectors for any signs of cracks, breaks, or excessive wear. Damaged connectors can result in poor electrical contact and potential power loss.
-
Test for loose connections: Gently wiggle each connector to see if any of them are loose. Loose connections can cause intermittent power loss and affect the overall performance of your electric bike.
-
Replace damaged connectors: If you find any connectors that are damaged or loose beyond repair, it’s important to replace them. This will prevent future issues and ensure a secure and reliable connection.
By inspecting the connectors for damage or loose connections, you can identify any potential problems and take proactive measures to prevent future issues.
Now, let’s move on to the next step: cleaning the connectors and removing any corrosion.
Clean the Connectors and Remove any Corrosion
After inspecting the connectors for damage or loose connections, it’s time to clean them and remove any corrosion. Cleaning the connectors is an essential step in maintaining the performance and longevity of your electric bike battery.
To start, gather some cleaning materials such as a soft cloth, rubbing alcohol, and a small brush or toothpick for hard-to-reach areas. Begin by disconnecting the battery from the bike and removing any dust or debris from the connectors using the brush or toothpick.
Next, dampen the cloth with rubbing alcohol and gently wipe the connectors to remove any dirt or grime. Be sure to pay attention to the contact points and ensure they are thoroughly cleaned.
Once the connectors are clean, it’s crucial to take preventive measures to avoid future corrosion. Applying a thin layer of dielectric grease to the connectors can help protect them from moisture and oxidation. This will significantly reduce the risk of corrosion and ensure a reliable connection.
Repair or Replace Damaged Connectors
After thoroughly cleaning the connectors and removing any corrosion, I examined the connectors on my electric bike battery and discovered some damage.
It is crucial to repair or replace damaged connectors to ensure a secure and reliable connection between the battery and the bike’s electrical system.
To begin the repair process, I carefully removed the damaged connectors using a pair of wire cutters and stripped the insulation from the wires.
Next, I obtained new connectors that were compatible with my electric bike battery and soldered them onto the stripped wires. This step guarantees a strong and durable connection.
By taking the time to repair or replace damaged connectors, I can prevent future issues and maintain the optimal performance of my electric bike.
Now, let’s move on to reconnecting the battery to the electric bike.
Reconnect the Battery to the Electric Bike
To ensure a secure and reliable connection, it’s essential to reattach the battery to the electric bike. Follow these reconnecting steps to ensure proper functioning.
- Start by locating the battery compartment on your electric bike.
- Open the compartment and locate the connectors on both the battery and the bike.
- Align the connectors and firmly push them together until they are securely connected.
- Ensure that there are no loose or damaged wires.
If you encounter any difficulties during this process, try troubleshooting tips such as cleaning the connectors with a dry cloth or checking for any obstructions.
Once the battery is reconnected, you can proceed to the next step to test the connection and ensure proper functioning.
Test the Connection and Ensure Proper Functioning
Once you’ve reattached the battery to the electric bike, it’s important to test the connection and make sure everything is functioning properly. Proper maintenance is crucial to ensure the longevity and optimal performance of your electric bike.
Testing the connection is a vital step in this process. One common sign of connector issues is a weak or intermittent power supply to the bike’s components. To test the connection, start by turning on the bike and checking if all the electrical systems are working correctly. Pay close attention to the lights, motor, and any other electrically powered features.
If you notice any issues such as flickering lights or a lack of power, it may indicate a problem with the connection. In such cases, it is essential to address the issue promptly to prevent further damage.
To secure the connectors and prevent future issues, follow the next section’s instructions.
Secure the Connectors to Prevent Future Issues
Make sure you securely fasten the connectors to avoid any potential future problems.
When dealing with connectors on your electric bike battery, it is crucial to take preventive measures to ensure a reliable and long-lasting connection.
One common issue that can arise is corrosion, which can lead to poor conductivity and ultimately affect the performance of your battery.
To prevent corrosion, it is recommended to use electrical tape. After properly connecting the wires, wrap electrical tape tightly around the connectors. This will create a barrier against moisture and other corrosive elements, effectively protecting the connection.
Consider Upgrading to More Reliable Connectors
If you frequently experience issues with your current connections, you might want to consider upgrading to more reliable options. Upgrading benefits include improved durability, enhanced performance, and better compatibility with other components.
Here are four reasons why upgrading your connectors can be beneficial:
-
Enhanced durability: More reliable connectors are designed to withstand harsh conditions, ensuring long-lasting performance and reducing the risk of damage or failure.
-
Improved performance: Upgrading to compatible connectors can optimize the flow of electricity, minimizing power loss and maximizing the efficiency of your electric bike battery.
-
Better compatibility: Upgraded connectors often offer broader compatibility with different types of batteries and charging systems, allowing for easier integration and flexibility.
-
Reduced maintenance: With more reliable connectors, you’ll experience fewer connection issues, resulting in less time spent on troubleshooting and maintenance.
Regularly Maintain and Inspect the Connectors
To ensure optimal functionality, I regularly inspect and maintain my connectors. Preventive maintenance is key to avoiding potential issues with my electric bike battery.
When it comes to connectors, I start by visually inspecting them for any signs of damage or wear. I check for loose connections and ensure that the connectors are clean and free from dirt or corrosion. Regularly cleaning the connectors with a mild detergent and a soft brush helps to maintain their performance. Additionally, I make sure that the connectors are properly aligned and securely fastened.
By taking these preventive maintenance measures, I can troubleshoot common connector problems more effectively and minimize the risk of any electrical issues in the future.
Now, let’s explore some common connector problems and how to troubleshoot them.
Troubleshoot Common Connector Problems
After regularly maintaining and inspecting the connectors on my electric bike battery, I now turn my attention to troubleshooting common connector problems.
When dealing with connectors, it is important to be equipped with effective troubleshooting techniques. One of the most common issues is loose or corroded connectors. To address this, I start by ensuring that the connectors are securely tightened and free from any dirt or residue. If the problem persists, I carefully clean the connectors using a suitable contact cleaner.
Another common problem is bent or damaged pins. In such cases, I gently straighten the pins using a small tool or replace them if necessary. Additionally, I check for any signs of wear or fraying in the wires connected to the connectors.
Seek Professional Help if Necessary
When connectors on my electric bike battery become persistently problematic, seeking professional help is the best course of action. Despite my knowledge and experience in troubleshooting common issues, there are times when the problem exceeds my capabilities.
Seeking professional advice ensures that the issue is diagnosed accurately and efficiently. Professionals have the expertise and specialized tools to identify and resolve complex connector problems. They can also provide valuable insights on how to prevent future issues.
It is important to recognize that, while I may be able to troubleshoot some common problems, there are instances where seeking professional help is necessary. By doing so, I can ensure the safety and longevity of my electric bike battery.
Speaking of safety, it is crucial to follow precautions when working with electric bike batteries to avoid accidents and injuries.
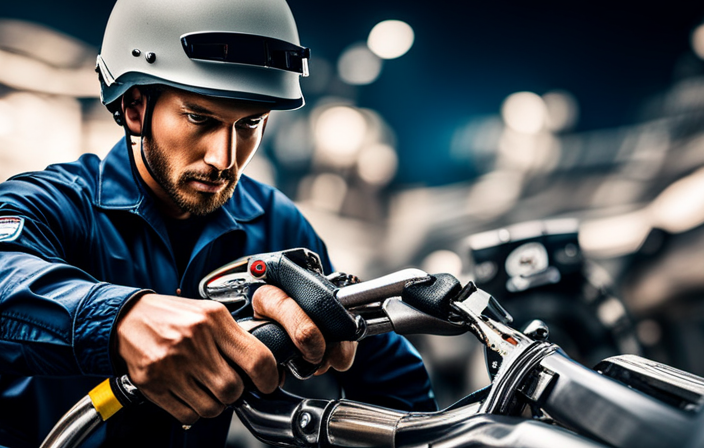
Follow Safety Precautions when Working with Electric Bike Batteries
Always remember to follow safety precautions when working with your e-bike’s battery. Safety measures are crucial to avoid accidents and ensure your well-being.
Firstly, make sure to wear protective gear such as gloves and goggles to protect yourself from any potential hazards.
Secondly, before working on the battery, disconnect it from the power source and remove the key to prevent any accidental activation.
Additionally, ensure that the area you’re working in is well-ventilated to avoid exposure to harmful fumes.
Lastly, handle the battery with care, avoiding any rough or forceful handling that could result in damage or injury.
Enjoy Your Fully Functional Electric Bike!
You can now fully enjoy your e-bike, knowing that it is in perfect working condition. To enhance your riding experience even further, consider upgrading your battery capacity and improving battery charging speed. By upgrading the battery capacity, you can extend the distance you can travel on a single charge. This can be especially beneficial for longer rides or when riding in hilly terrain. Additionally, improving battery charging speed can reduce the time it takes to fully charge your battery, allowing you to spend more time riding and less time waiting. To help you understand the benefits of these upgrades, here is a table outlining the potential improvements:
| Upgrade | Benefits |
|---|---|
| Upgrading Battery Capacity | Extended travel distance, especially for longer rides |
| Improving Charging Speed | Reduced charging time, more time spent riding |
Frequently Asked Questions
How do I identify the issue with the connectors on my electric bike battery?
To identify issues with the connectors on an electric bike battery, start by inspecting for loose connections or corrosion. Use a multimeter to check for continuity and ensure proper voltage. Troubleshooting common connector issues may involve tightening connections or replacing damaged connectors.
What tools and materials do I need to gather before fixing the connectors?
To fix faulty connectors on an electric bike battery, I need a multimeter to identify the issue and troubleshoot the connector problems. Additionally, I’ll gather a set of wire cutters, heat shrink tubing, and a soldering iron for repairs.
What are some common connector problems that I might encounter?
Some common connector problems that you might encounter include loose connections, corrosion, and damaged pins. To troubleshoot these issues, check for loose or dirty connections, clean corrosion using a wire brush, and replace damaged pins if necessary.
How often should I regularly maintain and inspect the connectors on my electric bike battery?
Regular maintenance and inspection of electric bike battery connectors is crucial for preventing issues. By regularly cleaning and checking for corrosion or loose connections, you can ensure optimal performance and avoid costly repairs.
What safety precautions should I follow when working with electric bike batteries?
When working with electric bike batteries, it is crucial to follow proper safety measures and handle them with care. This includes wearing protective gear, ensuring the battery is turned off, and using insulated tools to prevent electric shocks.
Conclusion
In conclusion, fixing connectors on an electric bike battery can be a simple and rewarding task. By identifying the issue, gathering the necessary tools, and inspecting the connectors for damage or loose connections, you can easily troubleshoot and resolve common problems.
Remember to follow safety precautions and seek professional help if needed. With a thorough cleaning and removal of corrosion, you can enjoy the benefits of a fully functional electric bike.
So, stay savvy, secure your connectors, and savor the smooth ride!