Connect with us

Electric Bike

How To Make Electric Bike Using Self Motor

Published

on

An image showcasing a step-by-step guide on building an electric bike

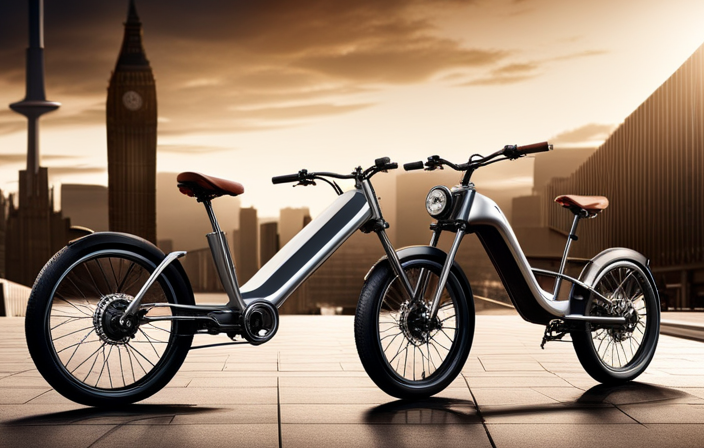
As I pedal down the road, the wind whips through my hair and the thrill of speed courses through my veins. My DIY electric bike, powered by a self motor, is a testament to my ingenuity and passion for innovation.

In this article, I will guide you through the step-by-step process of transforming your ordinary bicycle into an electrifying ride. With the right tools, materials, and a dash of determination, you too can experience the exhilaration of cruising on your very own electric bike.

Let’s get started!

Key Takeaways

  • Gathering the necessary tools and materials is the first step in preparing for the conversion process.
  • Researching and selecting the right motor is crucial for the successful creation of the electric bike.
  • Removing non-essential parts and accessories from the bike frame is necessary to make space for the electric components.
  • Testing and fine-tuning the electric bike is important to ensure optimal performance and functionality.

Gather the Necessary Tools and Materials

Now that you’ve decided to make an electric bike, the first step is to gather all the necessary tools and materials.

Advertisement

When it comes to tools and equipment, you will need a set of basic hand tools such as wrenches, screwdrivers, and pliers for disassembling and reassembling parts. Additionally, you will require specific tools like a torque wrench for precise tightening of bolts and a multimeter for electrical testing.

As for the materials, the most crucial aspect is choosing the right motor for your electric bike. Consider factors like power output, voltage, and compatibility with your bike’s frame. Research different motor options and select one that best suits your needs and preferences.

With the necessary tools and materials at hand, you can now move on to preparing your bike for the conversion process, ensuring a smooth transition.

Prepare Your Bike for the Conversion Process

First, I’ll begin preparing my bike for the conversion process by removing any non-essential parts and accessories, such as fenders or racks, that may interfere with the installation of the electric motor.

Next, I’ll thoroughly clean and inspect the bike frame to ensure it’s in good condition and free from any dirt or debris that could affect the performance of the conversion.

Advertisement

Remove Non-Essential Parts and Accessories

To make your electric bike using a self motor, you’ll need to start by removing any non-essential parts and accessories. This step is crucial to ensure that your bike is optimized for the conversion process.

Begin by identifying components that are not necessary for the functioning of an electric bike, such as fenders, racks, and reflectors. These parts can be set aside for upcycling options or alternative power sources.

Next, remove the pedals, chain, and gears, as they won’t be needed with the self motor. Don’t forget to disconnect the brakes and shifters as well. As you remove these non-essential elements, remember to handle them with care, as they may come in handy for future projects.

Once all unnecessary parts are removed, you can proceed to clean and inspect the bike frame for the next stage of the conversion process.

Clean and Inspect the Bike Frame

After removing non-essential parts and accessories, it’s important to clean and inspect the bike frame thoroughly. Cleaning techniques vary depending on the material of the frame. For aluminum frames, use a mild detergent and water solution to remove dirt and grime. For carbon frames, avoid using harsh chemicals and opt for a gentle cleaning solution.

Advertisement

During the cleaning process, pay close attention to the frame’s welds, joints, and any areas with paint chips or scratches. Inspect for any signs of damage or cracks, as these can compromise the frame’s integrity. Use a flashlight to thoroughly examine hard-to-reach places, such as the bottom bracket and headset areas.

In addition, check the alignment of the frame using a straightedge or laser tool. Ensure that the frame is straight and symmetrical, as any misalignment can affect the bike’s performance.

Once the frame is clean and inspected, it’s time to move on to the next step: installing necessary mounting brackets.

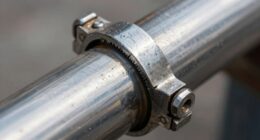
Install Necessary Mounting Brackets

Now that you’ve cleaned and inspected the bike frame, it’s time to install the necessary mounting brackets.

The mounting brackets are crucial for securely attaching the self motor to the frame. There are various mounting bracket alternatives available, such as clamp-on brackets or weld-on brackets, depending on your bike frame and personal preference.

Advertisement

When installing the mounting brackets, it is essential to ensure a proper fit and alignment. Check for any signs of misalignment or looseness, as these can lead to installation issues and affect the overall performance of the electric bike.

Troubleshooting installation issues may involve adjusting the position of the brackets or using additional spacers for a more secure fit.

Once the mounting brackets are properly installed, we can move on to the next step: installing the self motor.

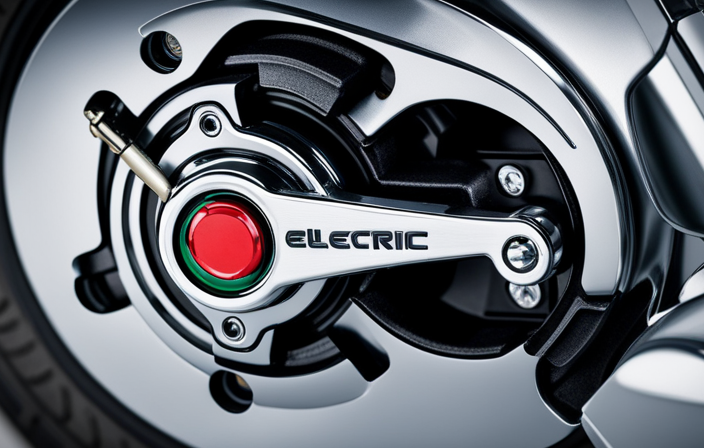
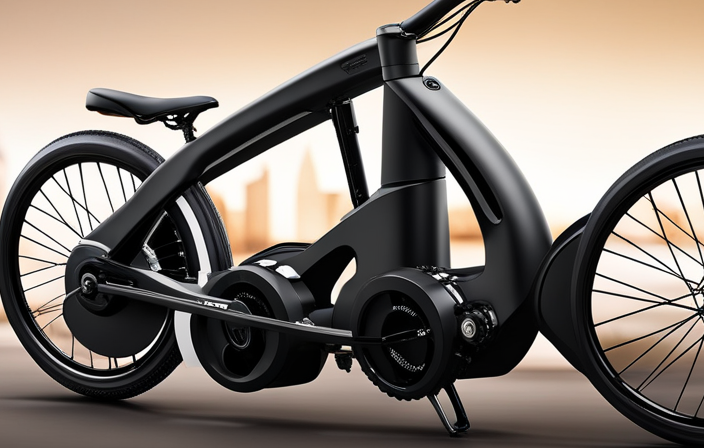
Install the Self Motor

First, make sure the self motor is securely attached to the frame of the bike. This is crucial to ensure stability and safety while riding.

Here are some important steps to follow during the installation process:

Advertisement
  • Align the mounting brackets with the designated holes on the motor and frame.
  • Securely fasten the brackets using the provided screws and bolts.
  • Double-check the tightness of the brackets to avoid any potential loosening during operation.
  • Test the stability of the motor by gently shaking it to ensure it remains firmly attached.

Once the motor is securely installed, the next step is to connect and install the batteries. This will provide the necessary power to the motor for it to function properly. Without the batteries, the motor will not be able to propel the bike forward.

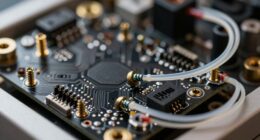
Connect and Install the Batteries

Once the batteries are connected and installed, the motor will have the necessary power to propel the bike forward.

Proper battery connections and installation are crucial for the smooth operation of the electric bike. To begin, ensure that the batteries are fully charged and compatible with the motor specifications.

Next, locate the battery compartment on the bike frame and carefully align the batteries. Connect the positive and negative terminals of each battery to the corresponding connectors in the compartment, ensuring a secure and tight connection. Use the provided screws or clips to secure the batteries in place, preventing any movement during bike operation.

Wire the Motor and Batteries

To wire the motor and batteries, follow these steps:

  1. Identify the corresponding connectors for the motor and batteries.
  2. Ensure that the connectors are properly aligned.
  3. Connect the specific wires from the motor to the battery pack.
  4. Locate the positive and negative terminals on the battery pack.
  5. Match these terminals with the corresponding terminals on the motor.
  6. Use wire connectors or soldering to securely connect the wires.
  7. Once the motor is properly wired to the batteries, proceed to place the batteries in the designated compartments on the electric bike frame.
  8. Check if your bike has specific battery mounts and ensure that the batteries are securely fastened in place.
  9. With the motor and batteries wired and installed, you are now ready to move on to the next step of testing and fine-tuning the electric bike.

Test and Fine-Tune the Electric Bike

Now that you have the motor and batteries wired and installed, it’s time to test and fine-tune your electric bike.

Testing accuracy is crucial to ensure optimal performance. Begin by checking the battery voltage to ensure it matches the manufacturer’s specifications.

Advertisement

Connect the motor to the throttle and turn it on, gradually increasing the speed to test the acceleration and power. Take note of any abnormal sounds or vibrations, as they may indicate underlying issues.

Fine-tuning involves adjusting the motor controller settings, such as throttle response and maximum speed, to optimize performance. Experiment with different settings and test the bike on various terrains to find the perfect balance of power and efficiency.

Once you are satisfied with the performance, it is important to move on to the next section to ensure safety and compliance with regulations.

Ensure Safety and Compliance

Ensure your safety and compliance by double-checking that all necessary safety equipment is properly installed on your electric bike. This includes lights, reflectors, and a bell. Ensuring rider safety and compliance with local regulations is crucial when riding an electric bike.

Lights are essential for visibility, especially during low-light conditions or at night. Reflectors help increase your visibility to other road users, making it safer for everyone. Additionally, having a bell allows you to alert pedestrians and other cyclists of your presence.

Advertisement

It is crucial to follow local regulations regarding safety equipment to avoid any fines or penalties. By ensuring that your electric bike is equipped with all the necessary safety features, you can ride confidently and responsibly.

Now, let’s move on to how to maintain and charge your electric bike.

Maintain and Charge Your Electric Bike

Keep in mind that regular maintenance and proper charging are essential for keeping your electric bike in optimal condition. To ensure your bike stays in top shape, here are three maintenance and charging tips:

  1. Battery Charging Methods: When charging your electric bike’s battery, always use the charger provided by the manufacturer. Avoid using quick chargers or chargers not specifically designed for your battery, as they can damage the battery or shorten its lifespan. Additionally, it’s important to charge your battery in a well-ventilated area and away from flammable materials.

  2. Cleaning and Lubrication: Regularly clean your electric bike to remove dirt and debris that can accumulate on the frame, chain, and gears. Use a soft cloth or sponge and mild detergent to clean the bike, and avoid using high-pressure water, as it can damage electrical components. After cleaning, lubricate the chain and gears with bicycle-specific lubricant to ensure smooth operation.

  3. Tire Maintenance: Check your bike’s tire pressure regularly and inflate them to the recommended level. Underinflated tires can negatively affect your bike’s performance and range. Additionally, inspect the tires for any signs of wear or damage, and replace them if necessary.

Enjoy Your DIY Electric Bike

Don’t forget to take your DIY electric bike out for a spin and enjoy the ride! Now that you’ve built your own electric bike, it’s time to explore the customization options and troubleshoot any issues that may arise. To help you navigate through this exciting journey, here are some tips to enhance your experience.

Customization Options: Option Description
Battery Upgrade Increase the range of your electric bike by upgrading to a higher capacity battery.
Motor Power Fine-tune the performance by adjusting the power output of the motor.
Lighting Upgrades Add LED lights for better visibility and a stylish look.
Troubleshooting Tips: Issue Solution
Battery not charging Check the connections and ensure the charger is functioning properly.
Motor not running Inspect the wiring and connections, and verify if the controller is working correctly.
Poor performance Check tire pressure, motor settings, and battery charge level. Adjust accordingly.

Expand Your Knowledge and Skills

As an electric bike enthusiast, it’s crucial to continue learning about the latest advancements in electric bike technology. By staying updated with the latest trends, I can ensure that my DIY electric bike is equipped with the most efficient and innovative features.

Advertisement

Additionally, joining online communities and forums dedicated to DIY electric bike enthusiasts provides a valuable platform for exchanging knowledge, tips, and ideas with like-minded individuals.

Continue Learning about Electric Bike Technology

You can further expand your knowledge about electric bike technology by researching different motor types and their benefits. Understanding the advancements in electric bike motors is crucial for predicting the future of electric bikes.

Currently, there are three main types of electric bike motors: hub motors, mid-drive motors, and friction drive motors. Hub motors are the most common and are located in the center of the wheel, providing a smooth and quiet ride.

Mid-drive motors are positioned in the middle of the bike frame, offering better weight distribution and optimal performance on various terrains.

Friction drive motors are attached to the side of the wheel and are known for their simplicity and affordability.

Advertisement

Exploring these motor types and their advancements will give you a deeper understanding of the technology behind electric bikes. This knowledge will be valuable when you join online communities and forums for DIY electric bike enthusiasts, where you can exchange ideas and learn from others who share your passion for electric bike building.

Join Online Communities and Forums for DIY Electric Bike Enthusiasts

Joining online communities and forums for DIY electric bike enthusiasts is a great way to connect with others who share your passion and exchange valuable ideas. These communities provide a platform for enthusiasts to share their experiences, discuss design concepts, and seek advice from experienced builders. Here are some key benefits of joining these communities:

  • Access to online tutorials: These communities often have comprehensive tutorials that cover various aspects of building and customizing electric bikes. From choosing the right components to wiring and programming, these tutorials provide step-by-step instructions to guide you through the process.

  • Troubleshooting tips: When you encounter issues during your build or while riding your electric bike, these communities are a valuable resource for troubleshooting tips. Experienced members can offer insights and solutions to help you overcome challenges.

  • Supportive community: Being a part of these communities allows you to connect with like-minded individuals who share your enthusiasm for electric bikes. You can engage in discussions, ask questions, and receive valuable feedback from fellow members.

By joining these online communities, you can tap into a wealth of knowledge and expertise that will enhance your DIY electric bike building journey.

Now, let’s explore how you can experiment with advanced features and modifications to take your electric bike to the next level.

Experiment with Advanced Features and Modifications

Experimenting with advanced features and modifications can elevate the performance and functionality of your DIY e-bike. By incorporating advanced motor upgrades and optimizing battery performance, you can enhance the speed, power, and range of your electric bike.

Advertisement

To help you understand the potential upgrades available, I have created a table below showcasing some advanced motor options and their benefits:

Motor Upgrade Benefits
Brushless Motor Increased efficiency and power
Geared Hub Motor Improved torque and hill-climbing
Mid-Drive Motor Enhanced power transfer and control

In addition to motor upgrades, optimizing battery performance is crucial for maximizing the range of your e-bike. Consider upgrading to a higher capacity battery or implementing a battery management system to monitor and optimize the battery’s performance.

Frequently Asked Questions

What are the necessary tools and materials required to make an electric bike using a self motor?

To make an electric bike using a self motor, you’ll need the right motor for your bike, along with tools like wrenches, pliers, and wire cutters. It’s important to maintain and troubleshoot your bike regularly to ensure optimal performance.

How can I prepare my bike for the conversion process?

To prepare my bike for the conversion process, I will start by examining the bike frame to ensure it is structurally sound and can accommodate the necessary components. Next, I will research and choose an appropriate motor based on power, weight, and compatibility with my bike.

What are the steps to install the self motor on my bike?

To install a self motor on your bike, start by securing the motor to the frame using brackets. Connect the motor to the bike’s drivetrain and install a battery pack. The benefits of using a self motor include increased speed and reduced effort while riding.

Advertisement

How do I connect and install the batteries for my electric bike?

To connect and install the batteries for an electric bike, start by locating the battery compartment. Open the compartment and connect the positive and negative terminals of the batteries to the corresponding connections in the bike. Secure the batteries in place and close the compartment.

Can you provide guidance on how to wire the motor and batteries correctly?

To correctly wire the motor and batteries, start by connecting the motor wires according to the manufacturer’s instructions. When wiring the batteries, make sure to follow the correct polarity and use appropriate connectors. Proper wiring is crucial for the safe and efficient operation of your electric bike.

Conclusion

In conclusion, creating your own electric bike using a self motor is an exhilarating and rewarding experience. With the right tools and materials, you can transform your ordinary bicycle into a high-powered electric vehicle.

Imagine the feeling of gliding effortlessly through city streets, with the wind in your hair and a smile on your face. The process may require technical knowledge and attention to detail, but the end result is a reliable and efficient mode of transportation that will surely enhance your daily commute or leisurely rides.

So why wait? Start your electric bike project today and embark on a thrilling journey like no other.

Advertisement

Olivia's writing is not only informative but also inspiring. She has a knack for telling stories that capture the essence of cycling and the joy it brings to people's lives. Her writing has been praised by readers and industry experts alike for its clarity, depth, and authenticity. In addition to her writing, Olivia is also an avid cyclist. She enjoys exploring new trails and routes and has participated in several cycling events and races. Her first-hand experience with cycling gives her a unique perspective on the sport, reflected in her writing. Overall, Olivia is a talented writer passionate about cycling and dedicated to producing high-quality content for FlatironBike. Her contributions to the magazine have helped make it a go-to source for cycling enthusiasts worldwide.

Continue Reading
Advertisement

Electric Bike

How To Turn A Mountain Bike Into A Electric Bike

Published

on

By

An image showcasing a skilled hand swapping out a mountain bike's rear wheel with an electric motorized wheel, highlighting the seamless integration of the new electric components into the existing frame

Converting a standard mountain bike into an electric powerhouse is an exciting challenge that guarantees to enhance your biking experience significantly.

In this comprehensive guide, I will walk you through the step-by-step process of converting your beloved bike into an electrifying machine.

From assessing compatibility and selecting the perfect conversion kit to adjusting gearing and brakes, I will equip you with all the knowledge and tools needed to successfully embark on this electrifying adventure.

Get ready to conquer any trail with your very own electric mountain bike.

Let’s dive in!

Advertisement

Key Takeaways

  • Properly connect and maintain the battery attachment to the controller
  • Ensure secure wiring connections and troubleshoot any issues with the battery or controller
  • Reinstall the rear wheel correctly and adjust gearing and brakes for optimal performance
  • Test ride the electric bike and fine-tune for responsiveness, speed, and battery life

Assess Your Bike’s Compatibility

You’ll need to assess if your bike is compatible for conversion into an electric bike.

The first step is checking your bike’s specifications to ensure it meets the necessary requirements. Look for a strong and sturdy frame that can handle the added weight and stress of an electric motor. Additionally, consider the wheel size, as certain conversion kits may only be compatible with specific sizes.

Understanding motor compatibility is crucial as well. Check if your bike has enough space in the frame or rear triangle to accommodate the motor. Consider the voltage and wattage requirements of the motor and ensure your bike’s battery can handle it.

Once you have assessed your bike’s compatibility, you can move on to choosing the right electric conversion kit, which we will discuss in the subsequent section.

Advertisement

Choose the Right Electric Conversion Kit

When choosing an electric conversion kit for my mountain bike, it is crucial to consider the motor size and power. The motor size will determine the overall performance and speed of my electric bike, while the power will determine its ability to climb hills and handle various terrains.

Additionally, I need to decide between rear wheel, front wheel, or mid-drive kits, each offering their own advantages and disadvantages. The rear wheel kit provides better traction and stability, the front wheel kit is easier to install and maintain, and the mid-drive kit offers a more balanced and natural riding experience.

Consider the Motor Size and Power

To make your mountain bike electric, there are a few key factors to consider. First, you’ll need to think about the size and power of the motor. This will determine how much assistance you’ll get while riding.

Next, it’s important to choose the right battery capacity. This will depend on the range and duration of your rides. A higher capacity battery will allow for longer rides without needing to recharge.

When it comes to the motor type, there are a couple of options to consider. Hub motors are located in the wheel and provide a smooth and quiet ride. On the other hand, mid-drive motors are positioned near the bottom bracket and offer better weight distribution and handling.

Advertisement

Lastly, you’ll need to decide on the type of kit you want – rear wheel, front wheel, or mid-drive. Each kit has its own advantages and disadvantages, so it’s important to carefully consider which will best suit your riding style.

By taking these factors into account, you’ll be able to successfully convert your mountain bike into an electric one.

Decide Between Rear Wheel, Front Wheel, or Mid-Drive Kits

Deciding between rear wheel, front wheel, or mid-drive kits is an important factor when converting your mountain bike into an electric bike. Each type of electric conversion kit has its own pros and cons that should be carefully considered before making a decision.

Rear wheel kits are the most common and easiest to install. They provide good traction and stability, making them suitable for off-road use. However, they can be heavier and may affect the bike’s balance.

Front wheel kits are lightweight and easy to install, but they may reduce traction, especially on slippery surfaces. They also tend to increase the risk of wheelie accidents.

Advertisement

Mid-drive kits offer a more balanced weight distribution and better handling. They provide higher torque, making them suitable for steep terrains. However, they are more complex to install and may require additional modifications to the bike’s frame.

When converting a mountain bike to an electric bike, it’s important to avoid common mistakes such as improper installation, using low-quality components, or exceeding the weight limit of the bike.

To continue the conversion process, gather the necessary tools and equipment for the installation.

Gather the Necessary Tools and Equipment

Advertisement

First, gather all the necessary tools and equipment to turn your mountain bike into an electric bike. Start by choosing the right battery and controller for your specific needs. Make sure to consider factors such as voltage, capacity, and compatibility with your bike’s frame.

Additionally, it is important to prioritize proper maintenance and care for your electric bike. This includes regular cleaning, lubrication of moving parts, and checking the battery’s charge level.

To convert your mountain bike into an electric bike, you will need tools such as wrenches, screwdrivers, and pliers. It is also recommended to have a torque wrench to ensure proper tightening of bolts.

Once you have gathered all the required tools and equipment, you can proceed to the next step of removing the bike’s rear wheel (if applicable), which will be discussed in the subsequent section.

Remove the Bike’s Rear Wheel (if applicable)

If applicable, remove the rear wheel of the bike.

Advertisement

Before proceeding with the installation of the electric conversion kit, it is crucial to assess the compatibility of the kit with your specific mountain bike. Not all kits are suitable for every bike, so it is important to choose the right kit that matches your bike’s specifications.

Once you have determined the compatibility, you can begin the process of removing the rear wheel. Start by loosening the quick-release skewer or axle nuts that hold the wheel in place. Gently lift the bike off the ground and slide the wheel out of the dropouts. Take caution not to damage the derailleur or any other components during this process.

With the rear wheel removed, you are now ready to move on to the next step of installing the electric conversion kit, which will transform your mountain bike into an electric one.

Install the Electric Conversion Kit

To install the electric conversion kit, the first step is to connect the motor to the frame. This involves securely attaching the motor to a designated mounting point on the bike frame, ensuring it is aligned properly and tightened with the appropriate tools.

Next, the battery and controller need to be attached. The battery should be securely mounted to the frame, preferably in a location that allows for easy access and balance.

Advertisement

The controller, which regulates the power flow from the battery to the motor, should be mounted in a convenient location and connected to both the battery and motor with the appropriate wiring.

Connect the Motor to the Frame

Once the motor is connected to the frame, the electric bike conversion process can continue. The first step in this process is to ensure that the motor is securely attached to the bike frame. This can be done by using the mounting brackets provided with the conversion kit. The brackets should be positioned in such a way that the motor is aligned with the bike’s chain and pedal system. Once the brackets are in place, tighten the bolts to securely fasten the motor to the frame.

After the motor is connected, the next step is to attach the battery and controller. These components are essential for powering the motor and controlling its operation. The battery is typically mounted on the bike frame, while the controller is usually attached near the handlebars for easy access. With the motor connected and the battery and controller in place, the electric bike is now ready for use.

Transition: With the motor securely attached and the battery and controller in place, the next step in the electric bike conversion process is to attach the battery and controller.

Attach the Battery and Controller

Now you need to attach the battery and controller to power and control the motor.

Advertisement

The battery is the heart of your electric bike, providing the power needed to propel the motor. Start by finding a suitable location on the frame to mount the battery securely. Make sure it is easily accessible for charging and maintenance.

Next, connect the battery to the controller using the provided wiring harness. Ensure all connections are tight and secure to prevent any loose connections that could cause issues later on.

Once the battery is attached, connect the controller to the motor using the appropriate wiring. Troubleshooting common battery and controller issues may include checking for loose connections, testing the voltage output, and ensuring the controller is properly programmed.

Lastly, to maximize battery life and performance, consider keeping the battery charged between 20-80% and avoid overcharging or fully discharging it.

With the battery and controller properly attached, it’s time to move on to the next step: connecting the wiring and testing the system.

Advertisement

Connect the Wiring and Test the System

First, make sure you connect the wiring properly and test the system to ensure it is working correctly. Here are the steps to follow:

  1. Connect the wires from the battery to the controller. Make sure the positive and negative terminals are correctly aligned.
  2. Connect the wires from the controller to the motor. Again, verify that the positive and negative terminals match up.
  3. Double-check all connections and make sure they are secure.

Now it’s time to test the system. Turn on the power and give the bike a test ride. Pay attention to any unusual sounds or vibrations. Test the throttle and brakes to ensure they are functioning properly.

If you encounter any issues, troubleshooting common problems is essential. Check all connections, inspect the wiring for any damage, and verify that all components are properly installed.

With the wiring connected and the system tested, you can now move on to reinstalling the bike’s rear wheel (if applicable).

Reinstall the Bike’s Rear Wheel (if applicable)

To reinstall the bike’s rear wheel, you’ll need to align the axle with the dropouts on the frame. Before proceeding, it’s crucial to assess the compatibility of the electric conversion kit with your specific bike model. Ensure that the kit you’ve chosen is suitable for your mountain bike, taking into consideration factors such as wheel size and frame design. Once you’ve confirmed compatibility, follow these steps:

  1. Begin by placing the chain onto the smallest rear cog.
  2. Slide the wheel into the dropouts, ensuring that the axle is aligned with the frame.
  3. Tighten the axle nuts or quick-release skewer securely, but avoid overtightening.
  4. Check that the wheel spins freely and is centered within the frame.

With the rear wheel successfully reinstalled, you can now proceed to the next step of adjusting the bike’s gearing and brakes to optimize performance.

Adjust the Bike’s Gearing and Brakes

Make sure you adjust the gearing and brakes on your bike to optimize its performance. To start, check the bike’s suspension and make any necessary adjustments. This will ensure a smooth ride and prevent any unnecessary strain on the motor.

Advertisement

Next, upgrade the bike’s tires to ones that are suitable for electric biking. Look for tires with a high traction rating and puncture resistance, as these will provide better control and durability.

In terms of the bike’s gearing, consider installing a wider gear range cassette to accommodate the added weight and power of the electric motor. Additionally, adjust the derailleur to ensure smooth and precise shifting between gears.

Once you have made these adjustments, you can proceed to the next step of test riding and fine-tuning the electric bike to ensure everything is working properly.

Test Ride and Fine-Tune the Electric Bike

Once you’ve made the necessary adjustments, take the electric bike for a test ride to ensure its performance and then fine-tune any remaining issues.

Testing the electric bike’s performance is crucial to ensure its functionality and safety. Start by checking the responsiveness of the motor and the overall power output. Ensure that the bike accelerates smoothly and maintains a consistent speed. Pay attention to any unusual noises or vibrations that may indicate a problem with the motor or other components.

Advertisement

Additionally, test the brakes to ensure they engage properly and bring the bike to a quick and controlled stop. Troubleshoot common issues such as battery life, range, and display accuracy.

Fine-tune any remaining issues to optimize the electric bike’s performance. With the necessary adjustments made, you can now enjoy your new electric mountain bike!

Enjoy Your New Electric Mountain Bike!

Now that you have your new e-mountain bike, it’s time to enjoy the ride! Electric mountain biking brings numerous benefits that enhance your overall experience on the trails.

Firstly, the electric assist system provides additional power, allowing you to conquer steeper climbs and go farther than ever before. It also reduces the strain on your muscles, making it easier to navigate challenging terrain.

To ensure your electric mountain bike remains in optimal condition, it’s essential to perform regular maintenance and care. Keep the battery charged and store it in a cool, dry place when not in use. Clean the bike after each ride, paying special attention to the drivetrain and suspension components. Regularly inspect the brakes, tires, and gears for any signs of wear or damage. Additionally, lubricate the chain and other moving parts to prevent rust and ensure smooth operation.

Advertisement

By following these tips and maintaining your electric mountain bike properly, you can continue to enjoy thrilling rides and make the most out of your new e-biking adventure.

Frequently Asked Questions

How long does it take to install an electric conversion kit on a mountain bike?

The installation time for an electric conversion kit on a mountain bike can vary depending on the individual’s experience and the complexity of the kit. However, the benefits of electric conversion include increased speed and easier uphill rides.

What is the average cost of an electric conversion kit for a mountain bike?

The average cost of an electric conversion kit for a mountain bike varies depending on the type of kit you choose. There are several types available, each with their own pros and cons.

Can I install an electric conversion kit on any type of mountain bike?

Yes, electric conversion kits can be installed on most types of mountain bikes. It’s important to consider the pros and cons of converting a mountain bike into an electric bike, as well as how to choose the right electric conversion kit for your specific bike.

How much weight does an electric conversion kit add to a mountain bike?

The weight added by an electric conversion kit to a mountain bike depends on the specific kit, but it typically ranges from 15-25 pounds. This additional weight can impact the bike’s performance, making it slightly slower and less maneuverable.

Advertisement

Can I still use my mountain bike as a regular bike after installing an electric conversion kit?

Yes, you can still use your mountain bike as a regular bike after installing an electric conversion kit. However, there are potential drawbacks such as added weight and decreased maneuverability. To maintain your electric mountain bike, regularly check the battery, motor, and wiring for any issues. Keep the bike clean and lubricate the chain regularly.

Conclusion

Well, I must say, turning my mountain bike into an electric bike was quite the adventure!

From assessing compatibility to choosing the right conversion kit and gathering the necessary tools, it was no small feat.

But let me tell you, the end result was worth every ounce of effort. Riding my new electric mountain bike feels like soaring through the air on a cloud of pure exhilaration. The power and speed are simply mind-blowing.

It’s an experience like no other, and I can’t wait to hit the trails again.

Advertisement

Continue Reading

Electric Bike

How To Tell If Someone Is Cheating With Electric Bike

Published

on

By

An image that portrays a person secretly swapping out a battery on an electric bike while wearing a mischievous expression, with hidden wires and tools in the foreground, indicating a guide on detecting electric bike cheating

As someone knowledgeable in relationships, I have found a unique yet successful method for uncovering infidelity: the electric bike.

If you suspect your partner may be cheating, keep an eye out for unexplained disappearances, sudden increases in electric bike usage, and secretive behavior. Pay attention to changes in appearance and attitude towards the bike, as well as unusual expenses.

And trust your instincts – if something feels off, it probably is.

In this article, I’ll guide you through the signs to look for and offer advice on how to handle the situation.

Key Takeaways

  • Unexplained disappearances of electric bikes
  • Sudden increase in electric bike usage
  • Suspicious behavior around charging stations
  • Tampering with brakes or causing mechanical failures

Unexplained Disappearances with the Electric Bike

Advertisement

If your electric bike keeps disappearing without any explanation, it’s a sign that someone may be cheating with it. One possible explanation for the unexplained accidents with the electric bike could be that someone is intentionally causing these incidents to sabotage its performance.

This could involve tampering with the brakes or causing other mechanical failures that lead to accidents. Another red flag to look out for is suspicious behavior around charging the electric bike. If you notice someone constantly hovering around the charging station or tampering with the charger, it could indicate that they are trying to manipulate the bike’s battery or alter its performance.

Additionally, be aware of any sudden increase in usage or ownership of electric bikes in your vicinity. If you find that multiple people around you suddenly own or frequently use electric bikes, it could suggest that there is a network of individuals involved in cheating with these bikes.

Pay attention to these warning signs and take appropriate measures to protect your electric bike from potential cheaters.

Sudden Increase in Usage or Ownership of Electric Bikes

There’s been a recent surge in the number of people riding electric bikes. The increase in electric bike sales can be attributed to the numerous benefits of owning an electric bike. Here are a few reasons why more and more individuals are choosing to ride electric bikes:

Advertisement
  • Convenience:

  • Electric bikes provide a practical means of transportation, especially for short commutes or running errands. They are easy to maneuver in traffic and can be parked without hassle.

  • With electric bikes, there’s no need to worry about finding parking spaces or dealing with traffic congestion, making them an ideal choice for urban dwellers.

  • Health and Fitness:

  • Contrary to popular belief, riding an electric bike can still provide a decent workout. Pedaling with the assistance of the electric motor still requires physical effort, helping to improve cardiovascular health and strengthen leg muscles.

  • Electric bikes also offer the option to adjust the level of assistance provided by the motor. This allows riders to gradually increase their fitness level by decreasing the assistance over time.

With the rise in popularity of electric bikes, it comes as no surprise that some individuals may be engaging in secretive behavior regarding their electric bikes.

Secretive Behavior Regarding the Electric Bike

You might be surprised to discover the hidden tricks and tactics some riders use to keep their electric bikes a secret from others. Privacy concerns with electric bikes are becoming increasingly prevalent, as people become more conscious of the impact of electric bike usage on the environment. To maintain privacy, riders often go to great lengths to hide their electric bike activities. One common tactic is to disguise the electric bike as a regular bicycle by removing any visible signs of motorization. This can include removing the battery pack or covering it with a bag or a custom-made cover. Additionally, some riders modify the appearance of their electric bikes to resemble traditional bicycles, using accessories like fenders, baskets, or retro-style frames. By blending in with regular cyclists, these riders can ride their electric bikes without attracting attention or raising any privacy concerns.

To illustrate the impact of electric bike usage on the environment, consider the following table:

Advertisement
Electric Bike Usage Environmental Impact
Reduced carbon emissions Decreased air pollution
Less reliance on fossil fuels Reduced greenhouse gas emissions
Quieter operation Decreased noise pollution
Increased use of renewable energy Promotion of sustainable transportation
Encourages active transportation Decreased congestion and traffic emissions

These environmental benefits highlight the importance of electric bikes in addressing both privacy concerns and the impact on the environment. As riders continue to find ways to keep their electric bikes a secret, it is essential to recognize the positive changes in appearance or attitude towards the electric bike.

Changes in Appearance or Attitude Towards the Electric Bike

Riders have started modifying their electric bikes to resemble traditional bicycles, which has led to a shift in the public’s perception and attitude towards these environmentally friendly modes of transportation. These changes in behavior can be attributed to a decreased interest in the typical appearance of electric bikes.

As an avid cyclist myself, I have witnessed firsthand the growing trend of riders opting for a more traditional look. This modification involves removing any bulky components such as the battery and motor, and replacing them with sleeker alternatives that are seamlessly integrated into the bike frame.

The shift towards more inconspicuous electric bikes has had a profound impact on how these vehicles are perceived. Previously, electric bikes were often associated with a lack of physical effort and a reliance on technology. However, with the rise of modified electric bikes, the line between traditional bicycles and their electric counterparts is becoming increasingly blurred. This has resulted in a shift in public opinion, with more people embracing electric bikes as a viable and sustainable mode of transportation.

This change in appearance and attitude towards electric bikes also sets the stage for discussing the unusual expenses related to these vehicles.

Advertisement

Unusual Expenses Related to the Electric Bike

One thing to consider when it comes to the expenses associated with an electric bike is maintenance and repair costs. As an electric bike enthusiast, I have learned that these costs can sometimes be higher than anticipated. In addition to the regular maintenance tasks like tire replacements and brake adjustments, electric bikes require specific attention to their electrical components. This can result in increased maintenance costs compared to traditional bicycles.

Moreover, unexpected charging expenses can also add to the overall cost of owning an electric bike. While charging the bike’s battery is typically more cost-effective than refueling a car, it is still an expense that needs to be considered. Depending on the frequency and duration of rides, the battery might need to be charged more frequently, leading to higher electricity bills.

To give you a clearer picture, take a look at the table below detailing the potential maintenance and charging expenses associated with electric bikes:

Advertisement
Expense Type Cost
Regular Maintenance $50 – $100 per year
Electrical Component Repair $100 – $200 per repair
Battery Replacement $300 – $600
Charging Costs $5 – $10 per month
Additional Accessories Varies

Considering these increased maintenance costs and unexpected charging expenses, it is important to carefully budget and plan for the financial aspects of owning an electric bike. However, the benefits and enjoyment of riding an electric bike often outweigh these expenses.

This brings us to the next section, where we will explore how owning an electric bike can lead to decreased interest or time spent with other hobbies or activities.

Decreased Interest or Time Spent with Other Hobbies or Activities

Moreover, owning an electric bike can lead to a decrease in interest or time dedicated to other hobbies or activities. The convenience and enjoyment of riding an electric bike can become so enticing that it takes precedence over engaging in physical activities that were once enjoyed. The power-assisted nature of electric bikes may result in decreased motivation to engage in traditional forms of exercise such as running or cycling, as the effort required is significantly reduced. This shift in focus can lead to a sedentary lifestyle, which can have negative impacts on overall health and well-being.

Additionally, owning an electric bike may bring about changes in financial priorities. The initial investment in purchasing an electric bike, along with ongoing maintenance and charging costs, may divert funds that were previously allocated to other hobbies or activities. For example, funds that were once dedicated to gym memberships, sports equipment, or recreational classes may be reallocated to cover the expenses associated with owning and maintaining an electric bike.

The decreased interest in other activities and the changes in financial priorities brought about by owning an electric bike can have significant implications for individuals’ overall lifestyle and well-being. It is important to recognize and address these potential consequences to ensure a balanced and healthy approach to leisure activities.

Advertisement

Furthermore, inconsistent or conflicting explanations about the electric bike may further complicate the situation.

Inconsistent or Conflicting Explanations about the Electric Bike

As I delved deeper into my investigation, I noticed that my partner’s explanations regarding their newfound interest in electric bikes were becoming increasingly inconsistent and conflicting. This raised a red flag in my mind, hinting at the possibility that they might be cheating with an electric bike.

Here are some key observations I made:

  1. Vague and evasive responses: Whenever I tried to engage in a conversation about the electric bike, my partner would often provide vague and evasive explanations. It seemed as though they were trying to hide something or divert the conversation away from the topic.

  2. Changing stories: Over time, I noticed that my partner’s explanations about their electric bike activities would frequently change. One day, they would claim to have gone on a long-distance ride, while the next day, they would have a completely different story about a different route or distance.

  3. Lack of details: While discussing their electric bike adventures, my partner would often omit important details or provide incomplete explanations. This lack of specificity made me question the authenticity of their experiences and raised doubts about their honesty.

  4. Defensive behavior: Whenever I confronted my partner about the inconsistencies in their explanations, they would become defensive and agitated. Their defensive behavior further fueled my suspicions and added weight to the possibility of infidelity.

The inconsistent and conflicting explanations surrounding the electric bike serve as strong indicators that something may be amiss. However, to gain a clearer picture, I needed to observe whether any changes in schedule or routine were occurring to accommodate this newfound interest.

Changes in Schedule or Routine to Accommodate the Electric Bike

To truly understand the impact of the electric bike on your schedule and routine, you need to pay close attention to any noticeable changes in your daily activities.

Advertisement

Electric bikes offer cost-effective alternatives to traditional transportation methods while providing numerous benefits. When incorporating an electric bike into your daily routine, you may find yourself adjusting your schedule to accommodate the increased speed and convenience it offers.

For example, you may be able to complete errands and commute to work more efficiently, allowing for extra time for other tasks or leisure activities. Additionally, the electric bike’s ability to navigate through traffic and find parking easily can save you time and reduce stress.

These time-saving benefits can have a significant impact on your daily schedule, allowing you to make the most of your time. By recognizing and embracing these changes, you can fully appreciate the value that electric bikes bring to your daily routine.

As you integrate the electric bike into your schedule, it is essential to be aware of any unusual or suspicious messages or calls related to the electric bike, which will be discussed in the following section.

Unusual or Suspicious Messages or Calls Related to the Electric Bike

As we continue our investigation into the signs of cheating with an electric bike, it’s important to consider not only changes in schedule or routine but also unusual or suspicious messages or calls related to the electric bike. These indicators can often reveal hidden secrets and shed light on deceitful behavior.

Advertisement

When it comes to unusual maintenance requests, be attentive to any unexpected requests for repairs or modifications to the electric bike. Cheaters may use these requests as a cover-up for their activities, providing an excuse to spend more time away from home or engage in illicit affairs. Additionally, pay close attention to any suspicious online activity related to the electric bike. This could include secretive chats or messages, frequent visits to online forums or groups discussing electric bikes, or even purchases of accessories or parts that seem out of the ordinary.

By monitoring these unusual or suspicious messages and calls, we can gain valuable insights into a potential cheater’s activities and intentions. These signs should not be overlooked or dismissed lightly, as they can often lead to further evidence of infidelity.

Now, let’s delve into the next section, where we will discuss the lack of transparency or hiding of the electric bike, an important aspect to consider in uncovering a cheating partner’s actions.

Lack of Transparency or Hiding of the Electric Bike

The lack of transparency or hiding of the electric bike can be a red flag indicating potential deceitful behavior. When someone goes to great lengths to conceal their electric bike, it begs the question: what are they trying to hide?

Electric bikes have several environmental benefits, such as reducing carbon emissions and minimizing noise pollution. By using electric bikes for commuting, individuals can contribute to a cleaner and healthier environment. Therefore, it is crucial to be transparent about owning an electric bike, as it reflects a commitment to sustainable transportation practices. Hiding the electric bike may suggest a disregard for the positive impact it can have on the environment.

Advertisement

Moreover, concealing the use of an electric bike can also raise suspicions about the person’s motives. It is essential to address any concerns or questions openly, rather than resorting to guilty or defensive reactions. Open communication will foster trust and understanding, allowing for a healthy discussion about the electric bike and its role in one’s life.

Guilty or Defensive Reactions when Questioned about the Electric Bike

Why don’t you just be honest and open about your electric bike when someone asks you about it? It’s a simple question, yet the guilty behavior and defensive reactions that often follow speak volumes. As someone who has dealt with this situation before, I can tell you that these reactions are clear signs of something being amiss.

Here are some key behaviors to look out for:

  • Avoidance: When asked about the electric bike, they quickly change the subject or divert the conversation elsewhere.

  • Over-explanation: They provide overly detailed explanations about the bike, almost as if they are trying to convince themselves of their own story.

  • Deflection: Instead of addressing the question directly, they may accuse you of being nosy or suspicious, shifting the blame onto you.

  • Nervousness: They exhibit signs of anxiety, such as fidgeting, avoiding eye contact, or stumbling over their words.

  • Anger: They may become defensive, lashing out in anger or becoming overly defensive about the bike.

These guilty behaviors and defensive reactions are red flags that shouldn’t be ignored. They indicate that there may be more to their electric bike than meets the eye.

And this unexplained behavior can often lead to unexplained physical or emotional distance in the relationship, which we will explore in the next section.

Advertisement

Unexplained Physical or Emotional Distance in the Relationship

Their sudden lack of communication and constant need for space speaks volumes about the unexplained physical or emotional distance in the relationship. Signs of emotional detachment can manifest in various ways, such as decreased affection, disinterest in spending time together, or avoiding deep conversations. The impact of this unexplained distance on relationships can be devastating, leading to feelings of loneliness, insecurity, and a breakdown in trust. To better understand this phenomenon, let’s take a closer look at some specific signs of emotional detachment and their effects on relationships.

Sign of Emotional Detachment Impact on Relationships
Minimal physical contact Lack of intimacy and connection
Frequent arguments or disagreements Increased tension and hostility
Spending more time apart Decreased emotional support and understanding
Lack of interest in each other’s lives Feeling neglected and unimportant

These signs may indicate deeper underlying issues within the relationship, such as unresolved conflicts, lack of emotional investment, or even the presence of infidelity. It is crucial to address these issues openly and honestly to prevent further damage to the relationship. Failure to do so may lead to the next stage, where witnessing the person with someone else on the electric bike becomes a painful reality.

Witnessing the Person with Someone Else on the Electric Bike

Witnessing them together on the electric bike was a painful reminder of the distance that had grown between us. There could be several potential reasons for witnessing someone with someone else on an electric bike. Perhaps they are friends or colleagues who enjoy biking together. However, if suspicions of cheating arise, it is important to address and confront the situation.

Firstly, it is crucial to communicate openly and honestly with your partner. Express your concerns and observations without accusing or attacking them. Listen to their response and pay attention to their body language. Look for any signs of defensiveness or guilt that may indicate deception.

Secondly, gather concrete evidence to support your suspicions. Keep a record of any suspicious behaviors or activities related to the electric bike. This may include unusual patterns of bike usage or secretive behavior surrounding the bike.

Advertisement

Lastly, consider seeking professional help from a therapist or relationship counselor. They can provide guidance and support in navigating the complexities of infidelity and trust issues.

Transitioning into the next section about discovering evidence of deception or infidelity involving the electric bike, it is important to remain vigilant and observant in order to uncover the truth.

Discovering Evidence of Deception or Infidelity involving the Electric Bike

Discovering concrete evidence of deception or infidelity involving the electric bike can be a challenging and emotionally draining process. However, by paying attention to certain signs and clues, you may be able to uncover hidden motives and expose any financial deception related to the electric bike. To help you in this journey, I have created a table below that outlines some key indicators to look out for:

Signs of Deception Signs of Financial Deception
Frequent and secretive use of the electric bike Unexplained withdrawals or expenses
Inconsistencies in the person’s stories about the electric bike Sudden changes in their financial behavior
Strange behavior when asked about the electric bike Unexplained purchases related to the electric bike

Trust Your Instincts and Seek Professional Help if Needed

After meticulously analyzing the evidence and discovering signs of deception or infidelity involving the electric bike, it is essential to trust your instincts and seek professional advice if needed.

While uncovering the truth can be emotionally challenging, relying on your intuition can guide you towards the right course of action.

Advertisement

Trusting your instincts is crucial when dealing with complex situations like cheating. Our subconscious mind often picks up on subtle cues that our conscious mind may miss. If you have a gut feeling that something is amiss, it is important to acknowledge and explore it further.

Seeking professional advice can provide invaluable support and guidance during this difficult time. A relationship counselor or therapist can offer an objective perspective and help you navigate the complexities of the situation. They can provide tools and strategies to facilitate open and honest communication with your partner, aiding in the resolution of such issues.

Additionally, a private investigator can assist in gathering concrete evidence, ensuring that you have accurate information to make informed decisions. They possess the expertise and resources to conduct thorough investigations discreetly, preserving your privacy and maintaining the integrity of the process.

Frequently Asked Questions

How do I confront my partner about their secretive behavior regarding their electric bike?

Confronting my partner about their secretive behavior regarding their electric bike requires open and honest communication. I will discuss my concerns, expressing my need for transparency and trust in our relationship.

What are some signs of unexplained physical or emotional distance in a relationship involving an electric bike?

Signs of emotional distance in a relationship involving an electric bike may include decreased communication, lack of interest in shared activities, and frequent mood swings. Physical distance may manifest as spending more time with the electric bike than with the partner.

Advertisement

What should I do if I witness my partner with someone else on their electric bike?

If I witness my partner with someone else on their electric bike, I would confront them calmly and gather evidence discreetly. It’s essential to stay composed and gather all the necessary information before making any conclusions.

How can I discover evidence of deception or infidelity involving an electric bike?

To discover proof of deception or infidelity involving an electric bike, look for signs such as unusual behavior, secretive actions, or unexplained absences. Check for unfamiliar accessories or modifications on the bike, and consider tracking its location discreetly.

When should I trust my instincts and seek professional help regarding suspicions of cheating with an electric bike?

I trust my instincts when I feel something is off, but seeking professional help is necessary when suspicions of cheating with an electric bike persist. Their expertise can provide clarity and guidance in a complex situation.

Conclusion

In conclusion, it’s crucial to be aware of the signs that someone may be cheating with an electric bike. Unexplained disappearances, sudden increase in ownership, and secretive behavior are all red flags. Changes in appearance or attitude, unusual expenses, and distancing in the relationship are also signs to watch out for. Witnessing the person with someone else on the electric bike or finding evidence of deception should not be ignored. Trust your instincts and seek professional help if needed. Remember, it’s vital to address these issues with sensitivity and empathy to preserve emotional well-being.

Advertisement

Continue Reading

Electric Bike

How To Turn A Beach Cruiser To An Electric Bike

Published

on

By

An image showcasing a beach cruiser transformed into an electric bike

Picture yourself riding by the shore, with the breeze flowing through your hair and the sun shining on your cheeks. Now, envision enhancing your beach cruiser with the **speed** and ease of an electric motor. Discover the thrill and freedom of riding with added power at your fingertips. Experience a whole new level of cruising by electrifying your beach adventure. Start your journey to an electrifying beach ride today and revolutionize the way you explore the coast!

With the right conversion kit and a little know-how, you can transform your beloved bike into an electric powerhouse. In this article, I will guide you through the step-by-step process of turning your beach cruiser into an electric bike, from selecting the right conversion kit to fine-tuning the performance.

Get ready to elevate your beach cruising experience to a whole new level.

Key Takeaways

  • Optimizing gear ratio and chain tension is essential for better performance, smooth operation, and improved acceleration, speed, and handling.
  • Testing the e-cruiser on various terrains helps evaluate its performance, including acceleration, speed, and handling on flat roads, hills, and rough surfaces.
  • Paying attention to unusual noises, vibrations, or jerky movements can help identify potential issues with loose or damaged electrical connections, brakes, and motor settings.
  • Converting a beach cruiser to an electric bike offers benefits such as effortless navigation through traffic, faster travel and reduced commuting time, decreased physical strain, and cost savings compared to gasoline or public transportation fees.

Selecting the Right Conversion Kit for Your Cruiser

You should start by selecting the right conversion kit for your cruiser. When it comes to electric motor types, there are a few options to consider. The most common types are hub motors and mid-drive motors. Hub motors are easier to install and require less maintenance, while mid-drive motors provide better torque and performance. Depending on your needs, you can choose a motor with varying power outputs.

Advertisement

Battery capacity options are another important factor to consider. The capacity of the battery determines how far you can ride on a single charge. It is important to choose a battery with enough capacity to meet your desired range. Common battery options include 36V and 48V batteries, with higher voltage batteries offering more power and longer range.

By carefully considering the electric motor type and battery capacity options, you can select the right conversion kit for your beach cruiser and transform it into an efficient and powerful electric bike.

Gathering the Necessary Tools and Equipment

First, gather all the essential tools and equipment needed for the conversion process. Here is a list of items you will need:

  1. Wrench set: This will help you remove and install various components such as the pedals, bottom bracket, and handlebars.

  2. Wire cutters: You’ll need these to trim and strip wires during the installation of the electric components.

  3. Multimeter: This tool is essential for troubleshooting electrical issues and ensuring proper connections.

  4. Safety gear: Don’t forget to wear a helmet and protective eyewear to safeguard yourself during the conversion process.

When converting a beach cruiser to an electric bike, there are some common challenges to keep in mind. The weight of the battery and motor can affect the bike’s balance and handling, so it’s important to distribute the weight evenly. Additionally, consider safety considerations such as ensuring the brakes are in good working condition and the electrical connections are secure.

Taking these precautions will help ensure a successful and safe conversion.

Advertisement

Removing the Pedals and Crankset

After gathering all the necessary tools and equipment, it’s time to remove the pedals and crankset. This step is crucial in upgrading the beach cruiser’s drivetrain and converting it into a pedal-free electric bike.

To begin, I will need a pedal wrench and a crank puller. First, I will loosen the pedal bolts using the pedal wrench in a counterclockwise direction. Once the pedals are loose, I can use my hands to remove them completely.

Next, I will use the crank puller to remove the crankset. This tool will thread into the crank arm, applying pressure and pulling it off the bottom bracket spindle.

Advertisement

With both the pedals and crankset removed, the beach cruiser is now ready for the next step in the conversion process.

Installing the Electric Motor and Battery

To start, it’s time to install the electric motor and battery. This step is crucial in turning a beach cruiser into an electric bike. Here’s what you need to do:

  1. Installing the motor controller:

    • Begin by finding a suitable location on the bike frame to mount the motor controller.
    • Secure the controller using zip ties or brackets, ensuring it is well-protected from vibrations and moisture.
    • Connect the motor controller to the electric motor according to the manufacturer’s instructions.
  2. Choosing the right battery capacity:

    • Consider the range you desire and the weight of the bike when selecting a battery.
    • Calculate the power requirements based on the motor’s voltage and current specifications.
    • Choose a battery with sufficient capacity to meet your needs, taking into account factors like terrain and rider weight.

By following these steps, you will successfully install the electric motor and battery, bringing your beach cruiser to life as an electric bike.

Connecting the Wiring and Controls

When connecting the wiring and controls, I always make sure to follow the manufacturer’s instructions and secure all connections properly. This is crucial for the safe and efficient operation of the electric bike.

Advertisement

Before starting the wiring process, it is important to have a clear understanding of the electrical components and their functions. I begin by carefully routing the wires along the frame, making sure to avoid any areas where they could get pinched or damaged.

I then connect the wires to the appropriate terminals on the motor and battery, double-checking that the connections are tight and secure. Once the wiring is complete, I perform a thorough inspection to ensure everything is in order.

If any issues arise, I refer to the troubleshooting guide provided by the manufacturer, taking all necessary safety precautions throughout the process.

Mounting the Battery and Controller

After successfully connecting the wiring and controls, it’s time to move on to the next step: mounting the battery and controller. This is a crucial part of the process as it ensures the functionality and efficiency of your electric beach cruiser.

When it comes to mounting the battery and controller, it is important to consider their compatibility. Ensure that the battery and controller are designed to work together, as this will optimize performance and prevent any potential issues.

Advertisement

Additionally, it’s essential to take into account the mounting options for different bike frames. Depending on the bike frame you have, there may be specific mounting points or brackets available. It’s crucial to choose the appropriate method for your bike to ensure a secure and stable attachment. This will prevent any unwanted movement or damage to the battery and controller while riding.

Attaching the Throttle and Brake Sensors

Attaching the throttle and brake sensors is an important step in the installation process of the electric beach cruiser. The throttle installation allows the rider to control the speed of the bike by twisting or pressing a lever. It is usually mounted on the handlebars for easy access. The brake sensor attachment ensures that the motor is disengaged when the rider applies the brakes, providing a safer riding experience. To attach the throttle, follow the manufacturer’s instructions and secure it to the handlebars using the provided mounting hardware. As for the brake sensors, they are typically installed near the brake levers. Connect the sensor wires to the corresponding brake wires and secure them in place. After completing these steps, ensure that the throttle and brake sensors are functioning properly before proceeding with the rest of the installation process.

Throttle Installation Brake Sensor Attachment
Follow manufacturer’s instructions Install near brake levers
Secure to handlebars using mounting hardware Connect sensor wires to brake wires
Test functionality Ensure secure attachment

Adjusting the Gearing for Optimal Performance

To optimize your performance, adjust the gearing of the electric beach cruiser for a smoother ride. Achieving the optimal gear ratio is crucial for efficient power transfer and increased speed. Here are five key steps to adjust the gearing for optimal performance:

  • Determine your desired gear range based on your riding needs and terrain.
  • Install a larger or smaller front chainring to adjust the gear ratio.
  • Adjust the chain tension by loosening or tightening the rear derailleur.
  • Test ride the bike to ensure the chain is running smoothly and not skipping gears.
  • Fine-tune the gear ratio by making small adjustments to the front or rear derailleur.

By optimizing the gear ratio and adjusting the chain tension, you can enhance the performance of your electric beach cruiser, ensuring a smoother and more enjoyable ride.

Testing and Fine-Tuning Your Electric Beach Cruiser

Once you have adjusted the gearing, it’s important to test and fine-tune your electric beach cruiser to ensure optimal performance.

Testing methods play a crucial role in identifying any issues and making necessary adjustments. Start by taking your e-cruiser for a test ride on various terrains, including flat roads, hills, and rough surfaces. This will allow you to evaluate the bike’s acceleration, speed, and handling.

Advertisement

Pay close attention to any unusual noises, vibrations, or jerky movements, as these may indicate mechanical problems. Additionally, test the battery life and charging time to ensure they meet your expectations.

Troubleshooting tips include checking all electrical connections for loose or damaged wires, inspecting the brakes for proper functionality, and adjusting the motor settings if needed.

Regular testing and fine-tuning will guarantee a smooth and enjoyable ride on your electric beach cruiser.

Enjoying the Benefits of Electric Bike Conversion

Get ready to experience the countless benefits of converting your regular bike into an electric one.

Electric bike conversion opens up a whole new world of possibilities for commuting. One major advantage is the ease of travel. With an electric bike, you can effortlessly navigate through traffic and reach your destination faster.

Advertisement

Another benefit is the reduction in physical strain. Electric bikes provide assistance when pedaling, making it easier on your joints and muscles.

Additionally, electric bike commuting is environmentally friendly. By choosing to ride an electric bike, you are reducing your carbon footprint and contributing to a cleaner and healthier planet.

Finally, electric bike conversion saves you money in the long run. You no longer have to rely on expensive gasoline or public transportation fees.

Enjoy the convenience and savings that come with electric bike conversion.

Frequently Asked Questions

Can I convert any type of beach cruiser into an electric bike?

I can convert most beach cruiser models into electric bikes, but compatibility issues may arise with certain models. Converting a beach cruiser can present challenges and limitations, such as frame design or lack of space for batteries and motor components.

Advertisement

How much does a conversion kit for a beach cruiser typically cost?

The cost of a conversion kit for a beach cruiser varies depending on the brand and features, but on average, it ranges from $300 to $800. However, the benefits of electric beach cruisers outweigh the cost comparison.

Do I need any specialized tools or equipment to convert my beach cruiser?

To convert my beach cruiser into an electric bike, specialized tools such as wrenches, screwdrivers, and a wire cutter may be needed. Additionally, equipment like a conversion kit, battery pack, and motor will also be necessary.

How long does it usually take to complete the conversion process?

The conversion process timeline for turning a beach cruiser into an electric bike varies depending on the individual’s experience and the complexity of the project. Common challenges in beach cruiser conversion include finding the right components and ensuring proper installation.

Can I still ride my electric beach cruiser without using the electric motor?

Yes, you can still ride your electric beach cruiser without using the electric motor. By choosing not to engage the electric assist, you can enjoy a traditional riding experience while still benefiting from the added convenience and power when desired.

Conclusion

As I stand on the sandy shores, my newly converted electric beach cruiser beside me, I can’t help but feel a sense of accomplishment.

Advertisement

The journey from a simple cruiser to a powerful electric bike was not an easy one, but the end result is worth every effort.

The conversion kit, tools, and precise installation have transformed this cruiser into a symbol of freedom and efficiency.

With the wind in my hair and the smooth hum of the electric motor, I am ready to embark on new adventures, exploring the world in a whole new way.

Continue Reading
Advertisement

Affiliate disclaimer

As an affiliate, we may earn a commission from qualifying purchases. We get commissions for purchases made through links on this website from Amazon and other third parties.

About us

We are a passionate team driven by the belief that cycling is a fantastic and accessible way to stay active while enjoying the beauty of the outdoors. Our mission is to share our love for cycling with as many people as possible. We provide a welcoming environment for individuals of all ages, abilities, and backgrounds to come together and ride bikes. With Ralf’s visionary leadership, Zane’s expertise in cycling adventures, and Olivia’s dedication to community building, we strive to create a vibrant space where everyone can experience the joy of cycling. Through group rides, workshops, and inclusive events, we inspire and empower individuals to embrace an active lifestyle. Join us in our quest to pedal together, embrace the joy of cycling, and foster connections that last a lifetime.

Advertisement

Trending