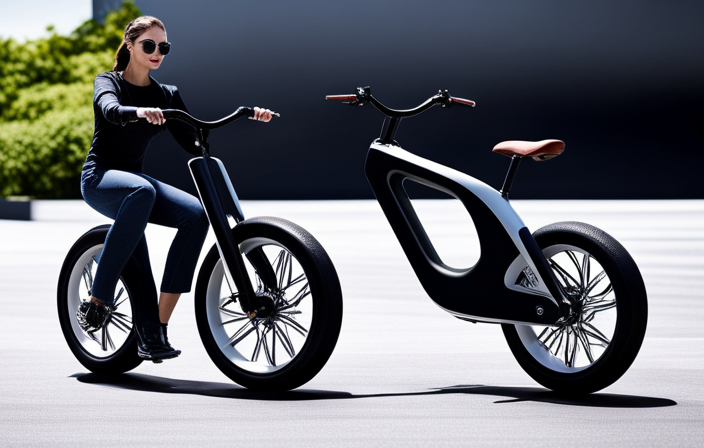
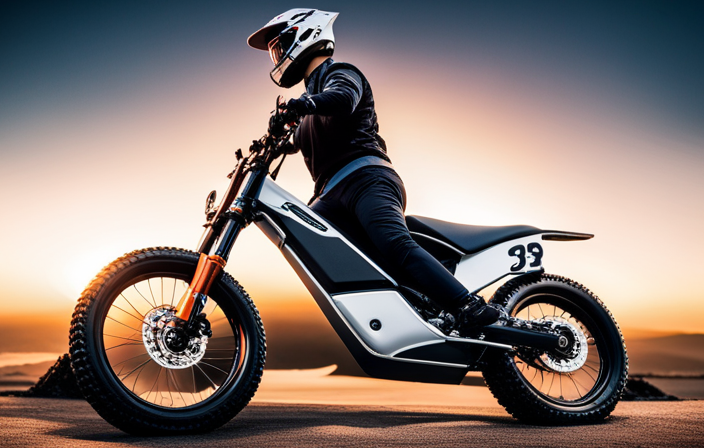
Connect with us

Electric Bike

Which Battery Are In Electric Dirt Bike

Published

on

An image depicting a close-up of an electric dirt bike's exposed battery pack, revealing its sleek design and compact size

As an avid dirt bike enthusiast, I’ve always been fascinated by the power and performance of electric dirt bikes. One crucial element that contributes to their impressive performance is the type of battery they use.

In this article, we’ll delve into the different types of batteries found in electric dirt bikes, such as lithium-ion, nickel-metal hydride, and lead-acid batteries. By understanding the intricacies of these battery systems, you’ll be equipped with the knowledge to make an informed decision when it comes to choosing the right battery for your electric dirt bike.

Key Takeaways

  • Lithium-ion batteries are the most popular choice for electric dirt bikes due to their high energy density and longer lifespan.
  • Other battery types such as nickel-metal hydride (NiMH), lead-acid, and nickel-cadmium (NiCd) batteries are also considered as alternative options.
  • Lithium iron phosphate (LiFePO4) batteries offer advantages in terms of lower cost, lower maintenance, and suitability for off-road riding.
  • Sodium-ion batteries, zinc-air batteries, and solid-state batteries are also being explored for their potential in electric dirt bikes, but they have their own advantages and limitations.

Lithium-ion Batteries

You should know that lithium-ion batteries are commonly used in electric dirt bikes. These batteries offer several advantages that make them an ideal choice for powering these vehicles.

One major advantage is their high energy density, which means they can store a large amount of energy in a compact size. This allows for longer riding distances without the need for frequent recharging. Additionally, lithium-ion batteries have a longer lifespan compared to other battery types, which reduces the need for frequent replacements.

Advertisement

However, there are also some disadvantages to consider. Lithium-ion batteries can be expensive compared to other options, and they require careful handling to prevent overheating or damage. Despite these drawbacks, lithium-ion batteries remain a popular choice for electric dirt bikes.

Speaking of alternative options, let’s now explore nickel-metal hydride (NiMH) batteries.

Nickel-metal Hydride (NiMH) Batteries

When considering alternative battery options for electric dirt bikes, one environmentally friendly option to explore is Nickel-metal Hydride (NiMH) batteries. These batteries offer a good energy density, meaning they can store a significant amount of energy for their size and weight.

Additionally, NiMH batteries tend to have a lower cost compared to lithium-ion batteries, making them an attractive choice for those looking for a more affordable power source.

Environmentally friendly option

An environmentally friendly option for the battery in an electric dirt bike is a lithium-ion battery. Lithium-ion batteries have gained popularity in recent years due to their numerous advantages and positive impact on the environment. Here are three reasons why lithium-ion batteries are a great choice for electric dirt bikes:

Advertisement
  1. Renewable energy sources: Lithium-ion batteries can be charged using renewable energy sources such as solar or wind power. This means that the energy used to charge the battery comes from clean and sustainable sources, reducing reliance on fossil fuels.

  2. Impact on air quality: Electric dirt bikes powered by lithium-ion batteries produce zero emissions during operation. Unlike traditional combustion engines, which release harmful pollutants into the air, lithium-ion battery-powered bikes contribute to improved air quality and reduced pollution.

  3. Long lifespan: Lithium-ion batteries have a longer lifespan compared to other battery options. This means less frequent replacement and fewer batteries ending up in landfills, reducing environmental impact.

Transitioning into the subsequent section about ‘good energy density,’ it is important to note that lithium-ion batteries also offer a high energy density, allowing for longer rides and greater overall performance.

Good energy density

With good energy density, lithium-ion batteries provide longer rides and better performance for your electric dirt bike. These batteries offer exceptional energy efficiency, storing a high amount of energy in a compact space. This means that you can experience extended riding sessions without worrying about running out of power.

Additionally, lithium-ion batteries have a long-lasting performance, allowing you to enjoy your electric dirt bike for years to come. Their durability ensures that they can handle the demands of off-road riding and continue to provide reliable power. Moreover, the advanced technology used in lithium-ion batteries maximizes their efficiency, minimizing energy loss during charging and discharging. As a result, you can rely on these batteries to deliver consistent and efficient power for your electric dirt bike.

Transitioning to the next section, while lithium-ion batteries offer these advantages, they also come with a lower cost compared to other battery options.

Lower cost compared to lithium-ion batteries

The lower cost of lithium-ion batteries compared to other options makes them a more affordable choice. When exploring alternative battery options and evaluating the feasibility of alternative battery technologies, cost is a crucial factor to consider. Lithium-ion batteries have gained popularity in various applications, including electric dirt bikes, due to their affordability. Let’s compare the cost of lithium-ion batteries with other battery technologies commonly used in electric vehicles:

Advertisement
Battery Technology Cost per kWh
Lithium-ion $150
Nickel Metal Hydride (NiMH) $250
Lead-Acid $80

As shown in the table, lithium-ion batteries offer the most cost-effective solution for electric dirt bikes. This affordability allows for broader adoption of electric bikes, making them more accessible to a wider range of riders. However, while lithium-ion batteries may be more affordable, it is important to evaluate their performance and suitability for specific applications. Transitioning into the subsequent section, let’s now explore the feasibility of using lead-acid batteries in electric dirt bikes.

Lead-acid Batteries

You should consider using lead-acid batteries for your electric dirt bike. These batteries offer several advantages, including lower maintenance and longer lifespan compared to other battery types.

Lead-acid batteries are known for their robustness and ability to withstand rugged off-road conditions. They require minimal maintenance, making them a reliable choice for your dirt bike. With proper care and regular charging, lead-acid batteries can last for several years, providing you with worry-free riding experiences.

However, if you’re looking for even higher performance and lighter weight, you may want to consider lithium polymer (lipo) batteries. These batteries offer faster recharge times and higher energy density, making them a popular choice among electric dirt bike enthusiasts.

Lithium Polymer (LiPo) Batteries

If you’re after higher performance and lighter weight, consider opting for lithium polymer (LiPo) batteries. These batteries have become increasingly popular in electric dirt bikes due to their impressive power-to-weight ratio.

Advertisement

One key advantage of LiPo batteries is their faster charging time compared to other battery types. With the right charger, you can recharge a LiPo battery in just a fraction of the time it takes for other batteries.

However, it is important to note that extreme temperatures can have a significant impact on the performance of LiPo batteries. High temperatures can cause the battery to degrade more quickly, while low temperatures can reduce its overall capacity. It is crucial to properly store and operate LiPo batteries within the recommended temperature range to ensure optimal performance.

Transitioning into the next section about nickel-cadmium (NiCd) batteries, it’s important to weigh the pros and cons of each battery type before making a decision.

Nickel-cadmium (NiCd) Batteries

When it comes to discussing Nickel-cadmium (NiCd) batteries, there are three key points that need to be highlighted.

Firstly, NiCd batteries have a good cycle life, meaning they can be charged and discharged numerous times before losing their effectiveness.

Advertisement

Secondly, they have a high discharge rate, allowing for quick and efficient power delivery.

However, it is important to note that NiCd batteries are environmentally hazardous due to their cadmium content, which poses risks to both human health and the ecosystem if not properly disposed of.

Good cycle life

The electric dirt bike has a battery with a good cycle life. This means that the battery can go through many charge and discharge cycles before it starts to degrade and lose its capacity. The advantage of a battery with a good cycle life is that it can be used for a longer period of time without needing to be replaced. This is especially important for electric dirt bikes, as they are often used for off-road adventures where a reliable and durable battery is essential. However, there are also some disadvantages to consider. One disadvantage is that batteries with a good cycle life tend to be more expensive compared to batteries with a shorter cycle life. Additionally, these batteries may be heavier, which can affect the overall performance and maneuverability of the dirt bike.

Advantages Disadvantages
Longer battery lifespan Higher cost
Reliable and durable Increased weight
Potential performance impact

With a battery that has a good cycle life, the electric dirt bike can provide a longer-lasting and reliable power source for your off-road adventures. However, there is another important factor to consider: the high discharge rate of the battery.

High discharge rate

Having a high discharge rate means the battery can provide a quick and powerful burst of energy for acceleration and high-speed performance. This feature offers several advantages in electric dirt bikes:

Advertisement
  1. Enhanced speed: With a high discharge rate, the battery can deliver the necessary energy to achieve faster speeds, giving riders an exhilarating experience.

  2. Quick acceleration: Electric dirt bikes equipped with high discharge rate batteries can accelerate rapidly, allowing riders to quickly navigate through various terrains.

  3. Improved performance: The ability to deliver a powerful burst of energy ensures that the bike performs optimally, providing riders with a thrilling and responsive riding experience.

  4. Increased versatility: High discharge rate batteries enable electric dirt bikes to handle challenging terrains with ease, making them suitable for various off-road adventures.

However, there are also some disadvantages to consider:

  • Reduced overall battery life: The higher the discharge rate, the quicker the battery may deplete, resulting in a shorter overall battery life.

  • Increased heat generation: High discharge rates can cause the battery to generate more heat, which may lead to decreased efficiency and potential damage if not properly managed.

  • Higher cost: Batteries with high discharge rates tend to be more expensive, adding to the overall cost of the electric dirt bike.

  • Limited selection: Not all electric dirt bikes come equipped with high discharge rate batteries, limiting the options available to riders.

It’s important to note that high discharge rate batteries used in electric dirt bikes can be environmentally hazardous due to their cadmium content, which will be discussed in the subsequent section.

Environmentally hazardous due to cadmium content

You should be aware that the high discharge rate batteries used in electric dirt bikes can pose an environmental hazard due to their cadmium content. Cadmium is a toxic heavy metal that can have detrimental effects on both human health and the environment. As a result, it is essential to consider cadmium-free alternatives when choosing batteries for electric dirt bikes.

One way to assess the environmental impact of these batteries is through an environmental impact assessment, which evaluates the potential harm they may cause throughout their lifecycle. By considering cadmium-free alternatives and conducting a thorough environmental impact assessment, we can minimize the negative effects of these batteries on the environment and ensure a more sustainable future.

Transitioning into the subsequent section, let’s explore the benefits of lithium iron phosphate (LiFePO4) batteries.

Advertisement

Lithium Iron Phosphate (LiFePO4) Batteries

When it comes to electric dirt bikes, one option for batteries is lithium iron phosphate (LiFePO4). LiFePO4 batteries have gained popularity due to their numerous advantages over other battery types.

One of the key advantages is their long lifespan, which can be up to 2000 cycles compared to around 500 cycles for other lithium batteries. Additionally, LiFePO4 batteries are more stable and have a lower risk of thermal runaway, making them safer to use. They also have a higher tolerance for extreme temperatures and can perform well in both hot and cold environments.

Another significant advantage is their faster charging time. LiFePO4 batteries can be charged in as little as 2 hours, whereas other lithium batteries may take up to 6 hours to reach full capacity. This makes them a convenient choice for electric dirt bike riders who don’t want to wait around for their battery to charge.

Now, let’s transition to the next section where we will discuss sodium-ion batteries.

Sodium-ion Batteries

Sodium-ion batteries are a promising alternative to lithium batteries due to their potential for high energy density. These batteries have a wide range of applications, including the storage of renewable energy, electric vehicles, and portable electronics. Sodium-ion batteries use sodium ions instead of lithium ions for charge storage, which allows for the use of abundant and low-cost sodium resources.

Advertisement

However, there are some limitations to sodium-ion batteries that need to be addressed. One major limitation is the lower energy density compared to lithium-ion batteries, which affects the overall performance and range of electric vehicles. Additionally, sodium-ion batteries face challenges in terms of cycle life and safety.

Despite these limitations, ongoing research and development efforts aim to overcome these hurdles and unlock the full potential of sodium-ion batteries.

Looking ahead, let’s explore another promising battery technology: zinc-air batteries.

Zinc-air Batteries

After exploring the potential of sodium-ion batteries, let’s delve into another promising option for electric dirt bikes: zinc-air batteries. These batteries utilize a zinc anode and oxygen from the air as the cathode, generating electrical energy through a chemical reaction.

Here are the advantages and limitations of zinc-air batteries:

Advertisement
  1. Advantages

    • High energy density: Zinc-air batteries can store a large amount of energy, providing longer driving ranges for electric dirt bikes.
    • Lightweight: The absence of heavy metals like lithium reduces the weight of the battery, enhancing the bike’s overall performance.
    • Cost-effective: Zinc is abundant and inexpensive, making zinc-air batteries a more affordable option compared to other battery technologies.
  2. Limitations

    • Limited lifespan: The zinc electrode gradually corrodes over time, reducing the battery’s efficiency and lifespan.
    • Slow recharge: Recharging a zinc-air battery can be time-consuming due to the need to replenish the zinc anode.
    • Environmental impact: The disposal of zinc-air batteries requires proper handling to prevent zinc contamination.

With the understanding of zinc-air batteries, we can now explore the next step in battery technology: solid-state batteries.

Solid-state Batteries

Solid-state batteries offer enhanced safety compared to liquid electrolyte batteries due to their non-flammable and non-volatile nature. Additionally, they have a high energy density, allowing for longer rides and improved performance in electric dirt bikes.

However, it is important to note that solid-state batteries are still in the early stages of development for electric dirt bikes. Further research and testing is needed to optimize their performance and efficiency in this specific application.

Enhanced safety compared to liquid electrolyte batteries

You’ll appreciate the enhanced safety of these batteries compared to liquid electrolyte ones.

Solid-state batteries have made significant technological advancements in terms of safety features. Unlike liquid electrolyte batteries, which are prone to leakage and thermal runaway, solid-state batteries are designed with enhanced safety features that minimize these risks. The use of solid-state electrolytes eliminates the need for a flammable liquid electrolyte, reducing the chances of leakage and fire. Additionally, solid-state batteries have improved thermal stability, making them less susceptible to overheating and explosions.

These advancements in safety have paved the way for the widespread adoption of solid-state batteries in various applications, including electric dirt bikes.

Advertisement

Now, let’s explore another key aspect of solid-state batteries: their high energy density.

High energy density

Their high energy density is one of the key advantages of solid-state batteries. Solid-state batteries have a higher energy density compared to traditional batteries, allowing them to store more energy in a smaller size. This is especially beneficial for electric dirt bikes, as it allows for longer rides without constantly needing to recharge. The table below showcases the energy density of different battery types:

Battery Type Energy Density (Wh/kg)
Solid-State 400-600
Lithium-Ion 150-200
Nickel-Metal 60-120
Hydride 30-80
Lead-Acid 30-50

With solid-state batteries, electric dirt bikes can enjoy improved battery longevity and reduced charging times. However, it’s important to note that solid-state batteries are still in the early stages of development for electric dirt bikes, and further advancements are needed before they become widely available. Nonetheless, the high energy density of solid-state batteries holds great promise for the future of electric dirt biking.

Still in the early stages of development for electric dirt bikes

In the realm of electric off-road vehicles, advancements in battery technology are still in the early stages of development. Electric dirt bikes face unique challenges when it comes to battery performance.

One major challenge is the limited range of electric dirt bikes compared to their gasoline-powered counterparts. Another challenge is the weight of the batteries, which affects the handling and maneuverability of the bike.

Advertisement

To improve the performance of electric dirt bikes, potential solutions include developing batteries with higher energy density, allowing for a longer range. Additionally, reducing the weight of the batteries through advancements in battery materials can enhance the bike’s agility and responsiveness.

These advancements are crucial for the widespread adoption of electric dirt bikes and will contribute to a more sustainable and eco-friendly off-road riding experience.

Transitioning into the subsequent section about flow batteries, let’s explore another potential solution for improving battery technology.

Flow Batteries

Flow batteries, such as the vanadium redox flow battery, offer a promising solution for storing energy in electric dirt bikes. These batteries have a few key advantages that make them suitable for such applications:

  • High energy density: Flow batteries have a high energy storage capacity, allowing them to store a large amount of energy in a compact size.

  • Long cycle life: Flow batteries can withstand a large number of charge and discharge cycles without significant degradation, ensuring a longer lifespan for the battery.

  • Scalability: These batteries can be easily scaled up or down to meet the specific energy storage requirements of electric dirt bikes.

  • Rapid charging: Flow batteries can be charged quickly, allowing for shorter charging times and reducing downtime for the rider.

With these advantages, flow batteries provide a reliable and efficient energy storage solution for electric dirt bikes.

Advertisement

However, another alternative to consider is supercapacitors, which offer their own unique benefits.

Supercapacitors

Supercapacitors have a higher power density compared to flow batteries, allowing for more rapid energy discharge. This means that supercapacitors can charge and discharge energy more quickly than flow batteries. They are capable of handling high power demands, making them ideal for applications that require fast charging and discharging, such as electric vehicles.

Additionally, supercapacitors have the potential for a long lifespan. Unlike traditional batteries, which degrade over time due to chemical reactions, supercapacitors store energy through the physical separation of charges. This means that they can be charged and discharged repeatedly without significant degradation, potentially lasting for many years.

Now, let’s move on to the next section about zinc-nickel batteries, which offer their own unique advantages.

Zinc-nickel Batteries

Zinc-nickel batteries have a higher energy density, making them great for longer-lasting power storage. They are an excellent choice for a wide range of applications. One advantage of zinc-nickel batteries is their high capacity, allowing them to store more energy than other battery types. These batteries also have a longer cycle life, making them ideal for use in electric vehicles. They are durable and reliable, which is crucial for electric vehicles. Zinc-nickel batteries are also environmentally friendly as they do not contain toxic materials. These advantages and applications make zinc-nickel batteries a promising option for various industries.

Advertisement

Now, let’s move on to the next section about lithium-sulfur batteries.

Lithium-sulfur Batteries

Now, let’s talk about how lithium-sulfur batteries offer a higher energy density and lighter weight compared to traditional battery chemistries.

Lithium-sulfur battery applications:

  1. Electric vehicles: Lithium-sulfur batteries have the potential to revolutionize the electric vehicle industry by providing longer ranges and shorter charging times.
  2. Portable electronics: These batteries can be used in smartphones, laptops, and other portable devices, offering extended battery life.
  3. Renewable energy storage: Lithium-sulfur batteries can store excess renewable energy, allowing for a more efficient and reliable energy grid.

Lithium sulfur battery performance improvements:

  • Enhanced energy density: Lithium-sulfur batteries can store more energy per unit weight compared to traditional batteries, making them ideal for applications where weight is a concern.
  • Longer cycle life: Recent advancements have addressed the issue of limited cycle life in lithium-sulfur batteries, improving their overall performance and durability.
  • Cost-effectiveness: With ongoing research and development, the production cost of lithium-sulfur batteries is expected to decrease, making them a more affordable option in the future.

As we transition to the subsequent section about ‘graphene batteries,’ it is important to note that graphene offers unique properties that can further enhance the performance of lithium-sulfur batteries.

Graphene Batteries

As you delve into the topic of graphene batteries, you’ll discover how this innovative material can significantly enhance the performance of lithium-sulfur batteries. Graphene battery technology is at the forefront of future advancements in battery technology, offering exciting possibilities for increased energy density, longer cycle life, and faster charging times. Graphene, a single layer of carbon atoms arranged in a hexagonal lattice, possesses remarkable properties such as high electrical conductivity, mechanical strength, and thermal stability. These properties make it an ideal material for battery electrodes, enabling better electron and ion transport within the battery system. In a lithium-sulfur battery, incorporating graphene as a conductive additive can improve the overall battery performance by increasing energy storage capacity and reducing the formation of unwanted side reactions. This breakthrough technology holds immense potential for powering electric vehicles and revolutionizing energy storage systems as we know them.

Properties Graphene Battery
Energy Density High
Cycle Life Long
Charging Time Fast
Stability Excellent

Moving forward to hybrid battery systems, we explore the combination of different battery technologies to achieve enhanced performance and efficiency.

Advertisement

Hybrid Battery Systems

Moving forward to hybrid battery systems, we’ll see how different battery technologies can be combined to achieve enhanced performance and efficiency.

Hybrid battery technology is a promising solution for the future of energy storage. By combining the strengths of multiple battery types, such as lithium-ion and solid-state batteries, hybrid systems can provide higher energy density, longer lifespan, and faster charging capabilities.

These advancements in hybrid battery technology are driven by the need for improved range and reduced charging times in electric vehicles. Researchers are exploring various approaches, including integrating different battery chemistries, optimizing battery management systems, and developing new materials for electrodes and electrolytes.

The future advancements in hybrid battery systems hold great potential for revolutionizing not only the automotive industry but also other sectors that rely on energy storage.

Frequently Asked Questions

Are there any other types of batteries used in electric dirt bikes besides the ones mentioned in the article?

There are alternative battery options for electric dirt bikes, including lithium-ion, nickel-metal hydride, and lead-acid batteries. Each type has its pros and cons, such as energy density, weight, and cost, which should be considered when choosing the right battery for a dirt bike.

Advertisement

What are the advantages of using lithium-sulfur batteries in electric dirt bikes?

The advantages of using lithium-sulfur batteries in electric dirt bikes include higher energy density, longer range, lighter weight, and lower cost. Compared to lithium-ion batteries, lithium-sulfur batteries offer improved performance and efficiency, making them an attractive option for electric dirt bike manufacturers.

How do hybrid battery systems work in electric dirt bikes?

Hybrid battery systems in electric dirt bikes work by combining different types of batteries to optimize battery performance. By strategically using a combination of batteries, the bike can benefit from the strengths of each type, resulting in improved overall performance and efficiency.

Can zinc-air batteries be a suitable alternative to lithium-ion batteries in electric dirt bikes?

Zinc-air batteries can be a suitable alternative to lithium-ion batteries in electric dirt bikes. They offer longer run times, higher energy density, and lower costs. However, they have limitations such as slower recharge times and shorter overall lifespan compared to lithium-ion batteries.

Are there any specific safety considerations or precautions when using graphene batteries in electric dirt bikes?

When using graphene batteries in electric dirt bikes, it is important to consider the efficiency and performance of these batteries. Additionally, the impact of temperature on battery performance should be taken into account for optimal use.

Conclusion

In conclusion, when it comes to electric dirt bikes, there are various battery options available. From the widely used lithium-ion batteries to the more traditional lead-acid batteries, each type has its own advantages and limitations.

Advertisement

However, it is important to consider the specific requirements and preferences before making a choice. So, whether you are looking for long-lasting power or lightweight design, there is a battery out there for you.

Don’t let outdated ideas hold you back, embrace the future of electric dirt bikes and ride on with confidence!

Olivia's writing is not only informative but also inspiring. She has a knack for telling stories that capture the essence of cycling and the joy it brings to people's lives. Her writing has been praised by readers and industry experts alike for its clarity, depth, and authenticity. In addition to her writing, Olivia is also an avid cyclist. She enjoys exploring new trails and routes and has participated in several cycling events and races. Her first-hand experience with cycling gives her a unique perspective on the sport, reflected in her writing. Overall, Olivia is a talented writer passionate about cycling and dedicated to producing high-quality content for FlatironBike. Her contributions to the magazine have helped make it a go-to source for cycling enthusiasts worldwide.

Continue Reading
Advertisement

Electric Bike

How To Turn Your Bike Electric

Published

on

By

An image showcasing the step-by-step transformation of a traditional pedal-powered bike into an electric one

Are you prepared to upgrade your bike with more power? Converting your ordinary bike into an electric one is simpler than you may believe. With the appropriate conversion kit and a few easy steps, you’ll be enjoying rides on an electric bike in no time.

In this article, we’ll guide you through the process, from assessing your bike’s compatibility to installing the electric components.

So, strap on your helmet and get ready to pedal into the future with your very own electric bike.

Key Takeaways

  • Choose a motor and battery based on power output, size, weight, and compatibility with the bike.
  • Consider the range, charging time, and capacity of different battery options for desired distance requirements.
  • Select a motor type for optimal efficiency and battery range, such as lithium-ion batteries with high energy density and long lifespan.
  • Ensure proper wiring installation and controller compatibility for safe and efficient conversion.

Assess Your Bike’s Compatibility

You’ll need to assess if your bike is compatible for an electric conversion. Start by choosing the right motor for your bike. Consider factors such as the power output, size, and weight of the motor.

Advertisement

Evaluate battery options based on their capacity, voltage, and weight. Determine if your bike has enough space to accommodate the battery and if it can handle the added weight. Additionally, consider the range and charging time of different battery options.

Once you have assessed your bike’s compatibility and chosen the right motor and battery, you can move on to the next section about choosing the right conversion kit. This will ensure that you have all the necessary components to successfully convert your bike to electric.

Choose the Right Conversion Kit

When choosing the right conversion kit for your electric bike, there are three key points to consider.

First, you need to consider the motor type that’s compatible with your bike and your specific needs.

Second, evaluate the different battery options available. Take into account factors such as capacity, weight, and range.

Advertisement

Lastly, determine the controller requirements for your conversion kit. Ensure that it’s compatible with your bike’s existing components and provides the necessary functionality.

Consider Motor Type

To make your bike electric, you can choose from different motor types. When considering motor type, it is important to think about motor efficiency and battery range.

The motor efficiency refers to how effectively the motor converts electrical energy into mechanical energy. A higher motor efficiency means that your bike will be able to go further on a single charge.

The battery range, on the other hand, refers to how far your bike can travel on a full battery. This is influenced by both the motor efficiency and the capacity of the battery.

By selecting the right motor type, you can ensure that your bike will have optimal motor efficiency and battery range.

Advertisement

Now, let’s move on to evaluating battery options for your electric bike.

Evaluate Battery Options

Now, let’s take a look at the different battery options available for your e-bike. When converting your bike to electric, the battery is a crucial component to consider. Here are some battery options you can evaluate:

  • Lithium-ion batteries: These are the most common and widely used batteries for e-bikes due to their high energy density and long lifespan.

  • Lead-acid batteries: Although they are cheaper, lead-acid batteries are heavier and have a lower energy density than lithium-ion batteries.

  • Nickel-metal hydride (NiMH) batteries: These batteries are less common nowadays due to their lower energy density and shorter lifespan compared to lithium-ion batteries.

  • Lithium polymer (LiPo) batteries: These batteries have a higher energy density than lithium-ion batteries, but they are more expensive and require special care during charging.

When choosing a battery for your e-bike, consider the battery capacity, as it determines the range you can achieve. Also, evaluate the charging options available for the battery you choose. They can vary from plug-in charging to removable batteries with external chargers.

With the battery options covered, let’s now transition into determining the controller requirements for your electric bike conversion.

Determine Controller Requirements

Next, let’s explore the necessary controller requirements for your e-bike conversion.

Advertisement

Controller selection is a critical aspect of turning your bike electric. It serves as the brain of your electric system, controlling the power output to the motor and managing the flow of electricity from the battery.

When choosing a controller, consider factors such as voltage compatibility, current rating, and motor compatibility.

Wiring installation is another crucial step in the process. Ensure that you have the appropriate connectors, wires, and tools to connect the controller to the battery and motor. Proper wiring is essential for a safe and efficient electric bike conversion.

Once you have determined the controller requirements, you can move on to the next step of gathering the necessary tools for the installation process.

Gather the Necessary Tools

First, gather all the necessary tools for the job. Here are three essential items you’ll need to get started:

Advertisement
  • A conversion kit: Choose the right conversion kit that suits your bike’s specifications and provides the power and speed you desire.

  • Compatible batteries: Find lithium-ion batteries specifically designed for electric bike conversions. Ensure the battery has enough capacity to meet your distance requirements.

  • Basic tools: Have a set of wrenches, screwdrivers, and pliers to remove and install components during the conversion process.

Once you have gathered all the necessary tools, you can move on to the next step, which is removing non-essential components from your bike.

Remove Non-Essential Components

To begin the conversion process, start by removing any non-essential components from your bicycle. This step is crucial in making room for the electric components that you will be installing later on. Take off accessories such as fenders, racks, and bells that are not necessary for the functioning of the electric bike.

By doing this, you can reuse these components on another bicycle or sell them to recover some of the costs associated with the conversion. If you don’t plan on reusing these components, there are cost-effective alternatives available in the market. For example, instead of using a traditional rear rack, you can opt for a seat post rack that doesn’t require any additional mounting points.

Once you have removed these non-essential components, you can move on to the next step of installing the electric components, which will give your bike the power it needs.

Install Electric Components

To install electric components on your bike, you’ll need to follow a few key steps.

Advertisement

First, attach the motor to the bike frame securely using the provided brackets and screws.

Next, mount the battery and controller in a convenient and balanced location. Make sure they are easily accessible but won’t interfere with your riding.

Finally, connect the wiring and cables, making sure to follow the provided instructions to ensure proper functioning of the electric system.

Attach Motor to Bike Frame

After attaching the motor to the bike frame, you can move on to the next step in the bike motor installation process.

To ensure a secure attachment, begin by aligning the motor with the frame and making sure it is centered.

Advertisement

Use the appropriate mounting brackets and hardware to secure the motor in place.

Tighten all bolts and screws to ensure a stable connection.

It is important to double-check the alignment and tightness of the motor to prevent any issues during operation.

Once the motor is securely attached, you can now proceed to the next section about mounting the battery and controller.

This step is crucial in completing the electric bike conversion process and will provide power to the motor for a smooth and efficient ride.

Advertisement

Mount Battery and Controller

Once the motor is securely attached, you can now move on to mounting the battery and controller. Battery installation is a crucial step in converting your bike into an electric one. The battery provides the necessary power to run the motor and ensures a smooth ride. To mount the battery, follow these steps:

  1. Choose a suitable location on the bike frame, ensuring it is secure and easily accessible.
  2. Use straps or brackets to attach the battery securely to the frame, minimizing any movement or vibration during rides.
  3. Connect the battery to the controller using the provided wiring harness and connectors.
  4. Mount the controller near the battery, ensuring it is protected from any external elements.
  5. Use zip ties or clamps to secure the controller to the bike frame, keeping it stable and preventing damage.

Once the battery and controller are securely mounted, you can now proceed to connect the wiring and cables. This ensures proper communication and power flow between the motor, battery, and controller, allowing for a seamless electric biking experience.

Connect Wiring and Cables

First, connect the wiring and cables to ensure proper communication and power flow between the motor, battery, and controller. This step is crucial for the functioning of your electric bike. Here are some wire connection techniques and cable routing tips to help you with this process:

  1. Use proper wire connectors such as butt connectors or soldering for secure connections.
  2. Organize and route the cables in a way that avoids interference with other bike components.
  3. Secure the cables using zip ties or cable clamps to prevent them from getting caught in moving parts.
  4. Test the connections by gently tugging on the wires to ensure they are properly secured.

Once you have completed the wiring and cable connections, you can move on to the next step of reassembling and adjusting the components of your electric bike.

Reassemble and Adjust

To reassemble and adjust your bike, you’ll wanna start by attaching the electric motor to the frame. Ensure that it is securely fastened using the appropriate bolts and brackets.

Next, reconnect the wiring and cables, making sure to follow the correct color-coded scheme. Double-check that all connections are tight and free from any damage.

Once the motor is in place, adjust the tension of the drive belt or chain to ensure smooth operation. Use adjustment techniques such as loosening or tightening the tensioner bolts as needed.

Advertisement

If you encounter any issues during this process, troubleshoot by checking the wiring connections and making sure all components are properly aligned.

Finally, ensure safety measures are in place by testing the brakes and adjusting them if necessary. This will guarantee a safe and reliable electric bike experience.

Ensure Safety Measures

Now that you have reassembled and adjusted your electric bike, it’s time to focus on ensuring safety measures.

Safety precautions are of utmost importance when it comes to riding an electric bike. Before you hit the road, make sure to have the right protective gear. A helmet is essential to protect your head from potential injuries. Elbow and knee pads can protect your joints in case of a fall. Don’t forget to wear gloves to enhance your grip and protect your hands.

Additionally, reflective clothing or accessories can increase your visibility, especially when riding at night. Following these safety measures will greatly reduce the risk of accidents and injuries.

Advertisement

With your safety gear in place, you are ready to learn to ride electric and experience the thrill of your newly transformed bike.

Learn to Ride Electric

Once you feel comfortable with the safety gear, it’s time to start experiencing the thrill of riding an electric bike.

Riding an electric bike offers numerous benefits that make it a popular choice among cycling enthusiasts. First and foremost, electric bikes provide assistance in pedaling, allowing you to cover longer distances with less effort. They also offer various levels of assistance, so you can choose the level that suits your fitness level and desired intensity of workout.

However, it’s important to take certain safety precautions when riding an electric bike. Always wear a helmet and other protective gear, obey traffic laws, and be mindful of your surroundings. Additionally, make sure to familiarize yourself with the controls and features of your electric bike before taking it for a spin.

Now, let’s move on to the next section and learn how to maintain your electric bike properly.

Advertisement

Maintain Your Electric Bike

Make sure you regularly check and maintain the various components of your e-bike to ensure its optimal performance. Electric bike maintenance is crucial to keep your bike running smoothly and avoid any unexpected issues. Here are some key tasks you should perform:

  • Check the tire pressure regularly to ensure proper traction and efficiency.
  • Clean and lubricate the chain to prevent excessive wear and ensure smooth operation.
  • Inspect the brakes for any signs of wear or misalignment and adjust them if necessary.

Troubleshooting common issues is also an important part of maintaining your electric bike:

  • If your battery doesn’t hold a charge, try resetting it or consider replacing it.
  • If your motor is not functioning properly, check the connections and consult the user manual for troubleshooting steps.

By following these maintenance tips and promptly addressing any issues, you can enjoy your electric bike to the fullest without any interruptions.

Enjoy Your Electric Bike

Get ready to have a blast riding your e-bike and experience the thrill of effortless speed and freedom.

Electric bikes offer a range of benefits that enhance your riding experience. Firstly, they provide assistance with pedaling, making it easier to tackle hills and long distances. This means you can ride for longer periods without getting tired.

Additionally, electric bikes allow you to travel at higher speeds, reaching up to 20 mph, while still maintaining control and safety.

To make the most out of your electric bike, consider investing in some accessories. A helmet is essential for safety, while a bike lock ensures your e-bike stays secure. Other popular accessories include lights for visibility, fenders to protect against splashes, and a pannier or basket for carrying your belongings.

Advertisement

With these accessories, you can fully enjoy the convenience and pleasure of riding your electric bike.

Frequently Asked Questions

Can any type of bike be converted into an electric bike?

Yes, any type of bike can be converted into an electric bike. Converting a mountain bike has pros such as enhanced performance, but cons like increased weight. To choose the right battery, consider factors like capacity, voltage, and compatibility with your bike’s motor.

What factors should be considered when choosing a conversion kit?

Consider the electric bike conversion cost and opt for the best electric bike conversion kits. Keep in mind factors like motor power, battery capacity, ease of installation, and compatibility with your bike model. Remember, "You get what you pay for."

Are there any specific tools required for the conversion process?

To convert your bike into an electric one, you will need specific tools such as wrenches, pliers, wire cutters, and a soldering iron. The step-by-step conversion process involves removing the bike’s pedals, attaching the motor, and connecting the battery and controller.

Can the non-essential components be reinstalled after converting the bike?

Sure, you can reinstall non-essential components after converting your bike, but be cautious of compatibility issues. Ensure the components are compatible with the electric conversion and won’t interfere with the new system’s performance.

Advertisement

How long does it typically take to complete the conversion process?

The time it takes to complete the conversion process depends on various factors, such as your familiarity with bike mechanics, availability of tools, and the complexity of the conversion kit. Common challenges include wiring issues and compatibility problems with existing bike components.

Conclusion

In conclusion, by following these steps, you can successfully turn your bike into an electric one.

While some may argue that the process is complicated and time-consuming, it is worth the effort for the benefits it brings.

Not only will you be able to enjoy a faster and smoother ride, but you will also contribute to a greener environment.

Don’t let the initial challenges discourage you; with the right tools and instructions, you can easily transform your regular bike into an electric one and experience the joy of riding in a whole new way.

Advertisement

Continue Reading

Electric Bike

How To Turn On Nakto Electric Bike

Published

on

By

An image showcasing a close-up of a hand firmly gripping the Nakto Electric Bike's handlebar, while the other hand reaches down to press the power button located on the battery pack

So you just got your hands on a new Nakto electric bike, and you’re ready to start riding.

But wait! Before you can embark on your thrilling adventure, you need to know how to turn on this sleek and powerful machine.

In this article, I will guide you through the step-by-step process of familiarizing yourself with the controls, checking the battery level, and activating the power button.

Get ready to unleash the full potential of your Nakto electric bike and experience the exhilaration of effortless riding.

Key Takeaways

  • Locate the power button on the display panel
  • Ensure the battery is fully charged before turning on the bike
  • Familiarize yourself with icons and symbols on the display panel
  • Press the power button to turn on the bike

Familiarizing Yourself with the Controls

Advertisement

To turn on the Nakto electric bike, familiarize yourself with the controls. Understanding the gear system is crucial for a smooth and efficient ride. The Nakto electric bike typically comes with a gear selector located on the handlebars.

By shifting gears, you can adjust the bike’s resistance and speed. Lower gears are ideal for climbing uphill or starting from a stop, while higher gears are suitable for cruising at faster speeds. Take some time to practice shifting gears before hitting the road to ensure a comfortable ride.

Additionally, it is essential to know how to use the brakes effectively. The Nakto electric bike usually has both front and rear brakes that can be engaged by squeezing the brake levers. Practice applying the brakes gradually and evenly to ensure a safe and controlled stop.

Familiarizing yourself with the gear system and mastering the art of using the brakes effectively will enhance your overall riding experience on the Nakto electric bike.

Checking the Battery Level

First, you’ll want to check the level of your battery. This is an important step in battery maintenance to ensure that you have enough power for your ride.

Advertisement

Here are some charging tips to help you keep your Nakto electric bike battery in good condition:

  1. Locate the battery indicator on your bike’s control panel. It is usually a series of bars or a digital display.

  2. Turn on the bike by pressing the power button.

  3. Look at the battery indicator to see the current level. If it is low, you’ll need to charge the battery before riding.

  4. To charge the battery, plug the charger into a power outlet and connect it to the battery port on your bike. Make sure the charger is securely plugged in.

Remember to follow the manufacturer’s instructions for charging and maintaining your battery. Regularly checking the battery level will help ensure a smooth and enjoyable ride.

Adjusting the Seat and Handlebars

Adjusting the seat and handlebars is an essential step in customizing your riding experience. It ensures that you are comfortable and in control while riding your Nakto electric bike. When adjusting the seat, make sure it is set at a height that allows your feet to touch the ground when seated and provides a slight bend in your knee when pedaling. The handlebars should be adjusted to a position that allows you to maintain a relaxed and upright posture.

Advertisement

In order to adjust the brakes, locate the brake levers on the handlebars. Squeeze the levers to test the brakes and make sure they engage properly. If they feel too loose or too tight, adjust the tension using the barrel adjuster located near the brake levers.

Finding the right gear is crucial for a smooth and efficient ride. Use the gears to match your pedaling speed with the terrain you are riding on. Shift to a lower gear when climbing hills or starting from a stop, and shift to a higher gear when riding on flat or downhill surfaces. Experiment with different gears to find the one that feels most comfortable and efficient for you.

Adjusting the seat, handlebars, brakes, and finding the right gear will greatly enhance your riding experience on your Nakto electric bike. Take the time to make these adjustments and enjoy a comfortable and safe ride.

Seat Adjustment Handlebar Adjustment Brake Adjustment Gear Selection
Adjust height for feet to touch ground Adjust for relaxed and upright posture Test and adjust tension Match pedaling speed to terrain
Slight bend in knee when pedaling Comfortable grip and reach Proper engagement Lower gear for climbing, higher gear for flat or downhill surfaces
Personalize for optimal comfort Enhance control and maneuverability Ensure responsiveness Experiment for best performance

Turning on the Display Panel

Make sure you know how to power on the display panel. It is an essential step in getting your Nakto electric bike up and running.

Once you have adjusted the seat and handlebars to your liking, it’s time to dive into the display panel. This is where you can adjust the gears and understand the display settings.

Advertisement

Here are a couple of tips to help you navigate the display panel like a pro:

  • Adjusting the gears:

  • Use the up and down arrows to shift between gears.

  • Experiment with different gear settings to find the one that suits your riding style and terrain.

  • Understanding the display settings:

  • Familiarize yourself with the different icons and symbols on the display panel.

  • Pay attention to important information like battery level, speed, and distance traveled.

By mastering these aspects of the display panel, you will have complete control over your Nakto electric bike.

Activating the Power Button

To activate the power button, simply press the button located on the display panel. This button is usually marked with a power symbol or labeled ‘on/off.’

Advertisement

If you are experiencing any power issues with your Nakto electric bike, troubleshooting the power system can help identify and resolve the problem. Start by checking the battery level and ensuring it is fully charged. If the battery is low, connect the charger and wait for it to reach a sufficient charge before attempting to turn on the bike.

Additionally, familiarize yourself with the different power modes available on your electric bike. Understanding these modes can help you optimize the bike’s performance and battery life. It’s important to note that different Nakto models may have varying power modes and features, so refer to the user manual for specific instructions.

Engaging the Pedal Assist Mode

Engaging the pedal assist mode is a simple way to enhance your riding experience. It allows you to effortlessly glide through various terrains while enjoying the benefits of electric assistance.

To activate the pedal assist mode on your Nakto electric bike, follow these steps:

  • Press the power button to turn on the bike.
  • Once the bike is powered on, locate the pedal assist button on the handlebar.
  • Press the pedal assist button to cycle through the different pedal assist settings.

The pedal assist mode offers several benefits. It provides an extra boost of power when you pedal, making uphill climbs and long rides more manageable. The different pedal assist settings allow you to customize the level of assistance according to your preference and riding conditions.

Whether you want a gentle assist or a more powerful boost, the pedal assist mode on your Nakto electric bike can be adjusted to suit your needs.

Advertisement

Testing the Throttle

Once you’ve activated the pedal assist mode, you can test the throttle by gently twisting it to experience the instant acceleration and control it provides.

The throttle on the Nakto electric bike is designed to give you a seamless riding experience. When you twist the throttle, the bike responds immediately, providing you with a burst of power that propels you forward.

It’s important to test the throttle in a safe and controlled environment, ensuring that you have enough space to maneuver and adjust to the acceleration.

Additionally, while testing the throttle, it’s a good idea to also test the brakes to ensure they are responsive and functioning properly. This will give you confidence in your ability to control the bike’s speed and come to a stop when necessary.

Lastly, don’t forget to adjust the gear shift to find the most comfortable and efficient setting for your riding style.

Advertisement

Ensuring Proper Safety Measures

Make sure you follow all safety precautions to ensure a safe riding experience. One of the most important safety measures to take when riding a Nakto electric bike is wearing a helmet. Wearing a helmet can significantly reduce the risk of head injuries in case of an accident. It is important to choose a helmet that fits properly and meets safety standards. Additionally, it is recommended to wear other protective gear such as knee and elbow pads, especially for beginners or when riding on uneven terrains.

To emphasize the importance of safety, here is a table highlighting some key safety precautions to follow when riding a Nakto electric bike:

Safety Precautions
Wear a helmet
Use proper hand signals
Follow traffic rules
Check brakes and tires regularly
Be aware of surroundings

Remember, taking these safety precautions can greatly reduce the risk of accidents and injuries while enjoying your Nakto electric bike. Stay safe and happy riding!

Troubleshooting Common Issues

Troubleshooting common issues with your Nakto e-bike can help resolve any problems you may encounter while riding. Here are four common problems and their solutions:

  1. Troubleshooting motor issues: If your Nakto electric bike’s motor is not working, first check the battery to ensure it is properly charged. Then, inspect the motor connections to make sure they are secure. If these steps don’t solve the issue, it might be a faulty motor that needs professional repair or replacement.

  2. Troubleshooting display panel errors: If you encounter errors on the display panel, start by checking the connections between the display and the controller. Ensure they are tightly connected. If the problem persists, try resetting the display panel by turning off the e-bike and turning it back on. If none of these steps work, contact Nakto customer support for further assistance.

Remember, troubleshooting is an essential skill to maintain your Nakto e-bike’s performance and ensure a smooth riding experience.

Advertisement

Enjoying Your Nakto Electric Bike Ride

Having fun on your Nakto e-bike ride is all about embracing the exhilarating experience of electric biking. To fully enjoy your ride, it is important to choose the right riding gear and maintain your electric bike properly. The right riding gear will ensure your safety and comfort throughout your journey. It is recommended to wear a helmet, gloves, and appropriate clothing that allows freedom of movement. Additionally, maintaining your Nakto electric bike is crucial for a smooth and enjoyable ride. Regularly check the tire pressure, brakes, and battery level before each ride. Clean the bike regularly and lubricate the chain to prevent rust and ensure smooth pedaling. By following these tips, you can maximize your enjoyment and make every Nakto e-bike ride a memorable experience.

Riding Gear Maintenance
Helmet Check tire pressure
Gloves Inspect brakes
Appropriate clothing Battery level
Clean and lubricate bike

Frequently Asked Questions

How do I charge the battery of my Nakto electric bike?

To charge the battery of my Nakto electric bike, I simply connect the charger to the bike’s charging port. I ensure the charger is properly plugged in and wait for the battery to fully charge. If I encounter any issues, I troubleshoot common battery problems.

Can I adjust the speed settings on my Nakto electric bike?

Yes, you can adjust the speed settings on your Nakto electric bike. To do this, you will need to navigate the troubleshooting display panel and make the necessary adjustments according to the bike’s user manual.

What do I do if the display panel on my Nakto electric bike is not turning on?

If the display panel on your Nakto electric bike is not turning on, there may be some common display panel issues. Troubleshooting the display panel involves checking the battery connection, ensuring the display is properly installed, and contacting customer support if needed.

How long does it take for the battery of my Nakto electric bike to fully charge?

The battery of my Nakto electric bike takes approximately 4-6 hours to fully charge, depending on the model. This ensures a longer battery life and allows me to enjoy extended rides without worrying about running out of power.

Advertisement

Is there a specific maintenance routine I need to follow for my Nakto electric bike?

To properly maintain my Nakto electric bike, I should follow a specific maintenance routine. This includes regular cleaning, checking tire pressure, lubricating the chain, and inspecting the brakes. Additionally, troubleshooting the display panel is important for identifying any potential issues.

Conclusion

After following these steps, you’re now ready to enjoy your ride on the Nakto electric bike.

First, familiarize yourself with the controls. Make sure you know how to operate the throttle, brakes, and any other features specific to your model.

Next, check the battery level. It’s important to know how much charge you have left before setting off on your ride. This will help you plan your route accordingly.

Then, adjust the seat and handlebars to ensure a comfortable riding position. This will help prevent any discomfort or strain during your ride.

Advertisement

Now, you’ve ensured a comfortable and safe ride. Some may argue that electric bikes are not as powerful as traditional bikes, but imagine the thrill of effortlessly gliding down the road. Feel the wind in your hair and the freedom of the open road.

So, hop on your Nakto electric bike and experience the joy of an eco-friendly and convenient mode of transportation.

Continue Reading

Electric Bike

How To Turn The Light On My Electric Bike

Published

on

By

An image capturing a close-up of a hand firmly grasping the bike's handlebar, fingers positioned on the power button, with the other hand reaching towards the front light switch, ready to toggle it on, showcasing the step-by-step process of turning on the electric bike's light

Are you tired of riding in the dark on your electric bike? Are you wondering how to light up your path and stay safe? Look no further!

In this comprehensive guide, we’ll walk you through the step-by-step process of turning on the light on your electric bike. From familiarizing yourself with the bike’s controls to troubleshooting common light issues, we’ve got you covered.

So, grab your bike and let’s shed some light on the road ahead!

Key Takeaways

  • Locate the light switch on the handlebar or control panel
  • Check the battery level regularly and keep it between 20% and 80%
  • Press the power button to turn on the bike’s power
  • Activate the display panel to adjust light settings and personalize preferences

Familiarizing Yourself with the Bike’s Controls

You’ll need to familiarize yourself with the bike’s controls before you can turn the light on. Understanding the bike controls is crucial for a seamless riding experience.

Advertisement

Start by locating the handlebar, where you’ll find various features and buttons. Look for the control panel, which is usually positioned near the center of the handlebar. This panel allows you to access different functions, including the light switch.

Take a moment to study the layout and labels on the control panel. Each bike may have different symbols or icons, so it’s essential to understand what each one represents.

Once you’ve grasped the basic functions, locate the light switch. It is commonly marked with a light bulb symbol. By pressing or flipping this switch, you can easily turn the light on and illuminate your path.

Locating the Light Switch

To find the switch, look for a small button or lever near the handlebars. The light switch location on electric bikes can vary depending on the model, but it is typically located within easy reach of the rider’s thumb or fingers. Some bikes have a dedicated switch for the lights, while others may have a multifunctional button that controls various features, including the lights. Make sure to familiarize yourself with your specific bike’s controls to locate the light switch easily.

Using bike lights at night is crucial for your safety and visibility. It not only helps you see the road ahead but also makes you more visible to other road users. Once you have found the light switch, you can turn on the lights and ride confidently in low-light conditions.

Advertisement

Now, let’s move on to checking the battery level.

Checking the Battery Level

When checking the battery level, it’s important to know how much power is left in order to plan your ride accordingly. To check the battery level on your electric bike, locate the battery indicator on the display panel. This indicator will show you the current charge level of your battery.

It’s recommended to regularly check the battery level to ensure you have enough power for your desired distance. Proper battery maintenance is crucial for prolonging battery life. To maximize the lifespan of your battery, avoid completely draining it and try to keep it between 20% and 80% charged. This will help prevent excessive wear and tear on the battery cells.

Advertisement

Now that you know how to check the battery level, let’s move on to turning on the bike’s power and getting ready for your ride.

Turning on the Bike’s Power

To start your ride, simply press the power button on the control panel. This button is usually located near the handlebars, within easy reach. Once you press the power button, the bike’s power system will activate, and you’ll be ready to go.

Here are four key things to keep in mind when turning on your electric bike:

  1. Check the battery level: Before starting your ride, it’s important to ensure that the battery has enough charge. You can do this by glancing at the battery indicator on the control panel.

  2. Safety precautions: Always make sure that you are in a safe and stable position before turning on the bike’s power. This will help you maintain balance and prevent any accidents.

  3. Listen for the startup sound: When you press the power button, listen for a startup sound or a beep. This indicates that the bike’s power system has successfully turned on.

  4. Confirm the bike’s readiness: Take a quick look at the control panel to ensure that all the necessary indicators, such as speed, assist level, and battery level, are active and functioning properly.

Once you have turned on the bike’s power, you can proceed to activate the display panel, which will provide you with additional information about your ride.

Activating the Display Panel

Advertisement

To activate the display panel, simply press the corresponding button on the control panel.

The display panel is an essential part of your electric bike as it provides important information about your ride and allows you to access various settings.

Once activated, you will be able to see your speed, battery level, and distance traveled.

Additionally, the display panel also allows you to activate the headlight on your electric bike. This is crucial for ensuring visibility and safety, especially when riding in low light conditions or at night.

Advertisement

To activate the headlight, navigate to the display panel settings and select the option to turn on the headlight. By doing so, you can have a clear view of the road ahead.

Next, we will delve into accessing the settings menu, where you can personalize your bike’s features and preferences.

Accessing the Settings Menu

Accessing the settings menu allows you to customize the features and preferences of your bike.

To access the settings menu, locate the display panel on your electric bike. This panel is usually located on the handlebars or near the center of the bike. Once you have located the display panel, press the power button to turn it on.

Use the buttons on the display panel to navigate through the menu options until you find the settings menu.

Advertisement

Once you have accessed the settings menu, look for the option to customize light settings. This option will allow you to adjust the brightness, mode, and other settings related to the lights on your electric bike.

By customizing the light settings, you can ensure optimal visibility and safety while riding.

To navigate to the lights option, simply scroll through the settings menu until you find the appropriate category.

Navigating to the Lights Option

Once you have located the display panel, simply scroll through the settings menu until you find the category for adjusting the lights on your e-bike.

To navigate to the lights option, follow these steps:

Advertisement
  1. Press the power button on the display panel to turn on the e-bike.
  2. Use the arrow buttons to scroll through the menu options until you see the settings icon.
  3. Press the settings icon to enter the settings menu.
  4. Within the settings menu, continue scrolling until you find the lights option.

Once you have successfully navigated to the lights option, you can proceed to adjust the light settings according to your preference.

This will allow you to select the light mode that best suits your needs.

Selecting the Light Mode

When you have reached the lights option, you can easily choose the light mode that suits your preferences. Ensure proper light alignment by adjusting the light intensity using the controls provided. Here is a table to help you understand the different light modes available:

Light Mode Description
Low Provides a dim light for conserving battery
Medium Offers a moderate amount of brightness for regular use
High Gives a bright light for enhanced visibility

By selecting the appropriate light mode, you can ensure that you have the desired level of brightness while riding your electric bike. Once you have adjusted the light intensity, you can proceed to the next step of adjusting the brightness level.

Adjusting the Brightness Level

To adjust the brightness level, simply use the provided controls to increase or decrease the intensity of the light. On most electric bikes, you can find these controls near the handlebars or on the display panel. By adjusting the brightness level, you can customize the lighting to suit your preference and riding conditions.

If you’re riding in a well-lit area, you may want to lower the brightness level to conserve battery power. On the other hand, if you’re riding in low light conditions or at night, increasing the brightness level will enhance visibility and safety.

Advertisement

Additionally, some electric bikes allow you to adjust the angle of the light, allowing you to direct the beam where you need it most.

Once you have adjusted the brightness level and angle, you can move on to choosing between steady or flashing light modes, which we will cover next.

Choosing Between Steady or Flashing Light

Now that you have adjusted the brightness level of your electric bike’s light, it’s time to choose between a steady light or a blinking light.

The steady light emits a continuous beam of light, providing a consistent source of illumination. This is particularly helpful when riding in low-light conditions or on dark roads, as it allows other road users to easily see you. The steady light also helps improve visibility and reduces the risk of accidents.

On the other hand, the blinking light flashes intermittently, which can attract attention and make you more noticeable to others on the road. However, it may not provide as much visibility as the steady light.

Advertisement

Now that you understand the benefits of using a steady light, let’s move on to testing the functionality of the light.

Testing the Light Functionality

Before proceeding, it’s important to ensure that the light on your electric bike is functioning properly. To test the light functionality, follow these steps:

  1. Turn on the bike’s power and locate the light switch or button.
  2. Press or toggle the switch to activate the light.
  3. Check if the light turns on and stays steady or flashes, depending on your preference.
  4. If the light doesn’t turn on, check the battery connection and make sure it’s securely attached.
  5. Ensure that the light bulb is not burnt out by visually inspecting it or replacing it with a new one.
  6. If the light still doesn’t work, consider upgrading your bike’s lighting system to a more reliable and brighter option.

Troubleshooting common light issues will be discussed in the next section, where we will address potential problems and provide solutions.

Troubleshooting Common Light Issues

If your bike’s light is not functioning properly, troubleshooting common light issues can help you identify and solve the problem. Here are some steps to troubleshoot the connections and replace light bulbs:

  • First, check the connections between the light and the battery or power source. Ensure that all the cables are securely connected and free from any damage or corrosion.

  • If the connections are fine, then the issue might be with the light bulb itself. To replace the light bulb, refer to the manufacturer’s instructions or user manual. Usually, you would need to remove the casing or cover of the light and carefully unscrew the old bulb. Replace it with a new bulb of the same type and wattage.

  • After replacing the light bulb, test the functionality by turning on the light. If it still doesn’t work, consider seeking professional help or contacting the manufacturer for further assistance.

To ensure the longevity and proper functioning of the light, it is crucial to maintain and clean it regularly.

Maintaining and Cleaning the Light

To keep your bike light in optimal condition, make sure to regularly clean and maintain it. Cleaning techniques for your electric bike light will depend on the specific model, but most can be wiped clean with a soft cloth and mild soap and water. Avoid using harsh chemicals or abrasive materials that could damage the light. Additionally, check the light for any loose or damaged parts and tighten or replace them as needed. It’s important to keep the light free from dirt, dust, and moisture to ensure it functions properly. Regularly inspect the wiring and connections to make sure they are secure and undamaged. By following these maintenance tips, you can ensure your bike light stays in top shape for years to come. Now, let’s move on to using additional light accessories to enhance your biking experience.

Advertisement

Using Additional Light Accessories

Using extra light accessories can enhance your biking experience by increasing visibility and safety. When it comes to bike light installation, choosing the right light accessories is crucial. Here are three essential accessories to consider:

  1. Headlights: Invest in a powerful headlight that emits a bright beam to illuminate the path ahead. Look for headlights with multiple brightness settings and a long battery life.

  2. Taillights: A taillight is essential for visibility from behind. Opt for a taillight with a flashing mode to grab the attention of drivers and ensure they can see you, especially in low-light conditions.

  3. Reflective gear: In addition to lights, wearing reflective gear such as vests, arm bands, and ankle straps can greatly increase your visibility. These accessories reflect light from car headlights, making you more noticeable on the road.

By incorporating these additional light accessories into your biking routine, you can stay safe and visible on the road, ensuring a worry-free ride.

Staying Safe and Visible on the Road

Make sure you wear bright and reflective clothing to stay safe and visible on the road.

Nighttime visibility is crucial when riding your electric bike, as it can be difficult for drivers to see you in the dark. Reflective clothing helps to increase your visibility by reflecting light from car headlights, making you more noticeable.

It is important to choose clothing that has reflective strips or patches on the front, back, and sides. This will ensure that you are visible from all angles. Additionally, consider wearing a reflective vest or jacket for added visibility.

Advertisement

Remember, the more visible you are, the safer you will be on the road. So, make it a priority to wear bright and reflective clothing every time you ride your electric bike at night.

Frequently Asked Questions

How do I change the light bulb on my electric bike?

To change the light bulb on your electric bike, start by locating the light assembly. Depending on the model, you may need to remove a cover or unscrew the assembly.

Once exposed, carefully remove the old bulb and replace it with a new one of the same type and wattage.

If you’re still experiencing light issues after changing the bulb, consider troubleshooting the wiring connections or checking the battery power.

Can I use a different type of light on my electric bike?

Switching up the light on your electric bike? No worries, there are a plethora of alternative light options available in the market.

Advertisement

To make the best choice, consider reputable brands known for their stellar performance, like [insert best light brands here]. These brands offer a range of lights designed specifically for electric bikes, ensuring optimal brightness, energy efficiency, and durability.

So go ahead, illuminate your ride with a new light that suits your style and needs!

How often should I clean and maintain the light on my electric bike?

To clean and maintain the light on your electric bike, start by disconnecting the light from the power source.

Use a soft cloth or sponge to gently wipe away any dirt or debris on the surface of the light.

For stubborn stains, you can use a mild soap and water solution.

Advertisement

After cleaning, make sure the light is completely dry before reconnecting it to the power source.

Regularly check for any loose connections or damage to ensure proper functioning.

Are there any regulations or laws regarding the use of lights on electric bikes?

To ensure your safety and comply with regulations, it’s crucial to understand the rules regarding lights on electric bikes.

The brightness of the light must meet specific regulations, typically ranging from 300 to 1000 lumens.

Additionally, the required light colors vary depending on your location. For example, in some areas, a white light is required at the front, and a red light at the rear.

Advertisement

Familiarize yourself with the regulations in your region to ensure your electric bike’s lights meet the necessary requirements.

Can I adjust the angle or direction of the light on my electric bike?

To adjust the angle or direction of the light on your electric bike, look for a small screw or lever near the light housing. Loosen the screw or move the lever to change the position of the light.

Adjusting the light angle has several benefits, including increased visibility and improved safety during nighttime rides. A brighter light can help you see the road ahead more clearly, making your rides safer and more enjoyable.

Conclusion

As you embark on your electric bike journey, remember that the light represents more than just illumination. It symbolizes safety, visibility, and a connection to the world around you.

By understanding the bike’s controls, locating the light switch, and ensuring the battery is charged, you can activate this powerful symbol.

Advertisement

Maintain and clean the light, and consider using additional accessories to enhance your visibility.

As you ride, let the light guide you, and may it serve as a beacon of safety on your path.

Continue Reading
Advertisement

Affiliate disclaimer

As an affiliate, we may earn a commission from qualifying purchases. We get commissions for purchases made through links on this website from Amazon and other third parties.

About us

We are a passionate team driven by the belief that cycling is a fantastic and accessible way to stay active while enjoying the beauty of the outdoors. Our mission is to share our love for cycling with as many people as possible. We provide a welcoming environment for individuals of all ages, abilities, and backgrounds to come together and ride bikes. With Ralf’s visionary leadership, Zane’s expertise in cycling adventures, and Olivia’s dedication to community building, we strive to create a vibrant space where everyone can experience the joy of cycling. Through group rides, workshops, and inclusive events, we inspire and empower individuals to embrace an active lifestyle. Join us in our quest to pedal together, embrace the joy of cycling, and foster connections that last a lifetime.

Advertisement

Trending