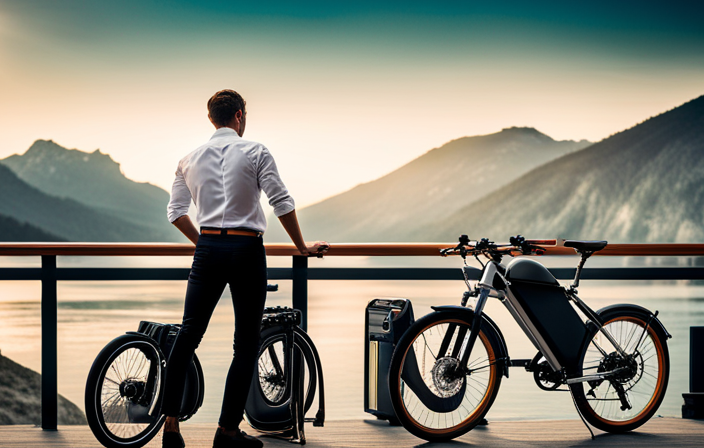

Imagine yourself out on the road, the wind rushing through your hair as you effortlessly glide along on your electric bike. But then, suddenly, a problem arises with your front brushless hub motor.
Don’t panic! In this article, we will guide you through the troubleshooting process step by step. From checking the battery connection to assessing the brake system, we’ll help you pinpoint the issue and get you back on the road in no time.
So let’s dive in and get your electric bike back in top shape!
Key Takeaways
- Regular maintenance of the motor is crucial for optimal performance and identifying potential issues.
- Following a maintenance routine helps reduce the likelihood of breakdowns and minimizes repair costs.
- Battery maintenance, including checking the battery level and addressing warning lights or error messages promptly, ensures reliable power supply and maximizes battery lifespan.
- Overall care tips such as keeping the e-bike clean, storing it in a dry and secure location, and regularly inspecting components for wear or damage are essential for maintaining the e-bike’s condition and increasing its resale value.

Varstrom 48V 1000W 1500W Rear & Front Hub Motor Kit - Ebike Conversion Kit for 26"/27.5"/28"/29"/700C Front Rear Wheel,Electric Bike Conversion Set with Display & Ebike Battery (Optional)
【POWERFUL 48V 1000W Front Hub Motor Kit】: 48V 1000W front wheel motor kit is designed for a variety...
As an affiliate, we earn on qualifying purchases.
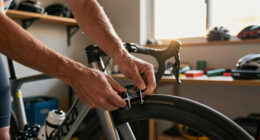
Check the Battery Connection
First, make sure the battery is securely connected to the motor controller. Begin by locating the battery pack and follow the wires to the motor controller. Check that the connectors are firmly attached and there are no loose or damaged wires. It is crucial to ensure a proper connection, as any loose or faulty connection can disrupt the power supply to the motor.
Inspect the terminals for any corrosion or dirt buildup, as these can also interfere with the connection. If you notice any issues, clean the terminals with a soft cloth or brush. A secure battery connection is essential for the smooth functioning of your front brushless hub motor electric bike.
Now, let’s move on to testing the motor controller to further diagnose any potential problems.

PEXMOR Electric Bike Conversion Kit, 20"/24" Front Wheel Ebike Conversion Kit, 36V 750W Electric Bike Hub Motor Kit w/3 Mode Controller/PAS/LCD Display/Twist Throttle Electric Bicycle Ebike Kit
【POWERFUL BRUSHLESS MOTOR】-The 36V 750W ebike front wheel conversion motor kit features a powerful brushless hub motor.It runs...
As an affiliate, we earn on qualifying purchases.
Test the Motor Controller
To test the motor controller, start by checking the wiring connections. Ensure that the wires are securely connected to the appropriate terminals. Look for any loose or damaged wires that may be causing a poor connection.
It is also important to examine the connectors for signs of corrosion or dirt buildup. Clean them if necessary to ensure a proper connection.
Next, use a multimeter to check the voltage across the controller’s input and output terminals. Compare the readings to the specifications provided by the manufacturer. If the voltage is significantly different, it may indicate a problem with the motor controller.
This test will help you determine if the motor controller is functioning properly or if there is a wiring issue that needs further inspection.
Now, let’s move on to inspecting the wiring for any potential problems.

Ktaxon Electric Bike Conversion Kit, 48V 1000W Ebike Conversion Kit, 26" Front/Rear Wheel E-Bike Conversion Kits with PAS, LCD Display, Aluminum Alloy Frame and Gearless Hub Motor (Front Wheel)
【UNMATCHED MOTOR KIT】With 48V 1000W brushless and gearless hub motor, this ebike conversion kit creates efficient and noiseless...
As an affiliate, we earn on qualifying purchases.
Inspect the Wiring
Now, let’s take a closer look at the wiring to identify any potential issues. Here are four things to check:
-
Connectors: Inspect all connectors for any signs of damage or loose connections. Make sure they’re securely plugged in and not corroded.
-
Insulation: Examine the wiring insulation for any fraying, cracks, or exposed wires. Any damaged insulation should be repaired or replaced to prevent short circuits.
-
Routing: Check the routing of the wiring to ensure it’s away from any moving parts or areas of excessive heat. Make sure it’s properly secured and not rubbing against any sharp edges.
-
Wiring Diagram: Refer to the wiring diagram provided by the manufacturer to ensure all connections are correctly wired. Any discrepancies should be addressed according to the manufacturer’s instructions.
By thoroughly inspecting the wiring, you can identify and resolve any potential issues before they cause problems.
Now, let’s move on to examining the throttle to continue troubleshooting your electric bike.

26 Inch 48V 1000W Rear Wheel Electric Bicycle Conversion Kit, Electric Bike Rear Wheel Hub Motor, Rears Wheel Electric Bicycle Motor Kit
Premium Material: This product is made of aluminum, iron, copper, magnetic steel, aluminum alloy, and rubber butyl. All...
As an affiliate, we earn on qualifying purchases.
Examine the Throttle
Take a closer look at your throttle to ensure it’s functioning properly and not causing any issues. Start by examining the physical condition of the throttle. Look for any visible damage, such as cracks or loose parts.
Next, check the wiring connections. Make sure they are secure and free from any fraying or corrosion.
Test the throttle by twisting it and observing the response. It should provide a smooth and consistent increase in power. Pay attention to any delays or jerky movements, as these could indicate a problem.
If you notice any abnormalities, such as a non-responsive throttle or erratic behavior, it may be necessary to replace or adjust the throttle.
Now, let’s move on to assessing the brake system.
Assess the Brake System
Check the condition of your brakes by inspecting the brake pads for signs of wear and ensuring that the brake cables are properly connected.
Start by visually examining the brake pads for any noticeable wear or damage. If the brake pads appear thin or worn down, they may need to be replaced.
It is also important to check the brake cables and make sure they are securely connected to the brake levers and calipers.
Test the brakes by squeezing the brake levers and observing the response. The brakes should engage smoothly and bring the bike to a complete stop without any excessive noise or resistance.
If there are any issues with the brake system, such as weak braking or squealing noises, further inspection or adjustment may be necessary.
Now, let’s move on to verifying the power supply.
Verify the Power Supply
To make sure your power supply is functioning properly, examine the battery connections and ensure they are securely attached.
Begin by locating the battery pack, typically mounted on the frame or inside a bag. Carefully inspect the wires and connectors for any signs of damage or corrosion. If you notice any issues, disconnect the battery and clean the connectors with a soft cloth and a mild cleaning solution.
Once the connections are secure, reconnect the battery and check for any loose or frayed wires. Additionally, check the battery voltage using a multimeter to ensure it is within the recommended range. If the voltage is low, recharge the battery accordingly.
By verifying the power supply, you eliminate potential issues that could affect the performance of your electric bike.
Now, let’s move on to the next section and look for faulty or damaged components.
Look for Faulty or Damaged Components
Now, let’s go ahead and see if there are any faulty or damaged components that may be causing issues with your electric bike. Here are some things to check for:
-
Wiring: Inspect the wiring harness for any signs of fraying, loose connections, or exposed wires. Ensure that all connections are secure and properly insulated.
-
Controller: Examine the controller for any visible damage or signs of overheating, such as burnt components or melted plastic. Check the connections to make sure they are tight and in good condition.
-
Motor: Look closely at the motor for any physical damage, such as dents or scratches. Check the bearings for smooth operation and listen for any unusual noises when the motor is running.
By thoroughly inspecting these components, you can identify any faults or damages that may be affecting the performance of your electric bike.
Once you have ruled out these issues, you can proceed to adjust the wheel alignment for optimal performance.
Adjust the Wheel Alignment
After identifying any faulty or damaged components in your front brushless hub motor electric bike, the next step is to adjust the wheel alignment.
Proper wheel alignment is crucial for optimal performance and handling of your bike. Start by loosening the axle nuts on both sides of the front wheel.
Next, gently push or pull the wheel until it is aligned with the frame. Ensure that the wheel is centered and straight by measuring the distance between the rim and the frame on both sides.
Once satisfied with the alignment, tighten the axle nuts securely. Remember to check the alignment periodically, as it may shift over time due to regular use.
If you encounter any difficulties or uncertainties during the adjustment process, seek professional assistance to avoid any potential damage or safety hazards.
Seek Professional Assistance if Needed
If you’re unsure about the wheel alignment adjustment process, it’s best to seek professional assistance to avoid any potential damage or safety hazards. Here are three reasons why professional help is recommended:
-
Expertise: Professionals have the knowledge and experience to accurately assess and adjust the wheel alignment of your electric bike. They understand the intricacies of the front brushless hub motor system and can ensure precise alignment, minimizing any potential issues.
-
Specialized Tools: Professionals have access to specialized tools specifically designed for wheel alignment adjustments. These tools enable them to make precise measurements and adjustments, ensuring optimal performance and safety.
-
Warranty Protection: Seeking professional assistance for wheel alignment adjustments can help protect your bike’s warranty. Making adjustments yourself may void the warranty, leaving you responsible for any future repairs or replacements.
Regular Maintenance and Care
Regular maintenance and care are essential for keeping your e-bike in optimal condition. By following a regular maintenance routine, you can ensure that your front brushless hub motor electric bike continues to perform efficiently and reliably. Here is a table outlining the key maintenance tasks you should perform:
| Maintenance Task | Frequency |
|---|---|
| Clean and lubricate the chain | Every 100 miles |
| Check tire pressure and tread wear | Every 200 miles |
| Inspect brake pads and adjust as needed | Every 500 miles |
| Test and calibrate the motor | Annually |
In addition to these tasks, it is important to regularly check the battery level and charge it as needed. Keep an eye on any warning lights or error messages on the display panel and address them promptly. By taking care of these maintenance tasks, you can maximize the lifespan and performance of your e-bike.
Conclusion
In conclusion, troubleshooting your front brushless hub motor electric bike requires careful attention to detail and precise technical knowledge. By following the steps outlined in this article, you can effectively identify and resolve any issues that may arise.
Remember to always check the battery connection, test the motor controller, inspect the wiring, examine the throttle, and assess the brake system. These steps will help you pinpoint the source of the problem and take appropriate action.
Additionally, regular maintenance and care are essential for ensuring the longevity and optimal performance of your electric bike. Keep your bike clean and free of debris, and regularly inspect and tighten any loose parts. This will help prevent issues from occurring and keep your bike running smoothly.
If you encounter any problems that you are unable to resolve on your own, don’t hesitate to seek professional assistance. A qualified technician can provide expert advice and assistance to get your bike back on track.
Enjoy the smooth and efficient ride that your electric bike offers. With proper troubleshooting and maintenance, you can continue to enjoy the convenience and eco-friendly benefits of your electric bike for years to come.