Connect with us

Electric Bike

Using An Electric Bike, How Many Houors Does It Take To Bike Around Martha’s Vineyard Mas

Published

on

An image of a picturesque landscape of Martha's Vineyard, with an electric bike parked near a stunning lighthouse

I’ve always been a lover of adventure and exploring new places. So, when I first heard about the possibility of biking around Martha’s Vineyard on an electric bike, I was beyond excited.

Imagine effortlessly gliding along the scenic routes and bike paths, taking in the breathtaking views of this beautiful island. With the help of an electric bike, I was able to cover more ground and see more of what Martha’s Vineyard has to offer.

In this article, I’ll share my experience and answer the burning question: how many hours does it take to bike around Martha’s Vineyard?

Key Takeaways

  • Martha’s Vineyard offers a unique boot-shaped layout with main towns along the eastern edge and rolling hills, farmland, and stunning beaches in the western part.
  • The island is home to various historical landmarks and attractions such as Gay Head Lighthouse, Aquinnah Cliffs, Edgartown Lighthouse, Martha’s Vineyard Museum, and Old Whaling Church.
  • Katama Beach, Chappaquiddick Island, and Aquinnah Lighthouse are popular destinations with beautiful landscapes and attractions like Mytoi Gardens and Cape Poge Wildlife Refuge.
  • When using an electric bike to explore Martha’s Vineyard, it is essential to plan your route, consider the terrain difficulty, estimate travel time, and ensure realistic expectations for breaks and rest stops.

Understanding the Layout of Martha’s Vineyard

Understanding the layout of Martha’s Vineyard can help you plan how many hours it’ll take to bike around. This beautiful island off the coast of Massachusetts is known for its charming towns, picturesque landscapes, and historical landmarks. When it comes to exploring the layout of Martha’s Vineyard, there are a few key areas to consider.

Advertisement

One of the first things you’ll notice about Martha’s Vineyard is its unique shape. The island is roughly shaped like a boot, with the main towns located along the eastern edge. From the bustling downtown of Edgartown to the charming streets of Oak Bluffs, there is plenty to see and do as you navigate the island’s layout.

As you venture further inland, you’ll discover the island’s rolling hills, farmland, and stunning beaches. The western part of Martha’s Vineyard is home to several historical landmarks, including the Gay Head Lighthouse and the Aquinnah Cliffs. These iconic sites offer a glimpse into the island’s rich history and provide breathtaking views of the surrounding area.

Now that you have an understanding of the layout of Martha’s Vineyard, it’s time to start exploring the scenic routes and bike paths that wind their way through the island. From the Martha’s Vineyard State Forest to the scenic coastal roads, there are countless opportunities to soak in the beauty of this enchanting island. So grab your electric bike and get ready for an adventure unlike any other.

Exploring the Scenic Routes and Bike Paths

To fully experience the beauty of Martha’s Vineyard, you’ll want to check out the scenic routes and bike paths available. There are so many amazing sights to see and explore on this picturesque island. Here are four reasons why you should take advantage of the scenic detours and bike paths:

  1. Breathtaking Views: The scenic routes on Martha’s Vineyard offer stunning views of the coastline, rolling hills, and charming towns. As you pedal along, you’ll be treated to picturesque landscapes that will take your breath away.

  2. Wildlife Encounters: Martha’s Vineyard is home to a diverse range of wildlife, and biking along the bike paths gives you the opportunity to spot some of these amazing creatures. Keep your eyes peeled for deer, foxes, and even the occasional seal or bird species.

  3. Peaceful Serenity: One of the best things about biking on Martha’s Vineyard is the sense of tranquility you’ll experience. The bike paths are often less crowded than the main roads, allowing you to enjoy the peacefulness of the island and soak in its natural beauty.

  4. Flexibility and Freedom: Exploring Martha’s Vineyard by bike allows you the freedom to take your time and discover hidden gems along the way. You can easily take scenic detours, stop at local shops or cafes, and truly immerse yourself in the island’s unique charm.

By taking advantage of the scenic routes and bike paths on Martha’s Vineyard, you’ll be able to fully appreciate the island’s beauty and create unforgettable memories.

Advertisement

Now, let’s dive into the next section and explore the introduction to electric bikes and their benefits.

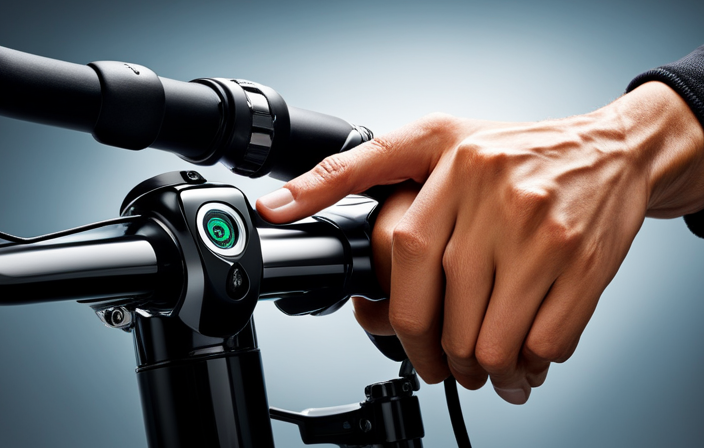
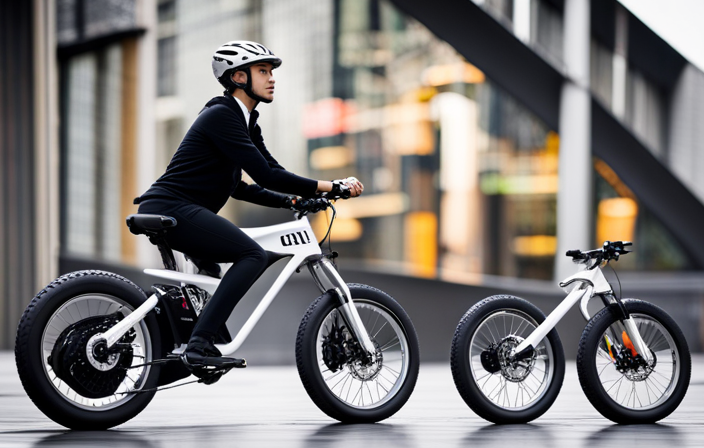
Introduction to Electric Bikes and their Benefits

Exploring Martha’s Vineyard is made even more convenient and enjoyable with the introduction of electric bikes and their numerous benefits.

Electric bikes, also known as e-bikes, provide a fantastic way to navigate the island’s picturesque landscapes without the fatigue and strain that traditional bicycles can sometimes bring.

Advertisement

One of the key advantages of electric bikes is that they offer pedal-assist technology, which means that you can choose the level of assistance you need while pedaling. This feature is particularly useful when tackling hilly terrains or longer distances, as it allows you to conserve energy and ride for longer periods.

When choosing the right electric bike for your Martha’s Vineyard adventure, consider factors such as battery range, motor power, and bike weight. A bike with a longer battery range will ensure that you can cover more ground without worrying about running out of power. Additionally, a powerful motor will provide the necessary assistance on challenging terrains. Lastly, a lightweight electric bike will make it easier to maneuver and transport when necessary.

By opting for an electric bike, you’ll have the opportunity to explore Martha’s Vineyard at your own pace, taking in the breathtaking scenery and enjoying the fresh air without feeling exhausted. These bikes are a game-changer when it comes to cycling experiences, offering a blend of exercise and ease that is hard to beat.

As you plan your route and set realistic expectations for your Martha’s Vineyard adventure, consider the advantages that electric bikes bring to the table. With their assistance, you can tackle longer distances and conquer challenging terrains with ease.

Planning Your Route and Setting Realistic Expectations

As you plan your route and set realistic expectations for your adventure around Martha’s Vineyard, it’s important to consider various factors that will affect your journey. One of the key planning strategies is to take into account the terrain difficulty of the different trails and roads on the island. Some areas may have steep inclines or rough terrain, which can significantly impact the time it takes to complete certain distances. Another important aspect to consider is time management. It’s essential to estimate how long it will take to travel between different points of interest, allowing for breaks and rest stops along the way. To help you visualize and plan your route effectively, here is a table highlighting some popular destinations on Martha’s Vineyard and the approximate time it may take to reach them using an electric bike:

Advertisement
Destination Distance (Miles) Estimated Time (Hours)
Edgartown 7 1.5
Aquinnah Cliffs 20 3.5
Menemsha Harbor 12 2.5
West Tisbury Farmers Market 10 2
Chappaquiddick 8 1.5

With these planning strategies and an awareness of the time it takes to travel certain distances, you can better manage your adventure around Martha’s Vineyard. Now, let’s dive into the starting point: Oak Bluffs, where your journey begins.

Starting Point: Oak Bluffs

When you arrive in Oak Bluffs, take a moment to soak in the vibrant atmosphere of this charming town. Oak Bluffs serves as the perfect starting point for your biking adventure around Martha’s Vineyard. With its picturesque streets lined with colorful Victorian cottages, bustling harbor, and lively downtown area, Oak Bluffs sets the tone for an exciting and enjoyable journey.

As you hop on your electric bike, you’ll be amazed by the convenience and ease it provides. With the assistance of the electric motor, you’ll be able to cover more ground and explore the island at a comfortable pace. The duration of your bike ride will depend on various factors such as your fitness level, the stops you make along the way, and the specific route you choose. On average, biking around Martha’s Vineyard can take anywhere from 4 to 6 hours.

Advertisement

Heading east from Oak Bluffs, you’ll find yourself venturing into the charming towns of Edgartown and Katama. These areas offer their own unique attractions, from the historic architecture in Edgartown to the stunning beaches in Katama. So, get ready to continue your journey as you pedal towards the next chapter of your Martha’s Vineyard adventure.

Heading East: Edgartown and Katama

After exploring Oak Bluffs and admiring its charming Victorian cottages, it’s time to continue my electric bike adventure around Martha’s Vineyard.

Heading eastward, I pedal towards the picturesque town of Edgartown and the stunning Katama Beach.

Edgartown Attractions:
As I approach Edgartown, the first thing that catches my eye is the iconic Edgartown Lighthouse. It stands proudly at the entrance of the harbor, offering breathtaking views of the coastline. The town itself is filled with historic buildings, boutique shops, and delicious seafood restaurants. I make a mental note to explore the Martha’s Vineyard Museum and the Old Whaling Church later on.

Katama Beach Activities:
Leaving Edgartown behind, I make my way towards the famous Katama Beach. Known for its soft sandy shores and rolling waves, this beach is a paradise for sunbathers and water sports enthusiasts alike. I can’t resist the temptation to dip my toes in the refreshing Atlantic Ocean and soak up the sun on this beautiful stretch of coastline.

Advertisement

Enjoying the Outdoors:
Apart from the attractions, Edgartown and Katama Beach offer plenty of opportunities to enjoy the outdoors. From kayaking in the calm waters of Katama Bay to exploring the scenic trails at Felix Neck Wildlife Sanctuary, there’s something for everyone seeking outdoor adventures.

As I bid farewell to Edgartown and Katama Beach, I eagerly set my sights on the next leg of my journey, southward bound towards the captivating Chappaquiddick Island.

Southward Bound: Chappaquiddick Island

Leaving Edgartown and Katama Beach behind, I’m excited to explore the captivating Chappaquiddick Island on my electric bike adventure. Chappaquiddick Island, located just south of Martha’s Vineyard, offers a wealth of attractions and bike trails to discover. As I pedal along, I can’t help but be amazed by the natural beauty of this island paradise.

One of the must-visit attractions on Chappaquiddick Island is the Mytoi Gardens. These Japanese-style gardens are a tranquil oasis, featuring serene ponds, vibrant flowers, and winding paths. It’s the perfect spot to take a break and soak in the peaceful surroundings.

Another highlight of my bike ride is the Cape Poge Wildlife Refuge. This expansive area is home to various bird species and other wildlife. As I ride through the trails, I keep my eyes peeled for ospreys, herons, and even the occasional seal basking in the sun.

Advertisement

To give you a better idea of the layout of Chappaquiddick Island and its attractions, here’s a handy table:

Attractions Location Description
Mytoi Gardens East of ferry Japanese-style gardens with serene ponds
Cape Poge Wildlife North of ferry Refuge with diverse bird species and wildlife
Wasque Reservation South of ferry Beach and trails with stunning ocean views

As I continue my journey, I look forward to taking in the views of Aquinnah and the majestic cliffs that await me.

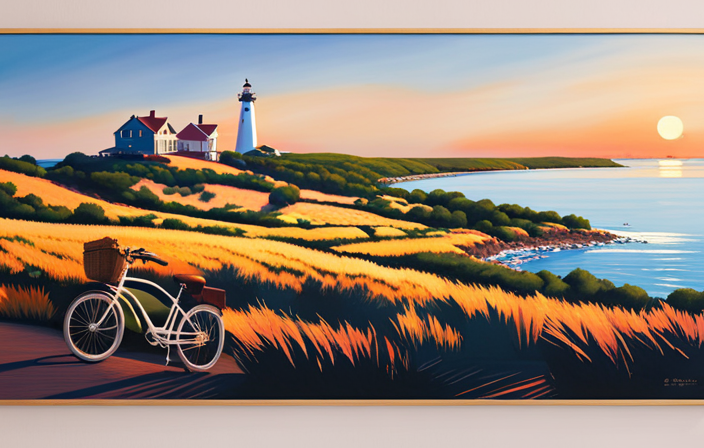
Taking in the Views: Aquinnah and the Cliffs

To fully appreciate the beauty of Aquinnah and its majestic cliffs, you should make sure to visit the iconic Aquinnah Lighthouse. This picturesque spot is not only a historic landmark but also offers breathtaking views of the surrounding landscape. As you approach the lighthouse, you’ll be greeted by the stunning sight of the vibrant red clay cliffs, which are a unique geological feature of this area. Taking memorable photos is a must here, as the combination of the lighthouse and the cliffs creates a truly awe-inspiring backdrop.

One of the best times to visit the Aquinnah Lighthouse is during sunset. The golden light casts a magical glow over the cliffs, making it an ideal setting for capturing stunning sunset views and photo opportunities. As the sun slowly descends, the colors in the sky intensify, creating a mesmerizing spectacle that will leave you in awe.

After taking in the beauty of Aquinnah, your journey continues northward to Vineyard Haven and West Tisbury, where more adventures and discoveries await. These charming towns offer a different kind of beauty, with their quaint streets, art galleries, and local shops. Exploring the vibrant culture and history of these areas will further enrich your Martha’s Vineyard experience.

Advertisement

Transitioning from the rugged cliffs of Aquinnah to the charming towns of Vineyard Haven and West Tisbury, you’ll find yourself immersed in a different side of the island’s allure.

Northward Bound: Vineyard Haven and West Tisbury

After taking in the breathtaking views of Aquinnah and the Cliffs, it’s time to continue my journey around Martha’s Vineyard. Heading northward, I find myself in the charming town of Vineyard Haven. This bustling hub is known for its vibrant downtown area and numerous attractions.

As I navigate the streets on my electric bike, I can’t help but admire the historic homes and quaint shops that line the main thoroughfare. One of the highlights of Vineyard Haven is the Martha’s Vineyard Museum, where I can delve into the island’s rich history and culture. The museum offers an array of exhibits and interactive displays that provide fascinating insights into the island’s past.

To fully immerse myself in nature, I make my way to West Tisbury, a serene town nestled in the heart of Martha’s Vineyard. Here, I discover an extensive network of bike trails that wind through picturesque landscapes, including lush forests and rolling meadows. These trails offer a perfect opportunity to explore the island’s natural beauty at a leisurely pace.

Before I continue my journey, let’s take a closer look at the attractions in Vineyard Haven and the bike trails in West Tisbury:

Advertisement
Vineyard Haven Attractions West Tisbury Bike Trails
Martha’s Vineyard Museum State Forest Trail
Owen Park West Tisbury Bike Path
Main Street Sepiessa Point

Now, it’s time to hop back on my electric bike and head towards the central region of Martha’s Vineyard, where Menemsha and Chilmark await with their own unique charms and attractions.

Exploring the Central Region: Menemsha and Chilmark

As I explore the central region of Martha’s Vineyard, I can’t wait to discover the unique charms and attractions of Menemsha and Chilmark. These two destinations offer a delightful blend of coastal beauty and rural serenity, making them must-visit spots on any Martha’s Vineyard itinerary.

  • Menemsha Fishing Village: Nestled on the western coast of the island, Menemsha is a picturesque fishing village that exudes authentic New England charm. Strolling along the docks, you can watch local fishermen unload their catches of the day or even try your hand at fishing. As the sun sets, the village transforms into a magical place, with vibrant hues painting the sky and the smell of fresh seafood wafting through the air.

  • Chilmark Farms: Known for its idyllic landscapes and thriving agricultural community, Chilmark is a haven for farm enthusiasts. Here, you can explore charming farm stands offering fresh produce, flowers, and homemade goods. Take a leisurely bike ride through the scenic countryside, passing by rolling hills and picturesque farms. Don’t forget to sample some of the delicious farm-to-table cuisine that Chilmark is renowned for.

As I continue my journey through Martha’s Vineyard, I’m excited to discover the hidden gems and amazing pit stops and refreshments along the way.

Pit Stops and Refreshments along the Way

Don’t forget to make pit stops along the way to try out the delicious local refreshments that Martha’s Vineyard has to offer. As you explore the island on your electric bike, you’ll come across numerous picnic spots where you can take a break and indulge in the island’s mouthwatering cuisine.

One popular spot is the Black Dog Tavern, located in Vineyard Haven. Known for its fresh seafood and waterfront views, it’s the perfect place to refuel and enjoy a leisurely meal. Another great option is Larsen’s Fish Market in Menemsha, where you can savor their famous lobster rolls while taking in the picturesque harbor scenery. For those with a sweet tooth, don’t miss a visit to Backdoor Donuts in Oak Bluffs. Their warm, freshly baked donuts are a true delight.

Advertisement

As you continue your biking adventure, be sure to stay hydrated and energized by sampling the local fare at these charming picnic spots.

Now that you know where to find the best local refreshments, let’s talk about safety tips and precautions for biking on the island.

Safety Tips and Precautions for Biking on the Island

Now that we’ve covered the importance of pit stops and refreshments along the way, let’s focus on some safety tips and precautions for biking on Martha’s Vineyard. As an avid cyclist who has explored every corner of this beautiful island, I want to ensure that you have the best experience possible.

Here are a few things to keep in mind:

  • Regular Bike Maintenance: Before setting off on your biking adventure, make sure your electric bike is in top-notch condition. Check the tires, brakes, and gears to ensure they are working properly. A well-maintained bike will provide a smooth and safe ride.

  • Staying Hydrated: Biking can be physically demanding, especially under the sun. It’s crucial to stay hydrated throughout your journey. Bring a water bottle and refill it whenever possible. There are plenty of convenient spots along the way where you can find drinking water or purchase a refreshing beverage.

  • Wearing the Right Gear: Always wear a helmet to protect your head in case of any accidents. Additionally, consider wearing bright and reflective clothing to increase your visibility to other road users.

By following these safety tips and precautions, you’ll be well-prepared for your biking adventure on Martha’s Vineyard.

Advertisement

Now, let’s dive into considering the weather and seasonal factors that can impact your ride.

Considering the Weather and Seasonal Factors

Considering the weather and seasonal factors, it’s important to be prepared for any changes in conditions while biking on Martha’s Vineyard.

The island’s unique climate and diverse terrain can greatly impact your biking experience. One of the primary factors affecting biking speed is wind. Martha’s Vineyard is known for its strong coastal winds, which can either work in your favor or against you. When selecting an electric bike, it’s crucial to choose one that can handle varying wind speeds and provide sufficient power to assist you in pedaling.

Another factor to consider is the terrain. Martha’s Vineyard offers a mix of flat roads, hilly areas, and off-road trails. Opting for an electric bike with multiple gears and a sturdy frame will ensure that you can navigate the island’s diverse topography with ease.

Additionally, the seasonal changes can impact your biking experience. Summers can be hot and humid, so it’s essential to stay hydrated and wear appropriate clothing. Fall and spring bring cooler temperatures, while winter can be chilly and snowy. It’s crucial to check weather forecasts and dress accordingly to stay comfortable and safe during your ride.

Advertisement

With proper preparation, you can fully enjoy biking on Martha’s Vineyard, taking breaks and enjoying the island’s attractions.

Taking Breaks and Enjoying the Island’s Attractions

It’s important to take breaks and explore the various attractions on Martha’s Vineyard while biking. Not only does it give you a chance to rest and recharge, but it also allows you to fully immerse yourself in the beauty and charm of this unique island.

Here are four reasons why taking breaks and enjoying the island’s attractions is a must:

  1. Taking scenic photographs: Martha’s Vineyard is a photographer’s paradise. From the picturesque lighthouses to the stunning beaches, there are countless opportunities to capture breathtaking moments. So, make sure to bring your camera and take some time to snap those unforgettable shots.

  2. Trying local cuisine: One of the best ways to experience a destination is through its food. Martha’s Vineyard offers a wide range of culinary delights, from freshly caught seafood to farm-to-table dishes. Take a break from biking and savor the local flavors at one of the island’s charming cafes or restaurants.

  3. Exploring charming towns: Martha’s Vineyard is home to several quaint towns, each with its own unique character. From the colorful gingerbread cottages in Oak Bluffs to the historic streets of Edgartown, wandering through these charming towns is like stepping back in time. Take a break from biking and stroll through the streets, browsing boutique shops and soaking up the island’s rich history.

  4. Enjoying nature’s beauty: Martha’s Vineyard is blessed with stunning natural landscapes, from rolling hills to serene ponds. Take a break from biking and immerse yourself in nature’s beauty. Take a leisurely walk along the coastline, hike through the island’s nature preserves, or simply find a peaceful spot to sit and enjoy the breathtaking views.

By taking breaks and exploring the various attractions on Martha’s Vineyard, you’ll create memories that will last a lifetime.

Now, let’s wrap up your adventure and reflect on the incredible experiences you’ve had on this enchanting island.

Advertisement

Wrapping Up Your Adventure: Reflections and Memories

As I wrap up my adventure on Martha’s Vineyard, I can’t help but reflect on the incredible memories I’ve made during my time exploring the island’s attractions. From the picturesque beaches to the charming towns, every moment has been filled with beauty and wonder.

One of the best ways I’ve captured these memories is through photography. With every click of the camera, I’ve been able to freeze these special moments in time and preserve them forever. Whether it’s a stunning sunset over the ocean or a quaint little cottage tucked away in the woods, each photo tells a story and allows me to relive the magic of this journey.

The island’s natural beauty has provided me with endless opportunities to capture breathtaking landscapes, vibrant wildlife, and charming architecture. As I look back on these photos, I can’t help but feel a sense of gratitude for the experiences I’ve had and the memories I’ve made.

Martha’s Vineyard will always hold a special place in my heart, and these photographs will serve as a reminder of the incredible journey I’ve had.

Frequently Asked Questions

Are there any bike rental shops on Martha’s Vineyard?

Yes, there are several bike rental shops available on Martha’s Vineyard. These shops offer a variety of bike rental options to suit your needs.

Advertisement

The cost of renting a bike varies depending on the type of bike and duration of rental. You can choose from regular bikes, electric bikes, or even tandem bikes.

Renting a bike is a convenient and affordable way to explore the beautiful sights of Martha’s Vineyard at your own pace.

Can I bring my own electric bike to Martha’s Vineyard?

Bringing your own electric bike to Martha’s Vineyard is a fantastic idea! Picture yourself effortlessly cruising along the picturesque roads, feeling the wind in your hair and the sun on your face.

Not only can you bring your electric bike on public transportation, but it also offers numerous benefits on the island. You’ll be able to explore the beautiful scenery while reducing your carbon footprint and enjoying the ease and convenience of an electric bike.

Are there any restrictions or regulations for biking on the island?

There are certain biking regulations and safety measures in place on Martha’s Vineyard. These regulations aim to ensure the safety and enjoyment of all cyclists on the island.

Advertisement

It is important to follow traffic laws, wear a helmet, and use hand signals when turning. Additionally, it is recommended to stay on designated bike paths and be mindful of pedestrians.

What is the average speed of an electric bike on Martha’s Vineyard?

The average speed of an electric bike on Martha’s Vineyard is around 20 miles per hour.

Riding an electric bike offers numerous benefits, including faster travel times, less effort required, and the ability to cover more ground in a shorter period.

With an electric bike, you can explore the beautiful sights and attractions of Martha’s Vineyard while enjoying a comfortable and efficient ride.

It’s a fantastic way to experience the island’s charm and make the most of your time.

Advertisement

Are there any charging stations for electric bikes available along the routes?

Yes, there are charging stations available along the routes on Martha’s Vineyard. These charging stations ensure that electric bike riders can conveniently recharge their bikes during their journey. This is especially useful for those who are concerned about the battery life of their electric bikes.

Additionally, Martha’s Vineyard offers alternative transportation options such as bike rentals and public transportation, making it easy for visitors to explore the island sustainably and conveniently.

Conclusion

In conclusion, biking around Martha’s Vineyard using an electric bike is a fantastic way to explore the island’s scenic routes and bike paths.

With careful planning and realistic expectations, you can navigate the island comfortably and enjoy all its attractions. Remember to prioritize safety, consider weather conditions, and take breaks to fully appreciate the beauty of the island.

As you wrap up your adventure, you’ll be left with unforgettable memories and a deeper understanding of Martha’s Vineyard. So, hop on your electric bike and embark on this incredible journey!

Advertisement

Zane rides her bike because she loves it, but also because she is mindful of the need to leave a better world for her children.

Continue Reading
Advertisement

Electric Bike

How To Turn Your Bike Into An Electric One.

Published

on

By

An image showcasing a bicycle with a sleek, low-profile electric motor attached to the rear wheel

Are you prepared to upgrade your regular bike into an electrifying adventure? Prepare to enjoy the excitement of easy pedaling and increased range with an electric bike conversion.

In this comprehensive guide, I’ll walk you through the step-by-step process of turning your regular bicycle into a powerful, eco-friendly electric bike.

From choosing the right bike for conversion to installing the electric conversion kit and adding extra features, you’ll have all the information you need to embark on this exciting transformation.

Get ready to revolutionize your cycling experience.

Key Takeaways

  • Lithium-ion batteries are commonly used for their high energy density and long lifespan in electric bike conversion kits.
  • Hub motors provide direct power to the wheels and are simpler to install, while mid-drive motors offer better balance and performance by driving the crankshaft.
  • When choosing a bike for conversion, consider factors such as frame size, weight capacity, and the bike’s weight and balance for a smooth and safe riding experience.
  • Necessary tools and materials for the conversion include a motor kit, battery pack, and miscellaneous tools like wrenches and screwdrivers. Prioritize safety by ensuring components meet safety standards and sourcing them from reputable suppliers.

Understanding Electric Bike Conversion Kits

Advertisement

Understanding electric bike conversion kits can be a game-changer for transforming your regular bike into an electric one.

When it comes to understanding battery technology, it’s crucial to know that lithium-ion batteries are the most common choice due to their high energy density and long lifespan. They provide efficient power delivery while being lightweight and easy to recharge.

Comparing different motor options is equally important. There are two main types: hub motors and mid-drive motors. Hub motors are simpler to install and provide direct power to the wheels, while mid-drive motors offer better balance and performance by driving the crankshaft.

Ultimately, the choice between the two depends on your specific needs and preferences.

By understanding battery technology and comparing motor options, you can make an informed decision when converting your bike into an electric one.

Advertisement

Choosing the Right Bike for Conversion

When choosing the right bike for conversion, it’s important to consider factors like frame size and weight capacity. Choosing the right frame for your conversion is crucial in ensuring a successful electric bike transformation.

The frame should be sturdy enough to support the added weight of the electric components without compromising its integrity. Additionally, considering the weight and balance of the bike is essential for a smooth and safe riding experience.

A heavier bike may require more powerful motor and battery to maintain balance and provide adequate propulsion. On the other hand, a lighter bike may be more agile but may not have enough stability for the added weight.

Carefully evaluating the frame’s weight capacity and balance will help you select the right bike for your electric conversion project.

Gathering the Necessary Tools and Materials

Advertisement

To gather the necessary tools and materials, you’ll need to make a list of items required for the conversion process. Here are the essential components you’ll need:

  1. Motor kit: This includes a motor, controller, and wiring harness. Make sure to choose a motor that is compatible with your bike’s frame and wheel size.

  2. Battery pack: Select a lithium-ion battery with a suitable voltage and capacity for your desired range. Consider factors like weight and mounting options.

  3. Miscellaneous tools: You will need a set of wrenches, screwdrivers, wire cutters, and crimping tools to install the components properly.

When sourcing components, it’s crucial to prioritize safety considerations. Ensure that the motor and battery meet safety standards and have built-in protection features. Additionally, choose a reputable supplier to guarantee the quality of the components.

Remember to wear protective gear when working with electrical components and follow all safety guidelines provided by the manufacturer.

Removing the Bicycle’s Existing Components

Start by removing the existing components of your bicycle. This is a crucial step in the process of turning your bike into an electric one. The first component to remove is the chain, which can be done by using a chain tool to break the chain and remove it from the bike. Next, remove the pedals by using a pedal wrench to unscrew them from the crank arms. Then, remove the front and rear derailleurs by loosening the bolts that hold them in place and sliding them off the bike. Finally, remove the brake calipers by loosening the bolts that attach them to the frame.

Advertisement

Removing these components allows for a clean slate to work with when installing the electric components. It is important to note that there are alternative methods of converting a bike into an electric one, such as using a conversion kit that can be attached to the existing components. However, removing the existing components provides a more seamless integration of the electric components and ensures optimal performance.

The following table showcases the components that need to be removed and the tools required for each:

Component Removal Method Required Tool
Chain Use chain tool Chain tool
Pedals Unscrew from crank arms Pedal wrench
Front Derailleur Loosen bolts and slide off Allen wrench
Rear Derailleur Loosen bolts and slide off Allen wrench
Brake Calipers Loosen bolts and remove Allen wrench

Removing the existing bike components may seem daunting, but with the right tools and a bit of patience, it can be accomplished smoothly. Once these components are removed, you will be ready to move on to the next step of the conversion process.

Installing the Electric Conversion Kit

Advertisement

First, you’ll need to install the electric conversion kit onto your bicycle. This kit includes a motor, battery, controller, and wiring. Here’s a step-by-step guide on how to install it:

  1. Start by removing the bottom bracket of your bike using a wrench. This is where the motor will be installed.

  2. Attach the motor onto the bottom bracket using the provided brackets and screws. Make sure it’s securely fastened.

  3. Connect the motor to the controller using the wiring harness. Follow the color-coding instructions for proper connection.

  4. Mount the battery onto the frame of your bike using the included battery mount. Ensure it’s in a secure and stable position.

  5. Connect the battery to the controller using the wiring harness. Double-check the connections to avoid any issues.

  6. Finally, test the electric conversion kit by turning on the battery and controller. Troubleshoot common issues like faulty wiring or loose connections if necessary.

By following these steps, you can successfully install the electric conversion kit onto your bike and enjoy the benefits of an electric bicycle.

Connecting the Motor and Battery

Once you have securely attached the motor onto the bottom bracket, the next step is to connect it to the battery. Motor and battery compatibility is crucial to ensure optimal performance and safety. Before making any connections, it is essential to check the specifications provided by the manufacturer for both the motor and battery. This will ensure that they are compatible in terms of voltage, current, and power output.

To make the necessary connections, refer to the wiring diagram provided with the electric conversion kit. This diagram will guide you on how to connect the motor and battery correctly. It is important to follow the instructions carefully to avoid any damage or malfunction.

In order to keep the audience engaged, let’s take a look at a table that summarizes the wiring connections for a typical electric bike conversion:

Advertisement
Motor Connections Battery Connections
Motor "+" wire Battery "+" wire
Motor "-" wire Battery "-" wire
Motor control wire Battery control wire

By following this table and the provided wiring diagram, you can ensure a successful connection between the motor and battery, allowing your bike to run smoothly as an electric one.

Testing and Adjusting the Electric System

To test and adjust the electric system, I should begin by ensuring that all the connections between the motor and battery are secure and correctly wired according to the provided diagram. This step is crucial to ensure the proper functioning of the electric bike.

Once the connections are checked, I can move on to testing the system. One important testing technique is to use a multimeter to measure the voltage and current at different points in the system. This will help me identify any potential issues or weak spots.

Additionally, I can test the performance of the electric system by taking the bike for a ride and observing its speed, acceleration, and overall power. Based on the test results, I can make adjustments to optimize the performance of the electric system, such as adjusting the voltage or current levels.

By thoroughly testing and adjusting the electric system, I can ensure that my bike operates smoothly and efficiently.

Advertisement

Adding Additional Features and Accessories

Adding extra features and accessories can enhance the functionality and style of your electric bike.

When it comes to upgrading brakes, you have several options. One option is to replace the stock brake pads with high-performance ones that offer better stopping power and durability. Another option is to upgrade to hydraulic disc brakes, which provide even more stopping power and better modulation.

Upgrading the suspension is another way to improve the overall performance of your electric bike. Consider replacing the stock suspension fork with a high-quality one that offers better damping and adjustability. This will provide a smoother and more controlled ride, especially when tackling rough terrains.

Additionally, you can add accessories like a rack and panniers for increased carrying capacity, or a comfortable saddle for long rides. These upgrades will not only improve the functionality of your electric bike but also elevate its style and make it a more enjoyable ride.

Maintaining and Troubleshooting Your Electric Bike

Make sure you regularly check the battery level and keep it properly charged to maintain the optimal performance of your electric bike. Troubleshooting battery issues is crucial for ensuring a smooth ride.

Advertisement

If you notice a sudden decrease in battery life, first check for any loose connections or damaged wiring. Clean the battery terminals regularly to prevent corrosion, as this can affect the battery’s performance.

In case of battery failure, it’s important to replace it with a compatible and high-quality battery.

Maintaining the motor is equally important. Regularly inspect the motor for any signs of wear or damage. Keep it clean and lubricated to reduce friction and extend its lifespan.

If you encounter any issues with the motor, consult the manufacturer or a professional electric bike technician for assistance.

Enjoying the Benefits of Your Electric Bike

Get ready to experience the many benefits of riding an electric bike. With an electric bike, you can enjoy the convenience of commuting without the hassle of traffic or the struggle of pedaling up hills.

Advertisement

Here are some reasons why electric bike commuting is beneficial:

  • Increased Efficiency:

  • Electric bikes provide a boost of power when needed, allowing you to cover more distance with less effort.

  • The pedal-assist feature helps you maintain a consistent speed, reducing fatigue during long rides.

  • Health Benefits:

  • Electric biking still requires pedaling, which provides a good cardiovascular workout and helps improve endurance.

  • Regular electric bike commuting can contribute to weight loss and muscle toning.

By incorporating an electric bike into your daily routine, you can enjoy the convenience of commuting while reaping the health benefits of regular exercise.

So, get ready to pedal your way to a healthier and more efficient lifestyle.

Frequently Asked Questions

How much does it cost to convert a regular bike into an electric one?

Converting a regular bike into an electric one can cost anywhere from $500 to $2000, depending on the quality of components and battery. However, the benefits of electric bikes, such as increased speed and reduced effort, outweigh the cost comparison.

Can I convert any type of bike into an electric bike?

Yes, any type of bike can be converted into an electric bike. Electric bike advantages include faster speeds, longer distances, and easier uphill climbs. There are different types of electric bike motors, such as hub motors and mid-drive motors.

Advertisement

How long does it take to install an electric conversion kit?

The installation time for an electric conversion kit can vary depending on your experience and the complexity of the kit. On average, it takes about 2-4 hours. Common issues may include compatibility problems and troubleshooting electrical connections.

Is it possible to switch back to a regular bike after converting it into an electric one?

Yes, it is possible to switch back to a regular bike after converting it into an electric one. However, there are pros and cons to consider. Converting offers convenience and speed, but it may reduce the bike’s range and require additional maintenance.

Are there any legal restrictions or requirements for riding an electric bike?

There are legal restrictions and requirements for riding an electric bike. It is important to follow electric bike regulations and be aware of safety concerns, such as wearing a helmet and obeying traffic laws.

Conclusion

After going through the process of converting my bike into an electric one, I can confidently say that the theory of turning a regular bike into an electric one is indeed true.

By following the steps outlined in this article, I was able to successfully transform my bike and enjoy the benefits of an electric ride.

Advertisement

It was a technical and detailed process that required the right tools and materials, but the end result was well worth the effort.

So, if you’re considering converting your bike, don’t hesitate to give it a try – you won’t be disappointed.

Continue Reading

Electric Bike

How To Turn Your Bike Into An Electric Generator

Published

on

By

An image of a bicycle with a modified rear wheel, equipped with a compact electric motor

I’m here to reveal how you can turn your regular bicycle into an amazing electric generator, just like a pedal-powered dynamo.

In this technical guide, we’ll delve into the intricacies of harnessing human power to produce electricity.

With a step-by-step approach, we’ll explore the tools, materials, and techniques needed to successfully convert your bike into a reliable source of energy.

So, fasten your helmet, grab your wrench, and let’s embark on this electrifying journey together.

Key Takeaways

  • Regularly clean the generator to remove dust and debris.
  • Check and recharge the battery as needed.
  • Lubricate moving parts to reduce friction.
  • Inspect tires, brakes, and other components for good condition.

Understanding the Basics of Bike-Powered Generators

Advertisement

Now you’re going to learn the basics of how to turn your bike into an electric generator. Bike-powered generators are a great way to generate electricity using human power.

One of the main applications of bike-powered generators is bike-powered lighting. With a bike-powered generator, you can power up your lights by simply pedaling your bike. This is a fantastic alternative to conventional lighting methods, especially in areas where electricity is scarce or during outdoor activities such as camping.

There are several advantages of bike-powered generators, including their portability, low cost, and environmental friendliness. By converting your bike into an electric generator, you not only generate electricity but also get a good workout.

To get started, you’ll need to gather the necessary tools and materials for the project.

Gather the Necessary Tools and Materials

First, gather all the tools and materials you’ll need for this project. To turn your bike into an electric generator, you will need a few specific tools. These include a wrench set, screwdrivers, pliers, wire strippers, and a multimeter to test electrical connections.

Advertisement

Additionally, you will require some essential materials such as a generator hub, a 12-volt DC motor, a bike stand or trainer, a battery, a voltage regulator, and various electrical connectors and wires.

It is crucial to ensure that you have all the necessary tools and materials before starting the project to prevent any delays or complications. Once you have gathered everything, you can move on to choosing the right bike for your generator project, taking into consideration factors like frame strength and stability.

Choose the Right Bike for Your Generator Project

When choosing the appropriate bicycle for your generator project, consider factors such as frame strength and stability. Here are four key considerations to keep in mind:

Advertisement
  1. Electric Bike Compatibility: Ensure that your bike is compatible with an electric bike conversion kit. This will make the process of turning it into an electric generator much easier and more efficient.

  2. Frame Material: Opt for a bike with a sturdy frame made of materials like steel or aluminum. These materials provide the necessary strength and stability to support the additional weight of the generator mechanism.

  3. Gear System: Look for a bike with a well-functioning gear system. This will allow you to adjust the resistance and speed of the generator, giving you more control over the generated electricity.

  4. Wheel Size: Consider the wheel size of the bike, as larger wheels tend to generate more power. However, keep in mind that larger wheels may also require more effort to pedal.

With these considerations in mind, you can select the right bike for your DIY generator project. Once you have the perfect bike, it’s time to move on to installing the generator mechanism onto your bike.

Install the Generator Mechanism onto Your Bike

To install the generator mechanism onto your bicycle, start by ensuring that the bike’s frame is sturdy and compatible with the electric conversion kit. This is crucial for a safe and efficient conversion process. Once you have confirmed compatibility, attach the generator to the rear wheel of your bike. Make sure it is securely fastened to prevent any wobbling or detachment during operation.

The benefits of using a bike powered generator for off-grid living are numerous. Not only does it provide a sustainable and renewable source of energy, but it also promotes physical fitness. To maximize energy output, maintain a steady pedaling rhythm and adjust the resistance level accordingly. Additionally, consider using high-quality batteries to store excess energy for later use.

With the generator mechanism successfully installed, it’s time to connect it to your devices and enjoy the power you have generated.

Connect the Generator to Your Device(s)

Advertisement

Now, it’s time for you to connect the generator to your devices and start enjoying the power you’ve generated.

To ensure a seamless charging experience, follow these steps:

  1. Determine your charging options: Assess the devices you wish to charge and their power requirements. Some common options include USB ports, DC power outlets, or AC power inverters.

  2. Connect your devices: Use the appropriate cables or adapters to connect your devices to the generator. Ensure a secure connection to avoid interruptions during the charging process.

  3. Manage the power: Consider using a power management system to regulate the charging process. This can help distribute the generated power efficiently and prevent overcharging or damaging your devices.

With your devices connected and power management in place, you are now ready to adjust the resistance and pedal to generate electricity. This will be discussed in the subsequent section.

Adjust the Resistance and Pedal to Generate Electricity

Adjusting the resistance and pedaling will allow you to generate electricity. By carefully manipulating these two variables, you can optimize the energy efficiency of your bike-turned-generator. There are several adjustment techniques you can employ to achieve maximum power output. First, adjust the resistance level on your generator to find the sweet spot where you can pedal comfortably while still generating a significant amount of electricity. This can be done using a 3×3 table to visually represent various resistance levels, pedal speed, and power output. Experiment with different combinations until you find the ideal setting that strikes a balance between effort and energy production. Additionally, pay attention to your pedaling technique. Maintaining a consistent and smooth pedal stroke will help maximize power generation. Once you have mastered the adjustment techniques, you can move on to the next step of monitoring and managing the power output without compromising your cycling experience.

Advertisement

Monitor and Manage the Power Output

Now that we have adjusted the resistance and pedal to generate electricity, it is important to monitor and manage the power output efficiently.

Power monitoring allows us to track the amount of electricity being produced by our bike-turned-generator. By keeping an eye on the power output, we can ensure that we are generating a consistent and optimal amount of electricity.

Additionally, energy management plays a crucial role in maximizing the efficiency of our electric generator. This involves finding the right balance between the power output and the energy consumed by the bike. By carefully managing the power output and energy consumption, we can ensure that our generator operates at its highest efficiency.

As we move into the next section about safety precautions and maintenance tips, it is essential to understand how to maintain and operate our electric generator safely.

Safety Precautions and Maintenance Tips

To ensure safe operation and proper maintenance, it is important to follow these safety precautions and maintenance tips.

Advertisement
  • Safety Measures:

  • Always wear protective gear, including a helmet and gloves, while operating the electric generator.

  • Keep the generator away from water or damp environments to prevent electrical shock.

  • Regularly inspect the bike’s wiring and connections for any signs of wear or damage.

  • Avoid overloading the generator by not exceeding its maximum power output capacity.

  • If any issues or abnormalities are noticed during operation, immediately turn off the generator and consult a professional.

  • Maintenance Tips:

  • Clean the generator regularly to remove dust and debris that can hinder its performance.

  • Check the battery level and recharge it as needed to maintain optimal power output.

  • Lubricate the moving parts of the generator to reduce friction and ensure smooth operation.

  • Periodically inspect the tires, brakes, and other bike components to ensure they are in good condition.

By following these maintenance tips and safety measures, you can ensure the safe and efficient operation of your electric generator. Now, let’s explore additional features and upgrades for your generator.

Explore Additional Features and Upgrades for Your Generator

You can enhance the capabilities of your electric generator by exploring additional features and upgrades. Here are some ideas to consider when looking to improve your bike-powered generator:

Feature/Upgrade Description Benefits
Adding a battery storage system Install a battery to store excess electricity generated Allows for power storage and use during low output
Exploring alternative power sources for the generator Incorporate solar panels or wind turbines Provides additional power sources for the generator

By adding a battery storage system, you can store excess electricity generated by your bike-powered generator. This allows you to use the stored power during periods of low output or when the bike is not in use. Additionally, exploring alternative power sources such as solar panels or wind turbines can provide additional sources of power for your generator. These upgrades expand the capabilities of your bike-powered generator, making it more versatile and reliable.

Now, let’s move on to the next section to learn about how to enjoy the benefits of bike-powered electricity.

Enjoy the Benefits of Bike-Powered Electricity

Experience the advantages of powering your devices with electricity generated by pedaling a bicycle. Bike-powered charging stations offer a sustainable and efficient alternative energy source for bikes.

Advertisement

Not only can you generate electricity while getting exercise, but you can also reduce your carbon footprint and save money on electricity bills. These charging stations typically consist of a stationary bike connected to a generator, which converts mechanical energy from pedaling into electrical energy.

The generated electricity can then be used to charge various devices such as smartphones, tablets, and even small appliances. By utilizing bike-powered electricity, you can have a reliable source of energy wherever you go, whether it’s during outdoor adventures, camping trips, or even in areas with limited access to power grids.

Embrace the benefits of bike-powered electricity and contribute to a greener and more sustainable future.

Frequently Asked Questions

Can I use any type of bike for this generator project?

Yes, the efficiency of generating electricity depends on the type of bike used. Certain types, like road bikes with lightweight frames and smooth tires, provide better efficiency compared to heavier and more rugged mountain bikes.

How much electricity can I generate with a bike-powered generator?

I’m amazed at how much electricity I can generate with my bike-powered generator! By calculating its energy efficiency, I found it produces a significant amount of power. I’m excited to explore its potential applications in various settings.

Advertisement

Can I connect multiple devices to the generator at the same time?

Yes, multiple devices can be connected to the generator, but there are power output limitations. The generator’s power output is determined by factors like the bike’s speed and the efficiency of the conversion system.

Is it possible to store the generated electricity for later use?

Yes, it is possible to store the electricity generated by a bike powered generator for later use. This opens up alternative uses for the stored electricity and hints at the future of energy storage with bike powered generators and their potential impact.

Are there any specific safety precautions I need to follow while using a bike-powered generator?

There are several safety tips to follow when using a bike-powered generator. Some common mistakes include not wearing protective gear, overloading the generator, and not properly securing the bike.

Conclusion

In conclusion, turning your bike into an electric generator is a fascinating and practical project that allows you to harness your own physical energy to generate electricity. By following the steps outlined in this article, you can create a sustainable and eco-friendly power source for your devices.

Did you know that a typical bike-powered generator can produce around 100 watts of electricity? This means that with just an hour of pedaling, you could charge your phone for up to 10 hours!

Advertisement

So, why not give it a try and experience the benefits of bike-powered electricity for yourself?

Continue Reading

Electric Bike

How To Turn Your Bicycle Into An Electric Bike

Published

on

By

An image showcasing a bicycle with a sleek conversion kit attached, displaying the step-by-step process of transforming it into an electric bike

Have you ever imagined smoothly ascending hills on your bike, with the wind blowing through your hair as you effortlessly conquer any type of terrain? If so, you can now turn that dream into reality!

In this article, I will show you how to turn your ordinary bicycle into an electrifying powerhouse. With the right conversion kit and a little know-how, you can transform your humble two-wheeler into a high-performance electric bike.

Get ready to embark on a thrilling journey of DIY ingenuity and experience the joy of riding like never before.

Key Takeaways

  • Install the electric system by securely attaching throttle and brake levers and connecting electric system wires to handlebar components.
  • Test and adjust the electric system by checking battery voltage, testing throttle and brakes, troubleshooting issues, and addressing problems before proceeding.
  • Ensure safety and legal compliance by familiarizing yourself with local regulations, making necessary modifications, adhering to safety gear requirements, and avoiding fines or legal issues.
  • Maintain and care for the electric bike by regularly checking and recharging the battery, keeping electric components clean and dry, storing the bike in a dry place, and maximizing battery lifespan by following proper charging tips.

Assess Your Bicycle’s Suitability for Conversion

Assess if your bicycle is suitable for conversion into an electric bike. Choosing the right conversion kit is crucial to ensure compatibility with your bicycle.

Advertisement

First, consider the type of bicycle you have. Electric bike conversion kits are typically designed for standard bicycles, such as road bikes, mountain bikes, or hybrid bikes.

Assessing the bicycle’s compatibility involves checking the frame, fork, and wheel sizes. Additionally, consider the weight capacity of the kit and ensure that it can support your weight and any additional cargo you may carry.

Take into account the installation process and determine if you have the necessary tools and skills.

Once you have assessed your bicycle’s suitability, you can proceed to choose the right electric bike conversion kit, which will be discussed in the subsequent section about choosing the right electric bike conversion kit.

Choose the Right Electric Bike Conversion Kit

Selecting the appropriate electric bike conversion kit is crucial. Electric bike conversion kits offer a convenient way to transform your regular bicycle into an electric-powered one. There are various benefits to converting your bicycle, such as increased speed and reduced effort while riding. However, it is important to consider the drawbacks as well, such as the added weight and the need for regular maintenance.

Advertisement

When choosing a conversion kit, it is essential to consider the motor and battery combination that best suits your needs. The motor should provide enough power to support your desired speed and terrain, while the battery should offer sufficient range for your intended rides. By carefully selecting the right components, you can ensure a successful electric bike conversion.

Now, let’s move on to gathering the necessary tools and equipment for the conversion process.

Gather the Necessary Tools and Equipment

To successfully convert your regular bicycle to an electric-powered one, you’ll need to gather the tools and equipment necessary for the process. Assessing compatibility is crucial to ensure that the conversion kit you choose will work seamlessly with your bicycle.

Advertisement

Common tools required for this conversion include a set of Allen wrenches, a socket wrench, pliers, and a screwdriver. Additionally, you will need a conversion kit that typically includes an electric motor, a battery pack, a controller, and a throttle. Troubleshooting common issues such as motor or battery malfunctions may require a multimeter to test electrical connections and diagnose any problems.

Once you have gathered all the necessary tools and equipment, you can move on to the next step of the conversion process: removing the bicycle’s front wheel and installing the electric motor.

Remove the Bicycle’s Front Wheel and Install the Electric Motor

Start by removing the front wheel of your bicycle and then proceed to install the electric motor. To install the electric motor, follow these steps:

  1. Place the motor bracket on the front fork of the bicycle and align it with the mounting holes.
  2. Insert the bolts through the bracket and secure them tightly with a wrench.
  3. Attach the electric motor to the bracket using the provided screws and ensure it is securely fastened.
  4. Connect the motor wires to the controller following the manufacturer’s instructions. Make sure to match the color-coded wires correctly.
  5. Next, wire the battery pack to the controller using the provided connectors. Double-check the wiring to ensure proper connections.
  6. Test the motor by turning on the battery pack and gently applying throttle.

Now that the electric motor is installed and wired, you can move on to the next step of installing the battery pack and controller.

Install the Battery Pack and Controller

Advertisement

To ensure optimal weight distribution, I positioned the battery pack in the center of the bicycle frame. This allows for a balanced and stable ride.

Next, I connected the controller to both the motor and the battery pack, establishing the crucial link between the two. This enables efficient communication and control over the electric system, ensuring a smooth and responsive performance.

Position the Battery Pack for Optimal Weight Distribution

Place the battery pack in a central location on your bicycle for balanced weight distribution. This is crucial to ensure optimal handling and stability when riding your electric bike.

By positioning the battery pack in the middle of the frame, you distribute the weight evenly between the front and rear wheels, allowing for better control and maneuverability. Avoid placing the battery too far forward or backward, as it can negatively affect the bike’s balance and overall performance.

Additionally, make sure the battery is securely fastened to the frame to prevent any movement or vibrations during rides.

Advertisement

Once you have positioned the battery pack correctly, you can proceed to connect the controller to the motor and battery, which will enable the electric assistance and power delivery.

Connect the Controller to the Motor and Battery

Now that you’ve positioned the battery pack correctly, you can easily connect the controller to the motor and battery. This step is crucial in turning your bicycle into an electric bike. Here are the steps to follow:

  • Start by identifying the wiring and connections on the controller. Refer to the manufacturer’s instructions for guidance.
  • Connect the wires from the motor to the appropriate terminals on the controller. Make sure to match the colors correctly.
  • Connect the wires from the battery to the corresponding terminals on the controller. Double-check the polarity to avoid any damage.
  • Secure the connections using zip ties or electrical tape to prevent any loose wires.
  • Finally, test the connections by turning on the system and checking if the motor responds accordingly.

In addition to connecting the controller, it’s important to consider the battery installation. Research different types of batteries and choose the one that suits your needs in terms of capacity and weight. Remember to regularly check the battery’s life and perform maintenance tasks to ensure optimal performance.

Now that the controller and battery are connected, let’s move on to the next step of connecting the electric system to the bicycle’s existing components.

Connect the Electric System to the Bicycle’s Existing Components

To connect the electric system to my bicycle’s existing components, I first attach the throttle and brake levers. This allows me to control the speed and apply the brakes effortlessly.

Next, I connect the electric system to the bicycle’s lighting and display, ensuring that I have clear visibility and can monitor the system’s performance.

Advertisement

These steps are crucial in transforming my bicycle into an electric bike and ensuring a seamless integration of the electric components with the existing ones.

Attach the Throttle and Brake Levers

Attach the throttle and brake levers by sliding them onto the handlebars.

To begin, install the throttle by locating the appropriate location on the handlebars and sliding it into place. Ensure that it is securely attached and aligned with your hand position for easy access while riding.

Next, attach the brake levers by removing the existing ones and replacing them with the electric brake levers. These levers will allow you to control both the electric motor and the brakes simultaneously. Make sure they are firmly in place and adjust them to your preferred position.

Once the throttle and brake levers are properly attached, you can move on to connecting the electric system to the bicycle’s lighting and display. This will provide you with a complete electric bike setup.

Advertisement

Connect the Electric System to the Bicycle’s Lighting and Display

Once the throttle and brake levers are securely attached, I can now connect the electric system to the bicycle’s lighting and display. This step involves connecting the wires from the electric system to the appropriate components on the handlebars. I will also need to choose the appropriate display type for my electric bike, which will allow me to monitor important information such as speed, battery level, and distance traveled.

To make it easier for you to understand, here is a table that shows the different wire connections and their corresponding components on the handlebars:

Wire Connection Component
Red Headlight
Black Taillight
Yellow Display
Green Brake
Blue Horn

Once the electric system is connected to the handlebars, I can move on to the next step of testing the electric system and making any necessary adjustments.

Test the Electric System and Make Adjustments

Now, it’s time to test the electric system and make any necessary adjustments.

Before hitting the road, it’s important to ensure that the installation is functioning properly. To begin, conduct a thorough testing procedure to confirm that all components are working as intended.

Advertisement

Start by checking the battery’s voltage and verifying that it is within the recommended range. Next, test the throttle and brakes to ensure they respond appropriately. If any issues arise, utilize troubleshooting techniques such as inspecting connections, checking for loose wires, or replacing faulty components. It’s crucial to address any problems before proceeding.

Once you’ve completed the necessary adjustments and are satisfied with the system’s functionality, you can move on to the next section, where you’ll ensure the safety and legal compliance of your electric bike.

Ensure the Safety and Legal Compliance of Your Electric Bike

To ensure the safety and legal compliance of your e-bike, it’s important to familiarize yourself with local regulations and make any necessary modifications.

Electric bike regulations vary from place to place, so it’s crucial to understand the specific requirements in your area. Some locations may have speed limits for electric bikes or restrict them from certain areas like sidewalks or bike paths. Additionally, there might be specific safety gear requirements such as helmets or reflective clothing. It is essential to adhere to these regulations to avoid fines or legal issues.

Once you have ensured that your electric bike meets all the necessary safety and legal requirements, you can move on to the next section about maintaining and caring for your electric bike.

Advertisement

Maintain and Care for Your Electric Bike

I need to regularly check and recharge the battery of my electric bike to ensure its optimal performance. This involves monitoring the battery level and charging it when necessary, following the manufacturer’s guidelines.

Additionally, I should keep the electric components of my bike clean and dry to prevent damage and ensure their longevity. This can be achieved by using a damp cloth to wipe away any dirt or debris and storing the bike in a dry place when not in use.

Regularly Check and Recharge the Battery

Make sure to regularly check and recharge the battery for your electric bike. Proper battery maintenance is crucial to ensure optimal performance and longevity. Here are some battery charging tips to keep in mind:

  • Always use the charger provided by the manufacturer to avoid any compatibility issues.
  • Charge the battery in a cool and well-ventilated area to prevent overheating.
  • Avoid charging the battery immediately after a ride to allow it to cool down.
  • Aim to keep the battery level between 20% and 80% for the best battery health.
  • If you’re storing the bike for an extended period, charge the battery to around 50% and store it in a cool, dry place.

By following these battery charging tips, you can maximize the lifespan of your electric bike’s battery.

Additionally, it’s important to keep the electric components clean and dry to ensure their proper functioning. Transitioning into the subsequent section, maintaining a clean and dry environment is essential for the overall longevity of your electric bike.

Keep the Electric Components Clean and Dry

Ensure that you regularly clean and keep the electric components of your bike dry for optimal performance and longevity. Proper electric component maintenance is crucial to prevent water damage and ensure that your electric bike functions seamlessly. Water can cause corrosion and short circuits, leading to costly repairs or even permanent damage.

Advertisement

To keep your electric components clean, use a dry cloth to wipe them down, removing any dirt or debris. Avoid using water or liquid cleaners as they can seep into sensitive areas. Additionally, make sure to store your electric bike in a dry location to prevent moisture accumulation.

By taking these simple precautions, you can enjoy your new electric bike and explore the possibilities it offers without worrying about water damage.

Enjoy Your New Electric Bike and Explore the Possibilities

Explore all the possibilities and enjoy your new electric bike to the fullest.

With your upgraded ride, you can now venture into exciting new electric bike trails and experience the many benefits of electric bike commuting.

Electric bikes provide a convenient and eco-friendly alternative to traditional modes of transportation. They allow you to effortlessly navigate through traffic, saving you time and reducing your carbon footprint.

Advertisement

Additionally, electric bikes offer a great way to explore the outdoors and connect with nature. Whether you’re commuting to work or embarking on a weekend adventure, your new electric bike opens up a world of opportunities.

So, hop on your bike, embrace the freedom it offers, and start discovering all the amazing experiences waiting for you.

Enjoy the ride!

Frequently Asked Questions

How long does it take to convert a bicycle into an electric bike?

On average, converting a bicycle into an electric bike takes a few hours. The necessary tools include a conversion kit, wrenches, pliers, and a screwdriver. The process involves attaching a motor, battery, and controller to the bike.

What is the average cost of an electric bike conversion kit?

The average cost of an electric bike conversion kit is around $500. However, it’s important to choose a reliable brand like Bafang or Voilamart for better performance and durability.

Advertisement

Can any bicycle be converted into an electric bike?

Not all bicycles can be converted into electric bikes due to limitations. Converting a bicycle into an electric bike has pros like increased speed and distance, but cons include added weight and potential damage to the frame.

Are there any weight limitations for installing an electric motor on a bicycle?

Are there weight limitations for installing an electric motor on a bicycle? What safety considerations should be taken into account? It is crucial to consider weight limitations and safety measures when adding an electric motor to a bicycle.

Do I need any special skills or knowledge to convert my bicycle into an electric bike?

No special skills or knowledge are required to convert your bicycle into an electric bike. However, some special tools and necessary components, such as an electric motor kit, battery, and controller, will be needed.

Conclusion

Well, there you have it – your very own electric bike! It may have taken some effort and a bit of tinkering, but the end result is worth it.

Just like the feeling of freedom when you first learned how to ride a bike, this new electric bike opens up a whole world of possibilities.

Advertisement

It’s like having a gentle tailwind at your back, propelling you forward effortlessly.

So hop on, explore the world around you, and let your electric bike become your trusty companion on all your adventures.

Continue Reading
Advertisement

Affiliate disclaimer

As an affiliate, we may earn a commission from qualifying purchases. We get commissions for purchases made through links on this website from Amazon and other third parties.

About us

We are a passionate team driven by the belief that cycling is a fantastic and accessible way to stay active while enjoying the beauty of the outdoors. Our mission is to share our love for cycling with as many people as possible. We provide a welcoming environment for individuals of all ages, abilities, and backgrounds to come together and ride bikes. With Ralf’s visionary leadership, Zane’s expertise in cycling adventures, and Olivia’s dedication to community building, we strive to create a vibrant space where everyone can experience the joy of cycling. Through group rides, workshops, and inclusive events, we inspire and empower individuals to embrace an active lifestyle. Join us in our quest to pedal together, embrace the joy of cycling, and foster connections that last a lifetime.

Advertisement

Trending