
Imagine this scene: You’re gearing up for an extended bicycle ride, but just as you’re about to clip into your pedals, it dawns on you that they’re excessively worn and require a replacement. No need to fret! Swapping out your bike pedals is an easy task that can be completed swiftly in a few straightforward steps. Armed with the proper tools and a bit of fundamental understanding, you’ll be equipped with fresh pedals before you know it.
First things first, gather the necessary tools. You’ll need a pedal wrench, which is a long-handled wrench specifically designed for removing and installing pedals, as well as some grease to lubricate the threads.
Once you have the tools, it’s time to remove the old pedals. This can be a bit tricky, but with the right technique, you should be able to get them off without too much trouble. From there, it’s just a matter of preparing the new pedals, tightening them securely, and testing them out to make sure they’re functioning properly.
So, let’s get started!
Key Takeaways
- Use a pedal wrench and grease to change pedals, and prepare new pedals according to manufacturer’s instructions.
- Tighten pedals to recommended torque setting using a torque wrench, and check tightness regularly using a pedal wrench.
- Different types of pedals may require different maintenance techniques, and inspect pedals for wear or damage before installing new ones.
- Proper positioning is essential for efficient pedaling and injury prevention, and clipless pedals allow for shoe attachment and increased stability.
Gather the Necessary Tools
You’ll wanna grab your tools now, so you can get those old pedals off and put on some new ones that’ll have you cruising with excitement in no time!
First, you’ll need a pedal wrench that fits your bike’s pedals. Pedal wrenches have thin jaws that can fit into the tight spaces between the pedal and crank arm. You’ll also need a lubricant, like WD-40, to loosen the pedals and make it easier to remove them. If you’re having trouble getting the pedals off, try tapping the wrench with a hammer or using a longer wrench for more leverage.
Next, you’ll need a clean rag to wipe off any dirt or debris from the pedal threads and crank arm. It’s important to have clean threads so the new pedals can be installed properly.
You may also want to have a torque wrench to ensure the new pedals are tightened to the correct torque, which is usually around 35-40 Nm.
With your tools ready, it’s time to move on to the next step and remove those old pedals from your bike.
Remove the Old Pedals
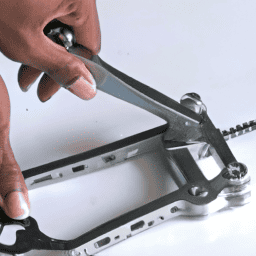
Gonna need a pedal wrench to loosen these babies up. Start by positioning your bike upside down, with the seat and handlebars resting on the ground.
The first step to remove your old pedals is to determine whether they have a left-hand or right-hand thread. Most pedals have a standard right-hand thread, but some have a left-hand thread on the non-drive side of the bike. To avoid damaging your pedals or crank arms, make sure you know which way to turn the wrench.
Once you’ve identified the correct thread direction, use your pedal wrench to loosen the pedals. Apply pressure in a counterclockwise direction for the left pedal, and in a clockwise direction for the right pedal.
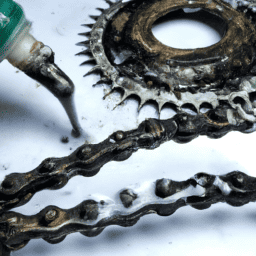
If your pedals are stuck, you can try using a lubricant such as WD-40 or penetrating oil to loosen them. Alternatively, you can use a pedal removal tool or a hex wrench to remove the pedals. Common pedal problems include stripped threads, rusted pedals, or pedals that are difficult to remove. Make sure to inspect your pedals for any signs of wear or damage before installing the new ones.
Now that you’ve successfully removed your old pedals, it’s time to prepare the new pedals for installation.
Prepare the New Pedals
First things first, it’s important to get excited about your new pedals and take a moment to appreciate how they will enhance your riding experience.
However, before installing them, it’s crucial to prepare the new pedals properly. Different types of pedals require different techniques to prepare them for installation.
For instance, if you have clipless pedals, you may need to lubricate the cleats and clean the threads before installing them. On the other hand, platform pedals require a thorough cleaning to remove any dirt or debris that may interfere with the installation process.
Whatever type of pedal you have, make sure to read the manufacturer’s instructions carefully and follow their recommendations.
Once you have prepared the new pedals, you can move on to the next step: tightening them.
Tighten the Pedals
Now that you’ve successfully changed your bicycle pedals, it’s time to ensure they’re tightened properly. To do this, you need to use the proper torque, which is the amount of force required to tighten the pedal to the recommended level.
Make sure you check the tightness of the pedals after a few rides to ensure they’re secure and haven’t become loose. By following these steps, you can avoid any potential accidents or damage to your bike.
Use Proper Torque
To ensure your pedals are securely attached, you should use a torque wrench to tighten them to the recommended torque setting. Proper torque is important because it ensures that the pedal is securely attached to the crank arm and prevents it from becoming loose while riding.
Failing to use the proper torque could cause an accident and result in injury or damage to your bike. One common mistake to avoid when using a torque wrench is over-tightening the pedals. This can damage the threads on the crank arm and make it difficult to remove the pedals in the future.
Another important step to take is to lubricate the pedal threads before installation. This will help prevent the pedals from becoming stuck and make it easier to remove them in the future. Once you’ve used the torque wrench to tighten the pedals, it’s important to check for tightness before riding.
Check for Tightness
Make sure your pedals are secure by checking their tightness before you ride. This step is important to ensure a safe and enjoyable cycling experience.
Even if you’ve installed the pedals correctly, they can still become loose over time due to regular use or lack of proper maintenance. Checking the tightness of your pedals is a quick and easy task that you should perform regularly. Here are a few tips to keep in mind:
- Use a pedal wrench to check the tightness of your pedals.
- Tighten the pedals to the manufacturer’s recommended torque specification.
- Be sure to lubricate the threads of your pedals before installation to prevent corrosion and ensure they’re easy to remove later on.
It’s also worth noting that different types of pedals may require different maintenance techniques. For example, platform pedals may require more frequent lubrication than clipless pedals. Understanding the maintenance requirements of your specific pedals can help you keep them in good condition for longer.
With your pedals properly tightened and lubricated, you can move on to the next step of testing them before your ride.
Test the Pedals
You’ll love the feeling of a smooth pedal rotation once you’ve properly tested and adjusted your new bicycle pedals. To test the pedals, sit on the bike and place your feet on the pedals. Slowly rotate the pedals to ensure they spin smoothly and without any wobbling or clicking noises.
If the pedals don’t feel right, stop and check for proper pedal positioning. Proper pedal positioning is essential for efficient pedaling and injury prevention. The ball of your foot should be centered on the pedal and your heel should be slightly raised.
Clipless pedals offer the added benefit of allowing you to secure your shoe to the pedal, providing a more stable and efficient pedal stroke. Once you’ve tested the pedals and ensured proper positioning, you’re ready to hit the road and enjoy a smoother ride.
Frequently Asked Questions
Can I use any type of pedal on my bicycle?
Pedals for your bike come in plenty of types, each with benefits. Picking the proper pedal relies on your riding style and needs. Take into account the materials, weight, and grip to make the best choice.
How often should I change my bicycle pedals?
To ensure optimal performance, replace pedals every 12-18 months or when they become damaged. Consider the benefits of clipless pedals and choose the right type for your riding style – road, mountain, or hybrid.
How do I know if my pedals are worn out and need to be replaced?
You may notice signs of wear on your pedals such as looseness, squeaking, or difficulty engaging. Regular maintenance tips like cleaning and lubrication can prolong their lifespan. Check compatibility with different bikes before replacing.
Do I need to use any special lubricant when installing new pedals?
When installing new pedals, it’s recommended to use a lubricant to prevent rust and corrosion. Benefits of regular pedal maintenance include smoother operation and increased lifespan. Apply a light coating of grease to the threads before installation.
Is it necessary to have a specific type of wrench to remove and install pedals?
To remove stubborn pedals, using a pedal wrench with a long handle can provide more leverage. Lubricating the threads regularly can prevent seizing. Any wrench that fits the pedal flats can be used to install pedals.
Conclusion
Congratulations! You’ve successfully changed your bicycle pedals. Now, you can enjoy a smoother and more efficient ride. But before you hit the road, let’s review the steps you took to make this happen.
First, you gathered the necessary tools, which included a pedal wrench and possibly some lubricant.
Then, you removed the old pedals, being careful to turn them in the correct direction.
Next, you prepared the new pedals by applying some lubricant and ensuring they were threaded correctly.
Finally, you tightened the pedals as much as possible, double-checking for any looseness or wobbling. And voila! You are ready to test out your new pedals and enjoy a comfortable and safe ride.
Remember, changing pedals may seem like a daunting task at first, but with the right tools and a little patience, it’s a task that anyone can handle. So the next time you need to change your bicycle pedals, don’t hesitate to follow these steps and get your bike up and running in no time.
Happy riding!