
To prevent saddle pain on the trainer, make certain your saddle fits well and is properly adjusted. Set your saddle height so your leg is nearly fully extended with a slight bend at the knee, and position it so your knees track directly over the pedals. Keep the saddle level or slightly nose-down for comfort. Experiment with padding or different saddle styles if needed. Getting these adjustments right makes a big difference—stay tuned to learn more tips to enhance your comfort.
Key Takeaways
- Ensure your saddle is properly adjusted, with the correct height and fore-aft position to prevent pressure points.
- Choose a saddle that fits your anatomy or try different styles to improve comfort.
- Use padded shorts or gel covers to reduce friction and sit bone discomfort during rides.
- Regularly check and fine-tune saddle tilt and position to maintain proper alignment and prevent soreness.
- Gradually increase ride duration to allow your body to adapt and avoid overloading sensitive areas.

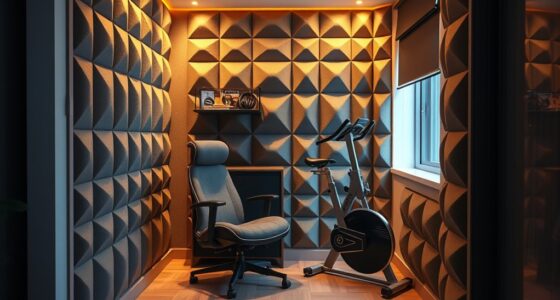
Are you tired of discomfort and soreness after every indoor cycling session? One of the most common culprits is an improperly fitted saddle. When your saddle doesn’t fit correctly, it puts unnecessary pressure on sensitive areas, leading to pain and fatigue. The key to avoiding this starts with understanding saddle fit and how to adjust your seat height properly. If your saddle is too high or too low, your body compensates, which can cause strain on your hips, knees, and pelvis. Ensuring the right saddle fit is essential for comfort and efficiency on your trainer.
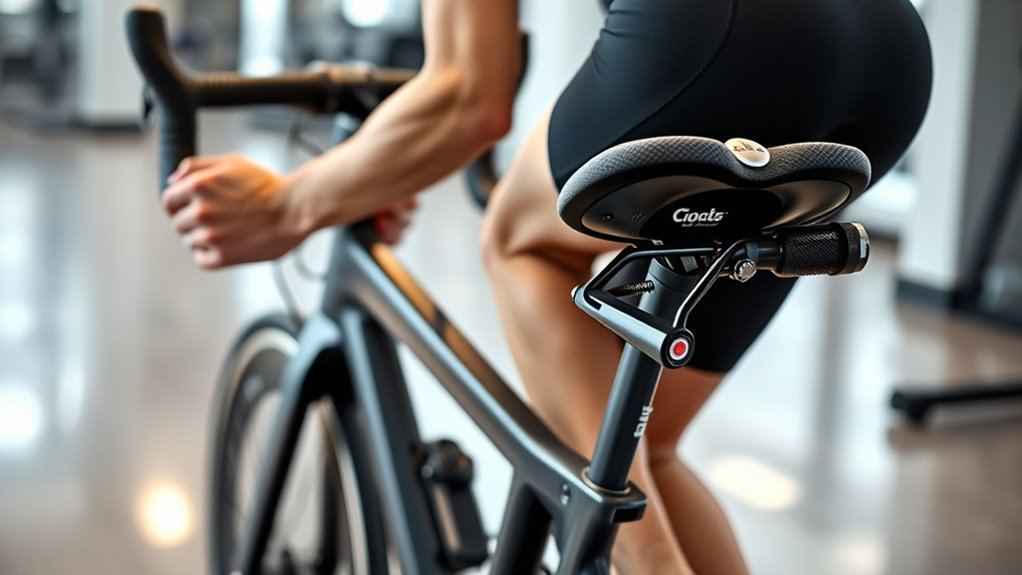
Begin by adjusting your seat height so that when you’re seated on the saddle, your leg is nearly fully extended at the bottom of the pedal stroke, with a slight bend in your knee—about 25 to 35 degrees. This position allows for efficient pedaling and reduces stress on your joints. To find this spot, sit on your bike or trainer and place the pedal at its lowest point. Your leg should be straight but not locked, and your hips should stay level without rocking side to side. Making this adjustment helps distribute your weight evenly and minimizes pressure on your sit bones, which is vital for saddle comfort.
Adjust your saddle height so your leg is nearly fully extended with a slight knee bend at the bottom of the pedal stroke.
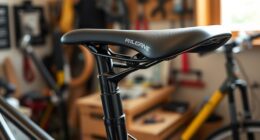
Next, consider saddle fit beyond height. The saddle should be positioned so that when you’re pedaling, your knees track straight over the middle of the pedals. If your saddle is too far forward or backward, it can cause discomfort and misalignment. Use the markings on your seat post or measure from your bottom bracket to find the proper fore-aft position. You want to feel balanced, with your hips stable and your upper body relaxed. Proper saddle tilt also matters—you should aim for a level saddle or a very slight nose-down tilt to prevent sliding forward or backward.
Don’t forget that saddle fit isn’t just about height and fore-aft position; it’s also about choosing the right saddle for your anatomy. If you’ve tried adjustments and still experience pain, consider trying different saddle styles or padding. Some riders benefit from padded shorts or gel covers, but the primary focus should be on proper fit and adjustment. Reassess your seat height after making any changes, and ride for a few minutes to see how your body responds. Small tweaks can make a significant difference in comfort.
In the end, prioritizing correct saddle fit and precise seat height adjustment helps prevent saddle pain and enhances your indoor cycling experience. When your saddle is dialed in properly, you’ll enjoy longer, more comfortable sessions without soreness or discomfort.
Frequently Asked Questions
How Do I Adjust My Saddle Height Correctly?
To adjust your saddle height correctly, first sit on your bike and position your heel on the pedal at the lowest point. Your leg should be straight, with a slight bend at the knee. Check the saddle angle; it should be level or slightly tilted for comfort. Consider the saddle material—more cushioned options can reduce pressure. Fine-tune the height and angle for a smooth, pain-free ride.
Are Padded Shorts Necessary for Trainer Rides?
Padded shorts aren’t necessary, but they can make your trainer rides much more comfortable. They offer different padding options and chamois benefits that help reduce saddle soreness and chafing. Wearing padded shorts provides extra cushioning, absorbs sweat, and minimizes friction, making long sessions more enjoyable. If you’re prone to saddle discomfort, investing in good quality padded shorts can markedly improve your experience and help you ride longer without pain.
How Often Should I Replace My Saddle?
You should replace your saddle every 1 to 3 years, depending on use. Studies show that saddle material and shape greatly impact comfort and durability. If your saddle shows signs of wear or discomfort, it’s time for a change. A worn saddle can cause pain and inefficiency. Regularly evaluating your saddle’s condition guarantees you maintain ideal comfort and performance during trainer rides.
Can Saddle Pain Be Caused by Bike Fit Issues?
Yes, bike saddle discomfort can definitely be caused by trainer saddle fit issues. If your saddle isn’t properly adjusted for your body, it puts undue pressure on certain areas, leading to pain. Ensuring your trainer saddle fit aligns with your riding position and anatomy helps prevent saddle pain. Regularly check and adjust your saddle height, tilt, and fore-aft position to optimize comfort and reduce the risk of discomfort during your workouts.
What Are Signs of Saddle Soreness Versus Injury?
You might think saddle soreness is just normal, but sneaky signs tell a different story. Soreness causes discomfort that eases with rest, like a mild ache after a ride. Injury symptoms, however, include persistent pain, swelling, or numbness that lingers. If your discomfort doesn’t improve or worsens, it’s a red flag. Pay attention—what feels like normal soreness could hide something more serious. Don’t ignore the warning signs.
Conclusion
To prevent saddle pain on the trainer, prioritize proper saddle height, choose the right saddle, and take regular breaks. Remember, over 60% of cyclists experience discomfort at some point, so addressing these tips can make a big difference. Stay attentive to your body, make adjustments as needed, and don’t ignore persistent pain. With the right setup and habits, you’ll enjoy smoother, more comfortable rides—turning trainer time into a more enjoyable experience.
Related Posts:


Olivia’s writing is not only informative but also inspiring. She has a knack for telling stories that capture the essence of cycling and the joy it brings to people’s lives. Her writing has been praised by readers and industry experts alike for its clarity, depth, and authenticity.
In addition to her writing, Olivia is also an avid cyclist. She enjoys exploring new trails and routes and has participated in several cycling events and races. Her first-hand experience with cycling gives her a unique perspective on the sport, reflected in her writing.
Overall, Olivia is a talented writer passionate about cycling and dedicated to producing high-quality content for FlatironBike. Her contributions to the magazine have helped make it a go-to source for cycling enthusiasts worldwide.