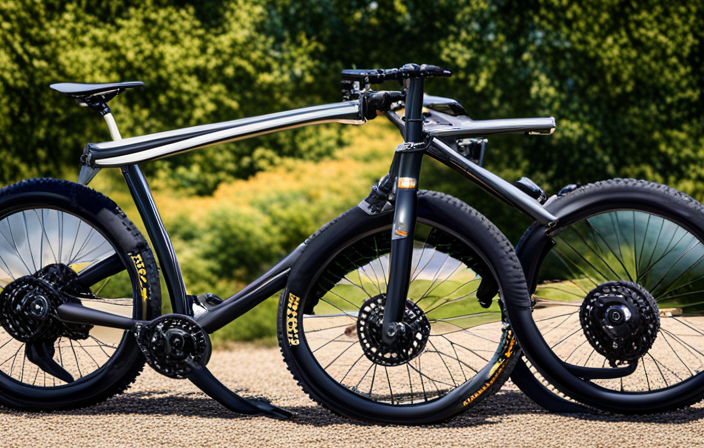
Want to turn your mountain bike into a beast that eats gravel for breakfast? You’ve hit the jackpot! I’ll walk you through turning your reliable mountain ride into a gravel-chomping champ, step by step.
From assessing compatibility and selecting the right tires to adjusting suspension and upgrading gearing, we’ll cover all the necessary modifications to ensure optimal performance on gravel terrain.
So grab your wrenches and let’s get ready to tackle those gravel roads with confidence!
Key Takeaways
- Evaluate frame geometry and consider upgrading to a gravel-specific frame for a comfortable riding position and improved handling on gravel terrain.
- Check tire clearance and consider upgrading to wider tires for better traction and stability on mixed surfaces.
- Upgrade components such as the drivetrain, brakes, and suspension for optimal gear ratios, improved performance, and better control on gravel terrain.
- Consider adding gravel-specific accessories such as a dropper seatpost, gravel-specific brake pads, and a gravel-specific fork for enhanced maneuverability, stability, comfort, and handling on gravel rides.
Assess Your Mountain Bike’s Compatibility with Gravel Riding
You’ll need to assess if your mountain bike is compatible with gravel riding. This compatibility assessment involves evaluating various aspects such as frame geometry, tire clearance, and component suitability.
First and foremost, consider the frame geometry of your mountain bike. Gravel bikes typically have a more relaxed geometry compared to aggressive mountain bikes, providing a comfortable riding position for long hours on rough terrain.
Next, check the tire clearance of your mountain bike. Gravel tires are usually wider than those used in mountain biking, allowing for better stability and traction on loose gravel surfaces. Ensure that your frame has enough space between the fork blades and seatstays to accommodate wider tires.
Additionally, evaluate the suitability of your components for gravel riding. Optimal gear ratios and brake systems can greatly enhance your overall experience. Consider selecting lower gearing options for tackling steep climbs or carrying heavy loads on gravel roads.
After conducting this compatibility assessment, you can move on to equipment selection. Choose the right tires for gravel riding that provide adequate grip and durability on mixed surfaces without compromising rolling resistance on smoother sections of road.
With these considerations in mind, you’ll be well-prepared to convert your mountain bike into a capable gravel machine.
Choose the Right Tires for Gravel Riding
Finding the suitable tires for riding on gravel roads is essential. To ensure a smooth and enjoyable ride, it is crucial to choose the right tire pressure and width for your riding style. Here are some key considerations when selecting tires for gravel riding:
-
Tire Pressure: Adjusting your tire pressure can greatly impact your performance on gravel terrain. Lowering the pressure provides better traction and improves comfort by absorbing vibrations. However, be cautious not to go too low as it may increase the risk of pinch flats.
-
Tire Width: The ideal tire width depends on your riding style and preferences. For riders seeking more speed and efficiency on smoother gravel surfaces, narrower tires between 32mm and 40mm would be suitable. If you prioritize stability and control over rougher terrains, wider tires ranging from 40mm to 50mm will provide better grip.
-
Tread Pattern: Consider choosing tires with a versatile tread pattern that offers good rolling resistance while still providing enough traction on loose surfaces. A combination of small knobs in the center for low rolling resistance and larger side knobs for cornering stability is recommended.
-
Durability: Opt for durable tire compounds that are resistant to punctures and cuts, as gravel roads can be rough on tires.
By choosing the right tires, you’ll enhance your bike’s performance on gravel roads. In the next section, we’ll discuss how to adjust your suspension for optimal handling in such terrain.
Adjust Your Suspension for Gravel Terrain
To optimize your handling on gravel terrain, make sure to adjust your suspension accordingly. When transitioning from mountain biking to gravel riding, it is important to understand that the suspension setup for these two types of terrains differs significantly.
While a full-suspension mountain bike allows for maximum shock absorption on rough trails, it may not be ideal for gravel riding where efficiency and control are key.
Firstly, you need to adjust the sag on your suspension fork and rear shock. This involves setting the amount of compression that the suspension has when you are in a neutral riding position. For gravel riding, a firmer setup is generally recommended to reduce pedal bob and improve power transfer.
Next, consider adjusting the rebound damping. This controls how quickly or slowly the suspension returns after being compressed. On gravel terrain, a faster rebound speed can help maintain traction and prevent unwanted bouncing.
Lastly, take into account any additional adjustments specific to your bike’s suspension system. This could include tweaking compression settings or adding volume spacers if needed.
By properly adjusting your suspension, you can enhance your bike’s performance on gravel roads and trails. With this done, we can now move onto the next step: installing a gravel-specific handlebar…
Install a Gravel-Specific Handlebar
Once you’ve adjusted your suspension, it’s time to install a handlebar specifically designed for gravel riding. One popular option is the aero handlebar, which offers several benefits for gravel biking. Aero handlebars are aerodynamically shaped, reducing wind resistance and allowing you to maintain higher speeds with less effort. This can be particularly advantageous when riding on flat or rolling terrain where speed is key. Additionally, these handlebars often have ergonomic features that provide a more comfortable hand position, reducing fatigue during long rides.
When choosing the right handlebar width for gravel biking, there are a few tips to keep in mind. First, consider your shoulder width and riding style. A wider handlebar can provide better control and stability on rough terrain, but it may feel uncomfortable if it’s too wide for your shoulders. On the other hand, a narrower handlebar can offer more maneuverability but may sacrifice stability.
To help you visualize different handlebar widths and their corresponding benefits, refer to the table below:
| Handlebar Width | Benefits |
|---|---|
| Wide | Better control and stability |
| Narrow | Increased maneuverability |
Now that you’ve installed a gravel-specific handlebar, the next step is to upgrade your gearing for optimal performance on gravel roads without compromising speed or efficiency.
Upgrade Your Gearing for Gravel Riding
Upgrading your gear ratios can greatly enhance your performance when riding on gravel roads. When upgrading your bike’s drivetrain for gravel riding, selecting the right crankset is crucial. Here are three important factors to consider:
-
Gear Range: Look for a crankset with a wider range of gears to tackle varying terrain on gravel roads. This will allow you to maintain a comfortable cadence whether you’re climbing steep hills or cruising on flat sections.
-
Chainring Size: Opt for smaller chainrings to provide lower gearing options, which are beneficial when navigating challenging off-road conditions. These smaller chainrings offer easier pedaling and better traction without sacrificing speed on smoother surfaces.
-
Crank Arm Length: Choose the appropriate crank arm length based on your body proportions and riding style. Shorter crank arms can provide better clearance over rough terrain while longer ones offer increased leverage for powerful pedal strokes.
By upgrading your bike’s drivetrain and selecting the right crankset for gravel riding, you’ll have improved gear ratios that optimize your performance on varied terrains.
Now let’s explore how adding a dropper seatpost can further enhance versatility during gravel rides.
(Note: The subsequent section about ‘add a dropper seatpost for versatility’ will be discussed next.)
Add a Dropper Seatpost for Versatility
Consider adding a dropper seatpost to enhance the versatility of your ride. It allows you to easily adjust your seating position for optimal control on different terrains. A dropper seatpost is a game-changer for gravel riding. It allows you to quickly lower or raise your saddle height on the fly, which comes in handy when transitioning from smooth gravel roads to technical descents or steep climbs.
The benefits of a dropper seatpost are numerous. Firstly, it improves maneuverability and stability by lowering your center of gravity when descending. This gives you more confidence and control over the bike, especially on loose terrain where sudden changes in direction are common. Secondly, it enhances climbing performance by enabling you to shift your weight forward for better traction and power transfer.
Installing a dropper seatpost requires some technical know-how. Start by removing your old seatpost and measure its diameter accurately before purchasing a compatible dropper post. Ensure that the length of the new post doesn’t interfere with any cables or hoses on your bike frame. It’s also crucial to follow the manufacturer’s instructions carefully during installation.
By adding a dropper seatpost, you can take full advantage of the benefits it offers for gravel riding. With increased control and adaptability, tackling varied terrains becomes easier than ever before. Transitioning seamlessly into our next section about installing gravel-specific brake pads, we can further optimize our gravel bike for superior performance in all conditions.
Install Gravel-Specific Brake Pads
To optimize your ride on varied terrains, it’s important to install brake pads specifically designed for gravel riding. Gravel bike brake pad options are specially engineered to provide superior stopping power and control in loose and unpredictable conditions.
Here are three key benefits of using gravel-specific brake pads:
-
Enhanced Performance: Gravel-specific brake pads offer improved modulation, allowing for precise braking control on loose surfaces. This is crucial when navigating rough terrain or steep descents where maintaining traction is essential.
-
Increased Durability: These brake pads are built to withstand the harsh conditions encountered during gravel riding. They have a higher heat resistance compared to standard road bike brake pads, ensuring consistent performance even during prolonged descents.
-
Reduced Wear: Gravel-specific brake pads are designed to minimize wear on your rims. With their unique compound composition, they provide optimal stopping power while being gentler on the braking surface, prolonging the lifespan of your wheels.
Consider adding a gravel-specific fork for even greater adaptability on mixed surfaces.
Consider Adding a Gravel-Specific Fork
When it comes to converting a mountain bike into a gravel bike, one crucial component to consider is the fork. In the previous subtopic, we discussed installing gravel-specific brake pads. Now, let’s delve into the idea of adding a gravel-specific fork.
Using a rigid fork for gravel riding has its pros and cons. On the positive side, a rigid fork provides increased efficiency and better power transfer due to its stiffness. It also reduces weight compared to suspension forks, making it ideal for riders focused on speed and climbing. However, the lack of suspension means less comfort on rough terrain, which can lead to increased fatigue and decreased control.
On the other hand, adding a suspension fork to your gravel bike offers several benefits. It enhances ride comfort by absorbing bumps and vibrations from uneven surfaces. This not only reduces fatigue but also improves handling and traction in challenging conditions like loose gravel or washboard roads.
Transitioning into our next section about upgrading your bike’s frame for gravel riding, let’s explore how choosing the right frame can further enhance your off-road adventures without compromising performance or handling capabilities.
Upgrade Your Bike’s Frame for Gravel Riding
Choosing the right frame for your off-road adventures is essential to enhance your gravel riding experience. When converting a mountain bike to a gravel bike, upgrading your bike’s frame becomes crucial.
One important aspect to consider is the suspension system. Mountain bikes typically have a longer travel suspension designed for rough terrains, while gravel bikes require a more rigid setup for better efficiency on smoother surfaces. Upgrading your bike’s suspension to a lighter and stiffer fork specifically designed for gravel riding can greatly improve your overall performance.
In addition to upgrading the suspension, selecting the right handlebar is another important consideration. Gravel-specific handlebars like drop bars or flared drop bars offer multiple hand positions, allowing you to adapt to different terrain and ride with more comfort and control. These handlebars also provide better aerodynamics, reducing wind resistance when riding at higher speeds.
Now that you have upgraded your bike’s frame and chosen the appropriate handlebar, it’s time to move on to installing gravel-specific pedals. These pedals will further enhance your riding experience by providing better grip and stability on loose surfaces.
Install Gravel-Specific Pedals
When it comes to converting a mountain bike to a gravel bike, one important aspect to consider is the type of pedals you choose. Gravel-specific pedals can greatly enhance your riding experience on rough and unpredictable terrain. These pedals are designed with features that provide better grip, stability, and efficiency.
One advantage of gravel-specific pedals is their larger platform size, which offers more support and stability when pedaling through loose gravel or uneven surfaces. Additionally, these pedals often have adjustable float and tension settings, allowing you to customize the level of engagement and release according to your preference.
There are several types of gravel-specific pedals available in the market. Some popular options include clipless pedals with recessed cleats, which allow for efficient power transfer while still providing walkability off the bike. Another option is flat pedals with aggressive pins that offer excellent grip even in wet or muddy conditions.
It’s important to note that while gravel-specific pedals can improve your performance on rough terrain, they may not be suitable for all riders or riding styles. It’s essential to consider your individual needs and preferences before making a decision.
Now that we’ve covered upgrading the frame and installing gravel-specific pedals, let’s move on to adding accessories for gravel riding, such as fenders and bags.
Add Accessories for Gravel Riding, such as Fenders and Bags
To enhance your gravel riding experience, consider adding accessories like fenders and bags. These accessories can greatly improve your comfort and convenience when tackling gravel roads.
First, let’s talk about fenders. Gravel-specific fenders are designed to provide protection from mud and water splashes, keeping you clean and dry during your ride. Look for fenders that are lightweight yet durable, as they need to withstand the rough terrain of gravel riding.
Next, let’s discuss bags. Gravel riding often involves long distances and unpredictable terrains, so having a bag to carry your essentials is essential. Choose a bag that is specifically designed for gravel riding, with compartments to keep your belongings organized and secure. Look for options that offer easy access while on the go.
In addition to these accessories, it’s crucial to choose the right gravel tires for your converted mountain bike. Opt for wider tires with aggressive tread patterns that can handle various surfaces encountered during gravel rides. The right tires will provide traction and stability on loose surfaces while still maintaining efficiency on smoother sections.
Now that we have covered fenders, bags, and tire selection, let’s move onto the next step: adjusting your bike’s geometry for optimal performance in gravel riding without compromising its original design.
Adjust Your Bike’s Geometry for Gravel Riding
In the previous subtopic, I discussed adding accessories such as fenders and bags to your mountain bike to enhance your gravel riding experience. Now, let’s dive into the importance of adjusting your bike’s geometry for a comfortable and efficient gravel riding experience.
Bike fit is crucial when converting a mountain bike to a gravel bike. By making adjustments to the saddle height, handlebar position, and stem length, you can ensure that your body is properly aligned for optimal power transfer and reduced fatigue on long rides. Additionally, it’s important to consider the width of your handlebars for better control on rough terrain.
Body positioning plays a significant role in maintaining control and stability on gravel terrain. By shifting your weight slightly forward and keeping a relaxed grip on the handlebars, you’ll be able to navigate through loose surfaces more confidently. It’s also helpful to practice bending your elbows and knees while maintaining an upright upper body position.
To further enhance performance on gravel, the next section will cover how to install tubeless tires. Transitioning seamlessly into this topic will allow us to explore even more ways to optimize our gravel riding experience without compromising safety or comfort."
Install Tubeless Tires for Better Performance on Gravel
Installing tubeless tires can greatly improve your performance on gravel roads. When it comes to gravel riding, tubeless tires have several advantages over clincher tires. Unlike clincher tires, which require inner tubes, tubeless tires create an airtight seal between the tire and the rim, eliminating the risk of pinch flats caused by punctures or impact. This not only provides added protection against flats but also allows you to run lower tire pressures for better traction and control on rough terrain.
Tubeless tires offer numerous benefits for off-road terrain. The absence of an inner tube means there is no risk of pinch flats when hitting rocks or roots on gravel roads. Additionally, running lower tire pressures enhances comfort by absorbing more vibrations from the uneven surface. This can significantly reduce fatigue during long rides.
Incorporating tubeless tires into your converted gravel bike setup will enhance your overall riding experience. Not only will you benefit from improved puncture resistance and better control on rough terrains, but you’ll also enjoy increased confidence in tackling technical sections with ease.
Considering adding a suspension seatpost for comfort on rough terrain seamlessly transitions us into the next section about enhancing ride quality while maintaining control and stability during off-road adventures.
Consider Adding a Suspension Seatpost for Comfort on Rough Terrain
Adding a suspension seatpost can greatly improve your comfort on rough terrain when riding off-road. It helps absorb the shocks and vibrations that would otherwise be transferred to your body, reducing fatigue and strain.
Here are four benefits of using a suspension seatpost on your converted gravel bike:
-
Enhanced Comfort: The suspension seatpost provides an additional layer of cushioning, smoothing out bumps and uneven surfaces. This allows you to ride longer and with less discomfort.
-
Increased Stability: By absorbing the impacts from rough terrain, the suspension seatpost improves stability by keeping your rear wheel in contact with the ground more consistently. This enhances traction and control, especially on loose or slippery surfaces.
-
Adjustable Suspension: Most suspension seatposts offer adjustable features, allowing you to fine-tune the amount of suspension based on your weight and riding preferences. This ensures optimal comfort and performance for different terrains.
-
Alternative Comfort Solutions: While there are other options like wider tires or padded saddles for added comfort, a suspension seatpost offers a more dynamic solution by actively absorbing shocks instead of just providing passive cushioning.
With a properly installed suspension seatpost, you’ll experience improved comfort and stability while tackling rough terrain on your converted gravel bike. Now let’s move on to the next section about test riding and fine-tuning your setup for optimal performance without compromising safety or efficiency.
Test Ride and Fine-Tune Your Converted Gravel Bike
To optimize the performance of your converted gravel bike, take it for a test ride and make any necessary adjustments. This step is crucial in ensuring that your bike is tuned perfectly to handle the rough terrain you’ll encounter on gravel rides.
Firstly, focus on fine-tuning the suspension. Gravel riding involves tackling uneven surfaces, so having a properly adjusted suspension will greatly enhance your comfort and control. Start by adjusting the preload on your front fork and rear shock to match your weight and riding style. Experiment with different settings until you find the perfect balance between responsiveness and stability.
Next, test out different tire pressures. The ideal pressure for gravel riding may differ from what you’re used to on a mountain bike or road bike. Start with slightly lower tire pressures than normal and gradually increase or decrease as needed. This will help you find the sweet spot where your tires grip well without sacrificing too much rolling resistance.
During your test ride, pay attention to how the bike handles corners, descents, and climbs. Take note of any areas where adjustments could be made to improve performance further. Keep in mind that small changes can have a significant impact on how your converted gravel bike performs.
In conclusion, testing and fine-tuning are essential steps in converting a mountain bike into a gravel bike successfully. By experimenting with suspension settings and tire pressures during your test ride, you’ll be able to optimize both comfort and control for an enjoyable gravel riding experience.
Frequently Asked Questions
Can I convert any mountain bike into a gravel bike?
Yes, not all mountain bikes can be easily converted into gravel bikes. Mountain bike compatibility for a gravel conversion depends on various factors such as frame clearance, tire size, and brake type.
Gravel bike components like narrower tires, drop handlebars, and different gearing are required for optimal performance. It is crucial to assess your mountain bike’s compatibility with these components before attempting a conversion.
How do I choose the right tires for gravel riding?
Finding the right tires for gravel riding is like selecting the perfect shoes for a rugged adventure.
To determine optimal tire pressure, start with a lower pressure and gradually increase until you find the sweet spot between comfort and control.
When it comes to tubeless vs. tubed tires, tubeless offers better puncture protection and increased traction, while tubed tires are easier to install and repair.
Consider your preferences and priorities when making this decision.
How do I adjust my suspension for gravel terrain?
To adjust my suspension setup for gravel terrain, I start by considering the fork’s travel and sag. For a more efficient ride, I increase the air pressure in the fork to reduce sag.
Next, I fine-tune the compression and rebound settings to ensure optimal performance on rough surfaces. Additionally, choosing the right fork oil can greatly impact suspension performance. Thicker oil provides more damping, while thinner oil offers a smoother feel.
Experimenting with different oils can help find the perfect balance for gravel riding.
What are the benefits of adding a dropper seatpost to my gravel bike?
Riding a gravel bike without a dropper seatpost is like exploring uncharted territory without a compass. While not necessary, it offers distinct advantages for gravel riding.
The pros of using a dropper seatpost on a gravel bike include enhanced maneuverability, improved control in technical sections, and increased confidence on descents.
However, there are cons to consider as well, such as added weight and potential maintenance issues.
Ultimately, the decision to use one depends on personal preference and riding style.
Do I need to upgrade my bike’s frame for gravel riding?
Yes, upgrading the bike’s frame may be necessary for optimal gravel riding.
When transitioning from mountain biking to gravel riding, it is important to consider the specific demands of the new terrain.
Upgrading suspension can provide better shock absorption on rough gravel roads, while changing handlebars to a wider and more relaxed design can improve stability and control.
These upgrades will enhance your overall riding experience and ensure better performance on gravel surfaces.
Conclusion
In conclusion, converting my mountain bike into a gravel bike has been an exhilarating journey. The process involved carefully assessing compatibility, choosing the right tires, adjusting suspension and gearing, and fine-tuning every aspect for optimal performance on gravel terrain.
The transformation has been nothing short of magical! My bike now glides effortlessly over rough surfaces, thanks to the tubeless tires and suspension seatpost. With each pedal stroke, I feel like I’m soaring through clouds of gravelly bliss.
So if you’re ready to experience the thrill of conquering gravel roads, don’t hesitate to embark on this extraordinary conversion adventure!
