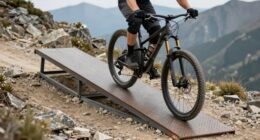

Picture yourself riding along a beautiful bike path, feeling the breeze in your hair as you smoothly pedal. All of a sudden, you notice a slight wobble in your tires.
Don’t let a flat tire ruin your ride! In this article, I’ll guide you through the essential steps of using a bicycle pump.
From understanding different valve types to proper inflation for various riding conditions, you’ll gain the knowledge and confidence to handle any tire-related situation.
So, let’s dive in and master the art of using a bicycle pump!
Key Takeaways
- There are different types of bicycle pumps, including portable pumps, floor pumps, manual pumps, and electric pumps.
- Before pumping, it is important to check the tire pressure, remove dust caps, securely attach the pump head to the valve stem, and know the recommended tire pressure range.
- Understanding the different valve types, such as Presta and Schrader valves, is crucial as it affects pump compatibility and the correct pump head attachment.
- When pumping, it is essential to position the pump head securely onto the valve, use a smooth and controlled pushing and pulling motion, monitor the pressure gauge, and use the correct amount of force to avoid damage or overinflation.

Schwinn Sporterra RX Gravel Bike, 700c Mens and Womens Bike, 14-Speed Drop Bar Gravel Bicycle, Mechanical Disc Brakes, Rigid Fork, Aerodynamic Riding Position, Quick Release Seat Post, Adult Bicycle
GRAVEL BICYCLE: Enjoy next level riding with the Sporterra RX by Schwinn. With 700c wheels, this mens and...
As an affiliate, we earn on qualifying purchases.
Types of Bicycle Pumps
To use a bicycle pump, you’ll need to know about the different types available.
There are two main types of bicycle pumps: portable and floor pumps. Portable pumps are small and lightweight, making them easy to carry with you on a ride. They usually have a smaller volume, so it may take longer to fully inflate your tires.
On the other hand, floor pumps are larger and designed to be used at home or in a workshop. They have a higher volume and can inflate your tires more quickly.
Another distinction is between manual and electric pumps. Manual pumps require physical effort to pump air into the tires, while electric pumps operate with the push of a button.
Now that you know about the different types of pumps, let’s move on to preparing your bike for pumping.

AVASTA 700C Road Adult Step-Over Gravel Hybrid Bike Bicycle for Men Woman Male Female,Lightweight Aluminum Alloy Frame with 21-Speed Gearing for City Commuting,Dual Disc Brakes,19 inch Frame,White
🚴♂️【Durable Aluminum Alloy Frame】This lightweight yet strong frame is built to last, offering a perfect balance of durability...
As an affiliate, we earn on qualifying purchases.
Preparing Your Bike for Pumping
Before pumping your bike, it’s crucial to check the tire pressure to ensure optimal performance and safety.
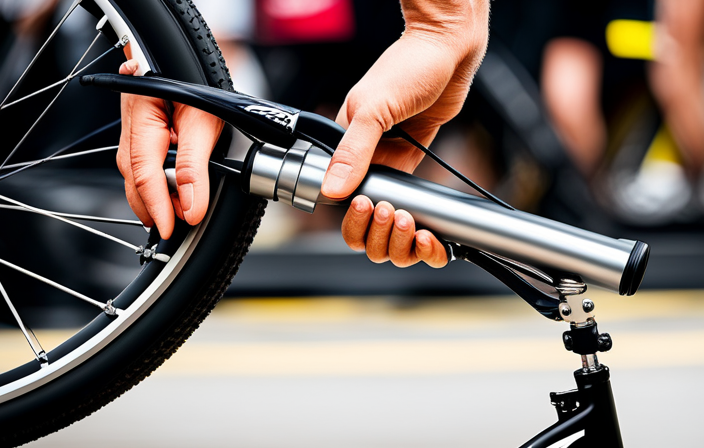
Start by removing the dust caps from the valve stems to expose the valve cores. This will allow air to flow freely into the tubes.
Once the dust caps are off, securely attach the pump head to the valve stem, making sure it’s properly aligned and tight.
Check tire pressure
First, make sure you know the desired tire pressure before using a bicycle pump. Checking tire pressure is crucial for maintaining optimal pressure and ensuring a smooth ride. To help you understand the recommended pressure range for your tires, refer to the table below:
| Tire Size | Recommended Pressure (PSI) |
|---|---|
| 26" | 35-65 |
| 27.5" | 35-65 |
| 29" | 35-65 |
| 700c | 80-130 |
| 20" | 35-65 |
By regularly checking your tire pressure, you can prevent issues like punctures, uneven wear, and decreased performance. Once you have confirmed the correct pressure range, you can proceed to the next step of removing the dust caps. This will allow you to access the valve easily and efficiently.
Remove dust caps
Removing the dust caps makes it easier to access the valve when checking tire pressure. Not only does it allow for convenient attachment of the pump head, but it also prevents dust buildup in the valve, ensuring a proper seal.
To remove the dust caps, simply unscrew them counterclockwise using your fingers. If they are tight, you can use a coin or a flathead screwdriver for extra leverage. Once removed, inspect the dust caps for any debris or dirt.
Cleaning techniques such as wiping with a cloth or rinsing with water can be used to remove any buildup. Make sure to dry them thoroughly before reattaching.
With the dust caps removed and cleaned, it’s now time to attach the pump head and begin inflating the tire.
Attach the pump head
To attach the pump head, simply align the nozzle with the valve and push it on firmly. This step is crucial for proper pump attachment and ensuring a secure seal.
When choosing a portable pump, it’s important to consider the type of valve on your bike’s inner tube. There are two common valve types: Schrader and Presta. Schrader valves are found on most mountain bikes and have a wider diameter, while Presta valves are commonly used on road bikes and have a narrower diameter. Make sure your pump head is compatible with the valve type you have.
Once the pump head is securely attached, you’re ready to start pumping. Now, let’s move on to understanding valve types and how to properly use them.

SAVADECK Carbon Gravel Bike - T800 Carbon Frame & Fork | Shimano U6000 11-Speed Groupset | Hydraulic Disc Brakes | 700CX40mm All-Terrain Tires | Men & Women Road/Off-Road Bicycle (Gray, 55cm)
【Ultralight T800 Carbon Performance】: Featuring a premium T800 R21 carbon fiber frame and fork weighing just 10.4kg (22.92...
As an affiliate, we earn on qualifying purchases.
Understanding Valve Types
To properly use a bicycle pump, it’s important to understand the different types of valves. This knowledge is essential for effective valve maintenance and proper inflation of your bike tires. There are two main types of valves commonly found on bicycles: the Presta valve and the Schrader valve.
Here is a breakdown of the different valve types:
-
Presta valve: This type of valve is commonly found on road bikes and high-performance bicycles. It has a slender and elongated shape, with a small screw at the top that needs to be loosened before inflating the tire.
-
Schrader valve: This valve is similar to the ones used in car tires and is commonly found on mountain bikes and hybrid bicycles. It has a wider shape and a spring-loaded pin in the center that needs to be depressed to allow air in.
Understanding these valve types will help you choose the correct pump head attachment and ensure a proper connection.
Now that you know about valve types, let’s move on to the next section about pumping technique.

Mongoose Men's Elroy Adventure Bike 700C Wheel Bicycle, Blue, 54cm frame size
Versatile adventure touring bike features capable adventure bike geometry, a sleek alloy frame and steel fork for the...
As an affiliate, we earn on qualifying purchases.
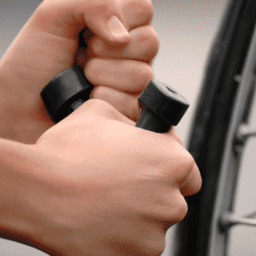
Pumping Technique
Start by positioning the pump head attachment securely onto the valve of your bike tire. Make sure it is properly aligned and tightened to prevent any air leaks.
Once the attachment is secure, start pumping by pushing and pulling the handle in a smooth and controlled manner. This pumping technique helps create the necessary pressure to inflate the tire. Keep a steady rhythm and monitor the pressure gauge on the pump to ensure proper inflation.
It is important to use the correct amount of force while pumping to avoid damaging the valve or overinflating the tire.
Once you have achieved the desired pressure, you can transition into the next step of checking tire pressure by releasing the pump head attachment and using a pressure gauge.
Checking Tire Pressure
Now that we’ve covered the proper pumping technique, let’s move on to the next crucial step in using a bicycle pump: checking tire pressure.
This is an essential aspect of bike maintenance as it directly affects the performance and safety of your ride. Properly inflated tires ensure optimal traction, control, and stability while preventing unnecessary wear and tear.
To check the tire pressure, start by locating the valve on the inner tube. Attach the pump head securely to the valve and read the pressure gauge to determine if it matches the recommended PSI for your bike.
If the pressure is too low, you’ll need to add air using the pump. If it’s too high, release some air until the desired pressure is achieved.
Now that you understand the importance of proper inflation, let’s delve into troubleshooting common issues that may arise during the pumping process.
Troubleshooting Common Issues
When it comes to troubleshooting common issues with using a bicycle pump, there are a few key points to keep in mind.
Firstly, if you find that the pump head is not fitting securely onto the valve, ensure that you are using the correct type of pump head for your specific valve.
Secondly, if you notice air leaking from the connection between the pump head and the valve, check for any damage or debris that may be obstructing a tight seal.
Finally, if you are experiencing difficulty when pumping, double-check that the pump is properly attached and exert steady pressure to ensure an effective inflation.
Pump head not fitting
If the pump head doesn’t fit, you’ll need to try a different attachment. This is a common issue when troubleshooting a pump. Luckily, there are alternative pump heads available that can solve this problem. These attachments are designed to fit a variety of valves, ensuring a secure connection and preventing any air leakage.
To help you understand the different types of pump heads and their compatibility, here is a table that compares the most commonly used attachments:
| Pump Head Type | Valve Type | Pros | Cons |
|---|---|---|---|
| Schrader | Car tires | Easy to use, widely available | Not suitable for Presta valves |
| Presta | Road bikes | Better for high-pressure tires | Requires a smaller valve hole |
| Dunlop | European bikes | Versatile, fits most valves | Less common in certain regions |
If you’re experiencing air leakage, it could be due to a faulty valve or a damaged pump head seal. Let’s delve into this issue further in the next section.
[Transition sentence: Now, let’s move on to addressing the problem of leaking air.]Leaking air
To address the issue of leaking air, you’ll need to check for a faulty valve or a damaged pump head seal.
First, inspect the valve for any signs of damage or wear. If the valve appears to be in good condition, it may be the pump head seal that is causing the leak. Carefully examine the seal for any cracks or tears. If you notice any damage, it will need to be replaced.
Another troubleshooting solution is to ensure that the pump head is securely attached to the valve stem. Make sure it is properly aligned and tightened.
Additionally, lubricating the pump head seal with a small amount of silicone grease can help create a better seal and prevent air leaks.
By implementing these preventive measures, you can avoid the frustration of air leaks and move on to addressing the next challenge of difficulty pumping.
Difficulty pumping
You may find it challenging to pump air into your bicycle tire. When experiencing difficulty pumping, it is important to troubleshoot potential issues and ensure you are using the proper technique. Here is a table that outlines common troubleshooting issues and their solutions:
| Issue | Solution |
|---|---|
| Pump not creating pressure | Check connection between pump and valve |
| Valve not opening | Press valve down firmly before pumping |
| Pump handle feels stiff | Apply lubricant to the pump’s moving parts |
By following these troubleshooting steps and using the correct technique, you should be able to overcome any difficulties when pumping air into your bicycle tire. Now, let’s move on to the next section about storing your bicycle pump.
Storing Your Bicycle Pump
When storing your bicycle pump, make sure to keep it in a dry and safe place. This will prevent any damage caused by moisture or environmental factors. To ensure its longevity, follow these guidelines:
-
Clean your bicycle pump thoroughly before storage. Remove any dirt or debris by wiping it down with a damp cloth.
-
Check the pump for any signs of damage or wear. Replace any worn-out parts before storing to avoid further deterioration.
-
Consider using a pump storage bag or case to protect it from dust, scratches, and potential impacts during transportation or storage.
Properly storing your bicycle pump will not only extend its lifespan but also ensure its optimal functionality when you need it.
Now, let’s move on to additional tips for pumping efficiency.
Additional Tips for Pumping Efficiency
After properly storing your bicycle pump, it’s time to focus on improving your pumping efficiency. By mastering the right technique, you can save time and energy while inflating your tires. To achieve optimal pumping efficiency, start by placing the pump nozzle securely onto the valve stem. Make sure it is aligned properly to prevent any air leakage. Next, use smooth, controlled strokes to pump the handle up and down. Avoid using excessive force, as it can damage the valve or cause the tire to overinflate. Additionally, maintaining a steady rhythm can help you maintain consistent pressure. Lastly, keep an eye on the pressure gauge to ensure you reach the desired tire pressure. By following these tips, you’ll be able to inflate your tires efficiently and effectively. Now, let’s explore some portable pumping options.
Portable Pumping Options
One option for pumping your tires on the go is a portable air compressor. These compact devices are designed for convenience and can easily be carried in a backpack or attached to your bike.
When choosing a portable air compressor, it is important to consider pump head compatibility. Some pumps come with multiple heads to fit a variety of valve types, including Presta and Schrader valves.
Additionally, it is worth exploring alternative inflation methods, such as CO2 cartridges, which provide quick and easy tire inflation. These cartridges are lightweight and can be stored in a saddlebag or jersey pocket.
Other options include mini pumps, which are small and lightweight, and hand pumps, which require manual effort but are reliable and durable.
When considering pumping accessories, there are a variety of options available to enhance your pumping experience and ensure proper tire inflation.
Pumping Accessories
To enhance your tire inflation experience, consider adding pumping accessories to your setup such as a pressure gauge or a valve adapter. These portable pump accessories can make the process more efficient and convenient. A pressure gauge allows you to monitor the air pressure in your tires accurately, preventing over or under inflation. This is crucial for optimal performance and safety. A valve adapter, on the other hand, ensures compatibility between different valve types, making it easier to inflate tires with varying valve designs.
To further illustrate the benefits of these accessories, here is a table showcasing their features and advantages:
| Pump Accessory | Features | Advantages |
|---|---|---|
| Pressure Gauge | Accurate pressure measurement | Prevents over or under inflation |
| Valve Adapter | Compatible with various valve types | Easy inflation for different valve designs |
By incorporating these pumping accessories into your setup, you can streamline your tire inflation process and ensure optimal performance. Moving forward into the section about maintenance and care, it is important to understand how to properly maintain your pump and its accessories.
Maintenance and Care
Make sure you properly maintain and care for your pump and its accessories to ensure their longevity and reliable performance.
Proper cleaning is essential to prevent rust and ensure the pump stays in good working condition. After each use, wipe down the pump with a clean cloth to remove any dirt or moisture. Pay close attention to the nozzle and valve connection areas, as these can easily accumulate debris.
If the pump becomes dirty or greasy, use a mild detergent and warm water to clean it. Avoid using harsh chemicals or abrasive materials that could damage the pump’s finish.
Regularly inspect the pump for any signs of wear or damage, such as cracks or loose parts. By taking the time to properly maintain and care for your pump, you can ensure it will be ready for proper inflation for different riding conditions, which I will discuss in the next section.
Proper Inflation for Different Riding Conditions
For optimal performance, it’s important to inflate your tires according to the specific riding conditions you will encounter. Proper tire inflation is crucial for a smooth and safe ride. Different pump types can affect the accuracy of the inflation, so it’s essential to choose the right pump for your needs.
Here are some guidelines for proper inflation based on various riding conditions:
-
For smooth pavement and road cycling, inflate your tires to the recommended pressure indicated on the sidewall of the tire.
-
For off-road or mountain biking, slightly lower the tire pressure to improve traction and absorb shocks.
-
If you plan to ride on wet surfaces, decrease the tire pressure slightly to enhance grip.
By adjusting your tire pressure according to the riding conditions, you can maximize performance and safety.
Now, let’s move on to the next section about emergency tire repair and maintenance.
Emergency Tire Repair
When it comes to emergency tire repair, there are three key points to consider: patching a tube, using tire sealant, and replacing a tube.
Patching a tube involves finding the puncture, cleaning the area, applying a patch, and ensuring a secure bond.
Tire sealant is a liquid that can be injected into a tube or tire, sealing small punctures as you ride.
If the damage to the tube is severe or the patching process is unsuccessful, it may be necessary to replace the tube entirely, ensuring a safe and functional ride.
Patching a tube
To patch a tube, you’ll need to first locate the puncture. Look for any visible holes or tears in the tube. Once you’ve found the puncture, clean the area around it with rubbing alcohol to remove any dirt or debris.
Next, apply a small amount of glue from your patch kit onto the puncture and spread it evenly. Wait for the glue to become tacky before applying the patch. Peel the backing off the patch and place it directly over the puncture, applying firm pressure for a few seconds to ensure a strong bond.
Finally, allow the patch to dry completely before re-inflating the tube. Patching techniques can vary depending on the size and location of the puncture, but these steps should work for most common tube punctures.
Moving on to using tire sealant, it’s important to…
Using tire sealant
Tire sealant is a convenient option for repairing small punctures in a bike tube. When applying tire sealant, it is important to first remove any debris from the puncture area. Then, shake the sealant bottle thoroughly to ensure a proper mixture.
Next, remove the valve core from the tube and attach the sealant applicator to the valve stem. Squeeze the sealant into the tube, making sure to distribute it evenly. Once the sealant is inside the tube, reinsert the valve core and inflate the tire to the recommended pressure.
The benefits of using tire sealant include quick and easy repair, as well as the ability to seal multiple punctures. This method can save time and effort compared to patching a tube.
Moving on to the next step of replacing a tube…
Replacing a tube
Replacing a tube is a straightforward process that can be done quickly and easily. Here is a step-by-step guide on how to replace a tube in case of an emergency tire repair:
- First, release any remaining air in the tire by pressing the valve stem.
- Use tire levers to remove the tire from the rim, starting at one side and working your way around.
- Once the tire is off, carefully remove the old tube from inside the tire.
- Before inserting the new tube, apply a small amount of tire sealant to the inside of the tire to prevent future punctures.
- Insert the new tube into the tire, making sure it is properly aligned.
- Carefully put the tire back onto the rim, ensuring that the tube is not pinched.
- Inflate the tire to the recommended pressure using a bicycle pump.
Now that the tube has been replaced, let’s move on to pumping safety precautions.
Pumping Safety Precautions
When using a bicycle pump, it’s important to keep in mind safety precautions.
Before starting the pumping technique, ensure that the bike is stable and won’t tip over during the process.
Begin by checking the tire pressure using a pressure gauge to determine the appropriate amount of air needed.
Attach the pump securely to the valve stem and ensure a tight seal to prevent air leakage.
When pumping, use a smooth and controlled motion, applying even pressure to the pump handle.
Avoid over-inflating the tire by periodically checking the pressure gauge.
It’s also important to wear protective eyewear to shield your eyes from any potential debris or flying objects.
By following these safety precautions, you can ensure a successful and safe pumping experience.
Now, let’s move on to the conclusion and final tips for using a bicycle pump.
Conclusion and Final Tips
To wrap up, make sure to follow these final tips for a successful and safe pumping experience.
-
Pumping Technique: When using a bicycle pump, it’s important to use the proper technique. Start by attaching the pump securely to the valve stem of the tire. Then, use smooth and consistent strokes to pump air into the tire. Avoid applying excessive force or pumping too quickly, as this can lead to overinflation or damage to the tire.
-
Proper Inflation: Achieving the correct tire pressure is crucial for optimal performance and safety. Refer to the manufacturer’s guidelines or the sidewall of the tire to determine the recommended pressure range. Use a pressure gauge to ensure accurate inflation. Overinflating or underinflating the tire can affect the bike’s handling and increase the risk of punctures or blowouts.
-
Regular Maintenance: Lastly, remember to regularly check and maintain your bike’s tire pressure. Changes in temperature and riding conditions can cause the pressure to fluctuate. By regularly inspecting and inflating your tires, you can ensure a smooth and comfortable ride while extending the lifespan of your bike’s tires.
By following these final tips, you can master the pumping technique and achieve proper inflation for a safe and enjoyable biking experience.
Frequently Asked Questions
How do I choose the right bicycle pump for my bike?
To choose the right bicycle pump for your bike, consider the different types available, such as floor pumps, hand pumps, and CO2 inflators. Each type has its advantages and limitations, so choose one that suits your needs and preferences.
Can I use a bicycle pump to inflate other inflatables like basketballs or pool floats?
Yes, a bicycle pump can be used to inflate other inflatables like basketballs or pool floats. However, it may not be the most efficient option. The pros include convenience and cost-saving, but the cons are slower inflation and the risk of overinflating certain items.
How often should I check the tire pressure on my bike?
I should check my bike’s tire pressure every two weeks or before each ride. To properly check tire pressure, I’ll need a tire pressure gauge and follow the manufacturer’s recommended PSI range.
What should I do if my tire keeps losing pressure after I pump it?
If my tire keeps losing pressure after I pump it, I would first check for any visible punctures or debris. To fix a flat tire, I would patch or replace the inner tube. To prevent tire pressure loss, I would ensure proper tire seating and use puncture-resistant tubes or sealant.
Is there a recommended way to store my bicycle pump to keep it in good condition?
To properly store your bicycle pump and prevent damage, make sure to keep it in a dry and clean area. Avoid extreme temperatures and store it in a way that protects the pump head and hose from getting bent or twisted.
Conclusion
In conclusion, learning how to use a bicycle pump is an essential skill for any cyclist. By understanding the different types of pumps, valve types, and proper pumping techniques, you can ensure your bike is always ready for a ride.
It is also crucial to regularly check tire pressure and inflate them according to the recommended levels for different riding conditions. Interestingly, studies have shown that maintaining proper tire pressure can reduce rolling resistance by up to 20%, resulting in increased speed and efficiency while cycling.
So, make sure to follow the guidelines mentioned in this article and enjoy a smooth and safe biking experience.