
If you use the wrong beam pattern on your MTB night lights, you’ll waste lumens and reduce visibility. Overusing flood beams, mounting lights too low or high, or misaligning your focus causes shadows, glare, and uneven illumination. These mistakes can create blind spots and compromise safety. Adjusting your light’s position, choosing the right beam type, and fine-tuning alignment help you make the most of your lumens. Keep exploring to learn how to optimize your setup.
Key Takeaways
- Improper beam height and angle can create shadows, blind spots, and reduce overall trail visibility.
- Overusing wide flood beams wastes lumens by illuminating unnecessary peripheral areas.
- Misaligned or uneven beam patterns impair obstacle detection and cause glare, decreasing safety.
- Failing to adjust beam focus for terrain results in inefficient lumen use and poor trail illumination.
- Mounting lights too high or low distorts beam coverage and diminishes riding safety and efficiency.
BrighRoad 1000Lumens Bike Helmet Light, 5 Modes, 650ft High-Beam, IPX6 Waterproof Rechargeable Bike Light for Night Riding, Lightweight Mountain Bike Headlight, Smart Thermal Protection Bicycle Light
Total Path Visibility: Get 1000Lumens MTB headlight power and a 650ft throw. Advanced optics provide 180 degree visibility,…
As an affiliate, we earn on qualifying purchases.
As an affiliate, we earn on qualifying purchases.
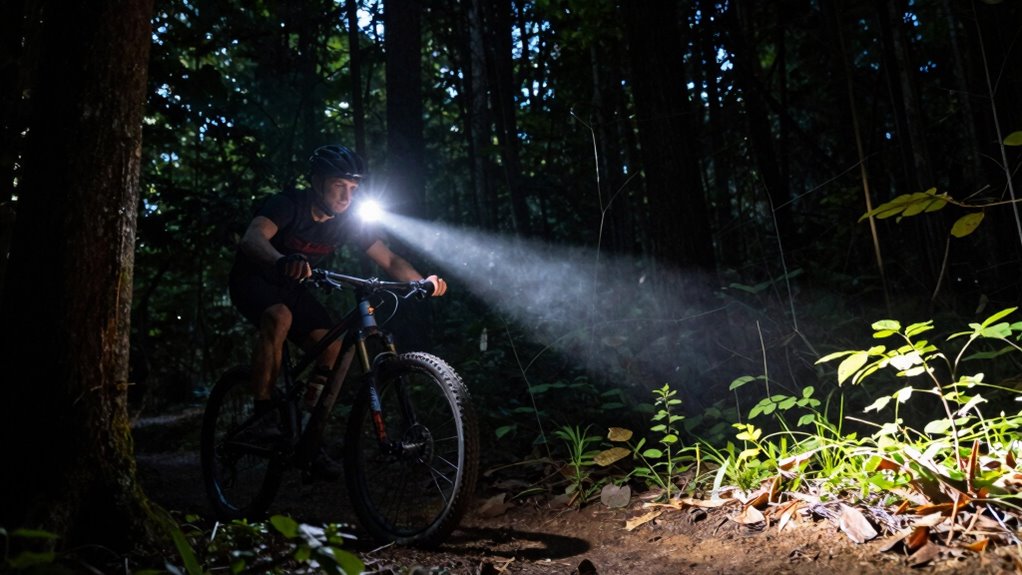
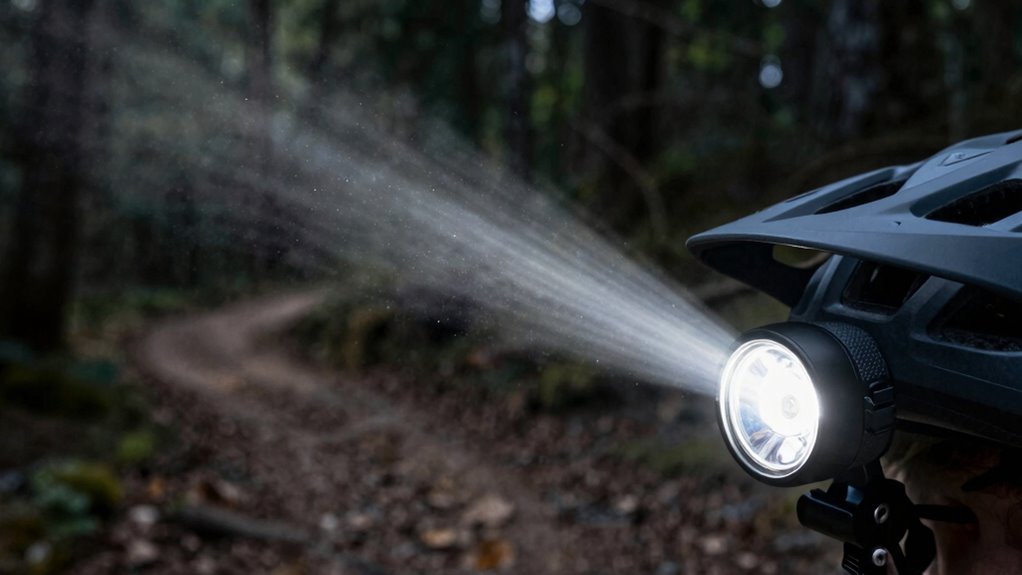
How MTB Lights Illuminate the Trail: Understanding Beam Patterns
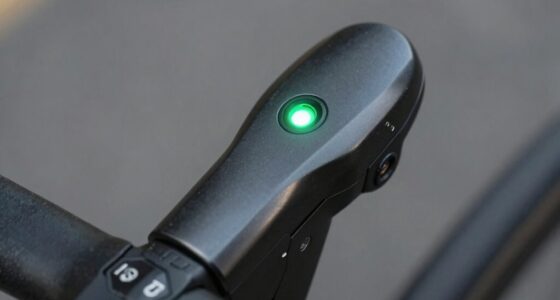
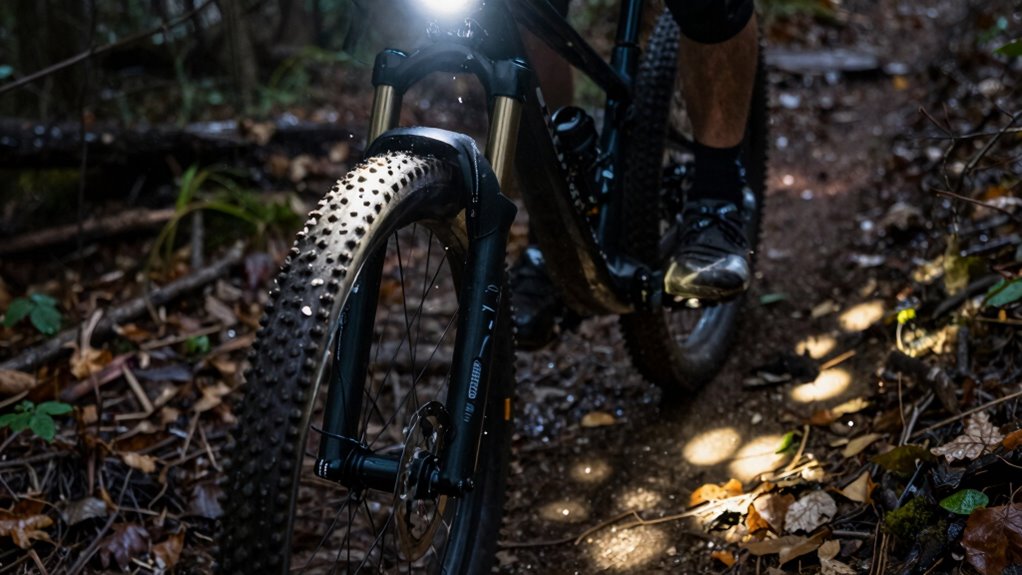
To navigate the trail safely at night, understanding how MTB lights project their beams is essential. Proper helmet placement of your light guarantees a focused, high-quality beam that illuminates your path without blind spots. Positioning the light correctly on your helmet or handlebars influences how the beam pattern shapes the trail ahead. Keep in mind that a well-placed light allows you to see obstacles clearly and react quickly. Additionally, consider the battery life—longer-lasting power ensures consistent illumination throughout your ride, preventing sudden darkness. Different beam patterns—spot or flood—offer varying visibility, so choosing the right setup depends on your riding style and terrain. Mastering beam projection helps optimize your MTB light’s performance and keeps you safe on your night rides. Furthermore, understanding the contrast ratio of your light can improve how well you perceive objects in dark environments. Maintaining optimal beam pattern alignment is also crucial for preventing light wastage and ensuring maximum lumen utilization. Being aware of energy efficiency in your lighting setup can help extend battery life and improve overall ride safety.

Vastfire 17 LED Bike Lights 5000 Lumen, Super Bright Bicycle Light for Night Riding, USB Rechargeable Bike Headlight and Taillight, Waterproof Wide Beam Bike Front Light with Digital Power Display
【🚲SUPRE-BRIGHT BIKE LIGHTS 5000 LUMENS & SAFE NIGHT RIDING】: Newly upgraded with 17 high-intensity LED bike headlight, delivering…
As an affiliate, we earn on qualifying purchases.
As an affiliate, we earn on qualifying purchases.
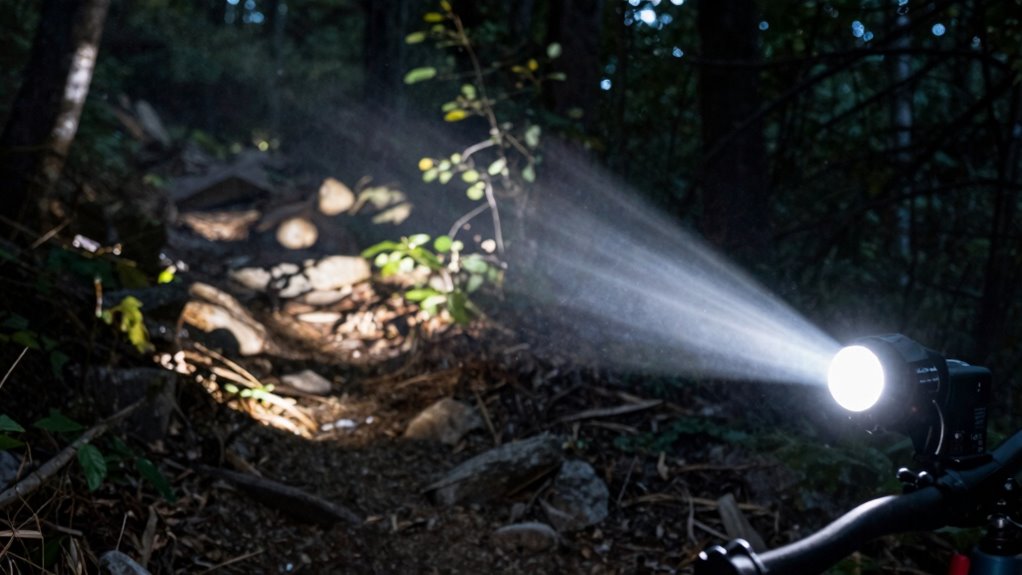
Common Beam Pattern Mistakes That Waste Lumens and Reduce Visibility
Using too much of a wide beam can flood your trail with light but waste lumens and reduce focus. Ignoring proper beam height causes shadows and blind spots, making it harder to see obstacles. Poor beam symmetry results in uneven lighting that diminishes overall visibility and safety. Additionally, understanding smartphone accessories can help optimize your lighting setup for better performance. Being aware of beam pattern design principles can help you adjust your lights for maximum efficiency and clarity. To further improve your setup, considering beam adjustment techniques can ensure optimal light distribution and safety. Recognizing the importance of proper mounting height can also prevent common beam mistakes and enhance your night riding experience. Incorporating lighting technology can further refine your beam pattern and overall visibility.
Overusing Wide Beams
Many riders make the mistake of overusing wide beams because they believe more light coverage enhances visibility. While a broad beam provides a wider beam width, it can actually dilute light distribution, reducing the intensity of illumination where you need it most. Overusing wide beams causes your light to spread thinly across a large area, wasting lumens on peripheral zones that don’t contribute much to your safety or navigation. This often results in poor trail illumination, making it harder to see obstacles or sharp turns ahead. Instead, focus on balancing beam width with proper beam pattern selection. Using a beam that directs light more precisely ensures better light distribution, improves visibility, and makes the most of your lumens. Additionally, understanding the importance of backup power can help ensure your lighting system remains reliable during emergencies or extended rides. Properly managing your beam pattern helps optimize your lighting efficiency and safety, especially when you consider the role of beam pattern customization in achieving optimal illumination. Remember that lumens efficiency plays a critical role in how effectively your light system performs.
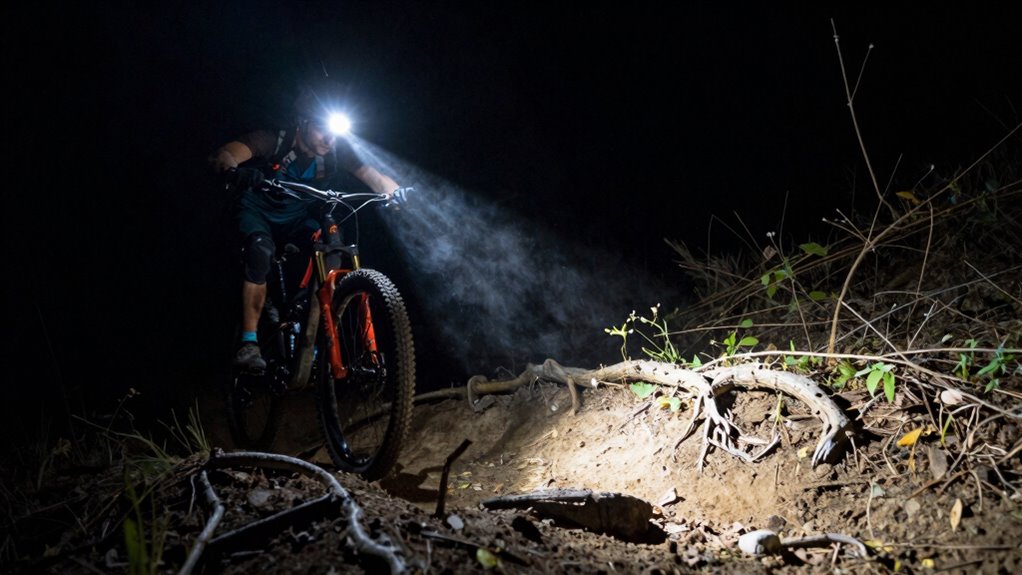
Ignoring Beam Height
Ignoring beam height can considerably undermine your MTB night lighting. If your light’s beam is positioned too low, it creates unnecessary shadows and limits visibility ahead. Conversely, if you set it too high, the beam may blind oncoming riders or illuminate the trail above your line of sight. Proper light positioning depends heavily on adjusting the beam height to match your riding terrain and speed. A well-calibrated beam height ensures maximum lumens are directed where you need them most, reducing wasted light and enhancing clarity. Always test and fine-tune your light’s position before heading out. Remember, the goal isn’t just brightness but effective illumination of the trail, which hinges on correct beam height and thoughtful light positioning. Understanding beam alignment is essential to optimize your trail visibility and safety. Additionally, adjusting your light’s settings to suit different trail conditions can further improve your visibility and safety during night rides. Proper beam pattern adjustment is also crucial to avoid common mistakes that waste lumens and reduce your overall riding safety. Regularly inspecting your light’s beam angle can help maintain optimal performance and prevent misalignment over time. To achieve the best results, consider using alignment tools designed for MTB lighting setups.
Poor Beam Symmetry
Poor beam symmetry can considerably diminish your trail visibility and waste valuable lumens. When your bike light lacks proper beam symmetry, light dispersion becomes uneven, creating hotspots or dark spots that impair your ability to see obstacles clearly. An imbalanced beam pattern causes light to focus excessively in one area, while neglecting others. This uneven distribution reduces overall illumination efficiency, forcing you to compensate by increasing brightness, which drains your battery faster. To optimize your light’s performance, ensure the beam pattern is symmetrical, providing even light dispersion across your path. Proper beam symmetry improves visibility, helps you detect hazards early, and conserves battery life. Remember, a well-balanced beam pattern isn’t just about brightness—it’s about delivering consistent, reliable illumination where you need it most. Additionally, maintaining smart lighting features can help automatically adjust beam patterns for optimal performance in various conditions.

2026 Upgrade 9800Lumen Bike Light for Night Riding,Super Bright 6 LED Headlight,Aluminum 10 Mode Rechargeable Bicycle Light Front and Rear,360°Rotatable Brackt,Waterproof,Runtime 72 hr,Road Shockproof
【700DAYS Support] 】:If your bike light have any problem, please to pass us on through Amazon for the…
As an affiliate, we earn on qualifying purchases.
As an affiliate, we earn on qualifying purchases.
How to Choose the Best Beam Pattern for Night Mountain Biking
Choosing the right beam pattern can make or break your night ride, so understanding your options is key. Consider the types of beam patterns available, how brightness and focus affect visibility, and how your terrain influences your choice. Making informed decisions helps you see clearly and ride safely in the dark. Additionally, smart appliances in modern lighting systems can optimize beam settings automatically to enhance your experience. These advanced features can adapt to changing conditions, ensuring you always have the optimal lighting configuration for your ride. Being aware of beam pattern options can further help you select the most effective lighting setup for your specific needs, especially when considering the Free Floating aspect of certain lighting technologies.
Beam Pattern Types
When selecting the best beam pattern for night mountain biking, understanding the different types can make a significant difference in your ride’s safety and enjoyment. Beam pattern terminology helps you identify how light is distributed, which affects visibility and focus. There are two primary types: focused beams, which produce a narrow, long-distance light ideal for spotting distant obstacles, and flood beams, which spread light wider to illuminate your immediate surroundings. Some lights combine both, offering a hybrid pattern for versatility. Light dispersion characteristics determine how well you can see both far ahead and the trail around you. Knowing these differences allows you to choose a beam pattern that matches your riding style and terrain, ensuring ideal visibility without wasting lumens on unnecessary light spread. Beam pattern types are essential to understanding how your light performs in various environments and conditions. Additionally, considering the light distribution can help optimize your setup for different trail scenarios. Recognizing the importance of beam angles can further enhance your ability to select the most effective lighting for specific trails and conditions.
Brightness and Focus
Selecting the right beam pattern for night mountain biking hinges on understanding how brightness and focus influence your visibility. Brightness, measured in lumens, impacts how well you see ahead, while beam focus determines the clarity and spread of light. To maximize lumen efficiency, choose a beam that concentrates light where you need it most, avoiding wasted lumens in unnecessary areas. A well-focused beam provides a sharper image of obstacles, reducing eye strain and fatigue.
Consider these points:
- Higher lumen output isn’t always better if beam focus isn’t optimized
- A narrow beam enhances distant visibility but may limit peripheral awareness
- Balance brightness with beam focus for optimal lumen efficiency
- Overly broad beams can waste lumens illuminating irrelevant areas
- Precise beam focus ensures you get the most out of your light’s brightness
Terrain Considerations
Your terrain plays a crucial role in determining the ideal beam pattern for night mountain biking. Different terrain features and trail surfaces demand specific lighting setups to maximize safety and visibility. For rocky, technical trails, a focused, narrow beam helps you see obstacles clearly. Conversely, open, smooth trails benefit from a wider beam that illuminates more of your surroundings. Consider the table below to match your terrain:
| Terrain Feature | Recommended Beam Pattern |
|---|---|
| Rocky, technical trails | Narrow, focused beam |
| Open, smooth trails | Wide, floodlight-style beam |
| Steep inclines/descents | Balanced beam with good distance |
Matching your beam pattern to your trail surface ensures excellent visibility and prevents wasteful lumen dispersion.

Victagen Bike Lights 9000lm Bike Headlights High & Low Beams, Super Bright Bicycle Lights, Waterproof MTB Bike Lights for Night Riding, USB Rechargeable Bike
🏆🏆【Memory Function】Victagen Bike Lights 9000LM Bike Headlights equipped with a memory chip to record the last mode used,…
As an affiliate, we earn on qualifying purchases.
As an affiliate, we earn on qualifying purchases.
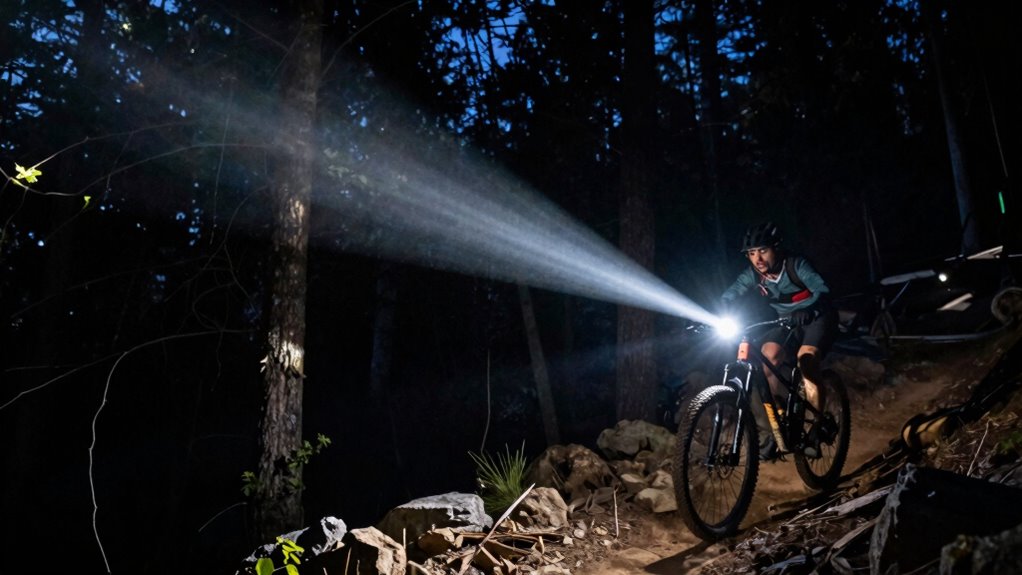
How to Adjust Your Bike Light for Better Coverage and Safety
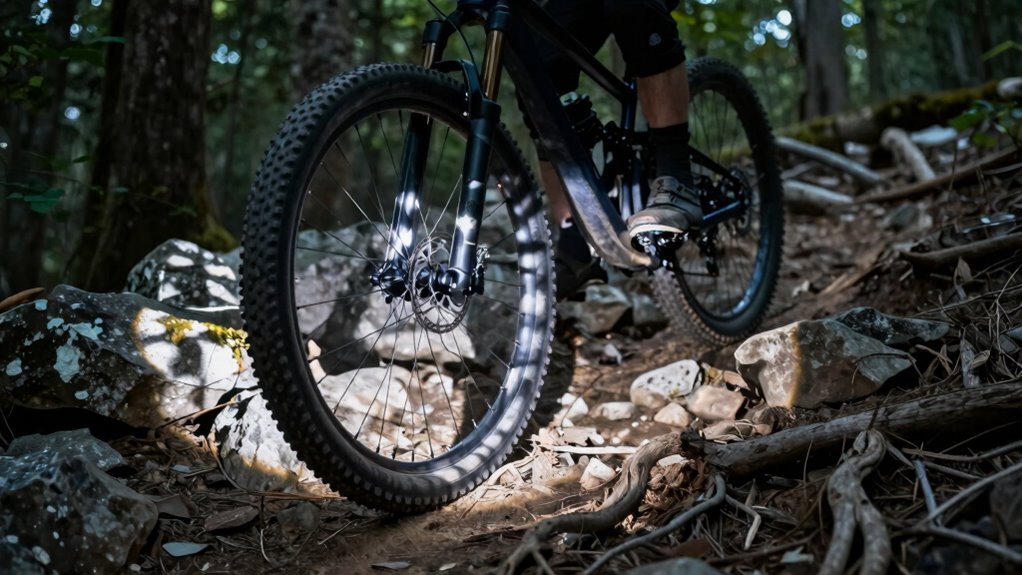
Properly adjusting your bike lights guarantees ideal coverage and enhances safety during night rides. For mountain biking on trails, proper alignment ensures you see obstacles early and others can spot you. Start by mounting your light at a height where it illuminates the trail ahead without blinding oncoming riders. Tilt the beam downward to focus on the trail, preventing wasted lumens and glare. Regularly check and adjust your light as terrain or riding conditions change. Remember, good lighting boosts trail safety and confidence.
- Position the light to maximize trail visibility
- Avoid aiming beams directly at oncoming riders
- Use beam angles that reduce glare and increase coverage
- Test your adjustments before riding
- Regularly maintain your lights for maximum performance
Why Proper Beam Patterns Are Critical for Night MTB Safety
Adjusting your bike lights for ideal coverage is a key step, but understanding how the beam pattern affects your ride is just as important. A proper beam ensures you see obstacles clearly without blinding others or wasting battery longevity. Poor beam patterns can create blind spots or excessive glare, increasing risk on treacherous trails. Your mounting techniques influence how effectively the beam pattern illuminates your path—improper mounting can distort coverage. To optimize safety, choose lights with well-designed beam patterns and secure mounting positions. Consider this table:
| Beam Pattern Type | Benefits | Common Mistakes |
|---|---|---|
| Wide | Better peripheral vision | Over-illumination |
| Focused | Long-distance visibility | Narrow coverage |
| Hybrid | Versatile for terrain | Improper alignment |
| Symmetrical | Balanced light distribution | Uneven coverage |
| Asymmetrical | Trail-specific lighting | Glare issues |
Proper beam patterns maximize safety, battery life, and riding confidence.
Maintaining Your Bike Light: Testing and Tips for Peak Performance
Regularly testing your bike light makes sure it performs at its best when you need it most. Check the battery capacity to verify your light has enough power for the ride, especially before long night excursions. Proper mounting techniques keep your light stable and aligned, preventing beam pattern mistakes that waste lumens. During testing, inspect for any dimming or flickering, which may indicate battery issues or loose connections. Keep batteries charged or replace them as needed to maintain peak brightness. Also, verify that mounts are secure and the light isn’t shifting during rides. Regular maintenance extends your light’s lifespan and guarantees maximum visibility.
- Confirm battery capacity for consistent brightness
- Use correct mounting techniques for stability
- Test beam pattern for proper distribution
- Check for loose connections or flickering
- Replace batteries before critical rides
Frequently Asked Questions
How Do Beam Patterns Affect Battery Life During Night Rides?
Your beam pattern greatly impacts battery life during night rides. When you customize your beam pattern to suit your trail, you optimize lumen efficiency, using light where it’s needed most. Narrow, focused beams conserve power by reducing wasted lumens in unnecessary areas, extending your battery life. Conversely, broad, unfocused beams drain your battery faster. Proper beam pattern customization helps you ride longer without sacrificing visibility, making your ride more efficient and enjoyable.
Can Different Terrains Require Different Beam Pattern Settings?
Did you know that over 60% of mountain bikers customize their beam pattern for different terrains? Yes, you should adjust your MTB night light’s beam pattern for terrain adaptation. Different terrains, like rocky trails or forested paths, demand specific beam customization to optimize visibility and safety. By tailoring your light settings, you ensure better control and reduce glare, helping you ride confidently regardless of the trail conditions.
Are There Specific Brands Known for Optimal Beam Pattern Design?
Some brands stand out for ideal beam pattern calibration, thanks to their strong manufacturer reputation. You should look into companies like Lezyne, NiteRider, and Exposure, which prioritize precise beam design to maximize lumens without glare or wasted light. These brands invest in advanced calibration technology, ensuring your MTB night light delivers the best performance on varied terrains. Choosing reputable manufacturers helps you avoid beam pattern mistakes that can diminish your bike’s lighting efficiency.
How Often Should I Replace or Upgrade My Bike Light’s Beam Components?
Think of your bike light like a trusty sidekick—it needs upgrades to stay sharp. You should replace or upgrade beam components every 1-2 years, depending on usage. Keep an eye on battery lifespan and LED longevity; if brightness dims or batteries don’t hold charge, it’s time for new parts. Regular checks ensure maximum performance, so your light keeps guiding you through the night’s darkness without faltering.
What Are the Best Techniques to Test Beam Pattern Effectiveness Before Riding?
To test your beam pattern effectiveness before riding, start with beam pattern calibration by shining your light on a flat surface at a set distance. Use lumen distribution analysis to evaluate how evenly the light spreads and avoid hot spots. Adjust your light’s angle as needed, then check again. This process helps guarantee ideal illumination, reduces waste, and enhances your safety during night rides.
Conclusion
Choosing the right beam pattern is like painting a clear trail on a dark canvas—every stroke matters. When you avoid common mistakes and fine-tune your MTB light, you transform your ride into a well-lit adventure rather than a shadowy gamble. Remember, proper illumination isn’t just about seeing; it’s about being seen and staying safe. So, gear up, adjust wisely, and let your light carve a safe path through the night’s darkness.