Are you prepared to elevate your bike to the next level? It’s time to add some electric power to your ride!
Converting your bike to an electric one is easier than you think, and in this step-by-step guide, we’ll show you exactly how to do it. With the right tools and an electric bike conversion kit, you can transform your regular bicycle into a powerful e-bike in just a few hours. Whether you’re looking to enhance your commuting experience or add extra power for longer rides, learning how to convert a bike to electric can be a game-changer. In this guide, we’ll cover everything from choosing the right motor to installing the battery and optimizing performance.
From assessing your bike’s compatibility to choosing the right conversion kit and installing the electric components, we’ve got you covered.
So buckle up (or should we say, pedal up) and get ready to enjoy the thrill of an electric bike.
Let’s dive in!
Key Takeaways
- Assess the compatibility of your bike frame and structure with the conversion kit
- Gather the necessary tools for the conversion process
- Remove non-electric components before installing the electric components
- Adjust and test the electric bike to ensure smooth operation and finalize the conversion
Assess Your Bike’s Compatibility
Before you can begin converting your bike, you’ll need to assess its compatibility.
Start by examining the frame and structure of your bike. Electric bike conversion kits are designed to fit certain types of frames, so make sure your bike meets the requirements. Check the spacing between the rear dropouts, as this will determine the size of the motor you can install. Look for any obstructions such as fenders or chain guards that might interfere with the installation process.
Next, evaluate the brakes and gears on your bike. Some conversion kits require specific types of brakes or gears, so ensure that your bike is compatible.
Once you have assessed the compatibility, you can move on to choosing the right conversion kit based on your bike’s specifications.
Choose the Right Conversion Kit
To make sure you select the correct kit, it’s essential to consider the type of bicycle you have. Assessing compatibility is crucial for a successful conversion.
Start by checking the frame size and shape, as well as the wheel size and tire clearance. Electric conversion kits are typically compatible with most bikes, but it’s important to ensure that the kit you choose fits your specific bike model.
Additionally, consider the weight and load capacity of your bike, as the conversion kit will add extra weight. Ensuring safety is another important factor when choosing a conversion kit. Look for kits that include safety features such as a torque arm to prevent the motor from loosening and a reliable braking system.
By taking these factors into account, you can select the right conversion kit for your bike and ensure a safe and efficient electric bike.
Now, let’s move on to gathering the necessary tools for the conversion process.
Gather the Necessary Tools
Once you’ve chosen the right conversion kit, gather all the necessary tools for the process. Here’s a list of tools you’ll need to assess your bike’s condition and choose the conversion kit that best suits your needs:
- Wrench set: You’ll need a set of wrenches to remove bolts and nuts from your bike.
- Multimeter: This tool will help you assess the electrical system of your bike and make sure it’s compatible with the conversion kit.
- Bike stand: A bike stand will make it easier for you to work on your bike and access all the necessary components.
- Wire cutters and strippers: These tools will be essential for cutting and stripping wires during the conversion process.
Now that you have gathered all the necessary tools, you can move on to the next step and remove the non-electric components from your bike.
Remove the Non-Electric Components
First, gather all the necessary tools for the process and then remove the non-electric components from your bike. Assess the compatibility of your bike with an electric conversion kit. Make sure that the kit you choose is suitable for your bike’s frame, wheel size, and brake system. Once you have the necessary tools and the compatible kit, follow these steps to remove the non-electric components:
- Start by removing the pedals using a pedal wrench.
- Use a wrench to loosen and remove the crankset, which includes the chainrings and crank arms.
- Next, remove the front and rear derailleurs, along with the chain.
- Take off the bottom bracket using a bottom bracket tool.
- Finally, remove the brake system, including the brake calipers, brake levers, and cables.
With the non-electric components removed, you are now ready to install the electric components and transform your bike into an electric one.
Install the Electric Components
To install the electric components on your bike, you’ll need to follow a few simple steps.
First, attach the electric wheel to the rear of the bike, ensuring that it is securely in place.
Next, connect the motor and battery by following the manufacturer’s instructions, making sure all connections are tight.
Finally, install the controller and wiring, ensuring that everything is properly connected and organized.
By following these steps, you’ll be on your way to converting your bike into an electric one.
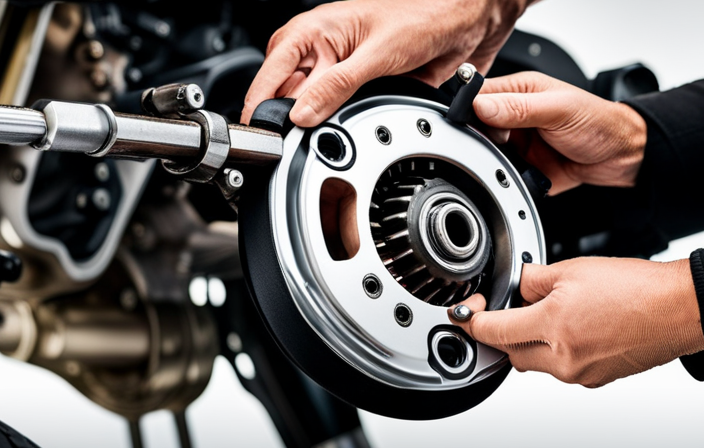
Attach the Electric Wheel
To attach the electric wheel, you’ll need a wrench and a screwdriver.
Begin by removing the existing wheel from your bike using the wrench. Once the wheel is off, take the electric wheel and align it with the bike’s fork, ensuring that the axle fits properly.
Use the screwdriver to tighten the nuts and secure the wheel in place.
The electric wheel installation is a crucial step in converting your bike to electric, as it provides power and propulsion. By converting your bike into an electric one, you’ll enjoy numerous benefits, such as increased speed, reduced effort in pedaling, and the ability to cover longer distances without getting tired.
Now that you have successfully attached the electric wheel, you can move on to the next step of connecting the motor and battery.
Connect the Motor and Battery
Once the electric wheel is securely attached, it’s time to connect the motor and battery.
To install the battery pack, locate the battery mount on the frame of your bike and securely attach it using bolts or straps. Make sure the battery is placed securely and won’t interfere with the bike’s functionality.
Next, locate the motor cables and connect them to the corresponding wires on the battery pack. Ensure that the connections are tight and secure to prevent any loose or faulty connections.
Once the motor is connected, double-check the wiring to ensure it is properly routed and secured. Finally, secure any loose wires with zip ties or tape to prevent them from getting tangled or damaged during rides.
Now, you are ready to move on to the next step of installing the controller and wiring.
Install the Controller and Wiring
Now that you have successfully connected the motor and battery, it’s time to move on to the next crucial step in converting your bike to electric.
In this step, you will install the controller and wiring to ensure proper functioning of your electric bike.
Start by locating a suitable spot on your bike to mount the controller securely. Once you have done that, connect the wiring from the motor and battery to the controller, making sure to follow the manufacturer’s instructions for proper wiring connections.
It is essential to double-check all the connections to avoid any potential issues later on. If you encounter any problems during this process, refer to the troubleshooting tips provided by the controller manufacturer.
With the controller and wiring successfully installed, you are now ready to adjust and test your electric bike’s performance in the next section.
Adjust and Test the Electric Bike
First, make sure to adjust and test your electric bike. This is an important step to ensure that your conversion is successful and that your bike is running smoothly. Here are three key things to do when adjusting and testing your electric bike:
-
Test the motor: Turn on the bike and observe how the motor performs. Check if it runs smoothly and provides the desired power. Take note of any unusual noises or vibrations, as these may indicate a problem.
-
Check the battery: Measure the voltage of the battery using a multimeter. Compare the test results with the manufacturer’s specifications to ensure it is within the acceptable range. If the voltage is too low, recharge the battery.
-
Troubleshooting tips: If you encounter any issues during the testing process, consult the user manual or reach out to the manufacturer for troubleshooting tips. They can provide guidance on common problems and help you resolve them.
Now that you have adjusted and tested your electric bike, let’s move on to the next step of ensuring safety and compliance.
Ensure Safety and Compliance
To ensure safety and compliance when converting your bike to electric, there are several key points to consider.
First, it is crucial to check the local regulations and laws regarding electric bikes in your area. This will ensure that you are aware of any restrictions or requirements that may apply.
Secondly, installing reflectors and lights on your electric bike is essential for visibility, especially when riding at night.
Finally, wearing a helmet and protective gear is a must to protect yourself in case of any accidents or falls.
By following these steps, you can ensure a safe and compliant electric bike conversion.
Check the Local Regulations and Laws
Before you start converting your bike to electric, make sure you check the local regulations and laws. This is crucial to ensure that your electric bike conversion is compliant and legal in your area. Here’s what you need to do:
-
Research local electric bike shops: They can provide valuable information about the regulations and laws specific to your area. They may also offer conversion services or recommend reputable conversion kits.
-
Look for online tutorials and resources: There are numerous online tutorials and resources available that can guide you through the process of converting your bike to electric. These resources often include information on local regulations and laws.
-
Familiarize yourself with the specific requirements: Different regions might have different requirements for electric bikes, such as speed limits, power restrictions, and licensing. Make sure you understand and adhere to these regulations to ensure a safe and legal conversion.
Once you have checked the local regulations and laws, you can move on to the next step of your electric bike conversion, which is installing reflectors and lights.
Install Reflectors and Lights
Next, you’ll want to make sure you have reflectors and lights properly installed on your bike.
Choosing the right reflectors and lights is crucial for ensuring your safety on the road. Look for reflectors that are specifically designed for bicycles and meet the local regulations. Opt for lights that are bright and visible from a distance, both on the front and rear of your electric bike.
When mounting reflectors, make sure they are securely attached to your bike frame and positioned in a way that they can reflect light from all angles. For lights, consider using a combination of a headlight and a taillight. Mount the headlight on the front handlebars, facing forward, and the taillight on the back of your bike, facing backward. This will help increase your visibility to other road users.
Now that you have your reflectors and lights installed, let’s move on to the next step, which is wearing a helmet and protective gear.
Wear a Helmet and Protective Gear
Make sure you wear a helmet and protective gear to prioritize your safety while riding. Helmet safety is crucial when it comes to riding an electric bike. It provides protection for your head in case of accidents or falls, reducing the risk of serious head injuries. When choosing a helmet, make sure it fits properly and is certified by safety standards.
Additionally, wearing protective gear such as knee and elbow pads, gloves, and sturdy footwear is equally important. These will protect your body from scrapes, bruises, and fractures in case of accidents.
Prioritizing your safety by wearing a helmet and protective gear will give you peace of mind while riding your electric bike. Now, let’s move on to the next section and learn how to operate and maintain your electric bike, ensuring its longevity and optimal performance.
Learn How to Operate and Maintain Your Electric Bike
To operate and maintain your electric bike, it’s important to understand the pedal assist and throttle modes.
The pedal assist mode provides assistance as you pedal, allowing you to control the speed and effort level.
The throttle mode, on the other hand, allows you to accelerate without pedaling.
Additionally, make sure to charge and maintain the battery regularly to ensure optimal performance.
This includes keeping the battery at a proper temperature, avoiding overcharging, and checking for any signs of damage.
Lastly, perform regular inspections and maintenance to keep your electric bike in top shape.
This includes checking the tires, brakes, chain, and other components for any wear or damage, and lubricating and adjusting as needed.
Understand the Pedal Assist and Throttle Modes
Understanding the pedal assist and throttle modes is crucial when converting to an electric bike. These two modes offer different ways to control the speed and power of your electric bike.
The pedal assist mode provides assistance when you pedal, giving you a boost as you ride. It allows you to control the level of assistance by adjusting the pedal assist settings on your electric bike.
On the other hand, the throttle mode allows you to control the speed of your electric bike with a twist or thumb throttle, similar to a motorcycle.
Both modes have their pros and cons. The pedal assist mode offers a more natural riding experience and helps you get exercise while still enjoying the benefits of electric power. It is great for longer rides or hilly terrains.
The throttle mode, on the other hand, offers instant power and is convenient for shorter rides or situations where you need a quick burst of speed.
To choose the right mode for your riding style, consider the type of terrain you will be riding on and your desired level of physical exertion. If you enjoy pedaling and want to get some exercise, the pedal assist mode might be the better option. If you prefer a more effortless ride or need quick bursts of speed, the throttle mode might be more suitable.
Now that you understand the pedal assist and throttle modes, let’s move on to the next section on how to charge and maintain the battery.
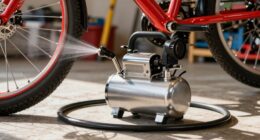
Charge and Maintain the Battery
Charging and maintaining the battery is essential for keeping your electric bike running smoothly. To ensure optimal battery performance, follow these battery charging techniques and battery maintenance tips.
First, always use the charger provided by the manufacturer and connect it to a standard electrical outlet. Avoid using extension cords or power strips.
Make sure to charge the battery fully before each ride to maximize its range. When not in use, store the battery in a cool, dry place, away from direct sunlight and extreme temperatures.
Regularly check the battery’s connections for any signs of corrosion or damage. Clean them with a cloth if needed.
Additionally, perform regular inspections and maintenance to prevent any issues and prolong the lifespan of your electric bike.
By following these steps, you can enjoy a reliable and long-lasting electric bike experience.
Perform Regular Inspections and Maintenance
Regularly inspect and maintain your electric bike to ensure its optimal performance and longevity. Here are some essential maintenance procedures you should follow:
-
Check the tire pressure regularly and inflate them to the recommended level. This will improve your bike’s efficiency and provide a smoother ride.
-
Inspect the brake pads for wear and tear. Replace them if necessary to ensure proper braking performance.
-
Clean the chain and lubricate it regularly to reduce friction and extend its lifespan.
-
Inspect the battery connections and make sure they are tight and secure. Loose connections can lead to power loss.
-
Keep an eye on the overall condition of your bike, including the frame, handlebars, and pedals. Look for any signs of damage or wear, and address them promptly.
By regularly performing these inspections and maintenance procedures, you can enjoy the benefits of your electric bike without any worries about its performance or reliability.
Enjoy the Benefits of Your Electric Bike
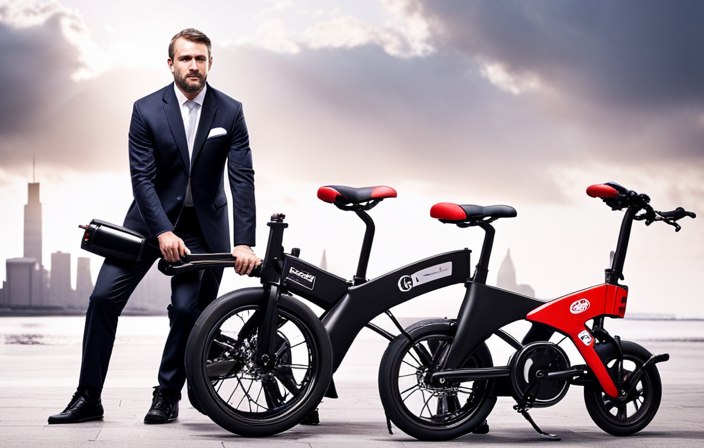
To fully appreciate the advantages of your electric bike, you’ll want to make the most out of your rides.
Start by exploring different electric bike models to find the one that suits your needs and preferences. Compare the benefits of each model, such as range, speed, and battery life, to make an informed decision.
Once you have your electric bike, take the time to familiarize yourself with its features and controls. Adjust the seat height, handlebars, and pedal assist settings to ensure a comfortable and efficient ride.
Don’t forget to regularly charge the battery and perform routine maintenance to keep your electric bike in optimal condition.
By doing so, you’ll be able to join the electric bike community and enjoy the many benefits it offers.
Join the Electric Bike Community
Get involved with the electric bike community and connect with other riders who share your passion for sustainable transportation. Joining the electric bike community is a great way to learn more about electric bike maintenance and get tips and tricks from experienced riders.
One of the benefits of being part of this community is the opportunity to attend group rides and events, where you can meet fellow electric bike enthusiasts and swap stories about your experiences. Additionally, the community often organizes workshops and classes on electric bike maintenance and repairs, which can help you save money and keep your bike in top shape.
By joining the electric bike community, you not only expand your knowledge and skills but also become part of a supportive network that shares your love for electric bikes and sustainable transportation.
Frequently Asked Questions
What are some common challenges or difficulties that people face when converting their bike to electric?
When converting your bike to electric, you may face challenges with battery capacity and motor power. Ensuring that your battery has enough capacity to sustain your desired distance and that your motor has sufficient power for your needs are important considerations.
Are there any specific weight limits or restrictions for electric bike conversions?
Weight limits and battery capacity are important factors to consider when converting your bike to electric. Make sure to check the weight limit recommended for your specific conversion kit and choose a battery with sufficient capacity to support your desired range and power needs.
Can I convert any type of bike to electric, or are there certain bikes that are not compatible?
You can convert almost any type of bike to electric using electric bike conversion kits. The benefits of converting include increased speed and distance, reduced effort when riding, and the ability to tackle hilly terrain with ease.
How long does the conversion process typically take?
The conversion process typically takes a few hours to a few days, depending on your level of experience and the complexity of the conversion. You will need basic tools such as wrenches, screwdrivers, and pliers, as well as specific electric bike conversion kits.
Are there any legal requirements or regulations I need to be aware of when riding an electric bike?
"Before hitting the road with your electric bike, it’s important to be aware of the legal requirements and safety regulations. Follow these steps to ensure a safe and lawful ride."
Conclusion
Congratulations, you’ve completed the electrifying journey of converting your bike into an electric wonder!
By assessing compatibility, choosing the right kit, gathering tools, removing non-electric components, installing the electric ones, ensuring safety and compliance, learning operation and maintenance, and lastly, enjoying the benefits, you’ve entered the electrifying era of cycling.
Embrace the exhilarating experience of effortless rides, extraordinary efficiency, and environmental friendliness.
Join the jubilant electric bike community, where like-minded enthusiasts unite for endless adventures.
Jump on your newly transformed electric bike and journey into a world of limitless possibilities!