When I started my inaugural journey into gravel biking, it became immediately clear to me that having the saddle adjusted correctly is crucial. Similar to how a building’s foundation ensures its stability and comfort, a correctly set saddle enhances the stability and comfort of your ride.
In this article, we will explore the key steps to finding the right saddle height, achieving the correct fore-aft position, ensuring proper tilt and angle, as well as making small adjustments for ultimate comfort.
So let’s dive in and discover how to make your gravel bike ride a pain-free journey.
Key Takeaways
- Proper saddle adjustment is crucial for comfort and efficiency on a gravel bike.
- Finding the correct saddle height using methods like the heel-to-pedal or knee angle method is important.
- Pay attention to the saddle fore-aft position to ensure optimal comfort and efficiency while pedaling.
- Adjusting the saddle tilt is essential for comfort during rides, but excessive nose tilt should be avoided.
Importance of a Properly Adjusted Saddle
The importance of a properly adjusted saddle cannot be overstated. When it comes to riding a gravel bike, having the right saddle position is crucial for comfort and efficiency. One of the first things to consider is finding the best saddle material for your needs. There are various options available, such as leather, synthetic materials, or even gel-infused saddles. Each material has its own advantages and disadvantages in terms of durability, weight, and comfort. It’s important to find one that suits your preferences and riding style.
Another aspect to keep in mind is avoiding common saddle adjustment mistakes. Many riders make the mistake of setting their saddle too high or too low, which can lead to discomfort or inefficient pedaling. Finding the optimal height requires careful consideration of factors like leg extension and knee angle when pedaling. Making small adjustments and testing them out during rides can help fine-tune your saddle position.
With a properly adjusted saddle, you’ll not only experience increased comfort but also improve your performance on the bike. So now that we’ve covered the importance of a well-adjusted saddle, let’s move on to discussing how to find the right saddle height for your gravel bike ride.
Finding the Right Saddle Height
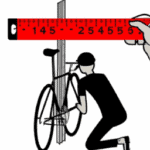
Start by finding the right height for your seat on a gravel bike. Proper saddle height is crucial for maximizing comfort and efficiency while riding. To determine the correct height, there are various methods you can use, such as the heel-to-pedal method or the knee angle method. Personally, I prefer using the knee angle method as it provides a more precise measurement.
To find your ideal saddle height using the knee angle method, follow these steps:
- Sit on your bike with one foot placed on the pedal at its lowest position.
- Adjust the saddle height until your leg is fully extended with just a slight bend in the knee.
- Ensure that your hips do not rock from side to side while pedaling.
Additionally, it’s important to consider proper saddle tilt and selecting appropriate saddle materials. The tilt of your saddle affects comfort and performance. A neutral tilt is generally recommended, but you can experiment to find what works best for you.
When selecting a saddle material, consider factors such as weight, durability, and padding. Materials like carbon fiber or titanium are lightweight and offer good shock absorption.
Next, we will discuss achieving the correct saddle fore-aft position in order to further optimize your riding experience without compromising on comfort or efficiency."
Achieving the Correct Saddle Fore-Aft Position
To achieve the correct fore-aft position of your saddle, consider your riding style and the type of terrain you will be traversing. Finding the optimal saddle position adjustment is crucial for comfort and efficiency while riding a gravel bike.
The correct saddle angle plays a significant role in distributing your weight evenly on the bike, reducing pressure points, and preventing discomfort or numbness.
Start by sitting on your bike in a relaxed riding position. Look down at your knee and check if it is directly above or slightly behind the pedal spindle when the pedal is at its lowest point. If your knee is too far forward or behind, adjust the saddle accordingly.
Make small adjustments to find the sweet spot that feels comfortable and efficient for you. It’s important to note that everyone’s preference may vary based on factors such as flexibility, power output, and personal anatomy.
Once you have achieved the correct fore-aft position of your saddle, ensure proper saddle tilt to further enhance comfort. This will be discussed in detail in the subsequent section about ensuring proper saddle tilt.
Transitioning into this next step will help you fine-tune your bike fit for an enjoyable gravel riding experience without sacrificing performance or comfort.
Ensuring Proper Saddle Tilt
Once you have achieved the correct fore-aft position of your saddle, it’s crucial to focus on properly tilting it for optimal comfort during your gravel rides.
Proper saddle maintenance is essential to ensure that your tilt adjustment stays secure and doesn’t shift while riding. Here are some important tips to consider when adjusting the tilt of your saddle:
-
Use a level: To ensure proper alignment, place a level across the top of your saddle and adjust its tilt until it is parallel with the ground.
-
Start neutral: Begin by setting your saddle at a neutral position, where the nose is neither tilted up nor down. This provides a good starting point for further adjustments.
-
Experiment with small increments: Make minor adjustments in tilt angle, usually one or two degrees at a time, to find the sweet spot that offers maximum comfort and support.
-
Avoid common mistakes: Be cautious not to excessively tilt the nose upwards or downwards, as this can lead to discomfort or strain.
By following these guidelines for proper saddle tilt adjustments, you can optimize your riding experience on gravel terrain. Understanding the importance of saddle angle will further enhance your overall comfort and performance on your gravel bike.
Understanding Saddle Angle
Understanding the angle of your saddle is crucial for optimal comfort and performance during your rides. The saddle angle refers to the tilt of the saddle in relation to the ground. It plays a significant role in preventing discomfort and saddle sores.
When adjusting your saddle, it’s important to find the right balance between a forward and backward tilt. A level saddle may seem like an obvious choice, but it can lead to pressure points on sensitive areas. On the other hand, a tilted-up or tilted-down saddle can cause discomfort and put unnecessary strain on different parts of your body.
To understand the ideal saddle angle for you, consider factors such as your riding style, flexibility, and personal preference. Experiment with small adjustments until you find a position that feels comfortable while providing efficient power transfer.
By understanding how different angles affect your riding experience, you can prevent potential issues like numbness or chafing. Taking the time to fine-tune your saddle angle will greatly enhance your overall comfort and help you avoid unnecessary discomfort during long rides.
Now that we’ve covered understanding saddle angle, let’s move on to choosing the right saddle width for further customization and comfort.
Choosing the Right Saddle Width
Finding the correct saddle width is essential for achieving personalized comfort and maximum support while cycling. When it comes to gravel biking, where long rides over rough terrain are common, choosing the right saddle width becomes even more crucial.
Here are three important factors to consider when selecting a saddle width:
-
Saddle pressure points: A wider saddle distributes your weight across a larger surface area, reducing pressure on sensitive areas like your sit bones. This can prevent discomfort and numbness during long rides.
-
Saddle material and construction: Different saddles are made with various materials and have different constructions that can affect comfort. Some saddles have cutouts or channels designed to relieve pressure, while others may use foam or gel padding for added cushioning.
-
Riding style and body type: Your riding position and body type should also influence your choice of saddle width. Generally, riders with a more upright position may prefer wider saddles, as they provide better stability and support. On the other hand, riders with a more aggressive position might opt for narrower saddles to allow for greater freedom of movement.
Considering these factors will help you find the perfect saddle width that suits your needs. Once you’ve chosen the right width, you can further enhance your riding experience by adjusting the saddle angle for additional comfort.
Adjusting Saddle Angle for Comfort
When it comes to achieving optimal comfort while cycling, it’s important to consider adjusting the angle of your saddle. The angle of your saddle plays a crucial role in providing support and preventing discomfort during long rides on your gravel bike. There are various saddle angle adjustment techniques you can use to optimize your saddle comfort.
One simple technique is to start by placing a level on top of your saddle and making sure it is parallel to the ground. This ensures that the weight is evenly distributed across the entire surface area of the saddle. Additionally, you can experiment with small adjustments by tilting the nose of the saddle up or down, depending on your personal preference.
To help you visualize how these adjustments can affect your riding experience, take a look at the table below:
| Saddle Angle | Effect on Comfort |
|---|---|
| Nose Up | Reduces pressure on soft tissue but may increase pressure on sit bones |
| Nose Down | Increases pressure on soft tissue but may reduce pressure on sit bones |
| Parallel | Provides balanced support for both soft tissue and sit bones |
By finding the right balance between reducing pressure on sensitive areas and providing adequate support for your sit bones, you can enhance your overall riding comfort.
In conclusion, adjusting the angle of your saddle is an important step in optimizing comfort while cycling. Once you have found a comfortable angle, you can move onto fine-tuning the position of your saddle for pedaling efficiency without sacrificing comfort."
Fine-Tuning Saddle Position for Pedaling Efficiency
To optimize your pedaling efficiency, it’s important to fine-tune the position of your saddle. Proper positioning not only maximizes power transfer but also minimizes potential discomfort or injury. When adjusting your saddle for pedaling efficiency, it’s crucial to consider your pedaling technique and the pressure points that may arise during long rides.
Firstly, pay attention to your pedaling technique. Ensure that you are using a smooth and circular motion rather than pushing down on the pedals with excessive force. This will help distribute pressure evenly across the saddle and reduce unnecessary strain on certain areas.
Next, take note of any saddle pressure points you may experience during rides. These can occur due to improper saddle tilt or fore/aft position. Experiment with small adjustments in these parameters until you find a comfortable balance between support and freedom of movement.
By fine-tuning the position of your saddle based on your pedaling technique and addressing any pressure points, you can enhance both comfort and efficiency on gravel rides. With a well-adjusted saddle, you’ll be able to ride longer distances without discomfort or loss of power.
Transitioning into considering saddle padding and cushioning: Now that we have optimized our saddle position for efficient pedaling, let’s explore how considering different types of padding and cushioning can further enhance our riding experience without sacrificing performance.
Considering Saddle Padding and Cushioning
Now that we’ve optimized our saddle position for efficient pedaling, let’s explore how different types of padding and cushioning can enhance our riding experience.
When it comes to saddle materials and construction, there are various options available in the market. Some saddles have foam padding, while others feature gel inserts or even a combination of both. It’s important to choose a saddle that provides enough cushioning to absorb road vibrations and shocks without being too soft, as this may cause discomfort or numbness during longer rides.
When considering the right saddle padding, here are three factors to keep in mind:
-
Density: The density of the padding affects how much support and cushioning it provides. Higher-density padding tends to offer more support but may feel firmer initially.
-
Thickness: The thickness of the padding determines how much comfort it offers. Thicker padding can provide more cushioning but might also increase pressure on sensitive areas.
-
Shape: Some saddles feature anatomical cutouts or channels designed to relieve pressure on certain areas like the perineum. These features can enhance comfort and blood flow.
Considering these factors will help us find the right balance between comfort and performance when choosing a saddle with suitable padding.
In the next section, we’ll delve into finding the right saddle shape for our body type and riding style without compromising on pedaling efficiency or overall comfort.
Finding the Right Saddle Shape for Your Body
Consider the shape of the saddle that best suits your body type and riding style to ensure optimal comfort and performance. When it comes to finding the right saddle shape for your body, there are a few factors to consider.
Firstly, think about your sit bone width. This can be measured by sitting on a piece of foam or using a specialized tool at a bike shop. Once you have determined your sit bone width, you can look for saddles that are designed to accommodate this measurement.
Additionally, it is important to explore different saddle brands and materials. Some riders prefer leather saddles for their durability and natural molding properties, while others may opt for synthetic materials that offer more cushioning and flexibility. Different brands also have their own unique designs and features, so experimenting with various options can help you find the perfect fit.
By taking the time to find the right saddle shape for your body, you can prevent discomfort and potential injuries during long rides. With countless choices available in terms of materials and brands, it is worth investing some effort into finding the one that works best for you.
Moving forward into checking saddle position for hip and knee alignment, it is crucial to ensure proper adjustment for maximum efficiency while riding without causing any strain on your joints.
Checking Saddle Position for Hip and Knee Alignment
Finding the right saddle position is essential for ensuring proper hip and knee alignment while riding. Achieving optimal alignment can prevent discomfort, pain, and potential injuries in these areas.
To check if your saddle position is correct, start by sitting on your bike with both feet on the ground. Your hips should be level and not tilted to one side.
Next, place your feet on the pedals and adjust the saddle height so that when the pedal is at its lowest point, your leg is almost fully extended but with a slight bend in the knee. This allows for efficient power transfer without overextending or straining your knees.
Additionally, make sure that there is a straight line from your knee to the ball of your foot when pedaling forward. This ensures optimal force distribution and reduces any unnecessary stress on your joints.
Once you have adjusted your saddle position accordingly, you can move on to testing and making small adjustments as needed to further fine-tune your comfort and performance.
Now let’s explore how to test and make small adjustments for an even better fit…
Testing and Making Small Adjustments
To test and make small adjustments for an even better fit, try experimenting with different positions to find the most comfortable and efficient riding stance. Start by adjusting the height of your saddle. A general rule of thumb is to have your leg almost fully extended at the bottom of the pedal stroke, with a slight bend in your knee. This will help prevent strain on your knees and maximize power transfer. Additionally, pay attention to the tilt of your saddle. A level saddle is usually recommended, but some riders prefer a slight upward or downward tilt for personal comfort.
When testing different positions, it’s important to consider how they affect your hip and knee alignment. Look for any signs of discomfort or pain in these areas during rides. If you experience pain in the front of your knee, it may be a sign that your saddle is too low or tilted too far forward. On the other hand, if you feel pain in the back of your knee, it could indicate that your saddle is too high or tilted too far backward.
Troubleshooting tips can also be helpful when making small adjustments. For example, if you’re experiencing numbness or tingling in your hands or fingers while riding, try adjusting the fore-aft position of your saddle slightly forward or backward to alleviate pressure on those areas.
By using various testing techniques and troubleshooting tips, you can fine-tune the position of your saddle for optimal comfort and performance on gravel rides. However, if you’re unsure about making further adjustments yourself or are struggling to find a suitable position despite experimentation, seeking professional help for saddle adjustments may be necessary.
(Note: Transition into next section) It’s always important to prioritize safety and ensure that proper bike fit is achieved before embarking on long rides or challenging routes where discomfort can easily escalate into serious issues without expert guidance.
Seeking Professional Help for Saddle Adjustments
If you’re unsure about making further adjustments yourself or struggling to find a suitable position, it’s always a good idea to seek professional assistance for fine-tuning your saddle. Professional saddle fitters have the expertise and experience to help you achieve optimal comfort and performance on your gravel bike. They can assess your riding style, body measurements, and biomechanics to recommend the best saddle position for you.
When seeking professional help for saddle adjustments, consider using online saddle fitting services. These platforms allow you to upload photos and videos of your bike setup and provide detailed information about your cycling habits. Based on this data, professional fitters can analyze your position remotely and offer personalized recommendations for improving saddle comfort and efficiency.
Using online saddle fitting services offers several advantages:
- Convenience: You can access these services from the comfort of your own home, eliminating the need for travel.
- Expertise: Online fitters often have extensive knowledge in biomechanics and ergonomics, ensuring accurate assessments.
- Cost-effective: Compared to in-person consultations, online services are typically more affordable while still providing valuable insights.
By seeking professional help through online or in-person fittings, you can ensure that your gravel bike’s saddle is adjusted properly based on expert advice. This will enhance your riding experience by maximizing comfort and preventing potential discomfort or injuries.
Transitioning into the next section, let’s explore the importance of regularly checking and re-adjusting your saddle.
Importance of Regularly Checking and Re-Adjusting Your Saddle
Make sure you regularly check and readjust the position of your saddle to maintain optimal comfort and prevent potential discomfort or injuries. Checking saddle alignment and maintaining saddle stability are crucial for a comfortable and pain-free ride on your gravel bike.
To ensure that your saddle is properly aligned, start by sitting on your bike in a natural riding position. Look down at the alignment of the seat rails with the top tube of your bike frame. They should be parallel to each other. If they are not, use an Allen wrench to loosen the bolts holding the saddle in place and make adjustments until they are aligned correctly.
Next, check for any signs of instability or rocking while seated on your bike. Any movement or shifting can lead to discomfort and even injury over time. Tighten all bolts securely while ensuring that the saddle is level both horizontally and vertically.
Regularly checking and re-adjusting your saddle will help maintain proper positioning, stability, and comfort during rides. By doing so, you can enjoy a comfortable and pain-free experience on your gravel bike without having to worry about discomfort or potential injuries affecting your performance.
Enjoying a Comfortable and Pain-Free Ride on Your Gravel Bike
Experience the joy of a comfortable and pain-free ride on your gravel bike by ensuring proper alignment and stability of your saddle. Achieving the perfect bike fit is crucial to avoid saddle soreness and maximize your riding experience. Here are three key steps to help you enjoy an optimal ride:
-
Find the right height: Start by adjusting the saddle height to ensure that your legs are properly extended when pedaling. When seated, there should be a slight bend in your knees at the bottom of each pedal stroke, preventing any strain or discomfort.
-
Position it correctly: Next, adjust the fore-aft position of your saddle. This adjustment affects both comfort and efficiency. The ideal position allows for a balanced distribution of weight between your sit bones, reducing pressure points and potential soreness.
-
Tilt it just right: Finally, fine-tune the tilt angle of your saddle. A level or slightly nose-down position works best for most riders as it promotes proper pelvic alignment and reduces unnecessary pressure on sensitive areas.
Remember, everyone’s body is unique, so don’t hesitate to experiment with small adjustments until you find what feels most comfortable for you. By taking the time to properly adjust your saddle, you’ll not only prevent discomfort but also enhance performance during those long rides on rough terrain.
Frequently Asked Questions
How can I determine the correct saddle height for my gravel bike?
To determine the correct saddle height for your gravel bike, start by positioning the pedals parallel to the ground and placing your heels on them. Adjust the saddle height until your legs are almost fully extended without locking out at the knees when pedaling with the balls of your feet.
Additionally, ensure that the saddle tilt is level and comfortable, while considering proper saddle padding for optimal support during long rides.
What are the signs that indicate my saddle tilt needs adjustment?
When it comes to saddle tilt adjustment, recognizing the signs of discomfort is crucial. Did you know that improper saddle tilt can affect not only your comfort but also your performance?
Signs such as numbness, pressure points, or sliding forward on the saddle indicate the need for adjustment.
To ensure optimal riding experience and prevent potential injuries, it’s essential to regularly assess your saddle tilt and make necessary adjustments.
Are there any specific considerations for saddle padding and cushioning on a gravel bike?
When considering saddle padding and cushioning on a gravel bike, saddle comfort should be a top priority. The type and amount of padding can greatly affect the overall comfort during long rides on rough terrain.
Additionally, it is important to ensure that the saddle width is appropriate for your body size and riding style. Finding the right balance between cushioning and support is crucial to prevent discomfort and potential injuries while riding on gravel roads.
How do I choose the right saddle shape for my body type?
When choosing a saddle shape for my body type, I focus on two key factors: choosing the right saddle width and finding the right saddle material.
The width of the saddle should match the distance between my sit bones to ensure optimal support and comfort.
Additionally, considering the right saddle material is crucial, as it affects both durability and cushioning.
Experimenting with different shapes and materials can help identify the perfect fit for my body type.
What are the potential consequences of not regularly checking and re-adjusting my saddle on a gravel bike?
Not regularly checking and re-adjusting my saddle on a gravel bike can lead to potential injuries, discomfort, and decreased performance. It’s truly fascinating how neglecting such a simple task can have such profound consequences.
By failing to ensure that my saddle is properly positioned, I am essentially inviting discomfort and pain into my rides. Not to mention the negative impact it can have on my overall performance.
It’s astonishing how something as trivial as a saddle adjustment can make or break my biking experience.
Conclusion
In conclusion, adjusting your saddle on a gravel bike is crucial for a comfortable and pain-free ride. By finding the right height and achieving the correct fore-aft position, you can optimize your riding experience. Ensuring proper tilt and understanding the angle of your saddle are also important factors to consider. Regularly checking and re-adjusting your saddle is necessary to account for any changes in your body or bike setup.
So why settle for discomfort when you can take control of your ride? Isn’t it time to make those necessary adjustments and enjoy an incredible gravel biking adventure?

