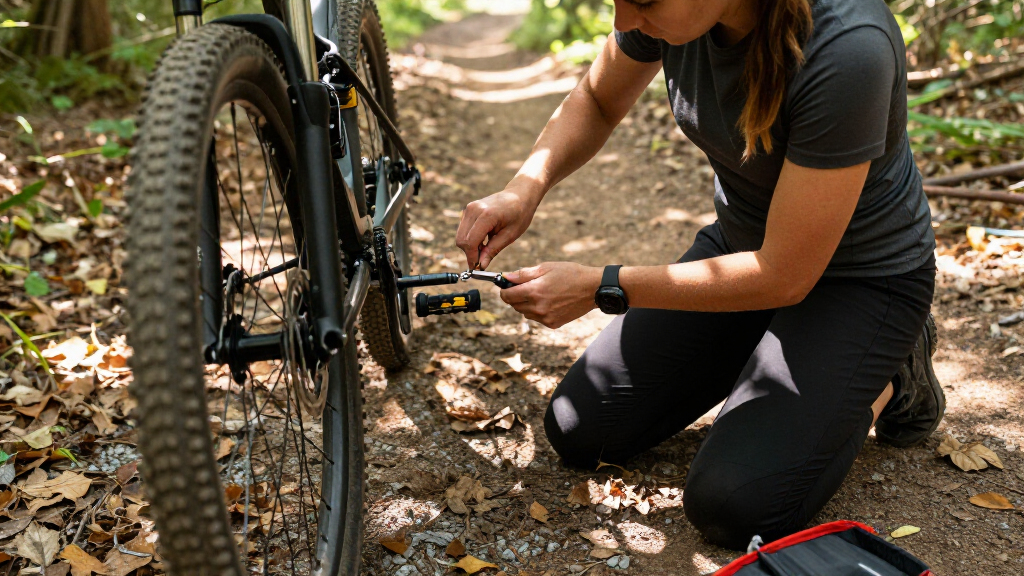
This guide helps mountain bikers assemble and maintain an effective repair kit for on-the-trail fixes. It covers selecting essential tools, organizing the kit, and performing basic repairs. Suitable for riders with basic bike knowledge, this process ensures you’re prepared for common issues during rides, reducing downtime and enhancing safety.

Get sports gear delivered free with Prime
- Fast, free delivery on millions of items
- Prime Video, Amazon Music and more included
- Member-only deals all year

Bicycle Repair Kit with Tire Pump and Accessories
- ✔ Brand: XCH Robots
- ✔ Model Number: XCH-004
- ✔ Included Components: Mini bicycle pump, bike multitool, crank extractor and wrench, bone wrench, tire lever, glueless patches set

NDakter Bike Frame Bag with Repair Kit, Bicycle Tire Repair Tool Set with Pump & 16-in-1 Multitool
- ✔ Pump PSI: 120
- ✔ Multitool: 16-in-1
- ✔ Bag Material: Carbon fiber

DURATECH 41-Piece Bicycle Repair Tools Kit with Storage Box
- ✔ Number of Pieces: 41
- ✔ Material: Steel
- ✔ Includes: Storage box
Difficulty: Intermediate | Time: 30-60 minutes
What You’ll Need
Tools & Materials:
- Small multi-tool with Allen wrenches and screwdrivers
- Tire levers (2-3)
- Portable pump or CO2 inflator
- Patch kit (patches, glue, sandpaper)
- Spare inner tube(s)
- Chain lube
- Small adjustable wrench
- Lubricant spray (optional)
Knowledge:
- Basic understanding of bike components and functions
- Ability to change an inner tube and use tire levers
- Familiarity with cleaning and lubricating parts
Allocate about 30 minutes to gather tools and assemble the kit. Check your bike to identify specific needs, such as valve type (Presta or Schrader) for the pump.
Bicycle Repair Kit with Tire Pump and Accessories
<p>This comprehensive kit stands out for its versatility, including a mini pump, multi-tool, tire patches, and waterproof bag—ideal for riders who want everything in one package. Compared to the other options, it offers the most complete set of tools for on-the-fly repairs, supporting various bike types and harsh conditions. However, this all-in-one approach results in a bulkier kit, which may be less appealing for casual or minimalist riders. The included waterproof and reflective bag enhances safety and convenience, though some users note the pump’s durability could be improved.</p>
Pros:
- Includes a wide range of essential tools and accessories
- Waterproof, reflective bag for safety and durability
- Supports quick repairs in tough outdoor conditions
Cons:
- Can be bulky to carry for short or casual rides
- Limited instructions for some tools may require prior knowledge
- Pump durability concerns for some users
Best for: Riders seeking a versatile, all-in-one solution suitable for varying environments and bike types
Not ideal for: Casual cyclists or those who prefer very lightweight, minimal gear
Bottom line: Ideal for riders who want a comprehensive, ready-to-go repair kit with safety features, accepting some bulkiness.
“Ideal for riders who want a comprehensive, ready-to-go repair kit with safety features, accepting some bulkiness.”
NDakter Bike Frame Bag with Repair Kit, Bicycle Tire Repair Tool Set with Pump & 16-in-1 Multitool
<p>This kit is designed for riders who value portability and quick access. Its durable triangle frame bag houses a mini pump, a 16-in-1 multitool, and various patches, making it perfect for mountain biking, road cycling, or BMX. Compared to bulkier sets, it’s lightweight and weather-resistant, with a high-pressure pump compatible with both Presta and Schrader valves. While it offers excellent convenience, its capacity is limited—larger items or multiple spare tubes might not fit comfortably—and some users find patches tricky to apply correctly. The pump’s PSI support is adequate but not suitable for very high-pressure needs.</p>
Pros:
- Compact, lightweight design with weather-resistant bag
- High-pressure mini pump suitable for various valve types
- Includes a multi-functional 16-in-1 multitool and multiple patches
Cons:
- Limited capacity for larger repairs or multiple spares
- Requires some skill to effectively use patches
- Pump PSI may not meet very high-pressure needs
Best for: Trail and mountain bikers who need a compact, reliable repair kit for quick roadside fixes
Not ideal for: Riders requiring extensive repair tools or carrying multiple spare tubes
Bottom line: A perfect choice for riders prioritizing portability and quick roadside repairs, though it sacrifices capacity.
“A perfect choice for riders prioritizing portability and quick roadside repairs, though it sacrifices capacity.”
DURATECH 41-Piece Bicycle Repair Tools Kit with Storage Box
<p>This extensive kit caters to those who want a full suite of tools for both major repairs and fine adjustments. With 41 steel tools organized in a sturdy storage box, it’s designed for durability and versatility. Compared to the more portable options, this set offers a broader range of specialized tools, making it ideal for riders who need to handle any repair situation. The downside is that it includes more tools than most casual riders will need, and its size makes it less convenient for carrying on quick rides. Nonetheless, for serious mountain bikers, this set provides peace of mind in a single package.</p>
Pros:
- Comprehensive set covering most repair needs
- Durable steel construction for longevity
- Organized storage case for easy access
Cons:
- Overkill for simple roadside fixes
- Bulkier and heavier to carry
- Higher cost due to the number of tools
Best for: Experienced cyclists and bike shops needing extensive repair capabilities
Not ideal for: Casual or beginner riders who only perform minor repairs
Bottom line: Best suited for experienced riders or mechanics who require a complete repair arsenal in one package.
“Best suited for experienced riders or mechanics who require a complete repair arsenal in one package.”
As an Amazon Associate we earn from qualifying purchases.
Before You Start
Ensure your bike is clean and accessible. Confirm the tools you have match your bike’s specifications, especially valve types and bolt sizes. Store the kit in a durable, accessible container, such as a small backpack or saddle bag, ready for quick access during rides.
Step-by-Step Instructions
Step 1: Select essential tools and supplies
Gather a multi-tool, tire levers, spare tubes, patch kit, pump or inflator, chain lube, and small adjustable wrench. Ensure all tools are in working condition and compatible with your bike.
Tip: Choose lightweight, compact tools designed for cycling to keep the kit portable.
Check: All tools and supplies are accounted for, functional, and fit your bike’s specifications.
Step 2: Organize the repair kit
Arrange tools in a small, durable container or bag. Separate items by function: inflating tools, tire repair, chain maintenance, and miscellaneous tools. Use small compartments or pouches for easy access.
Tip: Label sections if needed to quickly locate items during an emergency.
Check: The kit is well-organized, with each item easily accessible without rummaging.
Step 3: Inspect and prepare inner tubes and patches
Check spare tubes for damage or holes. Prepare patch kit by cutting patches to size and applying glue if needed. Sand the area on the tube to roughen the surface for better adhesion.
Tip: Test patches on damaged tubes before riding to confirm adhesion quality.
Check: Spare tubes are ready for installation, and patches are prepared properly.
Step 4: Learn how to remove and install a tire
Practice loosening the bead from the rim using tire levers, removing the tube, and installing a new or repaired tube. Use quick, gentle motions to avoid damaging the rim or tube.
Tip: Avoid pinching the tube when reinstalling the tire; ensure the bead is seated evenly.
Check: You can remove and install a tire smoothly without damaging the tube or rim.
Step 5: Practice fixing a flat tire
On your bike or a stand, deflate the tire, use tire levers to remove the tire, take out the damaged tube, patch or replace it, then reinstall the tube and tire on the rim. Inflate to the recommended pressure.
Tip: Check the sidewall for sharp objects before installing the new tube.
Check: The repaired or replaced tube holds air without leaks and the tire is securely mounted.
Step 6: Learn chain maintenance basics
Identify when the chain needs lubrication or cleaning. Use chain lube sparingly on the inside links, wipe off excess, and check for stiff links or damage.
Tip: Lubricate when the chain is dry and free of dirt for best results.
Check: Chain moves smoothly and no excessive noise or stiffness is present after lubrication.
Step 7: Test your repair kit
Perform a simulated repair by removing a tube, patching or replacing it, and inflating. Test chain lubrication and ensure tools are easily accessible.
Tip: Practice in a controlled environment to build confidence for trail repairs.
Check: You can complete repairs efficiently, with all tools functioning correctly.
Common Mistakes to Avoid
- Overloading the repair kit with unnecessary tools — Limit your kit to essential items that fit comfortably in your storage space.
- Not checking tools and supplies before rides — Verify all items are in working order and stocked regularly.
- Using incompatible or poor-quality patches and tubes — Use high-quality, compatible patches and tubes suited to your bike’s specifications.
- Ignoring regular maintenance of the repair tools — Clean and inspect tools after each ride to ensure functionality.
Troubleshooting
Problem: Pump cannot inflate the tire to proper pressure
Solution: Check the valve type and adapter; ensure the pump head is securely attached and the valve is not damaged.
Problem: Patch fails or leaks after patching
Solution: Ensure the tube surface was properly sanded, glue was fully dried, and the patch was pressed firmly in place.
Problem: Tube repeatedly punctures or gets damaged
Solution: Inspect the inside of the tire for sharp objects or debris; replace the tube and clean the tire thoroughly before reinstalling.
What Success Looks Like
The repair kit is fully assembled, organized, and ready for use. You can confidently perform basic repairs such as fixing flats, replacing tubes, inflating tires, and maintaining the chain. During a test, repairs are completed efficiently, and all tools function correctly.
Next Steps
After setting up your repair kit, periodically check and replenish supplies. Practice repairs regularly to build confidence. Before each ride, review the kit contents and ensure everything is in working order. When repairs are needed on a trail, follow the steps learned here to fix issues quickly and safely.
Frequently Asked Questions
How often should I replace or update my repair kit supplies?
Inspect your kit monthly or after each ride. Replace worn-out patches, damaged tools, or empty supplies immediately to stay prepared.
Can I use a multi-tool for all repairs?
While a multi-tool covers many basic needs, specialized tools like tire levers and a pump are essential for specific tasks. Use the right tool for each repair for best results.
What if I don’t have experience repairing flats?
Practice repairing a flat in a controlled environment before riding. Watching tutorials and following this guide will help build your confidence and skills.
How do I know my repair kit has the correct size patches and tubes?
Check your bike’s tire size, which is printed on the sidewall, and ensure patches and tubes match that size for proper fit and sealing.
NFL season / tailgating Picks
team gear
As an affiliate, we earn on qualifying purchases.