
Creating an electric bike is an exciting project that merges the joy of biking with the innovation of technology. Picture effortlessly gliding through urban areas, overcoming tough landscapes, and decreasing your environmental impact simultaneously.
In this step-by-step guide, I will walk you through the process of creating your very own electric bike. From determining your budget and selecting the right components to customizing your ride, get ready to embark on an exciting journey of DIY adventure.
Let’s dive in and turn your dream of an electric bike into a reality.
Key Takeaways
- Choose an ideal mounting location for the battery and controller, ensuring balanced weight distribution and optimized handling.
- Install a throttle and pedal assist system for instant power delivery and a natural riding experience.
- Ensure safety and compliance by installing brakes and lights, regularly checking their functionality, and complying with road regulations.
- Test and fine-tune the electric bike for smooth operation and optimal performance, considering customization and maintenance options for a personalized and enjoyable ride.
Determine Your Budget and Requirements
Now, let’s figure out how much you’re willing to spend and what specific features you want in your electric bike.
Determining your budget is crucial as it will help you narrow down your options and find a suitable electric bike. Consider how much you are willing to invest in this project, keeping in mind that higher-end electric bikes tend to have better quality components and longer-lasting batteries.
Alongside your budget, you need to identify your requirements. Do you need a bike with a long-range battery, or do you prioritize speed and power? Are you planning to use it for commuting or off-road adventures?
By understanding your needs, you can choose the right electric bike that fits your budget and requirements.
Now, let’s move on to the next section and explore how to choose the right bike frame.
Choose the Right Bike Frame
First, you’ll need to select the ideal frame for your new electrified two-wheeler. When choosing a bike frame, it’s important to consider your budget and requirements. Here are some budget considerations and frame material options to help you make an informed decision:
-
Aluminum: Lightweight and affordable, aluminum frames are a popular choice for electric bikes. They offer good strength and durability while keeping the cost in check.
-
Steel: Known for its strength and durability, steel frames provide a smooth and comfortable ride. However, they tend to be heavier and more expensive than aluminum frames.
-
Carbon Fiber: If budget is not a constraint, carbon fiber frames are the way to go. They are extremely lightweight, stiff, and offer excellent shock absorption. However, they come with a higher price tag.
Now that you have chosen the right bike frame, let’s move on to selecting a motor and battery system for your electric bike.
Select a Motor and Battery System
Once you’ve got the perfect frame, it’s time to dive into the exciting world of motor and battery systems for your electrified ride.
When it comes to motor selection, you have a few options to consider. Firstly, there are hub motors, which are mounted directly in the wheel. These motors are great for simplicity and ease of installation. Alternatively, you can opt for a mid-drive motor, which is mounted at the bottom bracket and provides better weight distribution and efficiency.
Next, you’ll need to choose the right battery for your electric bike. There are various options available, such as lithium-ion, lithium-polymer, and lead-acid batteries. Consider factors like weight, range, and cost when making your decision.
With the motor and battery system sorted, it’s time to move on to gathering the necessary tools and materials for the next phase of the build.
Gather the Necessary Tools and Materials
Get ready to embark on your electrifying journey by gathering all the essential tools and materials you’ll need for this exciting project. To ensure a successful build, it is crucial to have the right tools and materials at your disposal. Here are three key items you will need:
-
Wrench Set: A comprehensive set of wrenches is essential for loosening and tightening various components of the bike, such as the handlebars, pedals, and brakes. This will allow for easy removal and installation of the electric bike conversion kit.
-
Wire Strippers: These specialized tools are necessary for stripping the insulation off the wires, enabling you to connect the motor and battery system effectively. Make sure to select wire strippers that are suitable for the gauge of wire you will be working with.
-
Soldering Iron: A soldering iron is essential for creating secure and reliable connections between wires and components. This tool will ensure that your electric bike functions properly and has a robust electrical system.
Now that you have determined the required tools and found the right materials, the next step is to remove the existing components to prepare for the electric bike conversion.
Remove the Existing Components
To start the transformation, it’s crucial to dismantle and detach the current components, allowing for a seamless transition to the electrified version of your two-wheeled companion.
Begin by disconnecting the battery and removing it from the frame. Carefully unscrew and detach the motor, taking note of its positioning and any wiring connections. It’s essential to handle these components with care to prevent damage.
Once removed, it’s important to consider the proper disposal of the old components. Many local recycling centers accept electronic waste and can safely dispose of these items. Alternatively, you may choose to sell or repurpose the removed components. Online marketplaces or local bike shops often provide opportunities to list and sell used parts, or you can repurpose them for other projects.
With the existing components removed, it’s time to move on to the next step of installing the motor and battery system, seamlessly integrating the electric power into your bike.
Install the Motor and Battery System
Now comes the exciting part: fitting the motor and battery system onto your trusty two-wheeler! This step is crucial as it will determine the performance and functionality of your electric bike.
First, carefully connect the motor to the bike frame, ensuring it is securely mounted. Then, attach the battery securely to the frame, making sure it is easily accessible for charging and maintenance. Take note of any specific instructions provided by the manufacturer regarding the motor and battery installation.
Once everything is properly connected, test the motor and battery system to ensure they are functioning correctly. Troubleshoot common motor and battery issues, such as loose connections or faulty components.
Now, transition into the subsequent section about ‘connect the wiring and controls’ to finalize the installation process.
Connect the Wiring and Controls
Once you’ve secured the motor and battery onto your trusty steed, it’s time to connect the wiring and controls, bringing your electric transformation to life like a symphony conductor weaving together the harmonious notes of power and control.
The wiring connections are crucial for ensuring a seamless flow of electricity throughout the bike. Start by identifying the appropriate connectors for each component, such as the motor, throttle, and brake sensors. Carefully attach each wire, making sure to match the color codes and follow the manufacturer’s instructions.
Once the connections are made, neatly organize and secure the wires using zip ties or electrical tape to prevent any accidental damage or interference.
Next, strategically place the controls, such as the throttle and display panel, in a comfortable and accessible location on the handlebars. This ensures easy access and control while riding.
With the wiring and controls in place, you’re now ready to move on to the next step of mounting the battery and controller, seamlessly continuing your electric bike project.
Mount the Battery and Controller
Securely attach the battery and controller, allowing your electrifying creation to come alive and fuel your thrilling adventures. When it comes to mounting options, there are a few factors to consider.
First, determine the type and size of your battery and controller, as this will dictate the available mounting options. Common options include frame-mounted, rear-rack-mounted, or even seat-post-mounted setups. Carefully choose a mounting location that provides easy access for charging and maintenance, while also ensuring a balanced weight distribution for optimal handling.
Once you’ve chosen the ideal mounting location, use high-quality straps or brackets to secure the battery and controller firmly in place. Double-check for any potential interference with other bike components or cables.
With the battery and controller securely mounted, you’re ready to move on to the next step: installing the throttle and pedal assist system, enhancing your riding experience.
Install the Throttle and Pedal Assist System
To enhance your riding experience, start by installing the throttle and pedal assist system. This will allow you to effortlessly control your electrifying creation and zoom through thrilling adventures.
The throttle system provides instant power delivery, giving you complete control over the speed at which you want to ride. It allows you to quickly accelerate from a standstill and eliminates the need to pedal continuously. However, keep in mind that it can consume more battery power compared to the pedal assist system.
On the other hand, the pedal assist system offers a more natural riding experience. It provides assistance based on your pedaling input, making it feel like you have supercharged legs. This system is great for longer rides and conserving battery power.
When troubleshooting either system, start by checking the wiring connections. Make sure everything is properly connected and secure. Additionally, ensure that the throttle is properly calibrated and functioning correctly. For the pedal assist system, double-check that the pedal sensor is working as it should.
With the throttle and pedal assist system installed and functioning properly, it’s time to move on to the next step: attaching the motor to the bike frame.
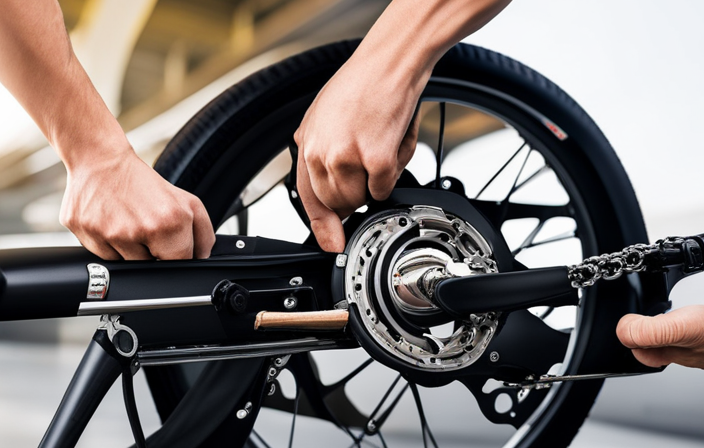
Attach the Motor to the Bike Frame
Now that the motor is in place, you can easily attach it to the bike frame, ensuring a seamless integration and maximizing performance. Did you know that a well-attached motor can increase the efficiency of your ride by up to 25%?
To achieve this, consider the following techniques for motor attachment:
-
Secure mounting brackets: Use sturdy brackets to firmly attach the motor to the frame, ensuring it stays in place even during rough rides.
-
Proper alignment: Align the motor with the bike’s chain and gears to ensure smooth power transfer and prevent any unnecessary strain on the components.
-
Adequate clearance: Make sure there is enough clearance between the motor and other bike parts to prevent any interference or damage.
-
Cable management: Neatly route and secure the motor cables along the bike frame to prevent tangling or snagging.
The positioning of the motor on the bike frame can have a significant impact on bike performance. It affects the weight distribution, balance, and handling of the electric bike. Experiment with different positions to find the one that suits your riding style and preferences best.
Now that the motor is securely attached, let’s move on to installing the brakes and lights to ensure a safe and functional electric bike.
Install the Brakes and Lights
Once the motor is properly attached, it’s time to ensure your safety by installing the brakes and lights.
Brake maintenance is crucial for the safe operation of your electric bike. Regularly check the brake pads for wear and tear, and replace them if necessary. Adjust the brake cables to ensure optimal braking performance.
Installing high-quality front and rear lights is essential for visibility, especially during low-light conditions. There are various types of bike lights available, including LED lights, which offer bright illumination and long battery life. Consider choosing lights with different modes, such as steady and flashing, to enhance visibility and conserve battery power.
With the brakes and lights installed, it’s time to test and fine-tune your electric bike to ensure it operates smoothly and safely.
Test and Fine-tune Your Electric Bike
Make sure you take your newly assembled ride for a test spin to ensure everything is running smoothly. Don’t you want to show off your new wheels?
Testing methods for your electric bike can greatly enhance its performance. Start by testing the brakes to ensure they are responsive and provide adequate stopping power. Check the lights to verify they are functioning properly, both for your safety and to comply with road regulations.
Additionally, test the motor and battery to ensure they are working efficiently and providing the desired power output. Fine-tuning your electric bike can involve adjusting the suspension, tire pressure, and gear ratios to optimize performance.
Once you are satisfied with the performance enhancements, it is essential to consider safety precautions to ensure a safe and enjoyable riding experience.
Consider Safety Precautions
Ensure your riding experience is safe and enjoyable by taking the necessary safety precautions.
When building an electric bike, it is crucial to prioritize safety at all times. There are several important safety measures to consider.
First, always wear appropriate safety gear and equipment, such as a helmet, knee pads, and elbow pads. These protective items can greatly reduce the risk of injury in the event of an accident.
Additionally, make sure to install proper lighting on your electric bike to enhance visibility, especially during nighttime rides. It is also advisable to equip your bike with a horn or bell to alert pedestrians and other cyclists of your presence.
Lastly, familiarize yourself with local traffic laws and regulations to ensure you are riding responsibly. By following these safety precautions, you can enjoy your electric bike with peace of mind.
Now, let’s move on to customizing your electric bike.
Customize Your Electric Bike
To truly personalize your e-bike, consider tailoring it to reflect your unique style and preferences. Here are some ways you can customize your electric bike:
-
Custom paint: Give your e-bike a personal touch by choosing a color or design that stands out. Whether you prefer vibrant hues or a sleek matte finish, custom paint can transform your bike into a statement piece.
-
Upgraded suspension: Enhance your riding experience by upgrading the suspension system. Opt for adjustable shocks or forks that can handle rough terrains, providing a smoother and more comfortable ride.
-
Ergonomic grips and saddle: Make long rides more enjoyable by investing in ergonomic grips and a comfortable saddle. These additions can reduce hand and back fatigue, ensuring a pleasant riding experience.
-
Integrated accessories: Add functionality and convenience to your e-bike by incorporating accessories such as a cargo rack, fenders, or a phone mount. These accessories can enhance your bike’s usability and make it more versatile.
With these customizations, you can create an electric bike that not only suits your style but also meets your specific riding needs. Enjoy your DIY electric bike and embrace the freedom it brings!
Enjoy Your DIY Electric Bike!
Now that you’ve successfully customized your electric bike, it’s time to enjoy the fruits of your labor! But before you hit the road, it’s important to know how to maintain your DIY electric bike to ensure its longevity and optimal performance.
Regularly check and tighten all the bolts, especially those holding the motor and battery in place. Keep the chain well-lubricated and clean, as it is crucial for smooth and efficient pedaling.
Additionally, inspect the tires for any signs of wear and tear, and adjust the tire pressure accordingly for a comfortable and safe ride.
To increase the speed and range of your electric bike, consider upgrading the battery to a higher capacity one. You can also install a more powerful motor or use pedal-assist to maximize your bike’s potential.
Remember, with proper maintenance and a few tweaks, your DIY electric bike can provide you with an exhilarating ride for years to come.
Frequently Asked Questions
How long does it typically take to build an electric bike?
Typically, building an electric bike requires a significant time investment. The process involves acquiring the necessary skills, such as knowledge of electrical systems and bike mechanics. It can take several weeks to complete, depending on the complexity of the project.
Can I use any bike frame to build an electric bike, or are there specific requirements?
When considering bike frame options for building an electric bike, it’s important to ensure motor compatibility. Not every frame can handle the power and weight of an electric motor, so it’s crucial to choose a frame that can handle the extra oomph.
What are the maintenance requirements for an electric bike?
To properly maintain an electric bike, it is crucial to follow the maintenance requirements. This includes ensuring proper charging of the battery and regularly checking tire pressure, tread wear, and overall condition for optimal performance and safety.
Are there any legal restrictions or regulations I need to be aware of when riding an electric bike?
When riding an electric bike, it’s important to be aware of legal restrictions and regulations. Just as a ship needs to navigate through treacherous waters, riders must navigate electric bike safety and speed limits.
How much weight can an electric bike typically carry?
An electric bike typically has a cargo capacity of around 50-100 pounds, depending on the model. The weight limit is usually specified by the manufacturer and exceeding it may affect the bike’s performance and safety.
Conclusion
I hope this guide has been helpful in showing you how to build your own electric bike.
It may seem like a daunting task at first, but with the right tools and materials, anyone can do it.
Just like riding a bike, building an electric bike is a journey that requires patience and determination.
But once you’ve completed your creation and feel the rush of power as you zip along, it will all be worth it.
So go ahead, dive in, and enjoy the satisfaction of riding your very own DIY electric bike!