To improve your bike’s brake performance, start by inspecting and replacing worn pads, ensuring they contact the rim or rotor evenly. Adjust cable tension with barrel adjusters for a responsive feel, and make sure brake calipers are aligned properly. For disc brakes, check rotor clearance and caliper positioning. Regular lubrication of cables and pivots helps smooth operation. If you keep fine-tuning these aspects, you’ll achieve more effective, reliable braking—more tips await to fine-tune your setup.
Key Takeaways
- Check and replace worn brake pads to ensure optimal friction and stopping power.
- Center and align brake pads evenly on the rim or rotor for balanced braking.
- Adjust cable tension using barrel adjusters for responsive lever feel and proper contact.
- Ensure calipers are properly aligned and parallel to prevent uneven wear and rubbing.
- Lubricate cables and pivot points regularly to reduce friction and maintain smooth operation.

Schwinn Sporterra RX Gravel Bike, 700c Mens and Womens Bike, 14-Speed Drop Bar Gravel Bicycle, Mechanical Disc Brakes, Rigid Fork, Aerodynamic Riding Position, Quick Release Seat Post, Adult Bicycle
GRAVEL BICYCLE: Enjoy next level riding with the Sporterra RX by Schwinn. With 700c wheels, this mens and...
As an affiliate, we earn on qualifying purchases.
Understanding Different Types of Bike Brakes
To properly adjust your bike brakes, it’s essential to understand the different types of braking systems. Brake calipers, including V-brakes and cantilever brakes, use brake pads that squeeze the rim to slow you down. These calipers are straightforward to adjust and maintain, making them popular on mountain bikes. Disc brakes, whether mechanical or hydraulic, employ calipers that clamp onto a rotor attached to the wheel hub. Hydraulic calipers, operated by fluid pressure, deliver consistent braking with less effort, while mechanical ones rely on cables. Each system requires specific adjustments to the brake caliper and pads for ideal performance. Knowing how your brake system works helps ensure you can properly maintain and fine-tune your brakes for safe, reliable stopping power. Understanding different brake systems plays a significant role in effective bike maintenance and safety. Additionally, proper adjustment can help prevent premature wear of brake components and improve stopping efficiency.

SAVADECK T800 Carbon Gravel Bike, with Shimano GRX610 12-Speed, Hydraulic Disc Brakes, 700x40c Tires for Road & Off-Road Adventure, Men's/Women's Bicycle(Elegant White, 51cm)
【With SHIMANO GRX Drivetrain Setup】Equipped with SHIMANO GRX610 shifters and RX822 rear derailleur, matched with a 12-speed M6100...
As an affiliate, we earn on qualifying purchases.
Inspecting and Replacing Worn Brake Pads
Regularly inspecting your brake pads is vital for safe and effective braking. Check the brake pads for wear lines or grooves; replace them when they’ve worn past the manufacturer’s limit. Worn brake pads lose their grooves, which hampers debris removal and reduces braking power, risking metal-on-metal contact with the rims. If the pads look glazed—shiny from heat buildup—you can lightly sand them to restore friction. Also, look for debris, dirt, or metal bits lodged in the pads, as these can damage your rims and decrease braking efficiency. Always examine your brake pads before making brake adjustments to guarantee they’re in good condition. Incorporating proper maintenance techniques can extend the lifespan of your brake components and improve overall bike safety. Regularly checking for wear and tear helps prevent unexpected brake failure and keeps your riding experience safe.

SAVADECK Carbon Gravel Bike - T800 Carbon Frame & Fork | Shimano U6000 11-Speed Groupset | Hydraulic Disc Brakes | 700CX40mm All-Terrain Tires | Men & Women Road/Off-Road Bicycle (Gray, 53cm)
【Ultralight T800 Carbon Performance】: Featuring a premium T800 R21 carbon fiber frame and fork weighing just 10.4kg (22.92...
As an affiliate, we earn on qualifying purchases.
Properly Aligning Brake Pads for Optimal Contact

To get the best braking performance, you need to center your brake pads on the rim. Make sure they contact the braking surface evenly without touching the tire or spokes. Proper alignment guarantees safe, efficient stopping every time. Regularly reviewing and adjusting your brake setup helps maintain optimal contact and performance. Ensuring your brakes are properly tuned and maintained can prevent uneven wear and improve overall safety. Additionally, understanding how Gold IRA principles can inform vehicle modifications encourages a more comprehensive approach to vehicle performance and safety. Incorporating data-driven strategies from industry transformations can further optimize your bike’s braking system for better reliability and longevity.
Center Brake Pads
Have you ever noticed uneven braking or squealing when using your bike’s brakes? That’s often due to improperly centered brake pads. To fix this, loosen the pad bolts with an Allen wrench, then carefully move the brake pad so it hits the rim evenly on both sides. Make sure the brake pads are aligned to contact the rim squarely and centrally, avoiding the tire sidewall or spokes. Use visual cues or a ruler to check that the gap between the pad and rim is equal on top and bottom when you squeeze the brake lever. Adjust the brake pads so they make full contact with the braking surface simultaneously. Regularly verify the centering after initial setup or if you notice uneven wear or rubbing during your rides. Proper alignment ensures a best airless paint sprayer finish, similar to how correct brake pad positioning maximizes braking efficiency. Additionally, ensuring the brake pads are properly centered in the caliper can prolong their lifespan and improve overall performance. Properly aligning brake pads also helps prevent uneven wear and reduces the risk of brake squeal, contributing to a smoother riding experience. Being mindful of emotional support can also help maintain a calm and focused mindset while making these adjustments. Moreover, understanding the importance of environmental considerations, such as proper disposal of worn pads, can contribute to sustainable cycling practices.
Ensure Rim Contact
Are your brake pads making proper contact with the rim for effective stopping? To guarantee this, check that the pads hit the rim squarely in the center, avoiding contact with the tire or spokes. Loosen the brake pad bolts with an Allen wrench, then move the pads so they align evenly on the braking surface. Retighten the bolts securely. Make sure the pads are slightly inset from the rim edge to prevent dragging on the tire sidewall. When you squeeze the brake lever, both pads should contact the rim simultaneously for balanced braking. Adjust the pads so they have equal space above and below the rim, maximizing contact area. Also, verify that the brake cable is properly tensioned, allowing smooth, responsive pad movement for ideal contact and stopping power. Regularly checking and maintaining proper alignment and tension can significantly improve your braking performance.
WTB Riddler Gravel Bike Tire (700 x 37) Tubeless Folding - Light & Fast Rolling - Bikepacking (Black)
SUBSTANTIAL CORNERING KNOBS meet a low-profile center tread, making the Riddler an excellent choice for gravel grinding or...
As an affiliate, we earn on qualifying purchases.
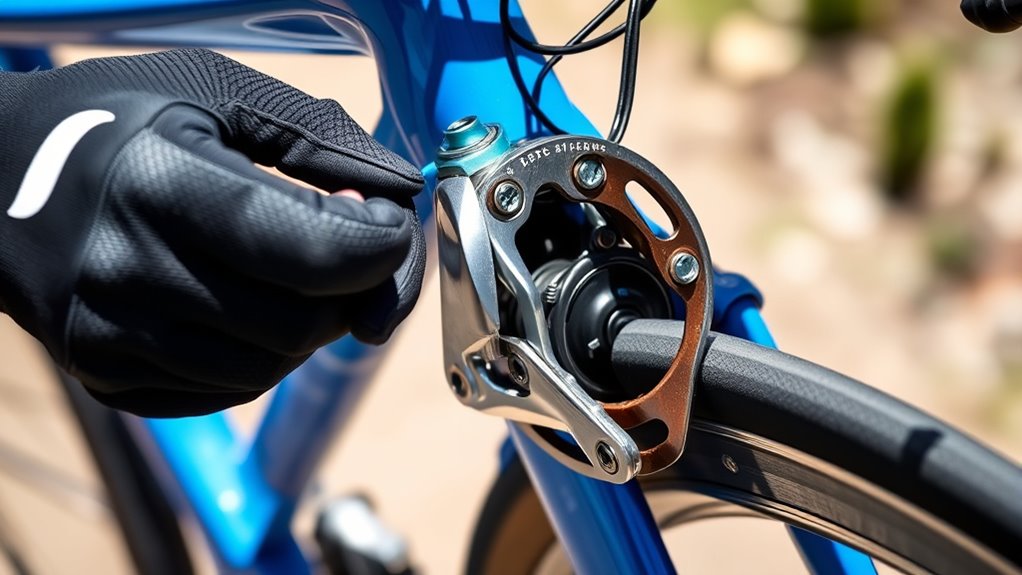
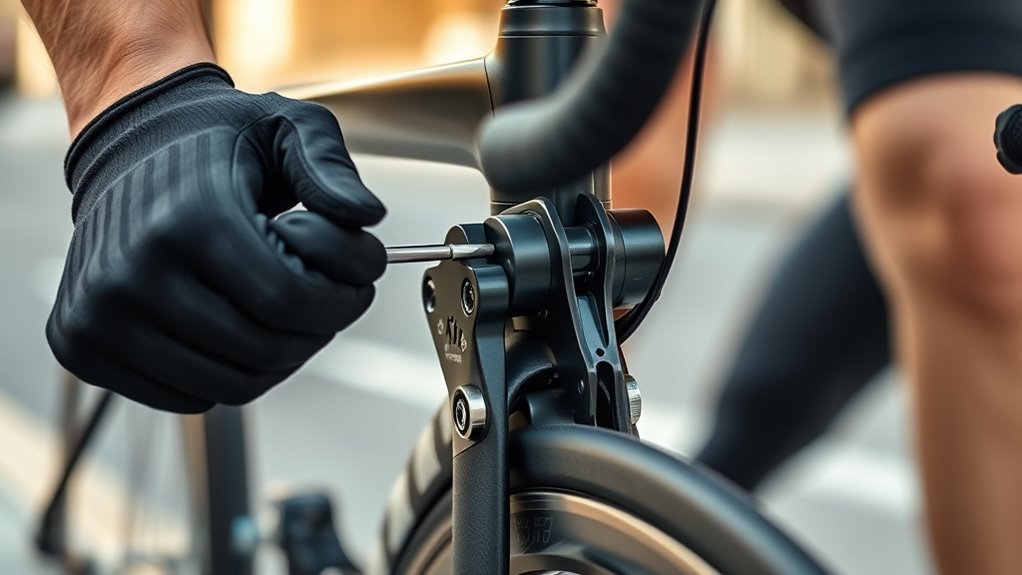
Adjusting Caliper Brake Tension and Positioning

To properly adjust caliper brake tension and positioning, you need to start by loosening the mounting bolts to allow side-to-side movement. Then, squeeze the brake lever to center the caliper over the rim before tightening the bolts securely. Ensuring you use the correct headphone jack type can also improve your overall audio experience during maintenance or troubleshooting. Additionally, checking the caliper alignment regularly ensures consistent braking performance. Proper brake pad alignment is essential for safe and effective braking, so take the time to verify the positioning before completing your adjustments. It’s also helpful to inspect the diversification strategy of your bike’s components, as it can contribute to a smoother ride and better overall handling. Regularly adjusting the brake cable tension ensures a responsive brake feel and prevents uneven wear. Finally, fine-tune the alignment and spring tension for smooth, effective braking.
Caliper Alignment Techniques
Proper caliper alignment guarantees smooth braking and even pad wear, so taking the time to adjust it correctly is essential. To achieve this, start by loosening the caliper mounting bolts slightly to allow side-to-side movement. Then, squeeze the brake lever firmly to center the caliper, tightening the bolts while maintaining pressure to ensure proper caliper positioning. Check that the brake pads contact the rim evenly on both sides, adjusting the caliper if needed. Make sure the caliper is parallel to the rim to prevent uneven pad wear and rubbing. Repeat these steps until the brake pads contact the rim evenly without rubbing when the brake is released.
Key steps:
- Loosen bolts for side-to-side movement
- Center caliper with brake lever pressure
- Verify pad contact and parallel alignment
Spring Tension Adjustment
Adjusting spring tension is key to ensuring your caliper brakes respond smoothly and evenly. To start, loosen the caliper mounting bolts slightly (2-3 turns) to allow side-to-side movement. Hold the brake lever firmly to set the pads against the rim, then tighten the bolts to lock the caliper in place. Next, locate the recoil spring tension adjustment near the caliper pivots. Turn it clockwise to increase spring tension, which pulls the pads slightly away from the rim, or counterclockwise to decrease tension, bringing the pads closer. Make incremental adjustments in half-turns, then hold the brake and test the brake feel and pad alignment. Repeat until the tension feels right and the brake response is smooth and consistent.
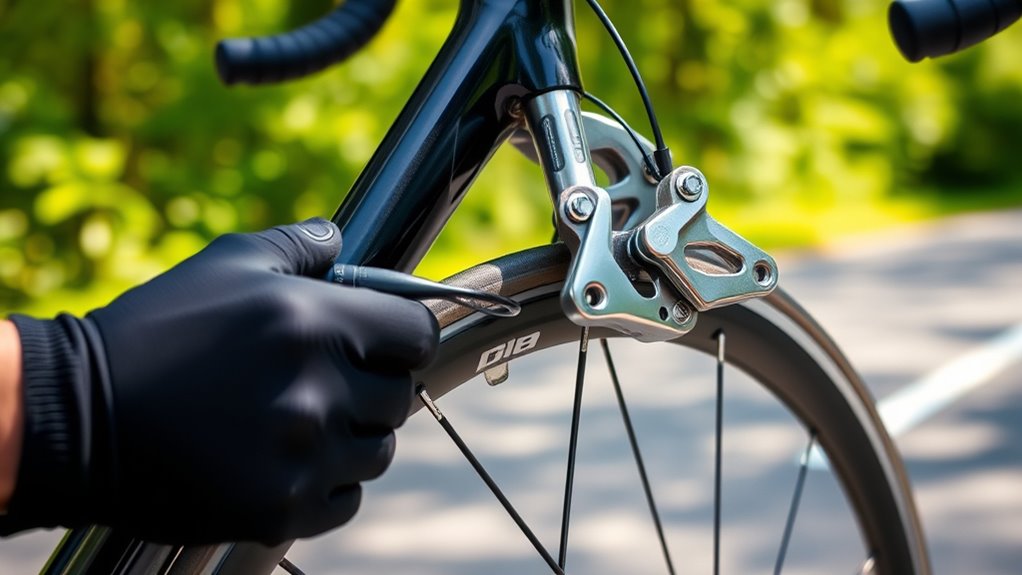
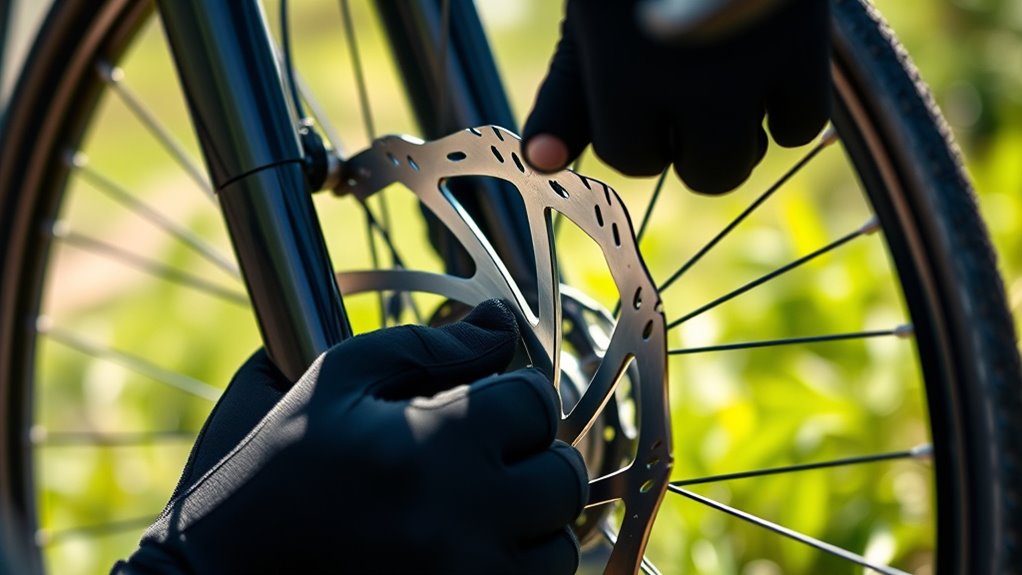
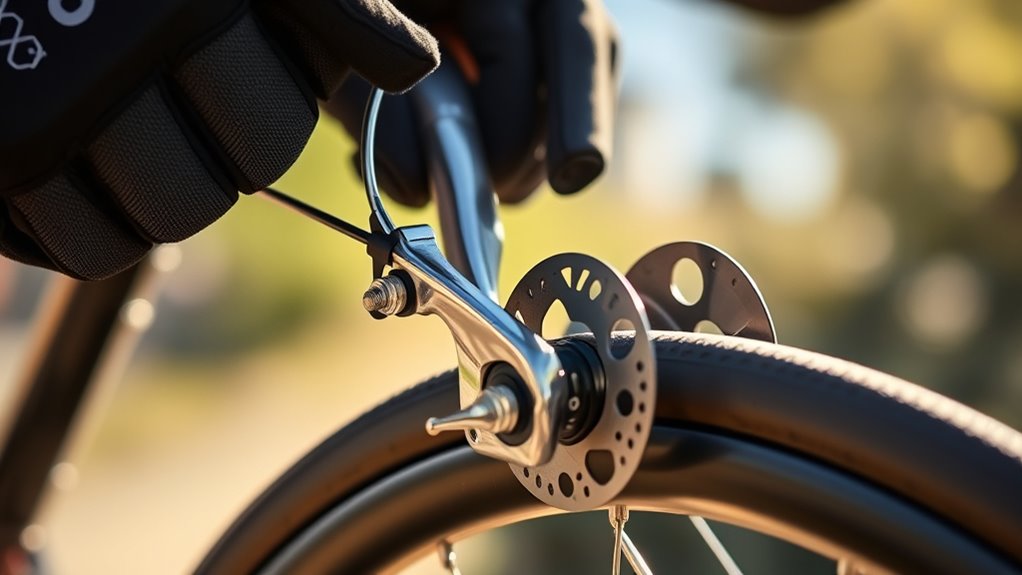
Fine-Tuning Disc Brake Alignment and Rotor Clearance

Ensuring your disc brake caliper is properly aligned and the rotor clearance is correct is essential for smooth, effective braking. First, confirm the wheel is seated correctly and the rotor spins freely without rubbing. Loosen the caliper mounting bolts slightly, hold the brake, and squeeze the brake lever to center the caliper over the rotor. While maintaining pressure, retighten the bolts. Check the rotor clearance by observing uniform gaps on both sides; adjust the caliper position if needed. Use a feeler gauge or plastic shim to measure the gap, aiming for about 0.2 to 0.5 mm. Remember, proper brake cables tension and caliper holding help prevent misalignment, ensuring consistent braking performance and reducing rotor rubbing.
Setting Up and Adjusting V-Brake Systems

Before setting up your V-brakes, make sure the wheel is properly centered and true. Start by releasing the brake cable and adjusting the brake pads to sit about 1-2 mm from the rim, ensuring they contact the center without touching the tire or spokes. Reattach the cable and tighten it securely using the bolt holding it in place. Fine-tune the cable tension with the barrel adjuster until the brake lever has a comfortable travel of about 1.5 inches. To perfect your setup, check the pad positioning and use the tension screws on each brake arm to eliminate uneven contact or rubbing. Proper adjustments ensure smooth, consistent braking performance.
| Adjustment Step | Key Tool/Component |
|---|---|
| Center and true wheel | N/A |
| Set brake pads | Hand, fingers |
| Tighten cable | Bolt holding cable, barrel adjuster |
| Fine-tune tension | Barrel adjuster |
Correcting Brake Cable Tension and Lubrication

To make certain your brakes work smoothly, you need to check and adjust the cable tension so the lever pulls about 1.5 inches. Use the barrel adjuster to fine-tune tension or loosen the cable bolt and pull the cable tighter if needed. Also, lubricate the pivot points regularly with WD-40 or GT85 to keep the cables moving freely and prevent sticking.
Cable Tension Adjustment
Have you noticed your bike’s brakes feel less responsive or require more effort? To fix this, you need to adjust cable tension properly. First, loosen the bolt on the caliper, then pull the brake cable outward to increase tension. Once adjusted, re-tighten the bolt securely. You can also fine-tune tension using the barrel adjuster—turn it clockwise to tighten or counterclockwise to loosen—until the brake lever feels about 1.5 inches from the handlebar grip. Here’s what to keep in mind:
- Proper tension ensures responsive braking and prevents lever hitting the handlebar.
- Adjust cable tension gradually to avoid over-tightening.
- Regularly check and tighten the bolt for consistent performance.
Lubricate Brake Components
Lubricating your bike’s brake components is essential for maintaining smooth and responsive braking. To do this, apply a small amount of bike-specific lubricant like WD-40 or GT85 to the brake cable and pivot points. This helps lubricate brake components, reducing friction and ensuring easy movement. Be careful not to over-lubricate, as excess lubricant can attract dirt and debris, which can hinder performance and cause wear. Regularly inspect and clean the brake cable with a cloth or brush to remove dirt, rust, or grime that can affect tension and responsiveness. When reapplying lubricant, make sure it reaches internal cable housings and pivot points without seeping into brake pads or surfaces. Support us by keeping your bike properly maintained for ideal braking.
Ensuring Quick-Release Mechanisms Are Secure
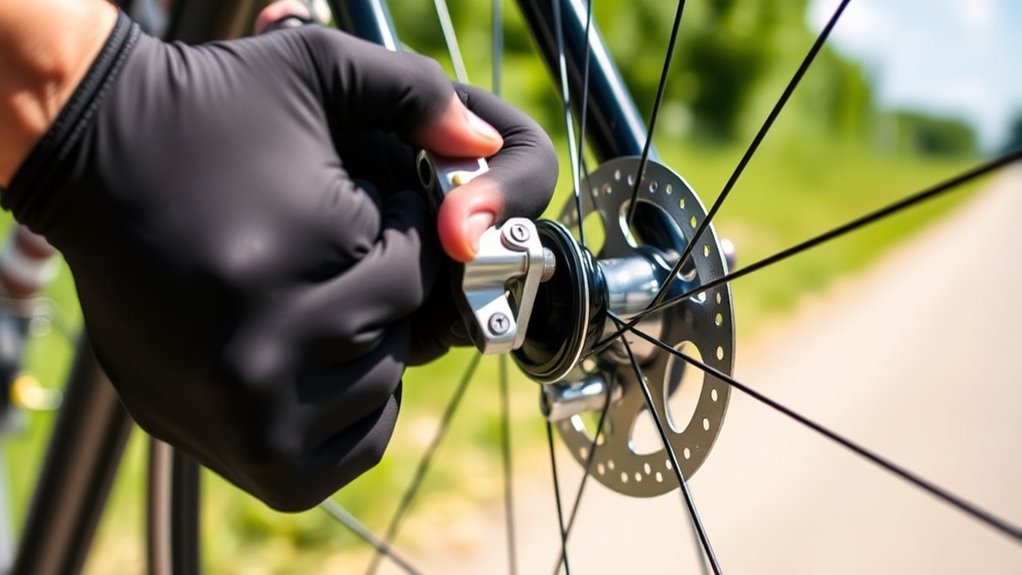
Ensuring your quick-release mechanisms are secure is essential for safe and reliable riding. You need to verify that the quick-release levers are fully closed and firmly tightened against the fork or frame to prevent accidental opening. Proper alignment with the dropout and secure engagement keep the wheel stable, which directly impacts brake performance. Regularly inspect for signs of wear or damage, and replace any quick-release that no longer locks securely. To test its security, try to open the quick-release after closing it; it should resist unless intentionally released.
- Confirm the quick-release is fully closed and tightened.
- Check for proper alignment with the dropout.
- Regularly inspect for wear or damage to the mechanism.
Troubleshooting Common Brake Performance Issues
When your bike’s brakes aren’t performing as they should, identifying the root cause is key to restoring reliable stopping power. Check to make sure the brakes are properly aligned; uneven contact or rubbing often results from misaligned calipers, which you can correct by realignment or centering. If you notice excessive brake lever travel or sponginess, it’s likely due to cable stretch, so adjust the tension or replace the cable. Reduced braking power may mean worn brake pads or contaminated surfaces—inspect, clean, or replace pads as needed. Rubbing or squealing noises can stem from misaligned or glazed pads, which you can fix by repositioning or lightly sanding them. Also, check for seizing caliper pistons or pivots caused by dirt or corrosion, requiring cleaning and lubrication.
Maintaining and Servicing Brake Components for Longevity
Regular maintenance of your bike’s brake components helps keep them functioning smoothly and extends their lifespan. To achieve this, focus on key tasks:
Routine brake maintenance ensures smooth operation and longer-lasting components.
- Check brake pads contact — replace them before grooves disappear to ensure effective braking.
- Clean and lubricate pivot points with WD-40 or GT85 to prevent caliper seizing and keep everything moving smoothly.
- Tighten all bolts securing brake pads, calipers, and cables to prevent looseness and uneven braking.
Additionally, regularly replace frayed or corroded brake cables and housing to reduce friction and improve brake response. Always monitor rotor and rim surfaces for debris, glazing, or uneven wear. Clean or sand them if needed, so the pads contact surfaces consistently. Proper servicing prevents brake failure and prolongs component life.
Frequently Asked Questions
How Do I Make My Bike Brakes Work Better?
To make your bike brakes work better, start by checking that your brake pads are centered and not worn out. Adjust the cable tension with the barrel adjusters so the brake lever has about 1.5 inches of travel. Keep your pivot points clean and lubricated for smooth action. Also, guarantee quick-releases are secure and replace worn pads promptly for consistent, powerful stopping.
How Can I Improve My Braking Performance?
To improve your braking performance, make sure your brake pads are properly aligned and centered on the rim or rotor. Adjust the cable tension so the levers engage with about 1.5 inches of pull, giving you a firm feel. Regularly inspect and replace worn pads, clean and lubricate pivot points, and fine-tune caliper and rotor clearance. These steps guarantee smoother, more responsive braking every time you ride.
How Can I Increase My Bike Brake Power?
You’re right on the money asking how to boost your brake power. To really get the most out of your brakes, start by tightening the cable tension and re-centering the brake pads for even contact. Upgrading to high-quality pads and keeping caliper pivots lubricated also help. Worn components can be a weak link, so replace them promptly. When you fine-tune these elements, braking becomes a piece of cake.
How to Improve Rim Brake Performance?
To improve rim brake performance, start by ensuring your brake pads are centered and contact the rim evenly. Adjust the cable tension with the barrel adjuster for a responsive feel. Make sure the pads hit the rim squarely without touching the tire or spokes, and tighten the bolts securely. Regularly inspect and replace worn pads to keep braking smooth and reliable. Fine-tuning these aspects will enhance your braking efficiency.
Conclusion
By following these steps, you’ll fine-tune your bike brakes just like a skilled mechanic, ensuring smooth and reliable stops every time. Remember, proper brake maintenance is like tending a garden—you need to regularly check and care for it to keep everything running perfectly. With a little attention, you’ll enjoy safer rides and better control, making every journey as enjoyable as a breeze on a sunny day. Keep your brakes in top shape and ride with confidence!