
Ever wondered if it’s possible to transform your ordinary bike into an electrified powerhouse? Well, buckle up because I’m here to guide you through the process step by step.
Whether you’re an experienced cyclist or just starting out, converting your bike to electric is a game-changer. In this article, I’ll share my expertise on understanding the basics, choosing the right conversion kit, gathering the necessary tools, and much more.
So, are you ready to take your cycling experience to the next level? Let’s dive in!
Key Takeaways
- Understand the components and their functions before converting a bike to electric
- Adjust and fine-tune the electric bike for optimal performance and safety
- Regularly maintain and care for the electric bike, including checking and charging the battery, cleaning and lubricating moving parts, and inspecting and replacing worn-out components
- Familiarize yourself with local electric bike laws and regulations to ensure a safe and legal riding experience

Young Electric E-Bike Rack with Ramp, Hitch 2 Bike Rack, 200 lbs Capacity Electric Bike Carrier, Foldable Platform Mount for Cars, Trucks, SUVs, Minivans, Up to 5-Inch Fat Tire for 2'' Receiver
200LBS CAPACITY & V-GROOVE RAMP: The electric bike rack weighing 66 pounds is built with durable steel and...
As an affiliate, we earn on qualifying purchases.
Understand the Basics of Electric Bike Conversion
Does anyone know how to convert a bike to electric?
Well, let me share some knowledge about the basics of electric bike conversion.
First off, you’ll need to choose the right conversion kit for your bike. There are various options available in the market, ranging from hub motor kits to mid-drive kits. Hub motor kits are easier to install, while mid-drive kits offer better performance.
Once you’ve chosen the kit, you’ll need to consider battery maintenance. Proper care and regular charging are essential to ensure optimal battery performance and longevity. Keep in mind that the battery is the heart of your electric bike, so taking care of it is crucial.
Now, let’s move on to the next section where we’ll discuss how to choose the right conversion kit for your bike.

WEIZE 700C Hybrid Bike for Adults, 14 Speed Road Bike, City Commuter Bicycle with Caliper Brakes, High-Carbon Steel Racing Adult Bike, Urban Adult Bicycle for Men and Women, White
Caliper brake system: The hybrid bike adopts a dual caliper brake design, making daily maintenance more convenient and...
As an affiliate, we earn on qualifying purchases.
Choose the Right Conversion Kit for Your Bike
To choose the right conversion kit for your bicycle, it’s important to carefully research and compare different options available in the market. When converting a bike to electric, two key components to consider are the battery and the motor. The battery is the heart of an electric bike, providing power to the motor. It’s crucial to choose a battery that suits your needs in terms of range and capacity. Understanding motor specifications is equally important. Factors such as power, torque, and efficiency should be taken into account when selecting a motor for your conversion. To help you make an informed decision, here’s a table comparing different conversion kits based on battery capacity, motor power, and overall cost:
| Conversion Kit | Battery Capacity (Ah) | Motor Power (W) | Cost ($) |
|---|---|---|---|
| Kit A | 10 | 250 | $500 |
| Kit B | 15 | 350 | $600 |
| Kit C | 20 | 500 | $700 |
| Kit D | 25 | 750 | $800 |
| Kit E | 30 | 1000 | $900 |
Choosing the right conversion kit involves finding the right balance between battery capacity, motor power, and cost. Once you have selected the ideal kit, it’s time to gather the necessary tools and equipment for the conversion process.

AVASTA 700C Road Adult Step-Over Hybrid Bike Bicycle for Men Woman Male Female,Lightweight Aluminum Alloy Frame with 21-Speed Gearing for City Commuting,Dual Disc Brakes,19 inch Frame,Chameleon Grey
🚴♂️【Durable Aluminum Alloy Frame】This lightweight yet strong frame is built to last, offering a perfect balance of durability...
As an affiliate, we earn on qualifying purchases.
Gather the Necessary Tools and Equipment
Now it’s time for me to gather all the tools and equipment I’ll need for the conversion process.
First and foremost, I need to choose the right battery for my electric bike. It’s important to consider factors such as capacity, voltage, and weight when making this decision. A high-quality lithium-ion battery is usually recommended for its long lifespan and lighter weight.
Additionally, I need to make sure I have the necessary tools, such as wrenches, screwdrivers, and pliers, to successfully perform the conversion. These tools will allow me to disassemble my bike and install the electric components.
Lastly, I should also be prepared to troubleshoot common issues that may arise during the conversion process, such as wiring problems or motor malfunctions.
With all the proper tools and equipment in hand, I can now move on to preparing my bike for the conversion process.

VEVOR Hybrid Bike, Lightweight Aluminum Frame Bike, 700c Wheel Men Women Hybrid Bicycle, Step-Over Adult Urban City Commuter Bikes, with 24-Speed Shimano Drivetrain, Alloy Adjustable Stem, Dual Brakes
Hybrid Bike: The bicycle is made with a lightweight aluminum alloy frame, offering durability and a weight capacity...
As an affiliate, we earn on qualifying purchases.
Prepare Your Bike for Conversion
Before beginning the conversion process, it’s important to ensure that my bike is properly prepared.
First, I inspect the frame for any damage or cracks, as the added weight of the electric components can put additional strain on the bike.
Next, I remove any unnecessary accessories or parts that might interfere with the installation of the electric motor and battery.
Finally, I check the brakes and tires to ensure they are in good condition, as the increased speed and power of the electric bike could put more strain on these components.
Converting a bike to electric has numerous advantages. It provides a cost-effective and environmentally friendly mode of transportation. Electric bikes also offer the opportunity to travel longer distances without getting tired, making them ideal for commuting or recreational purposes.
Now that my bike is prepared, it’s time to install the electric motor and battery, which will be discussed in the next section.
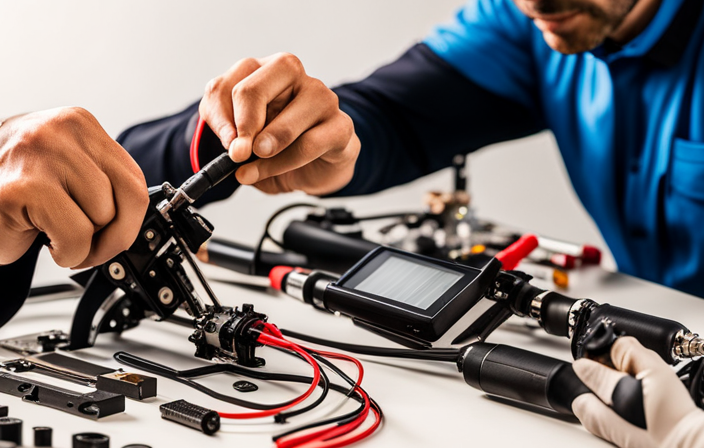
Install the Electric Motor and Battery
To properly install the electric motor and battery for converting a bike, it is crucial to mount the motor in the correct position on the frame. This ensures optimal performance and stability while riding.
Next, I will connect the battery to the motor and controller, making sure to follow the wiring diagram provided by the manufacturer. This step is essential for the motor to receive power and function properly.
Finally, I will secure all the wiring and cables, ensuring they are neatly organized and protected from any potential damage or interference. This will result in a clean and efficient electric bike conversion.
Mount the Motor Properly
You should definitely consider using a torque arm when mounting the motor. It is an essential component that helps prevent the motor from rotating and damaging other parts of the bike, especially under high torque.
When it comes to mounting techniques, there are a few options to choose from depending on the type of bike and motor compatibility. One common method is to mount the motor on the bottom bracket, where the pedals are connected. This provides a stable and secure position for the motor. Another option is to use a rear rack or frame mount. These methods may require additional modifications to ensure proper alignment and clearance.
Overall, choosing the right mounting technique is crucial for a safe and efficient conversion.
Now, let’s move on to the next step and connect the battery to the motor and controller.
Connect the Battery to the Motor and Controller
Now, let’s move forward and connect the battery to the motor and controller. This step is crucial for converting your bike to electric power.
Start by ensuring that the battery is fully charged and turned off. Locate the positive and negative terminals on both the battery and the motor/controller. Connect the positive terminal of the battery to the positive terminal of the motor/controller, and then connect the negative terminal of the battery to the negative terminal of the motor/controller. Make sure the connections are secure and tight to avoid any loose connections.
Once the battery is connected, you may encounter some common conversion issues, such as the motor not starting or the controller not functioning properly. In these cases, check the connections and troubleshoot any potential problems.
Moving on to the next section about securing the wiring and cables, we need to ensure a neat and organized setup.
Secure the Wiring and Cables
Once the battery is connected, it’s important to secure the wiring and cables to ensure a neat and organized setup. Proper wiring protection and cable management are crucial for the overall functionality and safety of the electric bike conversion. Here are three key steps to achieve this:
-
Utilize cable ties: Bundle and fasten the wires together using cable ties. This not only prevents them from tangling or getting caught in the bike’s moving parts but also provides a clean and professional look.
-
Employ wire looms: Install wire looms or conduits to protect the wiring from external elements such as moisture, heat, and abrasion. These protective sleeves keep the wires intact and minimize the risk of damage.
-
Secure the cables: Use zip-tie mounts or adhesive clips to secure the cables along the bike’s frame. This ensures they stay in place and aren’t hanging loosely, reducing the chance of accidental disconnection or interference with other components.
Now that the wiring and cables are securely in place, it’s time to move on to adjusting and fine-tuning the electric bike for optimal performance.
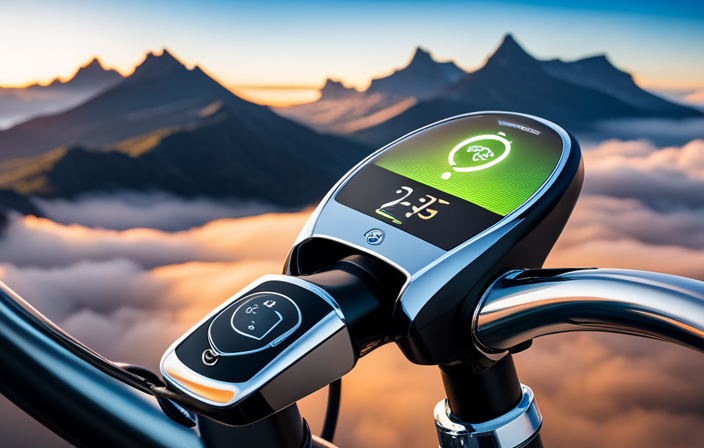
Adjust and Fine-Tune the Electric Bike
To properly adjust and fine-tune the electric bike, it’s essential to understand the various components and their respective functions. Below is a table that highlights some key adjustment techniques and troubleshooting tips that can help optimize the performance of your electric bike.
| Component | Adjustment Technique | Troubleshooting Tips |
|---|---|---|
| Brakes | Adjust brake pads for optimal grip | Check brake cables for any looseness |
| Gears | Fine-tune gear shifting for smoothness | Ensure derailleurs are properly aligned |
| Motor Controller | Adjust throttle sensitivity | Check wiring connections for any issues |
| Battery | Optimize charge and discharge levels | Inspect battery terminals for corrosion |
By following these guidelines, you can ensure that your electric bike functions at its best. Once adjustments and fine-tuning are complete, it’s time to move on to the next step: test ride and make any necessary adjustments to perfect the performance of your electric bike.
Test Ride and Make Necessary Adjustments
After adjusting and fine-tuning the electric bike, it’s time to take it for a test ride and make any necessary adjustments.
As I hop on the bike, I can feel the power of the electric motor propelling me forward. The test ride experience is exhilarating, and it allows me to assess the bike’s performance and handling.
During the ride, I pay close attention to any unusual noises or vibrations, as these could indicate underlying issues. If I encounter any problems, I refer to the troubleshooting guide provided by the electric bike conversion kit manufacturer.
This comprehensive guide helps me diagnose and resolve common issues, such as battery or motor problems. By thoroughly testing the bike and addressing any issues, I can ensure optimal performance and safety.
Now, let’s move on to the next section where we discuss how to maintain and care for your electric bike.
Maintain and Care for Your Electric Bike
When it comes to maintaining and caring for my electric bike, there are three key points that I always prioritize.
First and foremost, I make sure to regularly check and charge the battery to ensure optimal performance.
Additionally, I take the time to clean and lubricate all moving parts to prevent any unnecessary wear and tear.
Lastly, I carefully inspect and replace any worn-out components to maintain the overall functionality of my electric bike.
By following these steps, I can ensure that my electric bike is always in top-notch condition.
Regularly Check and Charge the Battery
Make sure you regularly check and charge the battery on your electric bike. Battery maintenance is crucial to ensure optimal performance and longevity of your electric bike.
Start by inspecting the battery for any signs of damage or corrosion. Clean the battery terminals with a soft cloth and ensure they are securely connected. Troubleshooting common battery issues includes checking the battery level indicator and replacing the battery if it doesn’t hold a charge.
It is also important to charge the battery fully after each ride to maximize its capacity. Additionally, store the battery in a cool and dry place when not in use.
Now, let’s move on to the next section about how to clean and lubricate the moving parts of your electric bike.
Clean and Lubricate Moving Parts
To keep your electric bike running smoothly, regularly clean and lubricate its moving parts. Proper cleaning techniques are important for maintaining the performance and longevity of your electric bike.
Start by using a mild detergent or bike-specific cleaner to remove any dirt or grime from the frame, wheels, and drivetrain. Pay special attention to areas where dirt can accumulate, such as the chain and gears. After cleaning, make sure to dry the bike thoroughly to prevent rusting.
Once clean, apply a lubricant specifically designed for bicycles to the chain, derailleurs, and other moving parts. This will reduce friction and ensure smooth operation. Regular maintenance is crucial because dirt and debris can cause premature wear and tear on the components.
Inspecting and replacing worn-out components is the next step in keeping your electric bike in top shape.
Inspect and Replace Worn-Out Components
To ensure optimal performance and safety, it is crucial to inspect and replace any worn-out components when converting a bike to electric. By carefully examining each part, you can identify any signs of damage or excessive wear that may compromise the integrity of your electric bike. This meticulous inspection will enable you to determine which components require replacement and ensure that your electric bike operates smoothly and reliably.
To assist you in this process, I have created a comprehensive table outlining the key components to inspect and potential replacement options. This table will guide you through the inspection and replacement process, providing valuable information on each component’s function and potential issues to look out for. By referring to this table, you can confidently make informed decisions regarding the replacement of worn-out parts.
Now, let’s transition into the next section to familiarize yourself with local electric bike laws and regulations, which is essential to ensure a safe and legal riding experience.
Familiarize Yourself with Local Electric Bike Laws and Regulations
Learn about the electric bike laws and regulations in your area before you start converting your bike. It is important to understand the specific rules and restrictions surrounding electric bikes in order to ensure your safety and compliance with local regulations.
Electric bike laws may vary from place to place, so it is crucial to familiarize yourself with the specific requirements in your area. This knowledge will help you make informed decisions during the conversion process, such as choosing the appropriate motor power and speed limits.
Additionally, being aware of electric bike laws will allow you to enjoy the benefits of electric bike commuting without any legal issues. Once you have a good understanding of the regulations, you can move forward with your conversion project and start enjoying the benefits of your electric bike.
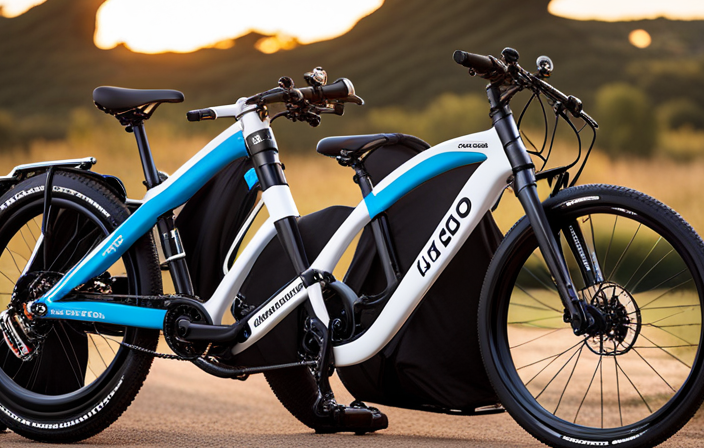
Enjoy the Benefits of Your Electric Bike
Now that you are familiar with the laws and regulations surrounding electric bikes, it’s time to delve into the exciting part – enjoying the benefits of your electric bike! As an avid electric bike enthusiast, I can attest to the numerous advantages of this mode of transportation. Not only does it provide a fun and exhilarating ride, but it also offers the convenience of effortless pedaling and the ability to travel longer distances without breaking a sweat. To truly maximize the battery life of your electric bike, it’s crucial to choose the right electric motor. A high-quality motor will ensure optimal performance and efficiency, allowing you to go further on a single charge. Additionally, selecting the appropriate battery capacity and regularly maintaining it will also contribute to prolonging the battery life. To give you a clearer understanding, let me present a comparison table:
| Electric Motor Type | Pros | Cons |
|---|---|---|
| Hub Motor | – Easy to install – Low maintenance – Silent operation |
– Heavier – Less efficient at low speeds – Limited torque |
| Mid Drive Motor | – Better weight distribution – More torque – Efficient at varying speeds |
– More expensive – Requires frequent gear shifting – Complex installation process |
By carefully considering these factors, you can make an informed decision that suits your needs and preferences, ensuring a seamless and enjoyable electric biking experience.
Frequently Asked Questions
How much does it cost to convert a bike to electric?
Converting a bike to electric can cost anywhere from $500 to $2000, depending on the quality of components and complexity of the conversion. However, the benefits of increased speed, efficiency, and reduced emissions outweigh the initial cost.
Can any type of bike be converted to electric?
Yes, any type of bike can be converted to electric. There are various bike conversion options available, offering benefits like increased speed, longer range, and reduced effort while riding.
How long does it take to complete a bike conversion?
The time it takes to complete a bike conversion depends on various factors, such as the complexity of the project and the individual’s experience. Additionally, the cost of materials and necessary tools will also impact the overall timeline.
Are there any safety concerns or risks involved in converting a bike to electric?
When converting a bike to electric, it is important to take safety precautions to minimize potential battery hazards. This includes proper insulation, secure wiring, and regular maintenance of the battery system to ensure safe operation.
Do I need any special skills or technical knowledge to perform a bike conversion?
Special tools and technical knowledge are necessary for a successful bike conversion. Without them, common mistakes can occur, leading to safety concerns and risks. It is crucial to have the proper skills and understanding before attempting a conversion.
Conclusion
In conclusion, converting a bike to electric was an incredible journey. I learned the basics, chose the perfect conversion kit, and gathered all the necessary tools.
With careful preparation, I seamlessly installed the electric motor and battery. After a successful test ride and a few adjustments, my electric bike was ready to hit the road.
Remember, ‘where there’s a will, there’s a way’ – so don’t be afraid to embark on this adventure yourself. Enjoy the freedom, speed, and sustainability of your very own electric bike!