To avoid a crunchy headset, make sure you use the proper bearing press tools that fit your bike’s specifications and provide even pressure during installation. Carefully align the bearings before pressing and double-check alignment throughout the process. Clean all components beforehand, apply high-quality lubricant, and avoid rushing. Using the right tools and techniques is key. Keep these tips in mind, and you’ll improve your install success—more essential advice awaits if you keep exploring.
Key Takeaways
- Use properly matched and compatible bearing press tools to ensure even pressure during installation.
- Thoroughly clean contact surfaces and components before pressing bearings to prevent dirt and debris interference.
- Confirm correct alignment of bearings before pressing and apply steady, even force throughout the process.
- Regularly inspect and replace worn or damaged bearings, races, or cups to prevent misfit and noise.
- Use high-quality lubricants during installation and maintenance to reduce friction and ensure smooth headset operation.

Swagman Standard Fork Mount Rooftop Bike Carrier
EASY TO ASSEMBLE: The STANDARD is easy to assemble with no tools required, sets up in just minutes...
As an affiliate, we earn on qualifying purchases.
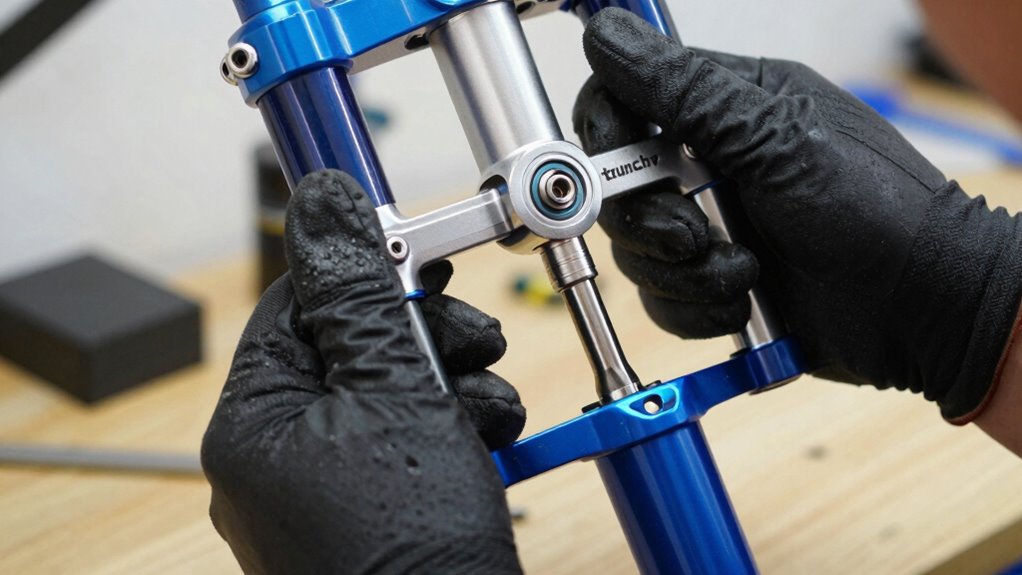
Why the Right Bearing Press Tool Keeps Your Headset Running Smoothly
Choosing the right bearing press tool is essential because improper installation can lead to premature headset failure or uneven steering. When you use the correct tool, it ensures proper lube application, reducing friction and preventing corrosion. Before pressing in new bearings, thoroughly clean the headset components to remove dirt, grease, and old lubricant that could compromise fit and function. Proper headset cleaning creates a clean surface, allowing the bearing to seat evenly and smoothly. A high-quality bearing press applies even pressure, minimizing the risk of damaging the bearings or frame. This careful process maintains the headset’s integrity, ensuring it runs smoothly for miles. Additionally, using the right installation technique helps prevent damage and guarantees a secure fit. Investing in the appropriate bearing press tools not only improves installation accuracy but also extends the lifespan of your headset and enhances your ride quality. Research supports that proper tool use significantly reduces installation errors and increases component longevity. Moreover, selecting the correct installation method can save you time and money by avoiding unnecessary repairs. Ultimately, investing in the right bearing press tool leads to a seamless installation, prolonging your headset’s lifespan and enhancing your ride quality.
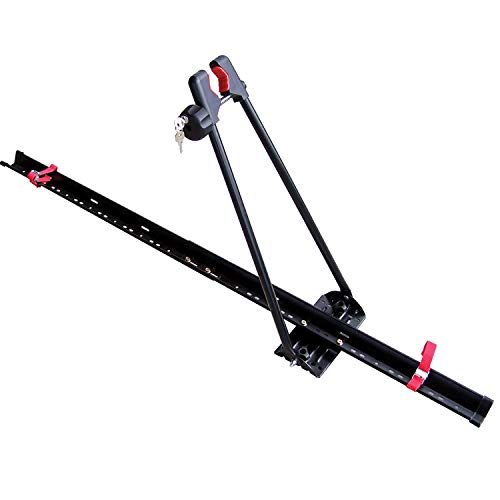
Swagman UPRIGHT Roof Mount Bike Rack
EASY TO ASSEMBLE: The UPRIGHT roof rack installs in minutes following the instructions and carries one bike with...
As an affiliate, we earn on qualifying purchases.
How to Choose the Best Bearing Press for Your Bike
When selecting the best bearing press for your bike, it’s important to take into account compatibility with your frame and headset type. Proper tool selection guarantees smooth bike maintenance and prevents damage to components. Consider these factors:
Choosing the right bearing press ensures compatibility, smooth maintenance, and prevents costly damage.
- Frame material and headset size to match your press.
- Whether the press is universal or designed for specific headset types.
- Your experience level with bike maintenance tools.
- Understanding easy document management can help you keep track of your maintenance records and ensure you select the right tools for your bike. Additionally, choosing a high-quality bearing press can reduce the likelihood of misalignment or crushing the headset, saving you time and money in the long run. For optimal results, selecting a press with adjustable features can accommodate different bike models and headset styles more effectively.
- Recognizing proper fit during installation is crucial to avoid damaging delicate components and ensuring longevity.
Investing in a properly fitted tool further ensures that your components are aligned correctly during installation or removal. Choosing the right bearing press minimizes the risk of misalignment or crushing the headset. It’s worth investing in a quality tool that suits your bike’s specifications. Avoid generic presses that might not fit well, as improper fit can lead to costly repairs. By carefully evaluating your bike’s requirements and the features of each press, you ensure a seamless maintenance process and a longer-lasting headset.

SYDSZ Roof Bike Rack Mount Upright Roof Bike Rack 1 Bike Carrier Car Roof Bicycle for Car Only Suitable for Removable Universal Crossbars
【COMPATIBILITY】Only applicable for installation on the driver's roof, fits 20" - 29" wheels. 64" long tray. Fits up...
As an affiliate, we earn on qualifying purchases.
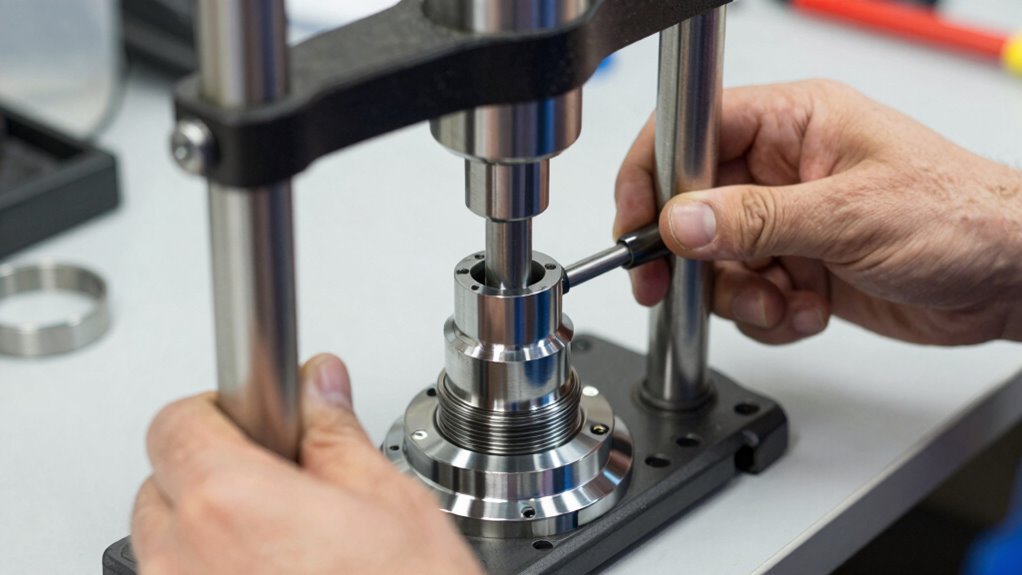
How to Install Headset Bearings the Right Way
To install headset bearings correctly, you need the proper tools that fit your bike. Make sure you align the bearings properly before tightening to avoid damage. Taking your time with these steps guarantees a smooth and lasting installation. Proper installation practices help ensure safety and longevity of your bike’s steering system. Using flat iron bike tools can facilitate precise installation and prevent common issues like a “crunchy” headset. Additionally, understanding bearing fit is crucial to achieving a secure and reliable connection. Developing a good installation technique can also reduce the risk of misalignment and improve overall performance. Incorporating auditory feedback therapy techniques can also assist in developing a better understanding of proper installation sounds, reducing the risk of misalignment.
Proper Tool Selection
Selecting the right press tools is essential for installing headset bearings correctly. Using incompatible tools or low-quality bearings can lead to damage or a crunchy headset. To guarantee a smooth installation, consider the following:
- Bearing quality: Opt for high-quality bearings that resist deformation and wear over time.
- Tool compatibility: Make sure the press tool matches your headset’s dimensions and type to avoid slipping or uneven pressure.
- Material and durability: Choose sturdy, well-made tools that won’t bend or break during installation, ensuring consistent, safe pressure. Investing in proper tools also reduces the risk of damaging delicate components.
- Proper tool selection supports proper alignment and helps prevent misfit issues that can cause a crunchy headset. Using the right pressure distribution during installation further ensures the bearing seats evenly and securely.
- Additionally, selecting tools with precise fitment minimizes the risk of damaging bearings or frames during pressing.
Proper tool selection helps prevent misalignment and ensures the bearing seats perfectly without risking damage to your headset components. When you pick the right tools, you’re setting yourself up for a reliable, long-lasting fit.
Align and Tighten Correctly
Proper alignment and tightening are crucial steps in installing headset bearings correctly. You need to confirm bearing alignment before pressing them into place, which prevents uneven load distribution and future issues. Use a press calibration to guarantee the bearing seats evenly, avoiding misalignment that can cause a crunchy headset. Carefully position the bearings so they sit flush and centrally aligned within their races. When tightening, apply steady, even pressure to avoid skewing the bearings or damaging the frame. Double-check the bearing alignment throughout the process. Proper press calibration ensures the bearings are pressed in straight, reducing the risk of premature wear or noise. Ensuring a proper cable connection can prevent issues that might contribute to headset problems. Taking your time to align and tighten correctly will help you achieve a smooth, reliable, and long-lasting headset installation. Additionally, paying attention to bearing preload helps maintain optimal contact and prevents play or crunchiness over time.

monTEK Swivel Bike Wall Mount, Bike Hangers for Garage, Space-Saving Vertical Bike Rack, Sturdy Bike Storage Rack Holds Up to 66lbs, Easy to Install, 4 Pack
【Strong, Safe & Secure】 monTEK bike wall mount is made of heavy-duty solid steel are able to hang...
As an affiliate, we earn on qualifying purchases.
Common Mistakes That Lead to Crunchy Headsets: and How to Avoid Them
Many people cause crunchy headsets by rushing through the installation process or neglecting proper technique. Using an incorrect tool can apply uneven pressure, damaging the bearing or headset. Poor lubrication during installation creates friction, leading to a gritty or crunchy feel. These mistakes often happen when you skip steps or don’t double-check your setup. To avoid this, verify you’re using the right press tools designed for your headset. Always apply proper lubrication to reduce friction and protect components.
- Rushing the process without proper setup
- Using incompatible or incorrect tools
- Skipping lubrication or using poor-quality lubricant
How to Troubleshoot and Fix a Crunchy Headset
When your headset feels crunchy, the first step is to identify what’s causing the issue. You’ll need to adjust the bearing pressure and check for worn components that might be contributing to the problem. Correcting these can restore smooth operation and prevent future damage. Additionally, inspecting the piercing for signs of irritation or infection can help ensure that the hardware is functioning properly and comfortably. To further enhance the longevity of your headset, consider incorporating modern farmhouse decor trends that emphasize natural and sustainable materials in your workspace, creating an environment that supports both comfort and function. Regular maintenance and understanding air-based cooking fundamentals can also help prevent similar issues in other kitchen tools. Being aware of dark psychology tactics can also help you recognize manipulation attempts that may impact your decision-making in troubleshooting and maintenance routines. Furthermore, understanding the essential oils for ear health can provide additional insights into maintaining overall comfort and health in related areas.
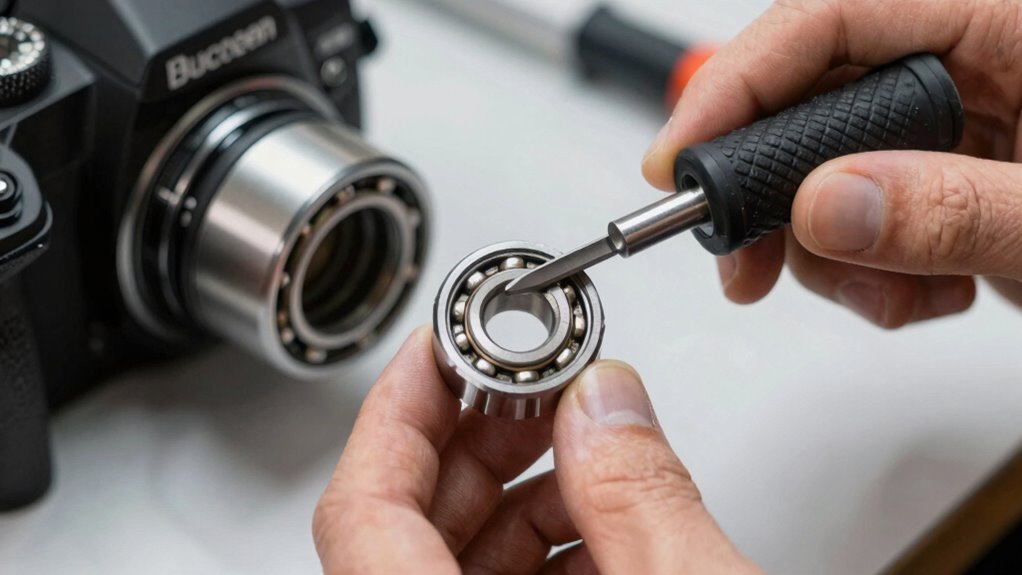
Identify Headset Issue
Have you ever experienced a crunchy or crackling sound in your headset during use? That’s a sign you need to identify the issue quickly. Start by inspecting the wear indicator—if it’s showing signs of wear, it could cause noise issues. Use noise diagnosis to pinpoint whether the sound comes from the bearing, headset, or other components. Check for loose or damaged parts, and listen carefully to locate the source of the crunch. Sometimes, debris or dirt can cause friction, creating the noise. Also, examine the headset’s contact points and connections. Proper identification helps you determine whether the problem is mechanical or related to insufficient lubrication. Addressing these issues early prevents further damage and ensures smooth operation.
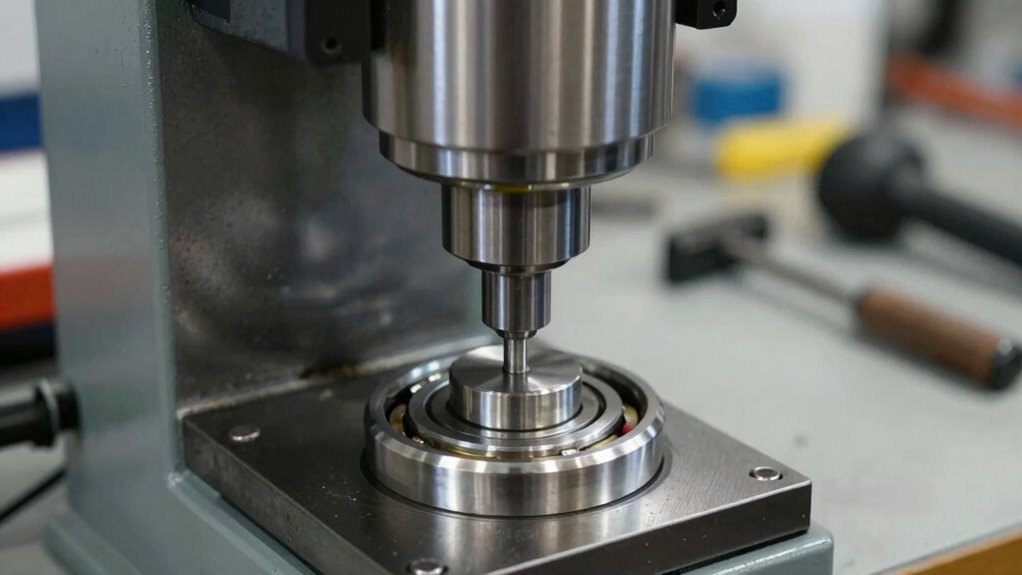
Adjust Bearing Pressure
To fix a crunchy headset caused by bearing issues, start by adjusting the bearing pressure. Confirm the bearing is seated properly in the head tube, as poor bearing seating can cause uneven pressure and noise. Check the press alignment to guarantee even force distribution during installation. Misalignment can lead to uneven bearing seating, resulting in a crunchy feel when turning the handlebars. If the bearing feels too tight or loose, carefully loosen or tighten the bearing preload, maintaining a smooth rotation without play. Use your bearing press to apply consistent, controlled pressure, avoiding over-tightening. Proper bearing seating and press alignment are essential to achieving the correct bearing pressure and eliminating the crunchiness in your headset. Additionally, inspecting the bearing quality and replacing worn or damaged bearings can significantly improve headset performance and prevent future issues.
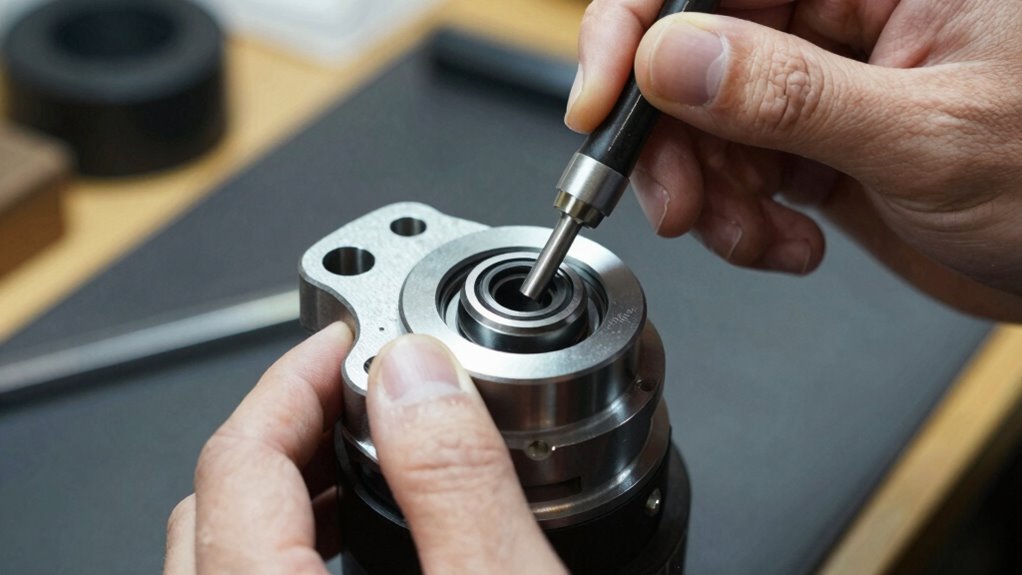
Replace Worn Components
Worn or damaged headset components are often the root cause of a crunchy feeling when turning your handlebars. Over time, bearing wear can cause increased resistance and noise. To fix this, you need to replace the affected components. Start by inspecting the bearings, races, and cups for signs of damage or corrosion. If you find excessive play or roughness, component replacement is necessary. Properly removing and installing new bearings ensures smooth steering and prevents future issues. Remember, using bearing press tools makes this process easier and more precise, reducing the risk of damaging new parts. Regularly checking and replacing worn components not only restores smoothness but also prolongs your headset’s lifespan, keeping your ride quiet and responsive.
Tips to Keep Your Headset Moving Smoothly for Years

Keeping your headset moving smoothly over the years requires regular maintenance and attention. Start by checking handlebar adjustments to ensure they’re tight but not overly compressed, which can cause unnecessary strain on the headset. Proper tire alignment also plays a vital role; misaligned tires can lead to uneven weight distribution, putting extra stress on your headset. Lubricate the bearings periodically with high-quality grease to reduce friction and prevent rust. Keep the steering components clean and free of dirt and debris, which can cause wear. When tightening the headset, avoid overtightening, as it can restrict movement and cause crunchiness. Regular inspections and adjustments help you catch issues early, extending the life of your headset and maintaining smooth steering for years to come.
Frequently Asked Questions
Can I Use a Bearing Press Tool on Different Bike Brands?
Yes, you can use a bearing press tool on different bike brands, but focus on bike compatibility and tool versatility. Confirm the tool fits the specific bearing sizes and types across various brands. Check if the press tool is adjustable or comes with different adapters, which enhances its versatility. Always verify compatibility beforehand to avoid damage and ensure smooth installation, regardless of the bike brand you’re working on.
What Materials Are Best for Making Bearing Press Tools?
For making bearing press tools, you should choose high-strength materials like hardened steel or alloy steel, as they offer excellent tool durability and resist wear under pressure. These materials guarantee you can apply consistent force without damaging the tool or the bearing. Proper material selection is vital for longevity and precision, enabling you to perform reliable, repeated presses across different bike brands without risking breakage or deformation.
How Often Should I Replace Headset Bearings?
Think of your headset bearings as the heartbeat of your ride. You should replace them when their bearing lifespan nears, typically every 1,000 to 2,000 miles, depending on conditions. Regular maintenance, like cleaning and lubrication, extends their life. If you notice roughness, play, or noise, it’s time for a change. Don’t wait for complete failure—proactive replacement keeps your ride smooth and prevents costly repairs later.
Are There Specific Safety Precautions for Using Bearing Press Tools?
When using bearing press tools, you should always wear appropriate safety gear like gloves and eye protection. Before starting, check your tools for proper maintenance—make sure they’re clean, well-lubricated, and free of damage. Follow the manufacturer’s instructions carefully, and never force the tool. By prioritizing safety gear and routine tool maintenance, you minimize risks and ensure smooth, safe operation during bearing installation or removal.
Is Professional Installation Necessary for Complex Headset Setups?
For complex headset setups, professional installation is highly recommended. DIY maintenance might seem cost-effective, but it can lead to improper fitting or damage if you’re not experienced. A professional ensures the headset is installed correctly, reducing the risk of issues like crunchiness or uneven wear. Investing in expert help guarantees peak performance and longevity, saving you time and potential costs down the line.
Conclusion
A smooth headset is like a steady heartbeat for your bike—it keeps your ride alive and responsive. Choosing the right bearing press tools and installing bearings correctly guarantees your bike’s spirit stays free of crunch. Avoid mistakes that cause friction and listen to your bike’s silent call for care. When you maintain with patience and precision, you’re not just fixing a headset—you’re nurturing the soul of your ride, ready to carry you smoothly through every adventure.