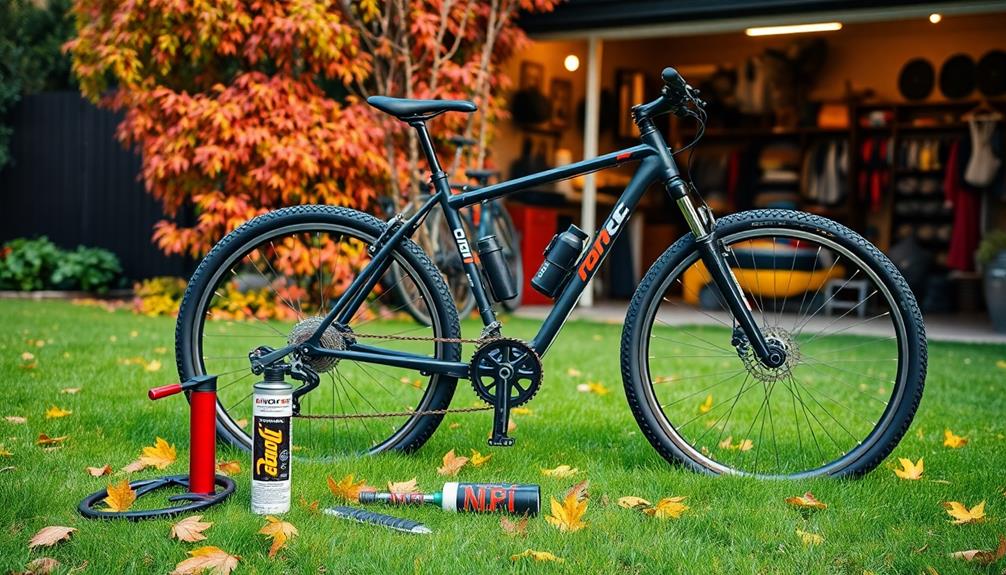

To clean your bike in under 20 minutes, gather your supplies, including a bike-specific cleaner, brushes, and microfiber cloths. Start by rinsing off loose dirt with gentle water flow, then apply cleaner and scrub all areas, paying special attention to the drivetrain and hard-to-reach spots. Rinse thoroughly, dry completely, and lubricate the chain and moving parts. Finish with a quick inspection and touch-ups—keep going to discover more tips for efficient, thorough bike maintenance.
Key Takeaways
- Gather all cleaning supplies and prepare a dust-free indoor storage area to streamline the process.
- Rinse the bike gently with low-pressure water, focusing on hard-to-reach areas and removing loose dirt.
- Use soft brushes and degreasers to clean drivetrain parts, then dry thoroughly to prevent rust.
- Apply bike-specific lubricants to the chain and moving parts, wiping off excess for smooth operation.
- Conduct final checks on tire pressure, brakes, and shifting, then wipe for a spotless, ready-to-ride bike.
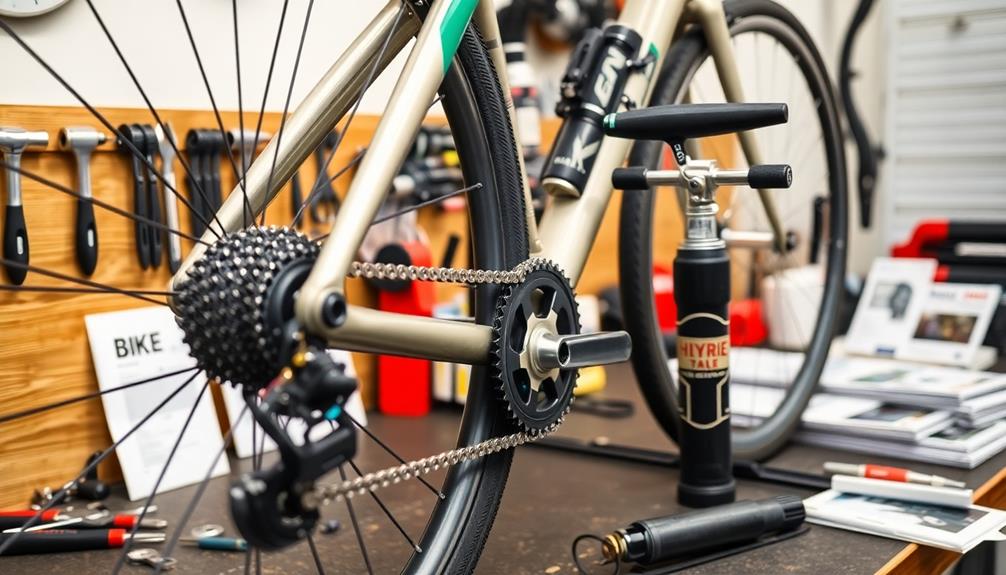
Gather Your Cleaning Supplies

Before you begin cleaning your bike, gather all the necessary supplies. Proper bike storage is essential to keep your bike in good condition between cleanings, so have a dedicated space ready. Consider how often you clean your bike; regular cleaning frequency prevents dirt buildup and prolongs its lifespan. For supplies, grab a bucket, mild soap or bike-specific cleaner, a soft brush, sponges, and a microfiber cloth. Having everything within reach helps streamline the process and keeps you from rushing or missing steps. If you store your bike indoors, ensure the area is dry and free of dust. Additionally, learning about bike maintenance can help you identify when cleaning is most needed and maintain your bike’s optimal performance. Regular cleaning also supports the longevity of components like the electric motor and battery, ensuring your bike stays in top shape. Using proper cleaning techniques can also prevent damage to sensitive parts and preserve the color accuracy of your bike’s paint and decals. By preparing your supplies and considering your bike’s storage and cleaning schedule, you’ll make the cleaning process quicker and more effective.
Rinse Off Loose Dirt and Debris
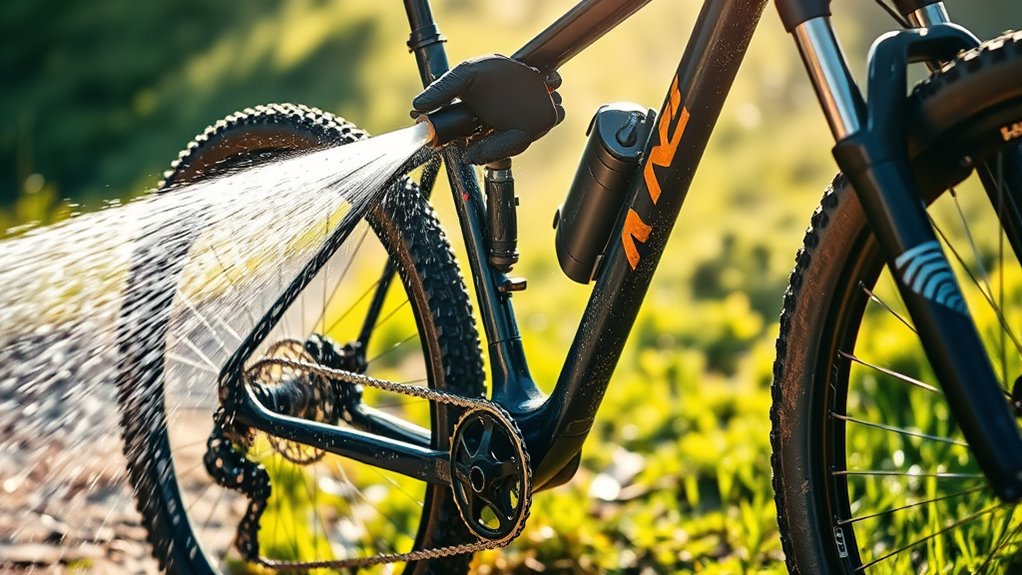
Start by using a gentle spray to rinse off loose dirt and debris, avoiding any harsh pressure. Focus on nooks and cracks where grime tends to hide, but steer clear of high-pressure jets that could harm your bike. This gentle approach guarantees a thorough clean without risking any damage. Incorporating appropriate cleaning techniques can also help maintain your bike’s appearance after cleaning. Additionally, understanding the versatility of Ford Transit vehicles can inspire you to choose suitable cleaning tools and storage solutions for your bike maintenance area.
Use a Gentle Spray
Using a gentle spray to rinse off loose dirt and debris is an essential first step in your bike cleaning routine. It helps loosen grime without damaging delicate components. As you spray, imagine the water softly flowing over your bike, lifting dirt gently away. To make this process effective, consider these steps:
- Use a hose with a nozzle set to a low pressure setting for a gentle spray.
- Opt for eco-friendly options like biodegradable cleaners or water-efficient nozzles.
- Focus the spray on areas with visible dirt, avoiding direct high-pressure blasts on bearings or seals.
- Regularly inspect and replace your filters to maintain optimal cleaning efficiency and air quality.
- Incorporate tuning Hyundai models into your maintenance routine to ensure all parts function smoothly, especially after cleaning. Additionally, understanding the importance of proper cleaning techniques can help prevent damage and extend your bike’s lifespan. Employing appropriate cleaning tools can also enhance the effectiveness of your routine and reduce the risk of scratches or other damage.
This method ensures thorough rinsing without risking damage, while eco-friendly options keep your cleaning routine sustainable. A gentle spray makes your bike ready for the next cleaning stages, saving time and effort.
Focus on Nooks and Cracks
As you focus on the nooks and cracks of your bike, it’s important to pay close attention to these often-overlooked areas where dirt and debris tend to accumulate. Use a soft brush or cloth to loosen grime in tight spaces, making frame detailing easier. Check for debris near brake calipers and cables, performing a quick brake inspection to ensure safety. These spots hide stubborn dirt that can affect performance if left untreated. For optimal results, consider tuning modifications that can improve your bike’s overall efficiency and longevity. Additionally, understanding safety gear requirements ensures you stay protected during maintenance and rides. When cleaning, you can also utilize appropriate tools such as specialized brushes or cloths designed for delicate components to prevent damage. To further enhance cleaning efficiency, employing advanced navigation sensors can help you reach every corner more thoroughly.
Avoid High-Pressure Jets
Have you ever damaged your bike’s components by using a high-pressure jet? A pressure washer set to high pressure can cause high pressure damage, especially to sensitive areas. To avoid this, stick to low-pressure settings or a gentle spray. When rinsing off loose dirt and debris, keep the nozzle at a safe distance and aim for these areas:
- Brake calipers and pads – high pressure can cause misalignment or damage.
- Bearings and hubs – excessive force may wash out lubrication.
- Derailleurs and cables – strong jets can bend or dislodge parts.
- Proper priming and cleaning techniques ensure smooth operation and prevent clogging in tools and equipment.
- Advancements in cleaning technology are making maintenance safer and more efficient. Additionally, understanding Mazda Tuning can help you select appropriate maintenance routines for your vehicle’s specific needs.
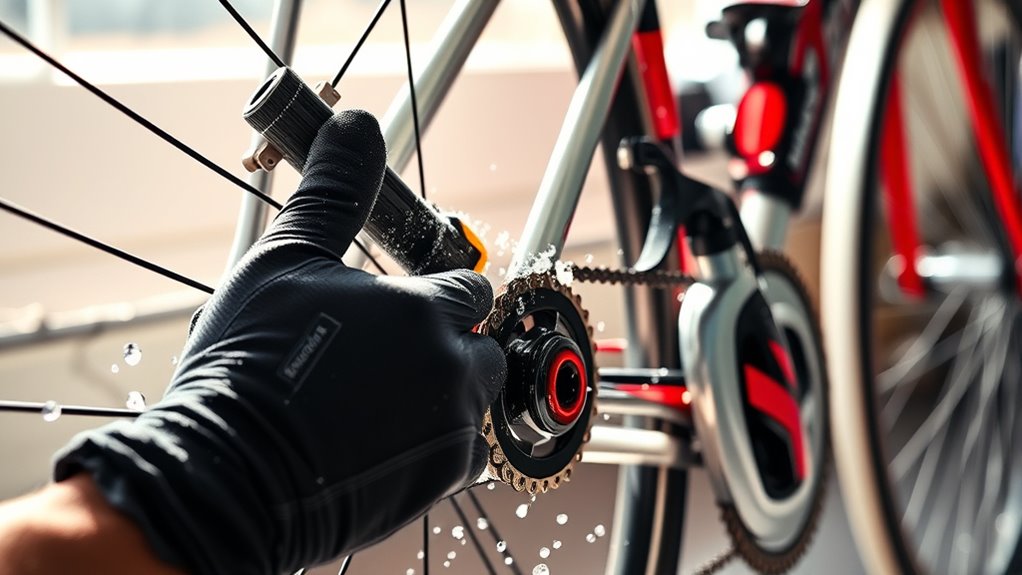
Apply Bike-Specific Cleaner and Scrub
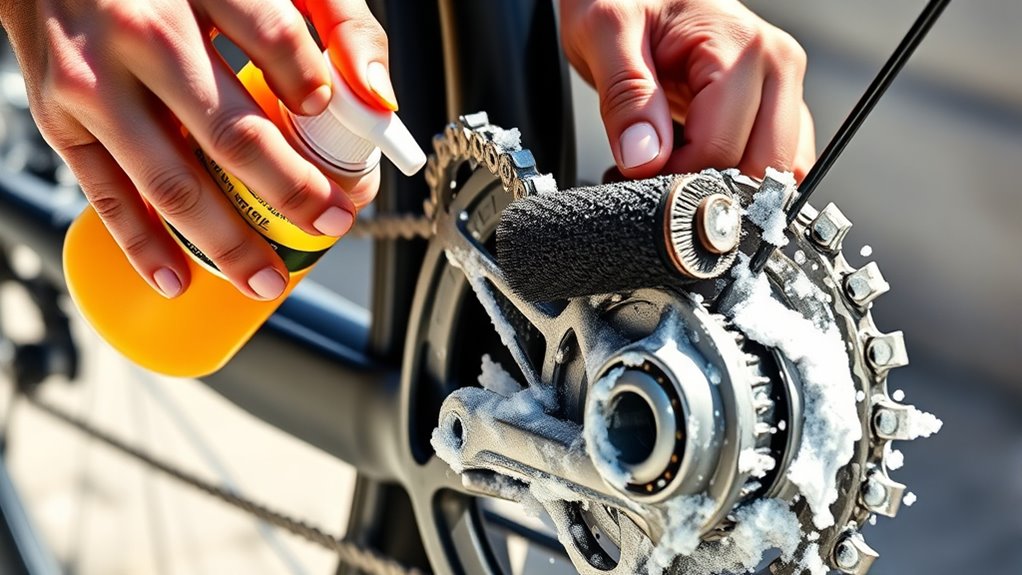
Before you start scrubbing, apply a bike-specific cleaner to all surfaces that have accumulated dirt and grime. Spray it evenly across the frame, wheels, and components, letting it loosen stubborn dirt. Use a soft brush or sponge to scrub gently, focusing on areas needing bike frame polishing for a shiny finish. Avoid harsh scrubbing that could damage delicate parts. As you clean, take this time to check your tires and remember tire inflation tips to maintain prime pressure. This ensures your bike rolls smoothly and reduces flats. Once you’ve scrubbed all surfaces, rinse thoroughly with water, removing any remaining cleaner. This step prepares your bike for a spotless, polished look while keeping it in top riding condition.
Focus on Drivetrain and Hard-to-Reach Areas

After thoroughly cleaning the main surfaces, shift your focus to the drivetrain and hard-to-reach areas. Start with chain maintenance by applying a degreaser, then scrubbing the chain with a brush to remove grime and buildup. Next, move to cassette cleaning: use a cassette brush to reach between the sprockets, removing dirt from the teeth. Finally, inspect the derailleur and jockey wheels, wiping away debris with a cloth or small brush. Visualize the chain gliding smoothly over a clean cassette, ensuring efficient shifting. Imagine your drivetrain shining like new, free of dirt and grime. Proper Jeep Tuning can also include detailed checks of drivetrain components to enhance overall performance. Regular maintenance of drivetrain parts, including lubrication, helps prevent premature wear and maintains smooth operation. Incorporating drivetrain inspection into your routine ensures all parts are functioning optimally. Paying attention to component wear can help identify potential issues early and prevent costly repairs. These steps not only improve performance but also extend your bike’s lifespan, all within your quick routine. Proper attention here keeps your ride silent and responsive.
Rinse and Dry Your Bike Thoroughly
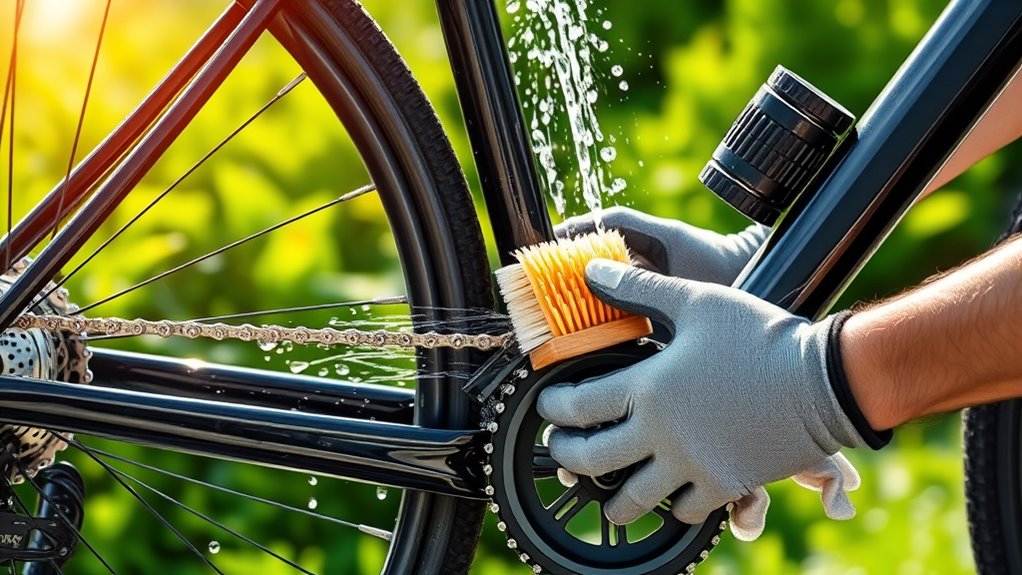
Once you’ve finished cleaning your bike, it’s essential to rinse away any remaining soap and loosened dirt thoroughly. Use a gentle stream of water to make sure no residue stays on the frame, components, or drivetrain. Proper rinsing prevents dirt buildup that can cause rust or damage, especially if you store your bike outdoors or in damp conditions. After rinsing, dry your bike completely with a clean, soft cloth or towel. Removing excess moisture helps prevent corrosion and keeps your bike looking new longer. Regular cleaning and drying, especially if you ride frequently or in wet environments, support good bike storage habits. This routine reduces the need for more intensive maintenance, saving you time and keeping your bike in top shape. Additionally, paying attention to the best cleaning techniques ensures your bike remains in optimal condition and prolongs its lifespan.
Lubricate the Chain and Moving Parts
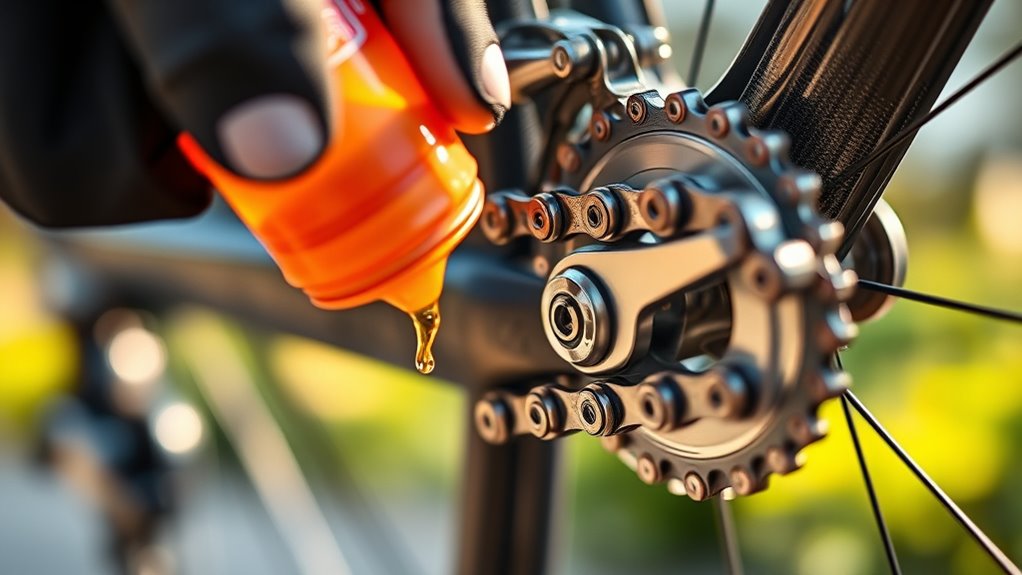
Choose the right lubricant for your bike’s chain and moving parts to guarantee smooth operation. When applying, use a sparing hand and spread it evenly to avoid buildup. Wipe away any excess carefully to prevent dirt from sticking.
Choose Proper Lubricant
Selecting the right lubricant is essential for keeping your bike’s chain and moving parts running smoothly. When choosing, consider the types of lubricants available:
- Dry lubes—ideal for dusty conditions, they won’t attract dirt.
- Wet lubes—perfect for wet weather, offering extra protection against moisture.
- All-purpose lubes—versatile for general use and moderate conditions.
Proper lubricant application guarantees ideal performance. Apply a small amount of lubricant to each link of the chain, focusing on the rollers and pins. Use just enough to coat the surfaces without excess, which can attract dirt. Be mindful of the type of riding you do to select the best lubricant, and always apply it evenly for smooth, quiet operation.
Apply Sparingly, Evenly
To guarantee peak performance, apply lubricant sparingly and evenly across your bike’s chain and moving parts. Excess lubricant can attract dirt and cause wear, so use just enough to coat the surfaces smoothly. Applying wax helps create a protective barrier, reducing friction and making future cleaning easier. For best results, wipe off any excess immediately to prevent buildup. Proper bike storage tips include keeping your bike in a dry, cool place to preserve lubrication and prevent rust. Remember, a little goes a long way.
| Key Point | Why It Matters | Tips |
|---|---|---|
| Apply sparingly | Prevents dirt accumulation | Use a small amount at a time |
| Apply evenly | Ensures smooth operation | Distribute with a brush |
| Use wax for protection | Extends chain life | Apply after cleaning |
Wipe Excess Carefully
After applying lubricant evenly, it’s important to wipe off any excess to prevent dirt buildup and guarantee smooth operation. Use a clean cloth to carefully remove the extra lubricant, focusing on avoiding streaks or missed spots. This step helps with dirt removal and keeps your chain and moving parts looking their best. Picture yourself:
- Gently sliding the cloth along the chain, catching any drips or dribbles.
- Wiping down the derailleur and sprockets to clear away residue.
- Polishing the surface shine on the chain rings and other components for a sleek look.
Final Inspection and Quick Touch-Ups

Once you’ve completed the main cleaning steps, it’s essential to perform a final inspection to guarantee every part of your bike is spotless and functioning properly. Start by checking the tire pressure; ensure your tires are inflated to the recommended PSI for maximum ride quality and safety. Next, test your brakes by squeezing the levers firmly—if they feel soft or unresponsive, adjust the brake cables or pads accordingly. Look over the chain and gears to confirm smooth shifting and lubrication. Wipe down any remaining spots or streaks you might have missed earlier. Finally, do a quick ride around the block to listen for unusual sounds or vibrations. This quick touch-up guarantees your bike is ready for a safe and efficient ride.
Conclusion
Now that you’ve powered through this routine in under 20 minutes, your bike will look and feel like it just rolled off the showroom floor—faster than you can say “new bike smell.” Regular cleaning not only keeps your ride shining but also boosts its performance and lifespan. So, make this quick routine part of your weekly ritual, and you’ll be conquering trails and streets with a bike that’s as fresh as the day you bought it. Happy riding!