Connect with us

Electric Bike

Collapsible Bike How To Make Electric Bike

Published

on

An image showcasing the step-by-step transformation of a collapsible bike into an electric bike

I’ve always been fascinated by the idea of having a bike that’s not only collapsible but also electric. The convenience of being able to fold it up and take it with me wherever I go, combined with the extra power of an electric motor, sounds like the ultimate transportation solution.

In this article, I’ll guide you through the process of making your own electric collapsible bike. From choosing the right bicycle to installing the conversion kit, I’ll provide you with all the technical details you need to know.

Let’s get started!

Key Takeaways

  • Collapsible bikes are a convenient and space-saving option for transportation.
  • Electric conversion kits can be installed on collapsible bikes to make them electric bikes.
  • It is important to gather the necessary tools and materials for customization, ensuring compatibility between components and the bike.
  • Safety and legal compliance should be prioritized, including testing, adjusting, and installing safety features on the electric bike.

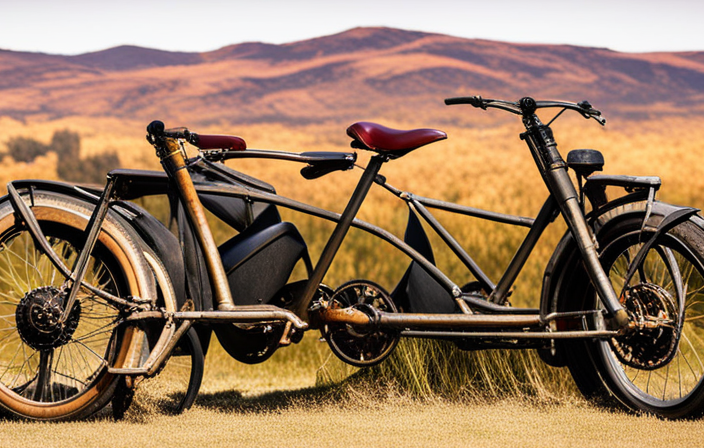
Understanding Collapsible Bikes

If you’re looking for a convenient and space-saving option for transportation, you’ll love understanding collapsible bikes.

Advertisement

These innovative bikes are designed with a folding mechanism that allows them to be easily folded and unfolded, making them perfect for commuters or those with limited storage space.

The folding mechanism is often simple and intuitive, with hinges and latches that secure the bike in its folded position.

Additionally, collapsible bikes are known for their lightweight design, making them easy to carry and maneuver.

Despite their lightweight nature, these bikes are still sturdy and durable, ensuring a safe and reliable ride.

Understanding the folding mechanism and the lightweight design of collapsible bikes is crucial when choosing the right bicycle for your needs.

Advertisement

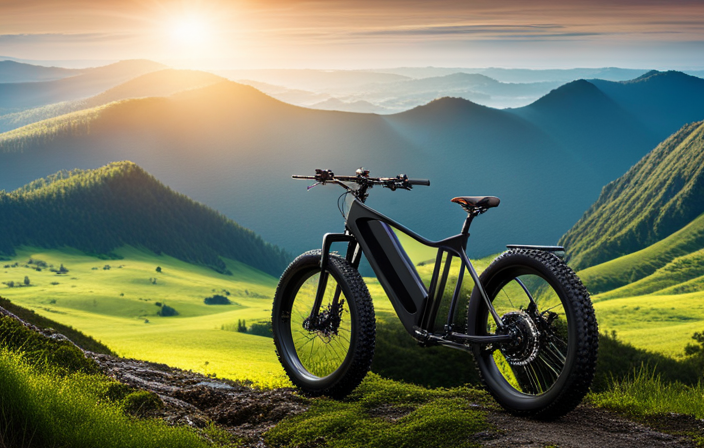
Choosing the Right Bicycle

When choosing the right bicycle, you’ll want to consider factors such as your riding style, terrain, and desired level of comfort. Here are four key things to keep in mind during the bike selection process:

  1. Riding Style: Determine how you plan to use your bike. Are you a casual rider, a commuter, or a mountain biker? Each riding style requires different features and components.

  2. Terrain: Consider the type of terrain you’ll be riding on. If you’ll be mainly on paved roads, a road bike or hybrid bike would be suitable. For off-road adventures, a mountain bike with robust tires and suspension is a better choice.

  3. Comfort: Pay attention to the bike’s frame geometry and saddle. A properly fitted bike will ensure a comfortable and enjoyable riding experience.

  4. Customization: Think about how customizable the bike is. Can you easily adjust the handlebars, seat height, and other components to suit your preferences?

By considering these factors, you can make an informed decision when selecting the right bicycle for your needs.

Once you’ve chosen your bike, it’s time to move on to gathering the necessary tools and materials for the customization process.

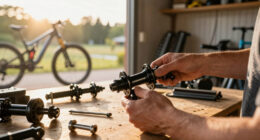
Gathering the Necessary Tools and Materials

Advertisement

To gather the necessary tools and materials, start by making a list of items required for the customization process. Consider factors such as power output, battery capacity, and compatibility with your bicycle’s frame when choosing the right components for your electric bike conversion.

Some essential tools you’ll need include a wrench set, screwdrivers, pliers, and wire cutters. Additionally, you’ll need specific parts like a motor, controller, battery pack, and throttle. Ensure that all the components you select are compatible with each other and with your bicycle.

Following a step-by-step conversion process will help streamline the customization. Now that you have your tools and materials ready, it’s time to prepare the bicycle for conversion. Remove unnecessary components and make necessary modifications.

Preparing the Bicycle for Conversion

Now that you’ve gathered the necessary tools and materials, it’s time to prepare your bicycle for conversion by removing unnecessary components and making necessary modifications.

Before starting the conversion process, it’s important to ensure that your bike is in good working condition. Begin by removing any accessories, such as baskets or fenders, that may interfere with the installation of the electric conversion kit.

Advertisement

Next, carefully detach the pedals and crankset, as they will need to be replaced with the motor and battery system. Check the condition of the chain and gears, replacing them if necessary. Additionally, inspect the brakes and make any adjustments or replacements to ensure optimal performance.

With these preparations complete, you’re now ready to move on to installing the electric conversion kit, which will transform your regular bicycle into an electric one.

Installing the Electric Conversion Kit

When it comes to installing an electric conversion kit, two key points to consider are attaching the motor and battery, and connecting the wiring and controls.

Advertisement

Attaching the motor and battery involves securely mounting the motor to the frame and finding a suitable location for the battery, ensuring proper weight distribution.

Connecting the wiring and controls entails carefully routing the wires and making the necessary connections between the motor, battery, and control unit, ensuring a reliable and efficient electrical system for the converted bike.

Attaching the Motor and Battery

First, make sure you have securely attached the motor and battery to your collapsible bike. When it comes to motor installation, carefully follow the manufacturer’s instructions.

Start by identifying the mounting points on your bike frame and aligning the motor with them. Use the appropriate screws or brackets to firmly attach the motor in place. Ensure that the motor is centered and level to prevent any imbalance while riding.

Next, focus on battery attachment. Find a suitable location on your bike frame, preferably near the motor, and securely fasten the battery using the provided mounting brackets or straps. Make sure the battery is securely attached to prevent any vibrations or movement during your rides.

Advertisement

With the motor and battery securely in place, we can now move on to connecting the wiring and controls, which will be discussed in the next section.

Connecting the Wiring and Controls

To ensure proper functionality, securely connect the wiring and controls of your motorized bicycle by following the manufacturer’s instructions.

Start by identifying the wiring harness and control components provided with your electric bike kit. Carefully route the wires from the motor, battery, and throttle to their respective connections. Use zip ties or adhesive clips to secure the wiring along the frame, ensuring it is away from moving parts and heat sources.

Double-check that all connections are tight and properly insulated to prevent any short circuits. If you encounter any issues during the wiring process, refer to the troubleshooting section in the instruction manual or contact the manufacturer for assistance.

Once the wiring is complete, you can move on to testing and adjusting the electric bike’s performance and settings.

Advertisement

Testing and Adjusting the Electric Bike

When it comes to testing and adjusting an electric bike, there are two key points to focus on: checking for proper functionality and making necessary adjustments.

Firstly, it is crucial to thoroughly inspect all components of the electric conversion kit, such as the motor, battery, and controller, to ensure they are functioning correctly.

Secondly, adjustments may be required to fine-tune the bike’s performance, such as adjusting the pedal assist level or the brake sensor sensitivity.

Checking for Proper Functionality

Before testing the collapsible electric bike, make sure all components are properly connected. Start by checking the battery to ensure it’s securely inserted and fully charged. Troubleshooting issues with the battery can prevent any potential problems during testing.

Verify that the power switch is in the ‘on’ position and that the battery indicator displays a full charge. Next, inspect the motor connections to ensure they’re tightly connected. Check the wiring for any signs of damage or loose connections.

Advertisement

Additionally, examine the brake system to ensure it’s functioning properly. Squeeze the brake levers and ensure they engage the brakes smoothly and effectively. By meticulously checking for proper functionality, you can identify and address any issues before making necessary adjustments to the bike.

Making Necessary Adjustments

First, you’ll need to ensure that all necessary adjustments have been made to the bike to optimize its performance. Here are the steps to follow:

  1. Adjusting Seat Height: Start by loosening the seat clamp bolt using an Allen wrench. Raise or lower the seat post to your desired height, making sure it is secure and aligned properly. Tighten the clamp bolt to secure the seat in place.

  2. Installing Handlebar Grips: Remove the old grips by spraying some soapy water or rubbing alcohol on them to make them easier to slide off. Apply a small amount of grip glue or hairspray to the handlebars, then slide the new grips on, making sure they are aligned and fully seated.

  3. Check and Adjust Brakes: Ensure the brake pads are aligned with the rim or disc. Adjust the cable tension using the barrel adjuster until the brakes engage properly when the levers are squeezed.

  4. Fine-tuning Gears: Adjust the front and rear derailleurs to ensure smooth shifting. Use the barrel adjusters to fine-tune the cable tension, and make sure the chain is properly aligned on the cassette and chainrings.

Ensuring Safety and Legal Compliance

When it comes to electric bikes, it’s crucial to understand the local regulations that govern their use. This includes knowing the maximum speed limits, age restrictions, and any additional requirements that may vary from one jurisdiction to another.

Additionally, installing safety features such as lights, reflectors, and a bell can greatly enhance visibility and ensure compliance with legal standards.

Understanding Local Electric Bike Regulations

To understand the local electric bike regulations, you should check if there are any restrictions on speed or power limits. It is essential to prioritize electric bike safety while enjoying the numerous benefits of electric bikes. Here are a few key points to consider:

Advertisement
  • Speed Restrictions:

  • Some areas may impose a maximum speed limit for electric bikes, typically around 20 or 25 miles per hour.

  • Make sure to adhere to these speed restrictions to ensure your safety and comply with local regulations.

  • Power Limits:

  • Certain regions might have specific power limitations for electric bikes, often measured in watts.

  • It is crucial to verify if your electric bike falls within the allowed power range to avoid any legal complications.

Understanding the local regulations regarding speed and power limits is vital for electric bike safety and legal compliance. Once you have a clear understanding of these regulations, you can proceed to the next step of installing necessary safety features on your electric bike.

Installing Safety Features

Once you’ve checked the local regulations, it’s important to ensure you have the necessary safety features installed on your e-bike.

Installing lights is crucial for visibility, especially when riding at night or in low light conditions. Choose lights that are bright, durable, and have different modes for various situations.

Front lights should provide a clear beam to illuminate the road ahead, while rear lights should be bright enough to alert drivers behind you.

Additionally, investing in a quality helmet is essential for protecting your head in case of accidents. Look for a helmet that fits comfortably and meets safety standards.

Advertisement

Transitioning into the next section about maintaining your electric collapsible bike, it’s crucial to regularly check and maintain these safety features to ensure they are functioning properly.

Maintaining Your Electric Collapsible Bike

When it comes to maintaining your electric collapsible bike, there are a few key points to keep in mind.

First, regular cleaning and lubrication are essential to ensure smooth operation and longevity of the bike’s components.

Second, proper battery maintenance is crucial for optimal performance and to extend the battery’s lifespan.

Lastly, knowing when and how to replace the battery is important to avoid any unexpected breakdowns during your rides.

Advertisement

Regular Cleaning and Lubrication

Regularly cleaning and lubricating your collapsible bike is essential for maintaining its performance and longevity. Proper maintenance not only keeps your bike running smoothly but also prevents unnecessary wear and tear.

To start, make sure to clean your bike regularly using a mild detergent and water, avoiding high-pressure sprays that could damage sensitive components. Once clean, focus on lubricating key areas such as the chain, gears, and pedals. Using a high-quality lubricant, apply a small amount to each part, ensuring even coverage. This will reduce friction and prevent rust, allowing for a smoother and more efficient ride.

Effective lubrication is crucial for maximizing your bike’s performance and extending its lifespan.

Now, let’s delve into the next topic of battery maintenance and replacement.

Battery Maintenance and Replacement

To properly maintain and replace your battery, it’s important to follow the manufacturer’s guidelines and ensure you’re using a compatible replacement.

Advertisement

When it comes to battery maintenance, charging is a critical aspect. It is recommended to charge your battery fully before each ride, and avoid overcharging or undercharging it. This will help to extend the battery life and ensure optimal performance.

It’s also important to regularly check the battery’s connections and clean them if necessary, as a poor connection can affect the charging efficiency.

Additionally, storing the battery in a cool and dry place when not in use can help to prolong its lifespan.

Riding and Enjoying Your Electric Collapsible Bike

You can effortlessly ride and enjoy your electric collapsible bike. To ensure a smooth and safe ride, here are some essential riding techniques and safety precautions:

  • Maintain proper body posture for balance and stability.
  • Gradually accelerate and decelerate to prevent jerky movements.
  • Use the brakes evenly and avoid sudden stops.
  • Always wear a helmet and reflective clothing for visibility.
  • Observe traffic rules and be mindful of pedestrians and other vehicles.

By following these guidelines, you can ride your electric collapsible bike with confidence and minimize the risk of accidents.

Now that you have mastered the basics, let’s explore further customization options for your bike, allowing you to personalize and enhance your riding experience.

Advertisement

Exploring Further Customization Options

Now that we’ve covered the basics, let’s dive into the various ways you can customize and enhance your riding experience even further. When it comes to further customization ideas and personalizing your electric bike, the possibilities are endless. Whether you want to add practical accessories for convenience or aesthetic upgrades to make your bike stand out, there are plenty of options to choose from.

To give you an idea of the customization possibilities, here’s a table showcasing some popular upgrades:

Customization Description Benefits
Upgraded Seat Ergonomic design with extra padding for added comfort Enhanced ride quality
Handlebar Extensions Allows for a more upright riding position, reducing strain on wrists and back Improved posture and reduced fatigue
LED Lights Bright and energy-efficient lights for increased visibility and safety Enhanced visibility during night rides

Frequently Asked Questions

How much does an electric conversion kit for a collapsible bike typically cost?

An electric conversion kit for a collapsible bike typically costs around $200 to $500. The cost estimation depends on the brand, quality, and features of the kit.

Can any type of collapsible bike be converted into an electric bike?

Yes, any type of collapsible bike can be converted into an electric bike. The electric bike conversion process involves adding a motor, battery, and controller. Electric collapsible bikes offer the benefits of easy transportation and a boost in speed and power.

Are there any legal restrictions or requirements for riding an electric bike?

There are legal restrictions and requirements for riding an electric bike. These include following electric bike regulations and safety guidelines. It is important to familiarize oneself with these rules to ensure a safe and legal riding experience.

Advertisement

How long does it typically take to install an electric conversion kit on a collapsible bike?

Can you imagine how quickly you can transform your collapsible bike into an electric one? The average installation time for an electric conversion kit is approximately 2-4 hours, depending on your familiarity with the necessary tools.

Are there any specific maintenance tasks that are unique to electric collapsible bikes?

Some unique maintenance tasks for electric collapsible bikes include checking the battery charge, inspecting the motor and wiring, and lubricating the moving parts. Regular maintenance ensures optimal performance and extends the lifespan of the bike. Additionally, electric bikes offer benefits such as increased speed and reduced effort during riding.

Conclusion

In conclusion, converting a collapsible bike into an electric bike is a rewarding and practical project that anyone can undertake.

By following the step-by-step guide provided, you can transform your regular bike into a convenient and efficient mode of transportation.

While some may argue that the process is complicated or time-consuming, it is important to remember that with the right tools and materials, anyone can successfully complete this project.

Advertisement

So don’t let any doubts hold you back – get started on your electric collapsible bike today and experience the benefits for yourself.

Olivia's writing is not only informative but also inspiring. She has a knack for telling stories that capture the essence of cycling and the joy it brings to people's lives. Her writing has been praised by readers and industry experts alike for its clarity, depth, and authenticity. In addition to her writing, Olivia is also an avid cyclist. She enjoys exploring new trails and routes and has participated in several cycling events and races. Her first-hand experience with cycling gives her a unique perspective on the sport, reflected in her writing. Overall, Olivia is a talented writer passionate about cycling and dedicated to producing high-quality content for FlatironBike. Her contributions to the magazine have helped make it a go-to source for cycling enthusiasts worldwide.

Continue Reading
Advertisement

Electric Bike

How To Turn Light On Electric Bike

Published

on

By

An image of a gloved hand gently pressing the small circular button on an electric bike's handlebar, causing a sleek LED headlight to illuminate the darkened road ahead with a crisp, bright beam

Turning on the lights of an electric bike is an easy but important task to ensure your safety and visibility while riding. In this article, I will walk you through the steps of turning on the lights on your electric bike, from finding the light switch to preserving battery power.

By following these steps, you can confidently ride your electric bike knowing that you are equipped with the necessary lighting for a safe and enjoyable journey.

Let’s dive in and explore how to turn on the light on your electric bike.

Key Takeaways

  • Most electric bike light switches are located near the handlebars, display panel, or frame.
  • Consult the user manual if you have trouble finding the light switch.
  • Ensure the battery is fully charged for optimal light functionality.
  • Locate and activate the light control button or switch to ensure proper functioning of the lights before riding.

Locate the Light Switch on Your Electric Bike

Find the light switch on your electric bike and let the glow illuminate your path, making your nighttime rides safer and more enjoyable.

Advertisement

Finding the light switch on your electric bike is crucial for ensuring a smooth and hassle-free ride. Most electric bike light switches are located near the handlebars, either on the left or right side. However, some models may have them integrated into the display panel or even on the frame. If you’re having trouble locating the switch, consult your electric bike’s user manual for specific instructions.

Troubleshooting common issues with electric bike lights, such as flickering or not turning on, can often be resolved by checking the connections, replacing the battery, or resetting the system.

Once you’ve found the light switch, ensure your electric bike’s battery is charged to avoid any unexpected darkness during your rides.

Ensure Your Electric Bike’s Battery is Charged

Make sure you’ve got enough juice in your battery so you can cruise with confidence on your awesome e-bike. Electric bike battery maintenance is crucial to ensure optimal performance and longevity.

A fully charged battery offers numerous benefits, including increased range and power output. To ensure your electric bike’s battery is charged, start by plugging it into a compatible charger. Check the battery’s indicator to ensure it is charging properly. It is recommended to charge the battery fully before each ride.

Advertisement

Regularly inspect the battery for any signs of damage or wear, and clean the contacts to maintain good conductivity. Having a fully charged battery will not only provide a smooth and enjoyable ride but also maximize the overall efficiency of your electric bike.

Now, let’s move on to turning on the bike’s power.

Turn on the Bike’s Power

To start riding, all you need to do is flip the switch on the handlebars and feel the exhilaration as the bike’s power kicks in. Before you do this, make sure your electric bike’s battery is fully charged for optimal performance. The battery charge level can be checked using the display panel located on the handlebars.

Once you have confirmed that the battery is sufficiently charged, locate the power switch, usually positioned near the handlebars or on the bike’s frame. Flip the switch to the ‘on’ position and listen for a soft click, indicating that the bike’s power has been activated. Now, you are ready to take off and experience the smooth acceleration of the electric motor.

Locate the light control button or switch to ensure visibility during your ride.

Advertisement

Locate the Light Control Button or Switch

Get ready to ride in style by finding the handy button or switch that controls the illuminating brilliance of your bike. To install bike lights or troubleshoot existing ones, locating the light control button or switch is crucial. This control allows you to easily turn the bike lights on and off, ensuring visibility and safety during your rides. To find the light control button or switch, refer to the bike’s manual or look for it on the handlebars or frame. Once located, press or flip the light control button or switch to activate the lights. Ensure the lights are functioning properly before heading out on your ride. With the lights on, you’ll be able to enjoy your ride with added visibility and confidence. Transitioning into the next section, let’s explore how to press or flip the light control button or switch correctly.

Press or Flip the Light Control Button or Switch

Find the control button or switch and effortlessly press or flip it to activate the illuminating brilliance of your ride.

When it comes to using lights on an electric bike, there are several advantages to consider.

Advertisement

First and foremost, lights greatly enhance visibility, ensuring that you are seen by other road users, especially in low-light conditions.

Additionally, lights help to improve your own visibility, allowing you to better navigate the road ahead.

When choosing the right light for your electric bike, consider factors such as brightness, beam pattern, and battery life.

Opt for a light that offers sufficient brightness to illuminate your path, a wide beam pattern for optimal coverage, and a long-lasting battery to avoid frequent recharging.

By selecting the right light and effortlessly activating it, you can enjoy a safe and well-illuminated ride.

Advertisement

Now, let’s check if the lights are working properly.

Check if the Lights are Working Properly

Make sure your ride is aglow with a brilliant beacon of safety and confidence by checking the functionality of your illuminating companions.

To test if the lights on your electric bike are working properly, you can follow these testing methods and troubleshooting tips.

First, turn on the bike’s power and switch on the lights. Check if all the lights, including the front headlight, rear tail light, and any additional lights, are functioning as expected. Ensure that the light beams are bright and focused, providing adequate visibility.

If any lights are malfunctioning or not illuminating properly, you may need to inspect the wiring connections, replace bulbs, or consult the bike’s manual for specific troubleshooting steps.

Advertisement

Once you have confirmed that the lights are in good working order, you can proceed to adjust the light’s brightness or mode, if applicable, to suit your preference and riding conditions.

Adjust the Light’s Brightness or Mode, if Applicable

Illuminate your ride by adjusting the brightness or mode of your electric bike’s lights to suit your preference and enhance your visibility in different riding conditions.

To adjust the brightness, locate the brightness adjustment button or switch on your bike’s light control panel. Press the button or switch to increase or decrease the brightness level according to your needs.

Alternatively, if your electric bike has multiple light modes, choose the mode that best suits your riding environment. These modes may include steady, flashing, or pulsing lights. Experiment with each mode to find the one that provides optimal visibility while riding.

Once you have adjusted the brightness or selected the desired mode, you can use the headlight for illumination in front.

Advertisement

Use the Headlight for Illumination in Front

To enhance your visibility and ensure a safe ride, you can rely on the headlight to illuminate the road ahead. It’s like having a small sun guiding your way, providing a beam of light that stretches up to 100 meters.

The headlight on an electric bike usually comes with adjustable brightness levels, allowing you to customize the intensity of the light based on your preference and riding conditions. To adjust the headlight brightness, simply locate the brightness control button or switch on the handlebar. Pressing or sliding this button will cycle through the different brightness levels available.

Additionally, some electric bikes offer different headlight modes, such as steady beam, flashing mode, or even an eco-mode to conserve battery power. Experiment with these modes to find the one that suits your needs best.

Now, let’s move on to the next section about using the taillight for visibility from behind.

Use the Taillight for Visibility from Behind

Don’t forget about the taillight – it’s your key to being seen from behind and ensuring your safety on the road.

Advertisement

Using taillights for visibility during the daytime is crucial, as it helps other drivers and cyclists see you from a distance. A bright taillight can make all the difference in preventing accidents.

Additionally, it is important to use reflectors on your electric bike. These small, reflective devices bounce light back to its source, making you more visible to others. Reflectors can be attached to the rear of your bike, pedals, and even your clothing.

By using both taillights and reflectors, you greatly enhance your visibility and minimize the risk of being involved in a collision. Consider installing additional lights for enhanced safety without compromising style or functionality.

Consider Installing Additional Lights for Enhanced Safety

To ensure optimal visibility and safety while riding an electric bike, it is crucial to consider installing additional lights in addition to the taillight.

One effective option is to install reflectors on the front and rear of the bike, which can greatly enhance visibility, especially in low-light conditions.

Advertisement

Additionally, incorporating LED lights into the bike’s lighting system can provide numerous benefits. LED lights are energy-efficient, durable, and offer bright illumination, making them ideal for riding at night or in foggy conditions. Furthermore, LED lights have a longer lifespan compared to traditional incandescent lights, reducing the need for frequent replacements.

By utilizing reflectors and LED lights, riders can significantly improve their visibility and increase their safety on the road.

Now, let’s move on to the next section and familiarize ourselves with local laws and regulations regarding bike lights.

Familiarize Yourself with Local Laws and Regulations Regarding Bike Lights

Before hitting the road on your e-bike, it’s important to get familiar with the local laws and regulations regarding bike lights, so you can ride safely and avoid any legal trouble.

Different regions may have specific requirements for bike lights, such as the minimum brightness, color, and positioning. Understanding these local laws will help you ensure that your electric bike is equipped with the appropriate lights.

Advertisement

Some areas may mandate a white light on the front and a red light on the rear, while others may have additional regulations regarding reflectors. By familiarizing yourself with the local laws and bike light regulations, you can confidently ride your electric bike knowing that you are in compliance with the law and promoting your own safety.

Now, let’s move on to the next section about using reflective gear or accessories for added visibility.

Use Reflective Gear or Accessories for Added Visibility

Ensure your own safety while riding by wearing reflective gear or using accessories that enhance your visibility. Reflective clothing benefits are crucial in increasing your visibility to other road users, especially during low-light conditions.

Here are four items that can help improve your visibility:

  • Reflective vests: These vests are made with highly reflective material that can be easily seen by motorists.

  • Reflective ankle bands: These bands wrap around your ankles and provide additional visibility.

  • Reflective tape: Apply this tape to your bike frame, helmet, or other accessories to increase visibility.

  • Reflective backpack covers: These covers fit over your backpack and have reflective strips to enhance your visibility from behind.

Proper lighting is essential for your safety as well. Ensure that your bike is equipped with front and rear lights that comply with local regulations. Regularly check and maintain your bike’s lights to ensure they are in proper working condition.

Advertisement

Regularly Check and Maintain Your Bike’s Lights

Make sure you regularly inspect and upkeep the illumination on your bicycle to guarantee optimal visibility and safety while riding. Bike light maintenance is essential for ensuring that your lights are in proper working condition at all times.

Start by checking the batteries or power source to make sure they are fully charged or functioning properly. Next, inspect the light bulbs or LEDs to ensure they are not burnt out or damaged. Clean the lenses to remove any dirt or debris that may obstruct the light output. It is also important to periodically check the wiring connections to ensure they are secure and not frayed.

Remember, the importance of bike lights cannot be overstated, as they greatly enhance your visibility to other road users. Ensure your lights are off when not in use to conserve battery life and transition into the next section.

Ensure Your Lights are Off When Not in Use to Conserve Battery Life

When you’re not riding, remember to switch off your bicycle’s lights to preserve battery power and extend their lifespan. This conservation tip is essential for optimizing battery life on your electric bike. Turning off your lights when not in use will help conserve energy and ensure that your battery lasts longer. To help you remember, here is a table outlining the benefits of switching off your lights:

Conservation Tips Battery Life Optimization
Switch off lights Extend battery lifespan
Conserve energy Preserve battery power
Optimize battery Longer battery life

By following these conservation tips and turning off your lights when not in use, you can enjoy your rides with the added safety and visibility of electric bike lights.

Advertisement

Enjoy Your Rides with the Added Safety and Visibility of Electric Bike Lights

Enhance your riding experience by embracing the safety and visibility that comes with the inclusion of powerful, illuminating bike lights. When it comes to lighting options for electric bikes, there are a variety of choices available that offer numerous benefits.

One of the main advantages of using bike lights is the increased visibility they provide, ensuring that you are easily seen by other road users. This is particularly important in low-light conditions or when riding at night.

Additionally, bike lights improve your safety by illuminating the road ahead, allowing you to spot any obstacles or hazards in your path. They also make you more visible to pedestrians and other cyclists, reducing the risk of accidents.

By investing in high-quality bike lights, you can enjoy your rides with peace of mind, knowing that you are taking every precaution to stay safe and visible on the road.

Frequently Asked Questions

How do I adjust the brightness or mode of the light on my electric bike?

To adjust the brightness or mode of the light on my electric bike, I can refer to the user manual for specific instructions. If I encounter any issues, troubleshooting steps such as checking the connections or replacing the bulb may be necessary.

Advertisement

Are there any local laws or regulations regarding the use of bike lights that I should be aware of?

Local regulations regarding bike light requirements vary, but it’s crucial to comply for safety. In the US, 48% of cyclist fatalities occur between 6pm and midnight. Understanding and abiding by local laws ensures visibility and reduces the risk of accidents.

Should I consider installing additional lights on my electric bike for enhanced safety?

Yes, installing additional lights on my electric bike enhances safety. Reflective gear increases visibility, especially at night. A horn alerts others to my presence. These features are essential for safe riding.

How often should I check and maintain the lights on my electric bike?

Regular maintenance of electric bike lights is crucial for safety. To troubleshoot common issues, check connections, replace faulty bulbs, and clean lenses. Remember, neglecting maintenance can lead to disastrous consequences—your lights may go out in the middle of the night, leaving you stranded in darkness!

Is it necessary to ensure that the lights are turned off when not in use to conserve battery life?

Yes, it is necessary to ensure that the lights are turned off when not in use to conserve battery life. Leaving the lights on can significantly impact the battery life of an electric bike. Automatic light sensors provide benefits by turning the lights on and off based on the surrounding light conditions.

Conclusion

In conclusion, turning on the light on your electric bike is as simple as flipping a switch.

Advertisement

With a fully charged battery and the press of a button, your bike will illuminate the path ahead, guiding you like a beacon in the dark.

Remember to regularly check and maintain your lights, and use reflective gear for added visibility.

By ensuring your lights are off when not in use, you can conserve battery life and enjoy your rides with the added safety and visibility of electric bike lights.

Continue Reading

Electric Bike

How To Turn A Pedal Bike Into An Electric Bike

Published

on

By

An image showcasing the transformation of a pedal bike into an electric bike

I recall my initial experience riding an electric bike – it felt like a burst of energy flowing through me, effortlessly pushing me forward. If you’ve ever fantasized about feeling that exhilaration, then you’re in for a treat.

In this article, I will show you step by step how to transform your ordinary pedal bike into an electrifying machine. So buckle up, grab your tools, and get ready to embark on this exciting journey of bike electrification.

Let’s dive in!

Key Takeaways

  • Consider weight distribution and secure attachment when mounting the battery
  • Choose appropriate locations for mounting the throttle and pedal assist sensor
  • Ensure proper installation of pedals, crankset, and bottom bracket
  • Regularly maintain and service the electric bike for optimal performance and safety

Assess Your Bike’s Compatibility for Conversion

Before you begin, make sure your bike’s frame and components are suitable for conversion.

Advertisement

Assessing your bike’s compatibility is an essential step in the conversion process. First, consider the frame material; steel and aluminum are ideal choices due to their strength and durability.

Next, examine the bike’s fork to ensure it can accommodate the weight and torque of an electric motor. Check the dropouts, as they need to be compatible with the motor axle size. Additionally, evaluate the bottom bracket for compatibility with the motor’s mounting system.

Lastly, assess the bike’s brakes and gearing system, as they may need to be upgraded to handle the increased speed and power of the electric motor.

Once you have determined your bike’s compatibility, you can move on to gathering the necessary tools and equipment for the conversion process.

Gather the Necessary Tools and Equipment

You’ll need to gather all the tools and equipment necessary for the conversion. Choosing the right tools is crucial for a successful electric bike conversion.

Advertisement

First, you’ll need a set of wrenches and screwdrivers to remove the bike’s components. Additionally, a torque wrench will ensure proper tightening of bolts and nuts. A multimeter is essential for testing and troubleshooting electrical connections.

Safety goggles and gloves are a must to protect yourself during the process. When working with electricity, it’s vital to take proper safety precautions. Make sure to disconnect the battery before touching any wires and wear insulated gloves when handling electrical components. By following these safety measures, you can avoid accidents and injuries.

Now that you have gathered your tools and know the importance of safety, let’s move on to the next step and choose the right electric bike conversion kit.

Choose the Right Electric Bike Conversion Kit

Advertisement

To select the appropriate electric bike conversion kit, make sure to consider factors like your bike’s specifications, desired range, and power requirements. Here are three key factors to keep in mind when choosing an electric bike conversion kit:

  1. Compatibility: Ensure that the kit is compatible with your bike’s frame and wheel size. Electric bike conversion kits come in various sizes and configurations, so make sure to choose one that fits your bike seamlessly.

  2. Power and Range: Determine the power and range you need for your electric bike. Consider factors like terrain, distance, and intended use to determine the motor power and battery capacity that will best suit your needs.

  3. Quality and Features: Look for a conversion kit that offers high-quality components and reliable features. Consider factors like motor efficiency, battery life, and ease of installation.

By carefully considering these factors, you can choose the right electric bike conversion kit that will enhance your biking experience and provide the benefits of electric bikes.

Now, let’s move on to the next section and learn how to remove the pedals, crankset, and bottom bracket.

Remove the Pedals, Crankset, and Bottom Bracket

Once you’ve gathered the necessary tools, start by loosening the bolts on the pedals using a wrench. This is an essential step in the process of turning your pedal bike into an electric bike. Removing the pedals, crankset, and bottom bracket will allow you to install the electric bike conversion kit properly. Here is a helpful table to guide you through the process:

Tools Needed
Wrench
Allen key
Screwdriver
Steps
Loosen pedal bolts using a wrench
Remove pedals
Use an Allen key to remove the crankset
Remove the bottom bracket using a wrench or screwdriver

Bike modification is a fantastic way to transform your regular bike into an alternative mode of transportation. After completing the removal of the pedals, crankset, and bottom bracket, the next step is to install the electric bike conversion kit’s motor.

Advertisement

Install the Electric Bike Conversion Kit’s Motor

Now that everything is removed, it’s time to install the motor from the electric bike conversion kit. Follow these motor installation tips to ensure a smooth process and avoid common issues:

  1. Position the motor: Determine the ideal location for the motor on your bike frame. Choose a spot that provides proper clearance and doesn’t interfere with other components.

  2. Secure the motor: Use the provided mounting brackets and hardware to securely attach the motor to the frame. Double-check that it is tightly fastened to prevent any movement during operation.

  3. Connect the motor cables: Follow the manufacturer’s instructions to connect the motor cables to the battery and controller. Ensure proper alignment and tight connections to avoid any electrical issues.

  4. Test the motor: Before riding, perform a thorough test of the motor. Check for any abnormal noises, vibrations, or overheating. Troubleshoot any issues promptly to ensure a safe and reliable electric bike conversion.

With the motor successfully installed, it’s time to connect it to the battery and controller for the next step in the conversion process.

Connect the Motor to the Battery and Controller

Make sure you carefully follow the manufacturer’s instructions to properly connect the motor to the battery and controller for a successful electric bike conversion.

Advertisement

First, locate the connectors on the motor, battery, and controller. Identify the positive and negative terminals on each component.

Connect the motor wires to the controller, ensuring a secure and tight connection.

Then, connect the battery to the controller, matching the positive and negative terminals. Double-check all connections to ensure they are properly secured.

Once connected, test the system by turning on the bike. Troubleshooting common issues with electric bike conversions may include checking for loose connections, ensuring the battery is fully charged, and inspecting the wiring for any potential damage.

With the motor, battery, and controller properly connected, you are now ready to mount the battery on the bike frame, integrating it seamlessly into your electric bike setup.

Advertisement

Mount the Battery on the Bike Frame

To securely mount the battery on your bike frame, ensure that you have chosen a suitable location that provides stability and easy access for charging. The mounting position should be sturdy and secure, as the battery is an essential component of your electric bike conversion.

It is important to consider the battery capacity when selecting the mounting position. A higher capacity battery may be larger and heavier, requiring a more robust mounting location. Additionally, take into account the weight distribution of the bike to maintain proper balance and stability.

Once the battery is securely mounted, you can proceed to install the throttle and/or pedal assist sensor, which will allow you to control the electric assistance provided by the motor.

Install the Throttle and/or Pedal Assist Sensor

You’ll need to first determine the appropriate location for mounting the throttle and/or pedal assist sensor on your bike frame. This step is crucial to ensure proper functionality and ease of use.

Here are four key considerations for installing the throttle and troubleshooting the pedal assist sensor:

Advertisement
  1. Choose a convenient location on the handlebars for the throttle, ensuring it is within easy reach while maintaining a comfortable grip on the handlebars.

  2. Mount the throttle securely, using the provided clamp or adhesive, making sure it is firmly attached to prevent any movement during rides.

  3. For the pedal assist sensor, locate the sensor bracket on the bottom bracket shell of the bike frame and attach the sensor securely.

  4. Test the functionality of both the throttle and pedal assist sensor before proceeding to the next step.

With the throttle and pedal assist sensor successfully installed, we can now move on to reinstalling the pedals, crankset, and bottom bracket.

Reinstall the Pedals, Crankset, and Bottom Bracket

Now that the throttle and pedal assist sensor are securely installed, we can focus on reinstalling the pedals, crankset, and bottom bracket. This step is of utmost importance as it ensures that the power from the motor is efficiently transferred to the bike’s drivetrain.

Follow these steps to successfully reinstall the pedals, crankset, and bottom bracket:

  1. Begin by removing any dirt or debris from the bottom bracket shell using a brush or rag.

  2. Apply a small amount of grease to the threads of the bottom bracket and insert it into the shell.

  3. Tighten the bottom bracket using a bottom bracket tool, ensuring it is secure and aligned properly.

  4. Attach the crankset to the bottom bracket, making sure it is aligned and tightened to the manufacturer’s specifications.

  5. Finally, reinstall the pedals, ensuring they are threaded correctly and tightened securely.

By completing these steps, you will have successfully reinstalled the pedals, crankset, and bottom bracket, allowing for a smooth and efficient electric bike conversion.

Now let’s move on to testing the electric bike conversion for functionality.

Advertisement

Test the Electric Bike Conversion for Functionality

Once you’ve completed the installation process, it’s important to ensure the electric bike conversion is functioning properly. Testing the electric bike conversion is crucial to ensure a safe and reliable ride.

There are several testing methods you can employ to check the functionality. First, check the battery level and ensure it is fully charged. Next, test the throttle and make sure it responds smoothly. You should also test the pedal assist system to ensure it engages and disengages properly.

If any issues arise during testing, there are troubleshooting tips you can follow to identify and fix the problem. By thoroughly testing the electric bike conversion, you can address any issues before hitting the road.

Transitioning into the next section, let’s now discuss how to adjust and fine-tune the electric bike’s performance.

Adjust and Fine-Tune the Electric Bike’s Performance

To optimize your ride, it’s important to make adjustments and fine-tune the performance of your newly converted electric bicycle. Here are some key areas to focus on:

Advertisement
  • Tire Pressure: Check and adjust the tire pressure regularly to ensure optimal grip and efficiency.

  • Gearing: Experiment with different gear ratios to find the right balance between power and speed.

  • Brake Adjustment: Ensure that your brakes are properly aligned and adjusted for maximum stopping power.

  • Battery Placement: Position the battery in a way that balances the weight distribution of the bike, improving stability and handling.

By fine-tuning these aspects of your electric bike, you can greatly improve efficiency and increase speed.

Once you’ve optimized the performance of your bike, it’s time to learn how to ride and control it effectively, ensuring a safe and enjoyable experience.

Learn How to Ride and Control Your Electric Bike

Take some time to familiarize yourself with the controls and handling of your new electric ride. Electric bike safety is of utmost importance, so it is crucial to understand how to properly operate your electric bike.

Start by adjusting the seat height to ensure a comfortable and stable riding position. Familiarize yourself with the throttle, which controls the speed of the electric motor. Get to know the pedal-assist system and how to switch between different levels of assistance. Practice braking, both with the handbrakes and the regenerative braking system.

Learn how to navigate corners smoothly and maintain balance. Understanding the intricacies of your electric bike will not only enhance your riding experience but also contribute to your overall safety.

Advertisement

Now that you have mastered the controls and handling, let’s explore how to maintain and service your electric bike regularly.

Maintain and Service Your Electric Bike Regularly

Make sure you regularly check the tire pressure, clean the chain, and lubricate the moving parts to keep your electric bike running smoothly. Regular maintenance is crucial for the longevity and performance of your electric bike.

By following a few simple steps, you can avoid common issues and ensure that your bike is always in top condition. Troubleshooting may be required from time to time, such as diagnosing electrical problems or replacing worn-out components.

Upgrading and customizing your electric bike is also an exciting option to enhance its capabilities, whether it’s installing a more powerful motor or adding additional batteries for extended range. However, before you embark on any modifications, it’s important to adhere to safety precautions and local laws, ensuring that your electric bike remains safe and legal to ride.

Adhere to Safety Precautions and Local Laws

Always remember to adhere to safety precautions and local laws when riding your electric bike, ensuring your own safety and the safety of others.

Advertisement

When it comes to safety measures, it is crucial to wear a helmet, as it provides protection for your head in case of an accident. Additionally, make sure to follow the speed limits and traffic rules specific to your area.

Familiarize yourself with the legal requirements for electric bikes, such as registration, licensing, and age restrictions. Check your local laws to determine if you need to have lights, reflectors, or a horn installed on your electric bike.

Enjoy the Benefits of Your Upgraded Electric Bike

To fully enjoy the benefits of your upgraded e-bike, you should explore new routes and experience the thrill of effortless speed. One way to enhance your riding experience is to improve battery life. By properly maintaining and charging your e-bike’s battery, you can ensure that it lasts longer and provides consistent power throughout your rides.

Regularly check the battery’s charge level and avoid letting it fully drain, as this can shorten its lifespan. Additionally, finding the best riding routes can make a significant difference in your enjoyment of the upgraded e-bike. Look for paths that offer scenic views, minimal traffic, and smooth surfaces to maximize your riding pleasure.

Utilize online resources and community forums to discover popular routes and gain insights from experienced riders. Happy riding!

Advertisement

Frequently Asked Questions

How can I assess my bike’s compatibility for conversion?

To assess your bike’s compatibility for conversion, start by examining the frame and fork for any damage or wear. Check if there is enough space to fit the necessary components, such as the motor and battery. Consider the weight capacity and compatibility of the brakes and gears.

What are the necessary tools and equipment required for the conversion process?

To modify a bike into a DIY electric bike, you will need a conversion kit, including a motor, battery, controller, and wiring. Other necessary tools include wrenches, pliers, screwdrivers, and a bike stand for easier installation.

How do I choose the right electric bike conversion kit for my bike?

To choose the right electric bike conversion kit, consider the three main types: front wheel, rear wheel, and mid-drive. Factors to consider include motor power, battery capacity, compatibility with your bike, and your budget.

Are there any specific safety precautions or local laws I should adhere to while converting my bike?

When converting a pedal bike into an electric bike, it is important to consider electric bike conversion safety and legal requirements. Adhering to local laws and wearing proper safety gear can ensure a safe and legal conversion process.

How can I maintain and service my electric bike regularly to ensure its longevity and optimal performance?

To prolong the lifespan and ensure optimal performance of your electric bike, regular maintenance is crucial. This includes checking and lubricating the chain, inspecting the battery and electrical connections, and keeping the tires properly inflated.

Advertisement

Conclusion

In conclusion, converting a pedal bike into an electric bike is a rewarding and exciting endeavor. With the right tools and equipment, along with a compatible bike and a quality conversion kit, you can transform your ordinary bike into a powerful and efficient electric machine.

Just like a caterpillar morphing into a butterfly, your bike will experience a metamorphosis that allows it to soar to new heights. So take the plunge, follow the steps, and soon you’ll be enjoying the benefits of your upgraded electric bike.

Happy riding!

Continue Reading

Electric Bike

How To Turn A Normal Bike Into An Electric Bike

Published

on

By

An image showing a person attaching a sleek, silver electric motor to the back wheel of a conventional bicycle

Upgrade your reliable bicycle into an exhilarating electric ride with this in-depth guide on converting a regular bike into an electric one.

From assessing your bike’s compatibility to choosing the right conversion kit, this article will equip you with the knowledge and tools needed to embark on this exhilarating journey.

We’ll delve into the step-by-step process, ensuring you have the necessary equipment and skills to successfully complete the conversion.

So, get ready to revamp your ride and experience the power and convenience of an electric bike.

Key Takeaways

  • Assess the bike’s frame and components for compatibility and condition before proceeding with a conversion kit
  • Gather the necessary tools and materials before starting the conversion process
  • Remove existing components such as the chain, derailleur system, pedals, crankset, brakes, and wheels
  • Install the conversion kit by securely attaching the electric motor to the bike frame, connecting it to the drivetrain, and mounting the battery and controller

Assess Your Bike’s Compatibility

Advertisement

Assess if your bike is compatible with an electric conversion kit. Before you can turn your normal bike into an electric one, it’s crucial to evaluate its compatibility.

Start by examining the frame and fork, ensuring they are sturdy and in good condition. The size of the frame should also be taken into consideration, as some conversion kits may not fit certain frame sizes.

Additionally, check the condition of your bike’s wheels, brakes, and gears, as these components may require necessary modifications for the conversion.

Assessing the compatibility of your bike is essential to ensure a successful electric conversion.

Once you have evaluated your bike’s compatibility, you can move on to the next step of choosing the right electric conversion kit, which will be discussed in the subsequent section.

Advertisement

Choose the Right Electric Conversion Kit

To choose the right electric conversion kit for your bicycle, you need to start by evaluating the specifications and features of different options. Research options and compare prices to find the best fit for your needs.

Here are three key factors to consider when selecting an electric conversion kit:

  • Motor Power: Determine the desired power output for your electric bike. Consider factors such as terrain and desired speed to choose an appropriate motor size.

  • Battery Capacity: Look for a battery with sufficient capacity to meet your riding distance requirements. Consider factors such as voltage, amp-hour rating, and battery chemistry.

  • Compatibility: Ensure that the conversion kit is compatible with your bike’s frame and wheel size. Check for any additional accessories or modifications needed.

Once you have chosen the right electric conversion kit, it’s time to gather the necessary tools and equipment to begin the conversion process seamlessly.

Gather the Necessary Tools and Equipment

Advertisement

Make sure you have all the tools and equipment you’ll need to complete the electric conversion of your bicycle seamlessly. Select the appropriate tools based on the type of bike you have and the electric conversion kit you’ve chosen. Common tools you may need include a wrench, screwdriver, pliers, and wire cutters.

Additionally, you’ll need to buy the necessary materials such as zip ties, electrical tape, and heat shrink tubing. These materials are essential for securing and insulating the electrical components of your electric bike.

Once you have all the tools and materials ready, you can move on to the next step and remove the existing components from your bike, making way for the installation of the electric conversion kit.

Remove the Existing Components

First, start by removing the existing components from your bicycle to prepare for the installation of the electric conversion kit. This step is crucial in the process of bike modification and performance enhancement. To ensure a smooth transition, consider the following:

  • Remove the chain and derailleur system.
  • Take off the pedals and crankset.
  • Disconnect the brake calipers and remove the brake levers.
  • Remove the front and rear wheel assemblies.
  • Disconnect the cables and wires connected to the existing components.

By removing these components, you create space for the new electric conversion kit. Once you have completed this step, you can proceed to the next section where you will install the electric conversion kit and begin the transformation of your normal bike into an electric bike.

Install the Electric Conversion Kit

Advertisement

Once you’ve removed the existing components, it’s time to install the electric conversion kit on your bicycle.

Begin by attaching the electric motor to the frame of the bike. Ensure that it is securely fastened and properly aligned.

Next, connect the motor to the drivetrain of the bike using a chain or belt, depending on the kit you have chosen. Make sure the connection is tight and the chain/belt is properly tensioned.

Then, mount the battery and controller onto the frame, ensuring they are securely fastened and well-protected.

Advertisement

Finally, connect the battery and controller to the electric motor using the provided wiring harness. Double-check that all connections are secure and properly insulated.

With the electric conversion kit installed, you are now ready to move on to the next step of connecting the battery and controller to complete the bike modification.

Connect the Battery and Controller

To connect the battery and controller, you’ll need to ensure a secure and tight connection between the two components. Start by identifying the wires coming from the battery and the controller. Typically, there will be a positive (red) and negative (black) wire from each component.

Connect the positive wire from the battery to the positive wire on the controller and the negative wire from the battery to the negative wire on the controller. Ensure that the connections are tight and properly insulated to avoid any loose connections or short circuits.

If you encounter any issues during the connection process, such as wires not fitting together or loose connections, carefully double-check the wiring diagram provided with your electric conversion kit. Additionally, troubleshoot common issues like loose or damaged wires, blown fuses, or faulty connections. It’s important to address these issues before proceeding to the next steps.

Advertisement

Now that the battery and controller are securely connected, you can move on to testing and fine-tuning your electric bike’s performance.

Test and Fine-Tune the Electric Bike

Now that you have connected the battery and controller, it’s time to test and fine-tune your electric bike. This step is crucial to ensure the efficiency of your bike and troubleshoot any potential issues. To do this, you will need to take your bike for a test ride and observe its performance. Pay attention to the speed, acceleration, and overall handling of the bike. If you notice any problems, such as a decrease in power or difficulty in controlling the bike, you may need to make adjustments to the battery or controller settings. By testing and fine-tuning your electric bike, you can optimize its performance and address any issues that may arise. Once you are satisfied with the results, you can proceed to the next section on how to upgrade your bike’s accessories.

Upgrade Your Bike’s Accessories

Upgrading the accessories on your bike can enhance its functionality and performance. When it comes to bike modification, choosing the right accessories can make a significant difference.

Start by upgrading your bike’s brakes. High-quality brakes will improve your bike’s stopping power and ensure a safe ride.

Next, consider upgrading your bike’s suspension system. A better suspension will provide a smoother and more comfortable ride, especially when tackling rough terrains.

Advertisement

Additionally, upgrading your bike’s tires to ones with better traction and durability will enhance its overall performance.

Finally, don’t forget to invest in a reliable bike lock to keep your newly upgraded electric bike secure.

Upgrading these accessories will not only improve your bike’s performance but also provide a more enjoyable riding experience.

Learn proper maintenance and care to ensure the longevity of your electric bike.

Learn Proper Maintenance and Care

Make sure you properly maintain and care for your electric bike to ensure its longevity and optimal performance. Proper cleaning is essential to keep your electric bike in good condition. Use a soft cloth and mild detergent to clean the frame, wheels, and other components. Avoid using high-pressure water as it can damage the electrical components. Regularly inspect the battery for any signs of damage or wear. Clean the battery terminals with a dry cloth to remove any dirt or debris. Additionally, keep the battery charged when not in use and avoid extreme temperatures that can affect its performance. Following these maintenance practices will help prolong the life of your electric bike and ensure that it continues to provide a smooth and enjoyable ride.

Advertisement

Now that you know how to properly maintain your electric bike, you can confidently enjoy your new electric bike experience.

Enjoy Your New Electric Bike Experience

Get ready to fully embrace and enjoy your exciting new ride on an electric bike. As you embark on this thrilling adventure, you’ll quickly realize the numerous benefits of owning an electric bike.

One of the key advantages is the added power and speed that an electric motor provides, allowing you to effortlessly conquer hills and cover longer distances without breaking a sweat. Additionally, electric bikes offer a more eco-friendly mode of transportation, reducing your carbon footprint while enjoying the great outdoors.

However, it’s important to prioritize safety when riding your electric bike. Always wear a helmet, follow traffic rules, and be aware of your surroundings. Take the time to familiarize yourself with the electric bike’s controls and features to ensure a smooth and safe riding experience.

So, hop on your electric bike and enjoy the ride of a lifetime!

Advertisement

Frequently Asked Questions

How much does it cost to convert a regular bike into an electric bike?

The cost of converting a regular bike into an electric bike varies depending on the type of electric bike conversion kit you choose. Factors to consider include the motor power, battery capacity, and additional features.

Can any type of bike be converted into an electric bike?

Yes, any type of bike can be converted into an electric bike. Converting a mountain bike offers the advantage of better off-road capability, while converting a road bike provides a more streamlined and efficient ride on paved surfaces. However, there are also disadvantages to consider, such as added weight and potential modifications needed for the conversion process.

Is it difficult to install the electric conversion kit?

Installing an electric conversion kit can be challenging. Pros include increased speed and range, while cons include added weight and potential damage to the bike. Common mistakes to avoid are improper wiring and incorrect installation of components.

How long does it take to complete the conversion process?

Converting a normal bike into an electric bike typically takes around 2-4 hours, depending on your experience and the complexity of the kit. Required tools include wrenches, screwdrivers, pliers, and possibly a drill.

Can the electric conversion kit be easily removed if I decide to go back to a regular bike?

Yes, the electric conversion kit can be easily removed if you decide to go back to a regular bike. However, it is important to consider the benefits of converting a bike into an electric bike and the pros and cons of using an electric conversion kit.

Advertisement

Conclusion

Congratulations on successfully converting your normal bike into an electric bike! By following the steps outlined in this guide, you have transformed your regular bicycle into an efficient and eco-friendly mode of transportation.

Did you know that electric bikes have been proven to increase the distance people are willing to travel by bike? A study conducted in the Netherlands found that e-bike riders were willing to cycle an average of 9.4 kilometers, compared to only 6.3 kilometers by regular bike riders.

So get out there and enjoy the benefits of your new electric bike!

Continue Reading
Advertisement

Affiliate disclaimer

As an affiliate, we may earn a commission from qualifying purchases. We get commissions for purchases made through links on this website from Amazon and other third parties.

About us

We are a passionate team driven by the belief that cycling is a fantastic and accessible way to stay active while enjoying the beauty of the outdoors. Our mission is to share our love for cycling with as many people as possible. We provide a welcoming environment for individuals of all ages, abilities, and backgrounds to come together and ride bikes. With Ralf’s visionary leadership, Zane’s expertise in cycling adventures, and Olivia’s dedication to community building, we strive to create a vibrant space where everyone can experience the joy of cycling. Through group rides, workshops, and inclusive events, we inspire and empower individuals to embrace an active lifestyle. Join us in our quest to pedal together, embrace the joy of cycling, and foster connections that last a lifetime.

Advertisement

Trending