
To DIY paint your bike fenders and frames, start by thoroughly cleaning and lightly sanding the surfaces, then apply a metal-appropriate primer in thin coats. Use high-quality enamel or acrylic paints designed for outdoor use, applying multiple thin layers for smooth coverage. Finish with a clear topcoat for extra protection and shine. Taking your time during each step guarantees a professional look and durable results, so keep going to discover all the tips for a flawless finish.
Key Takeaways
- Properly clean, sand, and prime metal surfaces before applying paint for better adhesion and durability.
- Choose high-quality, UV-resistant enamel or acrylic paint suitable for outdoor use.
- Apply multiple thin coats of paint and a clear protective topcoat for a smooth, long-lasting finish.
- Allow sufficient drying and curing time between coats to prevent drips and uneven coverage.
- Finish with a protective clear coat in your preferred gloss level to enhance appearance and shield against environmental damage.

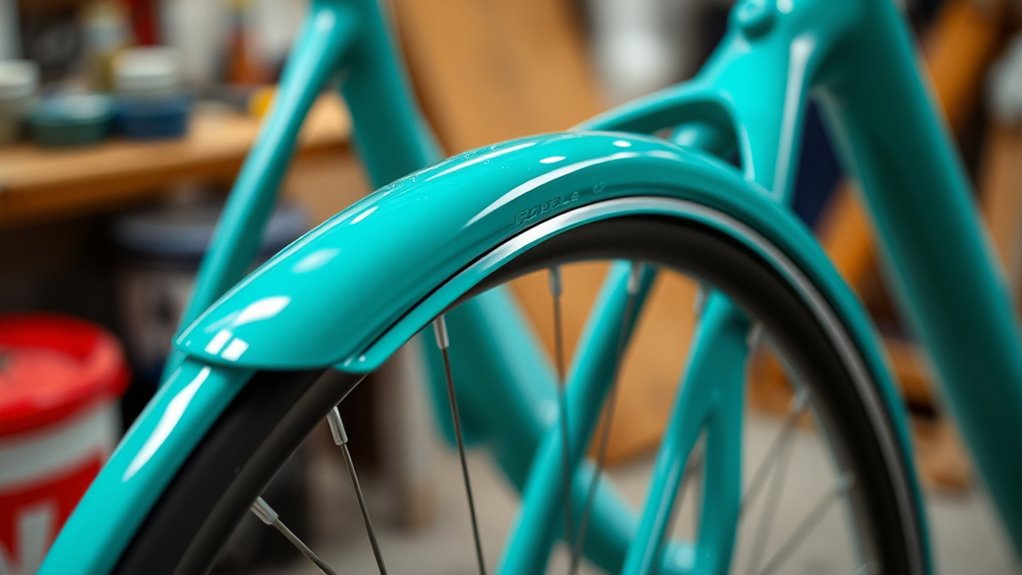
Painting your fenders and frames is a practical way to give your bike a fresh, personalized look while protecting the metal from rust and corrosion. When you choose to paint your bike components, you’re enhancing their durability and appearance simultaneously. The key to a professional-looking finish lies in selecting the right paint finish and guaranteeing proper frame protection. A good paint finish not only makes your bike look sharp but also adds a layer of defense against the elements. Glossy finishes tend to highlight color vibrancy and offer a smooth, reflective surface, while matte finishes provide a more subdued, modern look. Consider your style preferences and the level of durability you need when choosing between these options. Regardless of your choice, preparing the surface correctly is essential for a clean, long-lasting result.
Painting your bike parts protects metal and enhances style with glossy or matte finishes for a personalized, durable look.
Before you start painting, thoroughly clean the fenders and frame to remove dirt, grease, or old paint. Sanding the surface lightly with fine-grit sandpaper helps create a rough texture that allows the paint to adhere better. Using a primer designed for metal surfaces is a vital step; it promotes better paint adhesion and offers an additional layer of frame protection. Applying primer in thin, even coats and letting each layer dry completely ensures a smooth foundation for your paint finish. Once primed, you can proceed with the paint, applying it in multiple thin coats rather than one thick layer. This approach reduces drips, prevents uneven coverage, and results in a more professional appearance. Additionally, selecting paints with UV resistance helps ensure your paint job stays vibrant over time despite exposure to sunlight.
When choosing your paint, opt for a high-quality enamel or acrylic designed explicitly for metal or outdoor use. These types of paints are more resistant to chipping, fading, and corrosion, which extends the life of your paint job. Be sure to follow the manufacturer’s instructions for drying times and curing processes. After the final coat, consider applying a clear protective layer or topcoat. This not only enhances the paint finish’s shine but also provides extra frame protection against scratches, moisture, and UV rays. A glossy or matte clear coat can be selected based on your aesthetic preferences, but both serve the primary purpose of safeguarding your work.
In the end, taking your time during each step guarantees a smoother, more durable finish. Proper surface prep, selecting the right paint finish, and applying protective topcoats all work together to give your bike a standout look while shielding it from the elements. DIY painting your fenders and frames is a rewarding project that combines style and function, giving your bike a personalized touch that lasts.
Frequently Asked Questions
What Type of Paint Is Best for Metal Fenders and Frames?
For metal fenders and frames, you should use a high-quality enamel or polyurethane paint, which offers excellent paint durability. Before painting, apply a metal primer to prevent rust and confirm adhesion. This combination provides a durable, long-lasting finish that withstands weather and wear. Make sure to prep the surface properly, and choose a paint designed specifically for metal to achieve the best results and longevity.
How Long Does a DIY Paint Job Typically Last?
Think of your paint job as a shield standing against life’s storms. Typically, a DIY painted fender or frame lasts about 3-5 years, depending on how well you prep and the paint’s durability. Weather effects like rain, sun, and rust can wear it down faster. To extend its life, choose high-quality paint, apply multiple coats, and regularly clean and inspect your work.
Can I Paint Over Existing Rust Without Removing It?
You shouldn’t paint over existing rust without addressing it first. Rust treatment is essential to stop corrosion and ensure good paint adhesion. Use a rust converter or primer designed for rust to neutralize it, then sand the area for better adhesion. Skipping this step can cause the paint to peel or fail prematurely. Proper rust treatment guarantees a smooth, long-lasting finish and protects your fender or frame from future damage.
What Safety Precautions Should I Take During Painting?
Think of painting like a dance—safety steps keep you in rhythm. Always wear protective gear like gloves, goggles, and a mask to shield against fumes and debris. Work in a well-ventilated area to prevent inhaling harmful vapors. I once skipped a mask and ended up with a headache—lesson learned! Prioritizing safety guarantees you enjoy your project without health risks, and your paint job turns out flawless.
How Do I Prevent Paint From Chipping or Scratching Easily?
To prevent paint from chipping or scratching easily, you should focus on proper surface prep and paint adhesion. Clean and sand the surface thoroughly to create a smooth, rough texture that helps the paint stick better. Use a high-quality primer to improve adhesion, and apply multiple thin coats rather than one thick layer. Allow adequate drying time between coats, and finish with a clear sealant for extra durability.
Conclusion
By painting your fenders and frames, you transform your bike into a reflection of your style—like giving it a fresh new identity. With a little effort and patience, you can achieve professional-looking results that stand the test of time. So, don’t let your ride fade into the background; instead, take control and let your creativity shine. After all, a well-painted frame isn’t just protection—it’s a statement that you care.