
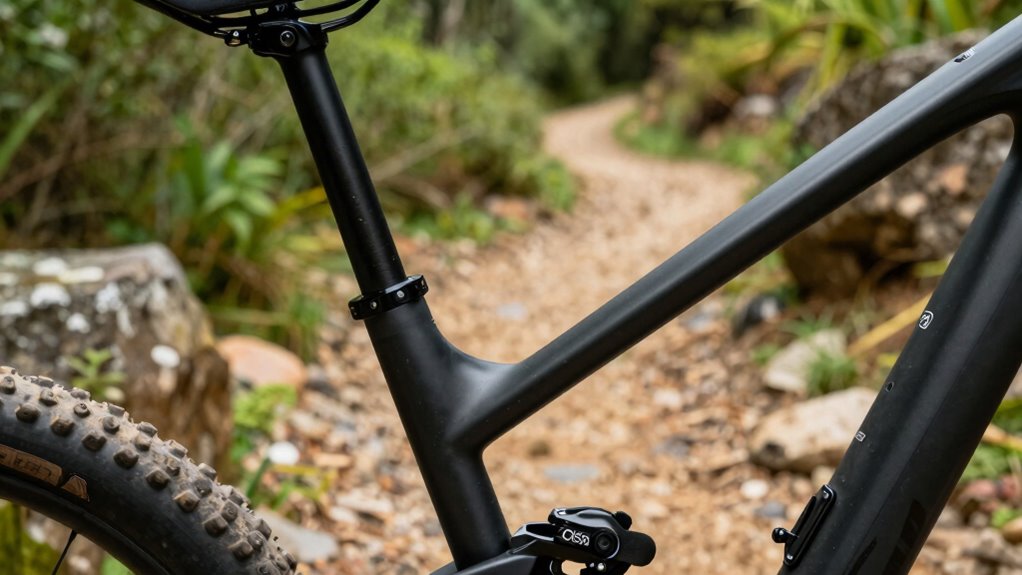
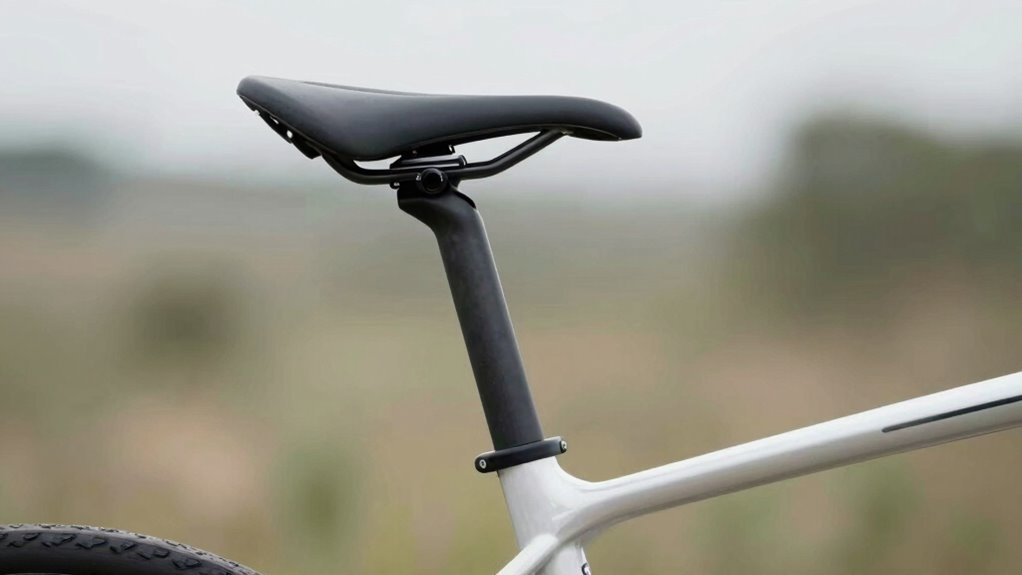
To fix awkward descents, set your dropper post height so that when fully dropped, your saddle is just below hip level, giving you maximum control. Make sure your saddle is level and aligned with your knee for proper positioning. Avoid setting it too high or too low, as both cause stability issues. Fine-tuning this height improves your handling and responsiveness on technical terrain. Keep exploring for more tips on perfecting your dropper post setup.
Key Takeaways
- Set your saddle just below hip height when fully extended for optimal control during descents.
- Ensure the saddle is level and aligned with your knee to maintain balance and comfort on technical terrain.
- Adjust saddle height to lower it on steep descents for better maneuverability and suspension response.
- Use terrain-specific saddle positioning—lower for descents, higher for climbs—to improve safety and handling.
- Regularly check and fine-tune your dropper post height to adapt to terrain changes and maximize descending confidence.
Why Proper Dropper Post Height Improves Mountain Biking Control

A proper dropper post height is essential because it directly affects your control on the trail. When your saddle’s at the right height, you can shift your weight smoothly, improving your bike suspension response. This setup allows for better absorption of shocks, making descents more stable and confident. Proper saddle height also helps optimize tire pressure, ensuring your tires grip the terrain without excessive bounce or slipping. When your post is too high, you lose leverage, and your suspension can’t work effectively; too low, and you may struggle to maneuver. Balancing your dropper post height with appropriate tire pressure creates a more predictable ride, giving you the control needed to tackle technical sections and steep descents confidently. Additionally, understanding the height rule for dropper posts ensures you set your saddle at an optimal position for diverse trail conditions. Knowing how to correctly measure saddle height can make a significant difference in your riding performance and safety. Proper saddle height also contributes to cycling biomechanics, reducing fatigue and potential injury during long rides. For optimal results, consulting with trusted bike fitting services can help fine-tune your setup to match your individual riding style and body geometry.
How to Measure and Set Your Dropper Post Height
To set your dropper post height correctly, start by measuring your inseam or the length from your saddle to your handlebars to determine an appropriate starting point. Proper saddle height guarantees comfort and control during your ride. When adjusting, consider your cable routing to ensure smooth operation and prevent cable slack or tension issues. To fine-tune your dropper post height, follow these tips:
Measure your inseam and check cable routing for optimal dropper post height.
- Set the saddle just below your hip when fully extended
- Adjust the cable routing for minimal friction
- Test the dropper by fully lowering and raising it smoothly
- Make sure your saddle remains level for better control
- Use visual cues like saddle position relative to your knee
- Cable routing plays a crucial role in maintaining smooth operation and preventing issues, so ensure it is properly managed during setup. Additionally, verifying your dropper post compatibility with your bike frame can help avoid installation problems. Ensuring your dropper post’s warranty terms can also guide your setup choices and maintenance routines.
- To optimize your setup further, consider adjusting your saddle position to improve weight distribution and control during descents.
- Remember that projector technology such as DLP or LCD influences the overall image quality and durability of your setup. These steps help you achieve a reliable, responsive setup for better descents and overall mountain biking performance.
The Dropper Post Height Rule: Get It Right for Better Descents
Getting your dropper post height right is essential for mastering descents and maintaining control on technical terrain. When you set it correctly, your suspension tuning improves because your bike’s geometry stays consistent, enhancing comfort and stability. Proper height allows you to shift your weight effectively and respond swiftly to obstacles. Don’t forget that tire pressure also plays a role in descent performance; lower pressures increase traction and shock absorption, while higher pressures improve rolling efficiency. Adjust your dropper post so you can fully extend your legs on climbs and lower it enough for aggressive downhill positions. This balance ensures your suspension functions ideally, providing better control and confidence on tricky descents. Remember, fine-tuning both the dropper height and tire pressure together maximizes your riding performance. Additionally, bike geometry significantly influences how effectively you can utilize your dropper post during descents.
Common Mistakes When Setting Up Your Dropper Post: And How to Avoid Them
Many riders make the mistake of setting their dropper post at the wrong height, which can hinder performance and comfort. Overlooking proper cable tension or skipping compatibility checks can cause issues that are easy to prevent with a quick double-check. Paying attention to these details ensures your dropper post functions smoothly every ride.
Incorrect Height Adjustments
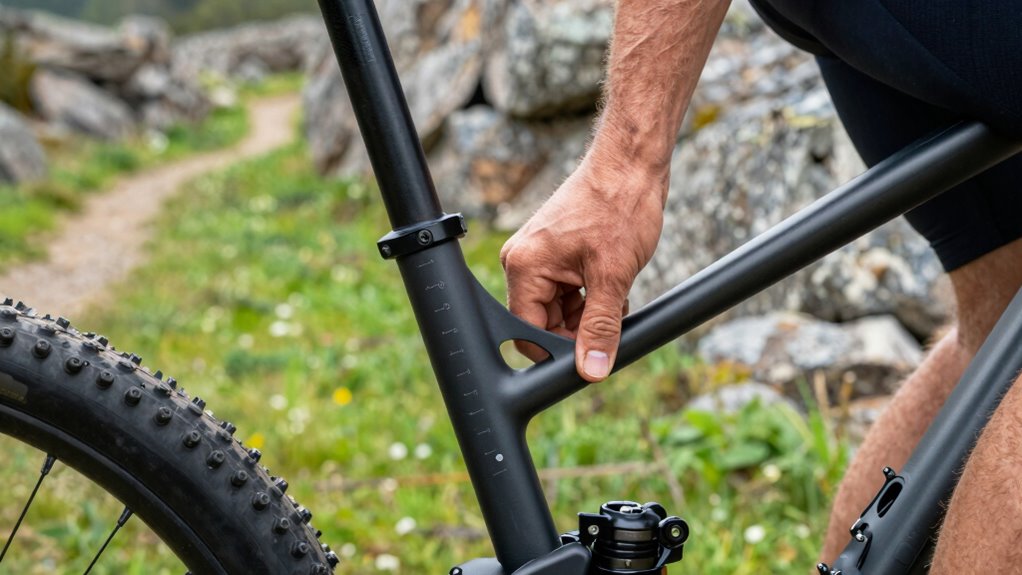
One of the most common mistakes when setting up your dropper post is adjusting it to the wrong height. If the seat height isn’t correct, your saddle position may feel uncomfortable or hinder your control. An incorrect height can lead to awkward descents and inefficient pedaling. To avoid this, ensure your saddle is positioned so that your leg is slightly bent at the bottom of each pedal stroke. When setting the dropper post, don’t just focus on lowering it; consider your riding style and terrain. Here are common pitfalls:
- Setting the saddle too high, risking over-extension
- Dropping the post too low, causing pedal strikes
- Ignoring your natural seat height for different riding modes
- Forgetting to recheck saddle position after adjustment
- Overlooking the importance of a comfortable saddle position for control
Overlooking Cable Tension
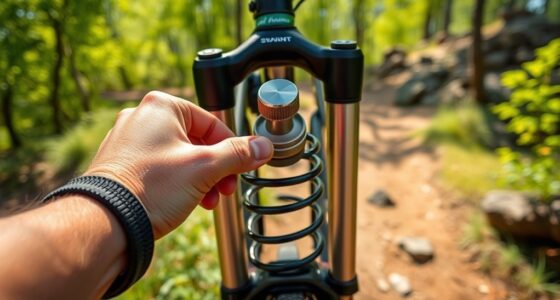
Have you checked the cable tension on your dropper post recently? If it’s too loose, your post may not stay in the desired position, leading to inconsistent setup. Conversely, overly tight cable tension can make it difficult to operate smoothly and cause premature wear. Proper cable tension guarantees setup consistency, allowing the dropper post to respond reliably every time you activate it. Before riding, test the post’s movement with the lever, adjusting the tension if needed. A simple way is to loosen or tighten the cable barrel adjuster to achieve a firm yet responsive feel. Neglecting cable tension compromises your dropper’s performance, making descents awkward and unpredictable. Regularly checking and fine-tuning this component keeps your setup consistent and your ride smooth.
Neglecting Compatibility Checks
Failing to verify that your dropper post is compatible with your mountain bike’s frame and components can lead to serious issues. An incompatible dropper can cause installation problems, poor performance, or damage to your suspension setup. Before installing, check the diameter of your seat tube, the compatibility with your frame material, and the travel range suitable for your riding style. Also, confirm the cable routing and lever compatibility match your shifter and brake setup. Consider these points:
- Frame size and seat tube diameter
- Cable routing type (internal or external)
- Compatibility with suspension travel
- Seatpost diameter and clamp style
- Lever and remote compatibility
Ignoring these factors can compromise your bike’s performance and safety, especially on technical mountain bike descents. Always double-check compatibility before proceeding with installation. Additionally, understanding Nordic-inspired design principles can help you choose components that not only function well but also enhance your overall riding experience. Being aware of mountain bike component compatibility can prevent costly mistakes and ensure a smooth setup process. Incorporating comprehensive compatibility checks into your setup routine can further safeguard against overlooked issues. Moreover, consulting manufacturer specifications can provide detailed insights into specific component limitations and requirements, ensuring a perfect match.
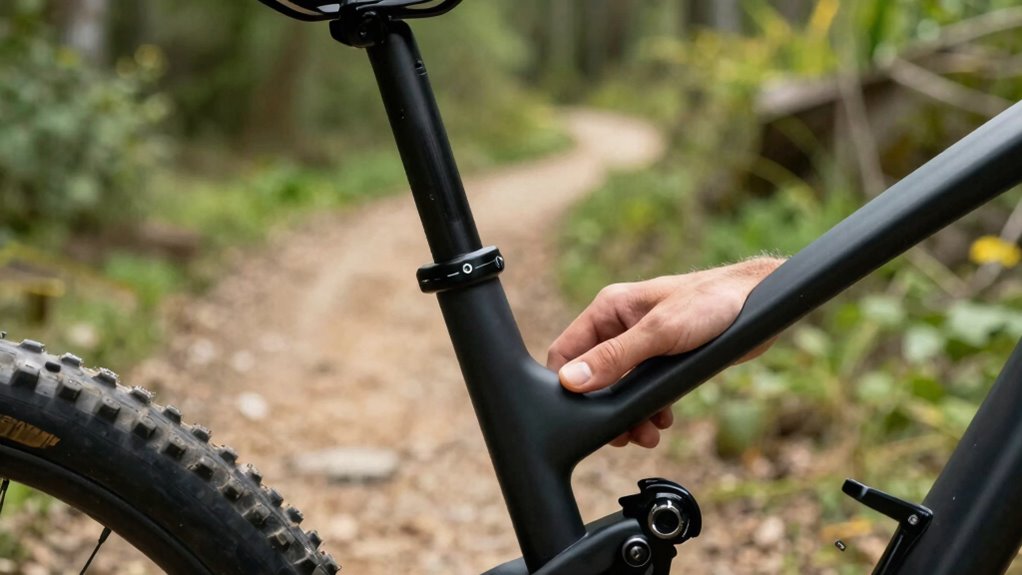
Adjusting Your Dropper Post for Different Terrains and Riding Styles
To get the most out of your dropper post, you need to adjust its height based on the terrain and your riding style. When tackling steep descents, lowering the post provides better control, while raising it for climbs keeps you efficient. Fine-tuning these settings guarantees your bike responds perfectly to different trail conditions. For optimal performance, ensure your saddle height aligns with recommended fit guidelines to prevent discomfort and improve handling. Additionally, understanding how ergonomics influence your riding position can help you make more precise adjustments for comfort and control. Recognizing the importance of bike fit can further enhance your riding experience by reducing fatigue and injury risk, especially when combined with proper dropper post setup techniques. Paying attention to adjustment techniques ensures your setup remains effective as your riding conditions change.
Tailoring Dropper Height
Adjusting your dropper post height for different terrains and riding styles guarantees ideal control and comfort. To tailor your dropper height effectively, focus on your saddle position, ensuring it’s optimized for your riding. Fine-tuning the saddle height allows you to respond quickly and maintain confidence on varied terrain. Consider these tips:
- Set the dropper height so you can fully extend your legs at the bottom of the stroke
- Ensure the saddle is level or slightly nose-down for better control
- Adjust the saddle height for climbing efficiency versus descending comfort
- Test different dropper heights on familiar terrains
- Keep the saddle securely in place once you find the ideal setting
- Understanding the plant properties of your saddle and post can help you choose the most comfortable and effective setup. Additionally, being aware of the post travel and how it interacts with your riding style can improve overall performance.
- Being familiar with your post adjustment options allows for more precise tuning to suit different riding conditions. Regularly checking your saddle alignment ensures consistent comfort and control during rides. Knowing how post flex impacts ride quality can also help you customize your setup for optimal comfort and performance.
Adapting to Terrain
Since different terrains demand different dropper post settings, it’s important to tweak your height based on where you’re riding. On technical mountain terrain, keeping your saddle low improves bike ergonomics and control, allowing you to shift your weight easily during descents. For smoother trails or climbs, raising the saddle slightly enhances pedaling efficiency without sacrificing safety. Adjust your dropper post to match the terrain’s demands, ensuring your saddle height supports optimal body positioning. This adaptability helps you stay balanced and confident, whether navigating rocky descents or fast-flowing singletrack. Remember, a well-tuned dropper post tailored to terrain enables you to react quickly and ride comfortably, minimizing fatigue and maximizing performance on every trail. Proper post adjustment is essential for maintaining safety and comfort during your ride.
Tips for Maintaining Your Dropper Post’s Height and Performance

Regularly maintaining your dropper post’s height and performance guarantees smooth operation when you need it most. To keep it functioning effectively, incorporate simple bike maintenance routines and refine your rider technique.
Here are some tips:
- Check for cable or hose wear and replace if necessary
- Keep the post clean and free of dirt and debris
- Lubricate moving parts periodically for smooth action
- Ensure proper air pressure or hydraulic fluid levels
- Practice consistent rider technique to avoid unnecessary strain
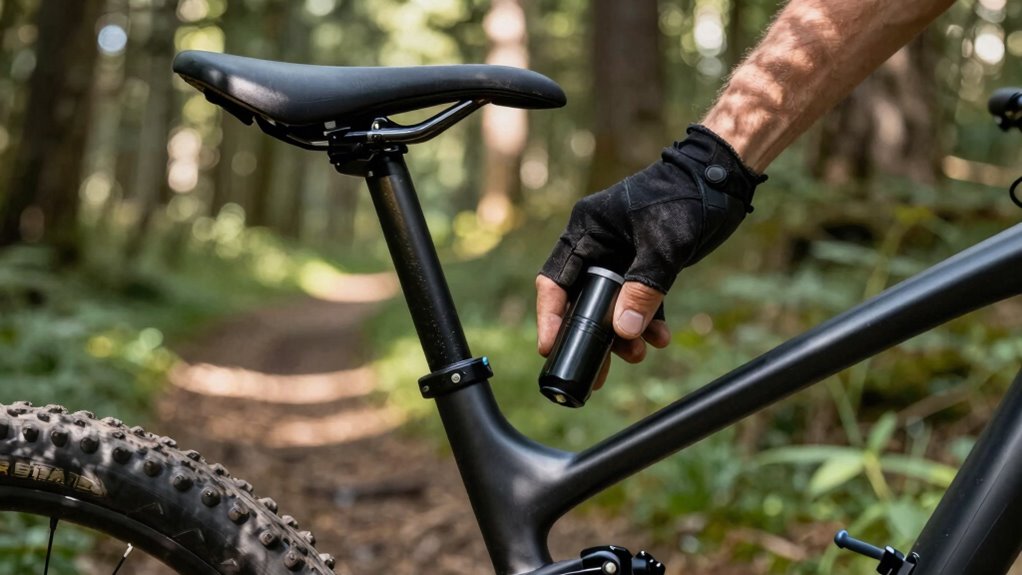
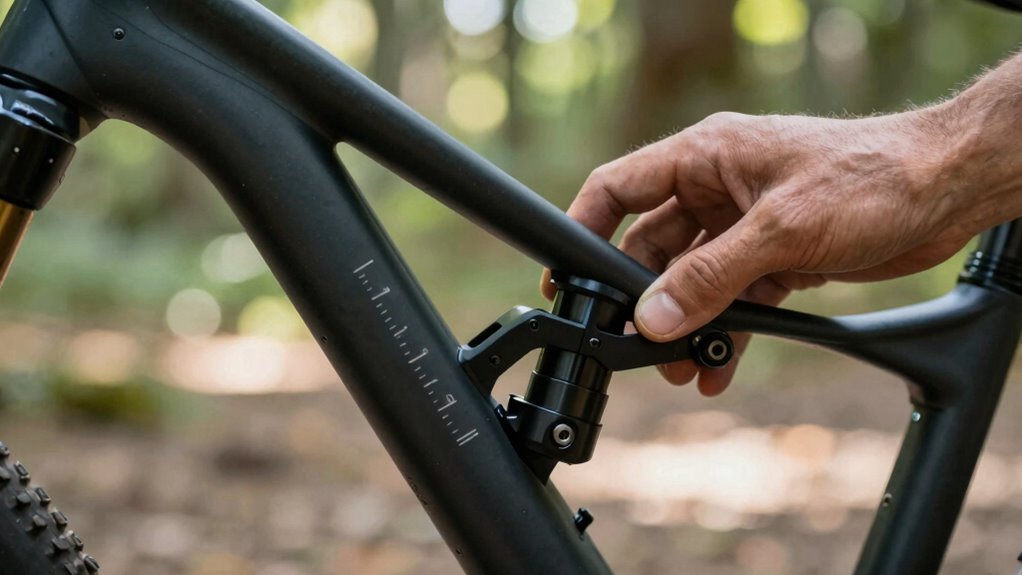
Troubleshooting Dropper Post Feel and Functionality
When your dropper post feels sluggish, inconsistent, or unresponsive, it can disrupt your ride and cause frustration. Start by checking the dropper post angles to ensure proper alignment; misaligned angles can hinder smooth operation. Next, evaluate your saddle height adjustments—if the saddle isn’t set correctly, the post may not respond accurately to your commands. Clean and lubricate the stanchion and post to prevent dirt buildup that causes sticking. Confirm that the cable or hydraulic line isn’t kinked or damaged, which can affect responsiveness. If the post still feels off, consider adjusting the air pressure or hydraulic fluid levels. Proper saddle height adjustments and correct angles are key to ensuring reliable, smooth dropper post performance on every ride.
Frequently Asked Questions
How Often Should I Recalibrate My Dropper Post Height?
You should recalibrate your dropper post height every few months or if you notice it’s not returning fully or feels off during rides. Follow your maintenance schedule and check calibration frequency regularly to guarantee smooth operation. It’s a good idea to recalibrate after any impact, after cleaning, or when you change saddle height. Staying consistent helps prevent issues and keeps your dropper post functioning perfectly on every descent.
Can I Use a Dropper Post on a Gravel Bike?
Yes, you can use a dropper post on a gravel bike, and it’s like adding a secret gear for mountain biking’s technical descents. Proper bike ergonomics matter, and a dropper helps you quickly switch positions, especially on rough terrain. Just make certain your gravel bike’s frame and saddle height accommodate the dropper post. It’s a game-changer, giving you better control and comfort on both paved and unpaved adventures.
What Tools Are Needed for Adjusting My Dropper Post?
To adjust your dropper post, you’ll need basic tools like an Allen wrench or hex key, depending on your post’s bolt sizes. These tools help with post calibration, ensuring smooth operation. You might also need a torque wrench for precise tightening. Make sure your bike’s seat post diameter matches your tool sizes. Proper adjustments prevent issues like sticking or slipping, making descents safer and more comfortable.
How Does Rider Weight Affect Dropper Post Setup?
Your rider weight influences your dropper post setup because heavier riders may need a slightly higher saddle height for comfort and control, while lighter riders might set it lower for better responsiveness. Adjust your saddle height based on your weight to guarantee smooth operation and proper bike handling. Test your setup by sitting on the saddle and fully extending the post; it should feel secure and allow quick adjustments when needed.
Is There an Ideal Dropper Post Height for Beginner Riders?
Think of your bike as a dance partner—finding the right dropper post height keeps your moves smooth. For beginners, a good rule is to set the saddle so your leg is slightly bent at the bottom of the stroke. Consider ergonomics and manufacturing tolerances to guarantee comfort and safety. Start with a mid-range height and fine-tune as you gain confidence, making sure your ride feels natural and controlled.
Conclusion
Getting your dropper post height just right is like tuning a guitar—when it’s perfect, everything sounds better. I remember racing down a trail, feeling confident because my setup was dialed. With the right height, awkward descents become smooth and controlled, turning challenges into thrilling rides. Take the time to set it up properly, and you’ll release a new level of confidence and fun on every trail. Your bike’s performance is worth it.