Connect with us

Electric Bike

Electric Bike Battery Packs How Does It Work

Published

on

An image showcasing the intricate inner components of an electric bike battery pack

Get ready to power up your ride with the electrifying technology of electric bike battery packs. These sleek and powerful devices are the beating heart of your electric bike, providing the energy needed to propel you forward with ease.

In this technical and detailed article, we will delve into the inner workings of electric bike battery packs, uncovering the secrets of how they store and release energy, exploring different types, and discussing the future of this cutting-edge technology.

So, strap on your helmet and prepare to be amazed by the wonders of electric bike battery packs.

Key Takeaways

  • Electric bike battery packs are made of multiple lithium-ion cells connected in series or parallel.
  • The capacity of the battery pack, measured in ampere-hours (Ah), determines the range of the bike.
  • Voltage should match the motor’s requirement for compatibility and higher voltage levels result in increased power output and faster acceleration.
  • Regular maintenance and care, such as cleaning, balancing charge levels, and avoiding overcharging, are necessary for the battery pack’s optimal performance and longevity.

Understanding the Basics of Electric Bike Battery Packs

If you want to understand the basics of electric bike battery packs, you’ll need to know how they work. Electric bike battery pack maintenance is essential for ensuring optimal performance and longevity.

Advertisement

These battery packs are typically made up of multiple lithium-ion cells connected in series or parallel to provide the necessary voltage and current for powering the electric bike. The benefits of electric bike battery packs include their portability, rechargeability, and the ability to provide consistent power output over extended periods.

Proper maintenance involves regular charging and discharging cycles, avoiding extreme temperatures, and keeping the battery pack clean and dry. Understanding the inner workings of electric bike battery packs will help you make informed decisions when it comes to choosing and maintaining your battery pack.

Moving on to the components of electric bike battery packs, let’s delve deeper into their construction and functionality.
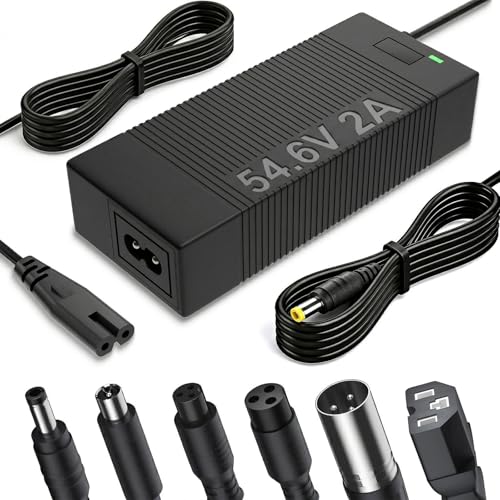
The Components of Electric Bike Battery Packs

When assembling your e-bike battery pack, you’ll need to familiarize yourself with its key components. Proper maintenance is crucial for electric bike battery packs to ensure their optimal performance and longevity.

There are several factors to consider when choosing an electric bike battery pack. Firstly, you should evaluate the capacity of the battery, which is measured in ampere-hours (Ah), to determine its range and how far you can travel on a single charge.

Advertisement

Secondly, the voltage of the battery pack should match the motor’s voltage requirement to ensure compatibility.

Lastly, consider the weight and size of the battery pack, as it can affect the overall balance and maneuverability of your electric bike. Understanding these components and factors will help you make an informed decision when selecting an electric bike battery pack.

Moving forward, let’s delve into how electric bike battery packs store and release energy.
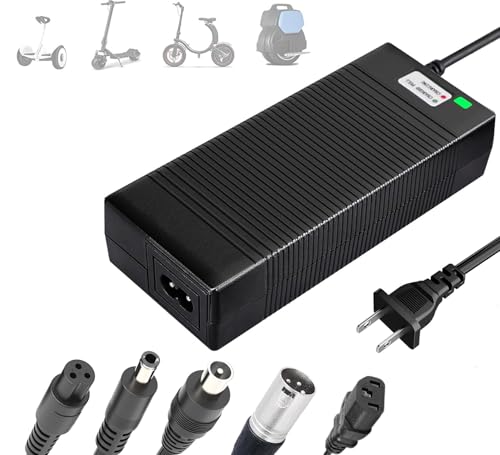
How Electric Bike Battery Packs Store and Release Energy

Advertisement

To store and release energy, your e-bike battery pack utilizes a complex system of cells and circuitry. The most common type of battery used in electric bikes is the lithium-ion battery pack. These battery packs offer numerous advantages, such as high energy density, lightweight design, and long lifespan. However, they also have some disadvantages, including high cost and sensitivity to extreme temperatures. Temperature plays a crucial role in the performance of electric bike battery packs. Cold weather can reduce the battery’s capacity and overall range, while excessive heat can cause damage and shorten the battery’s lifespan. It is important to keep your battery pack within the recommended temperature range to maximize its performance and longevity. In the next section, we will explore different types of electric bike battery packs, which offer various features and benefits.

Advantages Disadvantages Impact of Temperature
High energy density High cost Reduced capacity
Lightweight design Sensitivity to extreme temperatures Decreased range
Long lifespan Damage and shorter lifespan

Exploring Different Types of Electric Bike Battery Packs

Take a look at the various types of e-bike battery packs available and their unique features and benefits.

There are several different battery chemistries used in electric bike battery packs, each with its own pros and cons. One common type is the lithium-ion battery, known for its high energy density and long cycle life. Another option is the lithium iron phosphate battery, which offers improved safety and thermal stability. Nickel-metal hydride batteries are less common due to their lower energy density and shorter lifespan.

When it comes to battery pack capacity and range estimation, it is important to consider factors such as the battery’s voltage, ampere-hour rating, and the power consumption of the e-bike. These factors will determine how far you can travel on a single charge.

Now, let’s explore the role of voltage in electric bike battery packs.

Advertisement

The Role of Voltage in Electric Bike Battery Packs

Voltage plays a crucial role in determining the power output and performance of e-bikes. The role of voltage in electric bike battery packs is significant, as it directly impacts the battery’s performance.

Here are three key ways in which voltage affects battery performance:

  • Power Output: Higher voltage levels result in increased power output, allowing the e-bike to reach higher speeds and handle steeper inclines.

  • Range: A higher voltage battery pack can provide a longer range as it can store more energy.

  • Acceleration: Voltage affects the acceleration capabilities of an e-bike. Higher voltage levels enable quicker acceleration, enhancing the overall riding experience.

Understanding the impact of voltage on battery performance is essential for choosing the right battery pack for your e-bike.

Advertisement

The next section will delve into the amp-hour rating and its impact on electric bike battery performance, further enhancing your knowledge in this subject.

Amp-Hour Rating and its Impact on Electric Bike Battery Performance

The amp-hour rating of a battery directly affects its performance in an e-bike. The amp-hour rating refers to the amount of current a battery can deliver over a specific period of time. A higher amp-hour rating means the battery can deliver more power and the e-bike can go for a longer distance. It is important to choose a battery with an appropriate amp-hour rating for your specific needs.

The amp-hour rating also affects the charging efficiency of the battery. A battery with a higher amp-hour rating may take longer to charge, as it requires more energy to reach its full capacity. On the other hand, a battery with a lower amp-hour rating may charge faster but may not provide as much power or range.

To better understand the impact of amp-hour rating on performance, refer to the table below:

Amp-Hour Rating Power Delivery Range
10 Ah Moderate 30 miles
15 Ah High 45 miles
20 Ah Very High 60 miles

Understanding the amp-hour rating and its impact on battery performance is crucial in optimizing the performance of your e-bike. In the next section, we will discuss tips and best practices for charging electric bike battery packs, ensuring you get the most out of your battery without compromising its lifespan.

Advertisement

Charging Electric Bike Battery Packs: Tips and Best Practices

When charging an e-bike battery, it is important to follow these tips and best practices to optimize charging speed and maximize battery lifespan:

  1. Use the charger provided by the manufacturer: Using a different charger can result in improper charging and potential damage to the battery pack.

  2. Charge at the recommended voltage: Charging at a higher voltage may lead to overheating and reduced battery life, while charging at a lower voltage will result in slower charging.

  3. Avoid extreme temperatures: Charging at temperatures below 0°C or above 40°C can degrade the battery’s performance and shorten its lifespan.

  4. Don’t overcharge: Once the battery is fully charged, disconnect it from the charger to avoid overcharging, which can reduce battery capacity over time.

By following these tips and best practices, you can ensure that your e-bike battery charges efficiently and remains in good condition.

Now, let’s move on to maintaining and caring for electric bike battery packs.

Maintaining and Caring for Electric Bike Battery Packs

Now that you’ve learned about the best practices for charging electric bike battery packs, let’s dive into the crucial aspect of maintaining and caring for these battery packs. Battery pack maintenance is essential for maximizing battery life and ensuring optimal performance. By following a few simple guidelines, you can extend the lifespan of your electric bike battery pack and get the most out of your rides.

To help you understand the importance of battery pack maintenance, let’s take a look at the following table:

Advertisement
Maintenance Task Frequency Description
Regular Cleaning Monthly Remove dirt and debris from the battery pack casing
Proper Storage Long-term Store the battery pack in a cool and dry place
Balancing Cells Every 20-30 cycles Equalize the charge levels of individual battery cells
Firmware Updates As needed Install the latest firmware updates for the battery pack

By incorporating these maintenance tasks into your routine, you can ensure the longevity and efficiency of your electric bike battery pack. In the next section, we will explore ways to further extend the lifespan of your battery pack without compromising its performance.

Extending the Lifespan of Electric Bike Battery Packs

To effectively extend the lifespan of your e-bike battery pack, it’s important to implement proper maintenance and care. By following these steps, you can maximize battery performance and get the most out of your electric bike:

  1. Regularly charge your battery: Avoid fully draining the battery and recharge it after each use to prevent deep discharges that can reduce its overall capacity.

  2. Store your battery properly: Keep it in a cool, dry place to prevent overheating and avoid extreme temperatures that can degrade its performance.

  3. Avoid overcharging: Once the battery is fully charged, unplug it to prevent overcharging, which can cause damage and reduce its lifespan.

  4. Perform regular maintenance: Check for any loose connections, clean the battery terminals, and inspect for any signs of damage or wear.

By following these guidelines, you can extend the lifespan of your e-bike battery pack and maximize its performance.

Now, let’s explore the environmental impact of electric bike battery packs.

The Environmental Impact of Electric Bike Battery Packs

You can minimize the environmental impact of e-bike battery packs by implementing proper disposal methods and recycling options. Battery recycling is crucial in order to prevent the release of harmful chemicals into the environment. When disposing of an electric bike battery pack, it is important to follow local regulations and guidelines. Many countries and municipalities have designated recycling centers where you can safely drop off your old battery packs. These centers ensure that the batteries are handled and disposed of properly, minimizing the impact on the environment. Additionally, recycling also helps to recover valuable materials from the battery packs, reducing the need for new raw materials.

Advertisement

Another important aspect to consider is the impact of electric bike battery packs on the electric grid. As more people switch to electric bikes, the demand for charging these batteries increases. This puts strain on the electric grid, especially during peak hours. To mitigate this, it is recommended to charge your e-bike battery during off-peak hours. This helps to distribute the load on the grid more evenly and reduces the strain on the system. By following these practices, you can ensure that your e-bike battery has a minimal impact on the environment and the electric grid.

Now, let’s move on to common issues and troubleshooting for electric bike battery packs.

Common Issues and Troubleshooting for Electric Bike Battery Packs

One common issue with e-bike battery packs is their limited lifespan. Over time, the battery’s capacity gradually decreases, resulting in a shorter range and decreased performance.

To troubleshoot this issue, you can start by checking the battery’s voltage using a multimeter. If the voltage is significantly lower than the rated voltage, it may indicate a faulty cell or cells in the pack. In such cases, you can try balancing the cells or replacing the faulty ones.

Another common issue is a sudden drop in capacity, which can be caused by a faulty BMS (Battery Management System). In this case, you might need to replace the BMS to restore the battery’s performance.

Advertisement

Additionally, poor charging habits, extreme temperatures, and improper storage can also contribute to battery pack issues. By following proper charging and storage guidelines, you can prevent or minimize these problems.

Understanding these troubleshooting techniques can help you address common battery pack issues and ensure optimal performance.

In the next section, we will discuss upgrading and replacing electric bike battery packs.

Upgrading and Replacing Electric Bike Battery Packs

If you want to improve your e-bike’s performance, consider upgrading or replacing its battery pack.

Upgrading the battery capacity is one way to enhance your bike’s range and power. With a higher capacity battery, you can ride for longer distances without worrying about running out of juice.

Advertisement

Another option is to increase battery efficiency by opting for a lithium-ion battery pack. These batteries have a higher energy density and can provide more power while being lighter and smaller in size.

Additionally, upgrading to a smart battery pack with advanced features like battery management systems can optimize the performance and lifespan of your battery.

Keep in mind that when upgrading or replacing your battery pack, it is crucial to consider safety considerations.

[Transition sentence: Moving on to safety considerations for electric bike battery packs…]

Safety Considerations for Electric Bike Battery Packs

When upgrading or replacing your e-bike’s battery pack, it’s important to prioritize safety considerations. Battery pack safety is crucial to prevent any potential hazards.

Advertisement

One of the main safety concerns is preventing overheating. Overheating can lead to battery degradation, reduced performance, or even fire hazards. To ensure safety, it is essential to choose a battery pack that has built-in protective mechanisms, such as thermal sensors and overcurrent protection. These features help regulate the temperature and prevent the battery from overheating during use.

Additionally, proper installation and maintenance are crucial in preventing overheating. Regularly inspect the battery pack for any signs of damage or wear, and avoid exposing it to extreme temperatures or moisture.

By prioritizing battery pack safety and preventing overheating, you can enjoy a safer and more reliable e-bike riding experience.

Looking ahead, the future of electric bike battery pack technology holds exciting advancements in efficiency and capacity.

The Future of Electric Bike Battery Pack Technology

The future of e-bike battery pack technology holds exciting advancements in efficiency and capacity, with potential improvements in battery life and charging speed. Advancements in battery technology are driving the development of more powerful and efficient electric bike battery packs.

Advertisement

These advancements will not only increase the range and power of electric bikes but also have a significant impact on transportation as a whole. With improved battery capacity, people will be able to travel longer distances on their electric bikes without worrying about running out of power. Additionally, faster charging speeds will allow riders to quickly recharge their batteries, making electric bikes a more convenient mode of transportation.

These advancements in battery technology will revolutionize the way we travel and make electric bikes a viable option for daily commuting.

Transitioning into the next section, let’s now address some frequently asked questions about electric bike battery packs.

Frequently Asked Questions about Electric Bike Battery Packs

Now that you’ve gained insight into the future of electric bike battery pack technology, let’s dive into some frequently asked questions about these remarkable power sources.

Understanding the electric bike battery pack lifespan is crucial for any electric bike enthusiast. These battery packs typically have a lifespan of around 2 to 4 years, depending on factors such as usage, charging habits, and storage conditions. It’s important to note that proper maintenance and care can extend their lifespan further.

Advertisement

Using electric bike battery packs comes with a plethora of benefits. Firstly, they provide a reliable and consistent power source, allowing you to travel longer distances without worrying about running out of battery. Additionally, they are eco-friendly alternatives to traditional fuel-powered vehicles, reducing carbon emissions and promoting a greener environment.

Moreover, these battery packs are lightweight and can easily be removed for charging, making them convenient and practical for everyday use.

Frequently Asked Questions

Can I use any type of charger to charge my electric bike battery pack?

Using a non-compatible charger to charge your electric bike battery pack can have detrimental effects. The charger must be specifically designed for your battery pack to ensure proper charging and avoid damage.

Using a faulty charger can lead to overcharging, undercharging, or even short-circuiting the battery pack. This can significantly reduce the battery’s lifespan and performance.

Always use the recommended charger provided by the manufacturer to ensure safe and optimal charging of your electric bike battery pack.

Advertisement

How long does it take to fully charge an electric bike battery pack?

The charging speed of an electric bike battery pack depends on several factors. These include the capacity of the battery pack, the charging current, and the charger’s power output. All of these factors work together to determine the overall charging time. Generally, it takes around 3 to 5 hours to fully charge an electric bike battery pack. However, it’s important to note that these charging times can vary depending on the specific battery pack and charger used.

Can I replace the battery pack in my electric bike with a higher capacity one?

Yes, you can upgrade the battery pack in your electric bike with a higher capacity one. Doing so will provide several benefits.

A higher capacity battery pack will allow you to ride for longer distances without needing to recharge. It will also provide more power and increase the overall performance of your electric bike.

Upgrading to a higher capacity battery pack is a great way to enhance your riding experience and enjoy longer, more powerful rides.

Are electric bike battery packs waterproof?

Electric bike battery packs are not always waterproof, but many manufacturers have started designing them to be water-resistant. However, it is important to note that water resistance is not the same as being fully waterproof.

Advertisement

Regular electric bike battery pack maintenance is crucial to prevent common issues such as water damage. It is recommended to avoid submerging the battery pack in water and to keep it protected from heavy rain or direct exposure to water to ensure its longevity.

Can I use my electric bike battery pack to charge other devices?

Yes, you can use your electric bike battery pack to charge other devices. This offers the advantage of using it as an emergency power supply when needed.

The electric bike battery pack can provide a stable power source for various devices such as smartphones, tablets, and even small appliances. Its portability and compact design make it convenient to carry and use in various situations.

It is an efficient and reliable solution for charging your devices on the go.

Conclusion

In conclusion, electric bike battery packs are an essential component of electric bikes. They provide the necessary power for a smooth and efficient ride. Battery packs store and release energy through a combination of chemical reactions and electronic components.

Advertisement

There are various types of battery packs available, but voltage plays a crucial role in determining the performance and range of an electric bike. Upgrading or replacing battery packs can enhance the bike’s capabilities. However, it is important to prioritize safety when handling and maintaining these packs.

Despite any concerns about battery life, advancements in technology continue to improve the efficiency and longevity of electric bike battery packs.

Olivia's writing is not only informative but also inspiring. She has a knack for telling stories that capture the essence of cycling and the joy it brings to people's lives. Her writing has been praised by readers and industry experts alike for its clarity, depth, and authenticity. In addition to her writing, Olivia is also an avid cyclist. She enjoys exploring new trails and routes and has participated in several cycling events and races. Her first-hand experience with cycling gives her a unique perspective on the sport, reflected in her writing. Overall, Olivia is a talented writer passionate about cycling and dedicated to producing high-quality content for FlatironBike. Her contributions to the magazine have helped make it a go-to source for cycling enthusiasts worldwide.

Continue Reading
Advertisement

Electric Bike

Youtube How To Make An Electric Bike

Published

on

By

An image showcasing a skilled individual assembling an electric bike in a well-lit workshop, with tools neatly organized on a workbench, wires and components neatly laid out, and a sense of focused determination in their face

Did you know that the typical cost of a new electric bike is approximately $1,500? If that price seems too high for you, don’t fret, because I have a solution.

In this article, I will guide you through the process of making your own electric bike using step-by-step instructions and detailed explanations.

With the help of YouTube tutorials, you’ll be able to convert your regular bike into an electric one, saving you money and giving you the freedom to ride with ease.

So let’s get started on this exciting DIY project!

Key Takeaways

  • Average price of a new electric bike is around $1,500
  • Electric bikes offer eco-friendly transportation
  • Factors to consider when choosing an electric bike: motor power, battery capacity, and range
  • Understanding motor power and battery quality is important

Introduction to Electric Bikes

Advertisement

If you’re interested in building an electric bike, let’s start with a brief introduction to what electric bikes are.

Electric bikes, also known as e-bikes, are bicycles equipped with an electric motor that assists the rider’s pedaling. They have gained popularity due to their numerous benefits.

Electric bikes offer an eco-friendly mode of transportation, as they produce zero emissions and reduce reliance on fossil fuels. They also provide a practical solution for commuting, especially in hilly areas or when covering long distances.

When choosing the right electric bike, it is crucial to consider factors such as motor power, battery capacity, and range.

Understanding the components of an electric bike, including the motor, battery, controller, and display, is essential for successful assembly.

Advertisement

Now, let’s delve into understanding the components of an electric bike.

Understanding the Components of an Electric Bike

To understand the components of an e-bike, it’s important to learn about the different parts that make up this mode of transportation. The two key components of an electric bike are the motor and the battery. Understanding motor power is crucial in selecting the right one for your needs. The motor determines how fast and how far the bike can go, so it’s essential to choose a motor with sufficient power.

Additionally, choosing the right battery is essential for optimal performance. The battery provides the energy needed to power the motor, so selecting a high-quality battery with a long lifespan is important. Other components include the controller, which regulates the power flow, the throttle, which controls the speed, and the display, which provides information about the bike’s performance.

Now that we understand the components, let’s move on to the tools and materials needed for the project.

Tools and Materials Needed for the Project

Advertisement

You’ll need a variety of tools and materials to complete this project. Some of the tools you’ll need include a wrench set, a socket set, a screwdriver set, pliers, wire cutters, and a soldering iron. These tools will help you with tasks such as removing and installing components, tightening bolts and screws, and making electrical connections.

As for materials, you’ll need an electric bike conversion kit, which typically includes a motor, a battery, a controller, and other necessary components. Additionally, you’ll need a bike frame that is compatible with the conversion kit, as well as various cables, connectors, and zip ties for securing and organizing the wiring.

Once you have all the tools and materials ready, you can move on to the step-by-step guide to convert your bike.

Step-by-Step Guide to Convert Your Bike

In this discussion, I’ll guide you through the process of converting your bike into an electric one.

Advertisement

First, we’ll start by removing the old parts, such as the pedals and chain, to make room for the electric components.

Next, we’ll move on to installing the electric components. This includes the motor, battery, and controller. It’s important to ensure that these components are securely attached and properly connected.

Once the installation is complete, we’ll proceed to testing and adjustments. During this step, we’ll check if all the components are functioning correctly. If necessary, we’ll make any adjustments to ensure optimal performance.

Overall, converting your bike into an electric one requires careful removal of old parts, installation of new electric components, and thorough testing and adjustments.

Removing the Old Parts

First, take off the old handlebars and set them aside.

Advertisement

To remove bike parts efficiently, follow these steps:

  1. Loosen the stem bolts using an Allen wrench, allowing the handlebars to slide out.
  2. Detach the brake and gear cables from the handlebars by loosening the clamps with a screwdriver.
  3. Remove the grips by spraying a small amount of soapy water or rubbing alcohol underneath them, then twisting and pulling them off.
  4. Unscrew the stem cap and use a hammer to lightly tap the top of the stem bolt, loosening the stem from the fork.

Disposing of old components responsibly is crucial. Consider donating usable parts to a local bike shop or recycling center.

Now that you’ve successfully removed the old parts, let’s move on to installing the electric components.

Installing the Electric Components

Now that the old parts have been removed, it’s time to start installing the electric components for your electric bike conversion.

Choosing the right electric components is crucial to ensure the performance and efficiency of your bike. The first step is to select the right motor for your bike. Consider factors such as power output, torque, and compatibility with your bike frame.

Next, you’ll need to install the motor controller, which regulates the power flow to the motor. Make sure to follow the manufacturer’s instructions for proper wiring and connections.

Advertisement

Additionally, you’ll need to install the battery pack and connect it to the motor controller.

Finally, don’t forget to install the throttle and display panel to control the electric assistance levels and monitor battery life.

With all the electric components properly installed, you’re now ready to move on to testing and adjustments to ensure everything is working smoothly.

Testing and Adjustments

To ensure smooth operation, it is important to thoroughly test and make any necessary adjustments to the electric bike conversion. Here are some testing methods and performance improvements to consider:

  1. Test the battery: Check the voltage and capacity of the battery to ensure it’s functioning properly. Look for signs of damage or wear.

  2. Test the motor: Connect the motor to a power source and observe its performance. Make sure it’s running smoothly and producing the desired power output.

  3. Test the controller: Check the functionality of the controller by connecting it to the battery and motor. Ensure it properly regulates the motor’s speed and power.

  4. Adjustments: Based on the test results, make necessary adjustments to optimize performance. This may include fine-tuning the motor’s power output, adjusting the controller settings, or replacing any faulty components.

By thoroughly testing and making these adjustments, you can ensure that your electric bike conversion performs at its best.

Advertisement

Now, let’s move on to discussing safety precautions and regulations.

Safety Precautions and Regulations

Make sure you follow safety precautions and regulations when building your electric bike. It is crucial to prioritize your safety and comply with legal requirements. When working on your electric bike, always wear the appropriate safety gear, such as a helmet, gloves, and eye protection, to protect yourself from any potential accidents or injuries. Additionally, familiarize yourself with the legal requirements in your area regarding electric bikes, such as speed limits and age restrictions. Adhering to these regulations will ensure that you are riding within the law and maintaining the safety of yourself and others. In the next section, we will discuss maintenance and troubleshooting tips to keep your electric bike running smoothly and address any issues that may arise.

Maintenance and Troubleshooting Tips

When it comes to maintaining and troubleshooting an electric bike, there are a few key areas to focus on. Proper battery maintenance is crucial for ensuring optimal performance and longevity. This includes regular charging, avoiding extreme temperatures, and checking for any signs of damage.

Taking care of the motor is also important. Keeping it clean and lubricated can help prevent issues such as overheating or loss of power.

Lastly, being aware of common issues such as brake problems or electrical issues and knowing their solutions can save you time and money in the long run.

Advertisement

Battery Maintenance

Proper battery maintenance is essential for keeping your electric bike in good condition. One of the most important aspects of battery maintenance is ensuring that you charge it correctly. It is important to follow the manufacturer’s guidelines for charging your battery, as overcharging or undercharging can lead to decreased battery life. Additionally, it is recommended to avoid charging your battery to 100% capacity unless necessary, as this can also reduce its overall lifespan.

Another way to extend your battery’s life is by avoiding extreme temperatures, as both cold and hot weather can have a negative impact on its performance. Lastly, it is crucial to regularly check the battery connections and clean them if necessary, as loose or dirty connections can affect the battery’s performance.

By following these battery maintenance tips, you can ensure that your electric bike’s battery lasts as long as possible.

Now, let’s move on to motor care.

Motor Care

Taking care of your motor is essential for the longevity and performance of your electric bike. To ensure optimal motor efficiency, it is crucial to perform regular maintenance and adhere to proper battery charging practices. Here are some key points to consider:

Advertisement
Key Point Description
Regular Cleaning Keep the motor clean and free from debris to prevent any obstructions or damage.
Lubrication Properly lubricate the motor bearings and gears to reduce friction and improve performance.
Battery Charging Habits Follow the manufacturer’s guidelines for charging the battery to avoid overcharging or undercharging, which can affect the motor’s performance.
Regular Inspections Regularly inspect the motor for any signs of wear or damage, such as loose connections or overheating. Address any issues promptly to prevent further damage.

By taking these steps to care for your motor, you can ensure its longevity and optimize your electric bike’s performance. In the next section, we will explore common issues that may arise with electric bike motors and their solutions.

Common Issues and Solutions

After ensuring proper motor care, it’s important to be aware of common issues that may arise when building an electric bike. Identifying these issues early on can save time and frustration during the construction process.

Here are some common issues and their solutions:

  1. Battery Life: One common problem is a short battery life. This can be caused by a faulty battery or improper charging. To solve this, ensure you have a high-quality battery and follow the manufacturer’s charging guidelines.

  2. Motor Overheating: Another issue is motor overheating, which can be caused by excessive use or inadequate cooling. To prevent this, use a motor with proper cooling mechanisms or add external cooling components.

  3. Wiring Problems: Wiring issues can lead to power loss or malfunctions. Double-check all connections and use quality wiring to avoid these problems.

  4. Controller Malfunctions: A malfunctioning controller can result in erratic behavior or no power output. Troubleshoot the controller and consider replacing it if necessary.

With these common issues and their solutions in mind, we can now move on to exploring advanced modifications and upgrades for your electric bike.

Advanced Modifications and Upgrades

To enhance your electric bike, you can start by upgrading the battery for longer range and improved performance. Upgrading batteries is a common modification that can significantly improve the overall performance of your electric bike.

Advertisement

By installing a higher capacity battery, you can extend the range of your bike, allowing you to go on longer rides without worrying about running out of power. Additionally, upgrading to a more powerful battery can enhance the motor performance, providing you with increased speed and acceleration.

It is important to choose a battery that is compatible with your bike’s motor and controller to ensure optimal performance.

Once you have upgraded your battery, you can move on to exploring the various riding tips and techniques to further enhance your electric bike experience.

Riding Tips and Techniques

If you want to improve your overall experience with an e-bike, it’s essential to learn and implement various riding tips and techniques. Riding an electric bike requires a different set of skills compared to a regular bicycle, so it’s important to familiarize yourself with the right techniques. One important aspect is choosing the right gear for your ride. This involves considering factors such as the terrain, weather conditions, and the distance you plan to cover. By selecting the appropriate gear, you can ensure a smoother and more enjoyable ride. To give you an idea, here’s a table outlining different gear options based on the terrain:

Terrain Gear Option
Uphill Low gear
Downhill High gear
Flat surface Medium gear

By understanding and applying these riding techniques and choosing the right gear, you’ll be able to maximize your e-bike experience. Now let’s explore the resources and community support available to electric bike enthusiasts.

Advertisement

Resources and Community Support

When it comes to finding resources and community support for electric bikes, there are several key points to consider.

Online forums and groups are a great way to connect with other electric bike enthusiasts and share knowledge and experiences.

Electric bike shops and workshops are also valuable resources where you can get expert advice and assistance with repairs and modifications.

Additionally, there are recommended books and websites that provide in-depth information and guidance on electric bike technology and maintenance.

Online Forums and Groups

Online forums and groups are a great way to find advice and connect with other electric bike enthusiasts. Here are four reasons why they are invaluable resources:

Advertisement
  1. Knowledge sharing: Online forums provide a platform for electric bike enthusiasts to share their experiences and expertise. You can learn from their mistakes, gain valuable insights, and discover innovative ideas.

  2. Troubleshooting: When you encounter problems with your electric bike, online forums are a go-to place for finding solutions. Experienced enthusiasts can guide you through the process of diagnosing and fixing issues.

  3. Community support: Being part of an online community allows you to connect with like-minded individuals who share your passion for electric bikes. You can exchange stories, seek motivation, and build friendships that extend beyond the virtual world.

  4. Finding local enthusiasts: Online forums often have subsections dedicated to specific regions. This makes it easier to find fellow electric bike enthusiasts in your area, allowing you to organize group rides and meetups.

Joining online forums and groups can be a stepping stone to further explore the world of electric bikes. In the next section, we will delve into the realm of electric bike shops and workshops.

Electric Bike Shops and Workshops

When it comes to customizing your electric bike, there’s no better place to turn than electric bike shops and workshops. These specialized establishments are dedicated to all things electric bike-related and offer a wide range of services to help you create the perfect ride.

From upgrading your motor and battery to installing custom accessories, these shops have the expertise and resources to bring your vision to life. Not only do they provide the necessary tools and equipment, but they also have knowledgeable staff who can guide you through the customization process.

By visiting an electric bike shop or workshop, you can ensure that your bike meets your specific needs and preferences. Electric bikes offer numerous benefits, from reducing your carbon footprint to providing a more efficient mode of transportation.

Now, let’s delve into recommended books and websites to further expand your knowledge on electric bike customization.

Advertisement

Recommended Books and Websites

If you’re looking to learn more about customizing your electric bike, there are several recommended books and websites available.

One highly regarded book is ‘Electric Bicycles: A Guide to Design and Use’ by William C. Morchin. This comprehensive guide covers everything from the basics of electric bike technology to advanced customization techniques. It provides step-by-step instructions, detailed diagrams, and troubleshooting tips to help you build and modify your electric bike to suit your specific needs.

Another great resource is the website www.electricbike.com. This website offers a wealth of information on electric bikes, including articles, reviews, and forums where you can connect with other electric bike enthusiasts. It also has a section dedicated to DIY electric bike projects, providing detailed instructions and resources for building your own custom electric bike.

In conclusion, these recommended books and websites are invaluable resources for anyone looking to delve deeper into the world of electric bike customization. They provide the knowledge and inspiration needed to take your electric bike to the next level.

Conclusion and Final Thoughts

To wrap things up, you should take all the information into consideration and decide if making an electric bike is the right project for you. Throughout this guide, we have explored the world of electric bikes, providing step-by-step instructions and valuable resources to help you get started. Now, let’s summarize the key points and share some final thoughts.

Advertisement

Firstly, making an electric bike can be a rewarding and fulfilling project for those with a passion for DIY and a desire for sustainable transportation. It allows you to customize your bike according to your preferences and needs, while also reducing your carbon footprint. However, it’s important to remember that this project requires technical skills, research, and a significant investment of time and money.

In conclusion, if you have the necessary skills, resources, and enthusiasm, making an electric bike can be a fantastic project to undertake. It offers a unique opportunity to combine your love for biking with the excitement of creating your own eco-friendly mode of transportation. Keep in mind the project summary provided in the table below as you make your decision.

Project Summary
Difficulty: Moderate
Time Required: Several weeks
Estimated Cost: $500-$1000

Remember, this guide is just the starting point. It’s crucial to continue learning and seeking advice from experienced builders and online communities. With dedication and perseverance, you can successfully build your own electric bike and enjoy the thrill of riding it for years to come.

Frequently Asked Questions

Can I convert any type of bike into an electric bike?

Yes, any type of bike can be converted into an electric bike. The electric bike conversion process involves adding a motor, battery, and controller. Converting a regular bike into an electric bike offers benefits such as increased speed, easier uphill climbs, and longer range.

How much does it cost to convert a regular bike into an electric bike?

Converting a regular bike into an electric bike using electric bike conversion kits can cost anywhere from $200 to $1000. Pros include affordability and customizability, while cons include added weight and potential maintenance issues.

Advertisement

Are there any legal regulations or restrictions for using an electric bike?

There are legal regulations and restrictions for using an electric bike. Safety concerns include potential risks such as accidents and injuries. Additionally, using an electric bike contributes to sustainability by reducing carbon emissions and promoting eco-friendly transportation options.

What is the average range of an electric bike on a single charge?

The average range of an electric bike on a single charge depends on various factors, such as battery capacity, terrain, rider weight, and assistance level. Electric bike battery life can range from 20 to 100 miles, allowing for an efficient and enjoyable ride.

Can I still pedal the electric bike if the battery runs out?

Yes, you can still pedal an electric bike if the battery runs out. The pedal assist feature allows for easier pedaling and the benefits of pedaling include exercise, extending range, and reducing reliance on the battery.

Conclusion

In conclusion, converting your bike into an electric one is like giving it a turbo boost, propelling you into a whole new level of cycling excitement.

With the right tools, materials, and step-by-step guide, you’ll be able to create your own electric bike and enjoy the thrill of effortless rides.

Advertisement

However, it’s crucial to prioritize safety and adhere to regulations to ensure a smooth and secure experience.

Don’t forget to explore advanced modifications and upgrades to further enhance your electric bike’s performance.

Remember, with the support of the resources and community, you’ll be well on your way to becoming an electric biking pro.

Happy riding!

Advertisement

Continue Reading

Electric Bike

Why Won’t My Electric Bike Work

Published

on

By

An image capturing the frustration of a person standing next to their electric bike, with a puzzled expression and hands gesturing towards the bike's tangled wires, while a dimly lit workshop and scattered tools surround them

Do you find yourself pedaling without moving on your e-bike? Don’t let frustration take over! Your bike might just need a little troubleshooting to get back on the road.

In this article, we will explore the possible reasons why your electric bike won’t work and guide you through a step-by-step process to diagnose and fix the issue.

So, tighten your helmet and let’s dive into the world of electric bike problem-solving!

Key Takeaways

  • Unexplained loss of power can indicate a fault in the motor or battery system, and it is important to consult a professional technician for accurate diagnosis and fixing.
  • Strange noises or vibrations are often indicators of mechanical problems, and professional technicians can identify the source of the issue and perform necessary repairs.
  • Electrical malfunctions, such as lights or display not working, should be addressed by professionals who have expertise in troubleshooting and repairing wiring or connection issues.
  • Complex repairs should be left to professional technicians as failed DIY attempts may require their guidance, knowledge, and tools to effectively tackle the issues.

Check the Battery Connection

Check if the battery isn’t properly connected.

Advertisement

To troubleshoot the battery connection, begin by inspecting the battery wiring. Make sure that all the wires are securely attached and that there are no loose connections. Take a close look at the connectors and terminals to ensure they are clean and free from corrosion. If you notice any damage or frayed wires, they may need to be replaced.

Additionally, check if the battery is securely mounted in its designated place. A loose battery can cause disconnection issues.

Once you have confirmed that the battery connection is secure, you can move on to the next step of troubleshooting, which is ensuring that the battery is charged and functioning correctly.

Ensure the Battery is Charged

Make sure the battery’s charged. Troubleshooting battery issues is crucial when your electric bike won’t work. The first step is to ensure that the battery is fully charged.

Inspect the charging cable and make sure it is securely connected to both the battery and the power source. Look for any signs of damage or wear on the cable. Check if the charger light is on when plugged in. If not, it could indicate a faulty charger. You can also test the charger by using it on a different device to see if it functions properly. If the charger is indeed faulty, you may need to replace it.

Advertisement

Once you have confirmed that the battery is charged, it is time to move on to examining the motor and wiring to further diagnose the issue.

Examine the Motor and Wiring

Take a close look at the motor and wiring to troubleshoot motor issues and identify any wiring problems.

Start by examining the motor itself. Look for any visible signs of damage, such as loose or disconnected wires, burnt or frayed insulation, or broken components. Check the motor’s connections to ensure they are secure and tightly fastened.

Advertisement

Next, inspect the wiring that connects the motor to the battery and controller. Look for any loose or damaged wires, as well as any signs of corrosion or rust. If you find any issues, repair or replace the affected parts as necessary.

Once you have examined the motor and wiring, you can move on to testing the throttle and controller to further diagnose the problem.

Test the Throttle and Controller

To troubleshoot the issue with your electric bike, start by testing the throttle and controller. The throttle is responsible for controlling the speed of the bike, while the controller manages the power flow from the battery to the motor. Begin by checking the throttle connection to ensure it is securely plugged in. If the connection is loose, reattach it firmly. Next, test the throttle by twisting it and observing the response. If there is no response or the bike doesn’t accelerate, the throttle may be faulty and require replacement. Moving on to the controller, familiarize yourself with its functions by referring to the user manual. Check if the controller is powered on and if all the wires are properly connected. If everything appears to be in order but the bike still doesn’t work, it may be necessary to inspect the brake system for any potential issues.

Inspect the Brake System

Advertisement

Inspecting the brake system is crucial to ensure the safe operation of your e-bike. To check the brake pads, follow these steps:

  1. Look for any signs of wear or thinning on the brake pads. If they are less than 3mm thick, they need to be replaced.

  2. Check the alignment of the brake pads with the rim. They should be centered and not rubbing against the tire.

  3. Examine the brake cables for any fraying, kinks, or signs of damage. Replace them if necessary.

  4. Test the brake lever to ensure it engages smoothly and quickly stops the bike.

By thoroughly inspecting the brake system, you can identify any issues that may be causing your electric bike to not work properly.

Once you have checked the brake pads and inspected the brake cables, it’s important to look for any loose or damaged parts to address in the subsequent section.

Look for Any Loose or Damaged Parts

Now that you have inspected the brake system, it is time to move on to the next step in troubleshooting your electric bike.

The current subtopic is to look for any loose or damaged parts. This is an important step because common issues with electric bikes often stem from loose or damaged components.

Advertisement

Begin by carefully examining the entire bike, paying close attention to the frame, handlebars, pedals, and any other areas where parts may be attached. Look for any signs of wear and tear, such as cracks, rust, or loose screws.

Tighten any loose parts using the appropriate tools and replace any damaged components as necessary. By thoroughly inspecting and addressing any loose or damaged parts, you can ensure that your electric bike is in optimal working condition.

Moving forward, let’s verify the tire pressure in the next section.

Verify the Tire Pressure

Check the tire pressure on your electric bike to ensure optimal performance. Proper tire pressure is crucial for the smooth operation of your electric bike and can affect its speed, handling, and overall efficiency. To troubleshoot the motor and maximize your riding experience, follow these steps:

  • Use a digital tire pressure gauge to measure the pressure in each tire accurately.
  • Refer to your electric bike’s manual or the manufacturer’s recommendations for the ideal tire pressure.
  • Adjust the pressure using a bike pump, adding or releasing air as necessary.
  • Double-check the tire pressure after making adjustments to ensure it meets the specified range.

By checking the tire pressure regularly, you can prevent potential issues such as decreased battery life, increased rolling resistance, and unstable riding conditions.

Once you have verified the tire pressure, it’s time to move on to the next section and address the importance of cleaning and lubricating the chain.

Advertisement

Clean and Lubricate the Chain

To ensure optimal performance, make sure you clean and lubricate the chain on your electric bike regularly. Cleaning and lubricating the chain is essential for optimal performance and the longevity of your electric bike.

Over time, dirt, dust, and debris can accumulate on the chain, which can lead to increased friction and wear. By regularly cleaning the chain, you can remove these particles and prevent them from causing damage. Additionally, lubricating the chain helps to reduce friction and improve the overall efficiency of the bike. This not only enhances the performance of your electric bike but also prolongs its lifespan.

Once you have cleaned and lubricated the chain, the next step is to adjust the electric bike’s settings for a smooth and enjoyable ride.

Adjust the Electric Bike’s Settings

Make sure to adjust your electric bike’s settings for a smooth and enjoyable ride.

When troubleshooting issues with your electric bike, one of the first steps you should take is to adjust the power settings. This can help address problems such as poor acceleration or difficulty in climbing hills.

Advertisement

Start by checking the power level on your bike’s display and ensure that it is set to an appropriate level for your desired riding experience. Additionally, you may need to adjust the pedal assist level or throttle sensitivity to optimize your bike’s performance.

Experiment with different settings to find the right balance between power and efficiency.

If, after adjusting the settings, your electric bike still doesn’t work properly, it may be time to consult a professional technician for further assistance.

Consult a Professional Technician if Necessary

If you’re experiencing persistent issues with your electric bike, it might be worth seeking the help of a professional technician. While adjusting the settings can often resolve minor problems, there are certain situations that require the expertise of a trained technician.

Here are four indications that it’s time to consult a professional:

Advertisement
  1. Unexplained loss of power: If your electric bike suddenly loses power without any apparent reason, it could be due to a fault in the motor or battery system. A technician will be able to diagnose and fix the issue accurately.

  2. Strange noises or vibrations: Unusual sounds or vibrations during operation can indicate mechanical problems. A technician can identify the source of the issue and perform the necessary repairs.

  3. Electrical malfunctions: If the electrical components of your electric bike are not functioning correctly, such as the lights or display, a professional technician can troubleshoot and repair the wiring or connections.

  4. Complex repairs: If you’ve attempted to fix the problem yourself but haven’t had any success, it’s time to seek professional guidance. A technician will have the knowledge and tools to tackle complex repairs effectively.

Remember, consulting a professional technician is essential to ensure the safe and efficient operation of your electric bike.

Frequently Asked Questions

How do I clean and lubricate the chain on my electric bike?

To clean and lubricate the chain on your electric bike, start by using a degreaser and a brush to remove dirt and grime. Rinse with water and dry thoroughly. Apply a bicycle-specific lubricant evenly along the chain, wiping off any excess. Repeat regularly for optimal chain maintenance.

How do I adjust the settings on my electric bike?

To adjust the settings on your electric bike, start by accessing the control panel. From there, you can adjust the pedal assist level to your desired setting. If you’re experiencing battery issues, troubleshoot by checking the connection and charge level.

What should I do if I notice any loose or damaged parts on my electric bike?

If you notice any loose or damaged parts on your electric bike, you should take immediate action. To fix a punctured tire, locate the hole, remove the tire, patch the hole, and reassemble. To replace brake pads, remove the old pads, install new ones, and adjust the brake system.

How do I test the throttle and controller on my electric bike?

To test the throttle and controller on your electric bike, start by testing the battery voltage. Then, troubleshoot the motor by checking the connections, controller settings, and motor resistance. Remember the adage: "Measure twice, cut once."

Advertisement

When should I consult a professional technician for help with my electric bike?

To ensure the best performance of your electric bike, seek professional help when you encounter complex issues beyond basic troubleshooting. They can diagnose and fix common problems like faulty controllers, malfunctioning batteries, or motor issues.

Conclusion

In conclusion, if you find yourself asking why your electric bike won’t work, it’s crucial to go through a thorough troubleshooting process.

Check the battery connection, ensure it’s charged, and examine the motor and wiring.

Test the throttle and controller, inspect the brake system, and verify the tire pressure.

Additionally, clean and lubricate the chain, and adjust the bike’s settings.

Advertisement

If all else fails, don’t hesitate to consult a professional technician for further assistance.

Remember, taking these precise and detailed steps will help you get back on your electric bike with confidence and efficiency.

Continue Reading

Electric Bike

X-Treme Rocky Road 48v 500w Fat Tire Electric Bike How To Turn On

Published

on

By

An image showcasing the X-Treme Rocky Road 48v 500w Fat Tire Electric Bike being powered on

Are you fed up with having difficulty starting your X-Treme Rocky Road 48V 500W Fat Tire Electric Bike? Don’t worry, riders! In this helpful guide, I will take you through the process of starting your bike step by step.

From unpacking and assembling to finding the power button and ensuring the battery is charged, I’ve got you covered.

So buckle up, get ready to ride, and let’s dive into the electrifying world of the X-Treme Rocky Road Electric Bike!

Key Takeaways

  • Carefully cut through packaging tape without damaging parts
  • Locate the power button with a power symbol or the word ‘power’
  • Ensure the battery is fully charged by following manufacturer’s instructions
  • Press and hold the power button on the control panel until the display screen lights up

Unpack and Assemble the Bike

To turn on the x-treme rocky road 48v 500w fat tire electric bike, you need to unpack and assemble it.

Advertisement

Before diving into the assembly process, let me share some unpacking tips. Start by carefully cutting through the packaging tape, making sure not to damage any parts. Once unpacked, lay out all the components and refer to the instruction manual for guidance.

Now, let’s talk about the assembly process. Begin by attaching the front wheel, making sure it’s properly aligned and tightened. Next, mount the handlebars securely, adjusting them to a comfortable position. Troubleshooting common assembly issues, such as loose screws or misaligned parts, will ensure a smooth setup.

Finally, locate the power button, which is conveniently placed on the handlebar. With the bike unpacked and assembled, it’s time to power it up and hit the road.

Locate the Power Button

Find the power button on your x-treme rocky road 48v 500w fat tire electric bike. To turn on your bike, you need to locate the power button, which is usually located on the control panel or handlebars. Here are some important things to know about the power button:

  • Look for a button with a power symbol or the word ‘power’ written on it.
  • The power button may be illuminated or have a light indicator to show if the bike is on or off.
  • Some bikes have a key ignition system, so make sure to insert and turn the key to activate the power.

If you are having trouble turning on your bike, there could be a few issues to troubleshoot. Check the battery level and make sure it is fully charged. Additionally, ensure that all connections are secure and that the bike is properly assembled.

Once you have located the power button and resolved any issues, you can move on to ensuring the battery is fully charged.

Advertisement

Ensure the Battery is Fully Charged

Make sure the battery on your X-treme Rocky Road 48V 500W fat tire electric bike is fully charged. Before turning on the bike, it is important to ensure that the battery has enough power to operate the bike efficiently.

To charge the battery, connect the charger to a power outlet and then plug it into the charging port on the bike. It is essential to follow the battery charging precautions provided by the manufacturer to prevent any potential hazards. If you encounter any issues while charging the battery, such as slow charging or the battery not holding a charge, it is recommended to troubleshoot the problem or seek assistance from a professional.

Once the battery is fully charged, you can proceed to press and hold the power button to turn on the electric bike.

Advertisement

Press and Hold the Power Button

Hold down the power button to start it.

Press and hold the power button located on the control panel of your X-Treme Rocky Road 48V 500W fat tire electric bike. This button is usually labeled with a power symbol. Make sure to press and hold it for a few seconds until you see the display screen light up.

If the bike doesn’t turn on, there are a few troubleshooting steps you can try.

First, check if the battery is properly connected and fully charged, as discussed in the previous subtopic.

Next, ensure that the power button is not stuck or damaged.

Advertisement

Lastly, try resetting the bike by disconnecting and reconnecting the battery.

Avoid common mistakes like not pressing the power button long enough or not having the battery properly connected.

Once you have successfully turned on the bike, wait for the display screen to turn on, indicating that the bike is ready to use.

Wait for the Display Screen to Turn On

Advertisement

Once the power button is pressed and held, you just need to wait for the display screen to turn on.

The display screen is an essential component of the x-treme rocky road 48v 500w fat tire electric bike as it provides important information about the bike’s performance and settings.

It shows details such as speed, battery level, distance traveled, and even allows you to adjust various settings.

If the display screen does not turn on after pressing the power button, there may be some troubleshooting steps you can take.

Check if the battery is properly connected, ensure that the bike is turned on, or try resetting the display screen.

Advertisement

Once the display screen turns on, you can proceed to adjust the settings if necessary.

Adjust the Settings if Necessary

If needed, you can easily adjust the settings on the display screen of the x-treme rocky road 48v 500w fat tire electric bike. This allows you to customize your riding experience and troubleshoot any issues that may arise. The display screen is user-friendly and provides easy access to various settings. Here is a table outlining the available settings:

Setting Description Adjustments
Power Level Control the amount of power the motor provides Increase or decrease power level
Speed Limit Set a maximum speed for the bike Increase or decrease speed limit
Trip Distance Keep track of the distance you have traveled Reset trip distance

By adjusting these settings, you can fine-tune the performance of your electric bike to suit your preferences. Once you have made any necessary adjustments, you can then mount the bike and prepare to ride.

Mount the Bike and Prepare to Ride

To start your ride, simply hop on the bike and get ready to go. Before mounting the bike, it’s important to ensure you are following the proper techniques for a safe and comfortable ride. Here are some mounting techniques to keep in mind:

  • Position the bike upright and hold the handlebars firmly.
  • Place one foot on the ground and swing your other leg over the frame.
  • Take a comfortable seat on the saddle and position your feet on the pedals.

Once you are securely on the bike, it’s essential to take safety precautions. Make sure you are wearing a helmet and any other necessary protective gear. Check that the brakes are functioning properly and adjust your seat height if needed. Now, you’re ready to move on to the next step: testing the motor and pedal assist function.

Test the Motor and Pedal Assist Function

Make sure you test the motor and pedal assist function before starting your ride. This is an important step to ensure that everything is working properly and to troubleshoot any potential issues.

Advertisement

To test the motor, turn on the bike by pressing the power button located on the display panel. Once the bike is powered on, give the throttle a gentle twist and listen for the motor to engage. You should feel a smooth and steady acceleration. If the motor doesn’t engage or if there are any strange noises, you may need to check the connections or consult the user manual for motor troubleshooting tips.

Next, test the pedal assist function by selecting a level on the display panel and pedaling the bike. You should feel a boost in power as the pedal assist kicks in. Experiment with different levels to find the one that suits your riding style.

Finally, practice operating the brakes and gears to ensure they are functioning properly. Transitioning into the next section, it’s important to have a good understanding of the bike’s controls before heading out on your ride.

Practice Operating the Brakes and Gears

Before heading out on your ride, take the time to practice operating the brakes and gears. Proper hand positioning on the brake levers and gear shifters is crucial for safe and efficient riding. When gripping the brake levers, place your index and middle fingers on the brake lever, with your other fingers wrapping around the handlebar. This allows for quick and easy access to the brakes when needed. As for the gear shifters, position your thumb and index finger on the levers, allowing for smooth shifting between gears. Understanding the different gear ratios and when to use them for optimal performance is also important. Lower gears are ideal for climbing steep hills or accelerating from a stop, while higher gears are best for maintaining speed on flat terrain. With practice, you’ll become familiar with the right gear for each riding situation. Now, enjoy your ride on the x-treme rocky road electric bike!

Enjoy Your Ride on the X-Treme Rocky Road Electric Bike!

Enjoy your ride on the X-Treme Rocky Road Electric Bike! As a proud owner of this amazing electric bike, you’re in for some truly enjoyable ride experiences. With its powerful 500w motor and fat tires, this bike can conquer any terrain with ease.

Advertisement

But to ensure that you continue to have a smooth and trouble-free ride, it’s important to take proper care of your bike.

Regular maintenance is key to keeping your X-Treme Rocky Road in top shape. Make sure to regularly check the tire pressure, as the fat tires may require a slightly different PSI compared to regular bikes. Additionally, keep an eye on the chain and gears, and lubricate them as needed to prevent any unnecessary wear and tear.

Another important aspect of maintaining your electric bike is to keep the battery charged and stored properly. Follow the manufacturer’s instructions for the best battery care practices.

By following these maintenance and care tips, you can ensure that your ride on the X-Treme Rocky Road Electric Bike remains enjoyable and hassle-free for years to come.

Frequently Asked Questions

How long does it take to fully charge the battery of the X-Treme Rocky Road Electric Bike?

The charging time for the battery of the x-treme rocky road electric bike can vary depending on the current charge level and the charger used. You can check the battery indicator to see when it is fully charged.

Advertisement

Is there a specific order in which the bike should be assembled?

Sure, there is a specific order to assemble the bike. First, attach the handlebars, then the front wheel, followed by the pedals, seat, and finally the battery. This ensures a safe and efficient assembly process.

How do I know if the battery is fully charged?

To determine if the battery is fully charged, check the battery charge indicator on the bike. It will display the current level of charge. If you encounter any issues with battery charging, consult the troubleshooting section of the user manual for assistance.

Can I adjust the pedal assist level on the bike?

Sure, I can adjust the pedal assist level on the bike. It’s great because it allows me to customize the amount of assistance I receive while pedaling. This feature enhances my riding experience and makes it easier to conquer hills or ride longer distances.

Are there any safety precautions I should be aware of before riding the X-Treme Rocky Road Electric Bike?

Before riding the electric bike, it’s important to follow safety precautions. Use proper riding techniques, such as maintaining balance and using hand signals. Regular maintenance is also crucial, including checking tire pressure, brakes, and keeping the bike clean.

Conclusion

After following the simple steps to turn on the X-Treme Rocky Road electric bike, I was ready to hit the road in no time.

Advertisement

The unpacking and assembly process was a breeze, and locating the power button was a piece of cake.

Once I ensured the battery was fully charged, I pressed and held the power button, anxiously waiting for the display screen to turn on.

As I mounted the bike and tested the motor and pedal assist function, I couldn’t help but feel a rush of excitement.

Operating the brakes and gears was a smooth experience, and before I knew it, I was off on an exhilarating ride.

The X-Treme Rocky Road electric bike truly delivers an unmatched experience, combining power, comfort, and style.

Advertisement

Continue Reading
Advertisement

Affiliate disclaimer

As an affiliate, we may earn a commission from qualifying purchases. We get commissions for purchases made through links on this website from Amazon and other third parties.

About us

We are a passionate team driven by the belief that cycling is a fantastic and accessible way to stay active while enjoying the beauty of the outdoors. Our mission is to share our love for cycling with as many people as possible. We provide a welcoming environment for individuals of all ages, abilities, and backgrounds to come together and ride bikes. With Ralf’s visionary leadership, Zane’s expertise in cycling adventures, and Olivia’s dedication to community building, we strive to create a vibrant space where everyone can experience the joy of cycling. Through group rides, workshops, and inclusive events, we inspire and empower individuals to embrace an active lifestyle. Join us in our quest to pedal together, embrace the joy of cycling, and foster connections that last a lifetime.

Advertisement

Trending