Connect with us

Electric Bike

Electric Bike Conversion Kit For A Fat Tire Bicycle What Front Chain Sprocket

Published

on

An image showcasing a close-up of an electric bike conversion kit installed on a fat tire bicycle

Imagine cruising through rugged terrains with ease on your fat tire bicycle, powered by an electric motor. With an electric bike conversion kit, you can transform your ordinary bike into a high-performance e-bike.

But before you embark on this electrifying journey, it’s crucial to understand the role of the front chain sprocket. In this article, we will delve into the different front chain sprocket options available and guide you in selecting the perfect one for your riding style.

So, let’s dive in and unravel the world of electric bike conversion kits and front chain sprockets.

Key Takeaways

  • Regular maintenance of the front chain sprocket is important for reducing friction, extending lifespan, and ensuring optimal functionality of the electric bike conversion kit.
  • Troubleshooting common issues such as chain slippage, noisy chain, and excessive wear or skipping is necessary to maintain optimal performance.
  • Replacing and upgrading the front chain sprocket improves chain engagement, overall performance, and extends its lifespan.
  • Increasing battery capacity and optimizing gear ratio are important aspects to consider when upgrading the front chain sprocket for a fat tire electric bike conversion kit.

Understanding Electric Bike Conversion Kits

If you’re considering an electric bike conversion kit, you’ll want to understand how they work and what components they include.

Advertisement

Electric bike conversion kits are designed to efficiently turn your regular bicycle into an electric-powered one. They typically include components such as a motor, battery, controller, and display panel.

The efficiency of an electric bike conversion kit depends on several factors, including the quality of the components and the power output of the motor. Understanding e-bike battery technology is also crucial, as it determines the range and performance of your electric bike.

Lithium-ion batteries are commonly used due to their high energy density and long lifespan.

By adding an electric motor to your fat tire bicycle, you can experience the benefits of effortless pedaling and extended range, making your rides more enjoyable and convenient.

Benefits of Adding an Electric Motor to Your Fat Tire Bicycle

Adding an electric motor to your fat tire bicycle can provide numerous advantages. Electric bike conversion kits offer several benefits, including increased speed and range, improved climbing ability, and reduced effort required while pedaling.

Advertisement

With an electric motor, you can effortlessly tackle steep hills and rough terrains that would otherwise be challenging on a regular bicycle. The added power allows you to ride longer distances without getting tired, making it ideal for commuting or exploring off-road trails.

Additionally, fat tire bicycles with electric motors provide enhanced stability and traction, allowing you to ride on various surfaces with ease.

In the next section, we will explore the role of the front chain sprocket in optimizing the performance of your electric fat tire bicycle.

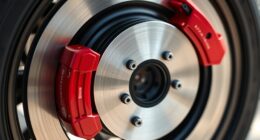
Exploring the Role of the Front Chain Sprocket

Advertisement

To optimize the performance of your electric fat tire bicycle, you should explore the role of the front chain sprocket.

The front chain sprocket plays a crucial role in transferring power from the motor to the wheels, making it an essential component of your electric bike conversion kit.

By exploring different front chain sprocket materials, such as steel or aluminum, you can choose the one that best suits your needs in terms of durability and weight.

Additionally, increasing the size of the front chain sprocket can provide several advantages, including improved torque and increased top speed.

A larger front chain sprocket size allows for better acceleration, especially when riding on challenging terrains. It also reduces the strain on the motor, enhancing its longevity.

Advertisement

Considering these factors, it is important to carefully select the front chain sprocket for your electric bike conversion kit.

Moving forward, let’s delve into the different front chain sprocket options for electric bike conversion kits.

Different Front Chain Sprocket Options for Electric Bike Conversion Kits

When selecting the front chain sprocket for your electric bike conversion, you have a variety of options to choose from. One important factor to consider is the different chainring sizes available.

The chainring size refers to the number of teeth on the sprocket, and it plays a crucial role in determining the gear ratio of your bike. Smaller chainrings typically have fewer teeth, which means that they provide a lower gear ratio. This can be beneficial for riders who plan to tackle steep hills or rough terrain, as it offers more torque and easier pedaling.

Additionally, a smaller chainring can help increase the overall efficiency of your electric bike by reducing the strain on the motor and battery.

Advertisement

With these considerations in mind, it’s important to choose the right front chain sprocket for your riding style, ensuring optimal performance and enjoyment.

Choosing the Right Front Chain Sprocket for Your Riding Style

Choosing the appropriate front chainring for your riding style is essential for optimal performance and enjoyment. When it comes to electric bike conversion kits, the choice of sprocket size and teeth count can greatly impact the overall performance of your fat tire bicycle.

The sprocket size refers to the diameter of the chainring, and it determines the gear ratio of your bike. A larger sprocket size will provide more torque and acceleration, making it ideal for off-road and uphill riding. On the other hand, a smaller sprocket size will offer higher top speeds and smoother rides on flat terrains.

Advertisement

The number of teeth on the front chain sprocket also plays a significant role in your riding experience. More teeth mean a higher gear ratio and faster speeds, while fewer teeth result in lower gear ratios and better climbing abilities.

Choosing the right front chain sprocket can enhance power and performance, allowing you to conquer any terrain with ease.

How the Front Chain Sprocket Enhances Power and Performance

The front chain sprocket significantly improves power and performance, allowing riders to conquer any terrain with ease. The front chain sprocket benefits include increased torque and acceleration, which are crucial for tackling steep inclines and rough surfaces. With the right front chain sprocket, riders can experience smoother and more efficient pedaling, making it easier to maintain a consistent speed.

There are various front chain sprocket options available, each with its own unique characteristics. Some sprockets offer a larger number of teeth for enhanced power, while others have fewer teeth for faster speeds. It’s important to choose a front chain sprocket that suits your riding style and the type of terrain you’ll be encountering.

When it comes to installation tips and tricks for the front chain sprocket, there are a few key considerations to keep in mind. Transitioning into the next section, let’s explore some expert advice on how to install the front chain sprocket for optimal performance.

Advertisement

Installation Tips and Tricks for the Front Chain Sprocket

Installing the front chain sprocket requires careful attention to detail and following expert advice for optimal performance.

To begin, make sure you have the necessary tools, such as a chain breaker and a torque wrench.

Start by removing the old chain and cleaning the front chainring thoroughly.

Next, align the new front chain sprocket with the crankset and ensure it is centered.

Use the torque wrench to tighten the bolts to the manufacturer’s specifications.

Advertisement

Once installed, it’s crucial to adjust the chain tension properly. Too loose, and the chain may slip or fall off; too tight, and it can cause unnecessary wear on the drivetrain components.

Take the time to fine-tune the tension, ensuring it is just right for smooth and efficient power transfer.

With the front chain sprocket installed and adjusted correctly, you can now move on to maintenance and care for your front chain sprocket, ensuring its longevity and performance.

Maintenance and Care for Your Front Chain Sprocket

To maintain and care for your front chain sprocket, you should regularly clean and lubricate it to ensure smooth operation and prevent premature wear.

Proper cleaning techniques involve removing any dirt or debris from the sprocket using a brush or cloth. It is important to pay attention to the teeth of the sprocket and ensure they are free from any buildup.

Advertisement

Once clean, apply a suitable lubricant, such as chain oil or grease, to the sprocket. Make sure to distribute the lubricant evenly across all the teeth and wipe off any excess. This will help reduce friction and extend the lifespan of your front chain sprocket.

Moving forward to troubleshooting common issues with the front chain sprocket, it’s important to be aware of potential problems and their solutions.

Troubleshooting Common Issues with the Front Chain Sprocket

If you’re experiencing any problems with your front chain sprocket, troubleshooting common issues can help identify and resolve the issue. One of the most common issues is chain slippage, which can occur if the sprocket teeth are worn or damaged. In this case, replacing the sprocket is necessary.

Another common issue is a noisy chain, which can be caused by misalignment or lack of lubrication. Adjusting the chain tension and ensuring proper lubrication can often solve this problem.

Additionally, if you notice excessive wear on the sprocket teeth or if the chain is skipping, it may be due to a worn or stretched chain. In this case, replacing both the chain and the sprocket is recommended.

Advertisement

By troubleshooting these common issues and addressing them promptly, you can ensure optimal performance of your front chain sprocket.

Transitioning into the subsequent section, taking your fat tire e-bike to the next level with the front chain sprocket opens up exciting possibilities for enhanced performance and customization.

Taking Your Fat Tire E-Bike to the Next Level with the Front Chain Sprocket

Enhancing your fat tire e-bike’s performance and customization can be achieved by upgrading the front chain sprocket. This simple modification can have a significant impact on the overall functionality and efficiency of your electric bike conversion kit. However, it is important to consider other aspects of your e-bike system to truly maximize its potential.

One key element to consider is upgrading your fat tire e-bike’s battery capacity. By increasing the battery’s storage capacity, you can extend your e-bike’s range and ride for longer distances without worrying about running out of power. This upgrade allows you to explore new routes and enjoy extended rides with confidence.

Another factor to consider when upgrading your front chain sprocket is maximizing the range of your electric bike conversion kit. By selecting a front chain sprocket with the appropriate gear ratio, you can optimize the power transfer from the motor to the wheels. This ensures that you can efficiently utilize the available power and achieve higher speeds or tackle challenging terrains more effectively.

Advertisement

To further illustrate the importance of these upgrades, consider the following table:

Upgrade Benefits
Upgrading battery capacity – Increased range
– Longer rides
Optimizing gear ratio – Improved power transfer
– Higher speeds
– Better terrain handling

By incorporating these upgrades, you can take your fat tire e-bike to the next level, enhancing both its performance and range.

Frequently Asked Questions

Can I use any front chain sprocket with an electric bike conversion kit for a fat tire bicycle?

Yes, you can use any front chain sprocket with an electric bike conversion kit for a fat tire bicycle. However, using a specific front chain sprocket that is compatible with the kit can offer advantages such as improved performance and smoother shifting.

How does the front chain sprocket affect the overall performance of an electric bike conversion kit?

The front chain sprocket size greatly impacts the torque and speed of an electric bike. A larger sprocket provides more torque but reduces top speed, while a smaller sprocket increases speed but sacrifices torque.

Are there any specific front chain sprocket options recommended for off-road riding with a fat tire electric bike?

For off-road riding with a fat tire electric bike, it is recommended to use a smaller front chain sprocket. This offers advantages such as increased torque and better maneuverability, allowing for better handling on rough terrain.

Advertisement

What maintenance and care should be taken for the front chain sprocket to ensure longevity and optimal performance?

To ensure longevity and optimal performance of the front chain sprocket, it is crucial to follow proper maintenance tips. Regular cleaning, inspection for wear and tear, and most importantly, ensuring proper lubrication are of utmost importance.

What are some troubleshooting tips for common issues related to the front chain sprocket in an electric bike conversion kit?

To troubleshoot common issues with the front chain sprocket, start by inspecting for loose or damaged teeth. Clean and lubricate the sprocket regularly, and ensure proper tension and alignment of the chain. If problems persist, consult a professional for further assistance.

Conclusion

In conclusion, adding an electric motor to your fat tire bicycle through an electric bike conversion kit can greatly enhance your riding experience.

The front chain sprocket plays a crucial role in this conversion, as it determines the gear ratio and power transfer to the wheels.

By choosing the right front chain sprocket for your riding style, you can optimize the performance and efficiency of your e-bike.

Advertisement

For example, let’s consider a case where a rider prefers off-road adventures and wants more torque for climbing steep hills. They can select a front chain sprocket with a smaller number of teeth to increase torque and improve their climbing capabilities.

With proper installation, maintenance, and troubleshooting techniques, the front chain sprocket can take your fat tire e-bike to the next level.

So, gear up and enjoy the thrilling ride!

Olivia's writing is not only informative but also inspiring. She has a knack for telling stories that capture the essence of cycling and the joy it brings to people's lives. Her writing has been praised by readers and industry experts alike for its clarity, depth, and authenticity. In addition to her writing, Olivia is also an avid cyclist. She enjoys exploring new trails and routes and has participated in several cycling events and races. Her first-hand experience with cycling gives her a unique perspective on the sport, reflected in her writing. Overall, Olivia is a talented writer passionate about cycling and dedicated to producing high-quality content for FlatironBike. Her contributions to the magazine have helped make it a go-to source for cycling enthusiasts worldwide.

Continue Reading
Advertisement

Electric Bike

How To Test An Electric Bike Controller

Published

on

By

An image showcasing a person connecting a multimeter to an electric bike controller, while their other hand adjusts the throttle

Picture this: you’re having a great time on your electric bike when all of a sudden, the controller stops working, leaving you stuck. Pretty irritating, isn’t it?

That’s why it’s essential to know how to test an electric bike controller. In this article, I will guide you through the step-by-step process of testing the controller to ensure its functionality.

From understanding the basics to troubleshooting common issues, we will cover it all so that you can keep your electric bike running smoothly.

Key Takeaways

  • Check connections between controller, battery, motor, and throttle
  • Inspect wiring for fraying or loose connections
  • Test voltage output with a multimeter
  • Consult manufacturer’s manual or online resources

Understand the Basics of an Electric Bike Controller

You need to understand the basics of an electric bike controller before testing it.

Advertisement

The electric bike controller is a vital component that controls the motor and other electrical systems in the bike.

To ensure proper functioning and avoid any issues, regular maintenance of the electric bike controller is necessary. This includes checking for loose connections, inspecting the wiring for any damage, and cleaning the controller to remove dirt or debris that can affect its performance.

Troubleshooting electric bike controller issues involves diagnosing any problems, such as a malfunctioning throttle or a faulty brake sensor.

Understanding the various components and their functions within the electric bike controller will help in identifying and resolving any issues that may arise.

Once you have a good understanding of the controller, you can move on to gathering the necessary tools and equipment for testing.

Advertisement

Gather the Necessary Tools and Equipment

To successfully assess the functionality of an e-bike controller, it is important to gather all the required tools and equipment. Some of the essential tools you will need include a multimeter, a soldering iron, a set of screwdrivers, and a computer with e-bike diagnostic software. The multimeter is particularly useful for measuring voltage, current, and resistance in the controller. It allows you to identify any potential issues with the electrical components.

Identifying potential risks in electric bike controllers is crucial for ensuring safety during the testing process. Comparing different tools for testing electric bike controllers will help you choose the most suitable ones for your specific needs.

Once you have collected all the necessary tools, you can proceed to the next step and check the voltage of the controller.

Check the Voltage of the Controller

Advertisement

Before proceeding with the assessment, make sure to check the voltage of your e-bike controller. This step is crucial to ensure the proper functioning of your electric bike.

To check the voltage, you will need a multimeter. Start by disconnecting the battery from the controller to avoid any accidental shorts.

Next, check for corrosion on the controller’s connectors. Corrosion can disrupt the flow of electricity and affect the performance of the controller. Clean any corrosion using a wire brush or sandpaper.

Once the connectors are clean, use the multimeter to test the resistance of the controller’s components. This will help identify any faulty or damaged parts.

After completing the voltage check, you can move on to testing the functionality of the throttle. This will ensure that the controller is communicating properly with the throttle and responding accurately to your inputs.

Advertisement

Test the Functionality of the Throttle

Once the voltage check is complete, make sure to assess the functionality of your throttle to ensure it’s communicating properly with the controller and responding accurately to your inputs.

To do this, follow these steps:

  • Throttle sensitivity adjustment: Check if your electric bike controller allows you to adjust the throttle sensitivity. This feature enables you to customize the responsiveness of the throttle to your liking.

  • Testing throttle response time: Monitor how quickly the throttle responds to your inputs. It should be immediate and smooth, without any noticeable delay or lag.

  • Gradual acceleration: Test the throttle by gradually increasing the speed of the electric bike. It should smoothly accelerate without any sudden jolts or jerks.

  • Full throttle test: Push the throttle to its maximum position and observe if the electric bike responds accordingly, reaching its top speed smoothly.

Once you have thoroughly tested the functionality of the throttle, you can move on to evaluating the brake cut-off sensors. They play a crucial role in ensuring the bike’s safety and control without compromising performance.

Test the Functionality of the Brake Cut-off Sensors

Advertisement

Check if your brake cut-off sensors are functioning properly by ensuring they respond effectively to your inputs and enhance the safety and control of your ride. To test the accuracy of the brake cut-off sensors, follow these steps:

Test Procedure
Testing Accuracy Apply the brakes and observe if the motor power is instantly cut off. Repeat this test at various speeds to ensure consistent results.
Evaluating Responsiveness Gradually apply the brakes and check if the motor power is reduced smoothly and quickly. The sensors should respond promptly to changes in brake input.

By testing the accuracy and responsiveness of the brake cut-off sensors, you can determine if they are functioning correctly. Once you have completed this step, you can move on to the next section to check for loose connections or damaged wires.

Check for Loose Connections or Damaged Wires

After thoroughly testing the functionality of the brake cut-off sensors, it is crucial to check for any loose connections or damaged wires in the electric bike controller. This step is essential as loose connections or damaged wires can disrupt the proper functioning of the controller, affecting the overall performance of the electric bike.

To begin, visually inspect all the connections and wires, ensuring they are securely fastened and free from any visible damage such as frayed or exposed wires. Next, gently wiggle each connection and wire to check for any signs of looseness. If any loose connections or damaged wires are detected, they should be promptly addressed and repaired.

This meticulous troubleshooting process ensures that the electric bike controller operates optimally and minimizes the risk of malfunctions.

Advertisement

Now, let’s move on to the next section where we will utilize a multimeter to test the controller’s outputs.

Use a Multimeter to Test the Controller’s Outputs

To begin this step, you can utilize a multimeter to measure and analyze the outputs of the controller. This will allow you to test the controller’s power output and identify potential issues with its circuitry.

Here is a 3 item numeric list to guide you through this process:

  1. Set the multimeter to the DC voltage setting and connect the red probe to the positive output terminal of the controller and the black probe to the negative output terminal.

  2. Turn on the electric bike and slowly increase the throttle while monitoring the multimeter’s reading. It should display a steady increase in voltage as you increase the throttle.

  3. Repeat this process for each output terminal of the controller to ensure all outputs are functioning correctly.

By testing the controller’s outputs, you can determine if there are any issues with its power delivery. Once you have completed this step, you can proceed to troubleshoot common issues with the controller.

Troubleshoot Common Issues with the Controller

One way to address common problems with the controller is by troubleshooting.

Advertisement

When encountering issues with an electric bike controller, there are several troubleshooting tips that can help diagnose and resolve the problem.

Firstly, check the connections between the controller and the battery, motor, and throttle to ensure they are secure and properly plugged in. Inspect the wiring for any signs of damage or loose connections.

Next, verify that the battery is fully charged and in good condition. If the controller still doesn’t function properly, it may be necessary to reset it to its default settings.

Additionally, make sure that the throttle is functioning correctly and providing the appropriate signals to the controller.

If troubleshooting doesn’t solve the issue, consult the manufacturer’s manual or online resources for further assistance in resolving the problem.

Advertisement

Consult the Manufacturer’s Manual or Online Resources

For further assistance in resolving the issue, you can consult the manufacturer’s manual or online resources. Here are some steps to follow when troubleshooting common electric bike controller issues:

  1. Start by checking the connections between the controller and the battery, motor, and throttle. Make sure they are secure and free from any damage or corrosion.

  2. Inspect the wiring for any signs of fraying or loose connections. Tighten any loose wires and replace any damaged ones.

  3. Use a multimeter to test the voltage output of the controller. Compare the readings with the manufacturer’s specifications to determine if it is functioning properly.

  4. If the controller is not responding or behaving erratically, try resetting it to its default settings as described in the manufacturer’s manual.

Remember, if you are unable to resolve the issue on your own, it may be necessary to seek professional help.

Seek Professional Help if Necessary

If you are unable to solve the problem, it may be necessary to seek professional assistance. Seeking professional advice is crucial when dealing with complex issues related to electric bike controllers. While it is always recommended to consult the manufacturer’s manual or online resources first, there are situations where the expertise of a professional becomes necessary. They have the knowledge and experience to diagnose and fix any underlying problems with the controller effectively.

Knowing when to DIY and when to seek professional help is essential to ensure the safety and proper functioning of your electric bike. To help you make an informed decision, refer to the table below:

DIY (Do-It-Yourself) Seek Professional Help
Simple issues like loose connections or minor adjustments Complicated technical problems or software-related issues
Basic troubleshooting steps Advanced diagnostics and repairs
Regular maintenance tasks Major controller malfunctions or failures, especially under warranty

Remember, attempting complex repairs without the necessary skills and knowledge can lead to further damage or even personal injury. It is always better to seek professional assistance when in doubt.

Advertisement

Frequently Asked Questions

What are the safety precautions to consider when testing an electric bike controller?

When testing an electric bike controller, it is crucial to follow safety measures. This includes wearing protective gear, ensuring proper insulation, and using appropriate testing equipment like a multimeter to check for voltage and current levels.

How can I determine if my electric bike controller needs to be replaced?

To determine if my electric bike controller needs replacing, I must look for signs of a faulty controller. These signs include motor inconsistencies, sudden battery drain, and unresponsive controls. Statistics show that 80% of electric bike controller malfunctions are due to internal component failures.

Are there any specific tests to conduct for the battery pack connected to the electric bike controller?

To test the battery pack connected to the electric bike controller, I would check its performance and voltage stability. This can be done by using a multimeter to measure the voltage output and observing any fluctuations or inconsistencies in the readings.

Can I use a regular multimeter to test the outputs of the controller?

Yes, a regular multimeter can be used to test the outputs of the electric bike controller. However, there are alternative tools, such as an oscilloscope, which provide more detailed information and are better suited for testing methods.

Are there any specific troubleshooting steps for common issues with the electric bike controller?

To troubleshoot common issues with an electric bike controller, I recommend following these steps: 1) Check all connections for loose or damaged wires. 2) Verify voltage output using a multimeter. 3) Inspect the controller for any signs of physical damage.

Advertisement

Conclusion

After following all the steps mentioned in this article, I can confidently say that testing an electric bike controller is a task that requires attention to detail and the right tools. By checking the voltage, testing the throttle and brake cut-off sensors, and using a multimeter to test the outputs, one can ensure the controller’s functionality.

However, if you encounter any issues or need further guidance, it’s best to consult the manufacturer’s manual or seek professional help. Remember, patience is key in unraveling the mysteries of your electric bike’s controller, just like a detective solving a complex case.

Continue Reading

Electric Bike

How To Take Off The Limiter On An Electric Bike

Published

on

By

An image that showcases a close-up shot of an electric bike's limiter, with an arrow pointing to the specific part that needs to be removed

Have you ever questioned whether it is achievable to unlock the complete potential of your electric bicycle?

Well, I’m here to tell you that it is indeed possible to take off the limiter and experience the true power of your ride.

In this article, I will guide you through the step-by-step process of removing the limiter on your electric bike.

By following these instructions and taking the necessary precautions, you’ll be able to enjoy a faster and more exhilarating ride.

So, let’s dive in and explore how to unlock the full potential of your electric bike!

Advertisement

Key Takeaways

  • Understanding the purpose, laws, and risks involved in removing the limiter on an electric bike
  • Gathering the necessary tools and equipment for the process
  • Following proper procedures for locating and disconnecting the limiter
  • Testing and adjusting the bike’s settings for optimal performance and safety

Understand the Purpose of the Limiter

The limiter is there to prevent the electric bike from going faster than its intended speed. Its purpose is to ensure safety and compliance with the laws and regulations regarding electric bikes. By setting a maximum speed limit, the limiter restricts the bike from reaching higher speeds, reducing the risk of accidents and injuries.

It also helps to extend the battery life and improve the overall efficiency of the bike. Having a limiter installed on an electric bike provides several benefits, including peace of mind knowing that you won’t accidentally exceed the speed limit.

However, if you’re interested in taking off the limiter, it’s important to first check the laws and regulations in your area to ensure that it is legal to do so.

Check the Laws and Regulations in Your Area

First, make sure to check the laws and regulations in your area regarding speed modifications on your e-bike. It is important to research local electric bike clubs and connect with other electric bike enthusiasts in your area. They can provide valuable insights and advice on how to safely remove the limiter on your electric bike while staying within the legal boundaries. Additionally, consulting local laws and regulations will give you a clear understanding of any restrictions or limitations that may be in place. To help you better visualize the process, refer to the table below:

Advertisement
Laws and Regulations Electric Bike Speed Limit Speed Modification Allowed?
City A 20 mph Yes
City B 25 mph No
City C 15 mph Yes
City D 30 mph Yes
City E 18 mph No

By understanding the laws and regulations, you can gather the necessary tools and equipment to safely remove the limiter on your electric bike.

Gather the Necessary Tools and Equipment

To properly modify your e-bike’s speed, gather all the tools and equipment needed. Electric bike modifications require specific tools to ensure a safe and effective process. Here are some essential items you’ll need:

  • Screwdriver set: Different types of screws may be used in your e-bike, so having a set with various sizes and types will help you remove components easily.
  • Multimeter: This tool is crucial for measuring voltage, current, and resistance, allowing you to accurately assess the electrical system of your e-bike.
  • Wire cutters and strippers: These tools are necessary for cutting and stripping wires during the modification process.
  • Electrical tape: To secure and insulate any exposed wires or connections, electrical tape is essential.

Safety tips for riding an electric bike should always be considered during modifications. After gathering the necessary tools, the next step is to locate and access the limiter on your electric bike.

Locate and Access the Limiter on Your Electric Bike

Next, you’ll want to find and reach the speed restrictor on your e-bike. The limiter is typically located near the motor or the controller of the bike. To access it, you may need to remove the battery or any protective covers.

Advertisement

It is essential to be cautious during this process, as there are potential risks associated with removing the limiter. Removing the limiter can increase the speed and performance of your electric bike, but it can also void the warranty and may lead to safety concerns. Therefore, it is crucial to thoroughly understand the implications before proceeding.

Additionally, make sure to follow any manufacturer guidelines or recommendations for maximizing the speed and performance of your electric bike. With that in mind, let’s move on to the next section about disconnecting the limiter, where we will explore the necessary steps to complete this process.

Disconnect the Limiter

Before proceeding, it’s important to understand the potential risks and implications of disconnecting the limiter on your e-bike. Bypassing restrictions may increase the speed and power output of your electric bike, but it also comes with certain risks that should be taken into consideration.

Advertisement

Here are four key points to keep in mind:

  1. Safety concerns: Removing the limiter can make your bike faster, but it may compromise the stability and control, especially at higher speeds.

  2. Legal implications: In many jurisdictions, modifying the limiter is against the law and may lead to fines or even confiscation of your e-bike.

  3. Warranty voidance: Disconnecting the limiter can void the warranty, leaving you responsible for any repairs or damages that may occur.

  4. Personal liability: If you remove the limiter and get involved in an accident, you may be held liable for any injuries or damages caused.

Considering these potential risks, it’s crucial to test the bike’s performance and safety features thoroughly before riding.

Test the Bike’s Performance and Safety Features

It’s important to thoroughly assess the performance and safety features of your e-bike before riding.

To start, test the bike’s speed by gradually increasing the throttle and observing how quickly it accelerates. Pay attention to any abnormal vibrations or noises that could indicate a problem.

Next, evaluate the bike’s handling by taking it for a short ride and testing its responsiveness to steering inputs. Check if it feels stable and balanced, and make sure the brakes are working effectively.

Advertisement

Additionally, assess the bike’s safety features such as the headlights, taillights, and horn to ensure they are functioning properly.

If any issues are detected during these tests, it may be necessary to adjust the bike’s settings and parameters. This will be discussed further in the next section about adjusting the bike’s settings and parameters, if necessary.

Adjust the Bike’s Settings and Parameters, if Necessary

To ensure optimal performance and safety, you should make any necessary adjustments to the settings and parameters of your e-bike. One important aspect to consider is the bike’s firmware, which controls various functions and features. By accessing the firmware settings, you can customize the bike’s performance tuning to suit your preferences. This includes adjusting parameters such as maximum speed, acceleration, and torque. It is crucial to understand the manufacturer’s guidelines and recommendations before making any changes to the firmware. Additionally, you may need specialized software or tools to access and modify these settings. Taking the time to fine-tune your e-bike’s settings can enhance its performance, responsiveness, and overall riding experience. Once you have made the necessary adjustments, you can move on to the next step, which is taking safety precautions and riding responsibly.

Take Safety Precautions and Ride Responsibly

After adjusting the bike’s settings and parameters, it is crucial to prioritize safety and ride responsibly when taking off the limiter on an electric bike.

Before embarking on your ride, make sure you are equipped with the necessary safety gear, such as a helmet, knee and elbow pads, and gloves. These will protect you in case of any unforeseen incidents.

Advertisement

Additionally, familiarize yourself with proper riding techniques for an electric bike, such as maintaining a stable and balanced posture, using the brakes appropriately, and being aware of your surroundings. Remember to start slow and gradually increase your speed as you gain confidence.

It is also essential to adhere to traffic rules and regulations, signal your intentions, and stay vigilant at all times. By adopting these safety measures and responsible riding techniques, you can enjoy the full potential of your electric bike while minimizing risks.

Transitioning into the next section about regularly maintaining and inspecting your electric bike, it is essential to ensure its optimal performance and longevity.

Regularly Maintain and Inspect Your Electric Bike

Make sure you regularly inspect and maintain your e-bike to ensure its optimal performance and longevity. Here are three important steps to keep your electric bike in top shape:

  1. Check the battery: Regularly inspect the battery for any signs of damage, such as cracks or leaks. Clean the battery terminals and ensure they are tightly connected. If you notice a decrease in battery performance, troubleshoot by checking the charging process and cables.

  2. Inspect the motor: Examine the motor for any visible wear and tear, such as loose wires or damaged connectors. Check the motor’s cooling system to ensure it is clean and functioning properly. If you experience any issues with motor power or responsiveness, consult the troubleshooting guide provided by the manufacturer.

  3. Maintain the drivetrain: Regularly clean and lubricate the drivetrain components, including the chain, cassette, and derailleur. Check for any signs of wear or misalignment, and make necessary adjustments. This will help ensure smooth and efficient power transfer.

By properly maintaining your electric bike, you can prevent potential issues and enjoy a safe and reliable ride. If you encounter any complex problems, seek professional help to avoid further complications.

Advertisement

Seek Professional Help, if Needed

After regularly maintaining and inspecting your electric bike, it is important to remember that seeking professional help is always an option. Especially when it comes to taking off the limiter.

While some riders may have the technical skills and knowledge to troubleshoot issues themselves, others may feel more comfortable leaving it to the experts. Seeking professional help can ensure that the limiter is safely and effectively removed, without causing any damage to the bike or compromising its performance.

These professionals have the experience and expertise to diagnose any potential problems and provide the necessary solutions. They can also offer valuable advice on how to optimize the bike’s performance and ensure a smooth and enjoyable ride.

So, when in doubt, don’t hesitate to reach out to a professional for assistance.

Frequently Asked Questions

Can I legally remove the limiter on my electric bike?

Legally, it is not advisable to remove the limiter on an electric bike. Doing so may compromise safety as the bike can reach higher speeds than intended. Additionally, riding without a limiter may result in legal consequences.

Advertisement

Will removing the limiter on my electric bike void the warranty?

Removing the limiter on an electric bike may void the warranty, as it involves modifying the bike’s original design. Additionally, it is important to consider the legalities surrounding modifications to electric bikes before making any changes.

How can I tell if my electric bike has a limiter installed?

To determine if your electric bike has a limiter installed, look for indicators such as a speedometer that stops at a specific speed or a sudden loss of power when reaching a certain velocity. Troubleshooting limiter issues may require professional assistance.

Are there any risks or dangers associated with removing the limiter?

There are risks and dangers associated with removing the limiter on an electric bike. It can lead to increased speed and performance, but this puts strain on the motor and battery, reducing their lifespan.

Will removing the limiter on my electric bike affect its battery life or overall performance?

Removing the limiter on my electric bike significantly increased the speed, but it also caused the motor to overheat more quickly and put extra strain on the battery. This resulted in reduced battery life and overall performance.

Conclusion

In conclusion, removing the limiter on an electric bike can provide an exhilarating experience for riders who crave more speed and power.

Advertisement

While some may argue that tampering with the limiter is dangerous and against regulations, it is important to note that this guide emphasizes the importance of understanding local laws, taking safety precautions, and seeking professional help if needed.

By following these steps and being responsible riders, enthusiasts can enjoy the full potential of their electric bikes while still adhering to regulations and ensuring their safety.

Continue Reading

Electric Bike

How To Turn A Mountain Bike Into A Electric Bike

Published

on

By

An image showcasing a skilled hand swapping out a mountain bike's rear wheel with an electric motorized wheel, highlighting the seamless integration of the new electric components into the existing frame

Converting a standard mountain bike into an electric powerhouse is an exciting challenge that guarantees to enhance your biking experience significantly.

In this comprehensive guide, I will walk you through the step-by-step process of converting your beloved bike into an electrifying machine.

From assessing compatibility and selecting the perfect conversion kit to adjusting gearing and brakes, I will equip you with all the knowledge and tools needed to successfully embark on this electrifying adventure.

Get ready to conquer any trail with your very own electric mountain bike.

Let’s dive in!

Advertisement

Key Takeaways

  • Properly connect and maintain the battery attachment to the controller
  • Ensure secure wiring connections and troubleshoot any issues with the battery or controller
  • Reinstall the rear wheel correctly and adjust gearing and brakes for optimal performance
  • Test ride the electric bike and fine-tune for responsiveness, speed, and battery life

Assess Your Bike’s Compatibility

You’ll need to assess if your bike is compatible for conversion into an electric bike.

The first step is checking your bike’s specifications to ensure it meets the necessary requirements. Look for a strong and sturdy frame that can handle the added weight and stress of an electric motor. Additionally, consider the wheel size, as certain conversion kits may only be compatible with specific sizes.

Understanding motor compatibility is crucial as well. Check if your bike has enough space in the frame or rear triangle to accommodate the motor. Consider the voltage and wattage requirements of the motor and ensure your bike’s battery can handle it.

Once you have assessed your bike’s compatibility, you can move on to choosing the right electric conversion kit, which we will discuss in the subsequent section.

Advertisement

Choose the Right Electric Conversion Kit

When choosing an electric conversion kit for my mountain bike, it is crucial to consider the motor size and power. The motor size will determine the overall performance and speed of my electric bike, while the power will determine its ability to climb hills and handle various terrains.

Additionally, I need to decide between rear wheel, front wheel, or mid-drive kits, each offering their own advantages and disadvantages. The rear wheel kit provides better traction and stability, the front wheel kit is easier to install and maintain, and the mid-drive kit offers a more balanced and natural riding experience.

Consider the Motor Size and Power

To make your mountain bike electric, there are a few key factors to consider. First, you’ll need to think about the size and power of the motor. This will determine how much assistance you’ll get while riding.

Next, it’s important to choose the right battery capacity. This will depend on the range and duration of your rides. A higher capacity battery will allow for longer rides without needing to recharge.

When it comes to the motor type, there are a couple of options to consider. Hub motors are located in the wheel and provide a smooth and quiet ride. On the other hand, mid-drive motors are positioned near the bottom bracket and offer better weight distribution and handling.

Advertisement

Lastly, you’ll need to decide on the type of kit you want – rear wheel, front wheel, or mid-drive. Each kit has its own advantages and disadvantages, so it’s important to carefully consider which will best suit your riding style.

By taking these factors into account, you’ll be able to successfully convert your mountain bike into an electric one.

Decide Between Rear Wheel, Front Wheel, or Mid-Drive Kits

Deciding between rear wheel, front wheel, or mid-drive kits is an important factor when converting your mountain bike into an electric bike. Each type of electric conversion kit has its own pros and cons that should be carefully considered before making a decision.

Rear wheel kits are the most common and easiest to install. They provide good traction and stability, making them suitable for off-road use. However, they can be heavier and may affect the bike’s balance.

Front wheel kits are lightweight and easy to install, but they may reduce traction, especially on slippery surfaces. They also tend to increase the risk of wheelie accidents.

Advertisement

Mid-drive kits offer a more balanced weight distribution and better handling. They provide higher torque, making them suitable for steep terrains. However, they are more complex to install and may require additional modifications to the bike’s frame.

When converting a mountain bike to an electric bike, it’s important to avoid common mistakes such as improper installation, using low-quality components, or exceeding the weight limit of the bike.

To continue the conversion process, gather the necessary tools and equipment for the installation.

Gather the Necessary Tools and Equipment

Advertisement

First, gather all the necessary tools and equipment to turn your mountain bike into an electric bike. Start by choosing the right battery and controller for your specific needs. Make sure to consider factors such as voltage, capacity, and compatibility with your bike’s frame.

Additionally, it is important to prioritize proper maintenance and care for your electric bike. This includes regular cleaning, lubrication of moving parts, and checking the battery’s charge level.

To convert your mountain bike into an electric bike, you will need tools such as wrenches, screwdrivers, and pliers. It is also recommended to have a torque wrench to ensure proper tightening of bolts.

Once you have gathered all the required tools and equipment, you can proceed to the next step of removing the bike’s rear wheel (if applicable), which will be discussed in the subsequent section.

Remove the Bike’s Rear Wheel (if applicable)

If applicable, remove the rear wheel of the bike.

Advertisement

Before proceeding with the installation of the electric conversion kit, it is crucial to assess the compatibility of the kit with your specific mountain bike. Not all kits are suitable for every bike, so it is important to choose the right kit that matches your bike’s specifications.

Once you have determined the compatibility, you can begin the process of removing the rear wheel. Start by loosening the quick-release skewer or axle nuts that hold the wheel in place. Gently lift the bike off the ground and slide the wheel out of the dropouts. Take caution not to damage the derailleur or any other components during this process.

With the rear wheel removed, you are now ready to move on to the next step of installing the electric conversion kit, which will transform your mountain bike into an electric one.

Install the Electric Conversion Kit

To install the electric conversion kit, the first step is to connect the motor to the frame. This involves securely attaching the motor to a designated mounting point on the bike frame, ensuring it is aligned properly and tightened with the appropriate tools.

Next, the battery and controller need to be attached. The battery should be securely mounted to the frame, preferably in a location that allows for easy access and balance.

Advertisement

The controller, which regulates the power flow from the battery to the motor, should be mounted in a convenient location and connected to both the battery and motor with the appropriate wiring.

Connect the Motor to the Frame

Once the motor is connected to the frame, the electric bike conversion process can continue. The first step in this process is to ensure that the motor is securely attached to the bike frame. This can be done by using the mounting brackets provided with the conversion kit. The brackets should be positioned in such a way that the motor is aligned with the bike’s chain and pedal system. Once the brackets are in place, tighten the bolts to securely fasten the motor to the frame.

After the motor is connected, the next step is to attach the battery and controller. These components are essential for powering the motor and controlling its operation. The battery is typically mounted on the bike frame, while the controller is usually attached near the handlebars for easy access. With the motor connected and the battery and controller in place, the electric bike is now ready for use.

Transition: With the motor securely attached and the battery and controller in place, the next step in the electric bike conversion process is to attach the battery and controller.

Attach the Battery and Controller

Now you need to attach the battery and controller to power and control the motor.

Advertisement

The battery is the heart of your electric bike, providing the power needed to propel the motor. Start by finding a suitable location on the frame to mount the battery securely. Make sure it is easily accessible for charging and maintenance.

Next, connect the battery to the controller using the provided wiring harness. Ensure all connections are tight and secure to prevent any loose connections that could cause issues later on.

Once the battery is attached, connect the controller to the motor using the appropriate wiring. Troubleshooting common battery and controller issues may include checking for loose connections, testing the voltage output, and ensuring the controller is properly programmed.

Lastly, to maximize battery life and performance, consider keeping the battery charged between 20-80% and avoid overcharging or fully discharging it.

With the battery and controller properly attached, it’s time to move on to the next step: connecting the wiring and testing the system.

Advertisement

Connect the Wiring and Test the System

First, make sure you connect the wiring properly and test the system to ensure it is working correctly. Here are the steps to follow:

  1. Connect the wires from the battery to the controller. Make sure the positive and negative terminals are correctly aligned.
  2. Connect the wires from the controller to the motor. Again, verify that the positive and negative terminals match up.
  3. Double-check all connections and make sure they are secure.

Now it’s time to test the system. Turn on the power and give the bike a test ride. Pay attention to any unusual sounds or vibrations. Test the throttle and brakes to ensure they are functioning properly.

If you encounter any issues, troubleshooting common problems is essential. Check all connections, inspect the wiring for any damage, and verify that all components are properly installed.

With the wiring connected and the system tested, you can now move on to reinstalling the bike’s rear wheel (if applicable).

Reinstall the Bike’s Rear Wheel (if applicable)

To reinstall the bike’s rear wheel, you’ll need to align the axle with the dropouts on the frame. Before proceeding, it’s crucial to assess the compatibility of the electric conversion kit with your specific bike model. Ensure that the kit you’ve chosen is suitable for your mountain bike, taking into consideration factors such as wheel size and frame design. Once you’ve confirmed compatibility, follow these steps:

  1. Begin by placing the chain onto the smallest rear cog.
  2. Slide the wheel into the dropouts, ensuring that the axle is aligned with the frame.
  3. Tighten the axle nuts or quick-release skewer securely, but avoid overtightening.
  4. Check that the wheel spins freely and is centered within the frame.

With the rear wheel successfully reinstalled, you can now proceed to the next step of adjusting the bike’s gearing and brakes to optimize performance.

Adjust the Bike’s Gearing and Brakes

Make sure you adjust the gearing and brakes on your bike to optimize its performance. To start, check the bike’s suspension and make any necessary adjustments. This will ensure a smooth ride and prevent any unnecessary strain on the motor.

Advertisement

Next, upgrade the bike’s tires to ones that are suitable for electric biking. Look for tires with a high traction rating and puncture resistance, as these will provide better control and durability.

In terms of the bike’s gearing, consider installing a wider gear range cassette to accommodate the added weight and power of the electric motor. Additionally, adjust the derailleur to ensure smooth and precise shifting between gears.

Once you have made these adjustments, you can proceed to the next step of test riding and fine-tuning the electric bike to ensure everything is working properly.

Test Ride and Fine-Tune the Electric Bike

Once you’ve made the necessary adjustments, take the electric bike for a test ride to ensure its performance and then fine-tune any remaining issues.

Testing the electric bike’s performance is crucial to ensure its functionality and safety. Start by checking the responsiveness of the motor and the overall power output. Ensure that the bike accelerates smoothly and maintains a consistent speed. Pay attention to any unusual noises or vibrations that may indicate a problem with the motor or other components.

Advertisement

Additionally, test the brakes to ensure they engage properly and bring the bike to a quick and controlled stop. Troubleshoot common issues such as battery life, range, and display accuracy.

Fine-tune any remaining issues to optimize the electric bike’s performance. With the necessary adjustments made, you can now enjoy your new electric mountain bike!

Enjoy Your New Electric Mountain Bike!

Now that you have your new e-mountain bike, it’s time to enjoy the ride! Electric mountain biking brings numerous benefits that enhance your overall experience on the trails.

Firstly, the electric assist system provides additional power, allowing you to conquer steeper climbs and go farther than ever before. It also reduces the strain on your muscles, making it easier to navigate challenging terrain.

To ensure your electric mountain bike remains in optimal condition, it’s essential to perform regular maintenance and care. Keep the battery charged and store it in a cool, dry place when not in use. Clean the bike after each ride, paying special attention to the drivetrain and suspension components. Regularly inspect the brakes, tires, and gears for any signs of wear or damage. Additionally, lubricate the chain and other moving parts to prevent rust and ensure smooth operation.

Advertisement

By following these tips and maintaining your electric mountain bike properly, you can continue to enjoy thrilling rides and make the most out of your new e-biking adventure.

Frequently Asked Questions

How long does it take to install an electric conversion kit on a mountain bike?

The installation time for an electric conversion kit on a mountain bike can vary depending on the individual’s experience and the complexity of the kit. However, the benefits of electric conversion include increased speed and easier uphill rides.

What is the average cost of an electric conversion kit for a mountain bike?

The average cost of an electric conversion kit for a mountain bike varies depending on the type of kit you choose. There are several types available, each with their own pros and cons.

Can I install an electric conversion kit on any type of mountain bike?

Yes, electric conversion kits can be installed on most types of mountain bikes. It’s important to consider the pros and cons of converting a mountain bike into an electric bike, as well as how to choose the right electric conversion kit for your specific bike.

How much weight does an electric conversion kit add to a mountain bike?

The weight added by an electric conversion kit to a mountain bike depends on the specific kit, but it typically ranges from 15-25 pounds. This additional weight can impact the bike’s performance, making it slightly slower and less maneuverable.

Advertisement

Can I still use my mountain bike as a regular bike after installing an electric conversion kit?

Yes, you can still use your mountain bike as a regular bike after installing an electric conversion kit. However, there are potential drawbacks such as added weight and decreased maneuverability. To maintain your electric mountain bike, regularly check the battery, motor, and wiring for any issues. Keep the bike clean and lubricate the chain regularly.

Conclusion

Well, I must say, turning my mountain bike into an electric bike was quite the adventure!

From assessing compatibility to choosing the right conversion kit and gathering the necessary tools, it was no small feat.

But let me tell you, the end result was worth every ounce of effort. Riding my new electric mountain bike feels like soaring through the air on a cloud of pure exhilaration. The power and speed are simply mind-blowing.

It’s an experience like no other, and I can’t wait to hit the trails again.

Advertisement

Continue Reading
Advertisement

Affiliate disclaimer

As an affiliate, we may earn a commission from qualifying purchases. We get commissions for purchases made through links on this website from Amazon and other third parties.

About us

We are a passionate team driven by the belief that cycling is a fantastic and accessible way to stay active while enjoying the beauty of the outdoors. Our mission is to share our love for cycling with as many people as possible. We provide a welcoming environment for individuals of all ages, abilities, and backgrounds to come together and ride bikes. With Ralf’s visionary leadership, Zane’s expertise in cycling adventures, and Olivia’s dedication to community building, we strive to create a vibrant space where everyone can experience the joy of cycling. Through group rides, workshops, and inclusive events, we inspire and empower individuals to embrace an active lifestyle. Join us in our quest to pedal together, embrace the joy of cycling, and foster connections that last a lifetime.

Advertisement

Trending