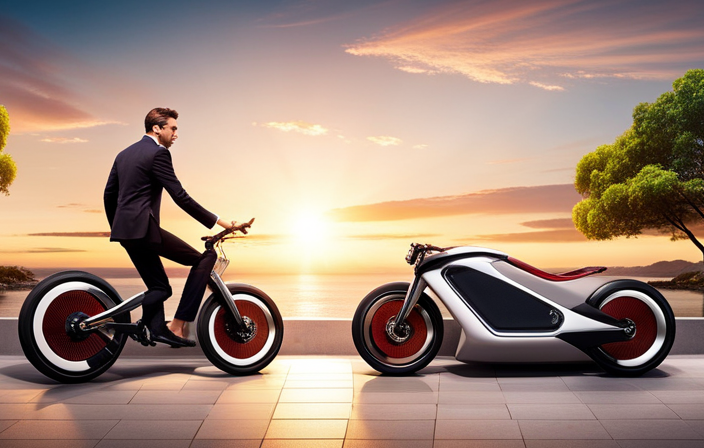
I’ve always been fascinated by the idea of electric bikes. The thought of effortlessly gliding through streets, powered by a motor, sounds almost too good to be true. But after diving into the world of electric bike conversion, I’ve come to realize that it’s not as complicated as it seems.
In this article, I’ll walk you through the step-by-step process of turning your regular bicycle into an electric powerhouse. So gather your tools, choose the right bike, and let’s get started on this electrifying journey.
Key Takeaways
- Familiarize yourself with the components and process of electric bike conversion
- Choose the right motor and battery based on size, weight, and power output
- Use the necessary tools and materials for disassembling and reassembling the bike
- Select the right bicycle for conversion based on frame material, size, and condition

Ascher Ultra Bright USB Rechargeable Bike Light Set, Powerful Bicycle Front Headlight and Back Taillight, 4 Light Modes, Easy to Install for Men Women Road Mountain Cycling Black
Bright Bike Lights for Night Riding: This bike light set includes both a bright headlight and taillight. Powerful...
As an affiliate, we earn on qualifying purchases.
Understand the Basics of Electric Bike Conversion
To understand the basics of electric bike conversion, you’ll need to familiarize yourself with the components and process involved. One of the most important decisions you’ll need to make is choosing the right motor for your electric bike. The motor is what provides the power to propel the bike forward. There are several factors to consider when selecting a motor, such as the size, weight, and power output. You’ll want to choose a motor that is compatible with your bike and meets your specific needs in terms of speed and torque.
Another crucial aspect of electric bike conversion is understanding battery capacity. The battery is what stores the energy needed to power the motor. The capacity of the battery determines how far you can travel on a single charge. It is important to choose a battery with sufficient capacity to meet your commuting or recreational needs. Consider factors such as the weight and size of the battery, as well as the charging time.
Now that you have a better understanding of the motor and battery, it’s time to gather the necessary tools and materials for your electric bike conversion.
ROCKBROS Bike Seat Bag, Bicycle Saddle Bag Under Seat 3D Shell Cycling Seat Pack for Mountain Road Bikes Black
SPECIAL SHAPE and UPGRADE STRAPS:3D shell saddle bag with wave cushion provides inside shock resistant protection if fell...
As an affiliate, we earn on qualifying purchases.
Gather the Necessary Tools and Materials
Gather all the tools and materials you’ll need. To successfully convert your bicycle into an electric bike, it is crucial to have the right tools and equipment at your disposal. Here are the essential items you will require:
-
Tools:
-
Wrench set: A good set of wrenches will help you disassemble and reassemble various components of your bike.
-
Screwdriver set: Different screwdrivers, including Phillips and flathead, will be needed to remove screws and fasteners.
-
Allen key set: Allen keys in various sizes are necessary for adjusting and tightening bolts on your bike.
-
Wire cutters and strippers: These tools are essential for working with electrical wiring.
-
Multimeter: A multimeter helps you test and troubleshoot electrical connections.
-
Materials:
-
Electric bike conversion kit: This kit includes the motor, battery, controller, and other necessary components.
-
Battery pack: Choose a high-quality lithium-ion battery pack that suits your needs and budget.
-
Wiring harness: The wiring harness ensures proper connections between the components.
Estimating the cost of these tools and materials is essential for planning your conversion project. The price will vary depending on the quality and brand of the items you choose. Additionally, consider any shipping costs if purchasing online.
With the necessary tools and materials in hand, we can now move on to the next section, where we will discuss how to choose the right bicycle for conversion.

TIROL SUPPLIES Ultra Light Action Camera | 170° Wide Angle FHD 1080P | Handlebar, Helmet, Bicycle, Outdoor Sports | USB Rechargeable & Portable Bike Camera
AUSTRALIAN-OWNED & TRUSTED CYCLING CAMERA: TIROL SUPPLIES is an Australian-owned brand trusted for 20+ years. This lightweight bike...
As an affiliate, we earn on qualifying purchases.
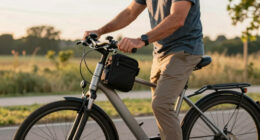
Choose the Right Bicycle for Conversion
When choosing the right bicycle for conversion, you’ll want to consider factors such as frame material, size, and condition. The frame material is crucial because it determines the overall weight and durability of the electric bike. I recommend choosing a frame made of lightweight materials like aluminum or carbon fiber, as they provide a sturdy foundation while keeping the bike relatively light.
Additionally, consider the size of the frame to ensure a comfortable riding experience. A frame that is too large or too small can affect your balance and control. Lastly, examine the condition of the frame. Look for any signs of damage or wear that could compromise the bike’s structural integrity.
Another important aspect to consider is battery selection. The battery is the heart of your electric bike, providing the power needed to assist your pedaling. Opt for a high-quality lithium-ion battery, as they offer long-lasting performance and are lighter than other types of batteries. Consider the battery capacity as well, as it determines how far you can travel on a single charge. Take into account your typical riding distance and choose a battery with an appropriate capacity.
Now that you have chosen the right frame and battery, it’s time to move on to the next step: removing the pedals, chain, and crankset.

BODEGA 12 volt Car Refrigerator - 26QT Portable Freezer IPX4 Waterproof Car Fridge Electric Cooler Ultra-Quiet for Truck Van Camping Travel 12/24V DC 110~240 Volt AC,-4℉~68℉
【𝗖𝗼𝗺𝗽𝗮𝗰𝘁 𝗘𝗹𝗲𝗰𝘁𝗿𝗶𝗰 𝗖𝗼𝗼𝗹𝗲𝗿, 𝟮0% 𝗠𝗼𝗿𝗲 𝗖𝗮𝗽𝗮𝗰𝗶𝘁𝘆】Maximize space without bulk! This 26QT 12V refrigerator stores 20% more than competitors—ideal...
As an affiliate, we earn on qualifying purchases.
Remove the Pedals, Chain, and Crankset
Once you’ve chosen the right frame and battery, it’s time to start by removing the pedals, chain, and crankset. This is a crucial step in the electric bike motor installation process. Before diving into the technical aspects, make sure to have the necessary tools: a pedal wrench, chain tool, and crank puller.
To remove the pedals, start by locating the left pedal, which is usually marked with an ‘L.’ Insert the pedal wrench onto the pedal axle and turn it counterclockwise. Repeat the process for the right pedal, which is marked with an ‘R.’ Once both pedals are removed, set them aside for future use or replacement.
Next, focus on the chain and crankset. Use the chain tool to break the chain at any link. This will allow you to separate it from the bike entirely. Once the chain is removed, you can proceed to remove the crankset using the crank puller tool. This tool will unscrew the crank arms from the bottom bracket spindle, allowing you to detach the crankset.
Now that the pedals, chain, and crankset are removed, it’s time to move on to the next stage of the conversion process: installing the electric bike conversion kit. This kit includes the motor, controller, throttle, and other components necessary to transform your bike into an electric one.
Install the Electric Bike Conversion Kit
Now that the pedals, chain, and crankset are removed, it’s time to proceed with installing the electric bike conversion kit.
There are several reputable electric bike conversion kit brands available in the market today, each offering their own unique features and advantages. These kits are designed to transform your regular bicycle into an electric-powered machine, providing a convenient and eco-friendly mode of transportation.
To start the installation process, carefully unpack the conversion kit and familiarize yourself with the components. The kit typically includes a motor, battery, controller, throttle, and wiring harness. Ensure that all the necessary tools are readily available before proceeding.
Begin by attaching the motor to the bike frame using the provided brackets and screws. Make sure the motor is securely fastened and aligned properly with the wheel.
Next, connect the wiring harness to the motor and route it along the frame, ensuring that it is well-secured and out of the way of moving parts.
Now, it’s time to connect the battery. Locate a suitable position on the bike frame to mount the battery pack, ensuring it is balanced and securely attached. Connect the wiring harness from the motor to the battery, ensuring the positive and negative terminals are properly aligned.
With the electric bike conversion kit successfully installed, you are now ready to connect the motor and battery. This crucial step will allow the motor to draw power from the battery and propel your bike forward.
Connect the Motor and Battery
After securely attaching the motor and battery, you can connect them for the final step in the installation process. Ensuring motor and battery compatibility is crucial for a successful connection.
Here are some tips to troubleshoot common connection issues:
-
Double-check the connectors: Make sure the connectors from the motor and battery match and are securely plugged together. Loose connections can lead to poor performance or even failure.
-
Inspect the wiring: Examine the wires for any signs of damage, such as fraying or exposed copper. Damaged wires can cause short circuits or unreliable connections. Replace any faulty wiring.
-
Check the polarity: Confirm that the positive and negative terminals on both the motor and battery align correctly. Reversing the polarity can damage the components and create connection problems.
-
Test the connection: Before fully securing the motor and battery, test the connection by turning on the electric bike. Ensure the motor spins smoothly and the battery provides power to the system.
By following these troubleshooting steps, you can ensure a proper connection between the motor and battery, setting the foundation for a functional electric bike.
Now, let’s move on to the next section: mounting the controller and throttle.
Mount the Controller and Throttle
To properly mount the controller and throttle, you’ll need to locate a suitable position on the handlebars for easy access and secure attachment. The mounting position should be within reach of your hand while riding, allowing you to conveniently control the speed and power of your electric bike. Ensure that the position does not interfere with other components or obstruct your view of the road.
Once you have chosen the mounting position, securely attach the controller and throttle using the appropriate brackets or clamps. Make sure they are tightly fastened to prevent any movement or vibrations during your rides. It is also important to consider the wiring connections while mounting. Ensure that the wires are neatly organized and properly secured to avoid any entanglement or accidental disconnection.
To help you visualize the process, here’s a table highlighting the key steps for mounting the controller and throttle:
| Steps | Description |
|---|---|
| 1. Choose mounting position | Locate a suitable position on the handlebars for easy access |
| 2. Attach controller | Securely mount the controller using the provided brackets or clamps |
| 3. Mount the throttle | Attach the throttle next to the controller, ensuring a secure fit |
| 4. Organize wiring | Neatly organize the wires and secure them to avoid any complications |
Now that you have successfully mounted the controller and throttle, let’s move on to the next section and learn how to install the brakes and lights for a complete electric bike setup.
Install the Brakes and Lights
Once you have finished mounting the controller and throttle, it’s time to install the brakes and lights for a complete setup.
Installing brakes is an essential step in ensuring the safety and functionality of your electric bike conversion. Begin by selecting the appropriate brake system for your bike. Consider factors such as the type of bike you have, the terrain you will be riding on, and your personal preferences. Popular options include mechanical disc brakes and hydraulic disc brakes.
Once you have chosen the brakes, follow the manufacturer’s instructions to install them properly. Ensure that the brake pads are aligned correctly and that the cables or hydraulic lines are securely connected.
Next, let’s talk about choosing lights for your electric bike. Lights are crucial for visibility, especially when riding at night or in low-light conditions. There are various types of lights available, including headlights and taillights. When selecting lights, consider their brightness, battery life, and mounting options. LED lights are energy-efficient and provide excellent visibility. Choose lights that are easy to install and durable enough to withstand outdoor conditions.
Now that you have installed the brakes and lights, your electric bike conversion is almost complete. In the next section, we will discuss how to test your electric bike to ensure everything is working correctly.
Test the Electric Bike Conversion
Now that the brakes and lights are properly installed, it’s time to move on to the next crucial step: testing the electric bike conversion. This step is essential to ensure that everything is functioning correctly before hitting the road. Testing the conversion involves evaluating the motor, battery, and overall performance of the electric bike.
To make this process easier, I have prepared a table below that provides testing methods and troubleshooting tips for each component:
| Component | Testing Methods | Troubleshooting Tips |
|---|---|---|
| Motor | Test for power output and responsiveness | Check for loose connections or damaged wiring |
| Battery | Measure voltage and capacity | Ensure proper charging and check for any signs of damage |
| Performance | Test speed, acceleration, and range | Address any issues with motor or battery performance |
By following these testing methods and troubleshooting tips, you can identify and resolve any issues that may arise during the testing phase. Once you are satisfied with the performance and functionality of the electric bike conversion, you can proceed to the next section, where we will fine-tune the motor and battery settings to maximize efficiency and performance.
Transitioning to the subsequent section, we will now focus on fine-tuning the motor and battery settings for optimal electric bike performance.
Fine-tune the Motor and Battery Settings
To optimize your electric bike’s performance, you’ll want to fine-tune the settings of both the motor and the battery. Tuning the motor performance is crucial for achieving the desired speed and power output. Most electric bikes come with a controller that allows you to adjust parameters such as motor power, acceleration, and speed limits. By fine-tuning these settings, you can customize your riding experience and make the most of your electric bike’s capabilities.
Optimizing the battery lifespan is equally important. The battery is the heart of your electric bike, supplying the power needed to propel you forward. To extend its lifespan, it’s essential to take several factors into consideration. First, ensure that the battery is properly charged and not overcharged, as this can degrade its performance over time. Second, avoid completely draining the battery, as this can also reduce its longevity. Lastly, store the battery in a cool and dry place to prevent excessive heat and moisture, which can damage the cells.
By fine-tuning the motor performance and optimizing the battery lifespan, you can enhance the overall performance and longevity of your electric bike.
Now, let’s move on to the next section where we will discuss how to add accessories for comfort and safety.
Add Accessories for Comfort and Safety
You can enhance your riding experience and increase your safety by adding accessories for comfort and protection. When it comes to choosing the right accessories for your electric bike, there are a few key factors to consider.
First, think about your personal preferences and needs. Are you looking for added comfort during long rides? Consider investing in a gel seat cover or padded cycling gloves. Do you often ride in low-light conditions? Adding front and rear lights, as well as reflective gear, can greatly improve your visibility to other road users. Additionally, it’s important to think about safety. A sturdy helmet is a must-have accessory for any cyclist, and a high-quality lock can help protect your electric bike from theft. Other accessories to consider include fenders to keep you dry during rainy rides, a water bottle holder for staying hydrated, and a handlebar phone mount for convenient navigation.
By choosing the right accessories, you can ensure a safe and comfortable riding experience on your electric bike.
As you now know, adding accessories to your electric bike can greatly enhance your riding experience. However, it’s not enough to just have the right gear – you also need to know how to maintain and service your electric bike to ensure its longevity and optimal performance.
Learning how to properly care for your electric bike is essential in preventing breakdowns and extending the lifespan of your investment. In the next section, I will share some valuable tips and techniques to help you keep your electric bike in top shape.
Learn How to Maintain and Service Your Electric Bike
Learning how to properly care for and service your electric bike is essential in ensuring its longevity and optimal performance. As an electric bike enthusiast, I have gathered some important maintenance tips and troubleshooting techniques that can help you keep your electric bike in top shape.
Here are some electric bike maintenance tips to keep in mind:
- Regularly clean your bike to prevent dirt and debris from damaging the components.
- Check the tire pressure regularly and make sure they are properly inflated to ensure a smooth ride.
- Keep the chain lubricated to reduce friction and extend its lifespan.
- Inspect the brakes and make sure they are properly aligned and functioning.
When it comes to troubleshooting common electric bike issues, there are a few things you can do:
- If your battery is not charging, check the connection and make sure it is securely plugged in.
- If your motor is not working, check the wiring connections and ensure they are properly connected.
- If your bike is not providing assistance, check the pedal assist settings and make sure they are properly adjusted.
- If you are experiencing an electrical issue, check the fuse and replace it if necessary.
By following these maintenance tips and troubleshooting techniques, you can keep your electric bike running smoothly and avoid any potential issues.
Now, let’s move on to the next important aspect of electric biking – following local laws and regulations.
Follow Local Laws and Regulations
Following local laws and regulations is crucial for ensuring a safe and legal experience while riding your electric bike. Electric bike safety should be a top priority for all riders, and it starts with understanding and abiding by the rules of the road.
First and foremost, always wear a helmet and other protective gear to minimize the risk of injuries. Additionally, familiarize yourself with the speed limits and designated bike lanes in your area. It’s important to remember that electric bikes are classified differently in various regions, so make sure you know the specific requirements for your location.
One of the advantages of electric bikes is their ability to provide a convenient and eco-friendly mode of transportation. However, it’s important to be mindful of the environment and other road users. Follow traffic signals and signs, yield to pedestrians, and always ride in a responsible manner. By doing so, you not only enhance your own safety but also contribute to a harmonious coexistence with other road users.
By adhering to local laws and regulations, you can enjoy the benefits of your electric bike without any legal issues or safety concerns.
Now that we’ve covered the importance of following the rules, let’s delve into the ways you can fully enjoy the advantages of your electric bike.
Enjoy the Benefits of Your Electric Bike
Take advantage of the convenience and eco-friendly nature of your electric bike by exploring new places and experiencing the joy of effortless transportation. Not only does an electric bike provide a fun and exciting way to get around, but it also offers numerous benefits that make it a great choice for everyday commuting or leisurely rides.
When it comes to enjoying the ride on your electric bike, there are a few things to keep in mind. First, make sure to maintain a proper seating position and adjust the handlebars and seat height to ensure comfort and control. Additionally, familiarize yourself with the different assist modes and adjust them according to your needs. This will allow you to balance the effort from the motor with your own pedaling power, giving you a smooth and efficient ride.
While electric bikes are generally reliable, it’s important to be prepared for common issues that may arise. One common problem is a flat tire. Make sure to carry a repair kit and spare inner tubes, as well as a pump, to quickly fix any punctures. Another issue could be a loss of power or a dead battery. In this case, double-check the connections and make sure the battery is properly charged. If the problem persists, consult the owner’s manual or contact a professional for assistance.
With your electric bike providing a hassle-free and enjoyable ride, it’s only natural to want to share your experience with others. In the next section, we will explore how you can share your electric bike conversion experience and inspire others to join the electric bike revolution.
Share Your Electric Bike Conversion Experience
When sharing my electric bike conversion experience, I can inspire others to join the revolution by highlighting the benefits and convenience of this eco-friendly mode of transportation. However, it is important to acknowledge that there can be challenges along the way.
One of the main challenges of electric bike conversion is ensuring optimal performance. To improve electric bike performance, here are a few tips to consider.
Firstly, choosing the right motor and battery combination is crucial. The motor should have enough power to handle the weight of the bike and rider, while the battery should have sufficient capacity to provide a decent range. It’s also important to consider the terrain you’ll be riding on. If you often encounter steep hills, a more powerful motor may be necessary.
Secondly, ensuring proper maintenance is key. Regularly check the tire pressure, chain tension, and brake pads to ensure they are in good condition. Keeping the bike clean and lubricating the chain will also help improve performance and extend the lifespan of the components.
Lastly, consider upgrading the controller and throttle. These components play a crucial role in how the motor responds to your input. Upgrading to a higher quality controller and throttle can result in smoother and more responsive acceleration.
Frequently Asked Questions
Can I convert any type of bicycle into an electric bike?
Yes, any type of bicycle can be converted into an electric bike through the electric bike conversion process.
Converting a bicycle into an electric bike offers numerous benefits. Firstly, it provides the convenience of effortless pedaling, especially on uphill terrains. Additionally, it allows for longer rides without getting tired. Moreover, it is an environmentally friendly alternative to traditional transportation methods.
The conversion process involves installing a motor, battery, and controller onto the existing bicycle frame.
How long does it typically take to complete an electric bike conversion?
Typically, the time it takes to complete an electric bike conversion depends on various factors. These factors include the complexity of the conversion, the skill level of the person performing it, and the availability of the necessary tools and parts.
Simple conversions can be done in a few hours, while more complex ones may take several days or even weeks.
It is important to carefully plan and allocate enough time for the conversion process to ensure a successful outcome.
Are there any safety precautions I should be aware of when installing an electric bike conversion kit?
When installing an electric bike conversion kit, it’s important to be aware of certain safety precautions.
One common mistake to avoid is not properly securing the cables and connectors, which can lead to electrical issues.
It’s also essential to ensure that all components are installed correctly, following the manufacturer’s instructions.
As for tools and equipment, you’ll need a set of wrenches, screwdrivers, and a torque wrench to properly tighten all bolts and screws.
Additionally, safety goggles and gloves are recommended to protect yourself during the installation process.
What is the average cost of a basic electric bike conversion kit?
The average cost of a basic electric bike conversion kit is around $500. This statistic provides a clear picture of the financial investment required for converting a regular bike into an electric one.
A basic kit typically includes a motor, battery, controller, and necessary wiring. It is important to note that additional costs may be incurred for professional installation or customization.
However, with this affordable price range, converting your bike into an electric one is a feasible option for many enthusiasts.
Do I need any special skills or knowledge to successfully convert a regular bicycle into an electric bike?
To successfully convert a regular bicycle into an electric bike, special skills and knowledge are necessary. A successful conversion requires a good understanding of electrical systems, as well as mechanical skills to install the necessary components.
It is important to have knowledge of battery technology, wiring, and how to properly mount and connect the motor. Without these special skills, the conversion may not be done correctly, leading to potential safety issues or performance problems.
Conclusion
After completing the electric bike conversion, I am thrilled with the results. The process was straightforward, and with the right tools and materials, I was able to transform my regular bicycle into a powerful electric bike.
Removing the pedals, chain, and crankset was a breeze, and installing the conversion kit was a seamless process. I am now equipped with the knowledge to maintain and service my electric bike, ensuring its longevity.
Adhering to local laws and regulations is essential, but the benefits of owning an electric bike are undeniable. Now, I can effortlessly navigate through traffic and enjoy the convenience of commuting on my eco-friendly and efficient electric bike.