
As an avid electric bike rider, I know the importance of having a well-lit ride, especially when it comes to safety. So, let me guide you through the process of turning on the light on your electric bike.
First, locate the light switch and check the battery level.
Then, simply turn on the power button and find the light button or switch.
Press or flip it, and voila!
But remember to familiarize yourself with local laws and regulations regarding bike lights and always use them appropriately.
Let’s dive into the details and make your electric bike ride brighter and safer.
Key Takeaways
- Locate the light switch on the handlebars and turn on the power button to activate the lights.
- Check the battery level and ensure it is charged and functioning properly.
- Adjust the light settings to optimize visibility without being too bright or dim.
- Troubleshoot light issues by checking connections, inspecting the fuse, and referring to the user manual or contacting the manufacturer for assistance.
Locate the Light Switch on Your Electric Bike
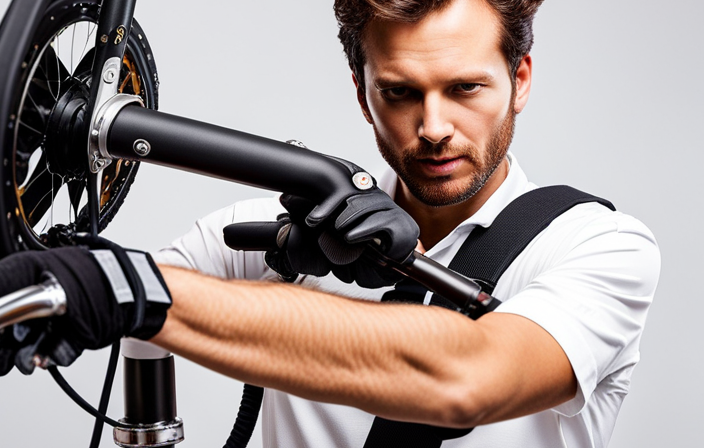
To turn on the light on your electric bike, locate the light switch. The light switch is usually located on the handlebars, near the controls for the brakes and gears. It may be a small button or a switch that you can easily toggle with your thumb or fingers. Take a moment to familiarize yourself with the layout of your electric bike’s handlebars so that you can easily find the light switch when needed.
If you’re having trouble turning on the light, there are a few things you can check. First, make sure that the battery is properly connected and charged. A low battery can prevent the light from turning on. Next, check the wiring connections between the battery and the light switch. If there are any loose or damaged wires, they may need to be repaired or replaced. Finally, make sure that the light switch itself is functioning properly. Press or toggle the switch a few times to see if it engages the light. If not, it may need to be cleaned or replaced.
Now that you know how to locate the light switch and troubleshoot light issues, let’s move on to the next step: checking the battery level.
Check the Battery Level
Make sure you check the level of the battery. It is crucial to be aware of the battery life to maximize its usage.
Here are three important things to consider when checking the battery level:
-
Voltage: The voltage of the battery indicates its capacity to store energy. A fully charged battery typically has a voltage of around 42 volts. By checking the voltage, you can determine how much power is left in the battery.
-
Battery Management System (BMS): The BMS monitors the battery’s state of charge and protects it from overcharging or discharging. It is essential to check the BMS to ensure that it is functioning correctly and maintaining the battery’s health.
-
Charging Cycles: Electric bike batteries have a limited number of charging cycles before their performance starts to degrade. By checking the battery’s charging cycles, you can estimate its remaining lifespan and plan accordingly.
Once you have checked the battery level, you can proceed to turn on the power button. By doing so, you will activate the electrical system of your electric bike, including the lights.
Now, let’s move on to the next step and learn how to turn on the power button.
Turn on the Power Button
First, you’ll need to press the power button to activate the electrical system. The power button is typically located near the handlebars, within easy reach. Once you locate the power button, simply press it firmly to turn on the electric bike. If the power button doesn’t respond, make sure the bike is properly charged and the battery is connected securely. Sometimes, the power button may be faulty and require replacement. If you’re still facing issues with the power button, it’s best to consult the user manual or contact the manufacturer for further troubleshooting guidance.
Turning on the power button is crucial to ensure that the electrical system is functioning properly, including the lights. If you’re experiencing light issues, such as the lights not turning on or flickering, it could be due to a faulty connection or a blown fuse. In such cases, it’s important to check the wiring connections and ensure they are securely connected. Additionally, inspect the fuse and replace it if necessary. Remember, a well-functioning power button is essential for the proper operation of the lights on your electric bike.
To find the light button or switch, you’ll need to locate the control panel or dashboard on your electric bike. This is where the light button or switch is typically located. Once you find it, simply press or toggle the button/switch to turn on the lights.
Find the Light Button or Switch
Once you locate the control panel or dashboard, simply press or toggle the button/switch to activate the lights. It’s important to check if your electric bike is compatible with the lights you want to install. Some electric bikes come with built-in lights, while others require additional accessories. Here are four key considerations to keep in mind:
-
Light compatibility: Before purchasing lights for your electric bike, make sure they are compatible with the bike’s electrical system. Check the voltage and wattage requirements to ensure a proper fit.
-
Mounting options: Determine where you want to mount the lights on your electric bike. Common locations include the handlebars, front fork, or rear rack. Ensure that the mounting hardware matches the bike’s frame and is secure.
-
Wiring connections: If you’re installing aftermarket lights, you may need to connect them to the bike’s electrical system. Check the wiring instructions provided with the lights and ensure proper connections to avoid any electrical issues.
-
Troubleshoot light issues: If you’re having trouble with your electric bike lights, start by checking the connections and wiring for any loose or damaged components. Additionally, make sure the battery is charged and functioning properly.
Press or Flip the Light Button or Switch
To activate the lights on your electric bike, all you need to do is press or flip the button or switch.
The first step is to locate the light switch, which is usually located near the handlebars or on the control panel. Look for a small button or switch that is specifically designated for the lights.
Once you have located the switch, simply press or flip it to turn on the lights. It is important to note that some electric bikes have adjustable light intensity settings.
If your bike has this feature, you can adjust the light intensity to your preference. This can be done by turning a dial or pressing additional buttons on the control panel.
By adjusting the light intensity, you can ensure that the lights on your electric bike provide optimal visibility without being too bright or dim.
Now that you have successfully activated the lights, let’s move on to the next section and learn how to adjust the light settings (if applicable).
Adjust the Light Settings (if applicable)
After successfully turning on the lights of my electric bike, I realized that the brightness level was too high for my liking. Thankfully, adjusting the light settings on my bike was a simple process.
To begin, I located the light adjustment button, usually situated near the light switch or on the control panel. By pressing this button, I was able to cycle through different brightness levels, allowing me to find the perfect balance between visibility and battery conservation.
In some cases, I encountered issues with the light settings, such as the lights not responding to adjustments or flickering intermittently. To troubleshoot these problems, I first checked the battery level of my electric bike. If the battery was low, it could affect the performance of the lights.
Next, I inspected the light connections to ensure they were secure and free from any dirt or debris. If necessary, I cleaned the connections gently with a soft cloth.
Once I had adjusted the light brightness to my liking and resolved any issues, it was essential to test the lights to ensure they were functional. This step would provide me with peace of mind and guarantee that I could rely on my electric bike’s lights when riding in low light conditions.
Test the Lights to Ensure They are Functional
Before taking my electric bike out for a ride in low light conditions, I made sure to test the functionality of the lights. Ensuring that the lights are in proper working order is crucial for safety and visibility on the road. To do this, I conducted a thorough test of the light brightness and troubleshooted any light issues that may arise.
To begin, I turned on the lights and observed their brightness. I compared the brightness of both the front and rear lights to ensure they were at their optimal levels. To assist you in understanding the process, I have provided a table below:
| Light Position | Brightness Level |
|---|---|
| Front Light | High |
| Rear Light | Medium |
By testing the light brightness, I can determine if the lights need any adjustments or if they are functioning properly. If the lights appear dim or not working at all, I would then proceed to troubleshoot the issue. This may involve checking the wiring connections, replacing the bulbs, or consulting the bike’s manual for further guidance.
Make Sure the Lights are Positioned Correctly
Ensure that your lights are positioned correctly for optimal visibility and safety on the road. Properly positioning your lights can greatly enhance your ability to see and be seen by other road users.
When it comes to positioning lights on your electric bike, there are a few key factors to consider. First, make sure that your lights are mounted securely on your bike, preferably at or above handlebar height. This will help to ensure that your lights are visible to other road users, especially when you are in a seated position.
Additionally, ensure that your lights are aimed in the correct direction. Point your lights slightly downwards to prevent blinding oncoming traffic, but also make sure they are angled high enough to illuminate the road ahead.
Lastly, familiarize yourself with the location of the light switch on your electric bike. This will allow you to easily turn your lights on and off when needed, ensuring that you are always visible to others on the road.
By properly positioning your lights and being aware of the light switch location, you can enhance your visibility and safety on the road.
To further enhance your visibility on the road, it is important to use reflective gear and accessories. Reflective gear such as vests, jackets, and ankle bands can greatly increase your visibility, especially in low light conditions. These items are designed to reflect light back towards its source, making you more visible to other road users.
Additionally, consider using reflective accessories such as stickers or tape on your bike and helmet. These small but effective additions can catch the attention of drivers and help them to better judge their distance from you.
Use Reflective Gear and Accessories for Added Visibility
To enhance your visibility on the road, consider incorporating reflective gear and accessories into your biking routine.
Reflective clothing benefits cyclists by making them more visible to other road users, especially in low-light conditions or at night. Reflective materials, such as vests, jackets, or armbands, utilize a special coating that reflects light back to its source, increasing the chances of being seen by motorists. When choosing reflective clothing, opt for garments with large reflective surfaces that cover a significant area of your body, such as your torso or legs. This will maximize your visibility from various angles. Additionally, consider adding reflective accessories like ankle bands, helmet stickers, or backpack covers to further increase your visibility.
Proper light positioning is also crucial for safety. Ensure that your bike’s lights are correctly aligned and angled to provide maximum visibility. The front light should be positioned in a way that it illuminates the road ahead, while the rear light should be angled slightly downward to alert motorists approaching from behind. It is important to regularly check and maintain your bike lights to ensure they are working properly and are not obstructed by dirt or other debris.
Consider installing additional lights for enhanced safety.
Consider Installing Additional Lights for Enhanced Safety
You can further enhance your safety by adding extra lights to your bicycle. Installing lights on your bike is a simple and effective way to increase your visibility to other road users, especially during low light conditions or at night.
To install lights on your bike, start by choosing the type of lights you want. There are various options available, such as front lights, rear lights, and even wheel lights. Once you have selected your lights, follow the manufacturer’s instructions to securely attach them to your bike. Make sure the lights are properly aligned and facing the correct direction for maximum visibility.
Additionally, regularly check and maintain your bike’s lights to ensure they are in proper working condition. This includes checking the batteries or charging them, cleaning the lenses, and inspecting the wiring for any damage. By regularly maintaining your bike’s lights, you can ensure they are always functioning optimally, keeping you safe on the road.
Transitioning into the subsequent section, let’s now explore how to regularly check and maintain your bike’s lights.
Regularly Check and Maintain Your Bike’s Lights
Regularly checking and maintaining your bike’s lights is crucial for optimal visibility and safety on the road. As a cyclist, I understand the importance of bike light visibility and the role it plays in preventing accidents. To ensure that my bike lights are always in top condition, I follow a simple maintenance routine. Here is a table outlining the steps I take to maintain my bike lights:
| Maintenance Steps | Frequency | Tools Required |
|---|---|---|
| Inspect for damage | Weekly | None |
| Clean the lenses | Monthly | Soft cloth |
| Check battery levels | Monthly | Battery tester |
| Replace batteries | As needed | Screwdriver |
| Test light brightness | Biannually | Light meter |
Familiarize Yourself with Local Laws and Regulations Regarding Bike Lights
Familiarizing yourself with the local laws and regulations will help ensure that you are in compliance when it comes to bike light requirements. When it comes to electric bikes, it is crucial to understand the specific regulations regarding their lights. Different regions may have different requirements, so it is important to explore local regulations to ensure that you choose suitable bike lights.
Start by researching the laws in your area. Look for specific guidelines on the brightness and positioning of the lights, as well as any additional requirements such as reflectors or flashing modes. Some jurisdictions may require lights to be visible from a certain distance, while others may have restrictions on the color of the lights.
Once you have a clear understanding of the regulations, you can choose the appropriate bike lights. Look for lights that meet the brightness and visibility requirements set by the local laws. Consider factors such as battery life, durability, and ease of installation. It is also important to choose lights that are suitable for the type of riding you will be doing, whether it’s commuting in a well-lit city or cycling on dark country roads.
Use Lights Appropriately in Different Riding Conditions
When riding in different conditions, it’s important to adjust your lights accordingly to maximize visibility and safety. Here are three key considerations for using lights at night and adjusting light brightness:
-
Select the appropriate light mode: Most bike lights have multiple modes, such as steady, flashing, or pulsing. Choose a mode that suits your riding environment. For well-lit urban areas, a flashing mode can attract attention without being too bright. In darker or rural areas, a steady mode will provide a consistent light source.
-
Adjust the brightness level: Many modern bike lights come with adjustable brightness settings. It’s crucial to find the right balance between being visible to others and not blinding them. Dimming your lights slightly when riding in close proximity to other cyclists or pedestrians is considerate and helps prevent accidents caused by glare.
-
Use additional lighting accessories: Apart from a front light and rear light, consider using additional lighting accessories to enhance your visibility. Attach reflective strips to your bike frame or clothing, and use spoke reflectors for added visibility from the sides. These accessories work in conjunction with your lights to make you more visible to other road users.
By adjusting your lights appropriately, you can ensure maximum visibility and safety while riding at night.
Now, let’s discuss the importance of keeping spare batteries or a charging cable handy to avoid any light failures during your ride.
Keep Spare Batteries or a Charging Cable Handy
Make sure you always have spare batteries or a charging cable with you to avoid any unexpected light failures during your ride. As an electric bike enthusiast, I understand the importance of having a backup power source for my bike’s lights. It not only ensures my safety but also allows me to enjoy a well-lit ride at any time of the day.
To emphasize the significance of carrying a backup battery or charging cable, let’s take a look at the following table:
| Discussion Ideas: |
|---|
| 1. Importance of carrying a backup battery or charging cable for electric bikes |
| 2. Tips for maximizing battery life on electric bikes |
Now, let’s focus on maximizing battery life. To make the most of your electric bike’s battery power, consider implementing these tips:
- Use the appropriate power mode for your riding needs. Lower power modes consume less battery, while higher modes provide more assistance but drain the battery faster.
- Avoid excessive acceleration and abrupt braking, as these actions put a strain on the battery.
- Regularly check tire pressure and ensure it is properly inflated. Under-inflated tires can increase rolling resistance, leading to higher battery consumption.
Enjoy Your Safe and Well-Lit Electric Bike Ride!
To fully appreciate your ride and ensure your safety, remember to always have a well-functioning and reliable source of illumination. Enhancing visibility is crucial when riding an electric bike, especially during low light conditions or at night. Choosing the right bike lights can make a significant difference in your overall riding experience.
When selecting bike lights, consider the brightness, beam pattern, and mounting options. Opt for lights that offer a high lumen output to ensure maximum visibility. A beam pattern that provides a wide and even spread of light is essential for illuminating the road ahead. Additionally, look for lights that offer multiple mounting options, such as handlebar or helmet mounts, to customize your lighting setup according to your preferences.
LED lights are a popular choice due to their energy efficiency and long lifespan. They provide a bright and focused beam that helps you see and be seen by others on the road. Some bike lights even come with additional features like flashing modes or the ability to adjust the brightness level to suit different riding conditions.
Remember to regularly check the batteries or charge your lights to avoid sudden power loss during your ride. Investing in high-quality bike lights and keeping them well-maintained will significantly enhance your visibility and ensure a safe and enjoyable electric bike ride.
Frequently Asked Questions
How do I adjust the light settings on my electric bike?
To adjust the light settings on my electric bike, I first locate the light control button or switch. By pressing or toggling it, I can cycle through different brightness levels.
If I’m experiencing any issues with the light, I can troubleshoot by checking the battery connection, ensuring the light bulb is properly installed, and inspecting the wiring for any damage.
Remember to always refer to the manufacturer’s manual for specific instructions.
What reflective gear and accessories should I use for added visibility?
For added visibility while riding, I highly recommend using reflective clothing and LED bike lights.
Reflective clothing, such as vests or jackets, helps to increase your visibility to others on the road, especially in low light conditions.
LED bike lights, on the other hand, provide a bright and focused beam of light to illuminate your surroundings and make you more visible to drivers.
Together, these accessories can greatly enhance your safety on the road.
Are there any local laws or regulations regarding bike lights that I should be aware of?
Local laws regarding bike lights vary depending on the jurisdiction. It is crucial to familiarize yourself with the specific regulations in your area.
In many places, it is mandatory to have a white light on the front of your bike and a red light on the back, both of which should be visible from a certain distance. Some areas may also require additional reflectors or lights on the sides of the bike.
Always ensure compliance with these laws to promote safety while riding.
How often should I check and maintain my bike’s lights?
In the realm of bike light maintenance, regular checks are of utmost importance. Ensuring that your bike’s lights are in optimal condition guarantees visibility and safety during rides.
By routinely inspecting the lights for any signs of damage, such as loose wires or worn-out bulbs, you can prevent potential accidents. Moreover, checking the alignment and brightness levels of the lights ensures maximum effectiveness.
Don’t overlook the significance of regular bike light maintenance; it’s a small but crucial step towards a safer journey.
What should I do if my lights are not functional even after following the steps provided?
If your lights aren’t functional even after following the steps provided, there are a few troubleshooting tips you can try.
- First, check if the light bulb needs to be replaced or if the wiring is loose or damaged.
- If that doesn’t solve the issue, make sure the battery is charged and properly connected.
If all else fails, contact customer support for further assistance. They can provide specific guidance based on your electric bike model.
Conclusion
After following the steps outlined above, I successfully turned on the light on my electric bike. As I pressed the light button, a soft glow illuminated the path ahead, casting a warm, welcoming light.
With my bike well-lit, I felt a sense of security and confidence as I embarked on my ride. It was like having my own personal beacon, guiding me through the darkness.
Now, I can navigate the streets with ease, knowing that I am visible and safe.