
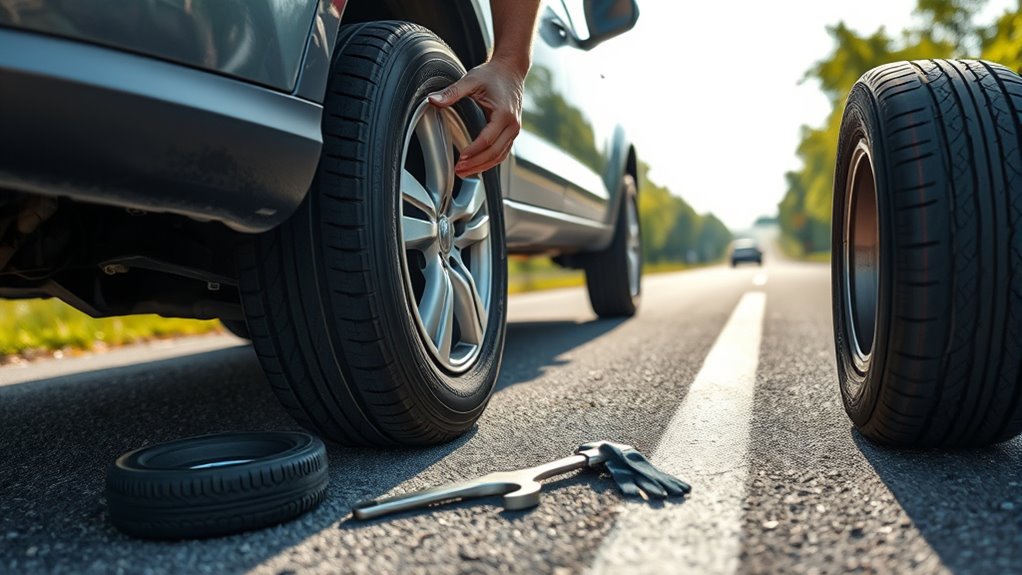
If you get a flat tire, first guarantee your safety by pulling over to a safe spot and turning on hazard lights. Gather your tools, including a jack, lug wrench, and spare tire. Loosen the lug nuts slightly while the tire is still on the ground, then lift your vehicle with a jack. Remove the flat tire, mount the spare, tighten the lug nuts properly, and carefully lower your car. Following these steps will help you handle the situation confidently.
Key Takeaways
- Safely pull over, turn on hazard lights, and block the opposite tire for stability before starting repairs.
- Loosen lug nuts slightly while the tire is still on the ground to prevent cross-threading.
- Use a jack to lift the vehicle at the proper jacking point and remove the flat tire.
- Mount the spare tire, tighten lug nuts in a star pattern, and lower the vehicle carefully.
- Finalize by torque-tightening lug nuts, checking tire pressure, and storing tools properly.
Ensure Safety and Find a Safe Spot

When you notice a flat tire, the first priority is to guarantee your safety by pulling over to the shoulder of the road as soon as possible. Make sure your vehicle is on a flat, paved surface before attempting to change a flat. Turn on your hazard lights to alert other drivers, and engage the parking brake. For added stability, block the tire opposite the flat with wheel wedges. Carefully exit your vehicle, checking for oncoming traffic. Once parked safely, use a pressure gauge to confirm the tire is flat. If your front tire is flat, consult your owners manual for specific instructions. Remember, it’s best to find a service station if you’re unsure or need professional help. Your safety always comes first. Additionally, being aware of home security systems can help protect your vehicle and property from theft or vandalism while you’re away or attending to roadside issues. Recognizing the importance of vehicle safety features can further assist in preventing accidents or complications during roadside emergencies. Proper knowledge of your vehicle’s tire types and features can also be beneficial in choosing the right tools or replacements when fixing a flat. Being familiar with emergency roadside kits can ensure you have all necessary supplies during such situations.
Gather the Necessary Tools and Spare Tire
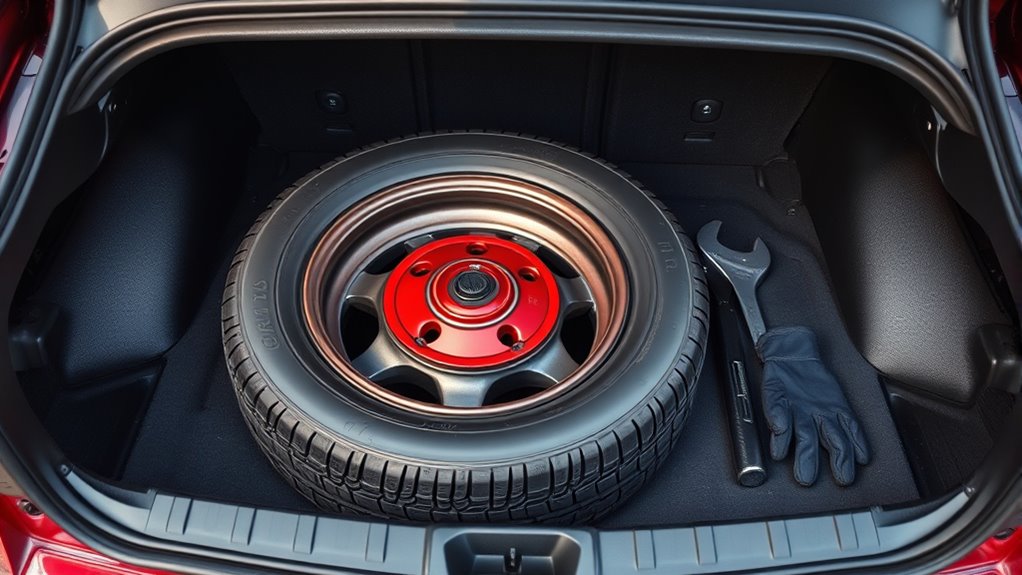
Start by locating your spare tire, usually stored in the trunk, under the rear cargo area, or mounted on the back of your vehicle. Gather the essential tools, including the car jack and lug wrench, and check they’re in good working condition. Don’t forget to pick up gloves and review your owner’s manual for specific instructions. It’s also helpful to be familiar with Ford Tuning techniques, which can help optimize your vehicle’s performance during repairs or upgrades. Additionally, understanding how to Self Watering Plant Pots work can be useful for maintaining garden tools and accessories. Familiarizing yourself with the safety precautions associated with essential oils can also ensure safe and effective use during your vehicle repair process. Being aware of essential oil safety guidelines can prevent accidents and ensure proper handling of these substances.
Essential Tools Checklist
Before beginning your tire change, gather all the essential tools and your spare tire to guarantee a smooth process. Make sure you have the right tools, including a compatible car jack and a sturdy lug wrench. It’s a good idea to check that your spare tire is fully inflated and matches your vehicle’s specifications. Collect any additional tools you might need, such as wheel wedges, work gloves, and your vehicle’s owner’s manual. Confirm the proper jacking points listed in the manual to avoid damaging your car during lifting. Keep everything organized and within reach—storing tools in your trunk or a designated compartment makes the process easier. Having the right tools on hand ensures you’re prepared to handle a flat tire efficiently and safely. Proper tool selection can significantly impact your safety during the tire change process, especially when considering parking lot safety protocols. Being prepared with the correct tools and knowledge can also help prevent remote work burnout by reducing stress and increasing confidence in handling unexpected situations. Additionally, understanding curiosity and problem-solving can motivate you to learn more about your vehicle’s maintenance needs, further empowering you to address issues independently.
Spare Tire Location
Locate the spare tire first, as it’s typically stored either underneath the trunk floor or mounted on the back of the vehicle, depending on your car’s make and model. Check your owner’s manual if you’re unsure about its exact location. Once found, inspect the tire to verify it has adequate air pressure—use a tire gauge if available. The tools needed for changing the tire, such as the jack and lug wrench, are usually stored nearby or in designated compartments within your vehicle. Before proceeding, park on a flat, stable surface for safety. Remember, knowing the spare tire’s location and condition is vital for a smooth tire change. Being prepared makes the process faster and safer. Additionally, understanding toilet flushing mechanisms can help prevent plumbing issues if you ever need to manually flush a toilet during emergencies. Properly maintaining your vehicle’s tires, including checking air pressure levels, can help prevent flats and ensure safer driving conditions. Regularly inspecting your tires for wear and tear can also extend their lifespan and improve safety. For added safety, consider car safety tips to prepare for unexpected situations on the road. Moreover, keeping a portable tire inflator handy can help you quickly restore proper pressure if you notice a slow leak.
Loosen the Wheel Lugs Before Lifting the Vehicle
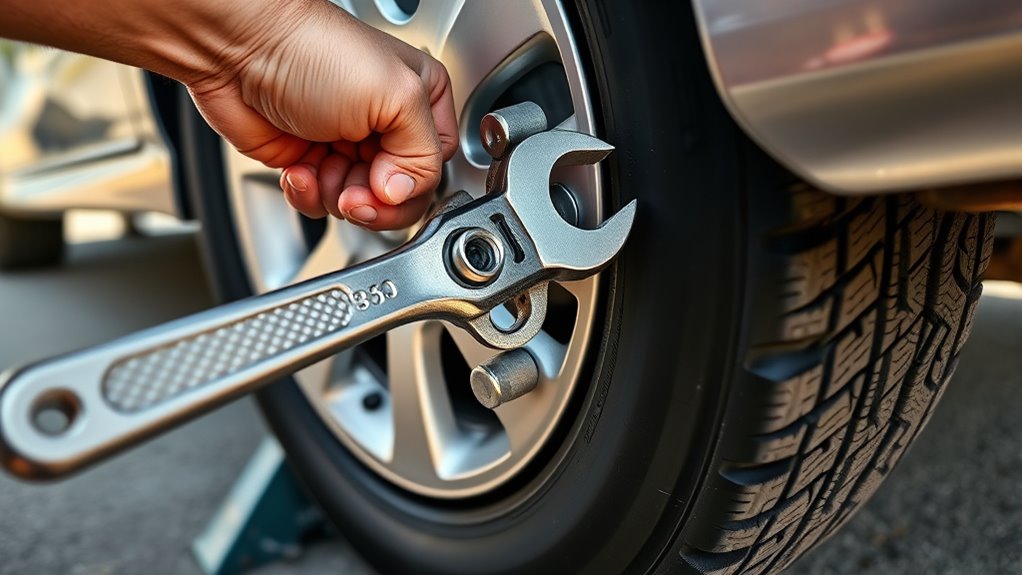
Before lifting your vehicle, it’s important to loosen the lug nuts properly. Use a firm grip and turn counterclockwise, making sure to keep your hand position steady and avoid cross-threading. Loosen each nut a few turns incrementally to make removal easier and safer once the car is raised. Additionally, ensuring the proper use of tools can help prevent damage to the lug nuts and maintain safety during the process. Remember that using the right safety precautions minimizes the risk of injury and ensures a smoother repair. Being aware of AI cybersecurity can also help protect your vehicle’s electronic systems from potential threats during maintenance.
Use Proper Hand Position
To loosen the wheel lugs safely and effectively, you should turn the lug wrench counterclockwise, making certain the wrench is securely attached to the lug nut first. Proper hand positioning helps maintain control and reduces fatigue. Place your hands on opposite sides of the wrench to apply even pressure, making the task easier. Keep a firm grip with both hands, but avoid wrapping your thumbs around the handle to prevent injury. Use your body weight rather than just arm strength to turn the wrench, which provides more power and stability. Remember these key points:
- Make sure the wrench is securely attached before applying force
- Place hands on opposite sides for balanced pressure
- Keep a firm grip without wrapping thumbs around the handle
- Use your body weight to turn the wrench
- Maintain control to prevent slipping or stripping the lug nut
Loosen Lugs Incrementally
Start loosening the lug nuts in a cross pattern, turning each counterclockwise about a quarter to a half turn. This technique guarantees even pressure on the wheel and prevents it from spinning as you work. Work on all the nuts before lifting the vehicle, which helps maintain control and stability. Apply firm, steady pressure with your wrench, but don’t remove the nuts completely yet. Loosening each about a quarter to a half turn keeps the wheel secure and makes removal easier once the vehicle is lifted. By loosening the lugs incrementally in a cross pattern, you distribute force evenly, reducing stress on the wheel and lug bolts. This step prepares you for a safer, smoother tire change process.
Avoid Cross-Threading Threads
Loosening the wheel lugs while the tire remains on the ground helps prevent cross-threading, which can damage the wheel studs and make future removal difficult. Cross-threading happens when you turn a lug nut at an incorrect angle, damaging the threads on the lug bolt. To avoid this, always turn the lug wrench counterclockwise to loosen, ensuring proper alignment and avoiding forced angles. Using the correct-sized lug wrench and applying steady, even force also helps prevent cross-threading.
- Ensure the lug nut is properly aligned before turning
- Use a compatible, properly-sized lug wrench
- Turn slowly and steadily, avoiding force
- Keep the lug nut straight during loosening
- Loosen all lug nuts slightly before lifting the vehicle
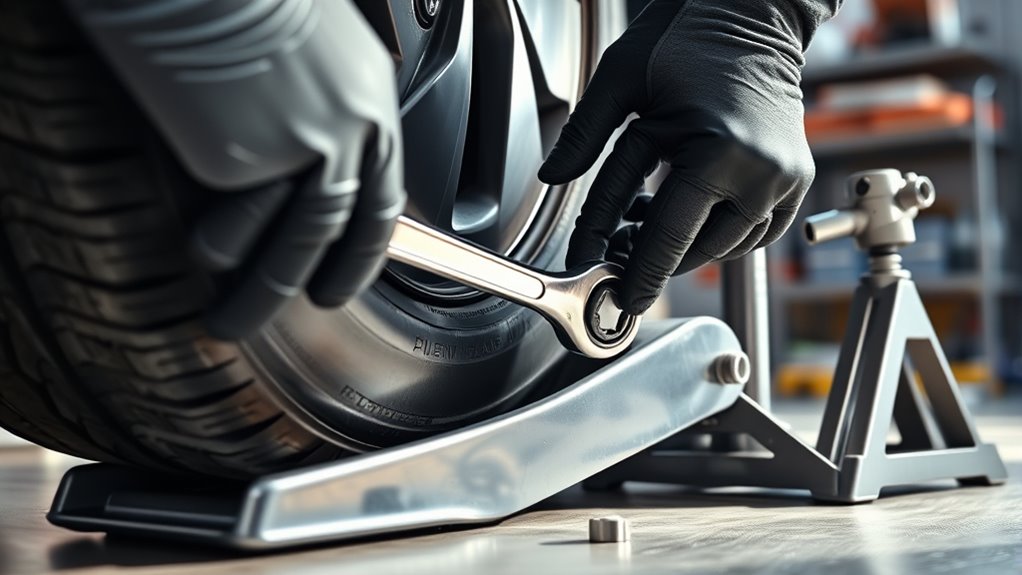
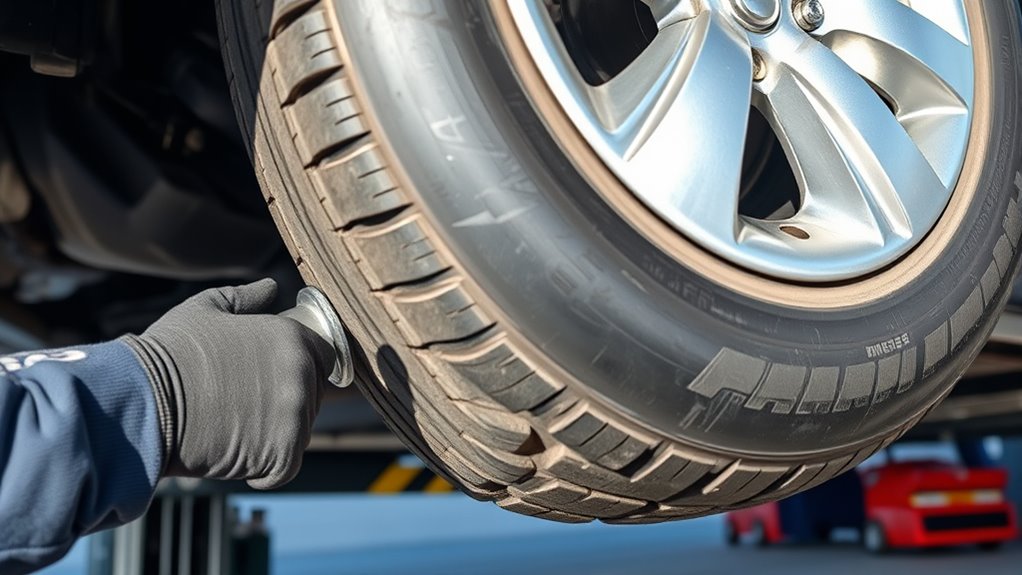
Lift the Car Using a Jack to Remove the Flat Tire
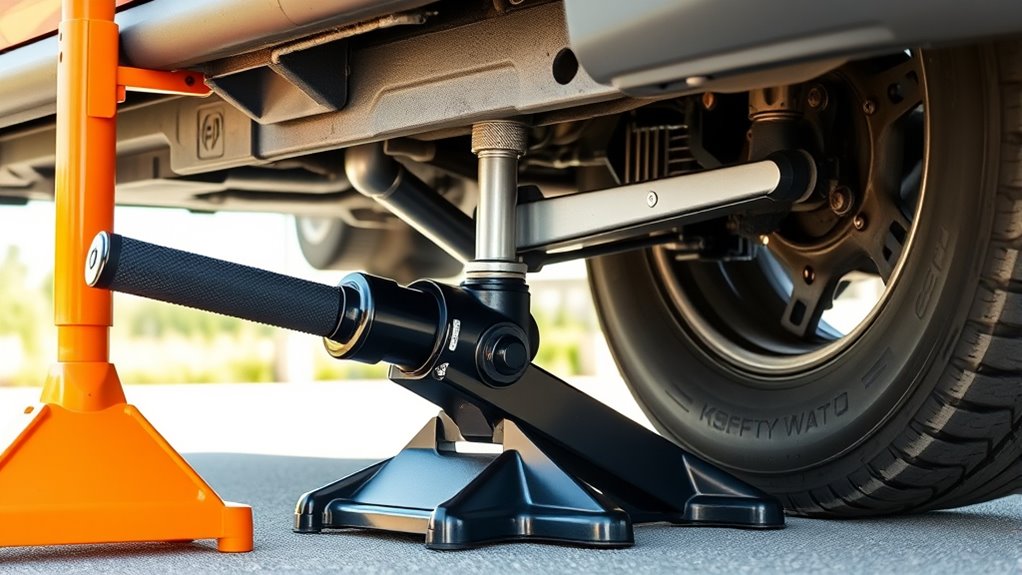
Before lifting the car, find the correct jacking point, usually marked in your owner’s manual, to guarantee stability. Position your jack securely under this point, ensuring it contacts the vehicle’s frame or reinforcement area. Turn the jack handle clockwise to steadily raise the vehicle until the flat tire is completely off the ground. Keep a close eye on the stability and levelness of the car as you lift, avoiding any body parts under the vehicle during this process. Once the tire is clear of the ground, double-check that the jack is firmly in place before proceeding. Proper placement and cautious lifting are essential to prevent slipping or damage, making sure the vehicle remains stable throughout this step.
Remove the Flat Tire and Mount the Spare
Once the vehicle is securely lifted and stable, you can begin removing the flat tire. Start by fully unscrewing and removing the lug nuts, then carefully lift the flat tire off the wheel hub. Place the flat tire to the side of the vehicle, ensuring it’s stable and out of the way. To mount the spare, align it with the wheel studs, making sure the holes match the lugs. Thread the lug nuts onto the studs by hand to secure the tire, avoiding cross-threading. Once the spare is in place, tighten the lug nuts snugly in a star pattern. This ensures even tightening and proper fitment before you proceed to lower the vehicle and tighten fully.
Secure the Spare Tire and Lower the Vehicle
After confirming the spare tire is properly inflated and in good condition, place it near the wheel hub, lined up with the wheel studs for easy mounting. Thread the lug nuts onto the studs by hand to hold the tire in place temporarily. Use the jack to carefully lower the vehicle until the tire contacts the ground but the full weight isn’t on the jack. This stabilizes the tire and makes tightening the lug nuts easier. Once the vehicle is stable, remove the jack. Then, tighten the lug nuts securely in a star pattern to ensure even pressure across the wheel. Double-check each nut for tightness. With the tire secured and the vehicle lowered, you’re ready to proceed to the final tightening step.
Tighten the Wheel Lugs and Finalize the Tire Change

To properly secure the wheel, use a tire iron to tighten each lug nut in a crisscross pattern, which helps distribute torque evenly across the wheel. Avoid fully tightening the nuts until the vehicle is on the ground to prevent warping the wheel. Once lowered, tighten each lug nut to the manufacturer’s recommended torque, usually between 80-100 ft-lbs. After driving a few miles, recheck and tighten the lug nuts to ensure they haven’t loosened. Before hitting the road again, make sure all lug nuts are securely fastened and properly torqued.
Secure the wheel by tightening lug nuts in a crisscross pattern and recheck torque after driving.
- Use a torque wrench for accuracy
- Tighten in a crisscross sequence
- Double-check the torque after driving
- Avoid overtightening to prevent damage
- Confirm all nuts are secure before long trips
After the Swap: Store Tools and Check the Spare

After you’ve installed the spare tire, it’s important to quickly secure your tools in their proper compartments. Store the jack, lug wrench, and other tools securely to prevent loss or damage while driving. Next, check the pressure of your spare tire with a gauge to verify it meets the recommended PSI, usually listed on the tire sidewall or in your vehicle manual. If you installed a temporary compact spare, remember it has speed limits (often 50 mph) and distance restrictions (around 50-70 miles), so drive cautiously. Inspect the flat tire for damage and consider having it repaired or replaced before reusing it. Finally, note the installation date of the spare, especially if it’s a temporary model, to plan for maintenance or replacement.
Frequently Asked Questions
How to Fix a Flat Tire Step by Step?
When you get a flat tire, you need to act quickly and safely. First, park on a flat, stable surface, turn on your hazard lights, and loosen the lug nuts slightly while the car’s still on the ground. Then, lift the vehicle with a proper jack, remove the flat tire, and replace it with your spare. Tighten the lug nuts, lower the car, and verify everything’s secure before driving off.
How to Change a Car Tire in 5 Steps?
Imagine your car’s tire as a stubborn obstacle blocking your path. To clear it, you start by loosening the lug nuts, like loosening a stubborn knot. Then, you lift the vehicle with a jack, remove the flat tire, and carefully place the spare onto the wheel hub. Tighten the lug nuts in a crisscross pattern, then lower the car, ensuring everything’s secure. Now, your journey can continue smoothly.
Where to Put the Jack When Changing a Tire?
When changing a tire, you need to place the jack at the vehicle’s designated jacking points. Check your owner’s manual for exact locations, usually reinforced spots near each wheel marked by notches or arrows. Position the jack directly under these points, ensuring it contacts a solid part of the vehicle’s frame. Always use a level surface, engage the parking brake, and avoid plastic panels to keep the process safe and effective.
How Do You Change a Tire in 7 Steps?
You change a tire in 7 steps by first loosening the lug nuts slightly with a tire iron, then using the jack at the proper points to lift your vehicle until the flat is off the ground. Next, remove the lug nuts completely and take off the flat tire. Mount the spare tire, tighten the lug nuts by hand, lower the car, and finally tighten the nuts in a star pattern for safety.
Conclusion
Now that you’ve swapped your flat tire, you’re back on solid ground. Remember, a well-prepared driver is like a lighthouse in a storm—guiding you safely through unexpected setbacks. Keep your tools organized and check your spare regularly so you’re ready when the road throws a curveball. With confidence and a steady hand, you can handle a flat tire and keep moving forward, no matter what the journey brings.
Related Posts:


Zane rides her bike because she loves it, but also because she is mindful of the need to leave a better world for her children.