To upgrade your garage lighting for bike work, focus on shadow-free solutions that guarantee even, bright illumination with minimal glare. Choose fixtures that provide consistent, adjustable light coverage, ideally placed high on the ceiling or strategically aimed to eliminate shadows. Regular maintenance, like cleaning and bulb replacement, keeps your lighting reliable. If you want to learn more about selecting, installing, and troubleshooting these lights, continue exploring the best techniques for a safer, more effective workspace.
Key Takeaways
- Use multiple adjustable fixtures and diffusers to ensure even, shadow-free illumination across your workspace.
- Prioritize high-quality, reliable LED lights with consistent brightness and minimal flickering for safety and clarity.
- Mount lights strategically high on ceilings and position fixtures to minimize shadows on critical bike components.
- Regularly maintain and replace bulbs or fixtures to prevent flickering, uneven lighting, and ensure optimal visibility.
- Customize lighting with adjustable angles and multiple sources for precise, tailored coverage during bike repairs.
Why Proper Garage Lighting Is Essential for Safe Bike Repairs

Good lighting is crucial when working on your bike in the garage because it directly impacts your safety and the quality of your repairs. The right lighting color helps you see details clearly, reducing errors and preventing accidents. Cool white or daylight LEDs mimic natural light, providing accurate color rendering that’s essential for inspecting parts and identifying issues. Additionally, choosing energy-efficient lighting ensures you use less power while maintaining bright illumination, saving you money and reducing your environmental impact. Proper lighting minimizes shadows and glare, which can obscure critical components or create hazards. By prioritizing lighting color and energy efficiency, you set a safer, more effective workspace that keeps you focused and confident during every bike maintenance session. Incorporating color accuracy into your lighting setup further enhances your ability to detect subtle imperfections and ensure precise repairs. Leveraging energy-efficient lighting helps support sustainable practices while maintaining optimal visibility. Incorporating adjustable lighting options can also improve your overall workstation flexibility, allowing you to adapt your workspace for different tasks and lighting conditions.
How to Choose the Best Shadow-Free Garage Lights for Your Bike Work

To guarantee your bike repairs are safe and precise, choosing shadow-free garage lighting is essential because shadows can hide critical components and cause mistakes. When selecting lights, pay attention to lighting angles; fixtures that distribute light evenly reduce shadows and provide clear visibility from multiple directions. Select adjustable or multiple light sources to customize coverage based on your workspace. Additionally, consider bulb color—cool white or daylight bulbs enhance contrast and reveal fine details, making work easier and more accurate. Avoid harsh or yellowish tones that can distort colors and obscure small parts. Proper lighting placement and the use of diffusers can further minimize shadows and improve overall illumination. Incorporating lighting techniques such as layering different light sources can help eliminate shadows and create a more uniform light environment. Understanding AI applications in lighting design can lead to smarter, more efficient setups that adapt to your workspace needs. By focusing on ideal lighting angles and the right bulb color, you’ll create a bright, shadow-free environment that improves safety and precision during your bike repairs. Implementing proper lighting techniques can further enhance visibility and reduce eye strain, ensuring you work efficiently and safely. Additionally, using lighting control systems can optimize the light levels throughout your workspace for different tasks.
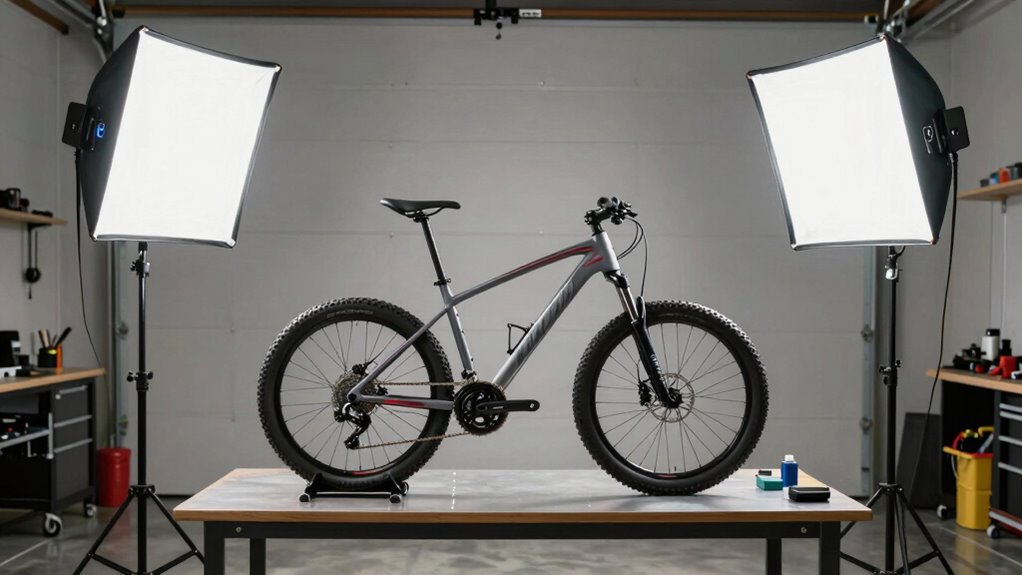
Installing and Positioning Your Garage Lights for Maximum Visibility

Properly installing and positioning your garage lights is essential for achieving maximum visibility while working on your bike. Good light placement ensures even illumination and reduces shadows, making your workspace safer and more efficient. When selecting fixtures, choose those with adjustable angles to direct light precisely where needed. Consider mounting lights high on the ceiling to spread light across the entire area, or use multiple fixtures to eliminate dark spots. Use bright, white LEDs for clear visibility and minimal heat emission. Always test your light placement before final installation to guarantee ideal coverage. Remember, fixture selection and strategic light placement go hand in hand in creating a shadow-free environment perfect for detailed bike work. Additionally, understanding the navigation and mapping features of smart lighting systems can help automate and optimize your workspace lighting for different tasks. Incorporating lighting controls can further enhance flexibility and energy efficiency, allowing you to customize lighting based on your specific needs. Taking advantage of smart home integration can also allow you to schedule or remotely adjust your garage lighting for convenience and efficiency. Incorporating advanced lighting techniques can help you achieve uniform brightness and eliminate shadows in even the most complex workspace layouts, especially when combined with dynamic adjustment features that adapt to your work environment.
Maintaining Your Garage Lighting: Bulb Care, Cleaning, and Upgrades
Maintaining Your Garage Lighting: Bulb Care, Cleaning, and Upgrades
Regularly maintaining your garage lighting guarantees it stays bright and reliable for bike work. To maximize bulb longevity, check and replace bulbs before they burn out completely, preventing flickering or dimming that hampers visibility. Use appropriate cleaning techniques, like wiping fixtures with a damp cloth to remove dust and dirt, which can reduce light output. Avoid harsh chemicals that might damage fixtures or bulbs. Periodic upgrades, such as switching to energy-efficient LEDs, can enhance brightness and lifespan while reducing energy costs. Tighten loose connections and inspect fixtures for corrosion or damage. Keep an eye on Free Floating elements such as fixtures and wiring to ensure safety and performance. Ensuring proper fixture installation can also prevent early failures and improve overall lighting quality. Proper maintenance and modern lighting techniques help maintain optimal illumination levels and energy efficiency. Incorporating professional services for large-scale upgrades can further improve overall lighting performance and safety standards. Keeping your lighting well-maintained ensures consistent illumination, minimizes shadows, and creates a safer, more effective workspace for bike repairs. Regular inspections can also help identify early signs of fixture deterioration, allowing for timely repairs or replacements. Proper care prolongs fixture life and maintains excellent visibility.
Troubleshooting Common Garage Lighting Problems When Working on Your Bike

When your garage lighting isn’t working as it should, it can make bike repairs frustrating and unsafe. Common issues include light flickering and uneven brightness, which can hinder your work and cause eye strain. To troubleshoot, first check the power source and ensure bulbs are screwed in tightly. If flickering persists, replace the bulb or inspect the ballast or dimmer switch if you have one. For uneven brightness, consider upgrading to LED fixtures with consistent illumination. Also, look for loose wiring or faulty connections that could cause instability. Regularly cleaning fixtures and replacing worn components helps prevent these problems. Additionally, choosing appropriate lighting solutions that are designed for garage work can significantly improve visibility and safety. Incorporating energy-efficient bulbs can also reduce flickering and improve longevity. Being aware of common lighting issues can help you diagnose and resolve problems quickly, ensuring your workspace remains safe and effective. Properly maintaining electrical wiring and fixtures is crucial for preventing future problems and maintaining optimal lighting conditions. Understanding field recording techniques can also help you select more reliable fixtures and placement strategies for consistent lighting. Remember, proper lighting is essential for safe, effective bike repairs, so addressing these issues promptly keeps your garage functional and well-lit.
Frequently Asked Questions
Can LED Garage Lights Improve Visibility During Winter Bike Repairs?
Yes, LED garage lights can markedly improve your winter visibility during bike repairs. They provide bright, consistent bike repair lighting, reducing shadows and glare that hinder your work. With their energy efficiency and long lifespan, LED lights guarantee you can see every detail clearly, even on cold, dark winter days. Upgrading to LED garage lighting makes wheel adjustments, chain repairs, and other tasks safer and more precise in low-light conditions.
Are Battery-Powered or Wired Lights Better for Shadow-Free Garage Lighting?
Did you know that 85% of DIY enthusiasts prefer portable lighting options? When choosing between battery-powered and wired lights for shadow-free garage lighting, battery-powered options often offer greater flexibility and easy setup, making them ideal for quick repairs. Wired lights provide consistent power for long sessions but limit mobility. If you prioritize versatility and minimal wiring, battery-powered lights are your best bet for shadow-free, efficient bike work.
How Do I Prevent Glare When Working Under Bright Garage Lights?
To prevent glare when working under bright garage lights, focus on glare reduction and light diffusion techniques. Use fixtures with diffusers or add lampshades to soften the light. Position lights at appropriate angles and avoid direct reflections into your eyes. Installing dimmable lights allows you to adjust brightness as needed. These steps help create a comfortable, shadow-free workspace, reducing eye strain and improving visibility during bike repairs.
What’s the Best Way to Upgrade Existing Garage Lighting for Bike Maintenance?
You should upgrade your garage lighting by adjusting fixture placement to eliminate shadows and improve visibility. Opt for fixtures with adjustable angles to direct light precisely where needed. Choose a light color temperature around 4000K to reduce eye strain and enhance clarity. Additionally, consider replacing bulbs with high-quality LEDs for brighter, more consistent illumination. Proper fixture placement combined with the right color temperature makes bike maintenance safer and more efficient.
Do Smart Lighting Systems Help in Customizing Bike Repair Illumination?
Yes, smart lighting systems help you customize bike repair illumination easily. You can adjust brightness, color temperature, and even set specific scenes for different tasks, ensuring ideal visibility. With smart lighting, you get customization options tailored to your workflow, reducing shadows and glare. Plus, you can control everything remotely or automate lighting changes, making your bike maintenance more efficient and comfortable.
Conclusion
With proper garage lighting, you’ll see clearly, work confidently, and stay safe during every bike repair. By choosing the right lights, installing them thoughtfully, maintaining them regularly, and troubleshooting issues promptly, you create a workspace that’s efficient, safe, and shadow-free. So, invest in good lighting, keep it maintained, and enjoy hassle-free bike repairs every time. Brighten your garage, improve your work, and make every bike project a success.