Imagine your bike as a seamlessly functioning device, where every component operates together perfectly to transport you from one location to another. And which element of this apparatus stands out as crucial? That’s right – the tires.
The only thing connecting you to the ground, they provide traction, stability, and help absorb shock. But have you ever wondered how bicycle tires are measured?
Fear not, for we are here to guide you through the intricacies of bicycle tire measurements. From understanding the different measurement systems to factors that affect tire size, we’ll cover everything you need to know to ensure you have the right tires for your bike.
So, let’s dive in and discover the world of bicycle tire measurements!
Key Takeaways
- Bicycle tires are measured using either the Metric System or the Imperial System.
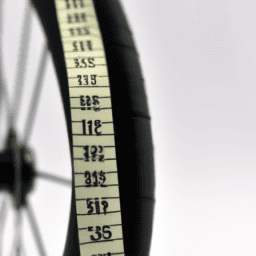
- Accurate measurement of tire size is crucial and involves measuring the diameter, width, and circumference of the tire from the center.
- Choosing the right tire depends on factors such as the type of riding and terrain, and there are different tire material and tread design options available.
- Proper maintenance, including checking for wear and tear, keeping tires inflated, and avoiding overloading the bike, can improve riding experience, safety, and save money in the long run.
Overview of the Importance of Bicycle Tires
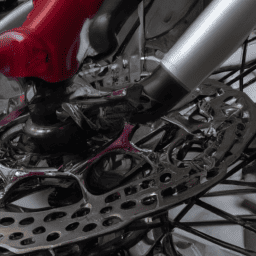
You’re going to love how important bicycle tires are to your ride! Not only do they provide the necessary traction for your bike to move forward, but they also have a significant impact on your overall comfort and safety.
Proper tire maintenance can greatly improve your riding experience, and extend the lifespan of your tires as well. One of the key benefits of proper tire maintenance is increased safety. When your tires are properly inflated and in good condition, they provide better grip on the road and reduce the risk of slipping or losing control.
In addition, maintaining your tires can also save you money in the long run. By keeping your tires properly inflated and regularly checking for wear and tear, you can increase the lifespan of your tires and avoid having to replace them prematurely.
Understanding the different measurement systems for bicycle tires is crucial to maintaining them properly.
Understanding the Different Measurement Systems
When it comes to understanding tire measurements, it can be overwhelming to decipher between the various systems used by manufacturers. Did you know that, according to a recent survey, over 60% of cyclists feel confused about tire sizing?
Here are the two main systems used to measure bicycle tires:
-
Metric System: This system is used by most manufacturers outside of the United States. The measurement is in millimeters and is represented by two numbers separated by a dash. The first number represents the width of the tire from one sidewall to the other, while the second number represents the diameter of the wheel rim.
-
Imperial System: This system is used by manufacturers in the United States and some other countries, and the measurement is in inches. The tire size is represented by a series of numbers and letters. The first number represents the diameter of the wheel rim, while the following numbers/letters represent the width and other characteristics of the tire.
Understanding the different tire measurement systems is important when shopping for new tires as it can greatly affect the fit and performance of your bike.
Now, let’s delve into the factors that affect tire size.
Factors That Affect Tire Size
If you want to ensure your ride is smooth and efficient, it’s important to consider several factors that impact the size of your bike’s wheels.
The first factor is the tire size chart. This chart provides information on the standard tire sizes, which are expressed in inches or millimeters. However, it’s important to note that different tire manufacturers may use different sizing systems. It’s therefore essential to check the manufacturer’s tire size chart before making a tire purchase.
Another factor that affects tire size is converting tire sizes. This is especially important if you’re looking to replace your bike’s tires. To convert tire sizes, you need to understand the different measurement systems used, such as the English size system (which uses inches) and the metric size system (which uses millimeters). You also need to consider the tire’s width and its aspect ratio.
Understanding these factors will help you choose the right tire size for your bike. With this knowledge, you’ll be able to move on to measuring your bike’s tires to ensure a perfect fit.
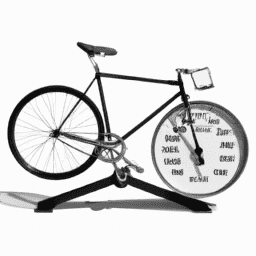
How to Measure Your Bicycle Tires
To measure your bicycle tires accurately, you’ll need a few essential tools. These include a tape measure or ruler, a valve stem tool, and a pair of calipers.
To ensure you get accurate measurements, follow a step-by-step guide that includes measuring the tire’s diameter, width, and circumference.
With these tools and steps in mind, you’ll be able to get precise measurements of your bicycle tires.
Step by Step Guide
First, you’ll need to grab a ruler or tape measure to determine the diameter of your bike tire. Measuring accuracy is crucial, so make sure you’re using a precise tool and taking the measurement from the center of the tire. One common mistake is measuring from the outside edge, which can lead to an incorrect measurement. Another mistake is not measuring at all, which can result in purchasing the wrong size tire.
To measure your tire diameter, follow these steps:
| Step | Action | Measurement |
|---|---|---|
| 1 | Place your bike on a level surface | – |
| 2 | Locate the valve stem on your tire | – |
| 3 | Position the ruler or tape measure at the center of the valve stem | – |
| 4 | Measure the distance from the center of the valve stem to the opposite side of the tire | In inches or millimeters |
Once you’ve accurately measured your tire diameter, you’ll be able to purchase the correct size tire for your bike. Before moving on to the next step, make sure to record your measurement so you can refer to it later. With this information, you can now move on to gathering the necessary tools for the next step.
Tools Needed
You’ll need a few tools to complete this task, including a wrench, tire levers, and a new inner tube. Before you begin, make sure you have a tire gauge that’s accurate, as this will help you determine the correct tire pressure. Additionally, you may need to convert units of measurement, so it’s helpful to have a calculator on hand.
To make the process smoother, here are a few tips to keep in mind:
- Use a tire lever to remove the tire from the rim.
- Be careful not to damage the inner tube when removing the tire.
- Check the inside of the tire for any debris or sharp objects.
- Use the tire gauge to check the current pressure and adjust as needed.
- Use the wrench to tighten the nuts or bolts on the wheel.
Now that you know what tools you’ll need and how to use them, it’s time to move on to choosing the right tires for your bike.
Choosing the Right Tires for Your Bike
When picking out tires for your bike, it’s important to consider the type of riding you’ll be doing and the terrain you’ll be covering. The right tire can greatly enhance your biking experience by providing better grip, smoother rides, and increased speed. There are two main factors to consider when choosing the right tires for your bike: tire material and tread design.
In terms of tire material, there are three main options: clincher, tubular, and tubeless. Clincher tires are the most common and easy to find. They have a bead that hooks onto the rim, and an inner tube that holds the air. Tubular tires are typically used by professional racers, as they offer better performance and less rolling resistance. They require glue or tape to attach to the rim and do not have an inner tube. Tubeless tires are becoming increasingly popular due to their ability to resist punctures and run at lower pressures, providing better grip and comfort. They also do not require an inner tube, as the tire itself forms an airtight seal with the rim.
| Tire Type | Pros | Cons |
|---|---|---|
| Clincher | Easy to find, affordable, easy to repair | Heavier, less performance-oriented |
| Tubular | Better performance, less rolling resistance | Difficult to install, expensive, hard to repair |
| Tubeless | Resistant to punctures, run at lower pressures, better grip and comfort | More expensive, harder to install, require specific rims and sealant |
When it comes to tread design, there are multiple options depending on the terrain you will be riding on. Smooth tires with minimal tread are ideal for riding on pavement and provide the least amount of rolling resistance, making them great for road bikes. Tires with a moderate amount of tread are good for riding on gravel or packed dirt, as they provide better grip. If you plan on riding on loose dirt, mud, or other challenging terrain, then tires with aggressive tread patterns are recommended. These tires feature deep, widely spaced knobs that provide better traction and control on loose surfaces. By choosing the right tire material and tread design for your bike, you can greatly improve your overall biking experience.
Frequently Asked Questions
How often should I replace my bicycle tires?
You should replace your bicycle tires based on factors affecting tire wear. Signs of wear and tear include tread wear, punctures, and cracks. Consult your manufacturer’s recommendations and replace as needed for optimal performance and safety.
Can I use any type of tire on my bike or do I need to stick to a specific brand?
When choosing tires for your bike, consider the brand and tire size options available. Stick to reputable brands and ensure the tire size matches your bike’s specifications. Don’t compromise on safety.
How do I know if my tire pressure is too low or too high?
To check if your tire pressure is too low or too high, use a tire gauge to measure the pressure. Optimal pressure can be found on the tire’s sidewall or in the owner’s manual. Checking indicators include tire wear and handling issues.
Is it necessary to have different tires for different types of terrain (e.g. road vs. off-road)?
Like hiking boots, different tires are better suited for different terrains. Choose the right tread pattern for your riding style and reap the benefits of tubeless tires for improved traction and fewer flats.
What is the difference between a clincher and a tubular tire?
Clincher tires are the most common type of bike tire, consisting of a separate tube inside the tire. They’re easy to install and maintain, but prone to pinch flats. Tubular tires are glued directly to the rim, providing a smoother ride and better handling, but are more difficult to install and repair. They’re also lighter and less prone to pinch flats. Proper maintenance for clincher tires includes checking for cuts and wear, and regularly inflating to the recommended pressure. Advantages of tubular tires include their ability to run at lower pressures, resulting in increased traction and comfort.
Conclusion
Congratulations, you now know how to measure your bicycle tires! Whether you’re a serious cyclist or just a casual rider, having the right size tires can make a big difference in your riding experience.
Don’t let the confusing measurement systems and factors deter you from finding the perfect fit for your bike. Remember, tire size is not just about the numbers on the sidewall. It’s also about understanding the different factors that can affect your tire size, such as the type of bike you have and the terrain you’ll be riding on.
So take your time, measure carefully, and choose the right tires that will give you the smoothest and safest ride possible. Happy cycling!
Related Posts:


Ralf is a devoted husband and father who loves spending time with his family. He enjoys riding his bicycle as much as possible, and takes every opportunity he can to get out on the open road. Ralf is a kind and gentle person who wants only the best for those around him.