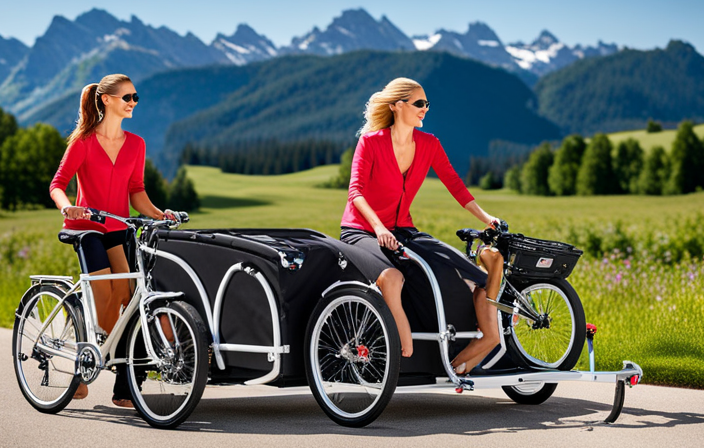
I have always been curious about how those sturdy trailers are connected to a bike. Don’t wonder anymore! This article will explain the various attachment options for burley trailers and provide a step-by-step guide on how to install them.
From the hitch arm attachment to the quick release and flex connector attachments, I’ve got you covered.
So, let’s dive in and make sure your burley trailer is securely connected to your bike for all your adventures!
Key Takeaways
- Burley trailers can be attached to bikes using different types of hitches, such as the Burley Standard Forged Hitch or the Burley Ballz Nutted Axle Hitch.
- Proper installation and attachment of the hitch arm and quick release attachments is important for a secure connection.
- The Flex Connector attachment should be aligned and securely connected to both the trailer and the bike.
- Regular maintenance, including inspections, cleaning, and lubrication, is necessary to ensure the safety and functionality of the trailer attachment.
Types of Burley Trailer Attachments
There are two main types of Burley trailer attachments that you can use to connect the trailer to your bike.
These options are designed to provide flexibility and compatibility with different bike models.
The first type is the Burley Standard Forged Hitch, which is compatible with most bikes. It attaches to the bike’s rear axle and allows for a secure and stable connection between the trailer and the bike. This hitch option is easy to install and provides a reliable connection for your Burley trailer.
The second type is the Burley Ballz Nutted Axle Hitch. This hitch is specifically designed for bikes with nutted axles, providing a secure attachment point for the trailer. It replaces the nut on the bike’s rear axle and allows for easy installation and removal of the trailer. This hitch option is ideal for bikes with non-quick release axles, ensuring compatibility and a solid connection.
Both hitch options are made from durable materials and provide a safe and reliable attachment between your bike and the Burley trailer.
Now that you know about the different hitch options available, let’s move on to installing the hitch arm attachment.
Installing the Hitch Arm Attachment
To install the hitch arm attachment, you’ll need to first align the hitch with the designated area on your bicycle frame. This ensures that the trailer is securely attached and won’t come loose while riding. Here’s a step-by-step guide to installing the hitch arm correctly:
-
Start by locating the hitch receiver on your bicycle frame. It is usually located near the rear wheel axle.
-
Line up the hitch arm with the hitch receiver, making sure they are aligned properly.
-
Insert the hitch arm into the hitch receiver and push it all the way in until it clicks into place. You should hear a distinct sound when it locks in.
-
Give the hitch arm a firm tug to ensure it is securely attached. It should not move or wiggle.
-
Check that the safety strap is properly attached to the hitch arm and the rear axle of your bicycle.
By following these steps, you can ensure that the hitch arm attachment is installed correctly. However, if you encounter any issues during the installation process, here are some common troubleshooting tips:
-
Make sure the hitch arm is fully inserted into the hitch receiver.
-
Check that the safety strap is securely fastened.
-
Ensure that there are no obstructions or debris preventing a proper attachment.
Now that the hitch arm is securely attached, we can move on to the next step of attaching the quick release attachment.
Attaching the Quick Release Attachment
Now that the hitch arm is securely attached, let’s move on to attaching the quick release attachment. This part is crucial for properly connecting your Burley trailer to your bike.
The quick release attachment is designed to provide a secure and easy connection between the trailer and the bike’s rear axle.
To install the quick release attachment, first, make sure the quick release lever is in the open position. Then, slide the attachment onto the bike’s rear axle, making sure it fits snugly. Once in place, close the quick release lever, ensuring that it is tightened securely. You should hear a clicking sound when the lever is fully closed, indicating that it is properly locked in place.
If you encounter any issues during the installation process, there are a few troubleshooting steps you can take. First, double-check that the quick release lever is fully closed and tightened. If it still feels loose, try adjusting the tension by turning the adjustment nut clockwise.
Now that the quick release attachment is securely installed, we can move on to connecting the flex connector attachment. This step is essential for ensuring a smooth and stable ride while towing your Burley trailer.
Connecting the Flex Connector Attachment
Attaching the Flex Connector to the trailer is a crucial step in ensuring a secure connection between the trailer and the bike.
To do this, first, locate the Flex Connector on the trailer and align it with the attachment point.
Then, insert the Flex Connector into the attachment point until it clicks into place.
Once attached, it is important to secure the Flex Connector to the bike by tightening the attachment knob or screw, ensuring a firm and stable connection that will withstand any bumps or turns during the ride.
Attaching the Flex Connector to the Trailer
First, make sure you’ve securely fastened the Flex Connector to the trailer before attaching it to your bike. The Flex Connector is an essential component that ensures a stable connection between your bike and the trailer.
To maintain the Flex Connector and troubleshoot any issues, consider the following:
- Regularly inspect the Flex Connector for any signs of wear or damage.
- Clean the Flex Connector with a mild detergent and water to remove dirt and debris.
- Lubricate the Flex Connector with a silicone-based lubricant to prevent rust and ensure smooth movement.
By properly maintaining the Flex Connector, you can prolong its lifespan and prevent any potential issues during your bike rides.
Now, let’s move on to securing the Flex Connector to the bike, ensuring a safe and secure connection without any compromises.
Securing the Flex Connector to the Bike
To ensure a secure connection, make sure you’ve firmly secured the Flex Connector to your bicycle. This step is crucial for a safe and smooth ride with your Burley trailer. When attaching the Flex Connector, it’s important to follow the manufacturer’s instructions to ensure proper installation. Here are some common attachment issues you may encounter and troubleshooting tips to resolve them:
| Common Attachment Issues | Troubleshooting Tips |
|---|---|
| Flex Connector won’t stay in place | Check if the attachment pin is properly inserted and tightened. Make sure there are no obstructions preventing a secure fit. |
| Flex Connector feels loose during rides | Double-check if the Flex Connector is securely attached. Tighten any loose bolts or screws if necessary. Consider using additional support devices like safety straps or hitch adapters for added stability. |
Ensuring a Secure Connection
Make sure you’ve secured the coupler properly to ensure a secure connection between the burley trailer and your bike. A secure connection is essential for a safe and smooth ride. Here are some tips to troubleshoot common issues and maintain your bike trailer:
-
Tighten the coupler: Ensure that the coupler is securely tightened onto the bike’s rear axle. Use a wrench to tighten the nut until it is snug. This will prevent the trailer from coming loose during your ride.
-
Check the safety strap: The safety strap attaches the trailer to the bike frame as an additional safety measure. Make sure it is properly secured and not worn or damaged.
-
Inspect the hitch mechanism: The hitch mechanism is responsible for connecting the trailer to the bike. Regularly inspect it for any signs of wear or damage. Lubricate the moving parts with a silicone-based lubricant to ensure smooth operation.
-
Test the connection: Before heading out on your ride, give the trailer a gentle shake to ensure that it is securely attached to the bike. If you notice any looseness or play, recheck the coupler and make necessary adjustments.
By following these troubleshooting tips and regularly maintaining your bike trailer, you can enjoy a safe and worry-free ride.
Now, let’s move on to adjusting the trailer position to ensure optimal performance.
Adjusting the Trailer Position
Now, let’s take a moment to consider how you can optimize the position of your trailer for the best performance. Adjusting the height of your trailer is crucial in ensuring a smooth and safe ride. When attaching the trailer to your bike, you may encounter some common issues that can be easily troubleshooted.
First, let’s talk about adjusting the trailer height. It is important to ensure that the trailer is level and parallel to the ground. This can be achieved by adjusting the height of the trailer’s hitch. Most trailers come with adjustable hitch mechanisms that allow you to raise or lower the trailer. Make sure to follow the manufacturer’s instructions for your specific trailer model.
Troubleshooting common attachment issues is also essential for a successful ride. One common issue is the trailer swaying from side to side. This can be caused by an improper attachment or an uneven load distribution. Double-check that the trailer is securely attached to the bike and that the weight inside is evenly distributed. Another issue could be the trailer leaning to one side. In this case, check if the hitch is properly aligned and ensure that the trailer is not overloaded on one side.
By adjusting the trailer height and troubleshooting common attachment issues, you can optimize the performance and stability of your trailer.
Now that we have discussed how to position your trailer correctly, let’s move on to the next section where we will focus on safety precautions to keep in mind while using your trailer.
Safety Precautions
When using your trailer, it’s important to ensure that you securely fasten all straps and buckles to prevent any accidents. Safety should always be your top priority when towing a trailer behind your bike.
One of the first things you should do is check the weight capacity of your trailer. Each trailer has a maximum weight limit, and exceeding this limit can be dangerous. Make sure you know how much weight your trailer can handle and do not exceed it.
In addition to checking the weight, it’s crucial to choose the right bike for towing a trailer. Not all bikes are suitable for this purpose, so it’s essential to select one that is sturdy and designed for towing. Look for a bike that has a strong frame and can handle the extra weight and stress that comes with pulling a trailer.
Testing the Connection
Before embarking on a bike ride with a Burley trailer attached, it’s essential to take a short test ride to ensure everything is properly secured. This test ride allows you to assess the connection between the bike and the trailer, making sure it feels stable and secure.
During this test ride, it’s crucial to check for any loose or shaky parts. These can compromise the safety and functionality of the trailer.
Taking a Short Test Ride
Let’s hop on the bike and take a quick test ride to see how the burley trailer attaches. This will give us a chance to experience the connection firsthand and identify any potential issues.
Here’s what you can expect during the short test ride:
-
As we pedal forward, you’ll feel the smooth and secure attachment of the burley trailer to the bike. It should provide stability and not sway side to side.
-
The trailer’s hitch should remain firmly in place, without any signs of loosening or wobbling.
-
As we navigate turns, the trailer should follow smoothly, without any resistance or jerking movements.
-
When we come to a stop, the trailer should stay upright and not tip over, ensuring the safety of any cargo or passengers.
Now that we’ve tested the connection, let’s move on to checking for any loose or shaky parts without skipping a beat.
Checking for Any Loose or Shaky Parts
During the inspection, make sure to check for any loose or shaky parts on the bike. This step is crucial to ensure the safety and stability of the Burley trailer attachment.
Start by examining the hitch mechanism. Look for any signs of damage or wear, such as cracks or bent parts. Ensure that all bolts and screws are tightened securely. Pay close attention to the quick-release mechanism, making sure it is properly engaged.
Next, check the frame of the bike for any cracks or dents. Inspect the rear axle and wheel attachment, ensuring they are securely fastened.
Troubleshooting common attachment issues involves examining the connection points between the bike and the trailer. Look for any signs of wear or damage on the trailer’s hitch arm and coupler.
By thoroughly inspecting and addressing any loose or damaged parts, you can ensure a safe and secure attachment for your Burley trailer.
Now, let’s move on to storing and transporting the Burley trailer.
Storing and Transporting the Burley Trailer
To store and transport the Burley Trailer, you can simply fold it up and secure it in the trunk of your car. This makes it incredibly convenient for those who are always on the go. Here are some tips to ensure proper storage and transportation of your Burley Trailer:
-
Fold the trailer: The first step is to fold the trailer properly. Most Burley Trailers have a quick-release feature that allows you to fold it up easily. Make sure all the parts are securely locked in place before moving on to the next step.
-
Secure it in the trunk: Once the trailer is folded, you can place it in the trunk of your car. It’s important to secure it properly to prevent any movement during transportation. You can use bungee cords or straps to keep it in place.
-
Protect it from damage: To ensure the trailer stays in good condition, you should also consider using a protective cover or bag. This will protect it from dust, dirt, and any potential scratches.
Proper storage and transportation are essential for maintaining the longevity of your Burley Trailer. Now that you know how to store and transport it, let’s move on to some maintenance and care tips to keep your trailer in top shape.
Maintenance and Care Tips
As the owner and user of a Burley trailer, it’s important to regularly inspect the trailer to ensure its safety and functionality. This includes checking the tires for proper inflation, examining the frame for any signs of damage, and ensuring that all attachments and connections are secure.
Additionally, cleaning the trailer after each use is crucial to maintain its longevity and hygiene. This can be done by wiping down the surfaces, removing any debris, and thoroughly drying the trailer to prevent rust and mold growth.
Regularly Inspecting the Trailer
Make sure you regularly check the trailer’s attachment points for any signs of wear or damage. Inspecting trailer maintenance is crucial to ensure the safety of both the trailer and its occupants.
Begin by examining the hitch mechanism, making sure it is securely attached to the bike and functioning properly. Look for any loose or damaged bolts, and tighten or replace them as needed.
Next, inspect the frame of the trailer for any cracks or dents, paying close attention to the areas where the attachment points are located.
Lastly, check the wheels and tires for proper inflation and any signs of wear. Safety precautions during inspection include wearing gloves to protect your hands and using a flashlight to thoroughly examine all areas.
After inspecting the trailer, it is important to move on to the next step of maintenance: cleaning the trailer after use.
Cleaning the Trailer after Use
After you’ve finished using the trailer, it’s important to clean it thoroughly to remove any dirt, debris, or residue. Cleaning your trailer regularly not only keeps it looking good, but also helps to prolong its lifespan. Here are some cleaning techniques and recommended cleaning products to keep your trailer in top condition:
| Cleaning Technique | Recommended Cleaning Products |
|---|---|
| 1. Rinse | Mild soap and water |
| 2. Scrub | Soft brush or sponge |
| 3. Dry | Clean, dry cloth |
| 4. Maintenance | Lubricating oil |
To start, rinse off any loose dirt or mud with mild soap and water. Then, scrub the trailer gently with a soft brush or sponge to remove stubborn stains. Be sure to dry the trailer thoroughly with a clean, dry cloth to prevent any water spots. Finally, apply a small amount of lubricating oil to any moving parts to keep them functioning smoothly. By following these cleaning techniques and using the recommended products, you can keep your trailer clean and well-maintained for years to come.
Frequently Asked Questions
How much weight can a Burley trailer attachment handle?
A Burley trailer attachment has a weight capacity that varies depending on the specific model. It is important to consult the manufacturer’s guidelines to determine the maximum weight it can handle.
To properly attach a Burley trailer to a bike, you should follow the instructions provided by the manufacturer. This typically involves securely connecting the trailer hitch to the bike’s rear axle or frame, ensuring a tight fit and proper alignment for a safe and stable ride.
Can a Burley trailer attachment be used with any type of bike?
Yes, a Burley trailer attachment can be used with most types of bikes. Burley trailers are designed to be compatible with a wide range of bicycles, including road bikes, mountain bikes, and hybrid bikes. They typically attach to the rear axle of the bike using a quick-release skewer or a hitch.
However, if your bike doesn’t have a rear axle, there are alternative options available, such as seat post attachments or frame-mounted hitches.
Are there any specific safety regulations or guidelines for using a Burley trailer attachment?
There are indeed specific safety regulations and guidelines for using a Burley trailer attachment. To ensure the safety of both the rider and the passenger, it is important to follow these guidelines.
Some common safety regulations include:
- Making sure the trailer is properly attached to the bike
- Using safety straps and harnesses for the passenger
- Maintaining proper tire pressure
It is also crucial to always wear a helmet while using the Burley trailer attachment.
What is the average lifespan of a Burley trailer attachment before it needs to be replaced?
On average, a Burley trailer attachment can last for several years before needing to be replaced. The lifespan of the attachment depends on several factors, such as the frequency of use, the terrain it is used on, and how well it is maintained.
With proper care and maintenance, including regular cleaning and lubrication, the attachment can remain durable and functional for a long time. This makes it a cost-effective investment for families who enjoy biking with their kids or pets.
Can a Burley trailer attachment be used off-road or on rough terrain?
Yes, a Burley trailer attachment can be used off-road or on rough terrain. It is designed to withstand the challenges of off-road biking with its sturdy construction and bike trailer suspension.
The attachment provides a smooth and stable ride, absorbing shocks and bumps encountered during your adventurous rides. Whether you’re tackling rocky trails or navigating through uneven terrain, the Burley trailer attachment ensures a safe and comfortable experience for both you and your child.
Conclusion
After thoroughly exploring the various types of Burley trailer attachments and learning how to properly install and connect them, it is clear that these trailers provide a secure and reliable way to transport cargo or children while biking.
By following the recommended safety precautions and regularly maintaining the attachment, one can ensure a smooth and worry-free riding experience.
Just like the intricate gears of a well-oiled machine, the Burley trailer attachment seamlessly integrates with the bike, allowing riders to embark on their cycling adventures with confidence and ease.