As an avid electric bike enthusiast, I’m always on the lookout for ways to keep my two-wheeled companion powered up and ready to ride. Charging an electric bike may seem daunting at first, but fear not! In this article, I’ll guide you through the process step by step, making it as easy as riding a bike.
So buckle up, because we’re about to dive into the world of electric bike charging and ensure you’re always juiced up and ready to hit the road!
Key Takeaways
- Choose the right amperage for the charger to avoid longer charging times or battery damage.
- Set a timer or alarm to remind yourself to unplug the charger and avoid overcharging.
- Safely disconnect the charger once the battery is fully charged and inspect for any wear or damage.
- Properly store the charger, secure the charging port, and handle the charger with care for safety.
Understand Your Electric Bike’s Battery
To properly charge your electric bike, it’s important to understand how the battery works. Understanding battery capacity is crucial in maximizing the performance and longevity of your electric bike.
Battery capacity refers to the amount of energy the battery can store, typically measured in watt-hours (Wh). It determines how far you can ride on a single charge. It’s important to note that battery capacity can decrease over time due to factors like aging and usage.
To maintain battery health, it’s recommended to avoid fully draining the battery and instead, charge it regularly. This helps prevent deep discharges, which can negatively impact the battery’s lifespan.
By understanding battery capacity and maintaining battery health, you can ensure efficient charging and optimal performance of your electric bike.
Now, let’s move on to locating the charging port on your electric bike.
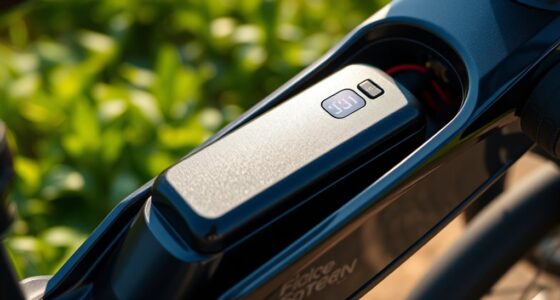
Locate the Charging Port on Your Electric Bike
First, find where the charging port is on your e-bike. The location of the charging port can vary depending on the make and model of your electric bike. Typically, the charging port is located on the frame of the bike, near the battery. Look for a small, rectangular or circular port with a cover. It may be labeled with a lightning bolt symbol or the word ‘charge.’
If you’re having trouble finding the charging port, consult your e-bike’s user manual or contact the manufacturer for assistance. Troubleshooting charging issues can be frustrating, but by locating the charging port, you’re one step closer to resolving any problems.
Now, let’s move on to the next step: gathering the necessary charging equipment.
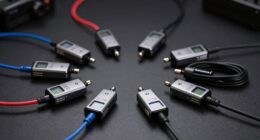
Gather the Necessary Charging Equipment
When it comes to charging my electric bike, it’s crucial to ensure that I have a compatible charger. Using the wrong charger can damage the battery and even pose a safety risk.
Additionally, I need to make sure that I have a power outlet or access to a charging station nearby. Having a reliable source of electricity is essential for keeping my electric bike charged and ready for the road.
Get a Compatible Charger for Your Electric Bike
Make sure you have a compatible charger for your electric bike. The charger you choose will depend on the specific model and battery type of your electric bike.
There are several options available in the market, each offering different charging capabilities and features. It is important to consider factors such as charging speed, voltage compatibility, and safety features when selecting a charger for your electric bike.
Regular battery maintenance is crucial for optimal performance and longevity of your electric bike. This includes charging your battery correctly and at regular intervals. Neglecting battery maintenance can result in reduced range and performance.
To ensure you have a power outlet or charging station available, it is recommended to plan your charging routine in advance and locate convenient charging points along your regular routes.
Have a Power Outlet or Charging Station Available
Having a power outlet or charging station readily available is essential for ensuring that your electric bike is always ready to ride.
Before you start charging your electric bike, make sure you have a dedicated power outlet or a reliable charging station specifically designed for electric bikes. The power outlet should be in a safe and accessible location, preferably near where you store your electric bike.
It is crucial to have a charging station that is compatible with your electric bike’s battery and has the necessary voltage and current output to charge it efficiently. Additionally, consider investing in a charging station that offers features like overcharge protection and temperature monitoring to ensure the safety of your electric bike’s battery.
Now that you have a power outlet or charging station available, let’s move on to preparing your electric bike for charging.
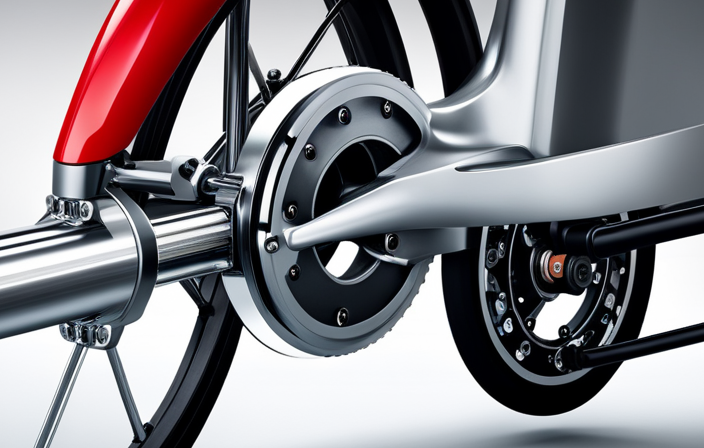
Prepare Your Electric Bike for Charging
To prepare your electric bike for charging, you’ll need to ensure it is turned off and the battery is easily accessible.
Begin by powering down your electric bike, ensuring that all lights and displays are turned off. This will help prevent any potential electrical mishaps during the charging process.
Next, locate the battery compartment on your electric bike. Depending on the model, it may be located under the seat or on the frame. Open the compartment carefully, following the manufacturer’s instructions, to expose the battery.
Finally, before connecting the charger, take a moment to appreciate the convenience of electric bike charging. It not only saves you money on fuel and reduces your carbon footprint, but it also allows for a smooth and quiet ride.
Now, let’s move on to the next step: connecting the charger to your electric bike’s charging port.
Connect the Charger to Your Electric Bike’s Charging Port
Now that you’ve located the battery compartment, it’s time to connect the charger to your electric bike’s charging port. Before we begin, it’s important to understand the charging capacity of your electric bike. Different models have different charging capacities, which determine how long it takes to fully charge the battery. It’s crucial to match the charger’s output with your bike’s charging capacity to ensure efficient and safe charging.
To connect the charger, follow these steps:
- Make sure your bike is turned off and the battery is properly installed.
- Locate the charging port on your electric bike. It is usually located near the battery compartment.
- Take the charger and align the plug with the charging port.
- Gently push the plug into the charging port until it is securely connected.
- Check that the connection is secure and the charger is properly plugged in.
By following these steps, you can connect the charger to your electric bike’s charging port and begin charging your battery. Understanding the charging capacity is essential for optimal charging performance. If you encounter any issues during the charging process, refer to the troubleshooting section for common solutions.
Moving on to the next section, you will learn how to plug the charger into a power outlet or charging station.
Plug the Charger into a Power Outlet or Charging Station
Before you begin, make sure your charger is plugged into a power outlet or charging station. Understanding battery life and troubleshooting charging issues are crucial for maintaining the optimal performance of your electric bike. Here are four important factors to consider when plugging in the charger:
-
Voltage: Ensure that the power outlet or charging station provides the correct voltage specified by the manufacturer. Using an incorrect voltage can lead to inefficient charging or even damage the battery.
-
Amperage: Check the amperage rating of the power outlet or charging station. Using a charger with a lower amperage can result in longer charging times, while a higher amperage may cause overheating or damage to the battery.
-
Stability: Ensure that the power outlet or charging station is stable and secure. Any loose connections or electrical fluctuations can affect the charging process and potentially damage the battery.
-
Compatibility: Verify that the charger is compatible with your electric bike’s charging port. Using a charger that is not designed for your bike can lead to ineffective charging or even harm the battery.
By following these guidelines, you can safely and effectively plug your charger into a power outlet or charging station. This will ensure that your electric bike’s battery is charged properly and ready for your next ride.
Now, let’s move on to monitoring the charging progress.
Monitor the Charging Progress
When it comes to charging my electric bike, I always make sure to check the battery indicator before plugging it in. This allows me to see how much charge is left and estimate the amount of time it will take to fully charge.
I also keep a close eye on the charging time to prevent overcharging, as this can negatively impact the battery’s lifespan.
Check the Battery Indicator on Your Electric Bike
To check the battery indicator on your electric bike, simply look at the display screen. Understanding battery maintenance is crucial for ensuring optimal performance and longevity of your electric bike’s battery. By regularly monitoring the battery indicator, you can stay informed about the current charge level and plan your rides accordingly. To help you interpret the battery indicator, I have prepared a table below:
| Battery Indicator | Charge Level |
|---|---|
| Green | Full |
| Yellow | Medium |
| Red | Low |
| Blinking Red | Critical |
| No Indicator | No Charge |
Troubleshooting battery charging issues becomes easier when you have a clear understanding of your battery’s charge level. By referring to the battery indicator, you can identify if the battery is fully charged, needs to be recharged, or requires maintenance. However, it is crucial to be mindful of the charging time and avoid overcharging, as it can negatively impact the battery’s lifespan and performance.
Be Mindful of the Charging Time and Avoid Overcharging
Make sure to keep track of the time when charging your battery and don’t overcharge it. Charging your electric bike battery properly is crucial for its longevity and performance. Here are some important tips to follow:
- Set a timer or alarm to remind yourself when to unplug the charger. Avoid charging overnight to prevent overcharging.
- Keep an eye on the battery indicator during the charging process. Once it reaches full capacity, promptly disconnect the charger.
- Ensure that the charging area is well-ventilated to prevent overheating. Excess heat can damage the battery cells.
- Use a charger specifically designed for your electric bike model. Using incompatible chargers can lead to problems like overcharging or undercharging.
By adhering to these guidelines, you can safely charge your electric bike battery and prevent any potential issues.
Now, let’s discuss how to safely disconnect the charger from your electric bike.
Safely Disconnect the Charger from Your Electric Bike
You should always ensure you safely disconnect the charger from your electric bike before unplugging it. Proper handling, precautions, and safety measures are crucial during the charging process to avoid any mishaps or damage to your bike or charger.
Here are some common issues and troubleshooting tips to keep in mind:
-
Check the charging cable and connection: Make sure the cable is securely plugged into both the charger and the bike’s charging port.
-
Monitor the charging progress: Keep an eye on the charging indicator to ensure it is functioning properly and the battery is charging as expected.
-
Avoid overcharging: Once the battery is fully charged, disconnect the charger to prevent overcharging, which can lead to reduced battery life.
-
Inspect for any damage: Before charging, inspect the charger and its cables for any signs of wear or damage. If you notice any issues, replace them immediately.
-
Consult the user manual: If you encounter any other charging-related problems, refer to the user manual for specific troubleshooting steps.
After safely disconnecting the charger, it is important to store it properly and securely close the charging port to prevent any dust or moisture from entering.
Store the Charger and Securely Close the Charging Port
Once the charger is safely disconnected, ensure that it is properly stored and the charging port is securely closed. To secure the charger during transport, wrap the cord around it in a neat coil and use the Velcro strap or any attached clips to hold it in place. This will prevent any damage or tangling during transportation.
Additionally, it is important to maintain the cleanliness of the charging port. After disconnecting the charger, inspect the port for any debris or dirt. Use a clean cloth or compressed air to remove any particles that may have accumulated. This will prevent any interference with the charging process and ensure a smooth connection for future charging sessions.
Enjoy Your Fully Charged Electric Bike and Hit the Road!
After ensuring that the charger is safely stored and the charging port is securely closed, it’s time to enjoy the benefits of your fully charged electric bike and hit the road!
Long rides are a great way to explore your surroundings and experience the thrill of electric biking. To make the most out of your journey, here are some helpful tips.
Firstly, always wear a helmet and other protective gear to ensure your safety.
Secondly, plan your route ahead of time and familiarize yourself with any bike lanes or trails available.
Additionally, consider bringing along a spare battery or portable charger for longer rides.
Lastly, maintain a comfortable pace and take breaks as needed to avoid fatigue.
With these tips in mind, you can fully enjoy the benefits of your electric bike on those long rides. Happy biking!
Frequently Asked Questions
How long does it take to fully charge an electric bike?
It takes a specific amount of time to fully charge an electric bike depending on its battery capacity. The charging time can vary, typically ranging from 2 to 8 hours, with higher capacity batteries taking longer to charge.
Can I use any type of charger for my electric bike?
I highly recommend using a specialized charger for your electric bike. While alternative charging options may seem convenient, a specialized charger ensures optimal performance, efficiency, and battery life. It’s like using a tailor-made suit for the perfect fit and function.
Is it safe to charge my electric bike overnight?
Charging an electric bike overnight can be potentially dangerous as it may result in overcharging the battery, leading to decreased battery life and potential safety hazards. Alternatives include using a timer or charging during the day.
Can I charge my electric bike using a solar panel?
Yes, you can charge your electric bike using a solar panel. Solar panel efficiency is important for maximizing charging speed. Solar charging offers the benefits of being environmentally friendly, cost-effective, and providing independence from the power grid.
What should I do if my electric bike’s battery does not hold a charge?
If my electric bike’s battery doesn’t hold a charge, I troubleshoot battery issues by checking for loose connections, ensuring proper storage temperature, and avoiding deep discharges. To maximize battery lifespan, I follow manufacturer recommendations for charging and maintenance.
Conclusion
So there you have it – a step-by-step guide on how to charge your electric bike.
By understanding your bike’s battery, locating the charging port, and gathering the necessary equipment, you can ensure a smooth charging process.
Remember to monitor the charging progress and safely disconnect the charger once it’s fully charged.
Store the charger securely and close the charging port to protect it from any damage.
Now, you’re all set to hit the road with your fully charged electric bike – the world is your oyster!