
Have you ever felt like your electric bike is running on empty? Sometimes, it’s as if the gears are stuck and the wheels refuse to turn.
Don’t fret, my friend, for I am here to guide you through the process of resetting your electric bike. In this article, I will provide you with step-by-step instructions on how to troubleshoot technical glitches, power off and disconnect the battery, reset the controller, and power on your bike again.
So gear up and let’s get your electric bike back on track!
Key Takeaways
- Resetting the electric bike involves accessing the settings through the menu button on the display screen and selecting the option to reset or restore factory settings.
- When checking for technical issues, inspect wiring connections for damage, check the display panel for error codes, reset the software according to the manufacturer’s instructions, and ensure all components are securely connected.
- Power off the bike by pressing and holding the power button, troubleshoot battery and motor issues by checking connections, and refer to the user manual for specific troubleshooting instructions.
- When disconnecting and reconnecting the battery, gently unplug it from the connection port, inspect for loose or damaged wires, and reconnect it securely to maintain battery life for optimal performance.
Amazon Product B0CQ7PSNVX
As an affiliate, we earn on qualifying purchases.
Understanding the Reset Process
To reset your electric bike, you’ll need to understand the reset process. When troubleshooting error messages on your electric bike, a reset can often resolve the issue.
The first step is to locate the display screen on your bike. This screen is where you’ll find the option to reset. Typically, there will be a menu button that allows you to access the settings.
Once you’ve navigated to the settings menu, look for the option to reset or restore factory settings. This will vary depending on the brand and model of your electric bike.
Selecting this option will prompt a confirmation message, and once confirmed, your bike’s display screen will reset. It’s important to note that resetting your electric bike may erase any personalized settings, so it’s always a good idea to make note of your preferred settings before proceeding with the reset process.
ShunTongDa 48V 10.4Ah 14Ah Folding Ebike Battery 48 Volt DCH-006 Built in Electric Bike Batteries with 30A BMS Totguard for 250W 500W 750W 1000W Motor Foldable E-Bike Battery (48V10.4Ah A Grade Cell)
①Battery Type: 18650 lithium ion batteries, Voltage: 48V, Capacity: 10.4Ah, Real High-Label Capacity. 30A BMS, Wattage at 500Wh,...
As an affiliate, we earn on qualifying purchases.
Checking for Technical Glitches
First, make sure you check for any technical glitches on your e-bike. Troubleshooting connection issues is crucial in the reset process. Start by inspecting the wiring connections between the battery, motor, and controller. Look for loose or damaged wires that may be causing a disruption in the electrical flow.
Additionally, diagnose software malfunctions by checking the display panel for error codes or unusual behavior. If you notice any anomalies, try resetting the e-bike’s software by following the manufacturer’s instructions.
Another important step is to verify if the firmware is up to date. Visit the manufacturer’s website and download the latest firmware version if necessary.
Lastly, ensure that all components are securely connected and in good working condition before proceeding with the reset.
- Loose or damaged wiring
- Error codes on the display panel
- Unusual behavior from the e-bike
- Outdated firmware
- Inadequate connections between components
Amazon Product B0CYT6TBYX
As an affiliate, we earn on qualifying purchases.
Powering Off Your Electric Bike
When you want to turn off your e-bike, simply press and hold the power button for a few seconds. This will shut down the electrical system and power off your bike. However, if you are experiencing battery issues or motor problems, simply turning off your e-bike may not be enough to resolve the problem. Troubleshooting these issues requires a more detailed approach. To troubleshoot battery issues, you can start by checking the battery connections and ensuring they are secure. If the battery is not charging or holding a charge, it may need to be replaced. For motor problems, check the motor connections and make sure they are properly connected. If the motor is not functioning properly, it may need to be repaired or replaced. Remember to always refer to your e-bike’s user manual for specific troubleshooting instructions.
| Common Battery Issues | Possible Solutions |
|---|---|
| Battery not charging | Check connections, replace battery if necessary |
| Battery not holding a charge | Check connections, replace battery if necessary |
| Battery draining quickly | Check for any electrical shorts, replace battery if necessary |
| Common Motor Problems | Possible Solutions |
|---|---|
| Motor not turning on | Check connections, repair or replace motor if necessary |
| Motor running inconsistently | Check connections, repair or replace motor if necessary |
| Motor not providing enough power | Check connections, repair or replace motor if necessary |

Young Electric E-Bike Rack with Ramp, Hitch 2 Bike Rack, 200 lbs Capacity Electric Bike Carrier, Foldable Platform Mount for Cars, Trucks, SUVs, Minivans, Up to 5-Inch Fat Tire for 2'' Receiver
200LBS CAPACITY & V-GROOVE RAMP: The latest electric bike rack features an upgrade V-groove ramp for easy loading...
As an affiliate, we earn on qualifying purchases.
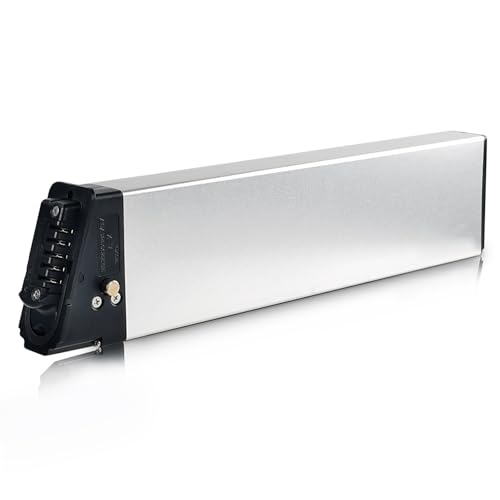
Disconnecting the Battery
To disconnect the battery on your e-bike, simply locate the battery connection and unplug it. Follow these steps to troubleshoot battery issues and maintain battery life:
-
Find the battery connection: Look for the battery compartment on your e-bike. It is usually located near the frame or under the seat.
-
Unplug the battery: Once you have located the battery, gently pull out the plug from the connection port. Make sure to handle the connection carefully to avoid any damage.
-
Inspect the battery connection: Check for any loose or damaged wires. Ensure that the connection is clean and free from any dirt or debris.
-
Reconnect the battery: If you have resolved any issues or performed maintenance, plug the battery back into the connection port securely. Ensure a snug fit to guarantee proper functioning.
Remember, troubleshooting battery issues and maintaining battery life is crucial for the optimal performance of your electric bike.
Resetting the Controller
To reset the controller on your e-bike, locate the reset button and press it for a few seconds. This will restore the controller to its default settings and can help resolve various issues you may be experiencing with your electric bike. Additionally, resetting the controller can also be useful when troubleshooting error codes or resetting the throttle.
When resetting the throttle, ensure that the e-bike is turned off before pressing and holding the reset button. This will recalibrate the throttle and ensure smooth operation.
Troubleshooting error codes can be done by referring to your e-bike’s user manual. Each error code corresponds to a specific issue, and the manual will provide instructions on how to resolve them. If the issue persists after resetting the controller and troubleshooting the error codes, it is recommended to consult a professional or contact the manufacturer for further assistance.
| Error Code | Issue | Solution |
|---|---|---|
| E01 | Motor Overheat | Allow the motor to cool down and check for any blockages |
| E02 | Throttle Malfunction | Reset the controller and recalibrate the throttle |
| E03 | Battery Voltage Low | Charge or replace the battery |
Remember, resetting the controller should only be done when necessary, and it is always important to follow the manufacturer’s instructions for your specific e-bike model.
Adjusting Settings and Preferences
After resetting the controller, I was able to access the settings and preferences of my electric bike. This allowed me to customize various features to suit my needs and preferences. The bike’s display menu provided a range of options, including adjusting the pedal assist levels, setting the maximum speed, and even changing the language of the display.
In addition to customizing features, the settings menu also provided troubleshooting options. It allowed me to diagnose and fix any errors that may have occurred during the reset process or while using the bike. This was particularly helpful in ensuring the smooth functioning of my electric bike and resolving any issues that may arise.
Overall, the ability to adjust settings and troubleshoot errors gave me a sense of control and confidence in using my electric bike.
Reconnecting the Battery
Reconnecting the battery is an essential step in ensuring the proper functioning of the e-bike. Troubleshooting battery issues and performing regular battery maintenance are key to maximizing the lifespan and performance of your electric bike. To reconnect the battery, follow these steps:
- Turn off the e-bike and locate the battery compartment.
- Open the battery compartment and carefully remove the battery.
- Inspect the battery terminals for any signs of corrosion or damage. Clean them if necessary.
- Align the battery with the designated slot in the e-bike frame and gently push it in until it clicks into place.
- Close the battery compartment securely.
- Turn on the e-bike and ensure that the battery is properly connected by checking the battery indicator on the display.
By regularly reconnecting the battery and performing maintenance, you can troubleshoot potential battery issues and ensure optimal performance of your electric bike.
Powering On Your Electric Bike
To power on your e-bike, simply press the power button located on the handlebar.
Once the power is on, you can start adjusting the pedal assist to your desired level. This feature allows you to control the amount of assistance the motor provides while you pedal. You can switch between different levels of pedal assist to customize your riding experience, whether you prefer a greater boost or a more natural feel.
If you encounter any troubleshooting error codes, it is essential to consult the user manual for specific instructions. Error codes can indicate various issues, such as motor malfunctions or sensor errors. By referring to the manual, you can identify the problem and take appropriate action, such as contacting customer support or performing basic troubleshooting steps.
Testing for Proper Functionality
Make sure you test the proper functionality of your e-bike by checking if all the essential components are working correctly.
To begin, test the battery life by turning on your electric bike and observing the battery indicator. Ensure that the battery is fully charged and that it holds a charge for a reasonable amount of time. If you notice any issues with the battery, such as a rapid decrease in power or a failure to hold a charge, it may be necessary to replace the battery.
Additionally, troubleshoot any motor issues by testing the acceleration and responsiveness of the bike. Check if the motor engages smoothly and if it provides the necessary power for a comfortable ride. If you experience any motor-related problems, consult the user manual or contact the manufacturer for further assistance.
Troubleshooting Common Issues
After testing for proper functionality, it’s time to dive into troubleshooting common issues that may arise with your electric bike.
When it comes to troubleshooting battery charging, it’s essential to first check if the battery is properly connected and securely attached to the bike. Ensure that the charger is functioning correctly and that the battery is receiving power. If the battery still doesn’t charge, it may indicate a faulty battery or charger that needs to be replaced.
Resolving motor performance issues requires a systematic approach. Start by checking the motor connections and ensuring they are secure. Look for any loose wires or damaged components. If everything appears to be in order, it’s recommended to consult the bike’s user manual or reach out to the manufacturer for further assistance.
Troubleshooting these common issues will help you get your electric bike back up and running smoothly.
Frequently Asked Questions
Can I reset my electric bike if it has a flat tire or other mechanical issues?
If your electric bike has a flat tire or a broken chain, you can reset it by first ensuring your safety and then addressing the mechanical issue. If the battery is faulty, you can reset it by disconnecting and reconnecting it.
Will resetting my electric bike erase any stored data or settings?
Resetting an electric bike will not erase any stored data or settings. The process of resetting your bike involves restoring it to its original factory settings, but it does not affect any stored data or personalized settings.
How often should I reset my electric bike for optimal performance?
Resetting frequency for optimal performance depends on individual usage and bike model. Regular resetting can benefit in resolving software glitches, improving battery life, and addressing performance issues. Consult the manufacturer’s guidelines for specific recommendations on resetting intervals.
Is it possible to reset my electric bike remotely using a smartphone app?
Resetting options for electric bikes can vary depending on the brand and model. While some bikes may offer remote resetting through smartphone apps, it’s important to consult the manufacturer’s troubleshooting tips for specific instructions on how to reset your bike.
Can I reset my electric bike if the display screen is not functioning properly?
If the display screen on your electric bike is not functioning properly, you can still reset it. Disconnect the battery for a few minutes, then reconnect it. This troubleshooting step often resolves issues with the display screen.
Conclusion
In conclusion, resetting your electric bike can be a simple process that can help resolve technical glitches and ensure proper functionality.
By following the steps outlined in this article, you can easily power off your bike, disconnect and reconnect the battery, reset the controller, and power it back on.
Once done, don’t forget to test for proper functionality and troubleshoot any common issues.
So, why wait? Reset your electric bike today and enjoy a smooth and efficient ride.