
Evaluating the performance of your electric bike battery is just as important as checking your pulse before a race. Similar to how a well-maintained instrument operates, your battery should be regularly assessed to guarantee peak performance and durability.
In this article, I will guide you through the precise and analytical process of testing your electric bike battery. From understanding the specifications to monitoring the temperature, following these steps will empower you to take control of your e-bike’s power source.
Let’s dive in!
Key Takeaways
- Battery inspection and maintenance are important for safety and performance.
- Testing methods such as using a multimeter and conducting discharge tests can provide valuable information about battery condition and performance.
- Monitoring battery temperature is crucial to prevent overheating and potential damage.
- Following manufacturer’s guidelines and considering professional testing can help maximize battery lifespan and ensure optimal performance.

EVAPLUS UL Certified 54.6V 1.5A Fast Electric Bike Charger for 48V Ebike Battery - Replacement for Razor, Jetson, Voyage, Gotrax, Ninebot,Segway, Hiboy(DC Connector:5.5x2.5/2.1mm)
54.6V 1.5A Smart Charger: for 48V Electric bicycle electric scooter battery, Input Voltage 120VAC 50/60HZ,Over output Voltage Protection;Over...
As an affiliate, we earn on qualifying purchases.
Understand the Battery’s Specifications
To test your electric bike battery, it’s important to first understand the battery’s specifications. The battery performance and lifespan are crucial factors to consider when evaluating its overall health.
Battery performance refers to how well the battery delivers power to the electric bike, while battery lifespan refers to the duration the battery can maintain its performance before needing to be replaced.
To assess battery performance, you can monitor the speed and distance traveled while riding your electric bike. Additionally, pay attention to any changes in the battery’s charging time or the amount of time it takes for the battery to drain.
Understanding these specifications will provide valuable insights into the battery’s condition and help you determine if it’s time to check the voltage, which we will discuss in the subsequent section.

54.6V 2A Electric Charger for 48V Ebike Lithium Battery (13S Li-ion Battery), Electric Bike Charger with 7 Charging Port Plugs
48V Ebike Lithium Battery Charger: Designed for 48V lithium batteries ONLY (13S Li-ion packs / battery voltage marked...
As an affiliate, we earn on qualifying purchases.
Check the Voltage
Check the voltage on your electric bike battery. It is an important step in battery maintenance to ensure the battery health. Here are three key points to consider when checking the voltage:
-
Use a multimeter: A multimeter is a versatile tool that measures voltage accurately. Set it to the DC voltage range and connect the positive lead to the positive terminal and the negative lead to the negative terminal of the battery.
-
Check the reading: A fully charged battery should have a voltage around 42V for a 36V battery and 54.6V for a 48V battery. If the reading is significantly lower, it indicates a potential issue with the battery’s capacity.
-
Compare with specifications: Refer to the battery’s specifications provided by the manufacturer and ensure the voltage reading aligns with the recommended range.
By measuring the voltage, you can assess the battery’s condition and then proceed to measure its capacity.

Fancy Buying 7-in-1 Universal 54.6V 2A ebike Charger for 48v Fast and Safe Charging of 13S Li-ion Battery
【Universal 54.6V 2A Fast Charger】Designed for 48V-54.6V lithium batteries (13S Li-ion packs), this 54.6v 2a charger supports global...
As an affiliate, we earn on qualifying purchases.
Measure the Capacity
Measuring the capacity of my e-bike battery is essential for evaluating its overall performance. Battery capacity refers to the amount of energy the battery can store and deliver. To measure the capacity, I will need a battery capacity tester or a multimeter capable of measuring voltage and current.
I will fully charge my battery and then discharge it at a controlled rate while measuring the time it takes to deplete. By comparing the discharge time to the battery’s rated capacity, I can determine its actual capacity. This measurement is crucial because it gives me an idea of how much distance I can travel on a single charge and helps me understand the battery’s life expectancy.
Knowing the battery capacity will also allow me to calculate the charging time required for a full charge, which I will discuss in the subsequent section.

Hexwatt 54.6V 2A Charger for 48V Lithium-ion Battery ebike Electric Bike Electric Scooter Hoverboard Battery Charger Replacement with 6 Connectors
1️⃣Safer & Smarter Charging – Zero Fire Risk 🔥Say goodbye to cheap plastic chargers that overheat and pose...
As an affiliate, we earn on qualifying purchases.
Test the Charging Time
The next step is to determine the charging time for my e-bike battery. Testing the charging time is crucial as it allows me to evaluate the battery’s performance and test its lifespan.
Here is a 4-item numeric list to guide you through the process:
- Connect the battery to a charger specifically designed for e-bike batteries.
- Start the timer as soon as the charging process begins.
- Monitor the battery’s voltage periodically to observe the charging progress.
- Stop the timer once the battery reaches its full charge capacity.
By following this procedure, I can accurately measure the charging time and assess the efficiency of my e-bike battery. This information will help me monitor the range and determine when it’s necessary to recharge.
Transitioning to the next section, let’s now explore how to monitor the range of my electric bike.
Monitor the Range
To keep track of how far I can go on a single charge, I can monitor the range of my e-bike. Monitoring the range is crucial for understanding the battery life and battery health. By keeping an eye on the range, I can determine the distance my electric bike can cover before needing to be recharged.
To monitor the range, I need to fully charge my battery and reset the trip meter on my e-bike’s display. Then, I ride the bike until the battery is nearly depleted. Once I reach that point, I note the distance covered and compare it to the manufacturer’s estimated range.
Monitoring the range regularly allows me to assess the battery’s performance over time and detect any potential issues. This information can help me gauge the overall health of my battery.
In the next section, I will discuss how to use a battery analyzer to further analyze the battery’s condition.
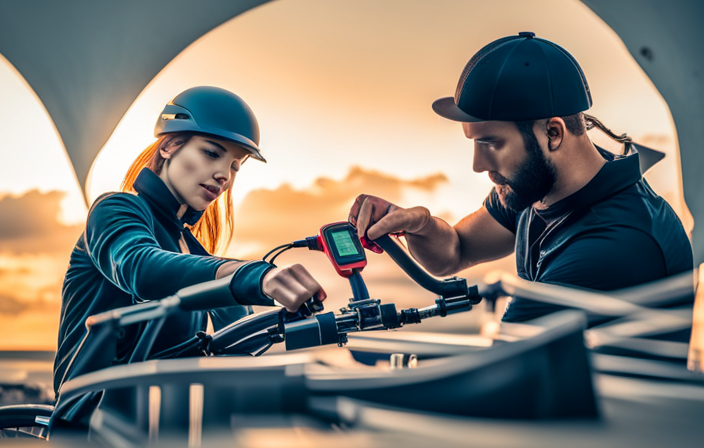
Use a Battery Analyzer
To effectively monitor the range of my electric bike, I rely on a battery analyzer. This device plays a crucial role in battery maintenance and provides valuable insights into battery performance. Using a battery analyzer allows me to accurately measure the state of charge, voltage, and capacity of my electric bike battery.
Here are four key benefits of using a battery analyzer:
-
Accurate measurements: A battery analyzer provides precise readings, ensuring that I have the most accurate information about my battery’s condition.
-
Early detection of issues: By regularly using a battery analyzer, I can identify any potential problems early on and take necessary steps to address them.
-
Optimized charging: With a battery analyzer, I can optimize the charging process to ensure that my battery is charged to its full capacity without overcharging.
-
Extended battery life: By understanding my battery’s performance through the analyzer, I can take appropriate actions to prolong its lifespan.
By utilizing a battery analyzer, I can now move on to the next step of testing my electric bike battery: performing a load test.
Perform a Load Test
Start by connecting a load tester to your electric bike’s battery and observe the results.
A load test is a reliable method to assess battery performance and determine its overall health.
The load tester applies a controlled discharge to the battery, simulating the bike’s power requirements under normal operating conditions.
By measuring the battery’s voltage and monitoring how it responds to the load, you can gauge its capacity and assess its ability to deliver power consistently.
This test is crucial in identifying any battery issues and ensuring optimal performance.
Additionally, it provides insights into the battery’s lifespan, indicating whether it may need replacement soon.
Once you have completed the load test, you can move on to inspecting the battery connections, ensuring they are secure and free from corrosion.
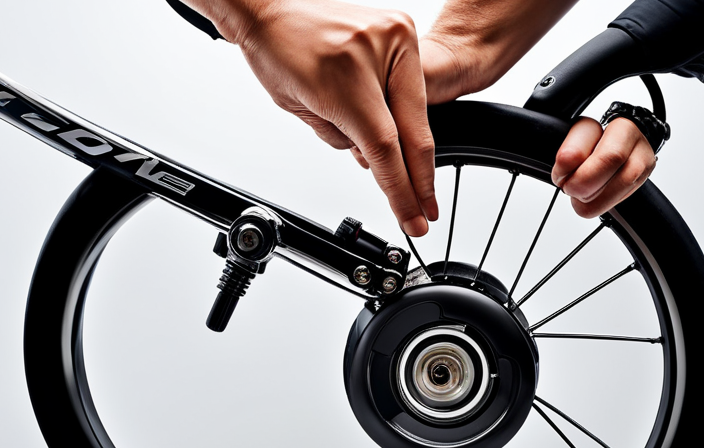
Inspect the Battery Connections
First, check the connections on your battery to ensure they are secure and free from any corrosion. This is crucial in maintaining optimal performance and safety of your electric bike battery.
Inspect the battery connections by visually examining them for any signs of looseness or damage. Tighten any loose connections using the appropriate tools and ensure they are snugly fastened.
Additionally, inspect the battery terminals for any signs of corrosion, which may hinder the flow of electricity. If corrosion is present, gently clean it using a mixture of baking soda and water and a soft brush. Regularly inspecting the battery connections is essential to ensure proper electrical conductivity and to accurately test battery performance.
Now we can move on to the next section and check for physical damage.
Check for Physical Damage
Now, let’s take a look for any physical damage.
When testing an electric bike battery, it is crucial to inspect the battery for any visible signs of physical damage. This includes cracks, dents, or any other abnormalities on the battery casing. Such damage can compromise the battery’s performance and safety.
Additionally, it is important to test the battery for water resistance. Look for any signs of moisture or water ingress, as this can also affect the battery’s functionality.
If any physical damage or water ingress is found, it is advisable to consult a professional for further evaluation and repair.
Moving on to the next step of testing the battery with a multimeter, we can gather more precise information about its overall condition and performance.
Test the Battery with a Multimeter
After thoroughly inspecting the electric bike battery for any physical damage, it is time to move on to the next step in testing it.
This involves using a multimeter to measure the voltage and determine the overall health of the battery. By connecting the multimeter’s positive and negative leads to the corresponding terminals on the battery, I can obtain an accurate reading of its voltage. This reading will help me identify if the battery is holding a charge or if it is experiencing any issues.
Battery maintenance is crucial in ensuring optimal performance, and troubleshooting common issues can save time and money in the long run.
Once I have completed the multimeter test, I can proceed to the next section on performing a discharge test to further assess the battery’s condition.
Perform a Discharge Test
To accurately assess the condition of the battery, it’s important to perform a discharge test. This test will give you valuable information about the battery’s life and performance. To conduct the test, follow these steps:
- Fully charge the battery and record the starting voltage.
- Connect a load to the battery, such as a light bulb or a resistor, to draw a consistent amount of power.
- Monitor the voltage over time and record the time it takes for the voltage to drop to a certain level.
By analyzing the data collected during the discharge test, you can determine the battery’s capacity and its ability to hold a charge. This information will help you make informed decisions about the battery’s future use and maintenance. Monitoring the battery’s temperature is another crucial aspect to consider.
Monitor the Battery’s Temperature
Make sure you monitor the temperature of your battery during the discharge test to ensure its optimal performance. Battery performance optimization is crucial for getting the most out of your electric bike.
Monitoring the battery’s temperature helps in identifying any potential issues that may affect its performance. During the discharge test, keep a close eye on the battery’s temperature to ensure it stays within the recommended range. This will prevent overheating and potential damage to the battery.
Safety precautions for battery usage include avoiding extreme temperatures and ensuring proper airflow around the battery. By monitoring the temperature, you can identify any abnormalities and take appropriate action to maintain the battery’s performance and extend its lifespan.
Moving forward, it is important to consult the manufacturer’s guidelines for further guidance on battery usage and maintenance.
Consult the Manufacturer’s Guidelines
It’s important to consult the manufacturer’s guidelines for further guidance on battery usage and maintenance. The manufacturer’s guidelines provide valuable information on how to properly care for your electric bike battery. Following these guidelines will help ensure that you maximize the battery lifespan and maintain its optimal performance.
The guidelines may include recommendations on charging cycles, storage conditions, and regular maintenance procedures. By adhering to these guidelines, you can avoid common mistakes that may shorten the battery’s lifespan or cause damage. Proper battery maintenance is crucial for the overall longevity and performance of your electric bike.
In the next section, we will explore the option of considering professional testing services to ensure the battery is functioning at its best.
Consider Professional Testing Services
Considering professional testing services can help ensure that your e-bike battery is functioning optimally. While there are DIY testing methods available, professional testing services provide a more accurate and comprehensive assessment of your battery’s health. They have specialized equipment and knowledge to detect any potential issues that may not be easily identified through common signs of battery failure, such as decreased range or reduced performance.
To give you an idea of the benefits of professional testing services, here is a comparison table showing the differences between DIY testing and professional testing:
| DIY Testing | Professional Testing |
|---|---|
| Limited accuracy | Accurate and thorough |
| Relies on basic tools | Utilizes specialized equipment |
| May miss hidden issues | Detects potential problems |
By considering professional testing services, you can have peace of mind knowing that your e-bike battery is in good condition. Maintaining and caring for your battery regularly is essential in prolonging its lifespan and maximizing its performance.
Maintain and Care for Your Battery Regularly
To ensure optimal performance, regularly maintaining and caring for your e-bike battery is crucial. Battery maintenance plays a significant role in prolonging battery life and maximizing its efficiency. Here are three important steps to follow:
-
Keep your battery at the right temperature: Extreme temperatures can negatively impact the battery’s performance. Avoid exposing it to excessive heat or cold, as it can reduce its capacity and lifespan.
-
Charge your battery properly: Follow the manufacturer’s guidelines for charging your battery. Overcharging or undercharging can lead to decreased battery life. It’s recommended to charge your battery after each use and avoid letting it fully discharge.
-
Store your battery correctly: If you won’t be using your e-bike for an extended period, store the battery in a cool, dry place. Make sure it is partially charged, around 30-50%, to prevent self-discharge and maintain its overall health.
By following these maintenance practices, you can ensure that your e-bike battery remains in optimal condition, prolonging its lifespan and maximizing performance.
Frequently Asked Questions
Can you test an electric bike battery without a multimeter?
No, it is not possible to accurately test an electric bike battery without a multimeter. Multimeters are essential tools for measuring voltage, current, and resistance, providing accurate and precise readings necessary for battery testing.
How often should I test the charging time of my electric bike battery?
I have found that testing the charging time of my electric bike battery every 2-3 months ensures optimal performance. Charging for the recommended duration, as stated in the manual, helps maintain the battery’s longevity and efficiency.
What are the potential risks of not monitoring the battery’s temperature?
Not monitoring the battery’s temperature can lead to potential dangers such as overheating, reduced battery life, and even the risk of fire or explosion. Temperature monitoring is crucial for safe and optimal battery performance.
Are there any specific guidelines to follow while maintaining and caring for an electric bike battery?
Maintaining and caring for an electric bike battery is crucial. Follow these best practices for electric bike battery care: keep it charged between 20-80%, store in a cool place, avoid extreme temperatures, and regularly clean and inspect the battery for any signs of damage.
Can using a battery analyzer help identify any hidden issues with the battery that may not be visible through visual inspection?
Using a battery analyzer offers several benefits. It can identify hidden issues that may not be visible through visual inspection, ensuring a more accurate assessment of the battery’s condition. This helps in detecting problems early and maximizing battery performance.
Conclusion
In conclusion, testing your electric bike battery is crucial to ensure its optimal performance. By understanding the battery’s specifications, checking the voltage, measuring the capacity, testing the charging time, monitoring the range, and considering the battery’s temperature, you can ensure its efficiency.
It is also important to consult the manufacturer’s guidelines and, if needed, seek professional testing services. Just like a skilled surgeon examines a patient with precision, testing your battery regularly is like the key to unlocking its full potential.