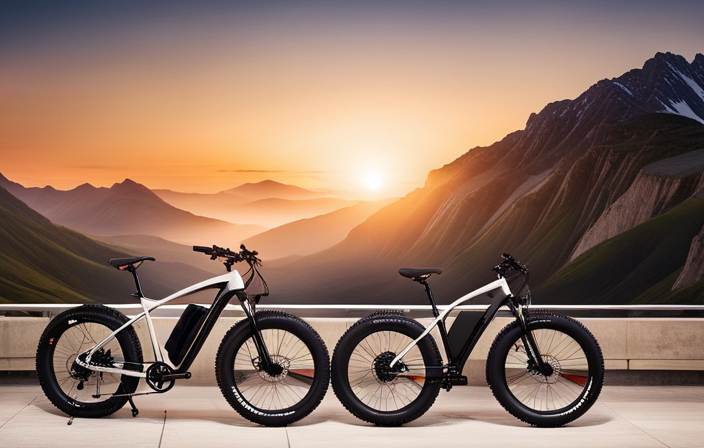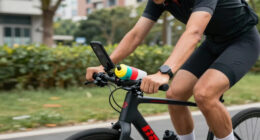
As an avid electric bike rider, I often find myself seeking ways to enhance my riding experience.
One crucial aspect that can greatly impact performance is the electric bike controller.
In this article, I will guide you through the process of adjusting your electric bike controller to optimize power and speed.
By understanding the functions, familiarizing yourself with the display, and making precise adjustments, you can enjoy a customized riding experience that perfectly suits your preferences.
Let’s delve into the technical intricacies of electric bike controller adjustment.
Key Takeaways
- Familiarize yourself with different settings and options
- Adjust speed limit and power assist level to suit your needs and terrain
- Troubleshoot common controller issues by checking connections and consulting manufacturer’s instructions
- Utilize controller display for valuable information and optimize riding experience by fine-tuning power level and throttle sensitivity
![LISEN Bike Phone Holder, [Super Easy Install] Motorcycle Phone Mount Ebike Accessories Bicycle Handlebar Holder Mount Gifts for Adults Kids Men Mountain Mini Bike Scooter Gear Accessories for iPhone](https://m.media-amazon.com/images/I/41f8iCmkMsL._SL500_.jpg)
LISEN Bike Phone Holder, [Super Easy Install] Motorcycle Phone Mount Ebike Accessories Bicycle Handlebar Holder Mount Gifts for Adults Kids Men Mountain Mini Bike Scooter Gear Accessories for iPhone
[Ultra-Secure Hold] – LISEN bike phone holder mount keeps your phone firmly in place even on bumpy or...
As an affiliate, we earn on qualifying purchases.
Understand the Controller Functions
To understand the controller functions, you need to familiarize yourself with the different settings and options available. The controller settings are crucial in adjusting your electric bike’s performance and ensuring a smooth ride. Understanding controller settings involves knowing how to troubleshoot common controller issues that may arise.
One important setting to consider is the speed limit adjustment. Some electric bikes come with a default speed limit that you may want to modify to suit your needs. By accessing the controller settings, you can adjust the maximum speed to a level that you are comfortable with.
Another setting to be aware of is the power assist level. This determines the amount of assistance the motor provides while you pedal. You can choose from different levels, such as low, medium, and high, depending on your preference and the terrain you will be riding on.
Troubleshooting common controller issues is also essential. If you encounter problems such as the motor not engaging or the bike not responding to throttle inputs, checking the controller connections and ensuring they are secure is a good first step. Additionally, familiarize yourself with the controller display, which provides valuable information about your electric bike’s battery level, speed, and power assist mode.

amzluv Bike Phone Holder Mount, Secure Handlebar Phone Mount Holder for Bike and Motorcycle, Suitable for iPhone and 4.5-6.8" Smartphones, Black
Universal Fit for 4.5-6.8 Inch Phones (Fits up to 3.19" Wide, 0.47" Thick): This motorcycle phone mount and...
As an affiliate, we earn on qualifying purchases.
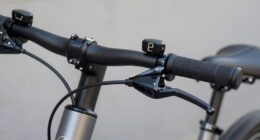
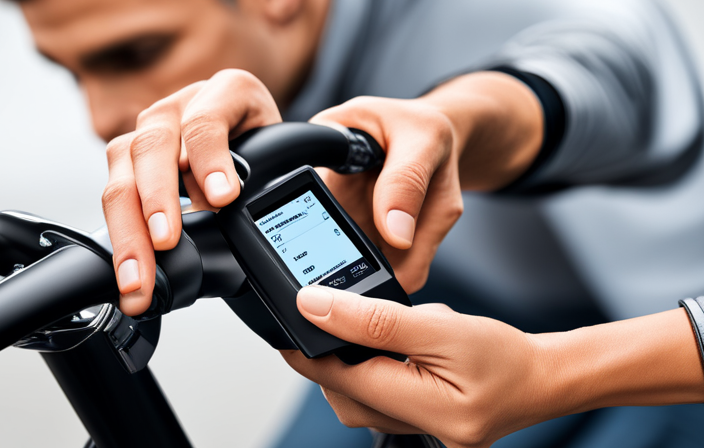
Familiarize Yourself with the Controller Display
Familiarize yourself with the controller display so you can easily navigate the settings. The controller display is a crucial component of an electric bike as it allows you to monitor and adjust various parameters to optimize your riding experience. Here are four important aspects to consider when familiarizing yourself with the controller display:
-
Display Type: The controller display can vary in type, such as LCD or LED. LCD displays offer more detailed information, while LED displays are simpler and more basic.
-
Information Displayed: The controller display typically shows information like battery level, speed, distance traveled, and power mode. Understanding what each piece of information represents is essential for troubleshooting and diagnosing common controller issues.
-
Navigation Buttons: Look for buttons or a joystick located near the display that allow you to scroll through the different menu options and select the desired settings. These buttons are crucial for adjusting parameters like pedal assist levels or speed limits.
-
Error Codes: Controller troubleshooting often involves interpreting error codes displayed on the controller. Familiarize yourself with the common error codes and their meanings to quickly identify and address any issues.
Now that you are familiar with the controller display, it’s time to locate the adjustment buttons or dials to make the necessary changes.

BODEGA 12 volt Car Refrigerator - 26QT Portable Freezer IPX4 Waterproof Car Fridge Electric Cooler Ultra-Quiet for Truck Van Camping Travel 12/24V DC 110~240 Volt AC,-4℉~68℉
【𝗖𝗼𝗺𝗽𝗮𝗰𝘁 𝗘𝗹𝗲𝗰𝘁𝗿𝗶𝗰 𝗖𝗼𝗼𝗹𝗲𝗿, 𝟮0% 𝗠𝗼𝗿𝗲 𝗖𝗮𝗽𝗮𝗰𝗶𝘁𝘆】Maximize space without bulk! This 26QT 12V refrigerator stores 20% more than competitors—ideal...
As an affiliate, we earn on qualifying purchases.
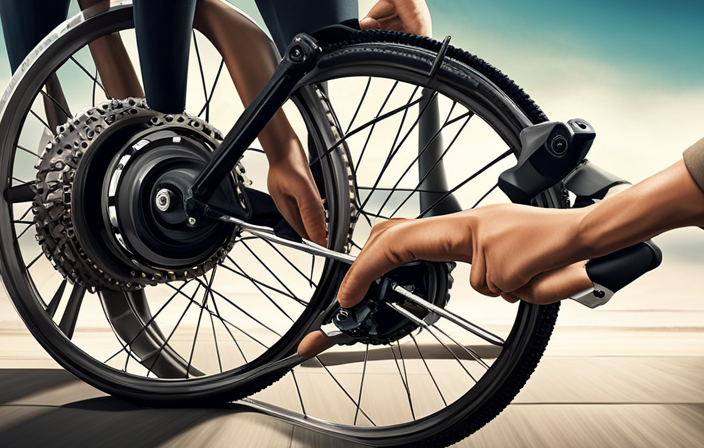
Locate the Adjustment Buttons or Dials
Once you’ve familiarized yourself with the controller display, locate the adjustment buttons or dials to easily make any necessary changes. The adjustment buttons or dials on an electric bike controller allow you to fine-tune various settings to optimize your riding experience. These adjustment techniques can help you customize your electric bike to suit your preferences and troubleshoot any issues you may encounter.
To assist you further, here is a table that outlines the common adjustment options found on most electric bike controllers:
| Adjustment | Description | Recommended Setting |
|---|---|---|
| Power Level | Controls the amount of power delivered to the motor | Start with a lower power level and gradually increase as needed |
| Speed Limit | Sets the maximum speed at which the electric bike can operate | Adjust according to local regulations and personal preference |
| Assist Level | Determines the level of pedal assistance provided by the motor | Adjust based on desired level of assistance and battery life |
| Regenerative Braking | Enables or disables the feature that recharges the battery during braking | Enable to increase battery life, disable for a more natural riding experience |
| Throttle Sensitivity | Adjusts the responsiveness of the throttle | Fine-tune to achieve optimal control and comfort |

SY Bicycle Speedometer and Odometer Wireless Waterproof Cycle Bike Computer with LCD Display & Multi-Functions by YS
【Auto Wake-up Function】Automatically wakes from sleep mode upon sensing vibration in the bicycle. Bright LCD display to easily...
As an affiliate, we earn on qualifying purchases.
Start with the Power Level Adjustment
Start by locating the adjustment buttons or dials on your electric bike controller to easily make changes to the power level. The power level adjustment is a crucial feature that allows you to control the amount of assistance provided by the motor.
However, there may be times when you encounter issues with your controller that require troubleshooting. Common controller issues include a non-responsive controller, sudden power loss, or error messages displayed on the screen.
To troubleshoot these problems, you can start by checking the connection between the controller and the battery, ensuring that all wires are securely attached. Additionally, you can try resetting the controller by disconnecting the battery for a few minutes and then reconnecting it.
If these steps don’t resolve the issue, you may need to consult the manufacturer’s instructions or contact customer support for further assistance.
Once your controller is working properly, you can proceed to adjust the speed limit setting, which allows you to set a maximum speed for your electric bike.
Adjust the Speed Limit Setting
To adjust the speed limit setting on your e-bike, simply locate the speed limit adjustment feature on your display panel. Use the arrow buttons to decrease or increase the maximum speed. This feature allows you to modify the speed control of your electric bike, giving you the ability to adjust the motor power according to your preferences and riding conditions.
By accessing the speed limit adjustment feature, you can fine-tune the maximum speed of your e-bike. Decreasing the speed limit will limit the top speed at which your bike can travel, while increasing it will allow you to reach higher speeds. This function is especially useful when riding in areas with specific speed regulations or when you want to conserve battery power by reducing the maximum speed.
It is important to note that adjusting the speed limit setting does not directly impact the assistance level provided by the motor. The assist level determines the amount of power the motor provides to assist your pedaling.
In the next section, we will explore how to fine-tune the assist level to optimize your riding experience without compromising safety and efficiency.
Fine-tune the Assist Level
After adjusting the speed limit setting, the next step in customizing my electric bike controller is to fine-tune the assist level. This allows me to customize the power output of my bike and optimize battery usage according to my specific preferences.
To fine-tune the assist level, I access the controller settings through the bike’s display interface. Once there, I can make adjustments to the level of assistance the motor provides when I pedal. This feature allows me to find the perfect balance between the motor’s assistance and my own effort, enhancing my riding experience.
Here are three emotions that can be evoked when fine-tuning the assist level:
- Excitement: The ability to customize the power output of my electric bike makes me feel like I have full control over my ride and can achieve new levels of performance.
- Confidence: By optimizing the battery usage, I can extend the range of my electric bike and be confident that I won’t run out of power during long rides.
- Personalization: Fine-tuning the assist level allows me to tailor the bike’s performance to my specific needs and preferences, giving me a unique and personalized riding experience.
With the assist level dialed in, I can now transition to the subsequent section: customizing the throttle response.
Customize the Throttle Response
Once the assist level is fine-tuned, it’s time to customize the throttle response for a more precise control over the acceleration of the bike. Customizing the throttle response allows riders to tailor the sensitivity and reaction of the throttle to their specific preferences. There are several throttle customization techniques that can be utilized to achieve this desired level of control.
One technique is adjusting the throttle sensitivity. This determines how quickly the bike responds to throttle input. By increasing the sensitivity, the bike will accelerate more rapidly, providing a quicker burst of speed. Conversely, decreasing the sensitivity will result in a more gradual acceleration, ideal for smoother and more controlled riding.
Another technique is configuring the throttle mapping. This involves mapping the throttle input to the motor power output. By adjusting the mapping, riders can modify the power delivery curve, making it either more aggressive or more linear. This allows for a more tailored riding experience, whether you prefer immediate power or a more gradual build-up.
To better understand the customization options available, refer to the table below:
| Customization Technique | Description |
|---|---|
| Throttle Sensitivity | Determines how quickly the bike responds to throttle input. Increase for quicker acceleration, decrease for gradual acceleration. |
| Throttle Mapping | Maps the throttle input to the motor power output. Adjust to modify power delivery curve for more aggressive or linear acceleration. |
Experiment with the Pedal Assist Sensitivity
Experimenting with the pedal assist sensitivity allows you to fine-tune the level of assistance provided by the motor, giving you more control over the level of power and responsiveness while riding. By adjusting this setting, you can customize your electric bike to suit your preferences and riding style.
Here are three key reasons why experimenting with different settings is important:
-
Power Output: Changing the pedal assist sensitivity can impact the amount of power the motor delivers when you pedal. By increasing the sensitivity, you can experience a higher level of assistance, making it easier to tackle challenging terrains or ride at higher speeds. Conversely, decreasing the sensitivity will provide a more natural riding experience, requiring more effort from your own pedaling.
-
Battery Life: The pedal assist sensitivity also affects the battery consumption. Higher sensitivity levels may drain the battery faster, while lower levels can help conserve energy and extend your riding range. Experimenting with different settings can help you find the right balance between power and battery life.
-
Riding Experience: The impact of pedal assist sensitivity on your overall riding experience cannot be underestimated. Finding the optimal setting can greatly enhance your comfort and enjoyment while riding, allowing you to effortlessly glide through your journey.
Analyzing the impact of different pedal assist sensitivity settings is crucial in maximizing the benefits of your electric bike. As you fine-tune this setting, consider the regenerative braking option, which we will explore in the next section, to further optimize your riding experience.
Consider the Regenerative Braking Option
To optimize your riding experience, consider the regenerative braking option. This feature allows you to recharge the battery while slowing down or descending hills. It is not only environmentally friendly but also extends the battery life of your electric bike. When you engage the regenerative braking, the motor switches from propelling the bike forward to generating electricity, which is then stored in the battery. This process harnesses the kinetic energy produced during braking and converts it into electrical energy.
Understanding the braking mechanism is crucial when considering the battery life impact. The regenerative braking system utilizes the electric motor as a generator, converting the mechanical energy of the moving bike into electrical energy. This energy is then used to recharge the battery. By effectively utilizing this feature, you can significantly increase the overall range of your electric bike.
Transitioning to the subsequent section about resetting the controller to factory settings, it is important to note that while the regenerative braking option enhances your riding experience, it might not always perform optimally. In such cases, resetting the controller to factory settings can help resolve any issues and restore the original functionality of your electric bike’s braking system.
Reset the Controller to Factory Settings
Resetting the controller to factory settings can resolve any issues with the braking system and restore its original functionality. Troubleshooting common controller issues often involves resetting the controller settings, which can be done by following a few simple steps.
To reset the controller to factory settings, consult the electric bike manual for specific instructions. The process may vary depending on the make and model of your electric bike. However, in general, it involves accessing the settings menu on the controller and selecting the option to reset to factory defaults.
Before resetting the controller, it is important to note that this action will erase any custom settings or configurations you have made. Therefore, it is recommended to take note of your current settings or take a photo for reference before proceeding with the reset.
Once the controller has been reset, any issues with the braking system should be resolved. If the problem persists, it may indicate a more serious underlying issue that requires further inspection or professional assistance.
Consult the Electric Bike Manual for Specific Instructions
If you’re unsure of how to proceed, consult the manual for specific instructions on your electric bike. Understanding troubleshooting and common controller issues is important when it comes to adjusting your electric bike controller.
The controller is a vital component that regulates the power and speed of your electric bike. If you’re experiencing any issues with the controller, such as erratic speed, loss of power, or error codes, it is essential to troubleshoot the problem.
Start by checking the connections between the controller and the battery, motor, and throttle. Make sure all the connections are secure and free from any damage. If the connections are intact, you can proceed to check the controller settings.
Consult the manual to understand the specific parameters and settings that can be adjusted on your electric bike controller. Common issues include incorrect speed limit settings, throttle calibration, or error codes. By following the instructions in the manual, you can adjust these settings accordingly.
However, if you’re unsure or uncomfortable performing these adjustments, it is best to seek professional help. They have the expertise and tools to diagnose and fix any controller issues effectively. Remember, safety should always be a priority, so seek professional assistance if needed.
Seek Professional Help if Needed
If you’re unsure or uncomfortable, it’s best to seek professional help for any issues with your electric bike controller. While adjusting the controller may seem simple, it involves intricate electrical components that require expertise to handle properly. Seeking professional advice ensures that the adjustments are done correctly, minimizing the risk of damaging the controller or compromising the safety of your electric bike.
To give you an idea of the complexities involved, let’s look at some common controller issues and potential troubleshooting steps. The table below outlines these problems and their possible solutions:
| Common Controller Issues | Troubleshooting Steps |
|---|---|
| No power to the motor | Check battery connections and voltage. Ensure the throttle is functioning properly. |
| Erratic speed control | Inspect wiring for loose connections or damage. Calibrate the throttle and check for any programming errors. |
| Overheating | Clean any debris obstructing the controller’s cooling system. Check for proper ventilation and adjust settings if necessary. |
| Error codes displayed | Refer to the electric bike manual for specific error code explanations. Follow the recommended troubleshooting steps. |
| Unresponsiveness | Check all wiring connections for loose or damaged wires. Test throttle and brake sensors for proper functionality. |
Test Ride and Evaluate the Adjustments
To properly evaluate the adjustments made, take your electric bike for a test ride and pay close attention to the performance and responsiveness.
During the test ride, it is important to have a thorough understanding of your bike’s previous performance in order to effectively assess the impact of the adjustments. Start by noting any changes in the acceleration and deceleration of your electric bike. Does it respond more quickly or take longer to reach the desired speed?
Additionally, observe how the adjustments have affected the overall power output. Are you able to maintain a consistent speed or do you notice any fluctuations?
Furthermore, pay attention to the handling and control of the bike. Does it feel more stable or do you experience any instability?
Finally, evaluate the battery life and range. Has the adjustment had any impact on the battery efficiency?
Make Further Adjustments as Necessary
After test riding and evaluating the adjustments made to my electric bike, I realized that there were still some areas that required further fine-tuning. One crucial aspect to consider is the pedal position, as it directly affects the performance and efficiency of the electric bike. Adjusting the pedal position can help optimize power delivery and ensure a comfortable riding experience.
To begin, I carefully examined the controller settings and checked for any common issues that could be affecting the performance. Troubleshooting common controller issues is essential to identify and resolve any potential problems that may arise. This involved checking the wiring connections, inspecting the throttle mechanism, and verifying the functionality of the speed sensor.
Once I had addressed any controller-related issues, I proceeded to make adjustments to the pedal position. By experimenting with different positions, I could find the optimal placement that allowed for maximum power transfer and minimized strain on my legs. It is important to note that everyone’s preferences and body mechanics may differ, so it is crucial to find the pedal position that suits you best.
With the adjustments made to the controller and pedal position, I was finally able to achieve the desired performance and comfort on my electric bike. Now, it’s time to enjoy your customized electric bike riding experience, tailored to your specific needs and preferences.
Enjoy Your Customized Electric Bike Riding Experience
Now that you’ve made the necessary adjustments, it’s time to fully enjoy your customized electric bike riding experience. Here are some key points to consider:
-
Customizing your electric bike’s appearance:
-
Choose a color scheme that reflects your personal style. Consider using vinyl wraps or custom paint jobs to give your bike a unique look.
-
Add accessories such as fenders, lights, and racks to enhance both the aesthetics and functionality of your bike.
-
Experiment with different seat styles and grips to find the most comfortable option for your rides.
-
Consider adding decals or stickers to further personalize your bike and showcase your individuality.
-
Finding the perfect battery placement:
-
Determine the optimal location for your battery based on your bike’s frame design and weight distribution.
-
Consider factors such as accessibility, balance, and stability when deciding where to mount the battery.
-
Ensure that the battery is securely attached to prevent any movement or damage during rides.
-
Take into account the ease of maintenance and replacement when choosing the battery placement.
By customizing your electric bike’s appearance and finding the perfect battery placement, you can create a riding experience that is tailored to your preferences and needs.
Get ready to hit the road with a bike that not only performs well but also reflects your personal style. Enjoy the ride!
Frequently Asked Questions
Can I adjust the power level on my electric bike controller?
Yes, you can definitely adjust the power level on your electric bike controller. The controller customization allows you to fine-tune the power output according to your preferences.
How do I adjust the speed limit setting on my electric bike controller?
To customize acceleration and increase the top speed of your electric bike, you can adjust the speed limit setting on the controller.
Start by locating the controller, usually mounted near the handlebars. Using the control panel, navigate to the settings menu and find the speed limit option.
Increase the limit gradually, testing the bike after each adjustment. Be cautious not to set it too high, as it may compromise safety and performance.
Is it possible to customize the throttle response on my electric bike controller?
Yes, it’s possible to customize the throttle response on an electric bike controller. By adjusting the acceleration curve, you can change the sensitivity of the throttle. This allows you to fine-tune the bike’s responsiveness to your preferences.
To customize the throttle sensitivity, access the controller’s settings menu and locate the option for adjusting the acceleration curve. From there, you can make precise adjustments to achieve the desired throttle response.
What is the purpose of the regenerative braking option on my electric bike controller?
Regenerative braking is like a superhero cape for your electric bike. It harnesses the power of braking to recharge your battery, extending your ride and reducing the need for frequent charging.
The purpose of regenerative braking is to convert kinetic energy into electrical energy, which is then stored in the battery for later use. This ingenious feature not only saves energy but also enhances your biking experience by providing smoother and more controlled braking.
How can I reset my electric bike controller to its factory settings?
To reset your electric bike controller to its factory settings, follow these steps for troubleshooting.
Firstly, locate the reset button on the controller. Press and hold the reset button for approximately 10 seconds until the controller’s LED display flashes.
Release the button and wait for the controller to reboot. This process will restore the controller to its original settings, resolving any issues you may be experiencing.
Conclusion
After adjusting the electric bike controller, I was filled with anticipation as I took my first ride.
The power level adjustment and speed limit setting had been fine-tuned to perfection.
As I pedaled forward, a surge of exhilaration coursed through my veins. The bike responded effortlessly, gliding smoothly along the road.
With each passing moment, a newfound sense of freedom enveloped me.
The customized riding experience was beyond anything I had imagined.
It was as if the bike and I were one, transcending the limits of ordinary cycling.