As someone passionate about cycling, I understand how crucial it is to have a bicycle that fits your body perfectly for both performance and comfort while riding. But what’s the best way to ensure a bicycle is the ideal match for you? The key lies in accurate measurements.
In this article, I’ll guide you through the steps to accurately measure a bicycle for a comfortable and efficient ride. Just as a tailor measures your body to create a perfectly fitting suit, measuring a bicycle is essential for a comfortable and efficient ride. A bike that is too big or too small, with a saddle that is too high or too low, can lead to discomfort, pain, and even injury.
That’s why it’s crucial to take the time to measure your bike properly. In the following sections, I’ll walk you through the steps to measure the bike frame, determine the wheel size, and set the saddle height, so you can ride with confidence and comfort.
Key Takeaways
- Proper measurements are crucial for a comfortable and efficient ride, and can prevent discomfort, pain, and injury.
- Frame size is not the only measurement that matters, with saddle height, handlebar reach, and crank length also important to consider.
- Wheel size is also crucial for a safe and comfortable ride, and can impact performance and efficiency.
- Double-checking measurements and test riding are essential for accuracy and ensuring a comfortable and enjoyable cycling experience.

Under Armour Squeeze Water Bottles, 32 oz Water Bottles, Sideline Sports Water Bottle with Quick-Shot Lid, Quick & Easy Hydration, Gym Water Bottles, Squeeze Bottle, 1 32oz Bottle
- Easy Hydration: Quick-shot lid and one-way valve
- On-the-Go Use: One-hand operation for active hydration
- Measurement Markings: Ounces and milliliters for tracking
As an affiliate, we earn on qualifying purchases.
Understanding the Importance of Proper Bike Measurements
You’ll want to make sure your bike measurements are accurate so that when you’re riding, you feel comfortable and in control, instead of wobbling or struggling to reach the pedals. Proper bike measurements are crucial in preventing injuries and discomfort during rides.
Having an improperly sized bike can cause knee pain, back pain, and even lead to accidents. One common mistake people make when measuring bike fit is thinking that the frame size is the only measurement that matters. However, there are several other measurements that are equally important, including the saddle height, handlebar reach, and crank length.
These measurements can affect your posture, pedal stroke, and overall riding experience. Therefore, it’s important to take the time to measure and adjust all the necessary components to ensure a comfortable and safe ride.
With that said, let’s move on to how to measure the bike frame.
Measuring the Bike Frame
When measuring a bike frame, it’s essential to choose the right size to ensure comfort and efficiency while riding. This involves measuring the seat tube length, which determines the height of the saddle.
Adjusting this length can help improve the bike’s fit and make it more comfortable for the rider.
Choosing the Right Frame Size
To find the perfect frame size for your bike, start by measuring your inseam. This is the distance from the ground to your crotch, while wearing the shoes you plan to ride in. It is important to measure accurately, as choosing the wrong frame size can result in discomfort and even injury. A common mistake is to choose a frame that is too big, thinking it will be more comfortable, but this can lead to stretching too far to reach the handlebars, causing strain on the back and arms. On the other hand, a frame that is too small can cause your knees to hit the handlebars while pedaling, also leading to discomfort and potential injury.
To help determine the correct frame size for you, refer to the following table:
| Inseam Measurement | Frame Size | Rider Height |
|---|---|---|
| 27-29 inches | 48-50 cm | 5’0"-5’3" |
| 29-31 inches | 50-52 cm | 5’3"-5’6" |
| 31-33 inches | 52-54 cm | 5’6"-5’9" |
| 33-35 inches | 54-56 cm | 5’9"-6’0" |
It is important to note that this table is a general guide, and a professional fitting may be necessary to ensure the best fit for your individual body type and riding style. Once you have determined the correct frame size, the next step is to adjust the seat tube length.
Adjusting the Seat Tube Length
Ah, the joys of adjusting your bike’s seat tube length – it’s almost as fun as a root canal! But in all seriousness, getting your seat height and saddle position right is crucial for comfortable and efficient cycling.
The seat tube length is the distance between the bottom bracket and the top of the seat tube, where the seat post is inserted. To adjust it, you’ll first need to determine the correct seat height for your body.
To find your ideal seat height, sit on the saddle with your feet on the pedals at the 6 o’clock and 12 o’clock positions. Your knee should be slightly bent when the pedal is at the bottom of the stroke. Adjust the seat height until you achieve this position. Then, adjust the saddle position forwards or backwards to achieve a comfortable and efficient pedaling motion.
A good rule of thumb is to position the saddle so that your knee is directly above the pedal spindle when the pedal is at the 3 o’clock position.
With the seat tube length and saddle position adjusted to your body’s needs, you’ll be ready to tackle the next step in preparing your bike for the road – determining the wheel size.
Determining the Wheel Size
One easy way to determine a bicycle’s wheel size is by simply measuring the diameter of the wheel with a tape measure. To measure tire diameter, find the tallest point of the tire’s tread and measure from the ground to the top of the tire. This measurement will give you the overall diameter of the tire. Measuring rim width is also important as it will impact the type of tire that can be used on the wheel. To measure rim width, use a caliper to measure the distance between the inner edges of the rim.
Determining the correct wheel size is crucial for ensuring a safe and comfortable ride. Using the appropriate wheel size can also improve the performance and efficiency of the bike. To help you choose the right wheel size for your bike, refer to the table below which outlines common wheel sizes and the appropriate bike types for each size. Now that we know the correct wheel size, let’s move on to setting the saddle height.
Setting the Saddle Height
Ready to ride comfortably? Let’s find the perfect saddle height for you. Can you feel the difference when your seat is too low or too high? To determine the appropriate saddle height, you need to take the inseam measurement accurately.
Here are three steps to measure the inseam correctly:
- Stand barefooted with your back against a wall, and spread your legs apart about 6 inches.
- Place a book between your legs, up against your pelvic bone, with the spine facing upwards.
- Measure from the top of the book to the floor, and that measurement is your inseam.
Once you have your inseam measurement, you can adjust the saddle height accordingly. It is essential to note that the angle of the saddle also plays a crucial role in ensuring optimum comfort during a ride.
The saddle angle should be parallel to the ground, as a tilted saddle can cause discomfort and even lead to injury. With the saddle height and angle set correctly, you’ll be able to ride for longer distances with improved comfort and performance.
Measuring your inseam accurately and adjusting the saddle height and angle is crucial in ensuring comfort and safety during a ride. Double-checking your measurements and making minor adjustments can make a significant difference in your cycling experience.
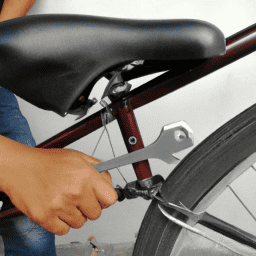
Double-Checking Your Measurements
After accurately measuring my inseam, it’s crucial to double-check my measurements when setting the saddle height and angle for my bicycle.
To recheck the accuracy of my measurements, I use measuring tools such as a level, plumb line, and ruler. I ensure that the saddle is level and the angle is adjusted to my desired position for optimal comfort and performance while cycling.
Once I have set the saddle height and angle, I double-check my measurements by taking a test ride. I pay attention to how my body feels while riding and make any necessary adjustments to the saddle height and angle.
It’s essential to ensure that my measurements are correct to avoid discomfort, prevent injury, and enhance my cycling experience.
Frequently Asked Questions
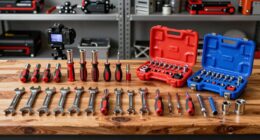
What tools are required to measure a bicycle accurately?
To measure a bicycle accurately, you’ll need specialized tools like a ruler, caliper, and tape measure. However, with some tips and tricks, you can measure a bike frame without these tools. Bicycle measurement tools vary in accuracy, so choose wisely.
How often should a bike’s measurements be checked?
To ensure safety and performance, it’s crucial to regularly check a bike’s measurements. Frequency of adjustments depends on riding habits, but yearly check-ups are recommended. Proper bike fit is important for comfort and efficiency.
Can a bike’s measurements be adjusted for multiple riders?
Bike fit customization can accommodate multiple riders by adjusting the saddle height, reach, and handlebar position. Women-specific models offer tailored geometry for optimal comfort and performance. Regular checks ensure proper fit and reduce the risk of injury.
Is it necessary to take into account a rider’s weight when measuring a bike?
The rider’s weight impacts the measuring accuracy techniques used to measure a bike. Accurate measurements are crucial for safety and performance. Techniques like measuring saddle height and adjusting tire pressure should consider the rider’s weight.
How do different types of terrain affect the ideal bike measurements?
Off road impact is significant in determining the ideal bike measurements. The terrain influences bike fit and determines the necessary adjustments to ensure comfort and stability. Seasonal adjustments are also crucial for different weather conditions.
Conclusion
In conclusion, measuring a bicycle is crucial to ensuring a comfortable, safe, and efficient ride. By following the steps outlined above, you can accurately measure the frame, determine the wheel size, and set the saddle height.
Double-checking your measurements is also vital to ensure that everything is in the correct position. For example, I had a friend who purchased a used road bike without measuring it. He assumed it would fit him based on the height of the previous owner. However, after a few rides, he experienced discomfort and pain in his knees.
It turned out that the saddle height was too low, causing his knees to bend excessively during each pedal stroke. After measuring the bike and adjusting the saddle height, he was able to ride comfortably and pain-free.
Remember, taking the time to properly measure your bike can make all the difference in your riding experience. Don’t underestimate the importance of this step, and always double-check your measurements to ensure that everything is in the correct position.