
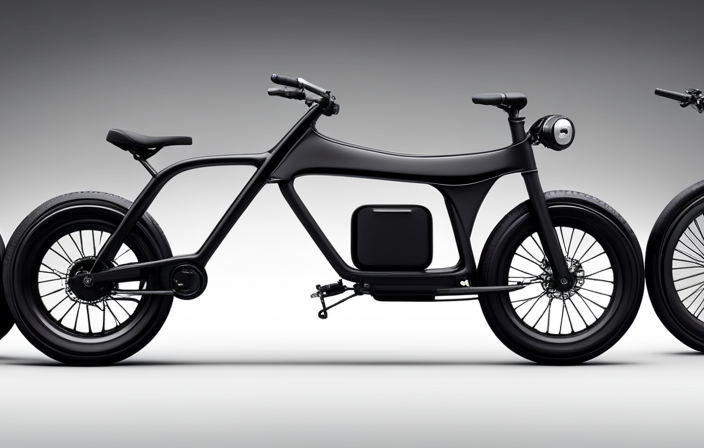
Are you tired of the back tire on your e-zip electric bike constantly giving you trouble? Fret not, my fellow bike enthusiasts, for I have the knowledge to set you free from the tyranny of a malfunctioning wheel.
In this article, I will guide you through the precise steps required to remove that troublesome tire. Prepare your tools, disconnect the battery, release the brake, and let’s embark on this mechanical journey together.
Get ready to conquer your bike maintenance fears and regain control of your two-wheeled companion!
Key Takeaways
- Gather the necessary tools: wrench, tire lever, pump, patch kit.
- Loosen axle bolts on both sides and slide the wheel out of the frame, maintaining alignment and noting washers/spacers.
- Consider cost-effectiveness of tire repair vs. replacement and regularly inspect the tire for damage.
- Reinstall the wheel by aligning it with the brake pads and sliding the axle through the wheel hub completely.
Gather the Necessary Tools
You’ll need to gather the necessary tools to properly maintain your e-zip electric bike and address common issues with the back tire. Having the right tools on hand will make the process much smoother and ensure that you can complete the task effectively.
Here are the tools you will need:
-
Wrench: A wrench will be needed to loosen and remove the nuts that hold the back tire in place.
-
Tire lever: This tool will help you remove the tire from the rim without damaging it.
-
Pump: You may need to inflate the tire or check the pressure before reinstalling it.
-
Patch kit: If you encounter a flat tire, a patch kit will allow you to repair it without having to replace the entire tire.
Once you have gathered these tools, you can move on to the next step of disconnecting the battery. This will ensure your safety while working on the bike.
Disconnect the Battery
To disconnect the battery on an e-zip electric bike, simply detach its power source. This is an essential step in the process of removing the back tire. Proper maintenance of electric bike batteries is crucial for optimal performance and longevity. Regular maintenance ensures that the battery remains in good condition and provides a reliable power source for your e-zip electric bike.
Here are some discussion ideas for maintaining the battery:
- Regularly check the battery’s charge level and recharge it when necessary.
- Store the battery in a cool, dry place to prevent damage from extreme temperatures.
- Avoid overcharging the battery, as it can shorten its lifespan.
- Follow the manufacturer’s guidelines for charging and discharging the battery.
By taking these steps, you can maximize the lifespan of your e-zip electric bike battery.
Now, let’s move on to the next section and discuss how to release the brake.
Release the Brake
To release the brake, simply squeeze the lever on the handlebar. This will disengage the brake mechanism, allowing you to remove the back tire of your e-zip electric bike.
Before doing so, it is important to make sure that the brake tension is adjusted properly. If you are experiencing any issues with your brake, such as it being too loose or too tight, you can troubleshoot it by adjusting the brake tension.
This can be done by using a 5mm Allen wrench to turn the barrel adjuster located on the brake caliper. By turning it clockwise, you can tighten the brake tension, and by turning it counterclockwise, you can loosen it.
Once you have released the brake and adjusted the tension, you can proceed to the next step of loosening the axle nut.
Loosen the Axle Nut
Once the brake is released, you can proceed to loosen the axle nut. To do this, you will need a few tools: a wrench or socket that fits the size of the axle nut, and possibly a breaker bar or long-handled wrench for extra leverage.
Start by placing the wrench or socket onto the axle nut and turning it counterclockwise. Apply steady pressure to break the nut loose. Be cautious not to damage the threads or strip the nut.
If the nut is stubborn and refuses to budge, you can try using a penetrating oil to help loosen it. Common issues when loosening the axle nut include rust or corrosion, which may require additional effort or tools.
Once the axle nut is loosened, you can move on to the next step of removing the chain.
Remove the Chain
After loosening the axle nut, it’s time to remove the chain. Here are four important maintenance tips for replacing the chain on your e-zip electric bike:
-
Inspect the chain: Before removing the old chain, thoroughly inspect it for any signs of wear, such as rust, stretched links, or damaged pins.
-
Choose the right replacement: Ensure you select a chain that matches the specifications of your e-zip electric bike. Refer to the user manual or consult a professional if you are unsure.
-
Remove the old chain: Use a chain tool or a master link plier to disconnect the old chain from the rear sprocket. Carefully slide the chain off the bike, taking note of its routing.
-
Install the new chain: Begin by threading the new chain onto the rear sprocket, following the same routing as the old chain. Use the chain tool or master link plier to connect the ends of the chain securely.
After replacing the chain, we can move on to the next step: loosening the axle bolts.
Loosen the Axle Bolts
Now it’s time to loosen the axle bolts.
Proper maintenance of electric bike tires is crucial for optimal performance and safety. Neglecting maintenance can lead to issues with the axle bolts, which hold the back tire securely in place.
To prevent axle bolt issues, there are a few tips to keep in mind. Firstly, regularly inspect the bolts for any signs of wear or damage. Tighten them if they become loose, but avoid over-tightening as it can cause damage.
Secondly, apply a small amount of lubricant to the bolts to prevent rust and ensure smooth operation.
Lastly, avoid riding over rough terrain or hitting curbs with excessive force, as this can put unnecessary strain on the bolts.
With the axle bolts loosened, we can now proceed to the next step of sliding the wheel out.
Slide the Wheel Out
To slide the wheel out, simply loosen the axle bolts and carefully remove the wheel from the frame. Removing the wheel safely is crucial to avoid any damage or injuries.
Start by using a wrench to loosen the axle bolts on both sides of the wheel. Once the bolts are loosened, gently slide the wheel out of the frame, making sure to keep it aligned properly. Pay attention to any washers or spacers that may be present and ensure they are kept in the correct order for reassembly.
Removing the wheel safely and ensuring proper alignment will make the process easier when it comes time to replace or repair the tire.
Now that the wheel is out, let’s move on to the next step of replacing or repairing the tire.
Replace or Repair the Tire
When replacing or repairing the tire, make sure to follow the appropriate steps to ensure a secure and safe installation.
First, let’s discuss whether it is more cost effective to replace or repair the tire. Generally, if the tire has minor damage such as a puncture or small tear, it can be repaired at a lower cost compared to replacing the entire tire. However, if the tire is severely damaged or worn out, it is recommended to replace it for better performance and longevity.
Now, let’s talk about common tire problems and how to avoid them. Some common issues include flat tires, uneven wear, and low tire pressure. To avoid these problems, regularly inspect the tire for any signs of damage, maintain proper tire pressure, and rotate the tires regularly.
Now, let’s move on to the next step, which is reinstalling the wheel.
Reinstall the Wheel
Once the wheel is removed, it’s time to reinstall it securely onto the axle. Here are the steps to follow when reinstalling the wheel and adjusting the brakes:
- Position the wheel onto the axle, making sure it aligns with the brake pads.
- Slide the axle through the wheel hub, ensuring it goes all the way in.
- Tighten the axle nut using a wrench, making sure it is secure.
Check the brake alignment and adjust if necessary by loosening or tightening the brake caliper bolts.
Reinstalling the wheel properly is crucial for the overall performance and safety of your e-zip electric bike.
Once the wheel is securely in place and the brakes are adjusted, you can move on to the next step: reconnect the battery and test the bike’s functionality.
Reconnect the Battery and Test the Bike
Now, reconnect the battery and test your bike’s functionality. Before doing so, make sure that the battery is fully charged. To reconnect the battery, locate the battery compartment on your e-zip electric bike and open it. Align the connectors on the battery with the corresponding connectors in the compartment and firmly push the battery into place. Once the battery is securely connected, close the compartment. Now, it’s time to test the bike’s functionality. Turn on the power switch and check if the battery indicator shows a full charge. If it doesn’t, recharge the battery before proceeding. Next, take the bike for a short ride to ensure that the motor is working properly. If you encounter any issues during the test, consult the troubleshooting section in the user manual to identify and resolve any electrical problems.
Frequently Asked Questions
How do I properly disconnect the battery on an e-zip electric bike?
To properly disconnect the battery on an e-zip electric bike, first, locate the battery compartment. Turn off the bike and remove the key. Then, carefully unplug the battery connector and secure it to prevent accidental reconnection. This is crucial for proper battery maintenance and troubleshooting battery issues.
What should I do if the brake release lever is stuck and won’t release?
If the brake release lever is stuck and won’t release, try troubleshooting common issues like checking for dirt or debris, lubricating the lever, or adjusting the tension. If all else fails, consider alternative brake release methods.
Can I remove the back tire without loosening the axle nut?
To remove the back tire of an e-zip electric bike, you must first loosen the axle nut. This allows you to remove the chain from the rear derailleur and then slide the tire out of the dropouts.
How do I remove the chain from the back tire of an e-zip electric bike?
To remove the chain from the back tire of an e-zip electric bike, first, shift the chain onto the smallest rear sprocket. Then, use a chain tool to break the chain and remove it from the sprocket.
What type of tools do I need to reinstall the wheel on an e-zip electric bike?
To reinstall the wheel on an e-zip electric bike, you will need a set of Allen wrenches, a wrench or pliers, and a tire lever. These tools will allow you to properly secure the wheel and ensure a smooth ride.
Conclusion
So there you have it, folks! Taking off the back tire of an e-zip electric bike may seem like a daunting task, but with the right tools and a little bit of know-how, it can be done.
Remember to disconnect the battery, release the brake, and loosen the axle nut before removing the chain and sliding the wheel out.
Whether you’re replacing or repairing the tire, make sure to follow the necessary steps with precision.
Once you’re done, simply reinstall the wheel, reconnect the battery, and give your bike a test ride to ensure everything is in working order.
Remember, with a little effort and attention to detail, you’ll be back on the road in no time!