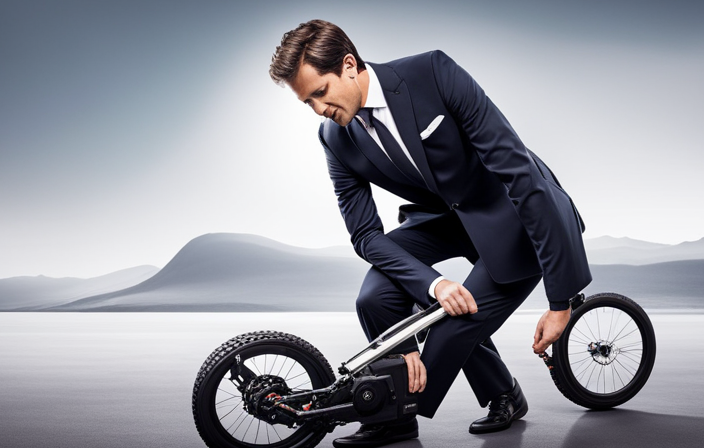
Hello everyone, I’m thrilled to be here today to discuss electric bike conversion kits. As a specialist in this area, I aim to impart some of my expertise to help you make well-informed choices as you select the ideal kit suited to your requirements.
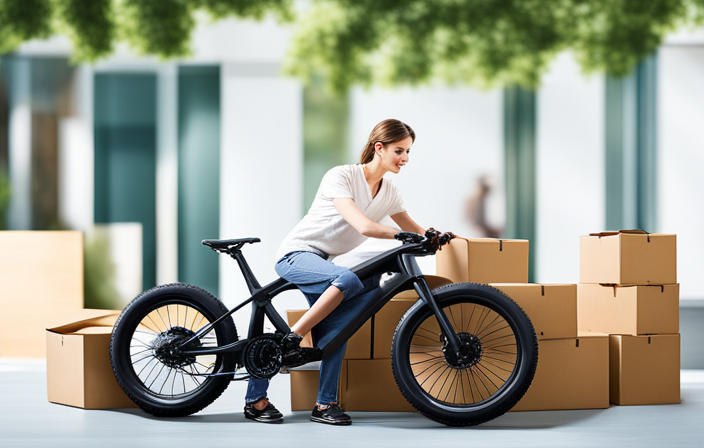
Electric bike conversion kits offer a great way for people to go green and reduce their carbon footprint while still enjoying the thrill of biking. Plus, converting your regular bicycle into an electric one is much more affordable than buying a new e-bike from scratch!
In this article, I will explain how easy it is to convert any existing bicycle into an electric one using an electric bike conversion kit. So let’s get started!
Understanding The Basics Of E-Bike Conversion Kits
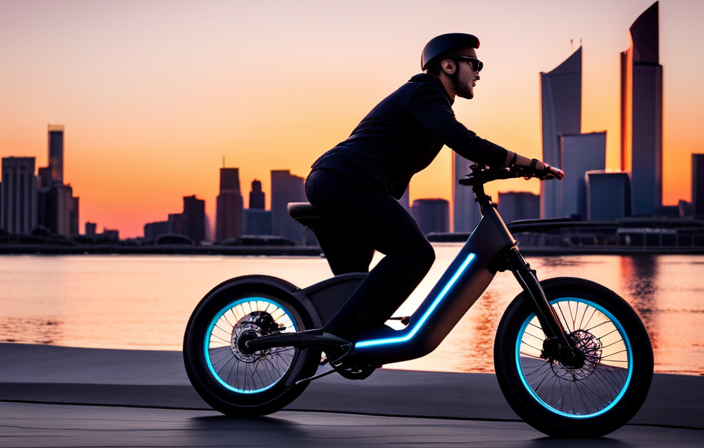
It’s time to get powered up and move with the wind – let’s talk about electric bike conversion kits! Outfitting your regular ride with a motorized boost is an exciting experience, allowing you to enjoy all of your favorite routes while taking it easy on the hills. With so many types of e-bikes out there, understanding the basics before diving into converting your own two-wheeler can make for a seamless process.
At its core, a conversion kit contains three essential components: a battery pack, controller unit, and motor. Choosing one that best fits the power requirements of your bike will ensure smooth sailing down those winding roads. Different bikes require different levels of wattage depending on weight capacity and terrain preferences; some are built more for climbing than speed or vice versa. Additionally, certain motors may be better suited for particular e-bike styles like city commuting versus off roading adventures.
The possibilities are endless once you have a good grasp on how much power you need and what type of cycling style works best for you – from beach cruisers to mountain bikes, any kind of rig can become motorized in no time when using the right conversion kit!
So let’s keep going and explore what type of motor would be ideal for powering up your specific set of wheels depending on the terrain you plan on riding on, as well as the speed you would like to achieve. For a beach cruiser, a smaller motor such as a 250W-500W hub motor will give you the power you need to cruise around, while a larger motor such as a 1000W motor will provide more torque and speed, perfect for tackling more challenging terrain.
Choosing The Right Motor For Your Bike
I’m here to help you choose the right motor for your bike.
You’ll want to consider the size of the motor and the power it offers.
A bigger motor can provide more speed, so if that’s important to you, you’ll want to go with a larger motor.
But if you’re looking for a more gentle ride, a smaller motor may be a better option.
Motor Size
When it comes to choosing the right motor for your electric bike conversion kit, there’s no one-size-fits-all solution. It all depends on what you’re looking for in terms of power output and battery life.
The first thing I’d recommend is getting a good understanding of motor sizes available to you. You’ll find motors ranging from 250W up to 2000W and beyond!
To give you an idea, a 250W motor will get you around 15 mph and provide decent torque while 2500W could take you above 40mph with ease – but at the cost of reduced battery life. If speed isn’t as important to you then going with something lower can be beneficial since it won’t drain your battery so quickly.
Ultimately, each rider has different needs and preferences when it comes to selecting the right motor size for their electric bike conversion kit so make sure to do your research before jumping into anything.
Motor Power
When it comes to motor power, it’s important to choose the right size for your electric bike conversion kit.
A 250W motor will provide decent torque and get you around 15mph – but if speed is more important then going with something a bit higher can be beneficial.
On the other hand, getting too powerful of a motor could drain your battery capacity quickly, so finding the perfect balance between power ratings and battery life is key!
It’s also helpful to look at reviews from people who have already done conversions similar to yours as they might be able to offer some insight into what worked best for them.
Ultimately, selecting the right motor for your setup depends on your individual needs and preferences; just make sure not to rush into anything without doing adequate research first!
Selecting The Appropriate Battery
When choosing a battery for your electric bike conversion kit, there are many factors to consider. It’s important to compare different types of batteries and find the one that is best suited for you.
The two main features to look at when making your comparison is battery lifespan and capacity. The lifespan of a battery will depend on how often it’s used, as well as other environmental conditions such as temperature and humidity. Capacity also plays an important role in determining which type of battery is right for you. A higher capacity means more power available for longer rides or faster speeds.
In addition to these two features, be sure to check out any safety labels attached to the battery before purchasing it – this can help ensure that your new electric bike conversion kit provides maximum performance while still keeping you safe!
With all these considerations taken into account, selecting the appropriate battery should now be much easier—allowing you to confidently move forward with installing the motor and battery onto your bike.
Installing The Motor And Battery
Have you ever wondered how to install a motor and battery for an electric bike conversion kit? Now that you have selected the right battery, it’s time to begin installing.
It is important to make sure that you are using proper tools when installing components like a motor and battery for your electric bike conversion kit. Depending on what type of installation you plan on doing, having the correct set of tools will enable you to properly assemble everything needed for your project.
When assembling the motor and battery, be sure to carefully read any instructions provided and follow them accordingly. You may also need additional assistance from someone who has experience with this particular type of installation.
After ensuring all parts have been assembled correctly, use a voltage meter or multimeter to test if the system is working as expected before beginning usage. This step should not be skipped in order to ensure maximum safety while riding your newly converted electric bicycle.
Now that the motor and battery have been installed, it’s time to move onto choosing the right throttle and brake system for your electric bike conversion kit. With so many options available these days, selecting one can seem overwhelming at first – luckily we’ll soon break down exactly which ones are best suited for different types of rides!
Choosing The Right Throttle And Brake System
When it comes to electric bike conversion kits, the throttle and brake systems are essential for a successful build. I strongly recommend that you choose these components carefully and consider your own skill level when making decisions.
When choosing a throttle system, identify what type of power levels you need in order to get the results you desire. For instance, if you plan on riding off-road then more powerful motors will be needed compared to those used for flat terrain rides. Consider also how much speed control is necessary as this varies from rider to rider depending upon their experience or preferences.
The same goes for brakes – decide which type works best with your frame and individual needs so that they provide reliable stopping power while ensuring maximum safety during use.
The right combination of both throttle and brake systems can give riders greater confidence in knowing that they have full control over their bikes at all times.
Matching The Motor To The Wheels
When it comes to electric bike conversion, power sizing and wheel compatibility are two factors you must consider. Did you know that the average motor size for an e-bike is 250-500 watts? This means a lot of power can be delivered in small packages. It’s important to choose your motor based on the desired speed and range of your new ride.
Here are some key points to remember when matching the motor to the wheels:
- Make sure your chosen motor fits within the frame dimensions or space available for mounting;
- Ensure that your motor has enough torque and wattage to handle hills and other obstacles;
- Consider how much weight the motor needs to support;
- Check if the rear hub axle width (100mm/135mm) matches with your current wheelset.
To make sure you get everything right, take measurements of all relevant parts before buying anything – this will help prevent any unpleasant surprises later down the line.
The next step is purchasing a compatible charger which should match both your battery type and amperage output.
Purchasing The Right Charger
As you start shopping for a charger, the first thing to consider is what type of battery you are working with. The two main rechargeable types are lithium and NiMH batteries. Each of these has its own set of features that might be suitable for your electric bike conversion kit needs.
The next factor to keep in mind when selecting a charger is the number of charging ports available on it. A single port will allow you to charge one battery at a time, while multiple ports can help speed up the process by allowing simultaneous charges.
It’s also important to look out for additional features such as temperature control, USB output, and overcharge protection. These extra functions can come in handy if something goes wrong during charging or if you need to power other devices along with your batteries.
Finally, make sure you read customer reviews before making any decisions about which charger is right for you. This will give you an insight into how well each product works and whether there have been any issues reported by previous users. Taking the time to do this research now could save you from encountering problems down the line!
With all these factors considered, it’s time to move onto installing the controller – another crucial component of an effective electric bike conversion kit setup.
Installing The Controller
When it comes to choosing an appropriate controller for your electric bike conversion kit, make sure it has the proper wattage and amperage for your needs.
Mounting the controller is a critical step, so be sure to take your time and secure it firmly to the frame. I recommend using zip ties for added security and peace of mind.
Don’t forget to also connect the motor to the controller – I suggest double checking the connections are secure before you hit the road.
Choosing An Appropriate Controller
When it comes to installing your electric bike conversion kit, choosing an appropriate controller is one of the most important decisions you’ll make.
As an expert in this field, I recommend considering the specs and power output of your desired controller before making a choice. This will ensure that your motor receives the right amount of current to reach its peak performance while keeping you safe from any unexpected surges or drops in voltage.
When selecting a controller for your e-bike conversion kit, look out for features like adjustable speed limit settings, cruise control functions and soft start capabilities which can add convenience and safety on longer rides.
It’s also important to consider the maximum amperage rating and wattage output as these values affect how powerful your motor can be driven – too low and you won’t achieve optimal performance; too high and potential damage may occur.
Ultimately, picking the best controller for your setup requires careful research into all available options – but if done correctly, it should provide everything necessary for smooth sailing during future rides!
Mounting The Controller
Now that you’ve chosen the right controller for your electric bike conversion kit, it’s time to move onto mounting.
Securing components is key here as an incorrectly placed or loosely mounted component can lead to instability and power issues during use – so do take care when positioning them in place.
I recommend using appropriate bolts and screws along with threadlocker where necessary for a secure fit; this will ensure reliable performance over longer rides.
Additionally, look out for programming options which allow you to customize the behavior of your motor – these are especially useful if you want precise control over its speed and acceleration outputs.
All in all, this step is just as important as picking the right controller, so make sure to give it due attention before continuing on!
Connecting All The Wiring
As the saying goes, ‘The devil is in the details.’ This rings true when it comes to electric bike conversion kit installation. Connecting all of the wiring can be a tricky task, but with proper soldering techniques and following the right wiring diagrams, you’ll have your new e-bike up and running in no time.
One crucial part of connecting all of the wiring is making sure that each wire connects securely to its designated port on both controller and battery pack. It’s important not to rush through this step—take your time and make sure everything is connected properly according to the instructions.
If needed, double check each connection point after soldering for extra peace of mind.
Once you’ve secured all connections between the controller and battery pack, turn on the power switch and test out your setup! With any luck, you should have a fully functional e-bike ready for action.
Next up will be setting up the display so that you can easily monitor speed, throttle position, etc., while riding.
Setting Up The Display
Installing the display for your electric bike conversion kit is a crucial step in ensuring that you have everything set up correctly. It’s important to make sure all of the components are properly selected, as this will help ensure that they fit together and function as intended.
When mounting the display, it should be done securely so that it won’t move around or come loose during use. Make sure to check the manufacturer’s instructions when attaching the bracket and any other parts needed to secure the display in place.
Once you’ve got everything installed, it’s time to check your wiring connections. Look at every connection point carefully, from where each wire connects with another component, down to where those wires connect into the main power source. This can help you identify if there might be an issue before you run into trouble later on.
Additionally, make sure all cables are tucked away neatly so nothing gets caught or damaged while riding or storing the bike between rides.
Now that everything has been checked and double-checked for accuracy and safety, you’re ready to move onto ensuring proper alignment of your new electric bike conversion kit system. With correct positioning of all components and well-placed cables throughout your setup, you’ll have confidence knowing you took extra care in assembling your motorized ride!
Ensuring Proper Alignment
Aligning the electric bike conversion kit components is a critical part of the installation process. Setting tolerances and troubleshooting any issues that arise can be daunting if you don’t know what to look for, but it needn’t be overwhelming.
Here are four steps you should take when aligning your e-bike parts:
- Check all connections before starting the alignment process.
- Make sure fasteners are torqued properly and all threads are free of debris or damage.
- Align the motor sprocket with the rear wheel sprocket using a straightedge as a reference point.
- Use shims or spacers to adjust chain tension while maintaining proper gear alignment.
Focusing on these key elements will help ensure that everything fits together correctly during assembly. With attention to detail and an understanding of how things work, you’ll have your system up and running in no time!
Now let’s move on to testing the system for optimal performance…
Testing The System
I’m excited to talk about testing your electric bike conversion kit. Before you go out and ride, it’s important to test the system to make sure everything is running correctly.
When troubleshooting issues, be patient and take it step by step. Start with a quick visual inspection of all components, checking for any damage or loose connections. Make sure that each component is securely connected to its respective part in the kit – bolts should be tight and wires should not be frayed.
Once you’ve done this initial checkup, start up the engine and let it run at idle speed for a few minutes before revving it up. As you do this, pay close attention to how well the clutch engages and disengages when shifting gears. If you’re having trouble with gear shifts, now would be an ideal time to adjust them until they feel smooth and responsive. This can help prevent any major problems from arising during use down the line.
When evaluating performance benefits comparison between your standard bicycle and e-bike setup, there are several things to consider; such as battery life, distance traveled per charge, motor power output, etc.. It’s essential that these features match your riding style so you can get maximum value out of your investment – something worth taking into consideration if you plan on using your e-bike regularly!
Taking all these elements into account will ensure optimal satisfaction with your new set up. Ready to optimize your e-bike? Let’s dive right in!
Optimizing Your E-Bike
Now that you have completed the testing process for your e-bike conversion kit, it’s time to optimize its performance and enhance its range. Here are some tips on how to get the most out of your new electric bike:
- Make sure all components such as battery, motor controller, and throttle are properly connected with no loose wires or connections.
- Regularly check tire pressure to ensure maximum efficiency. Pump up tires when they start getting low in order to reduce rolling resistance and increase power output from the motor.
- Ensure proper lubrication of chain links as well as sprockets so that there is minimal friction while pedaling or accelerating which can cause strain on motors and battery systems resulting in reduced overall range capability.
By following these simple steps, you can improve the performance of your e-bike conversion kit and extend its range significantly!
Now let’s move onto safety tips for e-bike riders so you can enjoy a safe riding experience.
Safety Tips For E-Bike Riders
Riding an electric bike conversion kit can be a lot of fun, but it is important to keep safety in mind. Many people are hesitant to get started due to the perceived risk associated with riding one, but the truth is that your chances of getting into an accident drastically decrease when you understand and follow basic safety tips and regulations.
One way to stay safe while riding your e-bike is by familiarizing yourself with local laws regarding bikes on public roads. Different areas have different rules about where and how fast you can ride so make sure you’re aware of any restrictions before hitting the road.
Additionally, even if biking on private property there may still be some restrictive regulations or special considerations for motorized vehicles so always check first!
Finally, being prepared for emergencies should also be part of every rider’s routine. Make sure you know what type of terrain you will encounter during your adventure, carry appropriate gear like spare parts, a toolkit, water bottles and energy snacks as well as having access to emergency contact information and/or location tracking devices (like cell phones).
By taking these precautions beforehand, riders can feel more confident when they hit the trails knowing they have taken steps towards their own personal safety. Armed with this knowledge, electric bike owners are ready to take control of their rides and explore new horizons.
Maintaining Your E-Bike Conversion Kit
Maintaining your e-bike conversion kit is essential for making sure you get the most out of it. Uphill climbs can be a challenge, even with an electric assist motor, so regular maintenance will keep you in good shape for those routes. When commuting around town, the last thing you want to worry about is whether or not your bike is running smoothly – and that’s why checking up on your kit regularly is key!
The first step when maintaining your e-bike conversion kit is to check all hardware connections to ensure they are tight and secure. This includes bolts, nuts, screws and any other mounting components. Make sure there’s no rust build-up either as this could cause dangerous malfunctions while riding.
Additionally, inspect the wiring system closely looking out for exposed electrical contacts which should be kept clean at all times.
Finally, look over your brakes carefully before heading off on any ride to make sure they’re working correctly. Check brake pads too if necessary; replace them once they become worn down as this will give you better stopping power. Inspect cables and housing for signs of wear and tear or damage as well since these parts are crucial for keeping you safe on the road or trail.
By taking care of your electric bike conversion kit now, you’ll have peace of mind knowing that you’re ready for whatever comes next!
Frequently Asked Questions
How Long Does It Take To Install An Electric Bike Conversion Kit?
Installing an electric bike conversion kit can be done quickly, depending on your battery and motor power choices.
If you have already decided on the battery and motor to use for your e-bike, expect a two-hour installation process at most.
You’ll need some basic knowledge about wiring if you want to do it yourself, so having an expert technician help out is always recommended.
Choosing the right combination of batteries and motors will make sure that your electric bike works optimally in any situation – making the installation time worth the effort!
How Much Does An Electric Bike Conversion Kit Typically Cost?
Installing an electric bike conversion kit can be a great way to make biking more enjoyable, and the cost typically ranges from around $200 to upwards of $2,000.
Whether you are looking for DIY tips or need help with selecting the right battery size, there is an option out there that will fit your budget.
From mid-level kits offering decent performance at reasonable prices to high-end sets boasting long-distance ranges, I’m here to provide some expert advice on finding the best electric bike conversion kit for your needs – no matter how much it costs!
Does An Electric Bike Conversion Kit Require Special Tools?
No, an electric bike conversion kit does not require special tools to install! In most cases, a DIY installation is possible with the help of basic tools such as screwdrivers and wrenches.
However, if you’re feeling uncertain about your skills or lack some essential knowledge for a successful build, you may want to consider taking it to a local shop that specializes in electric bikes.
Additionally, when selecting a battery for your conversion kit, make sure you buy one that has enough volts and amperage to meet your needs.
Doing so will ensure that your bike runs efficiently and safely.
How Do I Know If My Bike Is Compatible With An Electric Bike Conversion Kit?
Figuring out if your bike is compatible with an electric bike conversion kit is actually quite straightforward.
First, check the motor power of the kit you’re considering – it should be lower than the wattage of your existing bicycle engine.
Secondly, make sure that the battery size matches up with your frame; this will ensure that everything fits snugly and securely on your bike for optimal performance.
Finally, double-check to see if any special tools are needed to install the kit; most kits don’t require anything besides a few basic tools like screwdrivers or wrenches.
Once you’ve checked all these boxes, you can confidently purchase a kit knowing that it’ll work well with your current setup!
Is It Possible To Use A Regular Bike As An Electric Bike With A Conversion Kit?
Yes, it is possible to use a regular bike as an electric bike with a conversion kit.
All you need is the right power source and battery capacity for your needs.
With so many different types of kits available, finding the one that fits your budget and lifestyle can be tricky.
That’s why I’m here to help! As an expert in electric bike conversions, I have years of experience helping people get their bikes up and running quickly and easily.
Let me show you how easy it is to turn your regular bike into an electric one today!
Conclusion
Installing an electric bike conversion kit can be a great way to get the most out of your existing bicycle. With just a few simple steps, you can transform it into an eco-friendly ride with more power and speed than ever before – almost like magic!
And even though there are some costs associated with buying and installing a conversion kit, it’s still well worth it in the long run for all the amazing benefits that come along with owning an ebike.
So if you’re looking for a thrilling way to revolutionize your cycling experience, look no further than an electric bike conversion kit!