Connect with us

Electric Bike

How Long Can You Ride An Electric Bike

Published

on

An image showcasing an expansive coastal road, winding through lush green forests, with a lone rider on an electric bike effortlessly gliding along, capturing the boundless freedom and endurance of electric bike rides

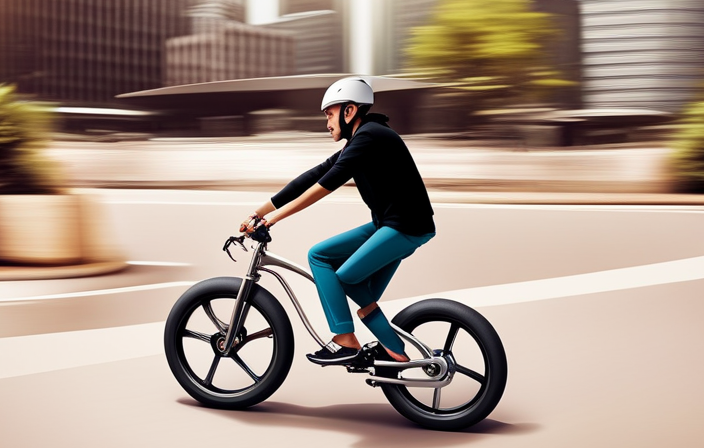
Did you know that the average electric bike can cover a distance of up to 50 miles on a single charge? That’s an impressive range that can take you on exciting adventures without worrying about running out of battery.

In this article, I will delve into the factors that determine how long you can ride an electric bike, such as battery capacity, riding conditions, and your own weight and fitness level.

Get ready to maximize your e-bike experience and explore new horizons.

Contents

Key Takeaways

  • Battery capacity and charging time determine the range of an electric bike.
  • Pedal-assist bikes extend battery life and offer a natural riding experience, while throttle-controlled bikes provide instant acceleration but drain the battery faster.
  • Terrain and riding conditions, such as uphill challenges and off-road trails, can impact battery life.
  • Rider’s weight and fitness level, as well as riding style and speed, also affect the range of an electric bike.

Understanding the Battery Capacity

The battery capacity determines how long you can ride an electric bike. It is essentially the amount of energy that the battery can store, which directly impacts the battery life. The higher the battery capacity, the longer you can ride before needing to recharge.

Advertisement

Charging duration is another important factor to consider. Some batteries can be fully charged in just a few hours, while others may take longer. It’s important to know the charging time of your battery so that you can plan your rides accordingly.

Now, let’s move on to the next section where we will discuss the difference between pedal-assist and throttle-controlled bikes.

Pedal-Assist vs. Throttle-Controlled Bikes

When it comes to pedal-assist vs. throttle-controlled bikes, you can go for a ride. These two types of electric bikes offer different ways to experience the thrill of riding.

With pedal-assist bikes, the motor provides assistance as you pedal, making it feel like you have supercharged legs. This not only extends the battery life but also allows for a more natural and intuitive riding experience.

On the other hand, throttle-controlled bikes let you control the speed with a twist of the throttle, similar to a motorcycle. While this offers instant acceleration and requires less effort, it can drain the battery faster due to the constant use of the motor. Therefore, it’s important to consider the battery life comparison and motor power efficiency when choosing between the two.

Advertisement

Speaking of which, terrain and riding conditions play a crucial role in determining how long you can ride an electric bike.

Terrain and Riding Conditions

To get the most out of your e-bike, consider the type of terrain and riding conditions you’ll be facing. This will help you optimize your battery life and range. Here are three important factors to keep in mind:

  1. Uphill Challenges: Riding on steep inclines requires more power from the motor, draining the battery faster. Make sure your e-bike has enough torque to handle uphill climbs effectively.

  2. Off-Road Adventures: If you enjoy off-road trails or rough terrains, opt for an e-bike with a robust suspension system. This will provide a smoother ride and reduce the impact on your battery.

  3. City Commutes: Riding in urban areas with frequent stops and starts can drain your battery quickly. Consider a pedal-assist e-bike that allows you to contribute to the power and extend your range.

Considering these terrain and riding conditions will help you optimize your e-bike’s battery life and range.

Advertisement

Moving on to the next section, let’s discuss how your weight and fitness level can impact your ride.

Rider’s Weight and Fitness Level

When it comes to electric bikes, understanding how rider weight affects range is crucial. The heavier the rider, the more power the motor needs to exert, which can decrease the overall range of the bike.

Additionally, fitness level plays a role in the amount of pedaling assistance needed. A rider who is less fit may rely more on the motor, while a fitter rider may require less assistance.

To maximize range based on weight and fitness level, it’s important to find a balance between using the motor and pedaling, and to consider choosing a higher capacity battery if necessary.

How rider weight affects range

Rider weight significantly affects the range of an electric bike. The battery capacity of an electric bike determines how far it can go on a single charge. Heavier riders put more strain on the battery, causing it to drain faster and reducing the overall range.

Advertisement

Additionally, the terrain plays a crucial role in determining the range. Uphill climbs require more power from the motor, which in turn drains the battery at a faster rate. On the other hand, riding on flat terrain or downhill requires less power, allowing the battery to last longer.

It’s important to consider these factors when choosing an electric bike, as a heavier rider or hilly terrain may require a bike with a larger battery capacity.

Moving on to the next topic, a rider’s fitness level and the amount of pedaling assistance needed can also impact the range of an electric bike.

Fitness level and the amount of pedaling assistance needed

Your fitness level and how much assistance you need while pedaling can impact the range of an e-bike. When it comes to battery life and energy consumption, the more you rely on the motor for assistance, the quicker the battery will drain. If you have a lower fitness level and require more assistance, you may find that your e-bike’s range is reduced. This is because the motor consumes more energy to provide the necessary assistance.

On the other hand, if you have a higher fitness level and require less assistance, you can expect a longer range as the motor consumes less energy. To maximize your range based on weight and fitness level, there are some tips to keep in mind.

Advertisement

[Transition into the subsequent section about ‘tips for maximizing range based on weight and fitness level’.]

Tips for maximizing range based on weight and fitness level

To get the most out of your e-bike’s range, it’s helpful to consider your weight and fitness level. Your weight plays a significant role in determining how far your electric bike can take you. The heavier you are, the more strain you put on the battery, which can result in reduced range. Therefore, it’s important to maintain a healthy weight to maximize your e-bike’s range.

Additionally, your fitness level affects the amount of pedaling assistance needed. If you’re in good shape, you can pedal more and rely less on the motor, which can help conserve battery power.

When it comes to battery maintenance, make sure to follow the manufacturer’s guidelines for charging methods. Properly charging your e-bike’s battery will not only extend its lifespan but also ensure optimal performance.

By considering your weight, fitness level, and following proper battery maintenance, you can make the most of your e-bike’s range.

Advertisement

Now let’s delve into the next section about riding style and speed.

Riding Style and Speed

When it comes to riding an electric bike, your riding style and speed can have a significant impact on the range you can achieve.

Riding at higher speeds can decrease your range, as the motor has to work harder to maintain that speed.

Additionally, frequent starts and stops can also decrease your range, as each time you stop and start again, the motor has to work harder to get you back up to speed.

To optimize your riding style and increase your range, it is best to maintain a consistent speed and avoid unnecessary stops and starts.

Advertisement

Additionally, using pedal-assist mode can help conserve battery power and extend your range even further.

Impact of riding at higher speeds on range

If you ride an electric bike at higher speeds, you’ll notice a decrease in your overall range. This is because riding at higher speeds consumes more battery power, resulting in reduced battery efficiency. When you ride faster, the motor needs to work harder to maintain the speed, which uses up more energy from the battery.

Additionally, the impact of wind resistance becomes more significant as you increase your speed. The faster you go, the greater the resistance you encounter, which further drains the battery. It’s essential to keep in mind that riding at higher speeds can significantly affect your electric bike’s range.

Moving on to the next section about how frequent starts and stops affect range, it’s important to consider how these actions can impact the overall efficiency of your electric bike.

How frequent starts and stops affect range

Frequent starts and stops can have an impact on the overall range of an e-bike. When you constantly accelerate and brake, it puts a strain on the battery, causing it to drain faster. The more often you start and stop, the more energy is wasted, resulting in a shorter battery range.

Advertisement

Additionally, the constant acceleration and deceleration require more power from the motor, which further reduces the range. To maximize your battery range, it is important to minimize the number of starts and stops during your ride. Instead, try to maintain a steady pace and anticipate traffic flow to avoid unnecessary braking.

By doing so, you can extend the distance you can ride on a single charge and reduce the frequency of charging.

Now let’s delve into some tips to optimize your riding style and increase your e-bike’s range.

Tips for optimizing riding style to increase range

When it comes to maximizing the range of an electric bike, it’s not just about the bike itself, but also about the way you ride it. One of the key factors in increasing range is optimizing your riding style. By implementing some simple techniques, you can conserve energy and extend the life of your battery.

One important aspect is maintaining a steady pace and avoiding frequent starts and stops, as mentioned in the previous section. Additionally, there are other energy-saving techniques you can employ, such as using lower levels of assistance when pedaling, avoiding excessive use of throttle, and taking advantage of regenerative braking whenever possible. These practices not only save energy but also contribute to a smoother and more enjoyable ride.

Advertisement

Now that we’ve covered optimizing riding style, let’s move on to the next section about bike maintenance and efficiency.

Bike Maintenance and Efficiency

You can maximize your electric bike’s efficiency through regular maintenance. Here are three key aspects to consider for bike maintenance and efficiency:

  1. Battery Maintenance: Ensure your battery is in good condition by keeping it clean and free of debris. Regularly check for any signs of damage or wear, such as cracked casing or loose connections. It’s also important to charge your battery properly, following the manufacturer’s guidelines, to maintain its performance and longevity.

  2. Increasing Efficiency: Keep your tires properly inflated to reduce rolling resistance and improve efficiency. Regularly clean and lubricate the chain to minimize friction and ensure smooth pedaling. Adjust your bike’s gears and brakes to optimize performance and reduce energy consumption.

  3. Regular Check-ups: Schedule routine check-ups with a qualified technician to inspect your bike’s components and ensure everything is functioning optimally. They can identify any potential issues before they become major problems, saving you time and money in the long run.

By maintaining your electric bike effectively, you can maximize its efficiency and extend its battery life.

Transitioning into the subsequent section about ‘battery management and charging’, it’s also crucial to understand the importance of proper battery management and charging techniques.

Battery Management and Charging

When it comes to electric bike battery management, there are a few key tips to keep in mind in order to prolong the life of your battery.

Advertisement

It’s important to avoid overcharging or fully draining the battery, as this can lead to decreased performance over time.

Additionally, understanding the charging times and methods specific to your bike model is crucial for efficient charging.

Lastly, planning your rides based on battery life and available charging options can help ensure you always have enough power to get where you need to go.

Tips for proper battery management to prolong battery life

To prolong the battery life of your electric bike, it’s important to follow proper battery management tips. Here are some key tips to help you understand battery maintenance and maximize battery efficiency:

  • Always charge your battery fully before using your electric bike.
  • Avoid leaving your battery fully discharged for extended periods of time.
  • Store your battery in a cool and dry place when not in use.
  • Regularly clean the battery contacts and ensure they are free from dirt and debris.

Understanding these battery management tips will not only help prolong the battery life of your electric bike but also ensure optimal performance.

Now, let’s delve into understanding charging times and methods, which is crucial for maintaining a healthy battery and maximizing your riding experience.

Advertisement

Understanding charging times and methods

To ensure the longevity of your electric bike’s battery, it’s crucial to manage its charging properly. In the previous section, I provided some helpful tips for maximizing battery life. Now, let’s delve into understanding charging times and methods, which are equally important for maintaining your electric bike’s battery health.

When it comes to charging, it’s essential to know the various charging methods available. These methods include standard charging, fast charging, and trickle charging. Each method has its own charging time and impact on battery life. To help you visualize this information, here is a table outlining the different charging methods and their corresponding charging times:

Charging Method Charging Time
Standard Charging 4-6 hours
Fast Charging 1-2 hours
Trickle Charging 10-12 hours

Understanding these charging times can assist you in planning your rides based on battery life and available charging options. So, let’s move on to the next section and explore how to make the most of your electric bike’s battery and available charging options.

How to plan your rides based on battery life and charging options

To effectively plan your rides, take into consideration your battery life and available charging options. Route optimization is key to maximizing your battery life and getting the most out of your electric bike. By planning your route to avoid steep hills and opting for smoother terrain, you can conserve battery power and extend your ride.

Additionally, consider the distance of your ride and the estimated battery life of your bike. This will help you determine if you need to charge during your ride or if you can make it to your destination and back without needing to recharge. Battery maintenance is also important to ensure optimal performance. Regularly check the charge level, clean the contacts, and store the battery properly when not in use.

Advertisement

By following these tips, you can plan your rides effectively and make the most of your electric bike’s battery life.

Looking ahead to the next section about riding with a second battery, having a backup power source can provide peace of mind and allow for longer rides.

Riding with a Second Battery

When it comes to riding with a second battery on an electric bike, there are several benefits to consider.

First and foremost, having a spare battery allows for longer rides without the worry of running out of power.

Additionally, it provides peace of mind knowing that if one battery dies, there is a backup ready to go.

Advertisement

When choosing a second battery, factors such as capacity, weight, and compatibility with the bike should be taken into account.

To switch and charge batteries during longer rides, it is important to have a battery swapping system in place and to plan ahead for charging opportunities along the route.

Benefits of carrying a spare battery

You can ride an electric bike for a longer distance by carrying a spare battery. This is especially useful when you need to go on longer trips or when you want to explore different areas without worrying about running out of power.

Having a second battery gives you the flexibility to extend your ride and enjoy the benefits of electric biking for a longer period of time. It also provides you with range extender options, allowing you to go even further than before.

Additionally, riding in different weather conditions can affect the range of your electric bike. Carrying a spare battery ensures that you will have enough power to overcome any weather-related challenges.

Advertisement

When choosing a second battery, there are several factors to consider, such as battery capacity, weight, and compatibility with your electric bike. Transitioning into the next section about factors to consider when choosing a second battery, it is important to make an informed decision to maximize your riding experience.

Factors to consider when choosing a second battery

When it comes to carrying a spare battery for your electric bike, the benefits are undeniable. Not only does it provide peace of mind knowing you have a backup power source, but it also extends your riding range. However, choosing the right second battery requires careful consideration of various factors. One crucial factor is battery capacity, which determines how long you can ride before needing to recharge. It’s important to choose a second battery with sufficient capacity to meet your riding needs. Additionally, range optimization is another important aspect to consider. Look for batteries that offer efficient power usage and consider factors like terrain and riding style to ensure you get the most out of your battery’s range. By selecting the right second battery, you can enjoy extended rides on your electric bike without worrying about running out of power. Now let’s explore how to switch and charge batteries during longer rides.

How to switch and charge batteries during longer rides

Switching and charging batteries during extended rides is an essential skill for maximizing your electric bike’s range. It allows you to continue your journey without worrying about running out of power. Here are three key tips for effectively switching and charging batteries during longer rides:

  • Plan your route: Before setting out, research places along your route where you can stop and charge your batteries. Look for cafes, rest stops, or charging stations that offer convenient access to power outlets.

  • Carry extra batteries: Having an extra battery or two can significantly extend your riding distance. Make sure to choose batteries that are compatible with your electric bike and are lightweight and easy to carry.

  • Time your battery swaps: Switching batteries during breaks, such as when you stop for a meal or take a rest, is a smart strategy. This way, you can utilize your downtime to charge the depleted battery while enjoying a break.

By mastering the art of switching and charging batteries, you can confidently embark on longer rides knowing that you have the power to keep going.

Now, let’s explore some range extender options for further enhancing your electric bike’s capabilities.

Advertisement

Range Extender Options

If you’re looking to extend the range of your electric bike, there are various options available. One option is to invest in a range extender, which can help you go the extra mile. A range extender is an additional battery pack that can be easily attached to your electric bike. It provides extra power and extends the battery range, allowing you to ride for longer distances without worrying about running out of battery. Another option is to utilize alternative charging methods, such as solar panels or portable power banks, which can be handy when you’re on the go and don’t have access to a traditional power outlet. These methods can help you charge your batteries during longer rides, ensuring you have enough power to reach your destination. Transitioning into the next section about riding in different weather conditions, it’s important to consider how weather can affect the range and performance of your electric bike.

Riding in Different Weather Conditions

When it comes to riding an electric bike in different weather conditions, there are a few key points to consider.

Extreme temperatures can greatly affect battery performance, causing it to drain faster in the cold and overheat in the heat. To maintain range in hot and cold weather, it’s important to take precautions such as keeping the battery insulated or cooled, and avoiding long rides in extreme temperatures.

Additionally, riding in the rain or wet conditions can also impact range, as water can damage the electrical components of the bike. It’s important to take extra care in these conditions and consider waterproof accessories or finding alternative routes to avoid puddles and wet surfaces.

How extreme temperatures affect battery performance

Extreme temperatures can negatively impact the performance of an electric bike’s battery. Battery longevity can be significantly affected by extreme hot or cold weather conditions. Here are some key ways in which extreme temperatures can impact battery life:

Advertisement
  • High temperatures can cause the battery to overheat, leading to a decrease in its overall capacity and efficiency.
  • On the other hand, extremely cold temperatures can cause the battery to lose its charge more quickly, resulting in reduced range and performance.
  • Rapid temperature changes, such as going from extreme heat to extreme cold or vice versa, can also put stress on the battery and affect its long-term durability.

Understanding the impact of extreme temperatures on battery life is crucial for electric bike riders. In the next section, I will provide tips for riding in hot and cold weather to maintain range and optimize battery performance.

Tips for riding in hot and cold weather to maintain range

For optimal range in hot and cold weather, it’s important to follow these tips while riding. First, ensure proper battery maintenance by keeping it charged and storing it in a cool, dry place when not in use. Extreme temperatures can affect battery performance, so avoid exposing your electric bike to direct sunlight or freezing temperatures for extended periods. Secondly, optimize your range by adjusting your riding style and speed. Riding at a moderate pace and avoiding sudden acceleration or braking can help conserve battery power. Additionally, dress appropriately for the weather, wearing layers in cold temperatures and using sunscreen in hot temperatures to stay comfortable. By following these tips, you can maximize your electric bike’s range and enjoy a smooth ride. Speaking of weather conditions, let’s now discuss the impact of rain and wet conditions on range.

Impact of rain and wet conditions on range

Rain and wet conditions can affect the range of an electric bike. When the weather is wet, the tires of the bike can have less grip on the road, which can result in increased rolling resistance. This increased resistance requires the motor to work harder, draining the battery faster and reducing the overall range.

To maintain battery performance in wet conditions, it is important to keep the bike’s tires properly inflated and ensure that the brakes are not dragging. Additionally, regularly cleaning and lubricating the bike’s chain and other moving parts can help to prevent rust and corrosion, which can also impact battery performance.

By following these maintenance tips, riders can help to ensure that their electric bike performs optimally in rainy and wet conditions.

Looking ahead, planning your routes can also be a key factor in maximizing range and overall riding experience.

Advertisement

Planning Your Routes

When it comes to maximizing range on my electric bike, route planning is key. By taking the time to plan my routes in advance, I can ensure that I am taking the most efficient path and avoiding unnecessary detours or uphill climbs that can drain my battery.

To find charging stations along my route, I rely on online maps and apps specifically designed for electric bike users, which provide real-time information on available charging stations nearby.

Additionally, I always consider factors such as traffic congestion and road conditions when choosing a route, as these can greatly impact my battery efficiency.

Importance of route planning for maximizing range

To maximize your range, it’s crucial to plan your route carefully when riding an electric bike. By considering battery management techniques and optimizing charging schedules, you can ensure that your electric bike lasts for a longer distance.

Here are some tips to help you plan your route effectively:

Advertisement
  • Choose routes with fewer inclines to minimize energy consumption.
  • Avoid routes with heavy traffic to maintain a steady speed.
  • Look for routes that offer shade to prevent overheating of the battery.
  • Consider using bike lanes or dedicated cycling paths to avoid obstacles and reduce the risk of accidents.

By following these route planning strategies, you can make the most of your electric bike’s range.

Now, let’s explore how to find charging stations along your route.

How to find charging stations along your route

Finding charging stations along your route is essential for ensuring a smooth journey on your electric bike. To find charging stations, you can use various resources such as electric bike apps, online maps, or even ask local bike shops for recommendations. These tools will provide you with a list of charging stations in your area, allowing you to plan your route accordingly.

Additionally, it’s important to consider alternative charging options, such as coffee shops or restaurants that offer charging facilities. This way, you can enjoy a meal or a quick break while your bike charges.

By finding charging stations and considering alternative options, you can eliminate any range anxiety and enjoy your ride without worrying about running out of battery power.

Now, let’s move on to some tips for choosing efficient routes to conserve battery power.

Advertisement

Tips for choosing efficient routes to conserve battery power

One helpful tip is to plan your route strategically to save battery power. This can be done by finding alternative charging options along your route. Look for places like coffee shops, restaurants, or public buildings that offer charging stations for electric bikes. By incorporating these stops into your route, you can ensure that you have access to a charger when needed.

Another tip is to take advantage of the benefits of regenerative braking. This feature allows your electric bike to recharge the battery while you ride by converting the energy from braking into electricity. By utilizing regenerative braking techniques, you can extend the range of your electric bike.

Understanding range estimates is the next step in maximizing your battery power and ensuring a longer ride.

Understanding Range Estimates

When it comes to understanding range estimates for electric bikes, manufacturers determine and advertise these estimates based on various factors such as battery capacity, motor power, and the level of assistance provided.

However, it’s important to keep in mind that real-world factors can impact the actual range you’ll get. Things like terrain, rider weight, wind resistance, and even tire pressure can all affect how far an electric bike can go on a single charge.

Advertisement

To manage and interpret range expectations, it’s helpful to consider these factors and also to ride in an efficient manner by using lower assistance levels when possible and maintaining a steady speed.

How manufacturers determine and advertise range estimates

Manufacturers determine and advertise range estimates based on various factors. Here are three key considerations for battery range estimation:

  1. Battery capacity: The size and quality of the battery directly affect the estimated range. Higher capacity batteries typically provide a longer range before recharging is required.

  2. Riding conditions: Manufacturers consider factors like terrain, speed, and rider weight when estimating range. Uphill rides, higher speeds, and heavier riders can all impact the battery’s performance.

  3. Battery age: As the battery ages, its capacity decreases, leading to a shorter range. Manufacturers take this into account by providing an estimated range based on a new battery, but it’s important to keep in mind that actual range may vary over time.

Understanding these factors helps consumers make informed decisions about electric bikes.

Now, let’s explore the real-world factors that can affect the actual range without taking another step.

Real-world factors that can affect the actual range

Keep in mind that various real-world factors can impact the actual range of an e-bike.

Advertisement

One important factor to consider is battery maintenance. Properly maintaining your e-bike’s battery can help ensure optimal performance and maximize its range. Regularly checking the battery’s charge level, keeping it clean and dry, and charging it according to the manufacturer’s instructions are all essential for maintaining its longevity.

Another factor that can affect the range is the impact of wind. Riding against a strong headwind can significantly reduce the distance you can travel on a single charge, while riding with a tailwind can extend your range. It’s important to be aware of these factors and adjust your expectations accordingly.

Understanding how real-world factors can influence range will help you manage your e-bike’s performance effectively. Now let’s explore some tips for interpreting and managing range expectations.

Tips for interpreting and managing range expectations

When it comes to electric bikes, understanding battery range and managing your expectations is crucial. There are several factors that can affect the actual range of your electric bike, as discussed in the previous subtopic. However, there are tips that can help you interpret and manage your range expectations effectively. To assist you, I have created a table below outlining these tips:

Tips for Interpreting and Managing Range Expectations
1. Familiarize yourself with the bike’s advertised range and understand that real-world conditions may vary.
2. Take into account factors such as terrain, wind, rider weight, and mode of assistance.
3. Plan your routes accordingly, considering charging stations and possible detours.
4. Monitor your battery level and adjust your riding style if needed.

By following these tips, you can make the most of your electric bike’s battery range. Now, let’s explore how to maximize range on your commutes without compromising efficiency.

Advertisement

Maximizing Range on Commutes

To get the most out of your electric bike’s battery on your daily commute, try maintaining a steady speed and avoiding sudden acceleration or braking.

When riding in hilly areas, it’s important to be mindful of how it can impact your bike’s range. Uphill sections require more power, which can drain the battery faster. On the other hand, going downhill can actually help conserve energy as the bike’s motor can recharge the battery.

Another factor to consider is the impact of wind on your bike’s range. Riding against a strong headwind can significantly reduce the distance you can travel on a single charge. To maximize your range, try to ride in sheltered areas or use buildings and trees as windbreaks.

By being mindful of these factors, you can make the most of your electric bike’s battery during your daily commutes. As we move on to the next section about riding in eco mode and power settings, let’s explore how these settings can further optimize your bike’s range.

Riding in Eco Mode and Power Settings

When it comes to maximizing range on my electric bike, I’ve found that the power settings play a crucial role. By adjusting the power settings, I can significantly affect the distance I can ride on a single charge.

Advertisement

Riding in eco mode, for instance, can provide me with a longer range, as it conserves battery power by reducing the motor assistance. However, it’s important to note that there are limitations to riding in eco mode, such as decreased speed and less assistance on steep hills.

To maximize my range, I’ve learned to find a balance by adjusting the power settings based on the terrain and my energy level, ensuring I get the most out of my electric bike.

Effects of different power settings on range

The range of an electric bike can vary depending on the power setting chosen. Higher power settings consume more energy and can reduce the range of the bike. Riding on hilly or uneven terrains requires more power and can decrease the range. Aggressive acceleration and frequent use of the motor can drain the battery faster. The amount of support provided by the motor affects the energy consumption and subsequently the range.

Considering these factors, it is important to choose the right power setting to optimize your electric bike’s range. Now, let’s explore the benefits and limitations of riding in eco mode.

Benefits and limitations of riding in eco mode

One advantage of using eco mode is that it can extend your battery life. Eco mode is designed to optimize battery efficiency by reducing the power output of the electric motor. This means that you can ride for longer distances before needing to recharge.

Advertisement

Additionally, riding in eco mode can have a positive impact on your range, especially when you encounter hilly or challenging terrain. By reducing the power output, the motor is able to conserve energy and provide a more consistent and balanced ride. However, it’s important to note that riding in eco mode may result in a slightly slower speed compared to higher power settings.

Nonetheless, the benefits of extended battery life and improved range make eco mode a valuable option for electric bike riders. When it comes to maximizing range, there are a few tips for adjusting power settings that can further enhance your riding experience.

Tips for adjusting power settings to maximize range

To get the most out of your e-bike’s battery, try adjusting the power settings to maximize your range. Maximizing efficiency is key when it comes to extending the distance you can ride on a single charge. Here are three tips for adjusting power modes to maximize efficiency:

  1. Start in eco mode: This power setting provides the least amount of assistance, but it also consumes the least amount of energy. By starting in eco mode, you can conserve battery power for when you really need it.

  2. Gradually increase power: As you ride, gradually increase the power mode to a higher setting when you encounter inclines or headwinds. This way, you can utilize the assistance of the e-bike without draining the battery too quickly.

  3. Use pedal assist wisely: Rather than relying solely on throttle mode, utilize the pedal assist feature. This not only helps you get more exercise, but it also maximizes the efficiency of the battery.

By adjusting power settings to maximize efficiency, you can extend the range of your e-bike.

In the next section, we will discuss additional tips for extending range on long-distance rides.

Advertisement

Tips for Extending Range on Long-Distance Rides

If you’re looking to extend the range on long-distance rides, there are a few tips you can follow.

First and foremost, maximizing battery life is crucial. One way to do this is by conserving energy during uphill climbs. When facing a steep incline, it’s important to use the appropriate power setting. Opt for a lower level of assistance to conserve energy and prevent draining the battery too quickly.

Additionally, maintaining a steady and consistent pace can help conserve energy and extend your range. Avoid sudden accelerations or decelerations, as these can drain the battery faster.

Another tip is to plan your route carefully, avoiding unnecessary detours or hilly terrains whenever possible.

By following these tips, you can make the most out of your electric bike’s range on long-distance rides.

Advertisement

Frequently Asked Questions

Are electric bikes suitable for all ages and fitness levels?

Electric bikes are suitable for all ages and fitness levels. They offer a great solution for commuting and provide numerous health benefits. Whether you’re young or old, fit or not, electric bikes can be enjoyed by everyone.

Can electric bikes be used for off-road trails and mountain biking?

To find the truth, I investigated whether electric bikes can handle off-road trails and mountain biking. To ensure a smooth ride, proper electric bike maintenance is crucial, as is choosing the right electric bike for these challenging terrains.

How long does it take to charge an electric bike battery fully?

It typically takes about 4-6 hours to fully charge an electric bike battery. The charging time may vary depending on the specific model and battery capacity. It’s important to note that the battery life can vary depending on factors such as terrain, rider weight, and assist level used.

Is it possible to ride an electric bike without any pedal assistance?

Yes, it is possible to ride an electric bike without any pedal assistance. However, utilizing pedal assistance offers numerous benefits such as increased range, improved exercise, and the ability to tackle challenging terrains more easily using different riding techniques.

Can electric bikes be ridden in heavy rain or snow?

Electric bikes can be ridden in heavy rain or snow, but there are pros and cons. The bike’s electrical components may be affected, but with proper maintenance and protection, riding in extreme weather conditions can still be possible and enjoyable.

Advertisement

Conclusion

In conclusion, riding an electric bike offers a world of possibilities. With the right understanding of battery capacity, choosing the right bike model, and considering terrain and riding conditions, riders can maximize the range of their electric bike. Taking into account factors such as rider’s weight and fitness level, riding style, and speed also plays a role in extending the range.

By riding in eco mode and using power settings wisely, riders can conserve battery power and enjoy longer rides. Additionally, following tips for extending range on long-distance rides, such as maintaining a steady speed and avoiding excessive acceleration or braking, can help riders go even further.

So, hop on your electric bike and let the coincidences of technology and human ability take you on an exhilarating journey.

Ralf is a devoted husband and father who loves spending time with his family. He enjoys riding his bicycle as much as possible, and takes every opportunity he can to get out on the open road. Ralf is a kind and gentle person who wants only the best for those around him.

Continue Reading
Advertisement

Electric Bike

How To Turn On Ancheer Electric Bike

Published

on

By

An image showcasing a person wearing a helmet, mounting their Ancheer Electric Bike, firmly holding the handlebars, effortlessly flipping the power switch, and confidently gliding away amidst a scenic backdrop

As I grip the smooth handlebars of my Ancheer electric bike, I feel a rush of excitement. With just a push of a button, I am whisked away into a realm of easy movement and exhilarating velocity.

In this article, I will guide you through the intricacies of turning on your own Ancheer electric bike. From checking the battery level to engaging the throttle, each step will be explained in detail, empowering you to embark on thrilling adventures with ease.

Let’s dive in and unlock the power of your Ancheer electric bike!

Key Takeaways

  • Press the power button to check the battery level.
  • Locate the power button on the Ancheer e-bike to turn it on.
  • Press and hold the power button to activate the bike’s power system and access additional features.
  • Check the battery indicator light on the handlebar console to determine the battery level.

Check the Battery Level

Check the battery level by pressing the power button on the Ancheer electric bike. This step is crucial to ensure that the bike has enough power for your ride.

Advertisement

The battery level is displayed on the bike’s control panel, indicating the percentage of charge remaining. If the battery level is low, you may need to charge it before starting your ride. Simply connect the charger to the battery and plug it into a power source.

In case the battery needs replacement, consult the user manual or contact Ancheer customer support for assistance.

Now that you have checked the battery level, let’s move on to the next step and locate the power button on the bike.

Locate the Power Button

Locating the power button on your Ancheer e-bike is easy. Once you have found it, you can perform various functions with it.

Here are three important things you can do with the power button:

Advertisement
  1. How to troubleshoot power button issues: If you encounter any problems with the power button, such as it not turning on or not functioning properly, check the connections and ensure that the battery is charged. If the issue persists, consult the user manual or contact Ancheer customer support for assistance.

  2. How to turn off the Ancheer electric bike: To turn off the bike, press and hold the power button for a few seconds until the display turns off. This will conserve battery power and ensure that the bike is completely powered down.

  3. How to turn on the Ancheer electric bike: To turn on the bike, simply press the power button once. You should see the display light up, indicating that the bike is ready to use.

Now that you know how to locate and operate the power button, let’s move on to the next step of pressing and holding the power button for other functions.

Press and Hold the Power Button

Press and hold the power button to access additional features and settings on your Ancheer e-bike. The power button is usually located on the handlebar or the control panel of the bike.

When you press and hold the power button, you activate the bike’s power system and turn it on. This allows you to start using the bike and take advantage of its electric assistance.

Advertisement

The power button is a crucial component of the bike, as it is responsible for turning the bike on and off. Once you have pressed and held the power button, you can then look for the battery indicator light, which will show you the current battery level of the bike.

This is important information to have, as it will let you know when it’s time to recharge the battery.

Look for the Battery Indicator Light

To find out the current battery level of your Ancheer e-bike, simply take a quick glance at the battery indicator light. It is located on the handlebar console and consists of a series of LED lights that indicate the remaining charge in your bike’s battery. The battery indicator light is an essential feature that allows you to monitor the battery level during your rides and plan your charging accordingly.

Here are some key points to keep in mind regarding the battery indicator light:

  • Green light: Indicates a full or almost full battery charge.
  • Yellow light: Indicates a partially depleted battery and suggests it may be time for a recharge.
  • Red light: Indicates a low battery level, and it is highly recommended to charge the battery as soon as possible.

Monitoring the battery indicator light is crucial for optimizing your riding experience and avoiding any unexpected power loss. Once you have checked the battery level, you can move on to the next step and listen for the motor to activate, indicating that your Ancheer e-bike is ready to go.

Listen for the Motor to Activate

Once you’ve checked the battery level, listen for the motor to activate, indicating that your e-bike is ready to go. Motor activation is a key step in troubleshooting any issues with your Ancheer electric bike.

Advertisement

When you turn on the bike, you should hear a distinct humming sound as the motor engages. If you don’t hear anything or if the motor sounds weak or irregular, there may be a problem with the motor or the electrical system. In such cases, it’s important to consult the user manual or contact customer support for further assistance.

Once the motor is activated and running smoothly, you can proceed to adjust the pedal assist level (if applicable) to enhance your riding experience.

Adjust the Pedal Assist Level (if applicable)

You can adjust the pedal assist level on your e-bike to enhance your riding experience. Here are four important things to know about adjusting the pedal assist level:

  1. Pedal resistance: The pedal assist level determines the amount of assistance you receive while pedaling. Higher levels provide more assistance, making it easier to pedal, while lower levels require more effort.

  2. Troubleshooting pedal assist problems: If you’re experiencing issues with the pedal assist, such as it not engaging or providing inconsistent assistance, try adjusting the level. Sometimes, a simple change in the assist level can solve the problem.

  3. Fine-tuning your ride: Adjusting the pedal assist level allows you to customize your ride to your preferences. You can increase the level when you need more assistance, like when climbing hills, or decrease it for a more challenging workout.

  4. Battery life preservation: Keep in mind that higher assist levels consume more battery power. If you want to extend your e-bike’s battery life, consider using lower assist levels when possible.

Now, let’s move on to the next section about engaging the throttle, if applicable, to further enhance your riding experience.

Engage the Throttle (if applicable)

When engaging the throttle, simply twist the handle to activate the motor. The throttle on the Ancheer electric bike is located on the handlebar, making it easily accessible while riding.

Advertisement

It is important to note that the throttle sensitivity can be adjusted according to your preference. If you find that the throttle is too sensitive or not responsive enough, you can make changes in the settings to suit your needs.

Additionally, if you encounter any issues with the throttle, such as it not working or being unresponsive, there are troubleshooting steps you can take. These may include checking the connections, ensuring the throttle is properly aligned, or consulting the user manual for further guidance.

Now, let’s move on to the next step and test the brakes and gears.

Test the Brakes and Gears

After engaging the throttle, it’s important to test the brakes and gears on your Ancheer electric bike to ensure they are in proper working order.

Start by squeezing the brake levers to check for any resistance or sticking. If the brakes feel loose or unresponsive, you may need to adjust the brake pads or replace them if they are worn out.

Advertisement

Next, shift through the gears to make sure they engage smoothly and without any skipping or grinding noises. Familiarize yourself with the different gear ratios and how they correspond to your riding style and terrain.

Proper brake maintenance and gear shifting techniques are essential for a safe and efficient ride.

Now, let’s move on to the next step and familiarize ourselves with the display panel.

Familiarize Yourself with the Display Panel

To get started, take a moment to familiarize yourself with the display panel on your Ancheer e-bike. The display panel serves as the control center for your bike, allowing you to easily navigate through various settings and modes. Here are a few key things to keep in mind:

  • Familiarize yourself with the motor settings: The display panel provides access to different motor settings, such as pedal assist levels and throttle control. Understanding these settings will help you customize your riding experience to suit your preferences.

  • Understand the different display modes: The display panel offers different modes, such as speed, distance, and battery level. Knowing how to switch between these modes will help you keep track of important information during your ride.

  • Monitor your battery level: The display panel provides a clear indication of your battery level, ensuring that you never run out of power during your ride.

  • Adjust your settings as needed: The display panel allows you to make adjustments to various settings, such as the backlight brightness and unit of measurement. Take the time to explore these options and personalize your biking experience.

Now that you are familiar with the display panel, it’s time to enjoy your ride!

Advertisement

Enjoy Your Ride!

Now that you’re familiar with the display panel on your Ancheer electric bike, it’s time to hit the road and enjoy your ride! As you embark on your journey, there are a few things you can do to improve battery life and ensure a safe and enjoyable experience.

First and foremost, it’s important to maintain a consistent speed and avoid sudden accelerations or decelerations. This will help conserve battery power and extend your riding range. Additionally, be mindful of the terrain you’re riding on. Uphill climbs and rough surfaces can put extra strain on the motor and drain the battery faster.

To further optimize battery life, make sure to keep your tires properly inflated and avoid excessive weight on the bike. Regularly check your brakes, lights, and other safety features to ensure they’re functioning correctly.

By following these safety tips and taking steps to improve battery life, you can have a smooth and enjoyable ride on your Ancheer electric bike. So, hop on, buckle up, and embrace the thrill of electric biking!

Frequently Asked Questions

How do I charge the battery of my Ancheer electric bike?

To charge the battery of my Ancheer electric bike, I first locate the charging port and connect the charger. I ensure the battery is properly inserted and wait for it to fully charge. If I encounter any issues, I troubleshoot by checking connections and contacting customer support.

Advertisement

Can I turn on the electric bike without using the power button?

When it comes to turning on an electric bike without using the power button, alternative methods and troubleshooting techniques can be used. However, it’s important to note that these methods may vary depending on the specific model and brand.

What should I do if the battery indicator light does not turn on?

If the battery indicator light on your Ancheer electric bike does not turn on, start troubleshooting by checking the power connection. Ensure that the battery is properly connected and securely attached.

How can I adjust the pedal assist level on my Ancheer electric bike?

To adjust the pedal assist level on my Ancheer electric bike, I can access the pedal assist settings on the control panel. By navigating through the menu, I can increase or decrease the level of assistance according to my preference.

Are there any safety precautions I should take before starting my ride on the electric bike?

It is important to wear a helmet while riding an electric bike for safety. To ensure a safe ride, proper maintenance is essential. Regularly check the brakes, tires, and battery, and keep the bike clean and lubricated.

Conclusion

And there you have it! Turning on your Ancheer electric bike is as easy as a breeze on a sunny day.

Advertisement

Just remember to check that battery level, locate the power button, and press and hold it until you see that battery indicator light.

Once you hear that motor purr to life, engage the throttle and feel the power at your fingertips.

Test the brakes and gears for a smooth ride, and take a moment to appreciate the display panel that keeps you informed.

Now, it’s time to hit the road and let the adventure begin!

Advertisement

Continue Reading

Electric Bike

How To Turn Mountain Bike Into Electric Bike

Published

on

By

An image showcasing a skilled cyclist effortlessly maneuvering through rugged mountain terrain on a modified electric bike

Converting your mountain bike into an electric powerhouse is an exciting project that will take your riding experience to the next level. With an electric bike conversion kit, you can easily tackle steep terrain and increase your riding range with ease.

In this comprehensive guide, we will walk you through the step-by-step process of turning your beloved mountain bike into an electrifying machine. Get ready to unlock a world of exhilaration and adventure as we delve into the intricacies of this electrifying transformation.

Key Takeaways

  • Assess frame design and consider compatibility with conversion kit components
  • Ensure sufficient space for battery pack and proper alignment of motor
  • Consider factors such as motor power, battery capacity, and overall weight when choosing a conversion kit
  • Properly remove existing bike components and keep track of small parts for smooth transition during installation

Assessing Your Mountain Bike’s Compatibility

Before you can turn your mountain bike into an electric bike, you’ll need to assess its compatibility. Start by examining your mountain bike for any specific modifications it may need for the electric bike conversion process.

Check the frame design, as some electric bike conversion kits require a certain frame type. Look for a suitable space to mount the battery pack, often located on the downtube or rear rack. Ensure that your bike has enough clearance for the motor, especially if you plan on using a hub motor. Consider the weight of the components and how it will affect your bike’s handling.

Advertisement

Once you’ve evaluated these factors, you can move on to choosing the right electric bike conversion kit, which will be discussed in the next section.

Choosing the Right Electric Bike Conversion Kit

First, you’ll want to select the appropriate conversion kit for your needs. When choosing an electric bike conversion kit, it’s important to consider the benefits and drawbacks.

On the positive side, conversion kits allow you to transform your mountain bike into an electric bike without having to buy a completely new one. This can save you money and allow you to keep using a bike you’re already familiar with.

However, there are some drawbacks to consider as well. Conversion kits can be quite expensive, especially if you opt for a high-quality kit. Additionally, the installation process can be challenging and time-consuming, requiring some technical skills.

Factors to consider when choosing an electric bike conversion kit include the motor power, battery capacity, and overall weight of the kit. You’ll want to ensure that the motor power is suitable for your desired level of assistance, whether you’re looking for a gentle boost or a more powerful ride. The battery capacity should be sufficient to meet your riding needs, and the overall weight of the kit shouldn’t make your bike too heavy or unbalanced.

Advertisement

Now that you have an understanding of the benefits and drawbacks of electric bike conversion kits and the factors to consider, it’s time to move on to gathering the necessary tools and equipment.

Gathering the Necessary Tools and Equipment

To gather all the tools and equipment you’ll need, start by checking what’s included in the electric bike conversion kit you’ve chosen. Most conversion kits will provide the necessary tools, such as wrenches, screwdrivers, and Allen keys, but it’s always a good idea to double-check.

In addition to the tools provided in the kit, you may also need some additional tools depending on your specific bike and the components you’ll be working with. Some common tools you might need include a torque wrench, a chain breaker tool, and cable cutters. Choosing the right tools is crucial to ensure proper installation and avoid any damage to your bike or the conversion kit.

Advertisement

Once you have gathered all the necessary tools, you can move on to the next step of removing the existing components.

Removing the Existing Components

Now, you’ll need to remove the components currently on your bike.

Before doing so, it’s important to assess the compatibility of your bike with an electric conversion kit. Look for a conversion kit that matches the specifications of your mountain bike, including the wheel size and frame type.

Once you have chosen the right conversion kit, you can begin the process of removing the existing components. Start by disconnecting the brakes, derailleurs, and chain from your bike. Use appropriate tools, such as a wrench or screwdriver, to carefully remove these components. Take your time and make sure to keep track of any small parts that you remove. This will ensure a smooth transition when installing the electric bike conversion kit later on.

With the existing components removed, you’re now ready to move on to installing the electric bike conversion kit.

Advertisement

Installing the Electric Bike Conversion Kit

Once you have removed the existing components, it’s time to begin installing the electric bike conversion kit. To ensure a smooth installation, follow these steps:

  • Carefully read the instructions provided with the kit.
  • Begin by installing the motor correctly on the frame. Make sure to align it properly and tighten all bolts securely.
  • Attach the motor controller to the frame, ensuring it is positioned in a way that allows for easy access and proper ventilation.
  • Connect the motor controller to the motor using the provided wiring harness, following the color-coding instructions.

Installing an electric bike conversion kit can sometimes present challenges. Troubleshooting common conversion issues such as motor alignment and wiring connectivity is crucial. Double-check all connections and consult the troubleshooting guide if any problems arise.

Now that the electric bike conversion kit is installed, it’s time to move on to connecting the battery and controller.

Connecting the Battery and Controller

Make sure you connect the battery and controller properly for the electric bike conversion kit to function correctly.

Advertisement

Begin by locating the battery and controller compartments on your mountain bike. Open the compartments and identify the positive and negative terminals on both the battery and controller.

Connect the positive terminal of the battery to the positive terminal of the controller, and the negative terminal of the battery to the negative terminal of the controller. Ensure the connections are secure and tight.

Once connected, double-check that the battery is fully charged and the controller is properly programmed. To maintain the battery, periodically check its voltage and charge it as needed.

Troubleshooting common issues such as loose connections or faulty wiring can help ensure the smooth operation of your electric bike.

With the battery and controller properly connected, you can now move on to mounting the motor and wiring.

Advertisement

Mounting the Motor and Wiring

To mount the motor and connect the wiring, you’ll need to locate the appropriate spots on your bike and secure the motor in place. Start by choosing a suitable location for the motor, typically near the bottom bracket or the rear wheel dropout. Ensure that the motor is aligned properly with the chain and sprocket. Use mounting brackets or clamps to secure the motor to the frame securely. Next, connect the wiring between the motor and the controller. Refer to the user manual or wiring diagram provided by the manufacturer for the correct connections. Make sure all connections are tight and insulated to prevent any electrical issues.

To engage the audience, here is a table with mounting techniques and wiring tips:

Mounting Techniques Wiring Tips
Choose a suitable location for the motor Refer to the wiring diagram for correct connections
Align the motor with the chain and sprocket Ensure all connections are tight and insulated
Secure the motor using mounting brackets or clamps Double-check all wiring connections before finalizing

Once you have successfully mounted the motor and connected the wiring, you can move on to adjusting the bike’s gearing system, improving the overall performance of your electric mountain bike.

Adjusting the Bike’s Gearing System

Now you can fine-tune the gearing system on your bike for optimal performance. Making the right gearing adjustments is crucial to ensure a smooth and efficient ride when converting your mountain bike into an electric bike.

One important aspect to consider is the gear ratio optimization. This involves finding the perfect balance between the motor’s power and your pedaling effort. Start by experimenting with different gear combinations to see which ones work best for your riding style and terrain. You may need to adjust the front and rear derailleurs to achieve the desired gear ratio.

Advertisement

Keep in mind that a lower gear ratio will provide more torque for climbing steep hills, while a higher gear ratio will give you more speed on flat roads.

Once you have fine-tuned the gearing system, you can move on to the next section about testing and fine-tuning the electric bike’s overall performance.

Testing and Fine-Tuning the Electric Bike

After adjusting the bike’s gearing system, it’s important to test and fine-tune the electric bike for optimal performance. Here are some fine-tuning techniques and troubleshooting common issues to help you with this process:

  1. Test the motor: Ensure that the motor engages smoothly and provides consistent power throughout the ride. Check for any unusual noises or vibrations.

  2. Adjust the pedal assist levels: Fine-tune the pedal assist settings to match your desired level of assistance. Test each level to ensure they’re functioning properly and providing the desired amount of assistance.

  3. Check the battery life: Monitor the battery’s performance by testing its capacity and range. Make sure it’s charging and discharging correctly and adjust any settings if needed.

  4. Troubleshoot common issues: Address any issues such as poor acceleration, uneven power delivery, or erratic behavior. Check the wiring connections, controller settings, and make necessary adjustments.

Once you have completed the testing and fine-tuning process, you can move on to ensuring safety and compliance with local regulations for your electric bike.

Ensuring Safety and Compliance

Make sure you prioritize safety and comply with local regulations when using your electric bike. Ensuring safety is crucial to prevent accidents and injuries. Additionally, meeting legal requirements will help you avoid fines and penalties. Before riding your electric bike, make sure to wear a helmet and other protective gear. Familiarize yourself with the bike’s features and controls, and always follow traffic laws and signals. It is also important to regularly inspect your bike for any damage or loose parts. Maintain a safe speed and be aware of your surroundings. To help you understand the importance of safety and compliance, consider the following table:

Advertisement
Safety Measures Legal Requirements Benefits
Wear protective gear Register your electric bike Prevent injuries
Follow traffic laws Obtain necessary permits Avoid fines
Regular inspections Install required lights Ensure bike’s safety

By ensuring safety and complying with legal requirements, you can enjoy a safe and trouble-free electric bike experience. Now let’s move on to maintaining and servicing your electric bike.

Maintaining and Servicing Your Electric Bike

Maintaining and servicing your e-bike is essential for its longevity and optimal performance. To maximize battery life and ensure smooth operation, follow these tips:

  • Keep your battery charged between 20% and 80% to avoid overcharging or deep discharging, which can shorten its lifespan.
  • Clean the battery terminals regularly with a soft cloth to prevent corrosion and ensure a good connection.
  • Store your e-bike in a cool and dry place, away from extreme temperatures and moisture, to prevent damage to the battery and electronic components.

Troubleshooting common issues can help you identify and fix problems quickly:

  • Check the connections and wiring for any loose or damaged parts.
  • Test the throttle, brakes, and motor to ensure they are functioning properly.
  • If you encounter any issues beyond your expertise, consult a professional e-bike technician for assistance.

By maintaining and troubleshooting your electric bike, you can enjoy its benefits for years to come.

Now, let’s explore how to upgrade and customize your e-bike.

Upgrading and Customizing Your Electric Bike

To enhance your riding experience, you can personalize and improve various aspects of your e-bike. There are a variety of customizing options available that allow you to make your electric bike unique to your preferences.

One way to upgrade your e-bike is by improving its performance. You can consider installing a more powerful motor or upgrading the battery for increased speed and range. Additionally, you can enhance the braking system by installing hydraulic disc brakes for better stopping power. Another option is to upgrade the suspension system to improve the bike’s handling and comfort on rough terrains.

Advertisement

Furthermore, you can customize the appearance of your electric bike by adding accessories such as fenders, lights, and racks. By making these performance enhancements and personalizing your e-bike, you can optimize your riding experience.

Now, let’s explore different riding modes and power levels.

Exploring Different Riding Modes and Power Levels

There are various riding modes and power levels available to choose from when using an e-bike. These options allow you to customize your riding experience and make the most out of your electric mountain bike.

When exploring different riding modes, you can select between modes such as pedal-assist, throttle-only, or a combination of both. Each mode offers a unique level of assistance and control, allowing you to adapt to different terrains and riding conditions.

Additionally, you can also adjust the power level of your e-bike, which determines the amount of assistance the motor provides. This is particularly useful when exploring battery life and finding the right balance between performance and range.

Advertisement

Comparing different motor options is also important, as each motor has different power outputs and efficiency levels. By understanding these factors, you can select the motor that best suits your riding style and needs.

With these various riding modes and power levels, you can truly customize your e-bike experience.

Now, let’s move on to some tips and tricks for maximizing performance.

Tips and Tricks for Maximizing Performance

Get the most out of your e-biking experience by implementing these tips and tricks to maximize performance. One of the key factors in maximizing performance is maximizing battery life. To do this, make sure to charge your battery fully before each ride and avoid overcharging. Additionally, try to ride in lower power levels whenever possible, as higher power levels drain the battery faster.

Troubleshooting common issues is also important for optimizing performance. If you notice a decrease in power or range, check for any loose connections or damaged wires. Clean the bike regularly to prevent dirt and debris from affecting the motor and battery.

Advertisement

To further enhance your e-biking experience, consider joining the electric bike community. This will allow you to connect with fellow e-bikers, share tips and tricks, and discover new trails.

Joining the Electric Bike Community

Joining the e-bike community allows you to connect with other riders, share tips, and discover new trails. When you become part of this community, you gain access to a wealth of knowledge and experience.

One of the first things you’ll notice is the wide variety of electric bike accessories available. From powerful batteries to comfortable saddles, these accessories can enhance your riding experience and make your electric bike even more efficient.

Additionally, being part of the e-bike community opens up a world of benefits. Electric biking not only provides a thrilling and exhilarating experience, but it also allows you to cover longer distances with ease. The electric assist feature helps you conquer challenging terrains and steep hills effortlessly.

Moreover, electric biking is an eco-friendly alternative to traditional modes of transportation, reducing your carbon footprint and contributing to a greener environment.

Advertisement

So, join the e-bike community today and start experiencing the numerous benefits of electric biking.

Frequently Asked Questions

Can I convert any type of mountain bike into an electric bike?

Yes, you can convert any type of mountain bike into an electric bike. The mountain bike conversion process involves adding an electric motor, battery, and controller to your existing bike.

By converting your mountain bike into an electric bike, you can enjoy the benefits of electric bike conversion, such as increased speed and range, easier uphill climbs, and reduced effort required while riding.

This conversion allows you to transform your regular mountain bike into a powerful and efficient electric bike.

How much does an electric bike conversion kit typically cost?

Converting your mountain bike into an electric bike with a conversion kit is a cost-effective option. The price for an electric bike conversion kit typically ranges from $200 to $1000, depending on the quality and features you desire.

Advertisement

There are various types of conversion kits available, such as front-wheel, rear-wheel, and mid-drive kits. Each type has its pros and cons, so it’s important to consider factors like ease of installation, power output, and battery life when choosing the right kit for you.

Are there any specific tools or equipment that I need to gather for the conversion process?

To successfully convert your mountain bike into an electric bike, there are a few essential tools and equipment you’ll need.

  • First, make sure to have a wrench set, screwdrivers, and pliers for disassembling and reassembling parts.

  • Additionally, an electric bike conversion kit, including a motor, battery, controller, and throttle, is crucial.

  • When choosing a battery, consider its capacity, voltage, and weight.

  • Avoid common mistakes like improper wiring or mismatched components.

  • Research extensively for the right battery that suits your conversion needs.

Is it possible to convert my mountain bike back to its original state after installing the electric bike conversion kit?

Yes, it’s possible to convert your mountain bike back to its original state after installing the electric bike conversion kit. This ensures that you have the flexibility to switch between an electric bike and a regular mountain bike whenever you desire.

The mountain bike conversion process offers numerous benefits. It includes increased speed and range, smoother rides, and the ability to tackle challenging terrains with ease. By installing the conversion kit, you can enjoy these advantages while still having the option to revert to your original bike.

Are there any legal requirements or regulations I should be aware of when converting my mountain bike into an electric bike?

When converting your mountain bike into an electric bike, it’s important to be aware of the legal requirements and regulations. Safety precautions should be a priority, such as wearing a helmet and following traffic laws.

Advertisement

Some advantages of converting include increased speed and assistance on uphill climbs. However, there are also disadvantages such as added weight and limited range.

It’s crucial to research and ensure your conversion complies with local laws to avoid any legal issues.

Conclusion

Congratulations on successfully transforming your mountain bike into an electric bike! By following the step-by-step process outlined in this article, you have joined a growing community of electric bike enthusiasts.

Did you know that the sale of electric bikes has been steadily increasing over the past few years? In fact, in 2020 alone, the global sales of electric bikes reached a staggering 40 million units! So, not only have you made a smart and eco-friendly choice, but you’ve also become part of a global trend.

Get out there and enjoy your new electric bike adventure!

Advertisement

Continue Reading

Electric Bike

How To Turn On Fiido Electric Bike

Published

on

By

An image showcasing a person wearing a helmet, standing beside a Fiido electric bike

Positioned between the excitement of embarking on a new journey and the eagerness of becoming proficient with innovative technology, activating a Fiido electric bike opens the door to a realm of easy exploration.

In this guide, I will walk you through the precise steps to activate your Fiido electric bike and unleash its full potential.

From connecting the battery to adjusting the settings, prepare to embark on a thrilling ride as we delve into the intricacies of powering up your Fiido electric bike.

Key Takeaways

  • The Fiido electric bike can be activated by pedaling on the bike, with a motion sensor engaging the motor for effortless propulsion.
  • The activation process from pedaling to electric power is smooth and seamless.
  • Regular maintenance, such as checking tire pressure, brakes, and chain, is important for optimal performance.
  • The electric motor of the Fiido electric bike provides convenience and assistance, making uphill climbs and long distances more manageable.

Unpack your Fiido electric bike and ensure all parts are present and in working condition.

First, unpack your Fiido electric bike and make sure all the parts are present and in working condition. Begin by carefully inspecting the bike for any damages during shipping or handling. Look for any scratches, dents, or loose components. It is crucial to ensure that the bike is in perfect condition before using it.

Advertisement

Next, test the brakes by gently squeezing the brake levers. Make sure they engage smoothly and that the brake pads make proper contact with the wheel rims. If there are any issues with the brakes, consult the user manual for troubleshooting steps or contact customer support.

Once you have completed the inspection and brake test, you can proceed to connect the battery to the bike by inserting the connectors into their corresponding slots. This will power the bike and enable it to function properly for your rides.

Connect the battery to the bike by inserting the connectors into their corresponding slots.

To connect the battery to your Fiido electric bike, simply insert the connectors into their corresponding slots. Here is a step-by-step guide on how to do it:

  1. Ensure that both the bike and the battery are turned off before connecting them.

  2. Locate the battery compartment on the bike, usually located near the rear wheel.

  3. Align the connectors on the battery with the slots on the bike. The connectors are usually color-coded for easy identification.

  4. Gently push the connectors into their corresponding slots until they are securely connected.

Troubleshooting common issues when connecting the battery to the Fiido electric bike and exploring the benefits of using an electric bike and how it can enhance your daily commute are important discussion ideas.

Once the battery is connected, make sure it is fully charged before turning on the bike.

Advertisement

Make sure the battery is fully charged before turning on the bike.

Before you start riding, ensure that the battery is fully charged. Properly charging the battery is essential for the optimal performance of your Fiido electric bike. Here are some battery charging tips to follow:

  1. Use the original charger provided by Fiido to avoid any compatibility issues.
  2. Plug the charger into a standard electrical outlet and connect it to the charging port on the battery.
  3. Monitor the charging progress through the LED indicator on the charger. It will typically turn green when the battery is fully charged.

To troubleshoot common battery charging issues, check for loose connections, damaged cables, or faulty charging ports. If you encounter any problems, refer to the user manual or contact Fiido customer support for assistance.

Now, let’s move on to locating the power button on the bike’s control panel or handlebar.

Locate the power button on the bike’s control panel or handlebar.

You can easily find the power button on the bike’s control panel or handlebar. The power button is a vital component of the fiido electric bike, responsible for turning on the bike and activating its various functions.

Advertisement

However, in some cases, users may encounter issues with the power button not working. Troubleshooting common issues with the power button on a fiido electric bike involves checking the battery connection, ensuring the power button is not stuck or damaged, and verifying that the bike is not in a locked or anti-theft mode.

If the power button still doesn’t work, there are alternative methods to turn on the bike. These methods may include using the key to activate the bike or accessing the bike’s settings menu to enable a different power-on option. By familiarizing yourself with these troubleshooting techniques, you can easily overcome any power button-related challenges.

Now, press and hold the power button for a few seconds until the bike’s display lights up, indicating that the bike is ready for use.

Press and hold the power button for a few seconds until the bike’s display lights up.

Advertisement

Simply hold the power button down for a few seconds and the bike’s display will illuminate. This is an essential step in turning on your Fiido electric bike.

Once the display lights up, you gain access to crucial information about your bike’s battery level and other important data.

To ensure the smooth functioning of your electric bike, it is vital to regularly perform maintenance tasks. This includes keeping the battery charged, inspecting the tires for wear and tear, and checking the brakes for proper functioning.

Troubleshooting common electric bike issues is also an important aspect of maintenance. If you encounter any problems, such as a loss of power or unusual noises, refer to the user manual for troubleshooting instructions.

Now, check the display screen for battery level and other important information.

Advertisement

Check the display screen for battery level and other important information.

After holding down the power button, take a look at the display screen to see the battery level and other important information.

The display screen of your Fiido electric bike provides you with crucial details about your ride. It shows the battery level, allowing you to monitor how much power you have left before needing to recharge. This information is essential for planning your routes and ensuring you don’t run out of battery in the middle of your ride.

Additionally, the display screen provides insights into your speed, distance traveled, and pedal assist level. To extend the battery life of your Fiido electric bike, consider adjusting your pedal assist level and reducing your speed when necessary.

Furthermore, it is important to maintain the display screen by keeping it clean and avoiding any physical damage. By doing so, you can ensure that the screen continues to provide accurate and reliable information.

Now, adjust the settings on the display screen, such as speed and pedal assist levels, according to your preferences, to enhance your overall riding experience.

Advertisement

Adjust the settings on the display screen, such as speed and pedal assist levels, according to your preferences.

To enhance your overall riding experience, adjust the settings on the display screen, like speed and pedal assist levels, according to your preferences.

The display screen on the Fiido electric bike allows you to easily customize various aspects of your ride. To begin, press the power button on the display screen to turn it on.

Once it is on, you can navigate through the various settings using the buttons on the display screen. To adjust the speed, simply use the up and down arrows to increase or decrease the desired speed level.

Additionally, you can customize the pedal assist levels by selecting the desired level from the options available on the display screen.

Remember to put on a helmet and any other safety gear before mounting the bike, ensuring a safe and enjoyable ride.

Advertisement

Put on a helmet and any other safety gear before mounting the bike.

Before mounting the bike, make sure to put on a helmet and any other necessary safety gear. Safety is paramount when engaging in mountain biking, and choosing the right size helmet is crucial to protect your head from potential injuries. To ensure a proper fit, measure the circumference of your head and refer to the manufacturer’s sizing chart. Additionally, don’t forget to wear knee and elbow pads, as well as sturdy shoes, to safeguard your body during the ride. Once you are fully geared up, sit on the bike, place your feet on the pedals, and start pedaling to activate the electric motor. By following these mountain biking tips and prioritizing safety, you can enjoy a thrilling ride while minimizing the risk of accidents.

Sit on the bike, place your feet on the pedals, and start pedaling to activate the electric motor.

Once you’re seated on the bike, simply place your feet on the pedals and start pedaling to activate the electric motor. This action triggers the motion sensor, which then engages the electric motor, propelling you forward effortlessly.

Electric bike maintenance is simplified with the Fiido electric bike, as the motor is designed to be low-maintenance and durable.

One of the key benefits of electric bikes is the assistance they provide, allowing you to travel longer distances and conquer challenging terrains with ease.

The smooth activation of the electric motor ensures a seamless transition from pedaling to electric power, providing a delightful riding experience.

Advertisement

So, buckle up, helmet securely fastened, and enjoy your ride on your newly turned-on Fiido electric bike!

Enjoy your ride on your newly turned-on Fiido electric bike!

Get ready to experience the thrill of riding your brand new Fiido electric bike! Now that you have successfully turned it on, it’s time to delve into the world of electric bike maintenance.

Regular maintenance is essential to keep your electric bike running smoothly and efficiently. Start by checking the tire pressure, brakes, and chain regularly. Cleaning the bike after every ride helps to remove dirt and debris, ensuring optimal performance. Additionally, don’t forget to charge the battery after each use to maximize its lifespan.

Now, let’s talk about the benefits of electric bikes. They offer a convenient and eco-friendly mode of transportation, reducing our carbon footprint. Electric bikes also provide a great alternative to traditional bicycles, especially for those who may have physical limitations or need assistance with pedaling. The electric motor adds an extra boost, making uphill climbs and long distances more manageable.

Moreover, electric bikes promote a healthier lifestyle by encouraging regular exercise and outdoor activities. So, hop on your Fiido electric bike and embark on an exciting journey, knowing that you are not only enjoying the ride but also contributing to a greener future.

Advertisement

Frequently Asked Questions

How long does it take to fully charge the Fiido electric bike battery?

It takes approximately X hours to fully charge the Fiido electric bike battery. To extend its battery life, you can follow these steps: minimize high-speed riding, avoid frequent stops and starts, and use pedal assist mode whenever possible. Additionally, the Fiido electric bike offers various charging options such as using a standard wall outlet or a portable battery charger.

Can I charge the Fiido electric bike battery while it is still connected to the bike?

Yes, you can charge the Fiido electric bike battery while it is connected to the bike. However, it is recommended to disconnect the battery for optimal charging time and to extend the battery life.

Is it necessary to adjust the settings on the display screen before riding the Fiido electric bike?

Yes, it is necessary to adjust the settings on the display screen before riding the Fiido electric bike. These adjustments can include things like selecting the desired mode, adjusting the pedal assist level, and checking battery life.

What is the maximum speed that the Fiido electric bike can reach?

The Fiido electric bike has a remarkable maximum speed of 25 mph, allowing for swift and efficient transportation. Its exceptional acceleration performance ensures quick and smooth acceleration, making it ideal for urban commuting.

Are there any specific maintenance tasks that should be performed regularly to keep the Fiido electric bike in good condition?

Regular maintenance is essential to keep the Fiido electric bike in good condition. Some tips include cleaning the bike regularly, checking tire pressure, lubricating the chain, inspecting the brakes, and ensuring all electrical components are functioning properly.

Advertisement

Conclusion

I carefully unpacked my Fiido electric bike, ensuring that all the parts were intact and in proper working condition. After connecting the battery, I made sure it was fully charged before I was ready to turn on the bike.

With a firm grip on the handlebar, I located the power button and pressed it for a few seconds. As if by magic, the bike’s display screen came to life, allowing me to customize the settings to my liking.

Equipped with my helmet and safety gear, I mounted the bike and started pedaling, feeling the electric motor seamlessly kick in. With a sense of excitement, I embarked on a thrilling ride, effortlessly gliding through the streets on my newly activated Fiido electric bike.

Continue Reading
Advertisement

Affiliate disclaimer

As an affiliate, we may earn a commission from qualifying purchases. We get commissions for purchases made through links on this website from Amazon and other third parties.

About us

We are a passionate team driven by the belief that cycling is a fantastic and accessible way to stay active while enjoying the beauty of the outdoors. Our mission is to share our love for cycling with as many people as possible. We provide a welcoming environment for individuals of all ages, abilities, and backgrounds to come together and ride bikes. With Ralf’s visionary leadership, Zane’s expertise in cycling adventures, and Olivia’s dedication to community building, we strive to create a vibrant space where everyone can experience the joy of cycling. Through group rides, workshops, and inclusive events, we inspire and empower individuals to embrace an active lifestyle. Join us in our quest to pedal together, embrace the joy of cycling, and foster connections that last a lifetime.

Advertisement

Trending