Were you aware that on average, a bicycle tube lasts for approximately 1,500 miles? While this distance might appear substantial, for dedicated bike riders who cycle frequently, it could result in the necessity to change their tubes multiple times within a year.
As someone who loves cycling, I’ve often wondered how long my tubes will last and what factors can affect their lifespan. So, I did some research and found some interesting information that I want to share with you.
There are several factors that can impact the life of your bicycle tubes, including the quality of the tube, the type of terrain you ride on, and how often you ride. It’s important to know these factors so that you can take steps to extend the life of your tubes and avoid unexpected punctures or blowouts while on a ride.
In this article, I’ll discuss these factors in more detail, as well as provide tips for extending the life of your tubes and signs that it’s time to replace them. So, let’s dive in and learn more about how long bicycle tubes last.
Key Takeaways
- Average lifespan of a bicycle tube is around 1,500 miles
- Lifespan can be affected by factors such as quality, terrain, and frequency of riding
- Proper maintenance and tire pressure management can help extend the lifespan of a tube
- Signs of replacement include visible damage, slow leaks, and age (2-3 years), and the process involves removing the tire and old tube, inserting a new tube, and reattaching the tire.

ZTZ 700C Road Bike Wheelset, Ultralight Aluminum Alloy 30mm Road Bike Wheel, 20H Front/24H Rear High-Strength Bike Rims, 700c Clincher, Rim Brake, Compatible 8-12 Speed Cassettes (Front+Rear Wheels)
Featherweight and Strong: This 700c road bike wheelset is crafted from high-strength aluminum alloy with 20H front/24H rear...
As an affiliate, we earn on qualifying purchases.
Factors that Affect the Lifespan of Bicycle Tubes
You might be surprised to know that your cycling habits and maintenance practices can drastically affect how long your bike tubes last, so don’t skimp on taking care of your ride if you want to avoid the frustration and expense of frequent replacements.
One of the key factors in tube longevity is proper tube maintenance. This includes things like checking for punctures, making sure the valve stem is tight, and inspecting the tube for wear and tear. Regular maintenance can help prevent small issues from turning into big problems that require a full tube replacement.
Another important aspect of tube longevity is tire pressure management. If your tire pressure is too low or too high, it can cause excessive wear and tear on your tubes. Low tire pressure can cause pinch flats, which occur when the tube gets pinched between the tire and the rim, while high pressure can cause blowouts or even cause the tube to burst. By properly managing your tire pressure and checking it regularly, you can help ensure that your tubes last as long as possible.
With that said, it’s important to know the signs that your bicycle tube needs replacing.

SUPERTEAM Carbon Wheelset 700C Tubeless Gravel Wheelset Disc Braking 45TU-28 (Rim Depth 45MM, Center Lock Thru AXLE 12 * 100-12 * 142)
Material: Toray T700c Full Carbon Fiber
As an affiliate, we earn on qualifying purchases.
Signs that Your Bicycle Tube Needs Replacing
When your bike tube starts to feel spongy, loses air faster than usual, or shows visible signs of wear and tear, it’s time to replace it. As a cyclist, it’s important to pay attention to these signs to prevent any potential punctures or blowouts while riding.
Here are three signs that indicate your bicycle tube needs replacing:
-
Visible damage: Any visible cuts, cracks, or holes in the tube are a clear indication that it needs to be replaced. These damages can be caused by sharp objects on the road or by improper handling during installation.
-
Slow leaks: If your tube is losing air faster than usual, it could be a sign of a slow leak. This can happen due to punctures, valve leaks, or even improper installation.
-
Age: Bicycle tubes have a lifespan of about 2-3 years, even if they haven’t been used frequently. Over time, the rubber can deteriorate and become more susceptible to punctures, making it important to replace them regularly.
Knowing when to replace your bicycle tube can make a big difference in preventing punctures and extending the life of your bike. In the next section, I’ll discuss how to replace your bicycle tube to help you stay prepared for any unexpected flats on your ride.

700c Clincher Carbon Wheelset Disc Brake 50mm Depth 28mm Width Quality Carbon ud Finish Rim Road Cycling Tubeless Compatible Clincher
1:Customers who purchase this product will receive a 1000-day guarantee. We will provide the necessary repair support, excluding...
As an affiliate, we earn on qualifying purchases.
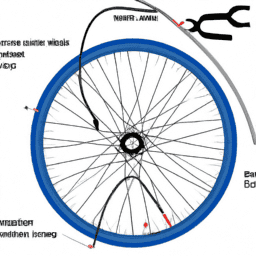
How to Replace Your Bicycle Tube
To replace a bicycle tube, you’ll need a few essential tools: tire levers, a new tube, and a pump.
The process involves several steps:
- Remove the tire from the wheel.
- Take out the old tube.
- Insert the new tube.
- Reattach the tire to the wheel.
In this guide, I’ll provide a step-by-step walkthrough of the process so you can easily replace your bicycle tube.
Tools You Need
Having the right tools can make all the difference in extending the lifespan of your bicycle tubes. It’s important to have a good quality pump and to maintain it properly, as a poorly maintained pump can cause unnecessary stress to the tube, leading to premature wear and tear.
Additionally, it’s a good idea to have alternative options to patch kits, such as spare tubes or even tubeless tires, in case of sudden punctures or tears.
When it comes to replacing your bicycle tube, having the right tools is essential. You’ll need a tire lever to remove the tire from the rim, a wrench to loosen the nuts holding the wheel in place, and a new tube to replace the old one.
With these tools on hand, you’ll be ready to tackle the step-by-step guide to replacing your bicycle tube.
Step-by-Step Guide
Let’s jump right into the step-by-step guide for replacing your bicycle tube, starting with removing the tire from the rim using a tire lever. After removing the tire, inspect the rim and tire for any damage that may have caused the puncture. Once the cause of the puncture is determined, it’s time to install the new tube. Before inserting the new tube, make sure it has been properly inflated to prevent any pinching or damage during installation.
Proper inflation is crucial for the longevity of your bicycle tubes. Overinflation can cause the tube to burst, while underinflation can lead to pinch flats. It’s also important to store your tubes in a cool, dry place to avoid any damage from UV rays or extreme temperatures. By following these simple steps, you can replace your bicycle tube and ensure it lasts as long as possible. In the next section, I will share some tips for extending the life of your bicycle tubes.

Schwinn Sporterra RX Gravel Bike, 700c Mens and Womens Bike, 14-Speed Drop Bar Gravel Bicycle, Mechanical Disc Brakes, Rigid Fork, Aerodynamic Riding Position, Quick Release Seat Post, Adult Bicycle
GRAVEL BICYCLE: Enjoy next level riding with the Sporterra RX by Schwinn. With 700c wheels, this mens and...
As an affiliate, we earn on qualifying purchases.
Tips for Extending the Life of Your Bicycle Tubes
Pump up those tires regularly, and not only will your bike ride smoother, but you’ll also extend the life of your bicycle tubes. Proper inflation is crucial to ensuring that your bike runs smoothly and efficiently.
Inflating your tires to the proper pressure, as indicated on the sidewall of your tire, reduces the risk of pinch flats, which occur when your tire is underinflated and the tube gets pinched between the rim and the ground. Pinch flats can cause punctures and shorten the lifespan of your bicycle tubes.
Puncture prevention is another important factor in maximizing the lifespan of your bicycle tubes. Avoiding sharp objects on the road and keeping your tires in good condition can help prevent punctures. You can also use puncture-resistant tires or tire liners for added protection.
Choosing the right tube for your bike is also crucial in extending tube longevity. Factors to consider include the type of riding you’ll be doing, the weight of your bike and rider, and the terrain you’ll be riding on.
By following these tips, you can extend the life of your bicycle tubes and enjoy a smoother, more efficient ride.
Frequently Asked Questions
Can I patch a bicycle tube instead of replacing it?
Yes, it’s possible to patch a bicycle tube instead of replacing it. However, there are pros and cons of patching. To properly patch a tube, first locate the puncture, clean the area, apply glue, affix the patch, and re-inflate.
How often should I check the air pressure in my bicycle tubes?
I check my bicycle tube air pressure weekly to ensure optimal performance and safety. Proper maintenance is important to prevent common mistakes, such as over or under-inflation. Regular checks can prevent flat tires and prolong tube life.
Is it okay to use a different size tube in my bicycle tire?
Using a tube of a different size can cause tube compatibility issues and impact performance. Always use the correct size tube for your tire. Check the tire’s sidewall for the recommended size.
Can extreme temperatures affect the lifespan of my bicycle tubes?
Imagine a marathon runner in the blistering heat. They may last half the distance before collapsing. Similarly, extreme temperatures can shorten a bike tube’s lifespan. I recommend brands like Schwalbe and Continental for these conditions.
Are there any specific storage methods I should use to prolong the life of my bicycle tubes?
To prolong the life of my bicycle tubes, I use proper storage techniques such as keeping them away from sharp objects and extreme temperatures. Additionally, I opt for high-quality tube materials that offer durability and resistance to punctures.
Conclusion
In conclusion, the lifespan of a bicycle tube varies depending on several factors such as the quality of the tube, the type of terrain you ride on, and the frequency of use. However, on average, a bicycle tube can last anywhere from 1,000 to 5,000 miles.
This statistic highlights the importance of regularly checking your bicycle tube for signs of wear and tear to ensure that you replace it before it causes a puncture or blowout. To extend the life of your bicycle tubes, you can take simple measures such as using a tire liner, keeping your tires properly inflated, and avoiding riding over sharp objects.
If you do need to replace your bicycle tube, it’s a relatively simple process that you can do yourself with the right tools and some basic knowledge. By taking care of your bicycle tubes and replacing them when necessary, you can ensure that your rides are safe and enjoyable for years to come.