Connect with us

Gravel Bike

How Much For A Good Beginner Gravel Bike

Published

on

An image of a sleek, vibrant gravel bike against a picturesque backdrop of rolling hills and golden autumn foliage

You don’t have to spend a fortune for a comfortable journey.

If you’re venturing into the world of gravel biking and looking for a good beginner bike that won’t cost you a fortune, this article is your guide.

We’ll delve into the basics of gravel bikes, help you set a budget, navigate through different brands and models, consider frame materials and components suitable for gravel riding, and even suggest accessories and upgrades.

So let’s dive in and find your perfect entry-level gravel bike without burning a hole in your pocket!

Key Takeaways

  • Determine your budget for a beginner gravel bike.
  • Consider the components and materials used at different price ranges.
  • Explore different price ranges to narrow down options.
  • Consider buying used gravel bikes for lower prices.

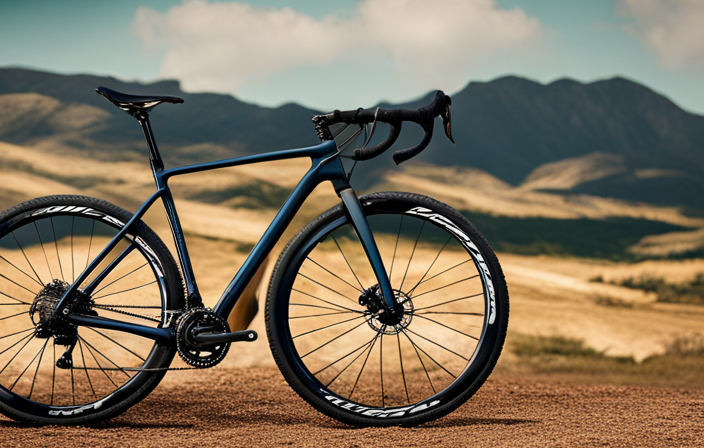
Understanding the Basics of Gravel Bikes

Advertisement

Gravel bikes are great for beginners who want to explore off-road riding. When choosing the right tire width for your gravel bike, there are a few factors to consider. Generally, wider tires provide more stability and traction on rough terrain, while narrower tires offer better speed on smoother surfaces. A common tire width range for gravel bikes is between 35mm and 45mm. It’s important to find the balance that suits your riding style and the type of terrain you plan to tackle.

Now, let’s discuss the difference between a gravel bike and a cyclocross bike. While both are designed for off-road riding, there are some key distinctions. Gravel bikes typically have a more relaxed geometry with longer wheelbases, which provides increased stability and comfort during long rides. Cyclocross bikes, on the other hand, have a more aggressive geometry that prioritizes agility and quick handling in race situations.

As we move into the next section about setting your budget for a beginner gravel bike, it’s essential to consider these factors when making your decision. By understanding tire width options and knowing how gravel bikes differ from cyclocross bikes, you can make an informed choice that aligns with your needs and preferences without overspending unnecessarily.

Set Your Budget for a Beginner Gravel Bike

To start, figure out your budget and determine how much you’re willing to spend on a solid entry-level option for off-road cycling. Setting a realistic budget is crucial when it comes to buying a beginner gravel bike. You don’t want to overspend, but at the same time, you want a bike that will perform well and last long.

When exploring different price ranges for beginner gravel bikes, it’s important to consider the components and materials used. Generally, the higher the price range, the better quality components and materials you can expect. However, there are some great options available at lower price points as well.

Advertisement

To give you an idea of what to expect in different price ranges, here’s a table outlining three common categories with their corresponding average prices:

Price Range Average Price
Entry Level $800 – $1,200
Mid-Range $1,200 – $2,000
High-End $2,000+

By setting a realistic budget and exploring different price ranges, you can narrow down your options and find a gravel bike that suits your needs without breaking the bank. Now that we have established our budget range let’s move on to researching different brands and models.

[Transition sentence into next section: Now that we have established our budget range let’s move on to researching different brands and models.]

Research Different Brands and Models

Advertisement

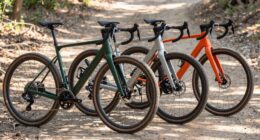
Now that we’ve determined our budget range, let’s delve into researching various brands and models available. In order to find the best beginner gravel bike for your needs, it’s important to thoroughly research prices and compare features. Here are four key steps to get you started:

  1. Check online retailers: Websites like REI, Wiggle, and Competitive Cyclist offer a wide range of gravel bikes from different brands. Take note of the prices and features listed for each model.

  2. Read customer reviews: Look for reviews on reputable cycling websites or forums where cyclists share their experiences with specific brands and models. Pay attention to any recurring issues or positive feedback.

  3. Visit local bike shops: Stop by your nearest bike shop and talk to the staff about the gravel bikes they carry. They can provide valuable insights into different brands’ reputations and help you try out different models.

  4. Consider used options: Don’t rule out buying a used gravel bike as they can often be found at lower prices. Check classified ads, online marketplaces, or local cycling clubs for second-hand options.

Researching prices and comparing features will help you make an informed decision when choosing a beginner gravel bike that suits your budget range and preferences.

In the next section about considering frame material and geometry, we’ll explore how these factors impact the performance of a gravel bike without compromising comfort or stability.

Consider the Frame Material and Geometry

When considering the frame material and geometry, it’s important to understand how these factors can affect the performance and comfort of your chosen bike. The frame material plays a crucial role in determining the overall weight, durability, and ride quality of the gravel bike. There are various materials available, each with its own pros and cons.

To help you make an informed decision, here is a comparison table showcasing some common frame materials used in gravel bikes:

Advertisement
Frame Material Pros Cons
Aluminum Affordable, lightweight, stiff Can transmit more road vibrations
Steel Comfortable, durable, absorbs road vibrations Heavier than other materials
Carbon Fiber Lightweight, excellent vibration damping properties Expensive

Apart from the frame material, the bike’s geometry also greatly influences its performance on gravel terrain. A gravel bike typically features a longer wheelbase for stability and clearance for wider tires. The bottom bracket height affects cornering ability while head tube angle impacts steering responsiveness. It’s important to find a balance between stability and agility based on your riding preferences.

Considering both frame material and geometry will ensure you choose a beginner gravel bike that suits your needs. As we move forward into discussing suitable components for gravel riding…

Look for Components Suitable for Gravel Riding

Consider the components that are ideal for riding on gravel. When it comes to choosing the right tires for gravel riding, there are a few key factors to consider.

Advertisement

First and foremost, you’ll want to look for wider tires with a tread pattern that provides good traction on loose surfaces. The size of the tire will depend on your personal preference and the type of terrain you plan on riding. Additionally, tubeless tires can be beneficial as they offer better puncture resistance and lower rolling resistance.

Another important component to consider is the gear ratio. Gravel riding often involves a mix of flat sections, steep climbs, and fast descents. Finding the right gear ratio can make a significant difference in your overall riding experience. Generally, a wider range cassette with smaller chainrings is preferred for gravel riding as it allows for easier climbing without sacrificing speed on flat or downhill sections.

Transitioning into finding the right size and fit for your body, it’s crucial to ensure that your bike is properly sized and adjusted to maximize comfort and performance. This includes considering factors such as frame size, handlebar width, stem length, saddle height, and reach adjustments. By finding the perfect fit for your body, you’ll be able to ride longer distances with less fatigue while maintaining optimal control over your bike.

Find the Right Size and Fit for Your Body

Finding the perfect fit for your body is crucial when it comes to maximizing comfort and performance while riding. Proper bike fit plays a significant role in preventing discomfort, reducing the risk of injury, and enhancing overall efficiency on the bike.

To ensure you find the right size and fit for your body, consider the following:

Advertisement
  1. Importance of proper bike fit: A well-fitted gravel bike allows for optimal power transfer, reduces strain on joints, and promotes efficient pedaling technique.

  2. Common sizing misconceptions: Don’t solely rely on height or inseam measurements when choosing a bike size. Factors like reach, stack height, and saddle position also impact how well the bike fits your body.

  3. Test ride multiple sizes: It’s essential to try out different frame sizes to determine which one feels most comfortable and suits your riding style.

  4. Get a professional fit: Consider seeking assistance from a professional bike fitter who can assess your individual biomechanics and make necessary adjustments to optimize comfort and performance.

Finding the right size and fit for your body is crucial in ensuring an enjoyable gravel riding experience. Once you have determined the ideal fit, you can proceed to compare prices and discounts available in order to make an informed purchasing decision without compromising on comfort or quality.

Compare Prices and Discounts

Once you’ve determined the right size and fit for your body, it’s time to compare prices and discounts to make a smart purchasing decision. Comparing different brands and models is crucial in finding the best beginner gravel bike within your budget.

It’s important to consider factors such as frame material, components, and overall quality when comparing prices. Start by researching various brands known for producing reliable gravel bikes. Look into their entry-level models that offer a good balance between performance and affordability. Take note of the specific components each bike comes with, such as the drivetrain, brakes, and wheels. This will help you compare the value each bike offers for its price.

In addition to comparing prices among different brands, keep an eye out for discounts or sales events that may be happening. Many stores offer seasonal promotions or clearance sales where you can find great deals on last year’s models or discounted bikes from previous seasons.

Considering buying used or last year’s model can also be a cost-effective option. These bikes may have minor wear but can often still provide excellent performance at a lower price point. Transitioning into the subsequent section about ‘consider buying used or last year’s model,’ keep in mind that thoroughly inspecting any used bike before purchase is essential to ensure its condition meets your expectations while providing potential savings on your ideal beginner gravel bike investment.

Advertisement

Consider Buying Used or Last Year’s Model

If you’re on a budget, exploring the option of purchasing a pre-owned or previous year’s model can offer potential savings on your ideal choice. When considering buying new vs. buying used, there are several advantages to buying last year’s model.

Here are five reasons why you should consider buying used or last year’s gravel bike:

  • Cost Savings: One of the primary benefits of purchasing a used or previous year’s model is the significant cost savings it offers. You can often find bikes in excellent condition at a fraction of the original price.

  • Upgrades and Accessories: Many sellers include additional upgrades and accessories with their used bikes, such as upgraded tires, pedals, or handlebars. These extras can enhance your riding experience without adding extra expenses.

  • Availability: Buying last year’s model means that you have more options available to choose from. You might find a specific color or size that is no longer in stock for the current models.

  • Known Performance: Last year’s models have been tested and reviewed by experts and users alike. This allows you to get a better understanding of their performance and reliability before making a purchase decision.

  • Reduced Depreciation: Unlike new bikes that experience an immediate drop in value once purchased, last year’s models have already gone through most of their initial depreciation.

Considering these advantages, it becomes evident why purchasing used or last year’s gravel bike can be an attractive option for those looking to save money without compromising quality.

As we move into the next section about ‘read reviews and seek recommendations,’ it is essential to gather as much information as possible before making your final decision.

Read Reviews and Seek Recommendations

Before making a purchase, it’s important to read reviews and ask for recommendations from fellow cyclists. When considering buying a gravel bike, taking the time to research and gather information can make a significant difference in finding the right bike for your needs.

Advertisement

One of the best ways to gain insight is by reading online forums dedicated to cycling. These forums are filled with discussions among experienced riders who can offer valuable advice based on their own experiences.

In addition to online forums, seeking opinions from experienced riders you know can also be beneficial. They may have valuable insights into specific brands or models that could help guide your decision-making process. Asking for recommendations allows you to tap into a wealth of knowledge and expertise that others have gained through their own cycling journeys.

By reading reviews and seeking recommendations, you can gain a better understanding of what features and qualities are important in a beginner gravel bike. This knowledge will ultimately help you make an informed decision about which bike is right for you.

When it comes time to test ride before making a purchase, it’s essential to ensure that the bike feels comfortable and meets your expectations in terms of performance.

Test Ride Before Making a Purchase

It’s crucial to take a test ride before buying to ensure the bike meets your preferences and feels comfortable while riding. This step is often overlooked, but it can make all the difference in finding the perfect gravel bike for beginners.

Advertisement

Here are four benefits of test riding and tips for finding the right bike shop:

  1. Assess Comfort: A test ride allows you to evaluate how well the bike fits your body and riding style. Pay attention to the handlebars, saddle, and overall geometry to ensure a comfortable position.

  2. Test Performance: Riding different bikes will give you a sense of their performance capabilities. Take note of how responsive they are when accelerating, braking, or climbing hills.

  3. Check Handling: Gravel bikes should provide stability and control on various terrains. Test ride on both paved roads and rough trails to see how well the bike handles bumps, corners, and turns.

  4. Evaluate Components: During your test ride, pay attention to the quality of components such as brakes, gears, and suspension systems.

To find the right bike shop for a test ride experience, consider researching local shops with knowledgeable staff who can guide you through different options based on your needs.

Transitioning into checking for warranty and after-sales support is important when making any purchase decision without overlooking these essential aspects that affect long-term satisfaction with your new gravel bike.

Check for Warranty and After-Sales Support

When purchasing a bike, it’s important to check for warranty and after-sales support to ensure long-term satisfaction. Warranty coverage is crucial as it protects your investment and provides peace of mind. Look for a gravel bike that comes with a comprehensive warranty, covering manufacturing defects and component failures. Ideally, the frame should have a lifetime warranty, while other components may have varying coverage periods.

Additionally, consider the level of customer service provided by the manufacturer or retailer. A reliable after-sales support system ensures that you can easily get assistance when needed. This includes prompt responses to inquiries, knowledgeable staff who can help troubleshoot issues, and efficient resolution of any problems that arise.

Advertisement

Before making a purchase decision, thoroughly research the manufacturer’s reputation for honoring warranties and providing excellent customer service. Reading reviews from other customers can give you valuable insights into their experiences.

Considering additional accessories and upgrades is another important aspect when buying a beginner gravel bike. These additions can enhance your riding experience and allow you to customize your bike according to your preferences. By choosing quality accessories such as fenders, lights, racks, or upgraded components like handlebars or saddles, you can make your gravel bike even more versatile and enjoyable.

Transitioning into the subsequent section about ‘consider additional accessories and upgrades’, it’s essential to explore these options alongside warranty coverage and after-sales support in order to make an informed decision about the best beginner gravel bike for your needs.

Consider Additional Accessories and Upgrades

To enhance your riding experience and customize your bike to suit your preferences, you should also consider exploring additional accessories and upgrades. Upgrading options can include components such as tires, handlebars, pedals, and saddles. These upgrades can improve comfort, performance, and overall ride quality.

One important aspect to consider when upgrading is the importance of bike fit. It is crucial to ensure that any new accessories or components are compatible with your bike’s frame size and geometry. A poorly fitting accessory or component can negatively affect your riding experience and even lead to discomfort or injury.

Advertisement

When selecting upgrades, it is helpful to refer to a table like the one below:

Accessory/Upgrade Description Benefits
Tires Wider tires for increased stability on gravel Improved traction and control
Handlebars Drop bars for better aerodynamics Enhanced speed and efficiency
Pedals Clipless pedals for efficient power transfer Increased pedaling efficiency
Saddles Comfortable saddle for long rides Reduced saddle soreness

Considering these options will allow you to tailor your gravel bike specifically for your needs. In the next section about ‘look for deals and special offers,’ we will explore ways to find these accessories at affordable prices without compromising quality.

Look for Deals and Special Offers

Finding deals and special offers can help you save money on accessories and upgrades for your customized gravel bike. When purchasing additional items for your bike, keep an eye out for promotions and discounts that retailers may be offering. Many retailers have seasonal sales or clearance events where you can find great deals on a variety of biking gear.

The best time to buy accessories and upgrades at a discounted price is during major holidays like Black Friday or Cyber Monday when retailers often offer significant discounts. Additionally, some retailers may have loyalty programs or email newsletters that provide exclusive access to special promotions. By signing up for these programs, you can stay informed about upcoming deals and potentially save even more money.

It’s important to note that while deals and promotions can help you save money, it’s equally crucial to buy from a reliable and reputable retailer. Look for online stores or local shops with positive customer reviews, as this ensures not only the quality of the products but also reliable customer service in case any issues arise. Buying from a trusted retailer will give you peace of mind knowing that you are making a wise investment in your beginner gravel bike setup.

Advertisement

Buy from a Reliable and Reputable Retailer

Make sure you purchase from a trusted and reputable retailer to ensure the quality of your accessories and upgrades for your customized gravel bike. When it comes to buying a beginner gravel bike, there are several reliable retailer options that offer reputable brands available.

Here are some key considerations to keep in mind:

  • Research online: Start by doing thorough research online to find out which retailers have a good reputation for selling high-quality bikes and accessories. Look for customer reviews and ratings to gauge their reliability.

  • Visit local bike shops: Local bike shops often have knowledgeable staff who can guide you in finding the right beginner gravel bike. They can provide expert advice on choosing the right brand and model, as well as help with customization options.

  • Check manufacturer websites: Many reputable brands have their own websites where you can directly purchase their products. Buying from the manufacturer ensures authenticity and quality control.

By purchasing from a reliable retailer, you can be confident that you are getting genuine products that will enhance your gravel riding experience.

Now, let’s move on to how you can enjoy your gravel riding experience without breaking the bank!

Enjoy Your Gravel Riding Experience without Breaking the Bank!

Get the most out of your gravel riding experience while staying within your budget! When it comes to enjoying gravel riding without breaking the bank, finding affordable gravel bike accessories and maintaining your bike on a budget are key. Here are some tips to help you do just that.

Advertisement

Firstly, let’s talk about finding affordable gravel bike accessories. It’s important to invest in quality accessories that will enhance your riding experience without draining your wallet. Look for sales or discounts at reliable retailers and online marketplaces. Additionally, consider buying used accessories from reputable sources such as classified ads or online forums.

To help you visualize how these affordable accessories can improve your gravel riding experience, here is a table showcasing three must-have items:

Accessory Purpose Price Range
Gravel tires Provide traction on loose surfaces $30 – $60
Bike lights Ensure visibility and safety $20 – $40
Bikepacking bags Carry essentials on long rides $50 – $100

Now let’s discuss tips for maintaining your gravel bike on a budget. Regular cleaning and lubrication of the drivetrain can prevent premature wear and expensive repairs down the line. Use cost-effective cleaning solutions like dish soap and water instead of specialized cleaners. Additionally, learn basic maintenance tasks such as adjusting brakes and gears yourself, saving money on professional services.

By following these tips for finding affordable gravel bike accessories and maintaining your bike on a budget, you can enjoy the thrill of gravel riding without breaking the bank!

Frequently Asked Questions

What are the different types of gravel bike frames available?

There are several types of gravel bike frames available, each with its own characteristics and advantages. One key consideration is the type of tires you plan to use on your gravel bike. Different frame designs accommodate different tire widths and styles, such as tubeless or clincher.

Advertisement

Another important factor to consider is the handlebars. Gravel bikes typically have drop bars or flared drop bars, which provide a comfortable and stable grip for off-road riding.

How do I know which size gravel bike is right for me?

When determining the right size gravel bike for you, it’s important to avoid common mistakes.

Start by measuring your inseam and use a sizing chart provided by the manufacturer. Consider factors like standover height, top tube length, and reach.

Remember that frame sizes can vary across brands, so always test ride before buying.

Tips and tricks include adjusting saddle height and position to ensure proper leg extension and comfort while riding.

Advertisement

Are there any specific accessories or upgrades I should consider for gravel riding?

When it comes to gravel riding, there are a few key accessories and upgrades that I highly recommend.

First and foremost, bike maintenance is essential for optimal performance on rough terrain. Regularly cleaning and lubricating your chain, checking tire pressure, and inspecting the brakes are crucial for safety and longevity.

Additionally, investing in essential safety gear such as a helmet, gloves, and protective eyewear is non-negotiable. These will provide necessary protection in case of any accidents or falls during your gravel adventures.

Where can I find reliable reviews and recommendations for beginner gravel bikes?

For reliable reviews and recommendations on beginner gravel bikes, I would suggest looking into the best gravel bike brands and top budget gravel bikes.

These sources often provide technical details and knowledgeable insights into the performance, features, and value of different models.

Advertisement

By researching these resources, you can gain a better understanding of which brands offer high-quality options for beginners at an affordable price point, helping you make an informed decision.

What are some common warranty and after-sales support options for gravel bikes?

Warranty options and after-sales support are essential considerations when purchasing a gravel bike.

It is important to choose a brand that offers a comprehensive warranty, covering any manufacturing defects or issues that may arise.

Additionally, reliable after-sales support ensures prompt assistance with any inquiries or problems that you may encounter during ownership.

Look for brands that provide responsive customer service, spare parts availability, and helpful resources such as user manuals or online tutorials.

Advertisement

Conclusion

In conclusion, finding a good beginner gravel bike doesn’t have to break the bank. By understanding the basics of gravel bikes and setting a budget, you can research different brands and models to find the perfect fit.

Consider the frame material and geometry, as well as components suitable for gravel riding. Don’t forget about additional accessories and upgrades that can enhance your riding experience.

Look for deals and special offers from reliable retailers to get the most value for your money. With these tips in mind, you’ll be able to enjoy the thrilling world of gravel riding without emptying your wallet.

Happy trails!

Advertisement

Olivia's writing is not only informative but also inspiring. She has a knack for telling stories that capture the essence of cycling and the joy it brings to people's lives. Her writing has been praised by readers and industry experts alike for its clarity, depth, and authenticity. In addition to her writing, Olivia is also an avid cyclist. She enjoys exploring new trails and routes and has participated in several cycling events and races. Her first-hand experience with cycling gives her a unique perspective on the sport, reflected in her writing. Overall, Olivia is a talented writer passionate about cycling and dedicated to producing high-quality content for FlatironBike. Her contributions to the magazine have helped make it a go-to source for cycling enthusiasts worldwide.

Continue Reading
Advertisement

Gravel Bike

How To Properly Size A Gravel Bike

Published

on

By

An image showcasing a cyclist astride a gravel bike, demonstrating the ideal frame size with a slightly bent knee at the bottom of the pedal stroke, a relaxed grip on the handlebars, and proper clearance between the rider and the top tube

Are you ready to tackle challenging gravel bike trails? Hang onto your handlebars as I unveil the key to a smooth ride: getting the right size.

It’s not just about guessing or settling for what’s available – it’s about finding that harmonious balance between you and your machine. In this article, I’ll guide you through the precise steps of measuring, calculating, and fine-tuning every aspect of your gravel bike’s size for an optimized riding experience.

Get ready to take control of your adventure like never before!

Key Takeaways

  • Proper sizing affects comfort, performance, and riding experience.
  • Measure inseam length for accurate frame size.
  • Reach, stack height, and top tube length fine-tune bike fit.
  • Test ride different sizes to find the best fit.

Understand the Importance of Proper Sizing

You need to understand the importance of proper sizing when choosing a gravel bike. The right fit can greatly affect your comfort, performance, and overall riding experience. Bike fit is crucial because it ensures that you are in the correct position to maximize power transfer and minimize strain on your body.

Advertisement

One of the most common sizing mistakes people make is choosing a bike based solely on their height. While height can give you a general idea of frame size, it doesn’t account for individual proportions such as inseam length or torso length. A bike that is too small or too large can lead to discomfort, pain, and reduced efficiency.

To ensure proper sizing, start by measuring your inseam length. This measurement will help determine the appropriate frame size for your gravel bike. Stand with your feet shoulder-width apart and measure from the floor to your crotch. With this measurement in hand, consult a size chart provided by the manufacturer or visit a professional bike fitter who can guide you in selecting the right frame size for your specific measurements.

Now that we understand the importance of proper sizing, let’s move on to how to measure your inseam length accurately without any guesswork.

Measure Your Inseam Length

To accurately measure your inseam length, start by standing barefoot against a wall. Place a book between your legs, pressing it firmly against your groin. Make sure the spine of the book is parallel to the floor. Have someone measure from the top of the book down to the ground using a measuring tape or ruler. This measurement will give you an accurate inseam length.

Once you have determined your inseam length, you can use it as a starting point for finding the right size gravel bike. Bike fit is crucial for comfort and efficiency while riding, so taking accurate measurements is essential.

Advertisement

When considering bike sizing, keep in mind that different brands and models may have slightly different sizing charts. It’s important to consult each manufacturer’s guidelines to find the best fit for you.

Now that you have measured your inseam length, it’s time to consider your riding style and terrain. This will help determine other aspects of bike fit such as top tube length and handlebar height. By taking these factors into account along with your inseam measurement, you can ensure that your gravel bike is properly sized for optimal performance on any ride.

Consider Your Riding Style and Terrain

Considering your riding style and the type of terrain you will be encountering is crucial when determining the right fit for your gravel bike. Your riding style will directly affect your position on the bike, which in turn impacts comfort and efficiency. If you prefer a more aggressive riding position with a lower handlebar height, you may want to consider a smaller frame size. On the other hand, if you prefer a more relaxed and upright position, a larger frame size would be more suitable.

Advertisement

The type of terrain you plan to ride on also plays a significant role in determining the appropriate sizing for your gravel bike. If you anticipate tackling rough and technical off-road trails, a smaller frame size with a shorter wheelbase can provide better maneuverability. However, if long-distance endurance rides or smooth gravel roads are more your style, a larger frame size with increased stability may be preferred.

When considering bike fit and sizing charts, it’s important to note that each manufacturer might have slight variations in their measurements. Take the time to review specific sizing charts provided by different brands to ensure an accurate fit for your body proportions.

In the subsequent section about determining your frame size, we will dive deeper into calculating specific measurements based on your inseam length and other factors.

Determine Your Frame Size

Taking into account your body proportions and riding preferences is essential when determining the right fit for your gravel bike. One of the key factors in finding the correct frame size is measuring your inseam accurately. To do this, stand barefoot against a wall with your legs slightly apart and place a book between your legs, snug against your crotch. Measure from the top of the book to the floor to get an accurate inseam measurement.

Once you have your inseam measurement, you can use it to choose the correct frame size for your gravel bike. Most manufacturers provide sizing charts that correlate inseam measurements with recommended frame sizes. These charts take into consideration factors such as seat tube length and top tube length to ensure a proper fit.

Advertisement

It’s important to note that different manufacturers may have slightly different sizing conventions, so be sure to consult each manufacturer’s specific sizing chart for accurate results. Additionally, keep in mind that there may be some variations depending on personal preference and riding style.

Now that you have determined your frame size based on your inseam measurement, let’s move on to the next step: taking into account reach and stack height when choosing the right gravel bike for you.

Take into Account Reach and Stack Height

Once you know your frame size, it’s important to consider the reach and stack height to ensure a comfortable fit for your riding style. The reach refers to the horizontal distance between the bottom bracket and the top of the head tube, while the stack height is the vertical distance between these two points. Proper reach and stack height are crucial in bike sizing because they directly affect your riding position and overall comfort on the bike.

Advertisement

When determining reach and stack height for gravel biking, there are several factors to consider. Firstly, your body proportions play a significant role. Longer arms may require a longer reach, while shorter arms may necessitate a shorter one. Additionally, considering your flexibility is important as well. If you have limited flexibility, opting for a higher stack height can alleviate strain on your back and neck.

To help you visualize how reach and stack height impact your riding experience, here is a table:

Reach Stack Height
Longer Reach Higher Stack Height
Shorter Reach Lower Stack Height
Increased Comfort Decreased Discomfort
Optimal Riding Position Reduced Strain

Considering the top tube length will further fine-tune your bike fit in relation to your individual needs. By ensuring proper reach, stack height, and top tube length, you’ll be one step closer to finding that perfect gravel bike fit.

Consider the Top Tube Length

The top tube length is an important factor to consider when finding the right fit for your riding style and body proportions. It plays a crucial role in determining your overall comfort and control on the bike. When considering the top tube length, it’s essential to take into account both the reach and stack height measurements.

The reach measurement refers to the distance from the center of the bottom bracket to the top of the head tube. It determines how stretched out or upright you will be on the bike. A shorter top tube length will result in a more relaxed and upright position, while a longer one will provide a more aggressive and aerodynamic stance.

Advertisement

On the other hand, stack height measures how high or low your handlebars are relative to your saddle. A higher stack height can lead to a more comfortable and relaxed riding position, ideal for long-distance rides or endurance events.

When considering these factors, it’s also crucial to check the standover height, which is how much clearance you have when standing over your bike with both feet flat on the ground. This ensures that you can easily dismount and maneuver your bike without any discomfort or restrictions.

Considering all these aspects will help you find a gravel bike with an optimal top tube length that suits your body proportions, riding style, and preferences. Now let’s move on to checking the standover height…

Check the Standover Height

Make sure you check the standover height to ensure comfortable dismounting and maneuvering when both feet are flat on the ground. Standover clearance refers to the amount of space between your crotch and the top tube of the bike frame when you straddle it. To measure this, stand with your feet shoulder-width apart and wear the shoes you plan to ride in. Lift one leg slightly and swing it over the bike as if mounting or dismounting.

The ideal standover clearance is about 2-3 inches for road bikes, but gravel bikes may require more due to their off-road nature. A higher standover clearance allows for easier handling and control on rough terrain.

Advertisement

When considering sizing options, make sure there is enough room between your inseam and the top tube while maintaining a proper riding position. Some manufacturers offer multiple frame sizes with different standover heights, so choose one that suits your body proportions best.

To test ride different sizes, visit a local bike shop or participate in demo events organized by manufacturers or cycling clubs. This will give you a better understanding of how each size feels under real riding conditions before making a final decision on which size gravel bike to purchase.

Test Ride Different Sizes

When you test ride different sizes, it gives you a better understanding of how each one feels under real riding conditions before you make a final decision on which size to purchase. This test ride experience is crucial in determining the optimal fit for your gravel bike.

Here are some key points to consider during your test ride:

  • Comfort: Pay attention to how comfortable you feel on each size. Does the bike feel too big or too small? A proper fit should allow for easy maneuverability and control.

  • Stability: Notice how stable the bike feels when riding at various speeds and on different terrains. A well-sized bike will provide a balanced and confident riding experience.

  • Handling: Test the bike’s responsiveness when cornering or navigating tight spaces. The right size should offer precise handling without feeling twitchy or sluggish.

  • Power Transfer: Observe how efficiently your pedaling power is transferred to the wheels. An optimal fit will maximize energy transfer, allowing you to ride more efficiently.

By test riding different sizes, you can gather valuable insights into how each option performs and find the best fit for your needs.

Advertisement

Once you have identified a few potential sizes, it’s time to consult with a professional bike fitter who can provide further guidance in selecting the perfect size for your gravel bike setup.

Consult with a Professional Bike Fitter

Consider consulting with a professional bike fitter to ensure the optimal fit for your gravel bike setup. A bike fit assessment conducted by a trained expert can provide valuable insights into your body’s biomechanics and help determine the ideal frame size, stem length, handlebar width, and saddle position for you. Professional bike fitting services are equipped with specialized tools and expertise to analyze your riding style, flexibility, and any potential imbalances or discomfort you may experience on the bike.

During a professional bike fit session, the fitter will take various measurements of your body proportions and assess your range of motion. They may also observe your pedaling technique to identify any areas that need improvement. Based on this comprehensive analysis, they will make precise adjustments to optimize your position on the gravel bike.

By consulting with a professional bike fitter, you can avoid common pitfalls like choosing a frame size that is too small or large for you, which could lead to discomfort or decreased performance. Additionally, they can recommend appropriate components such as saddles or handlebars that suit your individual needs.

Once you have completed the initial assessment and received recommendations from the professional fitter, it is time to consider adjustments and components that will further enhance your gravel biking experience.

Advertisement

Consider Adjustments and Components

To enhance your experience, you could explore different adjustments and components for your gravel biking setup. When it comes to bike fit, there are a few key areas to consider.

First, saddle position is crucial for comfort and power transfer. Make sure your saddle height is set correctly so that your legs can fully extend with a slight bend at the knee when the pedal is at its lowest point. Additionally, the fore-aft position of the saddle should be adjusted to achieve proper weight distribution between the front and rear wheels.

Next, handlebar width and reach can greatly affect your riding comfort and control. Experiment with different handlebar widths to find the one that feels most natural for you. You may also want to consider adjusting the stem length to achieve a comfortable reach to the handlebars.

In terms of components, selecting tires that suit your riding style and terrain is essential for optimal performance. Consider choosing wider tires with more aggressive tread patterns for off-road adventures, while opting for narrower tires with smoother tread patterns if you plan on spending more time on pavement.

Taking note of the bike’s geometry is crucial in ensuring a proper fit. The frame geometry determines factors such as stack height (vertical distance from bottom bracket to top of head tube) and reach (horizontal distance from bottom bracket to top of head tube). These measurements play a significant role in determining how comfortable you will be on long rides or during technical sections.

Advertisement

Transitioning into taking note of the bike’s geometry in order to properly size your gravel bike, it’s important to understand how these frame measurements can impact your overall riding experience.

Take Note of the Bike’s Geometry

Now that we have considered adjustments and components, let’s move on to the next important aspect of properly sizing a gravel bike: taking note of the bike’s geometry.

Bike fit is crucial for comfort, efficiency, and overall performance, so it’s essential to understand how the geometry of a bike can affect your riding experience.

Here are some important factors to consider when evaluating the bike’s geometry:

  1. Frame Size: The frame size determines the overall fit of the bike. It should be proportional to your body measurements and allow for proper reach and standover height.

  2. Top Tube Length: This measurement affects your riding position and comfort. A longer top tube provides a more stretched-out position, while a shorter one offers a more upright stance.

  3. Head Tube Angle: The head tube angle influences steering responsiveness and stability. Steeper angles provide quicker handling, while shallower angles offer stability at higher speeds.

  4. Bottom Bracket Drop: This measurement impacts pedal clearance during cornering and affects how low you feel on the bike.

By considering these aspects of the bike’s geometry, you can ensure a better fit and an optimal riding experience.

Advertisement

Now let’s move on to our next topic where we will discuss why it is important to consider the bike’s wheel size.

Consider the Bike’s Wheel Size

Take note of the wheel size on the bike to ensure a comfortable and enjoyable ride. The wheel diameter plays a crucial role in determining how the bike performs on different surfaces. For gravel biking, it is common to see wheel sizes ranging from 650b to 700c.

Smaller wheels, like the 650b, offer better maneuverability and acceleration while sacrificing some top-end speed. On the other hand, larger wheels, such as the standard 700c, provide better stability and roll over obstacles more easily.

Another important factor to consider is tire clearance. Gravel bikes are designed with wider tire clearances compared to road bikes. This allows for fitting tires with more tread and larger volume, which improves traction and comfort on rough terrains. When choosing a wheel size, make sure it accommodates your desired tire width without any clearance issues.

Considering both wheel size and tire clearance will help you find the right balance between agility and stability for your gravel bike adventures. In the next section about handlebar width, we will explore another aspect that contributes to a well-sized gravel bike setup.

Advertisement

Without compromising on performance or comfort…

Consider the Bike’s Handlebar Width

Ensure that your handlebar width suits your riding style and preferences for a comfortable and controlled experience.

When it comes to bike fit, handlebar comfort is crucial. Here are some factors to consider when determining the right handlebar width:

  • Shoulder Width: Your handlebars should be slightly wider than your shoulder width. This allows for better control and stability while riding.

  • Riding Style: Different riding styles require different handlebar widths. For example, if you prefer an aggressive riding position, narrower handlebars may be more suitable. On the other hand, if you enjoy long-distance rides or gravel adventures, wider handlebars provide better stability.

  • Maneuverability: Wider handlebars offer increased leverage, making it easier to maneuver through technical terrain or tight corners.

  • Comfort: Handlebar width can affect your overall comfort on the bike. It’s important to find a width that allows for relaxed hand positioning without strain or discomfort.

Finding the optimal handlebar width requires considering these factors along with personal preference. Once you have determined the appropriate handlebar width, you can move on to evaluating the bike’s stem length in order to achieve a well-balanced setup.

Consider the Bike’s Stem Length

Choosing the right stem length is crucial for achieving a well-balanced setup on your bike. When it comes to gravel biking, finding the optimal stem length can greatly affect your comfort, control, and overall riding experience. The stem connects the handlebars to the fork steerer tube, determining your reach and position on the bike.

Advertisement

To choose the right stem length for your gravel bike, you need to consider various factors such as your body measurements, riding style, and personal preferences. A shorter stem provides quicker handling and more responsive steering, ideal for technical terrains or aggressive riding. On the other hand, a longer stem offers more stability and less twitchy handling, suitable for long-distance endurance rides.

Adjusting the stem angle can also help fine-tune your fit on the bike. By angling it up or down slightly, you can modify your riding position and alleviate strain on your back or wrists. It’s essential to experiment with different angles until you find what feels most comfortable for you.

Once you have chosen the right stem length and adjusted its angle accordingly, you can further fine-tune the fit with saddle and handlebar adjustments. These additional adjustments will ensure that all components work together harmoniously to provide an ergonomic and efficient riding experience.

Transitioning into adjusting saddle and handlebar positions allows riders to optimize their setup without compromising comfort or performance.

Fine-Tune the Fit with Saddle and Handlebar Adjustments

To optimize your riding experience, it’s important to make adjustments to the saddle and handlebar positions. Fine-tuning these elements will ensure a comfortable and efficient ride on your gravel bike.

Advertisement

Let’s start with the saddle position. Finding the right height is crucial for proper leg extension and power transfer. Start by sitting on the saddle with one foot at the bottom of the pedal stroke. Your knee should have a slight bend, around 25-30 degrees. Adjust accordingly until you achieve this angle.

Next, let’s focus on handlebar height. This adjustment affects both comfort and control. Begin by loosening the stem bolts and raising or lowering the handlebars to your desired position. Keep in mind that a higher handlebar offers a more upright riding posture, which can be beneficial for long rides or those seeking greater comfort. Conversely, a lower handlebar promotes an aerodynamic position suitable for faster-paced riding.

Once you’ve made these adjustments, take some time to test out your new setup on various terrains. Pay attention to any discomfort or strain in your back, neck, or wrists – these are signs that further adjustments may be necessary.

Remember, finding the ideal saddle position and handlebar height is essential for achieving optimal performance and preventing injuries while enjoying your gravel bike adventures!

Frequently Asked Questions

What are the benefits of consulting with a professional bike fitter?

Consulting with a professional bike fitter offers numerous benefits. Firstly, they possess the expertise to ensure proper bike sizing, which is crucial for optimal performance and comfort. Through their precise measurements and analysis, they can identify any issues that may impact your riding experience.

Advertisement

Additionally, a professional bike fitting can help prevent injuries by ensuring correct body alignment and reducing strain on joints. Overall, the importance of proper bike sizing cannot be overstated, making a consultation with a professional bike fitter invaluable.

How does the bike’s geometry impact the sizing process?

The bike’s geometry plays a crucial role in the bike fit and sizing process. It determines how the bike will handle, its stability, and comfort. A slight change in geometry can have a significant impact on your riding experience.

Factors like head tube angle, top tube length, and seat tube angle all affect how you fit on the bike. Therefore, understanding the geometry is essential for finding the right size and achieving optimal performance.

What factors should I consider when choosing the bike’s wheel size?

When considering wheel size for a gravel bike fit, there are several important factors to take into account.

Firstly, the terrain you’ll be riding on plays a crucial role. Smaller wheels provide nimbleness and agility, while larger wheels offer better momentum and stability over rough surfaces.

Advertisement

Additionally, tire clearance is essential as wider tires require larger wheel sizes.

Lastly, personal preference and riding style should also influence your decision on wheel size considerations for optimal gravel bike fit.

How does the bike’s handlebar width affect the overall fit?

The handlebar width plays a crucial role in bike fit. It symbolizes control and comfort while riding.

A wider handlebar provides better stability and control, especially on rough terrains. However, it may affect aerodynamics and maneuverability.

On the other hand, a narrower handlebar allows for more precise steering and improved aerodynamics.

Advertisement

Finding the right balance between these factors is essential to ensure an optimal bike fit and enhance your overall riding experience.

What adjustments can be made to the saddle and handlebars for a more customized fit?

To achieve a more customized fit on a gravel bike, adjustments can be made to the saddle height and handlebar reach.

The saddle height refers to the vertical position of the seat, which affects leg extension and power output. By adjusting the saddle height correctly, optimal pedaling efficiency can be achieved.

Handlebar reach refers to the horizontal distance between the saddle and handlebars. Adjusting this allows for a comfortable riding position and proper weight distribution on the bike.

Conclusion

In conclusion, properly sizing a gravel bike is crucial for a comfortable and efficient riding experience. By measuring your inseam length and considering your riding style and terrain, you can determine the appropriate frame size that suits you.

Advertisement

Additionally, taking into account factors such as reach and stack height, wheel size, handlebar width, stem length, and fine-tuning the fit with saddle and handlebar adjustments will ensure a customized fit.

Remember that 90% of cyclists who ride bikes that are too big or small experience discomfort or pain. Therefore, investing time in finding the right size is essential for an enjoyable gravel biking journey.

Continue Reading

Gravel Bike

Mountain Bike Tire Pressure When Riding On Gravel Roads

Published

on

By

An image capturing the moment a mountain biker's tire encounters a gravel road, showcasing the tire's tread gripping the loose stones, while dust particles dance around in the air

Riding on gravel trails can be an exciting experience. However, it is important to pay attention to your mountain bike’s tire pressure in order to navigate the uneven terrain safely. Just like a tightrope walker on a thin wire, maintaining the perfect balance is essential for achieving peak performance and control.

In this article, we delve into the intricate world of tire pressure, exploring its impact on gravel riding. We provide you with valuable insights to help you conquer any off-road challenge with confidence.

So grab your helmet and let’s dive into the fascinating realm of mountain bike tire pressure on gravel roads!

Key Takeaways

  • Adjusting tire pressure based on factors like rider weight and terrain conditions enhances comfort and stability.
  • Wider tires with higher volume provide improved stability and traction on gravel roads.
  • Lower tire pressures increase grip and control during cornering.
  • Finding the right tire pressure for specific conditions ensures control and stability.

Understanding the Basics of Tire Pressure

You should understand the basics of tire pressure before riding on gravel roads. Tire pressure plays a crucial role in determining your bike’s performance and safety on different terrains.

Advertisement

When it comes to road biking, there are specific tire pressure recommendations that you can follow. Generally, higher tire pressures are recommended for smoother pavement surfaces, as they provide lower rolling resistance and better efficiency. However, when riding on gravel roads, lower tire pressures are typically preferred.

Understanding the effects of tire pressure on cornering is essential for safe navigation on gravel roads. Lower tire pressures allow for a larger contact patch between the tire and the road surface, increasing traction and grip while cornering. This increased grip helps to prevent sliding or skidding, ensuring better control over your bike.

Transitioning into factors affecting tire pressure on gravel roads, it is important to consider various elements such as rider weight, terrain conditions, and personal preference. These factors influence the optimal tire pressure that you should use when riding off-road.

By properly adjusting your tire pressure based on these factors, you can enhance your comfort, stability, and overall performance while tackling challenging gravel roads without sacrificing control or jeopardizing your safety.

Factors Affecting Tire Pressure on Gravel Roads

When it comes to tire pressure on gravel roads, there are three key factors that come into play: tire width and volume, rider weight, and riding style, as well as the terrain and surface conditions.

Advertisement

Tire width and volume determine the amount of air in the tires, affecting both stability and traction.

Rider weight plays a role in determining how much pressure is needed to support the bike on uneven surfaces.

Finally, the terrain and surface conditions impact tire pressure by influencing how much grip is needed for optimal performance.

It’s important to consider all these factors when adjusting tire pressure for a smooth and safe ride on gravel roads.

Tire Width and Volume

With increased tire width and volume, riders can experience improved stability and traction when riding on gravel roads. When it comes to tire pressure for wet conditions, wider tires with higher volume allow for lower pressures, which increase the contact patch with the ground and enhance grip. This is crucial in wet conditions where maintaining control is essential.

Advertisement

On the other hand, when riding on sandy terrain, narrower tires with lower volume and higher pressures are preferred to prevent sinking into the loose surface. These tires cut through the sand more efficiently and provide better maneuverability. However, it’s important to note that finding the optimal tire pressure involves a balance between stability, traction, and comfort based on individual rider weight and riding style.

Adjusting tire pressure according to these factors will ensure a smoother ride while tackling gravel roads.

Transitioning into the subsequent section about ‘rider weight and riding style’, it is crucial to consider these aspects as they greatly influence tire performance on different surfaces.

Rider Weight and Riding Style

Consider your weight and riding style as factors that significantly impact the performance of your tires on various surfaces. When it comes to adjusting tire pressure for downhill rides, it is crucial to find the right balance between grip and rolling resistance. Higher pressures provide better rolling efficiency but can decrease traction, while lower pressures increase grip but may result in higher rolling resistance. A general rule of thumb is to reduce tire pressure by 2-3 psi when descending, allowing for more contact with the ground and improved control. On the other hand, cornering requires a different approach. Higher tire pressures help prevent sidewall collapse and maintain stability during aggressive turns. It’s important to experiment with different pressures based on personal preference and terrain conditions to find what works best for you. Taking these factors into account will ensure optimal performance when riding on gravel roads.

Moving forward, let’s delve into how terrain and surface conditions further influence our tire pressure choices without compromising safety or ride quality.

Advertisement

Terrain and Surface Conditions

The type of surface you’re riding on can greatly impact the optimal tire pressure for your ride. When it comes to gravel roads, understanding the terrain and surface conditions is crucial in determining the right tire pressure. Gravel road maintenance plays a significant role in how bumpy or smooth the surface is. If the gravel has been recently graded and compacted, you may be able to run slightly higher tire pressures to increase efficiency and reduce rolling resistance. However, if the gravel road is wet or loose, lower tire pressures are recommended to improve traction and prevent sliding.

Wet gravel can be especially tricky as it tends to create a slippery surface that requires more grip from your tires. Finding the right tire pressure for these specific conditions is essential for maintaining control and stability while riding on gravel roads.

Transitioning into the subsequent section about the importance of finding the right tire pressure: It’s important to understand that finding the right tire pressure not only depends on terrain and surface conditions but also factors such as rider weight, riding style, and personal preferences.

Importance of Finding the Right Tire Pressure

To find the right tire pressure for riding on gravel roads, it is important to understand the importance of having the correct amount of air in your tires. Finding optimal tire pressure is crucial as it directly affects your performance and overall ride experience. Adjusting pressure based on different terrain and surface conditions can greatly enhance your bike’s handling capabilities.

Here are three factors to consider when finding the right tire pressure for gravel road riding:

Advertisement
  1. Traction: Maintaining adequate tire pressure ensures better traction on loose surfaces like gravel. Lower pressures allow the tire to conform to irregularities in the road, increasing grip and reducing slippage.

  2. Comfort: Adjusting your tire pressure can significantly impact ride comfort. Higher pressures result in a stiffer ride, transmitting more vibrations from rough terrains. Lower pressures absorb these vibrations, providing a smoother journey.

  3. Rolling Resistance: Tire pressure affects rolling resistance, which influences speed and efficiency while pedaling on gravel roads. Higher pressures reduce rolling resistance by minimizing tire deformation, enabling faster speeds with minimal effort.

Understanding these factors will help you fine-tune your mountain bike’s tire pressure for optimal performance on gravel roads. The relationship between tire pressure and performance is intricate and deserves careful consideration when seeking an enjoyable off-road cycling experience.

The Relationship Between Tire Pressure and Performance

When it comes to mountain biking, finding the right tire pressure is crucial for optimal performance. The relationship between tire pressure and performance can be seen in three key areas: traction and grip, rolling resistance, and comfort and control.

Maintaining the proper tire pressure ensures maximum traction and grip on various terrains. It reduces rolling resistance for a smoother ride and enhances overall comfort and control while riding.

Traction and Grip

Riding with lower tire pressure on gravel roads increases traction and grip. When the tire pressure is lower, the tire conforms better to the uneven surface of the gravel road, allowing for more contact points between the tire and the ground. This increased contact improves traction and stability, enabling me to maintain control and balance even on loose or slippery surfaces. The added grip gives me confidence in my bike’s handling capabilities, especially during cornering or braking maneuvers.

Lower tire pressure also helps in absorbing vibrations from rough terrain, reducing fatigue and providing a smoother ride. However, it is important to find a balance as too low of a tire pressure can lead to pinch flats or sidewall damage.

Advertisement

Transitioning into the next section about rolling resistance, maintaining optimal tire pressure not only improves traction but also affects how efficiently I can roll over gravel roads without expending excessive energy.

Rolling Resistance

Lowering tire pressure on gravel roads increases rolling resistance, making it more difficult to maintain speed and momentum.

When riding on gravel, the increased traction and grip provided by lower tire pressure can be beneficial, but it comes at a cost. The lower pressure causes the tires to deform more as they roll over the uneven surface, resulting in increased friction between the tires and the ground. This extra resistance slows down the bike and requires more effort from the rider to maintain speed.

Additionally, lower tire pressure can also affect puncture resistance. With less air in the tires, there is a higher risk of pinch flats or snake bites when hitting sharp rocks or potholes.

Therefore, finding an optimal balance between lower tire pressure for traction and grip while still maintaining sufficient rolling resistance is crucial for achieving both comfort and control on gravel roads without sacrificing speed or puncture protection.

Advertisement

Comfort and Control

Finding the right balance between traction and grip while still maintaining sufficient rolling resistance is crucial for achieving comfort and control on gravel roads.

When it comes to mountain bike tire pressure, there are a few factors to consider. For downhill trails, a lower tire pressure can provide increased traction and better handling on steep descents. This allows the tires to deform around obstacles, maximizing grip.

On the other hand, riding in wet conditions calls for slightly higher tire pressure to prevent excessive sinking into soft terrain and to improve mud shedding capabilities.

It’s important to find the sweet spot that offers enough cushioning for a comfortable ride while maintaining control over the bike. Determining the ideal tire pressure involves considering factors such as rider weight, trail conditions, and personal preference.

By finding this balance, riders can enjoy optimal comfort and control on gravel roads without compromising performance or safety.

Advertisement

How to Determine the Ideal Tire Pressure

To determine the ideal tire pressure for riding on gravel roads, it’s important to consider factors such as terrain and rider weight. By finding the right balance, you can optimize comfort and control during your off-road adventures. Determining pressure involves understanding how different tire pressures affect performance on gravel surfaces.

Terrain Type Rider Weight Ideal Tire Pressure
Loose Gravel Light 30-35 psi
Medium 35-40 psi
Heavy 40-45 psi
Packed Gravel Light 25-30 psi
Medium 30-35 psi
Heavy 35-40 psi
Rough Gravel Light 20-25 psi
Medium 25-30 psi
Heavy 30-35 psi

Maintaining tire pressure is crucial for optimal performance. Regularly check your tires using tools like a digital pressure gauge or a floor pump with an integrated gauge. Adjust the pressure according to the conditions you will be riding in, ensuring that you have enough traction without sacrificing too much comfort.

Moving forward into the section about tools and techniques for checking tire pressure, it’s essential to ensure accurate readings to maintain peak performance while exploring gravel roads.

Tools and Techniques for Checking Tire Pressure

When it comes to checking tire pressure, there are a few tools and techniques that I rely on.

First, using a pressure gauge is essential for precise measurements. It allows me to accurately determine the exact pressure of my tires.

Advertisement

Second, feeling for tire firmness can also be helpful, as I can quickly assess if the tires need more or less air based on how they feel when pressed with my hand.

Lastly, if I am using tubeless tires, I make sure to regularly check and replenish the tubeless sealant to ensure optimal performance and prevent any potential leaks.

These tools and techniques help me maintain the ideal tire pressure for a smooth and efficient ride.

Using a Pressure Gauge

Check your pressure gauge to ensure that you have the correct tire pressure for riding on gravel roads. Accuracy is crucial when using a pressure gauge, so it’s important to choose a high-quality one. Cheaper gauges may not provide accurate readings, leading to incorrect tire pressures. To check the accuracy of your gauge, compare its reading with that of another reliable gauge or use an alternative method such as a digital gauge or an air compressor with a built-in pressure display.

Once you have confirmed the accuracy of your gauge, it’s time to measure the tire pressure. Attach the gauge securely onto the valve stem and press down firmly until you hear a hiss indicating that air has been released into the gauge. The reading will show you the current tire pressure in PSI (pounds per square inch).

Advertisement

With this information, you can now assess whether your tires are properly inflated for riding on gravel roads. Transitioning into feeling for tire firmness allows for another practical way of checking if your tire pressures are suitable for off-road conditions without relying solely on numbers and gauges.

Feeling for Tire Firmness

Assessing the firmness of your tires by applying pressure with your hand will help determine if they are suitable for off-road conditions. When riding on gravel roads, it is crucial to have the right tire pressure to ensure optimal performance and prevent any mishaps. To accurately assess tire firmness, follow these tire pressure troubleshooting techniques:

Firmness Level Description Suitable for Off-Road?
Too Soft Tire feels excessively squishy and can bottom out easily on rough terrain. No
Ideal Firmness Tire feels slightly firm but still provides enough cushioning for a smooth ride. Yes
Overinflated Tire feels overly hard, resulting in reduced traction and a harsh ride. No

By feeling for tire firmness using this method, you can quickly identify if adjustments need to be made to your tire pressure before heading out on gravel roads. Next, we will explore the importance of using tubeless sealant in maintaining optimal tire performance.

Using Tubeless Sealant

Using tubeless sealant is essential for maintaining optimal performance of your tires. When applying tubeless sealant, there are several benefits that come along with it.

  • Increased puncture resistance: The sealant fills small holes and punctures as they occur, preventing air leakage and flat tires.
  • Enhanced traction: Tubeless tires allow for lower tire pressures, increasing grip on loose gravel surfaces.
  • Improved rolling efficiency: With the absence of inner tubes, friction is reduced, resulting in a smoother and faster ride.
  • Self-sealing properties: The sealant automatically seals punctures while riding, minimizing the need for immediate repairs.
  • Weight reduction: Eliminating inner tubes reduces overall weight, making your bike more agile and responsive.

By understanding the application process and appreciating the benefits of using tubeless sealant, you can ensure a hassle-free gravel riding experience.

Now let’s delve into some tips for adjusting tire pressure on the go.

Advertisement

Tips for Adjusting Tire Pressure on the Go

When riding on gravel roads, it’s important to be able to adjust tire pressure on the go. This skill becomes crucial when facing steep descents or navigating through wet conditions. Adjusting tire pressure correctly can greatly enhance your performance and ensure a safer ride.

When tackling steep descents, lowering your tire pressure can improve traction and control. By reducing the air volume in your tires, you increase the contact patch with the ground, allowing for better grip on loose gravel surfaces. It’s essential to find the right balance between low enough pressure for traction and high enough pressure to avoid pinch flats.

In wet conditions, adjusting tire pressure is equally important. Lowering your tire pressure slightly will provide more surface area contact with the ground, increasing traction and reducing the chances of slipping or sliding. However, be mindful not to go too low as this may result in decreased stability and an increased risk of punctures from sharp rocks or debris.

As you venture into different terrains, always remember that adjusting tire pressure is a continuous process that requires observation and experimentation. It’s crucial to monitor how your bike performs under varying conditions and fine-tune accordingly.

Transitioning into common mistakes to avoid when adjusting tire pressure…

Advertisement

Common Mistakes to Avoid

When it comes to adjusting tire pressure on the go, there are a few common mistakes that should be avoided.

One of these is overinflating or underinflating the tires, which can negatively impact performance and handling on gravel roads.

Another mistake is ignoring changing conditions, such as changes in terrain or weather, which can greatly affect tire pressure needs.

Lastly, neglecting regular maintenance, such as checking tire pressure before each ride and ensuring proper tire condition, can lead to potential issues while riding on gravel roads.

Overinflating or Underinflating

If you’re not careful, overinflating or underinflating your mountain bike tires can lead to a less enjoyable ride on gravel roads.

Advertisement

Overinflating your tires can be dangerous as it reduces the contact patch between the tire and the ground, resulting in decreased traction. This lack of traction can make it difficult to maintain control and navigate through loose gravel, leading to a higher risk of accidents.

On the other hand, underinflating your tires can have its disadvantages too. It increases rolling resistance and makes pedaling harder, causing unnecessary fatigue. Moreover, underinflation reduces stability and maneuverability, making it more challenging to handle your bike on uneven surfaces.

So finding the right tire pressure for riding on gravel roads is crucial for an optimal cycling experience. Ignoring changing conditions such as varying terrains or weather conditions can also impact your ride in unexpected ways.

Ignoring Changing Conditions

Ignoring changing conditions, such as varying terrains or weather, can impact your ride on gravel roads in unexpected ways. Adjusting pressure according to the conditions is crucial for maintaining control and maximizing performance. Here are some key considerations for tire pressure maintenance:

  • Tire Width: Wider tires require lower pressure to increase grip and stability on rough surfaces.
  • Terrain Type: Decrease pressure for loose gravel to enhance traction, while increasing pressure on hard-packed gravel minimizes rolling resistance.
  • Weather Conditions: Lower pressure in wet conditions improves traction, but higher pressure may be needed in dry conditions to prevent pinch flats.
  • Rider Weight: Heavier riders should increase tire pressure to avoid bottoming out.
  • Personal Preference: Experiment with different pressures to find what works best for you.

By adjusting tire pressure accordingly, you can ensure a smoother and safer ride on gravel roads. Neglecting regular maintenance, including tire pressure adjustments, can lead to further issues down the line.

Neglecting Regular Maintenance

Make sure you don’t neglect regular maintenance to avoid potential issues down the line.

Advertisement

When riding on gravel roads, it is crucial to adjust your tire pressure according to the conditions you encounter. Wet conditions, for example, require a lower tire pressure to increase traction and prevent sliding. Adjusting your tire pressure can greatly impact your cornering performance as well.

Lower pressures allow the tires to conform better to uneven surfaces, providing more grip when navigating turns. Neglecting regular maintenance can lead to improper tire pressure, which in turn can affect your handling and control on gravel roads.

Maintaining proper tire pressure ensures optimal performance and safety while riding off-road. It’s important not only for cornering but also for overall comfort and efficiency on rough terrains.

Benefits of Proper Tire Pressure on Gravel Roads

To ensure a smooth and comfortable ride on gravel roads, it is important to maintain proper tire pressure. Determining the ideal pressure for your mountain bike tires on gravel can make a significant difference in your overall riding experience. Proper inflation offers several benefits that contribute to better performance and increased safety.

Firstly, maintaining the correct tire pressure allows for optimal traction on loose surfaces. Gravel roads can vary in terms of compactness and texture, but having the right amount of air in your tires ensures that they conform to the terrain, providing maximum grip. This prevents unnecessary skidding or sliding, allowing you to confidently navigate through gravel patches without losing control.

Advertisement

Additionally, riding with proper tire pressure helps absorb shocks and vibrations caused by rough terrain. With enough cushioning effect from properly inflated tires, you’ll experience less discomfort and fatigue during long rides on gravel roads. This means you can focus more on enjoying the scenery and less on dealing with jarring impacts.

Furthermore, maintaining accurate tire pressure enhances rolling efficiency. When your tires are inflated to their recommended levels, they roll smoothly over gravel surfaces with minimal resistance. This reduces energy wastage and enables you to cover longer distances effortlessly.

In conclusion, ensuring proper tire pressure when riding on gravel roads is crucial for a smooth and enjoyable experience. The benefits of determining the ideal pressure include improved traction, enhanced comfort, reduced fatigue, and increased efficiency while rolling over different types of gravel road surfaces. Now let’s delve into how to handle these various terrains effectively without compromising our ride quality.

How to Handle Different Gravel Road Surfaces

Navigating through different types of gravel road surfaces can be challenging, but with the right techniques, you can handle them effectively.

When it comes to riding on gravel roads, having the correct tire pressure is crucial. Different tire pressures are required for different types of gravel roads. For loose or sandy surfaces, a lower tire pressure is recommended to increase traction and prevent skidding. This allows the tires to grip the surface better and provides more stability. On the other hand, for compacted or hard-packed gravel roads, a higher tire pressure is necessary to reduce rolling resistance and maintain speed.

Advertisement

To handle loose or sandy surfaces, it is important to distribute your weight evenly on both wheels and keep a relaxed grip on the handlebars. This helps in maintaining balance and control over your bike as you navigate through these tricky terrains. Additionally, it is advisable to pedal smoothly without any sudden jerks or accelerations.

For compacted or hard-packed gravel roads, maintaining a steady speed can help in riding more efficiently. With higher tire pressure, there will be less resistance from the surface which allows for smoother pedaling and faster speeds.

Transitioning into adjusting tire pressure for different riding styles:

Now that we have discussed how to handle different gravel road surfaces effectively using appropriate techniques, let’s move on to another important aspect – adjusting tire pressure for different riding styles without compromising safety or performance.

Adjusting Tire Pressure for Different Riding Styles

Transitioning into adjusting tire pressure for different riding styles, it’s important to consider the terrain and your desired level of performance. When it comes to mountain bike suspension, choosing the right tire pressure is crucial. The amount of air in your tires directly affects how well your bike absorbs shocks and maintains traction on varying surfaces.

Advertisement

For riders who prefer a more aggressive style on gravel roads, lower tire pressures are recommended. This allows the tires to conform to the uneven surface, providing better grip and control. However, keep in mind that running too low of a pressure can increase the risk of pinch flats or rim damage.

On the other hand, if you prefer a faster-paced ride with less rolling resistance, higher tire pressures are suitable. This reduces the amount of tire deformation during contact with the ground, resulting in improved efficiency and speed. However, be cautious not to go too high as this may compromise traction and comfort.

To find the optimal tire pressure for your riding style, start by experimenting within a range recommended by your bike manufacturer or experienced riders. Fine-tune from there based on personal preferences and feedback from each ride.

Transitioning into the subsequent section about ‘tire pressure recommendations for various tire widths,’ it’s essential to understand how different widths affect overall performance without compromising safety or comfort.

Tire Pressure Recommendations for Various Tire Widths

When considering different tire widths, it’s important to understand the recommended tire pressures for optimal performance and safety. For wet conditions, it is generally recommended to lower the tire pressure slightly to increase traction. This allows the tire to conform better to the surface, improving grip and reducing the chances of slipping. However, it’s important not to go too low as this can lead to pinch flats or a loss of control.

Advertisement

On sandy terrain, a higher tire pressure is typically suggested. This helps prevent the tires from sinking into the sand and improves rolling efficiency. By maintaining a firmer contact with the ground, you’ll be able to navigate sandy areas more easily without getting bogged down.

It’s worth noting that these recommendations may vary depending on personal preference and riding style. Some riders may prefer slightly higher or lower pressures based on their own experiences and comfort levels.

In conclusion, adjusting your tire pressure according to different terrains can greatly enhance your riding experience. By following these recommendations for wet conditions and sandy terrain, you can optimize your performance while maintaining safety on your mountain bike rides.

Now let’s move on to some tips for maintaining optimal tire pressure on long rides.

Tips for Maintaining Optimal Tire Pressure on Long Rides

To maintain optimal tire pressure on long rides, it is important to regularly check and adjust the air in your tires. This is especially crucial when riding on gravel roads, as the terrain can be unpredictable.

Advertisement

Here are some tips to help you maintain the right tire pressure for a smooth and safe ride:

  • Check tire pressure before every ride: Use a reliable pressure gauge to ensure your tires are inflated to the recommended PSI. This will help prevent pinch flats and improve traction on rough surfaces.

  • Adjust tire pressure for wet conditions: When riding in wet conditions, it is advisable to slightly lower your tire pressure to increase grip. This will provide better traction and reduce the risk of sliding or skidding.

  • Maintain tire pressure on steep descents: When going downhill, it is crucial to have adequate tire pressure for stability and control. Lowering the air pressure slightly can enhance grip without compromising speed.

  • Monitor temperature changes: Tire pressure can fluctuate with temperature variations. If you notice significant changes, make necessary adjustments to maintain optimal performance.

  • Carry a portable pump or CO2 inflator: In case of unexpected drops in tire pressure during your ride, it is recommended to have a portable pump or CO2 inflator handy. This will allow you to quickly add air if needed.

By following these tips, you can ensure that your mountain bike tires maintain optimal performance throughout long rides.

Now let’s move on to troubleshooting common tire pressure issues without skipping a beat.

Troubleshooting Common Tire Pressure Issues

Maintaining optimal tire pressure on long rides is crucial for a smooth and enjoyable biking experience. However, there may be times when you encounter common tire pressure issues that need troubleshooting. Understanding how to address these problems can help you find the right tire pressure for your mountain bike on gravel roads.

One common issue is having too low or too high tire pressure. This can cause discomfort, reduced traction, and increased risk of flats. To troubleshoot this problem, you can refer to the following table:

Advertisement
Tire Pressure Issue Possible Cause Solution
Low tire pressure Poor inflation or small punctures Inflate the tires to the recommended PSI or patch any punctures
High tire pressure Over-inflation or hot weather Release some air from the tires or wait for them to cool down

By addressing these issues promptly, you can ensure a more comfortable and safer ride on gravel roads. Finding the right tire pressure is essential for optimal performance and control. It may require some trial and error to determine what works best for your specific riding style and terrain conditions.

In conclusion, troubleshooting tire pressure issues is an important part of maintaining an optimal biking experience on gravel roads. By understanding possible causes and solutions for low or high tire pressures, you can fine-tune your bike’s performance. Now let’s move on to our final thoughts and recommendations for mountain bike tire maintenance.

Final Thoughts and Recommendations

In conclusion, when it comes to riding on gravel roads, there are a few final thoughts and recommendations that can greatly enhance your biking experience.

One important consideration is adjusting tire pressure for wet conditions. Wet gravel roads can be slippery, so reducing tire pressure slightly can improve traction and prevent sliding. However, be careful not to lower the pressure too much as it may increase the risk of pinch flats or rim damage.

Another crucial aspect to consider is the impact of tire pressure on cornering performance. Higher tire pressures provide better stability and reduce rolling resistance on straightaways, but they can compromise cornering ability. Lowering the tire pressure slightly allows for increased contact patch with the ground, providing better grip during turns.

Advertisement

It’s essential to find a balance between comfort, traction, and performance when adjusting tire pressure for gravel road riding. Experimenting with different pressures and observing how your bike handles in various conditions will help you determine the optimal range for your specific needs.

Remember that these final thoughts and recommendations are based on general guidelines, but individual preferences may vary. So always trust your own judgment and make adjustments accordingly to ensure an enjoyable and safe biking experience on gravel roads.

Frequently Asked Questions

How does tire pressure affect the comfort of the ride on gravel roads?

When it comes to choosing the right tire pressure for different types of gravel surfaces, it’s important to consider the impact on bike handling and stability.

A lower tire pressure provides more comfort by absorbing bumps and vibrations on rough gravel roads. However, too low of a pressure can increase the risk of pinch flats or sidewall damage.

It’s crucial to find a balance that offers both comfort and sufficient support for optimal bike control and stability on various gravel terrains.

Advertisement

Can I use the same tire pressure for both front and rear tires when riding on gravel?

When it comes to tire pressure on gravel, one size does not fit all. Different types of gravel surfaces require different tire pressures for optimal performance.

Additionally, when participating in the demanding sport of gravel racing, it is crucial to adhere to recommended tire pressures to ensure both speed and control.

However, it is important to note that using the same tire pressure for both front and rear tires may not always be ideal, as individual preferences and riding styles can differ.

Are there any specific tire pressure recommendations for riding on wet gravel roads?

When riding on wet gravel roads, it’s important to adjust your tire pressure accordingly. The recommended tire pressure for different types of gravel surfaces can vary.

Generally, a slightly lower tire pressure is preferred for wet conditions to increase traction and prevent slippage. However, it’s crucial to strike a balance as too low of a tire pressure can lead to increased rolling resistance.

Advertisement

Experimenting with different pressures will help find the optimal setting for your specific riding conditions.

Does tire pressure affect the grip and traction on loose gravel surfaces?

Tire pressure plays a crucial role in off-road performance, akin to a tightrope walker’s balance on a thin rope. It greatly affects grip and traction on loose gravel surfaces.

Finding the optimal tire pressure for different gravel road conditions is key. Lower pressure increases contact area, enhancing grip but risking pinch flats, while higher pressure reduces traction.

Experimentation is necessary to strike the perfect balance and conquer those challenging gravel roads with confidence and control.

What are the signs that indicate I have too low or too high tire pressure when riding on gravel roads?

When it comes to the effects of tire pressure on mountain bike performance, finding the optimal tire pressure for gravel riding is crucial.

Advertisement

Riding with too low tire pressure on gravel roads can result in a sluggish and unstable ride, making it difficult to maintain control and reducing overall traction.

On the other hand, riding with too high tire pressure can lead to reduced grip and an uncomfortable ride.

It’s important to find the right balance by experimenting with different pressures based on your weight, terrain conditions, and personal preference.

Conclusion

In conclusion, understanding the importance of tire pressure when riding on gravel roads is crucial for optimal performance and safety.

By finding the right tire pressure and maintaining it throughout your ride, you can ensure a smooth and enjoyable experience.

Advertisement

While some may argue that monitoring tire pressure can be time-consuming or unnecessary, the benefits far outweigh any inconvenience.

With improved traction, control, and reduced risk of flats or damage to your tires, taking the time to properly inflate them is well worth it.

So don’t hesitate to invest in a good pump and gauge and make tire pressure a priority on your next gravel adventure.

Continue Reading

Gravel Bike

What Kimd Of Bike To Buy For Gravel Trails

Published

on

By

An image showcasing a sturdy bike with wide tires, equipped with disc brakes and a suspension fork, conquering a scenic gravel trail surrounded by lush greenery and rocky terrain

Ready to tackle the gravel trails but unsure which bike is best for the adventure? Look no further!

In this article, I’ll be your guide through the world of bikes designed specifically for those rough and rugged terrain. From mountain bikes built to tackle any obstacle, to versatile adventure bikes perfect for long distances, we’ll explore all the options available.

So, saddle up and get ready to find your ideal ride for those exhilarating gravel trails!

Key Takeaways

  • High-quality touring bikes with wide tires and durable construction are ideal for gravel trails.
  • Different touring bike brands offer unique advantages, so choose based on preferences and needs.
  • Wide tires on soft surfaces provide increased comfort, improved control, better traction, reduced fatigue, and enhanced durability.
  • The right tire tread is important for different terrains to maintain stability and prevent sliding.

Mountain Bikes

If you’re looking to ride on gravel trails, you’ll want to consider a mountain bike. Mountain bikes are designed for off-road riding and can handle the rough terrain that gravel trails often present. They have sturdy frames, wide tires with aggressive tread patterns, and suspension systems that absorb shocks and bumps. These features make them ideal for navigating through uneven surfaces and maintaining control on loose gravel.

Advertisement

When it comes to mountain biking techniques, there are a few things to keep in mind. First, always maintain a balanced body position by keeping your weight centered over the bike. This will help you maneuver through obstacles more easily. Second, use proper braking technique by applying both brakes evenly to avoid skidding or losing control. Lastly, practice shifting gears smoothly to ensure efficient power transfer when climbing or descending.

Maintenance tips for mountain bikes include regularly cleaning and lubricating the chain to prevent rust and improve performance. It’s also important to check tire pressure before each ride and inspect the brakes for wear.

Now let’s transition into discussing gravel bikes without missing a beat. Gravel bikes offer some unique advantages when it comes to riding on gravel trails…

Gravel Bikes

When considering off-road paths, a gravel bike is an excellent choice. Gravel bikes are specifically designed to handle the challenges of riding on gravel trails, making them perfect for adventurous riders looking to explore new terrains. These bikes have several features that set them apart from other types of bicycles.

One key feature of gravel bikes is their wider tires, typically ranging from 35mm to 45mm in width. This allows for better traction and stability on loose surfaces, ensuring a smooth and comfortable ride. Additionally, gravel bikes often have a more relaxed geometry compared to road or mountain bikes, providing a more upright position that enhances comfort during long rides.

Advertisement

When it comes to brands, there are several reputable options available in the market. Some popular gravel bike brands include Specialized, Trek, Giant, and Cannondale. These brands offer a wide range of models with varying components and price points to suit different budgets and preferences.

Transitioning into the next section about cyclocross bikes, it’s important to note that while both gravel bikes and cyclocross bikes are suitable for off-road riding, they have slight differences in design and intended use.

Cyclocross Bikes

When it comes to off-road riding, one of the best options is a Cyclocross bike. These bikes are known for their agility and responsiveness, making them perfect for navigating through gravel trails and other challenging terrains.

Advertisement

Additionally, Cyclocross bikes are typically lighter in weight compared to other types of bikes, allowing for faster acceleration and easier maneuverability. Another advantage is their narrower tires, which provide better efficiency on hard surfaces, allowing riders to maintain speed with less effort.

Overall, if you’re looking for a bike that can handle off-road adventures with ease while still offering great performance on smoother surfaces, a Cyclocross bike is definitely worth considering.

Agile and Responsive for Off-Road Riding

For off-road riding, it’s essential to choose a bike that’s agile and responsive. One key aspect to consider is the benefit of suspension systems for off-road riding. These systems allow the bike to absorb bumps and uneven surfaces, providing a smoother and more comfortable ride. They also help maintain better control and traction on rough terrains, enhancing overall performance.

Another factor that plays a crucial role in agility and control is proper bike fit. A bike that fits well ensures an optimal riding position, allowing for quick maneuvering and precise handling on gravel trails. It’s important to find the right frame size, handlebar width, and saddle height that suit your body dimensions.

By prioritizing agility and control through suspension systems and proper fit, you’ll be able to tackle off-road trails with confidence and ease.

Advertisement

Speaking of ease, let’s now transition into discussing the importance of lighter weight for faster acceleration without skipping a beat.

Lighter Weight for Faster Acceleration

To achieve faster acceleration, prioritize a lighter weight when choosing your off-road bike. A lighter bike allows for quicker maneuverability and easier pedaling, resulting in faster speeds. Every ounce counts on gravel trails, helping you gain and maintain momentum. A lighter bike also improves climbing capabilities, requiring less effort on steep inclines. Manufacturers reduce overall weight to create agile and responsive frames and components for off-road riding, enhancing your experience on challenging terrain.

With faster acceleration and improved climbing abilities, a lighter-weight off-road bike enhances your performance on gravel trails.

When it comes to efficiency on hard surfaces, narrower tires are key.

Narrower Tires for Better Efficiency on Hard Surfaces

Choosing a lighter off-road bike with narrower tires can greatly improve efficiency on hard surfaces. When it comes to gravel trails, opting for narrower tires over wider ones has its advantages. Here are four reasons why:

Advertisement
  1. Increased speed: Narrower tires have less rolling resistance, allowing you to accelerate faster and maintain higher speeds on hard surfaces.

  2. Better traction: With less surface area in contact with the ground, narrower tires can dig into loose gravel and provide better grip.

  3. Improved maneuverability: The reduced width of the tires makes it easier to navigate corners and switch directions quickly.

  4. Less maintenance: Narrower tires tend to pick up fewer rocks and debris from the trail, minimizing the need for frequent cleaning.

Considering these benefits, a bike equipped with narrower tires is a great choice for efficient riding on hard-packed gravel trails.

Now let’s delve into the world of adventure bikes without skipping a beat.

Adventure Bikes

When looking for an adventure bike, you should consider the type of gravel trails you plan on riding. Adventure bikes are specifically designed to handle a variety of terrains, making them perfect for gravel trails. These bikes have features that enhance their performance and durability in off-road conditions.

One of the main benefits of adventure bikes is their versatility. They typically come with wider tires that provide better traction on loose surfaces like gravel. This allows you to navigate through uneven terrain with ease and confidence. Adventure bikes also have a more relaxed geometry compared to road bikes, providing a comfortable riding position for long hours on the saddle.

In addition to their tire width and geometry, adventure bikes often come equipped with disc brakes for reliable stopping power in all weather conditions. They also have mounting points for racks and panniers, allowing you to carry your gear on multi-day adventures.

Advertisement

Transitioning into the subsequent section about touring bikes, it’s important to note that while adventure bikes excel on gravel trails, touring bikes are specifically designed for long-distance rides on paved roads.

Touring Bikes

If you’re planning on taking long rides on paved roads, touring bikes are a great option. These bikes are specifically designed for long-distance travel and offer a comfortable riding experience. One of the key features of touring bikes is their ability to carry heavy loads, making them ideal for bikepacking or extended trips. They usually come with racks and panniers that allow you to easily transport your gear.

When it comes to choosing the best touring bike brand, there are several options available in the market. Some popular brands include Trek, Surly, and Salsa Cycles. These brands have a reputation for producing high-quality touring bikes that can withstand rough terrains and provide stability during long rides.

To help you better understand the different features offered by various touring bike brands, here’s a comparison table:

Brand Frame Material Tire Size
Trek Aluminum 700c
Surly Steel 26"
Salsa Carbon Fiber 650b

Each brand offers its unique advantages based on your preferences and needs. Now let’s move on to the next section about ‘fat bikes’ which are perfect for off-road adventures while still maintaining versatility and comfort."

Advertisement

Fat Bikes

When it comes to riding on soft surfaces like sand, snow, or mud, wide tires are essential for maximum traction. Fat bikes are designed with extra-wide tires that provide excellent grip and stability on these types of terrain.

The wide tires also allow the bike to float over these soft surfaces, making it easier to ride in challenging conditions. Additionally, fat bikes are built with durable construction to withstand rough conditions, ensuring that they can handle anything you throw at them.

Wide Tires for Maximum Traction on Soft Surfaces

For maximum traction on soft surfaces, wide tires are essential. When riding on gravel trails or any kind of loose terrain, having wider tires allows for a larger contact patch with the ground, which in turn provides better grip and stability.

The tire width you choose will depend on the specific terrain you plan to ride on. For example, if you’re mainly riding on packed gravel or hard-packed dirt, a tire width between 35-40mm would be suitable. On the other hand, if you anticipate encountering softer surfaces like sand or mud, opting for a tire width of 45-50mm would be more appropriate.

Wide tires also allow for lower tire pressure options, which further enhances their performance on soft surfaces. By decreasing the tire pressure within the recommended range (usually indicated on the sidewall), you increase the tire’s ability to conform and grip uneven terrain.

Advertisement

With their increased surface area and lower pressure capabilities, wide tires provide excellent flotation over sand, snow, and mud without sacrificing speed or agility. They effortlessly glide over these challenging terrains while providing exceptional traction and control.

Floats Over Sand, Snow, and Mud

Wide tires with their increased surface area and lower pressure capabilities effortlessly glide over sand, snow, and mud while providing exceptional traction and control. When it comes to conquering these soft surfaces, it’s crucial to understand the concept of floats vs sinks.

Wide tires excel in floating on top of loose terrain like sand or snow, preventing them from sinking in and getting stuck. Additionally, the best tire tread for different terrains plays a significant role in performance. Aggressive knobs are perfect for muddy conditions as they dig into the ground for maximum grip. On the other hand, smaller knobs with wider spacing work well on sandy trails by allowing the tire to float better. Lastly, a more closely spaced tread pattern is ideal for snowy conditions to maintain stability and prevent sliding.

Now let’s dive into discussing durable construction for rough conditions without any delay.

Durable Construction for Rough Conditions

With durable construction in mind, you’ll want to look for tires that can withstand rough conditions and provide long-lasting performance. When it comes to gravel trails, a bike with a sturdy frame is essential. Look for durable frame materials such as aluminum or steel, which can handle the bumps and vibrations of rough terrain. Additionally, consider suspension options to further enhance durability. Suspension forks absorb shocks and impacts, ensuring a smoother ride and reducing stress on the frame. A rear suspension system can also be beneficial for added comfort and control over uneven surfaces. By investing in a bike with durable construction and reliable suspension options, you can confidently tackle any rough conditions that come your way while enjoying the thrill of riding on gravel trails.

Advertisement
Pros Cons
Increased comfort Added weight
Improved control Higher cost
Better traction Maintenance requirements
Reduced fatigue Limited efficiency on smooth roads
Enhanced durability Decreased pedaling efficiency

Frequently Asked Questions

Can I use a mountain bike for gravel trails?

Yes, you can use a mountain bike for gravel trails. It has its pros and cons.

The pros include the ability to handle rough terrain with ease and provide better control on descents.

However, the cons include slower speeds on flat surfaces and less efficiency compared to a hybrid bike.

When choosing tire width for a mountain bike on gravel trails, consider wider tires (around 2 inches) for improved stability and traction, while narrower tires offer more speed but less stability.

What is the main difference between a gravel bike and a cyclocross bike?

Comparing gravel bikes to cyclocross bikes is like comparing a sturdy SUV to a nimble rally car. Both are designed for off-road adventures, but with different focuses.

Advertisement

Gravel bikes excel in long-distance comfort and versatility, making them ideal for exploring various terrain types.

On the other hand, cyclocross bikes prioritize speed and agility, perfect for intense races on rough courses.

Ultimately, the choice between the two depends on your specific off-road preferences and riding style.

Are adventure bikes suitable for long-distance rides on gravel trails?

Adventure bikes can be a great option for long-distance rides on gravel trails. They offer a comfortable riding position and are designed to handle rough terrains.

The pros of using a gravel bike for long distance rides include their versatility, allowing you to tackle different surfaces with ease. However, there are alternative bike options for gravel trails such as mountain bikes or cyclocross bikes that may provide better performance in certain situations.

Advertisement

Consider your specific needs and preferences when choosing the right bike.

Can I use a touring bike for off-road gravel trails?

Yes, you can use a touring bike for off-road gravel trails. While it may not be as nimble as a dedicated gravel bike, a touring bike offers stability and durability, making it suitable for rough terrains. It is important to choose a model with wider tires and sturdy construction.

Additionally, while hybrid bikes can handle some off-road trails, they may not be ideal for more challenging terrains.

As for speed, a gravel bike is generally faster than a mountain bike on gravel trails due to its lighter frame and more efficient rolling resistance.

Are fat bikes recommended for gravel trails or are they more suited for snow or sand terrains?

Fat bikes are versatile and can handle a variety of terrains, including gravel trails. Their wide tires provide excellent traction on loose surfaces, making them suitable for off-road adventures.

Advertisement

However, fat bikes may not be as efficient or fast on smoother trails compared to gravel bikes. Gravel bikes are specifically designed for off-road riding and offer a more efficient and comfortable experience on gravel trails.

Ultimately, the choice between fat bikes and gravel bikes depends on personal preference and the specific terrain you plan to ride on.

Conclusion

In conclusion, it’s important to choose a bike that suits your needs and riding style when considering what kind of bike to buy for gravel trails. Whether it’s a mountain bike for technical terrain or a gravel bike for smoother paths, there are plenty of options available.

One interesting statistic to note is that sales of adventure bikes have increased by 60% in the past year, reflecting the growing popularity of this versatile and capable type of bike.

So, go out there and find the perfect ride to conquer those gravel trails!

Advertisement

Continue Reading
Advertisement

Affiliate disclaimer

As an affiliate, we may earn a commission from qualifying purchases. We get commissions for purchases made through links on this website from Amazon and other third parties.

About us

We are a passionate team driven by the belief that cycling is a fantastic and accessible way to stay active while enjoying the beauty of the outdoors. Our mission is to share our love for cycling with as many people as possible. We provide a welcoming environment for individuals of all ages, abilities, and backgrounds to come together and ride bikes. With Ralf’s visionary leadership, Zane’s expertise in cycling adventures, and Olivia’s dedication to community building, we strive to create a vibrant space where everyone can experience the joy of cycling. Through group rides, workshops, and inclusive events, we inspire and empower individuals to embrace an active lifestyle. Join us in our quest to pedal together, embrace the joy of cycling, and foster connections that last a lifetime.

Advertisement

Trending