Riding a gravel bike is akin to going on a thrilling journey, navigating rough landscapes and experiencing the beauty of nature. However, to successfully tackle these obstacles, it is crucial to comprehend the significance of rise in gravel bikes.
Finding the perfect balance between comfort and performance can greatly enhance your riding experience. In this article, I’ll guide you through the process of determining how much rise is ideal for your gravel bike, considering factors such as riding style, body position, terrain, and expert advice.
Get ready to elevate your gravel cycling game!
Key Takeaways
- Rise refers to the upward angle of handlebars from stem attachment point
- Proper rise height improves comfort and control
- Higher rise provides upright position, reducing strain on back and neck
- Lower rise offers aggressive and aerodynamic position for speed
Understanding the Importance of Rise in Gravel Bikes
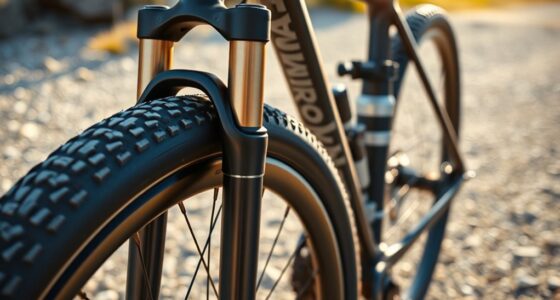
You need to understand the importance of rise in gravel bikes. When considering rise options for your bike’s handlebars, it is crucial to find the proper height that suits your needs. The rise refers to the upward angle of the handlebars from their attachment point on the stem. Getting this right can greatly impact your riding experience.
One of the benefits of having a proper rise height is improved comfort and control. A higher rise can give you a more upright riding position, reducing strain on your back and neck during long rides. It also allows for better maneuverability and handling, especially when navigating challenging terrains or making quick turns.
On the other hand, a lower rise provides a more aggressive and aerodynamic position, ideal for those who prefer speed over comfort. It lowers your center of gravity, enhancing stability at high speeds and steep descents.
To determine which rise height is best for you, consider your riding style and preferences. If you enjoy long endurance rides or prioritize comfort over speed, a higher rise may be suitable. However, if you are an avid racer or enjoy fast-paced off-road adventures, a lower rise might be more appropriate.
So now that you understand the importance of rise in gravel bikes, let’s consider your riding style and preferences in order to make an informed decision about finding the perfect ride for you.
Consider Your Riding Style and Preferences
When considering your riding style and preferences, it’s important to take into account the terrain you’ll be tackling. This will help determine how much rise you need for your gravel bike. Here are three factors to consider:
-
Riding Techniques: Think about the way you ride on different surfaces. If you prefer a more aggressive approach with fast descents and technical sections, a higher rise can provide better control and stability. On the other hand, if you enjoy a more relaxed ride with less aggressive maneuvers, a lower rise may be sufficient.
-
Gear Selection: Consider the gearing options available on your gravel bike. A higher rise can give you more leverage and make it easier to tackle steep climbs or power through rough terrain. However, if you have a wide range of gears and prefer spinning at a higher cadence, a lower rise may suit your needs better.
-
Personal Preference: Ultimately, your comfort and confidence should guide your decision on how much rise to go for. Experiment with different setups and see what feels most natural for you.
Assessing your body position and comfort is another crucial aspect of finding the right rise for your gravel bike…
Assess Your Body Position and Comfort
Assessing your body position and comfort is key to determining the most suitable rise for your gravel bike. When it comes to assessing comfort, it’s important to consider how your body interacts with the bike. Pay attention to any discomfort or pain you experience during rides, as this can be a sign that your body position needs adjustment.
Your body posture plays a crucial role in ensuring comfort and efficiency on the bike. A neutral spine and relaxed shoulders not only enhance comfort but also allow for better control and handling of the bike.
To assess your body position, start by checking if your saddle height is appropriate. Your legs should have a slight bend at the bottom of each pedal stroke, without fully extending or being too cramped. Additionally, make sure that your handlebars are at a comfortable reach and height. This will vary depending on personal preference and riding style, but generally speaking, you should have a slight bend in your elbows when gripping the handlebars.
By assessing these factors related to comfort and body posture, you can determine the ideal rise for your gravel bike. Once you have established this foundation, you can then take into account the terrain you’ll be riding on…
Take Into Account the Terrain You’ll be Riding On
Consider the type of terrain you’ll be riding on to determine the most suitable setup for your bike. Gravel biking can take you on a variety of surfaces, from smooth dirt paths to rough rocky trails. Each terrain requires different riding techniques and equipment recommendations to ensure a comfortable and efficient ride.
To help you navigate through various terrains, I have created a table that outlines some common types of terrain and the recommended setup for your gravel bike:
| Terrain Type | Riding Techniques | Equipment Recommendations |
|---|---|---|
| Smooth Dirt Paths | Maintain a steady speed and avoid sudden turns or maneuvers. | Use wider tires with lower tread patterns for better traction. Consider adding suspension to absorb vibrations. |
| Loose Gravel Roads | Keep a firm grip on the handlebars and maintain balance while cycling through loose gravel sections. | Opt for wider tires with aggressive tread patterns to improve stability and control. Consider using tubeless tires for added puncture resistance. |
| Rocky Trails | Employ proper body positioning by shifting your weight back when descending rocky sections, and lean forward when climbing over obstacles. | Choose tires with durable sidewalls and aggressive tread patterns for maximum grip on uneven surfaces. Consider using flat pedals or clipless pedals depending on personal preference. |
By considering these factors, you can select the appropriate setup for your bike based on the specific terrain you’ll encounter during your gravel rides. For further guidance, it is always beneficial to consult with experts or experienced gravel cyclists who can provide valuable insights into optimizing your gravel biking experience without compromising safety or comfort.
Consult with Experts or Experienced Gravel Cyclists
To get valuable insights into optimizing your gravel biking experience, it’s always beneficial to consult with experts or experienced cyclists. When it comes to bike fit and choosing the right gear for your gravel bike, these individuals can provide invaluable advice based on their own experiences and knowledge.
Experts or experienced gravel cyclists can guide you through the process of finding the optimal rise height for your gravel bike. They understand that different riders have varying preferences and body types, so they can help you determine the ideal rise height that suits your specific needs.
During a consultation, experts may consider factors such as your riding style, preferred terrain, and body measurements to recommend an appropriate rise height. They’ll take into account how much clearance you need between your handlebars and saddle, ensuring that you maintain a comfortable riding position while tackling challenging off-road trails.
In addition to assisting with bike fit, these knowledgeable individuals can also offer guidance on choosing the right gear for your gravel adventures. From selecting the appropriate tires for different terrains to finding the ideal gear ratios for efficient pedaling, their expertise will prove invaluable in enhancing your overall cycling experience.
By consulting with experts or experienced cyclists, you’ll gain valuable insights into optimizing your gravel biking experience. Their knowledge and advice can help ensure that both your bike fit and choice of gear are tailored specifically to meet your individual needs. With this solid foundation established, you’ll be ready to experiment with different rise heights in order to find what works best for you.
Experiment with Different Rise Heights
Try out various handlebar heights to see which one feels most comfortable and suits your riding style best. Experimenting with different rise heights can provide valuable insight into what works for you.
Based on my own experience and feedback from fellow gravel cyclists, here are some key observations:
-
Lower Rise: Some riders prefer a lower rise height as it offers a more aggressive, aerodynamic position on the bike. This can be advantageous for those seeking maximum speed and performance.
-
Medium Rise: A medium rise height is often considered a versatile option that strikes a balance between comfort and performance. It allows for a more upright position, providing better control and maneuverability while still maintaining some aerodynamic benefits.
-
Higher Rise: Riders who prioritize comfort over speed may opt for a higher rise height. This provides a more relaxed riding position, reducing strain on the back and shoulders during long rides or rough terrain.
Based on these experiment results, it’s important to find the right balance between comfort and performance when choosing your preferred rise height. This will ensure an enjoyable riding experience while still allowing you to push your limits on the gravel trails ahead.
Find the Right Balance between Comfort and Performance
Finding the perfect balance between comfort and performance is crucial when choosing your ideal handlebar height. The rise height of your gravel bike has a significant impact on both handling and stability, so it’s essential to find the optimal rise height that suits your riding style and preferences.
When considering the impact of rise height on comfort and performance, it’s important to understand how different heights can affect your riding experience. A higher rise can provide more comfort by allowing for a more upright riding position, reducing strain on your back and neck. However, a higher rise may also compromise performance by making it harder to maintain an aerodynamic position and reducing control over rough terrain.
On the other hand, a lower rise can enhance performance by allowing for better control and maneuverability, especially in technical sections or during fast descents. However, a lower rise may be less comfortable for longer rides as it puts more strain on your upper body.
To help you visualize the impact of different rise heights, here’s a table showcasing some common options:
| Rise Height | Comfort Level | Performance Level |
|---|---|---|
| High | High | Low |
| Medium | Medium | Medium |
| Low | Low | High |
Consider these factors when finding the right balance between comfort and performance for your gravel bike. Next, we will discuss how to consider the length and width of your handlebars to further enhance your riding experience.
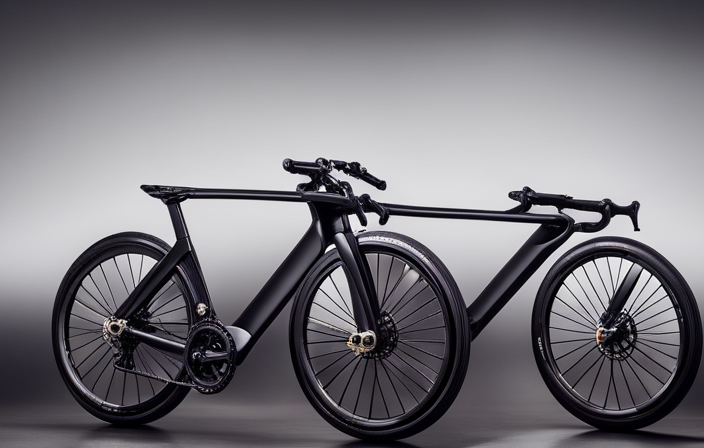
Consider the Length and Width of Your Handlebars
When considering the length and width of your handlebars, you should take into account your riding style and preferences. The grip and control of your handlebars are crucial factors to consider.
A wider handlebar provides more stability, especially when maneuvering through rough terrains or tackling technical trails. On the other hand, a narrower handlebar offers better aerodynamics, allowing for increased speed on flat surfaces or during sprints.
To determine the ideal length and width for your handlebars, it is essential to test different options and see which one feels the most comfortable and natural for you. Consider visiting a local bike shop that allows test rides or borrowing different handlebars from friends before making a purchase.
Additionally, take into account the aerodynamics of your handlebars. If you prioritize speed and efficiency over comfort, opting for narrower bars may be beneficial. However, if you value comfort and control more than outright speed, wider handlebars might be more suitable.
Ultimately, finding the right balance between grip, control, aerodynamics, and personal preference will ensure an enjoyable riding experience. With this in mind, let’s explore how to test different rise heights on various terrain types without compromising performance or comfort.
Test Different Rise Heights on Various Terrain Types
To experiment with different rise heights on different types of terrain, start by adjusting your handlebars and see how it feels. Here are three things you can do to fully enjoy this process:
-
Test different tire pressures: Changing the pressure in your tires can greatly impact the performance of your gravel bike. By experimenting with higher or lower pressures, you can find the perfect balance between comfort and traction for each type of terrain.
-
Compare different handlebar widths: Varying the width of your handlebars can affect both your stability and control on rough surfaces. Narrower bars offer agility, making it easier to navigate tight trails, while wider bars provide more stability when tackling technical descents.
-
Ride on various terrains: Take your gravel bike out on different types of terrain, such as rocky paths, muddy trails, or smooth gravel roads. This will allow you to feel how the bike handles at different rise heights and determine which setting works best for each specific environment.
By testing these variables and paying attention to subtle changes in performance, you can fine-tune your gravel bike setup to suit any terrain you encounter.
It’s important to listen to your body’s response and feedback as well before moving onto the next step about paying attention to their needs.
Pay Attention to Your Body’s Response and Feedback
Listen to how your body responds and provides feedback while riding on different terrains with varying rise heights. Pay attention to any discomfort, pain, or strain that you may experience during your rides. Your body’s response is a crucial indicator of whether the current rise height is suitable for you or if adjustments are necessary.
As you ride, be mindful of any sensations in your lower back, neck, shoulders, and hands. These areas often bear the brunt of an improper bike setup. If you notice any discomfort in these regions, it could be a sign that the rise height needs adjustment. Similarly, pay attention to your overall comfort level and riding efficiency. Are you able to maintain a relaxed and stable position? Does the bike feel responsive and agile?
Remember that everyone’s body is unique, so what works for someone else may not work for you. Experiment with different rise heights on various terrains to find the one that suits your body best. It may take some trial and error before finding the perfect fit.
By paying close attention to your body’s response, you can determine whether adjustments need to be made to your bike’s setup. Fine-tuning your bike’s rise height can improve both comfort and performance on different types of terrain.
Adjust and Fine-tune Your Bike’s Setup as Needed
As I mentioned earlier, paying attention to your body’s response and feedback is crucial when riding a gravel bike. However, it’s not the only factor that can affect your comfort and performance. Another important aspect to consider is adjusting and fine-tuning your bike’s setup as needed.
To ensure optimal positioning and maximize your efficiency on different terrains, there are various adjustment techniques you can employ. Here are five key areas to focus on:
- Saddle Height: Finding the right saddle height can prevent discomfort in your knees and hips.
- Handlebar Position: Adjusting the handlebar height and reach can optimize your upper body posture for better control.
- Cleat Alignment: Properly aligning your cleats will enhance power transfer and reduce strain on your joints.
- Tire Pressure: Experimenting with tire pressure allows you to find the sweet spot between traction and rolling resistance.
- Suspension Setup (if applicable): If your gravel bike has suspension, adjusting it based on the terrain can improve overall comfort.
By employing these adjustment techniques, you can achieve a more comfortable ride while maintaining optimal performance.
Now that we’ve covered how to fine-tune your bike’s setup, let’s move on to the next section where we’ll learn from other gravel cyclists’ experiences and recommendations.
Learn from Other Gravel Cyclists’ Experiences and Recommendations
Take advantage of the knowledge and insights shared by experienced gravel cyclists to enhance your own riding experience. Learning from others’ experiences and recommendations can help you navigate the world of gravel cycling with confidence. One aspect that many gravel cyclists have opinions on is tire pressure. Finding the right tire pressure for your gravel bike can greatly impact your ride quality and performance. Some riders prefer a lower tire pressure for increased traction and comfort on rough terrain, while others opt for higher pressures for faster rolling speeds on smoother surfaces. Experimenting with different pressures will allow you to find what works best for you and your riding style.
Another important consideration is gear ratios. Gravel bikes come with a variety of gear options, including 1x, 2x, and even 3x drivetrains. The gear ratios you choose will depend on factors such as the terrain you’ll be riding on and your personal fitness level. A wider range of gears might be beneficial if you plan to tackle hilly or mountainous routes, while a narrower range may suffice for flatter courses.
To give you an idea of how different cyclists approach these considerations, here’s a table showcasing some common gravel cyclist setups:
| Cyclist | Tire Pressure (psi) | Gear Ratios |
|---|---|---|
| Rider A | 40-45 | 1x: 42/10-46/11 |
| Rider B | 30-35 | 2x: Front: 48/32 Rear: 11-36 |
| Rider C | 50-55 | 1x: Rear: 38/11-42/11 |
Remember that these are just examples, and it’s important to experiment with different setups to find what works best for you.
Now that we’ve explored learning from others’ experiences, let’s delve into seeking professional bike fitting services to further optimize our setup without compromising comfort or performance.
Seek Professional Bike Fitting Services
Seeking professional bike fitting services can help optimize your setup and ensure maximum comfort and performance. When it comes to gravel biking, the right fit is crucial for a smooth and enjoyable ride. Professional bike fitters have the expertise and knowledge to assess your body mechanics, riding style, and goals to determine the best bike fitting techniques for you.
Here are some benefits of seeking professional advice for your gravel bike fitting:
-
Enhanced Comfort: A professional bike fit can alleviate discomfort in areas such as hands, neck, back, or knees by adjusting your position on the bike.
-
Injury Prevention: Proper bike fitting can help prevent overuse injuries by ensuring that your body is properly aligned and not under unnecessary strain during rides.
- Bike sizing: A professional fitter will analyze your body measurements to find the right frame size and geometry for optimal performance.
- Cleat positioning: Correct cleat placement can enhance power transfer and reduce stress on joints.
- Handlebar adjustment: Adjusting handlebar width, height, and reach can optimize control and reduce fatigue.
Regularly reviewing and reassessing your rise height as your skills and fitness improve is essential. Transitioning seamlessly into this next step allows you to continually refine your setup for an even better gravel biking experience.
Regularly Review and Reassess Your Rise Height as Your Skills and Fitness Improve
Make sure to regularly review and reassess your handlebar height as you improve your skills and fitness, in order to optimize your riding experience. As you become more proficient in gravel cycling, it’s important to evaluate your technique and make necessary adjustments to enhance your performance.
By periodically reviewing your handlebar height, you can ensure that it is properly aligned with your body position and riding style.
One key aspect to consider when assessing your rise height is improving endurance. As you build up stamina and strength, you may find that a slightly lower or higher handlebar position better suits your needs. Experimenting with different heights can help alleviate any discomfort or strain on the wrists, arms, or shoulders during longer rides.
Additionally, regularly reviewing and reassessing your rise height allows for continued growth in technical skills. Gravel biking requires adaptability on various terrains such as rough trails or loose gravel surfaces. Adjusting the handlebar height can aid in maneuverability and control while tackling these challenging conditions.
With the right rise height tailored to your evolving abilities, you’ll be able to enjoy the freedom and versatility of gravel cycling. Achieving the perfect balance between comfort and performance will enable you to confidently explore new routes, conquer obstacles along the way, and truly embrace all that gravel biking has to offer.
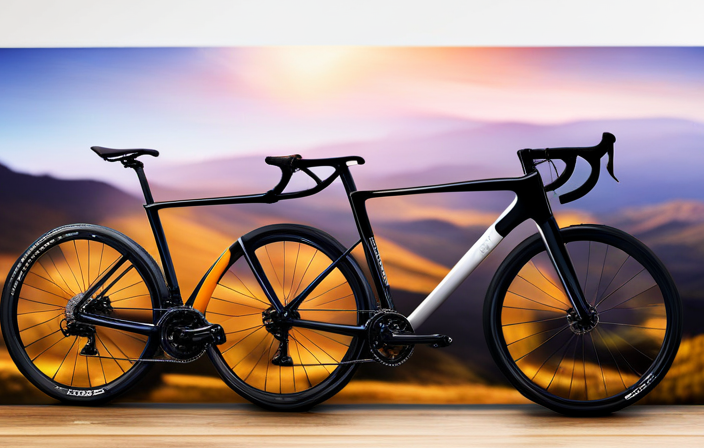
Enjoy the Freedom and Versatility of Gravel Cycling with the Perfect Rise Height
Embrace the freedom and versatility of gravel cycling by finding the ideal handlebar height that suits your evolving abilities and allows you to confidently conquer any terrain. When it comes to gravel riding, having the right handlebar rise is crucial for optimal bike handling and control. The handlebar rise refers to the vertical distance between the top of the handlebars and the center of the stem clamp area. By adjusting this height, you can customize your riding experience based on different conditions.
Finding the right handlebar rise for different riding conditions is essential because it directly impacts how your bike handles and responds to various terrains. A lower rise provides a more aggressive riding position, which is great for fast descents or technical sections where precise handling is required. On the other hand, a higher rise offers a more relaxed and comfortable position, allowing for better control during long rides or rough surfaces.
To help you understand how different handlebar rises can affect your ride, here’s a table showcasing three common types of handlebar rises and their corresponding characteristics:
| Handlebar Rise | Characteristics |
|---|---|
| Low | Aggressive riding position; better control in technical sections |
| Medium | Balanced position; suitable for most gravel riding conditions |
| High | Relaxed riding position; improved comfort on long rides |
By experimenting with different handlebar heights, you can find what works best for you in terms of comfort, control, and overall enjoyment on your gravel bike. Remember to regularly review and reassess your rise height as your skills and fitness improve so that you can continue pushing boundaries while maintaining confidence in every pedal stroke.
Frequently Asked Questions
How do I determine the right rise height for my gravel bike?
To determine the right rise height for your gravel bike, start by considering your riding style and preferences. Adjusting the rise height can greatly impact your comfort and performance on different terrains.
Begin by experimenting with different handlebar positions, taking note of how each adjustment affects your posture and control. It’s important to find a balance that allows for a comfortable riding position while maintaining optimal handling and control on rough or uneven surfaces.
Can I use the same rise height for all types of terrain?
Determining the right rise height for different terrains is crucial for optimal performance on a gravel bike. It’s like choosing the right gear when driving a car.
Just as you wouldn’t use the same gear to climb a steep hill and cruise on a flat road, adjusting your rise height based on the terrain can greatly impact your riding experience.
So, don’t be afraid to experiment and find what works best for each type of terrain you encounter.
What are the potential risks of choosing the wrong rise height for my gravel bike?
Choosing the wrong rise height for your gravel bike can have potential risks and consequences. A higher rise may lead to a more upright riding position, which can reduce aerodynamics and make it harder to generate speed on flat terrain.
On the other hand, a lower rise may result in a more aggressive position that puts strain on your back and shoulders during long rides.
It is important to find the right balance that suits your riding style and comfort level to avoid these issues.
Are there any specific techniques or tips for adjusting and fine-tuning the rise height?
When it comes to adjusting and fine-tuning the rise height of your gravel bike, there are a few techniques and tips that can make the process easier.
First, start by ensuring you have the right tools for adjustment.
Then, carefully measure and mark the desired rise height before making any changes.
Use incremental adjustments to find the perfect fit, keeping in mind that small changes can have a significant impact on your riding experience.
Finally, don’t be afraid to seek professional help if needed.
How often should I review and reassess my rise height as my skills and fitness improve?
As I continue to improve my skills and fitness, it is important to regularly review and reassess my rise height adjustments.
The frequency of these reviews will vary depending on individual progress and goals, but a good rule of thumb is to do so every few months or whenever significant changes in performance occur.
By staying proactive in evaluating and fine-tuning my rise height, I can ensure optimal comfort, efficiency, and control on my gravel bike.
Conclusion
So, after all this research and consultation with experts, I’ve finally found the perfect rise height for my gravel bike. It’s amazing how something as simple as a few centimeters can make such a difference in comfort and performance.
Who would have thought? But hey, that’s the beauty of cycling – it’s all about finding that sweet spot that works best for you.
So go ahead, embrace the irony of searching high and low for the perfect rise height, and enjoy the freedom and versatility of gravel cycling to its fullest!