Connect with us

Electric Bike

How Recharge Zip Electric Bike Battery Youtube

Published

on

An image showcasing a vibrant YouTube video thumbnail of a Recharge Zip Electric Bike battery being effortlessly detached and recharged, with a mesmerizing time-lapse background of urban landscapes and cyclists whizzing by

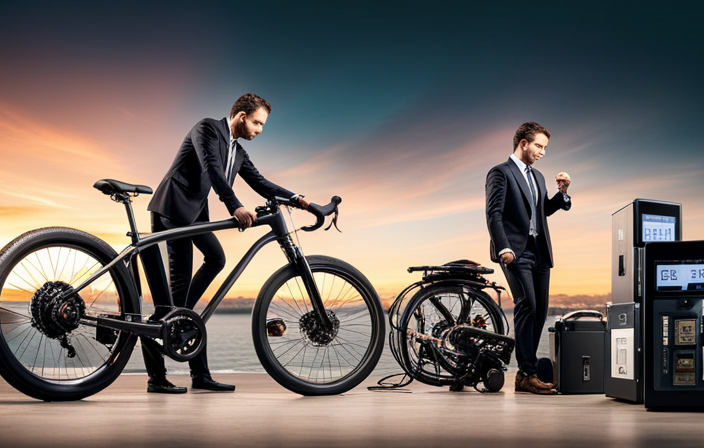
In this article, I will guide you through the process of recharging your Zip Electric Bike battery using the power of YouTube.

Recharging your electric bike battery can sometimes be a daunting task, but fear not! With the help of informative and reliable YouTube tutorials, you’ll be able to easily understand the components, assess battery life, and follow step-by-step instructions for a successful recharge.

Let’s delve into the world of battery optimization and ensure your Zip Electric Bike is always ready to hit the road.

Key Takeaways

  • Recharging is essential for maintaining performance and lifespan of the Zip electric bike battery
  • Regularly charge the battery to maintain consistent power supply and avoid deep discharges
  • Use a compatible charger and clean battery contacts before recharging
  • Find reliable and informative YouTube tutorials from popular channels to learn how to recharge the battery properly

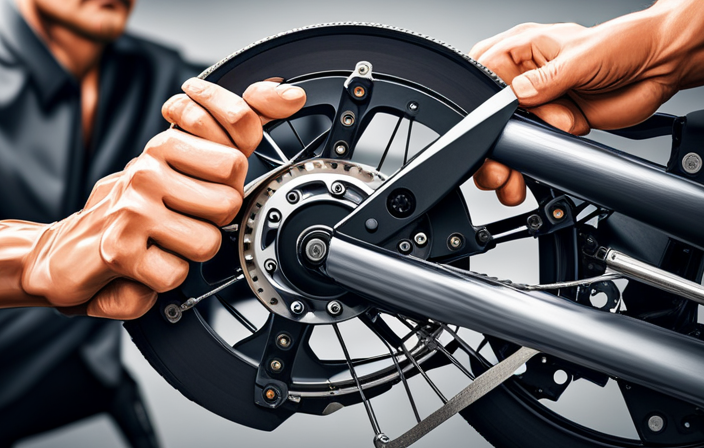
Understanding the Components of a Zip Electric Bike Battery

To understand the components of a Zip Electric Bike battery, you’ll need to know how to recharge it. Recharging the battery is essential for maintaining its performance and ensuring a longer lifespan.

Advertisement

When recharging, it is crucial to assess the battery capacity to determine how much charge it can hold. This can be done by using a battery capacity tester or a multi-meter. By understanding the battery capacity, you can plan your rides accordingly and avoid running out of power in the middle of a journey.

Additionally, it is important to have a basic understanding of battery chemistry. Knowing how the chemical reactions occur within the battery can help you better care for it and maximize its lifespan. This knowledge will also enable you to identify any potential issues with the battery and take appropriate action.

Assessing Battery Life and Performance

Assessing the battery’s life and performance can be done by monitoring its usage and overall efficiency. To ensure optimal battery maintenance and prolong its lifespan, here are some key factors to consider:

  • Charging frequency: Regularly charging the battery, especially before it completely drains, helps maintain a consistent power supply and prevents over-discharging.
  • Proper storage: Storing the battery in a cool and dry place, away from extreme temperatures and direct sunlight, can prevent damage and degradation.
  • Avoiding deep discharges: Deep discharging the battery frequently can negatively impact its lifespan. It is advisable to recharge the battery before it reaches a critical low level.
  • Regular cleaning: Keeping the battery clean and free from dust and debris helps maintain its efficiency and prevents overheating.

By following these battery maintenance practices, you can ensure a longer lifespan for your Zip Electric Bike battery, maximizing its performance and overall usage.

Preparing for the Recharging Process

Advertisement

Before starting the recharging process, it’s important to make sure you have a compatible charger for your Zip Electric Bike. This ensures that the battery is charged safely and efficiently.

To prepare for recharging, there are a few techniques and battery maintenance steps to consider. First, make sure the bike is turned off and the battery is securely connected to the charger. It’s a good practice to clean the battery contacts with a dry cloth to remove any dirt or debris that may affect the charging process.

Additionally, check for any signs of damage on the charger or the battery, such as frayed wires or corrosion. These issues should be addressed before proceeding with the recharging process.

Taking these preparing techniques and practicing regular battery maintenance will help prolong the lifespan and performance of your Zip Electric Bike.

Finding Reliable and Informative YouTube Tutorials

You can easily find reliable and informative tutorials on YouTube that will help you learn more about maintaining and optimizing your Zip Electric Bike. When searching for popular YouTube channels, it is important to consider the number of subscribers, the quality of the content, and the overall popularity of the channel. Some popular channels to consider include "Electric Bike Review," "ElectricBike.com," and "ElectricBikeReport." These channels provide in-depth tutorials that cover various aspects of electric bike maintenance, including recharging the battery. Additionally, it is beneficial to compare different tutorial styles to find the one that suits your learning preferences. Some channels may focus on step-by-step demonstrations, while others may provide more technical explanations. By exploring different channels and tutorial styles, you can find the most effective resources to help you recharge your Zip Electric Bike battery.

Advertisement

Step-by-Step Guide to Recharging Your Zip Electric Bike Battery

To start recharging your Zip Electric Bike battery, first make sure it is turned off and securely connected to the charging port.

It is important to assess battery health before starting the recharging process. Check for any physical damage or signs of wear on the battery. If you notice any issues, it is best to consult a professional for assistance.

Once you have confirmed the battery’s condition, you can proceed with the recharging. Plug the charger into a power outlet and connect it to the charging port on the battery. Allow the battery to charge fully, which may take several hours depending on the model.

Advertisement

Remember to always follow the manufacturer’s instructions for proper battery storage to prolong its lifespan. Proper storage includes keeping the battery in a cool, dry place and avoiding extreme temperatures.

Tips and Tricks for Maximizing Battery Life

One way to maximize your battery life is by properly storing it in a cool and dry place. This helps to prevent overheating and moisture damage, which can greatly affect the performance and lifespan of your Zip Electric Bike battery.

In addition to proper storage, there are several other tips and tricks you can follow to maximize battery capacity and extend its lifespan:

  1. Avoid frequent deep discharges: Try to keep your battery charged between 20% and 80% to avoid putting unnecessary stress on it.

  2. Optimize your riding style: Smooth acceleration and gentle braking can help conserve battery power and reduce strain on the battery.

  3. Keep your tires properly inflated: Underinflated tires can increase rolling resistance, making your battery work harder.

  4. Regularly clean and maintain your bike: Keeping your bike clean, lubricated, and well-maintained can help improve battery efficiency and overall performance.

By following these tips, you can make the most out of your Zip Electric Bike battery and enjoy extended rides with maximum power and performance.

Common Mistakes to Avoid During the Recharging Process

When recharging your Zip Electric Bike battery, it’s important to avoid these common mistakes to ensure optimal performance and longevity. One of the most common mistakes is overcharging the battery. This can lead to reduced battery life and even permanent damage. To avoid overcharging, it’s crucial to select the right charging method. The table below provides a comparison of different charging methods to help you make the best choice for your battery:

Advertisement
Charging Method Pros Cons
Standard Charger – Easy to use
– Affordable – Longer charging time
– Higher risk of overcharging
Smart Charger – Faster charging time
– Prevents overcharging – More expensive
– Requires additional equipment
Solar Charger – Environmentally friendly
– Portable – Slower charging time
– Dependent on sunlight availability

By avoiding overcharging and selecting the right charging method, you can ensure your Zip Electric Bike battery remains in optimal condition for longer rides and extended battery life.

Troubleshooting Battery Issues

If you’re experiencing battery issues with your Zip Electric Bike, troubleshooting can help identify and address the problem.

One of the most common issues is a decrease in battery life over time. This can be caused by a number of factors, such as overcharging, high temperatures, or using the wrong charger.

To troubleshoot this issue, start by checking the charger and making sure it is compatible with the bike’s battery. Additionally, avoid overcharging the battery and exposing it to extreme temperatures.

Another common issue is a sudden drop in battery power. This can be due to a faulty connection or a damaged battery. To troubleshoot this, check all the connections and make sure they are secure. If the battery is damaged, it may need to be replaced.

Advertisement

By following these troubleshooting steps and taking proper care of your battery, you can extend its lifespan and ensure optimal performance.

Safety Precautions for Recharging Your Zip Electric Bike Battery

Now that we have discussed troubleshooting battery issues, let’s move on to the important topic of safety precautions for recharging your Zip Electric Bike battery.

When it comes to recharging your battery, it is crucial to follow certain guidelines to ensure both your safety and the longevity of your battery.

One key aspect to consider is the recharging time. It is recommended to charge your battery fully before each use, and it typically takes around 4-6 hours for a complete charge.

Additionally, proper battery maintenance is essential. Regularly check the battery for any signs of damage or wear, and make sure to clean the battery terminals to prevent corrosion.

Advertisement

By adhering to these safety precautions and practicing good battery maintenance, you can enjoy a safe and efficient charging experience for your Zip Electric Bike.

Exploring Advanced Techniques for Battery Optimization

To optimize your battery, you can try implementing advanced techniques such as adjusting power settings and managing app usage. These methods can significantly improve battery maintenance and efficiency.

Here are some tips to help you get the most out of your Zip Electric Bike battery:

  • Adjust power settings: Lower the screen brightness, disable unnecessary notifications, and reduce the screen timeout to conserve battery power.

  • Manage app usage: Close unused apps running in the background and limit resource-intensive activities, such as video streaming or gaming.

  • Enable battery-saving mode: Utilize the built-in battery-saving mode on your Zip Electric Bike to automatically optimize power consumption.

  • Regularly update software: Keep your bike’s software up to date to improve battery efficiency by optimizing performance.

  • Avoid extreme temperatures: Extreme heat or cold can negatively impact battery life, so it’s important to store and charge your bike in a moderate environment.

By following these advanced techniques, you can maximize your Zip Electric Bike battery’s lifespan and enjoy longer rides without worrying about running out of power.

Frequently Asked Questions

Can I use any type of charger to recharge my Zip Electric Bike battery?

No, it is not recommended to use any type of charger to recharge your Zip electric bike battery. It is important to use the charger specifically designed for your bike to ensure charging compatibility and avoid potential damage to the battery.

Advertisement

How long does it typically take to fully recharge a Zip Electric Bike battery?

Typically, it takes around 4-6 hours to fully recharge a zip electric bike battery. However, it’s important to note that recharge time may vary depending on the battery’s capacity and the charger used. Regular charging can also impact the battery’s lifespan.

Are there any specific safety precautions I should take while recharging my Zip Electric Bike battery?

To ensure safety while recharging your Zip electric bike battery, it’s important to follow a few precautions. First, use the charger provided by the manufacturer. Second, avoid charging near flammable materials. Lastly, never leave the battery unattended during the charging process.

What should I do if my Zip Electric Bike battery is not holding a charge after recharging?

If my zip electric bike battery isn’t holding a charge after recharging, I’d panic! But don’t worry, troubleshooting tips can save the day. Check for loose connections, optimize usage, and maintain proper storage for maximizing battery performance.

Are there any advanced techniques or methods for optimizing the battery life of my Zip Electric Bike?

To optimize the battery life of my zip electric bike, I can employ advanced battery optimization techniques. These include properly charging and discharging the battery, avoiding extreme temperatures, and using a compatible charger. Following these practices will help extend the battery lifespan.

Conclusion

In conclusion, recharging your Zip Electric Bike battery is a straightforward process that can be easily accomplished with the help of informative YouTube tutorials.

Advertisement

By understanding the components of the battery, assessing its performance, and following a step-by-step guide, you can ensure a successful recharge every time.

It is important to avoid common mistakes and take necessary safety precautions during the process.

Additionally, exploring advanced techniques for battery optimization can further enhance the longevity and efficiency of your Zip Electric Bike.

So, hop on your bike and let the recharging begin!

Advertisement

Ralf is a devoted husband and father who loves spending time with his family. He enjoys riding his bicycle as much as possible, and takes every opportunity he can to get out on the open road. Ralf is a kind and gentle person who wants only the best for those around him.

Continue Reading
Advertisement

Electric Bike

How To Turn Your Bike Into An Electric Bike

Published

on

By

An image showcasing a person attaching a sleek, compact electric motor to their bike's rear wheel

Imagine this: smoothly gliding down the road, feeling the breeze in your hair, while your bicycle propels forward with an added electric kick. It may sound like a fantasy, but it can become a reality.

In this article, I’ll show you how to transform your regular bike into an electric powerhouse. From assessing your bike’s suitability for conversion to choosing the right kit and troubleshooting common issues, we’ll cover it all.

So, gear up and get ready to embark on an electrifying adventure with your very own electric bike.

Key Takeaways

  • Electric bikes provide a convenient and effortless riding experience for daily commutes.
  • Assessing the suitability of the bike for conversion is crucial, considering factors such as frame compatibility and weight capacity.
  • Choosing the right conversion kit involves evaluating battery capacity and motor power to meet specific needs and preferences.
  • Proper installation, preparation, maintenance, safety, and legal considerations are essential when turning a bike into an electric bike.

Benefits of Electric Bikes

You’ll be amazed at how electric bikes can transform your daily commute into a thrilling and effortless adventure. With an electric bike, you can say goodbye to the sweat-inducing uphill battles and long, tiring rides.

Advertisement

One of the biggest benefits of electric bikes is their charging time. Most electric bikes can be fully charged in just a few hours, allowing you to quickly get back on the road.

Not only do electric bikes save you time, but they also have a positive environmental impact. By opting for an electric bike instead of a car, you are reducing your carbon footprint and contributing to a cleaner and greener planet.

Now that we have discussed the benefits of electric bikes, let’s move on to assessing your bike’s suitability for conversion.

Assessing Your Bike’s Suitability for Conversion

When assessing the suitability of my bike for conversion, I need to consider three key points.

Firstly, I must ensure that my bike’s frame is compatible with the electric bike conversion kit I plan to use. This includes checking the frame’s dimensions, material, and structural integrity.

Advertisement

Secondly, I need to determine whether my bike’s wheel size and brakes are suitable for an electric conversion. The conversion kit should be compatible with my bike’s existing wheel size, and the brakes should be able to handle the increased speed and weight of an electric bike.

Lastly, I must consider my bike’s weight capacity and ensure that it can safely support the additional weight of the conversion kit, battery, and motor.

Frame Compatibility

Transform your bike into an electric version, and watch as the frame seamlessly embraces the powerful spirit of the new era, like a majestic eagle spreading its wings in the open sky. Assessing frame compatibility is crucial before choosing the right conversion kit. Not all bikes are suitable for electric conversion, as the frame needs to accommodate the added weight and components of an electric system. To help you determine if your bike is compatible, refer to the table below:

Frame Material Compatibility
Steel Excellent
Aluminum Good
Carbon Fiber Not Recommended

Steel frames are highly compatible due to their strength, while aluminum frames offer good compatibility but may require reinforcement in certain areas. Carbon fiber frames, however, are not recommended as they may not withstand the extra stress. Once you’ve assessed frame compatibility, you can move on to the next step, which is evaluating wheel size and brakes.

Wheel Size and Brakes

After assessing frame compatibility, the next step is to consider the wheel size and brakes of your bicycle.

Advertisement

Wheel size compatibility is crucial when converting your bike into an electric one, as it affects the overall performance and stability. It is important to ensure that the motor and battery system you choose are compatible with the wheel size of your bike.

Upgrading the brake system is also essential for safety reasons. Electric bikes tend to have higher speeds, so it is crucial to have reliable brakes that can handle the increased momentum. Consider upgrading to disc brakes, as they provide better stopping power and are less affected by wet conditions.

Moving forward to the next section on weight capacity, it is important to ensure that your bike can handle the additional weight of the electric components.

Weight Capacity

One important consideration is to ensure that your chosen bicycle can handle the additional weight of the electric components. The weight distribution of the bike becomes crucial when converting it into an electric bike.

The added weight of the battery and motor can affect the balance and stability of the bike. It is essential to choose a bike with a strong frame and sturdy construction to handle the increased load. Additionally, carefully consider the placement of the battery. It should be positioned in a way that does not disrupt the balance of the bike or hinder your ability to ride comfortably.

Advertisement

Once you have determined the weight capacity and battery placement, you can move on to choosing the right conversion kit, which will be discussed in the next section.

Choosing the Right Conversion Kit

To create an electrifying experience on your bike, envision yourself effortlessly zooming past traffic with the perfect conversion kit. When choosing the right conversion kit, it’s important to assess battery capacity and compare motor power. Here are two key factors to consider:

  1. Assessing Battery Capacity:

    • Look for a conversion kit that offers a high-capacity battery to ensure longer rides without frequent recharging.
    • Consider the voltage and amp-hour rating of the battery to determine its overall capacity and power output.
  2. Comparing Motor Power:

    • Opt for a conversion kit with a motor that matches your desired speed and terrain requirements.
    • Take note of the motor’s wattage, torque, and RPM to gauge its performance capabilities.

By carefully evaluating battery capacity and motor power, you can find the ideal conversion kit that meets your specific needs.

Once you’ve made your decision, it’s time to gather the tools and materials you’ll need to start the transformation.

Gathering the Tools and Materials You’ll Need

Now that you’ve chosen the perfect conversion kit, let’s dive into gathering all the tools and materials you’ll need for this electrifying transformation.

One of the first things to consider is evaluating the cost of the required tools and materials. Depending on your budget, you may opt for high-end tools or more affordable alternatives.

Advertisement

It’s also important to find tutorials or guides that provide step-by-step instructions on the conversion process, as they can be invaluable resources.

As for the tools themselves, you’ll typically need a set of wrenches, screwdrivers, pliers, wire cutters, and a multimeter for testing electrical connections.

Additionally, gathering materials such as the battery pack, motor, controller, wiring harness, and mounting brackets is crucial.

With all these tools and materials gathered, you can now move on to the next step of removing and preparing your bike’s components for the conversion process.

Removing and Preparing Your Bike’s Components

To prepare my bike for the electric conversion, I first need to remove the wheels. This involves loosening the bolts or quick-release levers that hold the wheels in place and carefully lifting them off the bike frame.

Advertisement

Next, I will detach the chain and pedals. This requires using a chain tool to break the chain and removing the pedals with a pedal wrench.

Finally, I will disconnect the brakes and shifters by loosening the bolts that hold them in place and carefully sliding them off the handlebars.

Removing the Wheels

When you’re ready to transform your bike into an electric powerhouse, the first step is getting those wheels off. Wheel removal is essential for various tasks like tire replacement or installing an electric motor.

To remove the wheels, start by flipping your bike upside down and placing it securely on a stand. Use a wrench to loosen the nuts or quick-release levers on both sides of the axle. Once loose, carefully lift the bike off the ground, holding onto the frame for stability, and slide the wheels out of the dropouts. Remember to release any remaining air pressure in the tires before removing them completely.

Proper wheel removal ensures a smooth transition into the subsequent section about detaching the chain and pedals, allowing you to continue the conversion process seamlessly.

Advertisement

Detaching the Chain and Pedals

Once you’ve successfully removed the wheels, it’s time to tackle the next step in the conversion process: detaching the chain and pedals.

To remove the pedals, you will need a pedal wrench. Start by positioning the wrench on the pedal axle and turn it counterclockwise to loosen the pedal. Once loose, unscrew the pedal by hand. It’s important to note that the left pedal is reverse threaded, so you will need to turn it clockwise to loosen it.

After removing the pedals, you can proceed to detach the chain. Use a chain tool to push out one of the chain pins and separate the chain into two sections. Ensure that the chain you choose for your electric bike conversion is compatible with your chainring and cassette.

Now that the chain and pedals are removed, we can move on to disconnecting the brakes and shifters, ensuring a smooth transition into the next step.

Disconnecting the Brakes and Shifters

Disconnecting the brakes and shifters is a breeze, allowing you to effortlessly transition to the next step of your conversion process.

Advertisement

Start by locating the brake and shifter cables on your bike. Using a 5mm Allen wrench, loosen the bolts that secure the brake and shifter cables to the handlebars.

Once the bolts are loosened, gently pull the cables out of the housing and detach them from the brakes and shifters. Make sure to keep track of which cable corresponds to which brake or shifter.

Now that the cables are disconnected, you can proceed to the next step of your electric bike conversion.

In the subsequent section about installing the electric bike conversion kit, we will explore the process of reconnecting the brakes and shifters, as well as adjusting the brake and shifter cables for optimal performance.

Installing the Electric Bike Conversion Kit

To install the Electric Bike Conversion Kit, all you need is a few basic tools and a willingness to transform your bike into an electric powerhouse. But have you ever wondered how difficult it actually is to complete this transformation? Let’s dive into the process.

Advertisement

First, you need to assess battery power. Choose a location on your bike to mount the battery pack, ensuring it is secure and won’t interfere with other components.

Next, installing the motor is crucial. Remove the bottom bracket from your bike and replace it with the motor assembly. Make sure to follow the manufacturer’s instructions for proper installation.

Once the motor is in place, connect it to the battery pack and secure all the connections.

With the motor and battery installed, you’re ready to move on to adjusting and testing your electric bike, ensuring everything is functioning correctly before hitting the road.

Adjusting and Testing Your Electric Bike

After successfully installing the electric bike conversion kit, it’s now time to adjust and test the effectiveness of your newly transformed electric bike.

Advertisement

One of the key aspects to consider is adjusting the performance of your electric bike to ensure optimal functionality. This can involve adjusting the throttle sensitivity, pedal assist levels, and brake settings to suit your preferences and riding style.

It’s also important to test the effectiveness of the electric motor and battery by taking your electric bike for a test ride. Evaluate how well the motor assists you while pedaling and how long the battery lasts before needing a recharge.

By fine-tuning and testing your electric bike, you can ensure that it meets your expectations and performs at its best.

Now, let’s move on to the next section where we’ll discuss adding additional accessories to further enhance your electric bike riding experience.

Adding Additional Accessories

When it comes to adding additional accessories to my electric bike, there are a few key points I always consider.

Advertisement

First, lights and reflectors are crucial for safety, especially when riding at night or in low visibility conditions.

Second, fenders and mudguards are essential to protect myself and the bike from water, mud, and debris kicked up by the wheels.

Lastly, a rear rack and panniers provide valuable storage space for carrying bags, groceries, or other items, making my electric bike even more versatile and convenient.

Lights and Reflectors

As I ride through the darkened streets, the shimmering lights and reflectors on my bike create a brilliant display, ensuring my safety and visibility to others. Installing reflectors is a crucial step in turning your bike into an electric bike. These small, reflective devices can be easily attached to the front, back, and sides of your bike, increasing your visibility from all angles.

When choosing headlights, it’s important to consider the brightness and beam pattern. LED headlights are a popular choice due to their energy efficiency and long lifespan. Look for headlights with a wide beam pattern to illuminate the road ahead and make you more visible to oncoming traffic.

Advertisement

Now, let’s move on to the next section about fenders and mudguards.

Fenders and Mudguards

Enhance your cycling experience with fenders and mudguards, keeping you dry and mud-free on those rainy rides. Installing fenders on your bike is a simple process that can be done in a few steps.

First, determine the type of fenders that are compatible with your bike’s frame. There are two main types: full fenders and clip-on fenders. Full fenders provide maximum coverage and protection, while clip-on fenders are easier to install and remove.

Once you have chosen the type of fenders, follow the manufacturer’s instructions to attach them securely to your bike. Mudguards, on the other hand, are designed to prevent mud and dirt from splashing up onto your bike and you. They usually attach to the down tube or seat tube of the frame.

Now that your bike is ready for any weather condition, let’s move on to the next section about rear rack and panniers.

Advertisement

Rear Rack and Panniers

Installing a rear rack and panniers on your bicycle can greatly increase its carrying capacity for all your essentials. This is especially important if you’re considering an electric bike conversion, as you may need extra space for batteries or other components.

Here are five key benefits of installing a rear rack and panniers:

  • Enhanced storage: With a rear rack and panniers, you can easily carry groceries, a change of clothes, or any other items you may need on your electric bike journeys.

  • Improved weight distribution: By placing the weight on the rear of the bike, you can maintain better balance and stability while riding.

  • Easy installation: Rear racks and panniers are designed to be easily attached to most bicycles, making the installation process straightforward.

  • Versatility: Rear racks and panniers come in various shapes and sizes, allowing you to choose the ones that best suit your needs.

  • Aesthetically pleasing: Apart from their functionality, rear racks and panniers can also add a sleek and stylish look to your electric bike.

With a rear rack and panniers installed, you can now focus on maintaining your electric bike’s optimal performance.

Maintaining Your Electric Bike

Keeping your electric bike in top condition is crucial to ensure a smooth and enjoyable ride. Proper electric bike maintenance is key to extending battery life and maximizing performance.

Firstly, it is important to regularly check and clean the battery contacts to ensure a good connection. Additionally, keeping the battery charged between 20% and 80% can help prolong its lifespan. It is also recommended to store the battery in a cool, dry place when not in use.

Advertisement

Regularly inspecting and lubricating the chain, gears, and brakes is essential for smooth operation. It is important to check tire pressure and tread wear regularly as well.

Finally, scheduling regular maintenance check-ups with a qualified technician can help identify and address any potential issues before they become major problems. Taking these steps to maintain your electric bike will ensure a safe and reliable ride.

Now let’s move on to some safety tips for riding an electric bike.

Safety Tips for Riding an Electric Bike

Stay safe while riding your e-bike by following these simple tips to ensure a smooth and enjoyable journey. It is important to prioritize your safety by wearing essential safety gear such as a helmet, gloves, and knee pads. Additionally, regular electric bike maintenance is crucial to ensure optimal performance and safety. Keep your brakes well-adjusted and check the tire pressure regularly. It is also important to inspect the battery connections and wiring to prevent any potential issues. To further enhance your safety, consider adding additional safety features such as lights, reflectors, and a horn to make yourself more visible to other road users. Remember to always follow traffic rules and be aware of your surroundings. By taking these precautions, you can have a safe and enjoyable ride. Moving on to legal considerations for electric bikes…

Legal Considerations for Electric Bikes

To ensure you are riding your electric bike in accordance with the law, it’s important to familiarize yourself with the legal requirements and restrictions in your area. Here are some key regulations to consider:

Advertisement
  • Age restrictions: Some jurisdictions have minimum age requirements for riding an electric bike. Make sure you meet the age criteria before hitting the road.

  • Speed limits: Different regions may have specific speed limits for electric bikes. It’s crucial to adhere to these limits to avoid legal consequences.

  • Equipment requirements: Many areas mandate certain equipment for electric bikes, such as lights, reflectors, and horns. Ensure your bike is equipped with the necessary items to comply with the law.

Additionally, it’s essential to consider insurance coverage for your electric bike. While regulations regarding insurance may vary, it’s wise to explore options to protect yourself and your bike in the event of an accident or theft. Understanding the legalities and insurance requirements will help you ride confidently and responsibly.

Transitioning into troubleshooting common issues, let’s now address some common problems that may arise with your electric bike.

Troubleshooting Common Issues

Experiencing a sudden loss of power on your e-bike can feel like being stranded in the middle of a vast desert with no oasis in sight. To troubleshoot battery issues, start by checking the battery connections and ensuring they are secure. Next, test the battery voltage using a multimeter to see if it is within the recommended range. If the voltage is low, try charging the battery fully and then retesting. If the voltage is still low, it may be time to replace the battery. When diagnosing motor problems, check the motor connections and make sure they are tight. Inspect the motor for any visible damage or signs of wear. If the motor still isn’t functioning properly, it may need to be repaired or replaced. Transitioning into the next section about upgrading and customizing your electric bike, it’s important to troubleshoot and resolve any issues before making any modifications.

Upgrading and Customizing Your Electric Bike

When it comes to upgrading and customizing your electric bike, there are three key points to consider.

First, swapping components for higher performance can greatly enhance the overall functionality and efficiency of your bike.

Advertisement

Second, personalizing the aesthetics of your electric bike allows you to showcase your unique style and make it truly your own.

Lastly, adding accessories for convenience, such as racks, lights, and baskets, can greatly improve the practicality and usability of your electric bike.

By exploring these areas, you can create a customized electric bike that meets your specific needs and preferences.

Swapping Components for Higher Performance

Upgrading the components can significantly enhance the performance of your bike, allowing for a smoother and more efficient ride. By swapping out certain parts, you can increase the speed and overall power of your electric bike. One key component to consider upgrading is the motor. A more powerful motor can provide a higher top speed and better acceleration. Additionally, upgrading the battery can increase the range of your bike, allowing you to ride for longer distances without needing to recharge. Another important component to upgrade is the controller, which regulates the power output from the battery to the motor. A more advanced controller can improve the responsiveness and efficiency of your bike. By upgrading these components, you can transform your electric bike into a high-performance machine. With the increased speed and power, you’ll be able to take your rides to the next level. In the next section, we will explore how to personalize the aesthetics of your electric bike.

Personalizing the Aesthetics

Get ready to unleash your inner artist and give your two-wheeled canvas a unique and captivating visual identity that will make heads turn and hearts race.

Advertisement

When it comes to personalizing the aesthetics of your electric bike, there are a plethora of customization options and DIY modifications available. You can start by choosing a color scheme that reflects your personality and style, whether it’s a bold and vibrant design or a sleek and minimalist look.

Additionally, you can add decals, stickers, or even custom paint jobs to make your bike truly stand out. Don’t forget about the smaller details like handlebar grips, seat covers, and pedals, which can also be customized to match your preferences.

By adding your personal touch to the appearance of your electric bike, you’ll create a ride that is as visually stunning as it is exhilarating.

Now, let’s move on to the next section about adding accessories for convenience.

Adding Accessories for Convenience

Enhance your riding experience by equipping your two-wheeled companion with a range of convenient accessories that will make every journey a breeze.

Advertisement

As part of the converting process to turn your bike into an electric bike, it is important to consider the various charging options available. One popular accessory is a removable battery pack that can be charged separately, allowing for easy and convenient charging at home or on the go.

Additionally, installing a handlebar-mounted display that shows battery life and power output can help you monitor your bike’s performance. Other useful accessories include a built-in USB port for charging your devices while on the move, as well as a rear rack for carrying extra gear or groceries.

By adding these accessories, you can transform your bike into a versatile and convenient mode of transportation. Joining the electric bike community opens up a world of possibilities for eco-friendly commuting and exploration.

Joining the Electric Bike Community

Joining the electric bike community can be a great way to reduce your carbon footprint. Over 66% of electric bike owners report that they ride more frequently than they did with a regular bike.

To join this community, you can start by exploring electric bike conversion kits. These kits allow you to easily transform your existing bike into an electric one. They provide you with the benefits of an electric bike without the need to purchase a new one.

Advertisement

Additionally, finding local electric bike groups can help you connect with other enthusiasts. It can also provide valuable insights into maintaining and optimizing your electric bike. Joining these groups allows you to learn about new routes, share experiences, and even participate in group rides.

Being a part of the electric bike community not only enhances your riding experience but also fosters a sense of camaraderie among fellow electric bike enthusiasts. Ultimately, it allows you to enjoy the ride on your electric bike to the fullest.

Conclusion: Enjoying the Ride on Your Electric Bike

Experience the thrill and freedom of riding on an electric bike, embracing the joy of the journey and the endless possibilities that await you.

Maintaining your electric bike and improving battery life are crucial for a smooth and enjoyable ride. Regular maintenance includes checking tire pressure, lubricating the chain, and inspecting the brakes.

Keeping your battery in optimal condition is essential for maximizing its lifespan. To improve battery life, avoid overcharging or fully depleting it and store it in a cool, dry place when not in use. It’s also important to clean the battery terminals regularly and avoid exposing it to extreme temperatures.

Advertisement

By following these maintenance tips and taking care of your battery, you can ensure a longer range and a more efficient ride on your electric bike.

So, get ready to hit the road and enjoy the exhilarating experience of riding your electric bike.

Frequently Asked Questions

Are there any specific safety precautions I should take when converting my bike into an electric bike?

When converting a bike to electric, it’s crucial to prioritize safety. Equip yourself with proper safety gear like a helmet, reflective clothing, and lights. Regularly check battery maintenance, ensuring it’s securely fastened and charged to avoid any mishaps.

Can I still use my bike as a regular bicycle after converting it into an electric bike?

Yes, after converting my bike into an electric bike, I can still use it as a regular bicycle. It offers the benefits of using an electric bike for commuting while retaining the option to pedal manually.

Will converting my bike into an electric bike affect its warranty?

Converting your bike to electric may void its warranty and impact insurance coverage. Altering the original design can be seen as a modification, making it important to check with the manufacturer and insurance provider beforehand.

Advertisement

How long does it typically take to install an electric bike conversion kit?

Typically, it takes around 2-4 hours to install an electric bike conversion kit. However, there can be common challenges like aligning components or adjusting the brakes that may increase the installation time.

Are there any restrictions or regulations regarding the use of electric bikes in my area?

In urban areas, electric bikes offer benefits like reduced emissions and increased speed. However, drawbacks include limited range and reliance on charging infrastructure. Regulations for electric bikes vary among cities and countries, so it’s important to research local laws before riding.

Conclusion

After going through the process of converting my bike into an electric bike, I must say, it’s been quite the ride!

Not only have I experienced the numerous benefits of electric bikes, such as increased speed and reduced effort, but I’ve also become a part of the vibrant electric bike community.

Troubleshooting common issues and upgrading my electric bike has allowed me to truly make it my own.

Advertisement

So, if you’re ready to take your biking experience to the next level, hop on the electric bike bandwagon and enjoy the electrifying journey ahead!

Continue Reading

Electric Bike

How To Turn Light On Electric Bike

Published

on

By

An image of a gloved hand gently pressing the small circular button on an electric bike's handlebar, causing a sleek LED headlight to illuminate the darkened road ahead with a crisp, bright beam

Turning on the lights of an electric bike is an easy but important task to ensure your safety and visibility while riding. In this article, I will walk you through the steps of turning on the lights on your electric bike, from finding the light switch to preserving battery power.

By following these steps, you can confidently ride your electric bike knowing that you are equipped with the necessary lighting for a safe and enjoyable journey.

Let’s dive in and explore how to turn on the light on your electric bike.

Key Takeaways

  • Most electric bike light switches are located near the handlebars, display panel, or frame.
  • Consult the user manual if you have trouble finding the light switch.
  • Ensure the battery is fully charged for optimal light functionality.
  • Locate and activate the light control button or switch to ensure proper functioning of the lights before riding.

Locate the Light Switch on Your Electric Bike

Find the light switch on your electric bike and let the glow illuminate your path, making your nighttime rides safer and more enjoyable.

Advertisement

Finding the light switch on your electric bike is crucial for ensuring a smooth and hassle-free ride. Most electric bike light switches are located near the handlebars, either on the left or right side. However, some models may have them integrated into the display panel or even on the frame. If you’re having trouble locating the switch, consult your electric bike’s user manual for specific instructions.

Troubleshooting common issues with electric bike lights, such as flickering or not turning on, can often be resolved by checking the connections, replacing the battery, or resetting the system.

Once you’ve found the light switch, ensure your electric bike’s battery is charged to avoid any unexpected darkness during your rides.

Ensure Your Electric Bike’s Battery is Charged

Make sure you’ve got enough juice in your battery so you can cruise with confidence on your awesome e-bike. Electric bike battery maintenance is crucial to ensure optimal performance and longevity.

A fully charged battery offers numerous benefits, including increased range and power output. To ensure your electric bike’s battery is charged, start by plugging it into a compatible charger. Check the battery’s indicator to ensure it is charging properly. It is recommended to charge the battery fully before each ride.

Advertisement

Regularly inspect the battery for any signs of damage or wear, and clean the contacts to maintain good conductivity. Having a fully charged battery will not only provide a smooth and enjoyable ride but also maximize the overall efficiency of your electric bike.

Now, let’s move on to turning on the bike’s power.

Turn on the Bike’s Power

To start riding, all you need to do is flip the switch on the handlebars and feel the exhilaration as the bike’s power kicks in. Before you do this, make sure your electric bike’s battery is fully charged for optimal performance. The battery charge level can be checked using the display panel located on the handlebars.

Once you have confirmed that the battery is sufficiently charged, locate the power switch, usually positioned near the handlebars or on the bike’s frame. Flip the switch to the ‘on’ position and listen for a soft click, indicating that the bike’s power has been activated. Now, you are ready to take off and experience the smooth acceleration of the electric motor.

Locate the light control button or switch to ensure visibility during your ride.

Advertisement

Locate the Light Control Button or Switch

Get ready to ride in style by finding the handy button or switch that controls the illuminating brilliance of your bike. To install bike lights or troubleshoot existing ones, locating the light control button or switch is crucial. This control allows you to easily turn the bike lights on and off, ensuring visibility and safety during your rides. To find the light control button or switch, refer to the bike’s manual or look for it on the handlebars or frame. Once located, press or flip the light control button or switch to activate the lights. Ensure the lights are functioning properly before heading out on your ride. With the lights on, you’ll be able to enjoy your ride with added visibility and confidence. Transitioning into the next section, let’s explore how to press or flip the light control button or switch correctly.

Press or Flip the Light Control Button or Switch

Find the control button or switch and effortlessly press or flip it to activate the illuminating brilliance of your ride.

When it comes to using lights on an electric bike, there are several advantages to consider.

Advertisement

First and foremost, lights greatly enhance visibility, ensuring that you are seen by other road users, especially in low-light conditions.

Additionally, lights help to improve your own visibility, allowing you to better navigate the road ahead.

When choosing the right light for your electric bike, consider factors such as brightness, beam pattern, and battery life.

Opt for a light that offers sufficient brightness to illuminate your path, a wide beam pattern for optimal coverage, and a long-lasting battery to avoid frequent recharging.

By selecting the right light and effortlessly activating it, you can enjoy a safe and well-illuminated ride.

Advertisement

Now, let’s check if the lights are working properly.

Check if the Lights are Working Properly

Make sure your ride is aglow with a brilliant beacon of safety and confidence by checking the functionality of your illuminating companions.

To test if the lights on your electric bike are working properly, you can follow these testing methods and troubleshooting tips.

First, turn on the bike’s power and switch on the lights. Check if all the lights, including the front headlight, rear tail light, and any additional lights, are functioning as expected. Ensure that the light beams are bright and focused, providing adequate visibility.

If any lights are malfunctioning or not illuminating properly, you may need to inspect the wiring connections, replace bulbs, or consult the bike’s manual for specific troubleshooting steps.

Advertisement

Once you have confirmed that the lights are in good working order, you can proceed to adjust the light’s brightness or mode, if applicable, to suit your preference and riding conditions.

Adjust the Light’s Brightness or Mode, if Applicable

Illuminate your ride by adjusting the brightness or mode of your electric bike’s lights to suit your preference and enhance your visibility in different riding conditions.

To adjust the brightness, locate the brightness adjustment button or switch on your bike’s light control panel. Press the button or switch to increase or decrease the brightness level according to your needs.

Alternatively, if your electric bike has multiple light modes, choose the mode that best suits your riding environment. These modes may include steady, flashing, or pulsing lights. Experiment with each mode to find the one that provides optimal visibility while riding.

Once you have adjusted the brightness or selected the desired mode, you can use the headlight for illumination in front.

Advertisement

Use the Headlight for Illumination in Front

To enhance your visibility and ensure a safe ride, you can rely on the headlight to illuminate the road ahead. It’s like having a small sun guiding your way, providing a beam of light that stretches up to 100 meters.

The headlight on an electric bike usually comes with adjustable brightness levels, allowing you to customize the intensity of the light based on your preference and riding conditions. To adjust the headlight brightness, simply locate the brightness control button or switch on the handlebar. Pressing or sliding this button will cycle through the different brightness levels available.

Additionally, some electric bikes offer different headlight modes, such as steady beam, flashing mode, or even an eco-mode to conserve battery power. Experiment with these modes to find the one that suits your needs best.

Now, let’s move on to the next section about using the taillight for visibility from behind.

Use the Taillight for Visibility from Behind

Don’t forget about the taillight – it’s your key to being seen from behind and ensuring your safety on the road.

Advertisement

Using taillights for visibility during the daytime is crucial, as it helps other drivers and cyclists see you from a distance. A bright taillight can make all the difference in preventing accidents.

Additionally, it is important to use reflectors on your electric bike. These small, reflective devices bounce light back to its source, making you more visible to others. Reflectors can be attached to the rear of your bike, pedals, and even your clothing.

By using both taillights and reflectors, you greatly enhance your visibility and minimize the risk of being involved in a collision. Consider installing additional lights for enhanced safety without compromising style or functionality.

Consider Installing Additional Lights for Enhanced Safety

To ensure optimal visibility and safety while riding an electric bike, it is crucial to consider installing additional lights in addition to the taillight.

One effective option is to install reflectors on the front and rear of the bike, which can greatly enhance visibility, especially in low-light conditions.

Advertisement

Additionally, incorporating LED lights into the bike’s lighting system can provide numerous benefits. LED lights are energy-efficient, durable, and offer bright illumination, making them ideal for riding at night or in foggy conditions. Furthermore, LED lights have a longer lifespan compared to traditional incandescent lights, reducing the need for frequent replacements.

By utilizing reflectors and LED lights, riders can significantly improve their visibility and increase their safety on the road.

Now, let’s move on to the next section and familiarize ourselves with local laws and regulations regarding bike lights.

Familiarize Yourself with Local Laws and Regulations Regarding Bike Lights

Before hitting the road on your e-bike, it’s important to get familiar with the local laws and regulations regarding bike lights, so you can ride safely and avoid any legal trouble.

Different regions may have specific requirements for bike lights, such as the minimum brightness, color, and positioning. Understanding these local laws will help you ensure that your electric bike is equipped with the appropriate lights.

Advertisement

Some areas may mandate a white light on the front and a red light on the rear, while others may have additional regulations regarding reflectors. By familiarizing yourself with the local laws and bike light regulations, you can confidently ride your electric bike knowing that you are in compliance with the law and promoting your own safety.

Now, let’s move on to the next section about using reflective gear or accessories for added visibility.

Use Reflective Gear or Accessories for Added Visibility

Ensure your own safety while riding by wearing reflective gear or using accessories that enhance your visibility. Reflective clothing benefits are crucial in increasing your visibility to other road users, especially during low-light conditions.

Here are four items that can help improve your visibility:

  • Reflective vests: These vests are made with highly reflective material that can be easily seen by motorists.

  • Reflective ankle bands: These bands wrap around your ankles and provide additional visibility.

  • Reflective tape: Apply this tape to your bike frame, helmet, or other accessories to increase visibility.

  • Reflective backpack covers: These covers fit over your backpack and have reflective strips to enhance your visibility from behind.

Proper lighting is essential for your safety as well. Ensure that your bike is equipped with front and rear lights that comply with local regulations. Regularly check and maintain your bike’s lights to ensure they are in proper working condition.

Advertisement

Regularly Check and Maintain Your Bike’s Lights

Make sure you regularly inspect and upkeep the illumination on your bicycle to guarantee optimal visibility and safety while riding. Bike light maintenance is essential for ensuring that your lights are in proper working condition at all times.

Start by checking the batteries or power source to make sure they are fully charged or functioning properly. Next, inspect the light bulbs or LEDs to ensure they are not burnt out or damaged. Clean the lenses to remove any dirt or debris that may obstruct the light output. It is also important to periodically check the wiring connections to ensure they are secure and not frayed.

Remember, the importance of bike lights cannot be overstated, as they greatly enhance your visibility to other road users. Ensure your lights are off when not in use to conserve battery life and transition into the next section.

Ensure Your Lights are Off When Not in Use to Conserve Battery Life

When you’re not riding, remember to switch off your bicycle’s lights to preserve battery power and extend their lifespan. This conservation tip is essential for optimizing battery life on your electric bike. Turning off your lights when not in use will help conserve energy and ensure that your battery lasts longer. To help you remember, here is a table outlining the benefits of switching off your lights:

Conservation Tips Battery Life Optimization
Switch off lights Extend battery lifespan
Conserve energy Preserve battery power
Optimize battery Longer battery life

By following these conservation tips and turning off your lights when not in use, you can enjoy your rides with the added safety and visibility of electric bike lights.

Advertisement

Enjoy Your Rides with the Added Safety and Visibility of Electric Bike Lights

Enhance your riding experience by embracing the safety and visibility that comes with the inclusion of powerful, illuminating bike lights. When it comes to lighting options for electric bikes, there are a variety of choices available that offer numerous benefits.

One of the main advantages of using bike lights is the increased visibility they provide, ensuring that you are easily seen by other road users. This is particularly important in low-light conditions or when riding at night.

Additionally, bike lights improve your safety by illuminating the road ahead, allowing you to spot any obstacles or hazards in your path. They also make you more visible to pedestrians and other cyclists, reducing the risk of accidents.

By investing in high-quality bike lights, you can enjoy your rides with peace of mind, knowing that you are taking every precaution to stay safe and visible on the road.

Frequently Asked Questions

How do I adjust the brightness or mode of the light on my electric bike?

To adjust the brightness or mode of the light on my electric bike, I can refer to the user manual for specific instructions. If I encounter any issues, troubleshooting steps such as checking the connections or replacing the bulb may be necessary.

Advertisement

Are there any local laws or regulations regarding the use of bike lights that I should be aware of?

Local regulations regarding bike light requirements vary, but it’s crucial to comply for safety. In the US, 48% of cyclist fatalities occur between 6pm and midnight. Understanding and abiding by local laws ensures visibility and reduces the risk of accidents.

Should I consider installing additional lights on my electric bike for enhanced safety?

Yes, installing additional lights on my electric bike enhances safety. Reflective gear increases visibility, especially at night. A horn alerts others to my presence. These features are essential for safe riding.

How often should I check and maintain the lights on my electric bike?

Regular maintenance of electric bike lights is crucial for safety. To troubleshoot common issues, check connections, replace faulty bulbs, and clean lenses. Remember, neglecting maintenance can lead to disastrous consequences—your lights may go out in the middle of the night, leaving you stranded in darkness!

Is it necessary to ensure that the lights are turned off when not in use to conserve battery life?

Yes, it is necessary to ensure that the lights are turned off when not in use to conserve battery life. Leaving the lights on can significantly impact the battery life of an electric bike. Automatic light sensors provide benefits by turning the lights on and off based on the surrounding light conditions.

Conclusion

In conclusion, turning on the light on your electric bike is as simple as flipping a switch.

Advertisement

With a fully charged battery and the press of a button, your bike will illuminate the path ahead, guiding you like a beacon in the dark.

Remember to regularly check and maintain your lights, and use reflective gear for added visibility.

By ensuring your lights are off when not in use, you can conserve battery life and enjoy your rides with the added safety and visibility of electric bike lights.

Continue Reading

Electric Bike

How To Turn A Pedal Bike Into An Electric Bike

Published

on

By

An image showcasing the transformation of a pedal bike into an electric bike

I recall my initial experience riding an electric bike – it felt like a burst of energy flowing through me, effortlessly pushing me forward. If you’ve ever fantasized about feeling that exhilaration, then you’re in for a treat.

In this article, I will show you step by step how to transform your ordinary pedal bike into an electrifying machine. So buckle up, grab your tools, and get ready to embark on this exciting journey of bike electrification.

Let’s dive in!

Key Takeaways

  • Consider weight distribution and secure attachment when mounting the battery
  • Choose appropriate locations for mounting the throttle and pedal assist sensor
  • Ensure proper installation of pedals, crankset, and bottom bracket
  • Regularly maintain and service the electric bike for optimal performance and safety

Assess Your Bike’s Compatibility for Conversion

Before you begin, make sure your bike’s frame and components are suitable for conversion.

Advertisement

Assessing your bike’s compatibility is an essential step in the conversion process. First, consider the frame material; steel and aluminum are ideal choices due to their strength and durability.

Next, examine the bike’s fork to ensure it can accommodate the weight and torque of an electric motor. Check the dropouts, as they need to be compatible with the motor axle size. Additionally, evaluate the bottom bracket for compatibility with the motor’s mounting system.

Lastly, assess the bike’s brakes and gearing system, as they may need to be upgraded to handle the increased speed and power of the electric motor.

Once you have determined your bike’s compatibility, you can move on to gathering the necessary tools and equipment for the conversion process.

Gather the Necessary Tools and Equipment

You’ll need to gather all the tools and equipment necessary for the conversion. Choosing the right tools is crucial for a successful electric bike conversion.

Advertisement

First, you’ll need a set of wrenches and screwdrivers to remove the bike’s components. Additionally, a torque wrench will ensure proper tightening of bolts and nuts. A multimeter is essential for testing and troubleshooting electrical connections.

Safety goggles and gloves are a must to protect yourself during the process. When working with electricity, it’s vital to take proper safety precautions. Make sure to disconnect the battery before touching any wires and wear insulated gloves when handling electrical components. By following these safety measures, you can avoid accidents and injuries.

Now that you have gathered your tools and know the importance of safety, let’s move on to the next step and choose the right electric bike conversion kit.

Choose the Right Electric Bike Conversion Kit

Advertisement

To select the appropriate electric bike conversion kit, make sure to consider factors like your bike’s specifications, desired range, and power requirements. Here are three key factors to keep in mind when choosing an electric bike conversion kit:

  1. Compatibility: Ensure that the kit is compatible with your bike’s frame and wheel size. Electric bike conversion kits come in various sizes and configurations, so make sure to choose one that fits your bike seamlessly.

  2. Power and Range: Determine the power and range you need for your electric bike. Consider factors like terrain, distance, and intended use to determine the motor power and battery capacity that will best suit your needs.

  3. Quality and Features: Look for a conversion kit that offers high-quality components and reliable features. Consider factors like motor efficiency, battery life, and ease of installation.

By carefully considering these factors, you can choose the right electric bike conversion kit that will enhance your biking experience and provide the benefits of electric bikes.

Now, let’s move on to the next section and learn how to remove the pedals, crankset, and bottom bracket.

Remove the Pedals, Crankset, and Bottom Bracket

Once you’ve gathered the necessary tools, start by loosening the bolts on the pedals using a wrench. This is an essential step in the process of turning your pedal bike into an electric bike. Removing the pedals, crankset, and bottom bracket will allow you to install the electric bike conversion kit properly. Here is a helpful table to guide you through the process:

Tools Needed
Wrench
Allen key
Screwdriver
Steps
Loosen pedal bolts using a wrench
Remove pedals
Use an Allen key to remove the crankset
Remove the bottom bracket using a wrench or screwdriver

Bike modification is a fantastic way to transform your regular bike into an alternative mode of transportation. After completing the removal of the pedals, crankset, and bottom bracket, the next step is to install the electric bike conversion kit’s motor.

Advertisement

Install the Electric Bike Conversion Kit’s Motor

Now that everything is removed, it’s time to install the motor from the electric bike conversion kit. Follow these motor installation tips to ensure a smooth process and avoid common issues:

  1. Position the motor: Determine the ideal location for the motor on your bike frame. Choose a spot that provides proper clearance and doesn’t interfere with other components.

  2. Secure the motor: Use the provided mounting brackets and hardware to securely attach the motor to the frame. Double-check that it is tightly fastened to prevent any movement during operation.

  3. Connect the motor cables: Follow the manufacturer’s instructions to connect the motor cables to the battery and controller. Ensure proper alignment and tight connections to avoid any electrical issues.

  4. Test the motor: Before riding, perform a thorough test of the motor. Check for any abnormal noises, vibrations, or overheating. Troubleshoot any issues promptly to ensure a safe and reliable electric bike conversion.

With the motor successfully installed, it’s time to connect it to the battery and controller for the next step in the conversion process.

Connect the Motor to the Battery and Controller

Make sure you carefully follow the manufacturer’s instructions to properly connect the motor to the battery and controller for a successful electric bike conversion.

Advertisement

First, locate the connectors on the motor, battery, and controller. Identify the positive and negative terminals on each component.

Connect the motor wires to the controller, ensuring a secure and tight connection.

Then, connect the battery to the controller, matching the positive and negative terminals. Double-check all connections to ensure they are properly secured.

Once connected, test the system by turning on the bike. Troubleshooting common issues with electric bike conversions may include checking for loose connections, ensuring the battery is fully charged, and inspecting the wiring for any potential damage.

With the motor, battery, and controller properly connected, you are now ready to mount the battery on the bike frame, integrating it seamlessly into your electric bike setup.

Advertisement

Mount the Battery on the Bike Frame

To securely mount the battery on your bike frame, ensure that you have chosen a suitable location that provides stability and easy access for charging. The mounting position should be sturdy and secure, as the battery is an essential component of your electric bike conversion.

It is important to consider the battery capacity when selecting the mounting position. A higher capacity battery may be larger and heavier, requiring a more robust mounting location. Additionally, take into account the weight distribution of the bike to maintain proper balance and stability.

Once the battery is securely mounted, you can proceed to install the throttle and/or pedal assist sensor, which will allow you to control the electric assistance provided by the motor.

Install the Throttle and/or Pedal Assist Sensor

You’ll need to first determine the appropriate location for mounting the throttle and/or pedal assist sensor on your bike frame. This step is crucial to ensure proper functionality and ease of use.

Here are four key considerations for installing the throttle and troubleshooting the pedal assist sensor:

Advertisement
  1. Choose a convenient location on the handlebars for the throttle, ensuring it is within easy reach while maintaining a comfortable grip on the handlebars.

  2. Mount the throttle securely, using the provided clamp or adhesive, making sure it is firmly attached to prevent any movement during rides.

  3. For the pedal assist sensor, locate the sensor bracket on the bottom bracket shell of the bike frame and attach the sensor securely.

  4. Test the functionality of both the throttle and pedal assist sensor before proceeding to the next step.

With the throttle and pedal assist sensor successfully installed, we can now move on to reinstalling the pedals, crankset, and bottom bracket.

Reinstall the Pedals, Crankset, and Bottom Bracket

Now that the throttle and pedal assist sensor are securely installed, we can focus on reinstalling the pedals, crankset, and bottom bracket. This step is of utmost importance as it ensures that the power from the motor is efficiently transferred to the bike’s drivetrain.

Follow these steps to successfully reinstall the pedals, crankset, and bottom bracket:

  1. Begin by removing any dirt or debris from the bottom bracket shell using a brush or rag.

  2. Apply a small amount of grease to the threads of the bottom bracket and insert it into the shell.

  3. Tighten the bottom bracket using a bottom bracket tool, ensuring it is secure and aligned properly.

  4. Attach the crankset to the bottom bracket, making sure it is aligned and tightened to the manufacturer’s specifications.

  5. Finally, reinstall the pedals, ensuring they are threaded correctly and tightened securely.

By completing these steps, you will have successfully reinstalled the pedals, crankset, and bottom bracket, allowing for a smooth and efficient electric bike conversion.

Now let’s move on to testing the electric bike conversion for functionality.

Advertisement

Test the Electric Bike Conversion for Functionality

Once you’ve completed the installation process, it’s important to ensure the electric bike conversion is functioning properly. Testing the electric bike conversion is crucial to ensure a safe and reliable ride.

There are several testing methods you can employ to check the functionality. First, check the battery level and ensure it is fully charged. Next, test the throttle and make sure it responds smoothly. You should also test the pedal assist system to ensure it engages and disengages properly.

If any issues arise during testing, there are troubleshooting tips you can follow to identify and fix the problem. By thoroughly testing the electric bike conversion, you can address any issues before hitting the road.

Transitioning into the next section, let’s now discuss how to adjust and fine-tune the electric bike’s performance.

Adjust and Fine-Tune the Electric Bike’s Performance

To optimize your ride, it’s important to make adjustments and fine-tune the performance of your newly converted electric bicycle. Here are some key areas to focus on:

Advertisement
  • Tire Pressure: Check and adjust the tire pressure regularly to ensure optimal grip and efficiency.

  • Gearing: Experiment with different gear ratios to find the right balance between power and speed.

  • Brake Adjustment: Ensure that your brakes are properly aligned and adjusted for maximum stopping power.

  • Battery Placement: Position the battery in a way that balances the weight distribution of the bike, improving stability and handling.

By fine-tuning these aspects of your electric bike, you can greatly improve efficiency and increase speed.

Once you’ve optimized the performance of your bike, it’s time to learn how to ride and control it effectively, ensuring a safe and enjoyable experience.

Learn How to Ride and Control Your Electric Bike

Take some time to familiarize yourself with the controls and handling of your new electric ride. Electric bike safety is of utmost importance, so it is crucial to understand how to properly operate your electric bike.

Start by adjusting the seat height to ensure a comfortable and stable riding position. Familiarize yourself with the throttle, which controls the speed of the electric motor. Get to know the pedal-assist system and how to switch between different levels of assistance. Practice braking, both with the handbrakes and the regenerative braking system.

Learn how to navigate corners smoothly and maintain balance. Understanding the intricacies of your electric bike will not only enhance your riding experience but also contribute to your overall safety.

Advertisement

Now that you have mastered the controls and handling, let’s explore how to maintain and service your electric bike regularly.

Maintain and Service Your Electric Bike Regularly

Make sure you regularly check the tire pressure, clean the chain, and lubricate the moving parts to keep your electric bike running smoothly. Regular maintenance is crucial for the longevity and performance of your electric bike.

By following a few simple steps, you can avoid common issues and ensure that your bike is always in top condition. Troubleshooting may be required from time to time, such as diagnosing electrical problems or replacing worn-out components.

Upgrading and customizing your electric bike is also an exciting option to enhance its capabilities, whether it’s installing a more powerful motor or adding additional batteries for extended range. However, before you embark on any modifications, it’s important to adhere to safety precautions and local laws, ensuring that your electric bike remains safe and legal to ride.

Adhere to Safety Precautions and Local Laws

Always remember to adhere to safety precautions and local laws when riding your electric bike, ensuring your own safety and the safety of others.

Advertisement

When it comes to safety measures, it is crucial to wear a helmet, as it provides protection for your head in case of an accident. Additionally, make sure to follow the speed limits and traffic rules specific to your area.

Familiarize yourself with the legal requirements for electric bikes, such as registration, licensing, and age restrictions. Check your local laws to determine if you need to have lights, reflectors, or a horn installed on your electric bike.

Enjoy the Benefits of Your Upgraded Electric Bike

To fully enjoy the benefits of your upgraded e-bike, you should explore new routes and experience the thrill of effortless speed. One way to enhance your riding experience is to improve battery life. By properly maintaining and charging your e-bike’s battery, you can ensure that it lasts longer and provides consistent power throughout your rides.

Regularly check the battery’s charge level and avoid letting it fully drain, as this can shorten its lifespan. Additionally, finding the best riding routes can make a significant difference in your enjoyment of the upgraded e-bike. Look for paths that offer scenic views, minimal traffic, and smooth surfaces to maximize your riding pleasure.

Utilize online resources and community forums to discover popular routes and gain insights from experienced riders. Happy riding!

Advertisement

Frequently Asked Questions

How can I assess my bike’s compatibility for conversion?

To assess your bike’s compatibility for conversion, start by examining the frame and fork for any damage or wear. Check if there is enough space to fit the necessary components, such as the motor and battery. Consider the weight capacity and compatibility of the brakes and gears.

What are the necessary tools and equipment required for the conversion process?

To modify a bike into a DIY electric bike, you will need a conversion kit, including a motor, battery, controller, and wiring. Other necessary tools include wrenches, pliers, screwdrivers, and a bike stand for easier installation.

How do I choose the right electric bike conversion kit for my bike?

To choose the right electric bike conversion kit, consider the three main types: front wheel, rear wheel, and mid-drive. Factors to consider include motor power, battery capacity, compatibility with your bike, and your budget.

Are there any specific safety precautions or local laws I should adhere to while converting my bike?

When converting a pedal bike into an electric bike, it is important to consider electric bike conversion safety and legal requirements. Adhering to local laws and wearing proper safety gear can ensure a safe and legal conversion process.

How can I maintain and service my electric bike regularly to ensure its longevity and optimal performance?

To prolong the lifespan and ensure optimal performance of your electric bike, regular maintenance is crucial. This includes checking and lubricating the chain, inspecting the battery and electrical connections, and keeping the tires properly inflated.

Advertisement

Conclusion

In conclusion, converting a pedal bike into an electric bike is a rewarding and exciting endeavor. With the right tools and equipment, along with a compatible bike and a quality conversion kit, you can transform your ordinary bike into a powerful and efficient electric machine.

Just like a caterpillar morphing into a butterfly, your bike will experience a metamorphosis that allows it to soar to new heights. So take the plunge, follow the steps, and soon you’ll be enjoying the benefits of your upgraded electric bike.

Happy riding!

Continue Reading
Advertisement

Affiliate disclaimer

As an affiliate, we may earn a commission from qualifying purchases. We get commissions for purchases made through links on this website from Amazon and other third parties.

About us

We are a passionate team driven by the belief that cycling is a fantastic and accessible way to stay active while enjoying the beauty of the outdoors. Our mission is to share our love for cycling with as many people as possible. We provide a welcoming environment for individuals of all ages, abilities, and backgrounds to come together and ride bikes. With Ralf’s visionary leadership, Zane’s expertise in cycling adventures, and Olivia’s dedication to community building, we strive to create a vibrant space where everyone can experience the joy of cycling. Through group rides, workshops, and inclusive events, we inspire and empower individuals to embrace an active lifestyle. Join us in our quest to pedal together, embrace the joy of cycling, and foster connections that last a lifetime.

Advertisement

Trending