As an experienced biker, I understand how crucial it is to keep the tension of my bike’s chain adjusted accurately. Having the chain tensioned correctly leads to seamless gear changes, effective transfer of power, and avoids early deterioration of the chain as well as other components in the drivetrain.
However, determining the correct tension for your bike’s chain can be tricky and varies depending on factors such as the type of bike and riding conditions.
In this article, I’ll provide a step-by-step guide on how to measure and adjust your bike’s chain tension. Whether you’re an experienced cyclist or a novice, this information will help you keep your bike running smoothly and efficiently.
So, grab your bike and let’s dive into the world of chain tension!
Key Takeaways
- Proper chain tension is crucial for smooth shifting, efficient power transfer, and preventing premature wear on chain and drivetrain components.
- Measuring chain tension with a chain checker tool is crucial to prevent excessive wear and slack, and adjusting tension requires referring to the manual or consulting a mechanic for recommended tension.
- A loose chain can cause excessive drooping and poor shifting performance, while a tight chain can cause increased wear on the chain and cassette, and damage to the frame and excessive noise.
- Regular maintenance and checks, including cleaning with degreaser, lubricating with bike-specific lubricant, and testing chain tension using a chain checker tool, are necessary for top bike condition and accident prevention.

SUPERTEAM Carbon Wheelset 700C Tubeless Gravel Wheelset Disc Braking 45TU-28 (Rim Depth 45MM, Center Lock Thru AXLE 12 * 100-12 * 142)
Material: Toray T700c Full Carbon Fiber
As an affiliate, we earn on qualifying purchases.
Understanding the Importance of Chain Tension
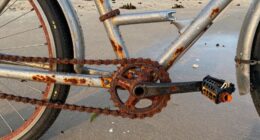
You gotta know that keeping the chain tension just right is key to getting the most out of your bike and preventing any unnerving slipping or grinding noises. Improper chain tension can lead to a host of problems, including premature wear and tear on the chain and sprockets, and even potential safety hazards.
Too tight a chain can put unnecessary strain on the drivetrain, leading to increased resistance and decreased efficiency. On the other hand, a chain that’s too loose can cause the chain to skip teeth on the sprocket, causing the bike to stall or even throw the chain off entirely.
Maintaining proper chain tension has several important benefits. For starters, it ensures smooth and efficient power transfer from the pedals to the rear wheel, which is crucial for a comfortable and enjoyable ride. Proper chain tension also helps to prolong the life of your chain and sprockets, saving you money in the long run.
Most importantly, maintaining proper chain tension helps to prevent accidents and keep you safe on the road.
Now, let’s move on to determining your bike’s chain type.

ZTZ 700C Road Bike Wheelset, Ultralight Aluminum Alloy 30mm Road Bike Wheel, 20H Front/24H Rear High-Strength Bike Rims, 700c Clincher, Rim Brake, Compatible 8-12 Speed Cassettes (Front+Rear Wheels)
Featherweight and Strong: This 700c road bike wheelset is crafted from high-strength aluminum alloy with 20H front/24H rear...
As an affiliate, we earn on qualifying purchases.
Determining Your Bike’s Chain Type
Wondering what type of chain your bike has? Check the manufacturer’s specifications to ensure proper maintenance.
Different types of bike chains have varying maintenance requirements. For instance, a single-speed chain requires less maintenance than a multi-speed chain. A chain with a master link is easier to remove and clean than one without. An 11-speed chain is narrower than an 8-speed chain, which increases the possibility of wear and tear.
Knowing your bike’s chain type is crucial in determining the proper maintenance that it needs.
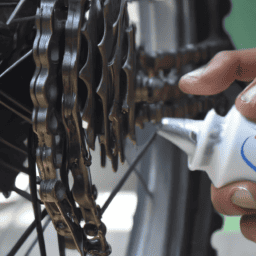
To keep your bike’s chain in top condition, regular maintenance is necessary. Clean the chain thoroughly with a degreaser and a chain cleaning tool, making sure to remove all dirt and grime. Lubricate the chain with a bike-specific lubricant, and wipe off any excess.
Ensure that the chain is properly tensioned, not too loose nor too tight. Measuring chain tension is the next step in maintaining your bike’s chain.

700c Clincher Carbon Wheelset Disc Brake 50mm Depth 28mm Width Quality Carbon ud Finish Rim Road Cycling Tubeless Compatible Clincher
1:Customers who purchase this product will receive a 1000-day guarantee. We will provide the necessary repair support, excluding...
As an affiliate, we earn on qualifying purchases.
Measuring Chain Tension
Feeling uncertain about whether your bike’s chain is properly tensioned? Take a deep breath and use a chain checker tool to ensure a smooth and efficient ride. Measuring chain tension is crucial in preventing excessive chain wear and chain slack, which can lead to poor shifting and even chain derailment.
To measure chain tension, use a chain checker tool to determine the amount of wear the chain has endured over time. A chain checker tool measures the distance between the chain pins and rollers, allowing you to determine whether the chain has stretched beyond its recommended limit. In general, a new chain will have a pitch of 1/2 inch, while a stretched chain may have a pitch of up to 1/8 inch longer. A chain that is too loose will cause excessive chain wear, while a chain that is too tight can lead to unnecessary stress on the chain and other drivetrain components. Using a chain checker tool will help you determine whether your bike’s chain needs to be adjusted to ensure optimal performance.
To adjust chain tension, refer to your bike’s manual or consult with a bike mechanic to determine the recommended chain tension for your specific bike model. Once you have determined the recommended chain tension, adjust the chain tension accordingly using the appropriate tools. Remember to check the chain tension periodically to ensure that it remains within the recommended range. By properly measuring and adjusting your bike’s chain tension, you can ensure that your bike runs smoothly and efficiently.

SUPERTEAM Carbon Disc Brake Road Bike Wheelset 28mm Tubeless Wheels 50mm Rim Depth (FIT for SHIMAN0 8-12 Speed, Thru-Axle Type 12 * 100/12 * 142mm)
Material:Carbon Wheels are Light but the Strength is Very Strong, and the Impact Absorption Performance is Good,It Can...
As an affiliate, we earn on qualifying purchases.
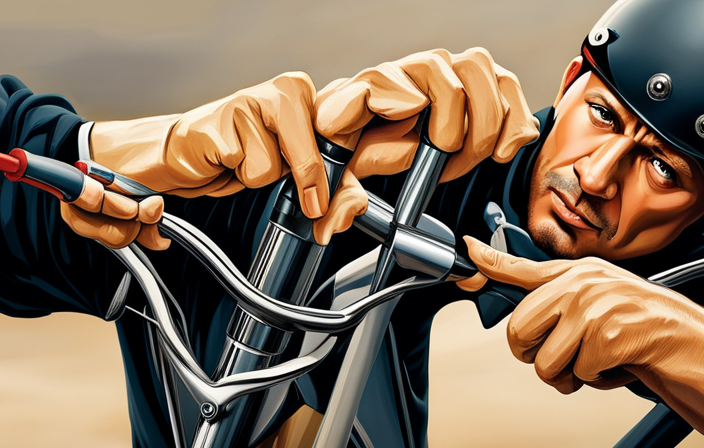
Adjusting Chain Tension
When it comes to adjusting chain tension on my bike, I typically start by loosening the rear wheel.
From there, I can move the wheel to adjust the tension to my desired level.
Once I have the tension set, I make sure to realign the wheel so that it is straight and secure.
These steps may seem simple, but they’re crucial in ensuring that my bike is functioning at its best.
Loosening the Rear Wheel
To properly loosen the rear wheel on your bicycle, you’ll need to follow these steps:
-
First, you’ll need to flip your bike over so that it’s resting on its handlebars and seat. This will give you access to the rear wheel.
-
Next, locate the quick-release lever or bolts that are holding the wheel in place. Depending on your bike, you may need to use a wrench or your hands to loosen them. Be sure not to completely remove the bolts or lever, as you’ll need them to adjust the tension later.
-
Once the bolts or lever are loose, you can gently wiggle the wheel back and forth to loosen it from the frame. Be careful not to damage any components while doing so.
It’s important to use the proper adjusting technique when loosening the rear wheel to avoid common mistakes. Make sure to keep the wheel straight and centered while loosening it to prevent it from getting stuck or causing damage to the frame.
Moving the wheel to adjust tension is the next step in the process.
Moving the Wheel to Adjust Tension
Now that you’ve loosened the rear wheel, it’s time to adjust the tension. Move the wheel towards or away from the frame using the quick-release lever or bolts. The correct tension for your bicycle chain is one that allows the chain to move up and down about a half-inch when you push or pull it at the midpoint between the front and rear gears.
Once you’ve achieved the correct tension, tighten the bolts or lever, making sure not to overtighten them. Before you tighten the bolts or lever, check the alignment of the wheel. If the wheel is not centered, it can cause the chain to rub against the gears and lead to unnecessary wear.
Also, take this opportunity to lubricate the chain to ensure it runs smoothly. Once you’ve aligned the wheel and lubricated the chain, you can proceed to tighten the bolts or lever. With the correct tension and alignment, your bicycle chain will be ready for your next ride.
Realigning the Wheel
After loosening the rear wheel and adjusting the tension, it’s crucial to ensure proper alignment of the wheel for a smooth and safe ride. Wheel alignment directly affects the bike’s performance and can cause chain skipping if not done correctly. Here are four things to consider when realigning the wheel:
-
Use a straight edge or ruler to check the alignment of the wheel with the frame. The distance between the rim and the straight edge should be the same on both sides.
-
Tighten the axle nuts or quick release skewer evenly on both sides to ensure the wheel stays aligned.
-
Check the alignment of the derailleur hanger. If it’s bent, it can also cause the chain to skip. Use a derailleur alignment tool to straighten it if necessary.
-
Spin the wheel and check if it rubs against the brake pads. Adjust the brake calipers if needed.
Proper wheel alignment is essential for a smooth and safe ride. Once the alignment is correct, it’s time to test the chain tension and fine-tune it for optimal performance.
Testing Chain Tension and Fine-Tuning
Start by checking the tension of your bicycle chain using a chain checker tool. Have you ever felt frustrated by a chain slipping during a ride? If so, it’s likely that your chain tension needs to be adjusted.
The proper tension of a bicycle chain is crucial for both performance and longevity. A chain that is too loose can cause slipping or even come off the gears, while a chain that is too tight can cause unnecessary wear and tear on the drivetrain components.
To begin, secure the bike in a stand or flip it over onto its handlebars and saddle. Use the chain checker tool to measure the tension of the chain. The tool should indicate whether the chain is too loose, too tight, or within the proper range.
If the chain is too loose, tighten it by adjusting the rear wheel position. If it’s too tight, loosen it by adjusting the rear wheel position or loosening the chain tension bolts. Once you’ve made the necessary adjustment, test the tension of the chain by pulling it away from the chainring. The chain should have a little bit of play, but not so much that it droops excessively.
Remember, proper chain tension is just one aspect of chain maintenance. It’s also important to keep your chain lubricated to prevent wear and corrosion. Make sure to clean your chain regularly and apply lubricant after each ride.
With proper maintenance and adjustment, your bicycle chain can provide smooth and reliable performance for thousands of miles.
Frequently Asked Questions
Can a loose bicycle chain cause damage to the bike?
Yes, a loose bicycle chain can cause damage to the bike. Preventive maintenance includes checking chain tension regularly to avoid chain lengthening. As an experienced cyclist, I recommend keeping the chain tight to prevent wear and tear.
How often should I check my bicycle chain tension?
I check my bicycle chain tension every 100-200 miles to ensure optimal performance. As part of my Bicycle chain maintenance routine, I use high-quality lubrication techniques to prevent wear and tear on the chain.
Is it okay to reuse a chain that has been stretched beyond the recommended limit?
Reusing stretched chains is an ethical dilemma as it compromises safety and performance. Instead, alternative chain maintenance methods like regular cleaning and lubrication can extend the life of the chain. Always replace a chain that has exceeded the recommended limit.
Can over-tightening a bicycle chain cause any issues?
Over-tightening a bicycle chain can cause premature wear and tear on both the chain and the gears. As someone with experience in chain maintenance, I know the importance of proper lubrication and regular adjustments to ensure optimal performance.
Is chain tension the only factor that affects a bicycle’s performance?
Chain tension is just one aspect of a bike’s performance. Proper lubrication is crucial for smooth shifting and longevity. Chain wear can cause skipping or misalignment, leading to poor performance and potential damage.
Conclusion
In conclusion, it’s crucial to ensure your bicycle chain is properly tensioned for the performance and longevity of your bike. A loose chain can cause sluggish shifting and even come off the gears, while an overly tight chain can damage your drivetrain.
To make adjustments, determine your bike’s chain type and measure the tension accurately. Don’t be afraid to test and fine-tune the tension until you reach that sweet spot. With the right tools and guidance, adjusting the chain tension can be done easily.
A well-tensioned chain will make your rides smoother, faster, and more enjoyable. So give your bike the TLC it deserves, and watch as it rewards you with an exhilarating ride that’s sure to make you feel like a pro cyclist!